manuals.online logo
Brands
  1. Home
  2. •
  3. Brands
  4. •
  5. Yard-Man
  6. •
  7. Lawn Mower
  8. •
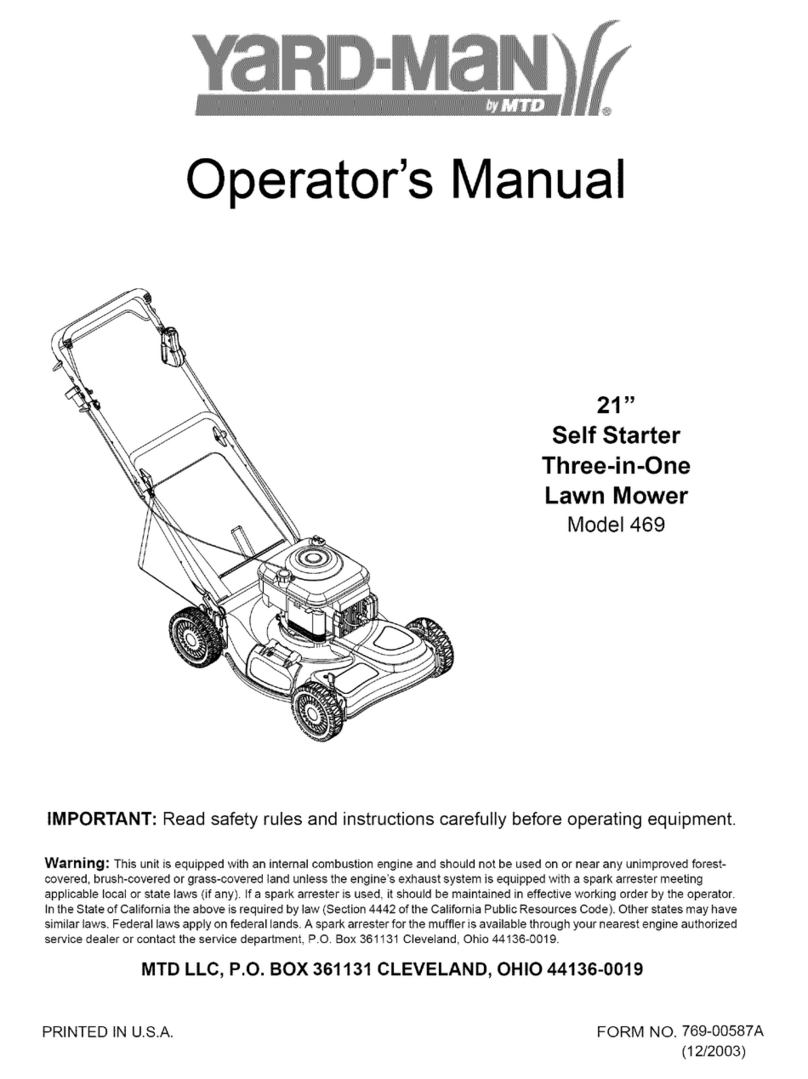
  9. Yard-Man 263 User manual

Yard-Man 263 User manual

Safety • Assembly • Operation •Maintenance • Troubleshooting • Engine • Parts Lists • Warranty
A'rO A AL
22=inch Rotary Mower- Model 263
iMPORTANT
READ SAFETY RULES AND iNSTRUCTiONS CAREFULLY BEFORE OPERATION
Warning: Thisunitisequippedwithaninternalcombustionengineandshouldnotbeusedon or nearanyunimprovedforest-covered,brush-
coveredor grass-coveredlandunlesstheengine'sexhaustsystemisequippedwitha sparkarrestermeetingapplicablelocalor statelaws(if any).
If a sparkarresterisused,itshouldbemaintainedineffectiveworkingorderbytheoperator.IntheStateofCaliforniatheaboveisrequiredbylaw
(Section4442oftheCaliforniaPublicResourcesCode).Otherstatesmayhavesimilarlaws.Federallawsapplyonfederallands.A sparkarrester
forthemufflerisavailablethroughyournearestengineauthorizedservicedealeror contacttheservicedepartment,RO.Box361131Cleveland,
Ohio44136-0019.
PRINTEDIN U.S.A. MTD LLC, P.O. BOX 361131 CLEVELAND, OHiO 44136-0019
FORMNO.769-02337
01/10/2006
This Operator's Manual is an important part of your new lawn mower, it will help you assemble,
prepare, and maintain the unit for best performance. Please read and understand what it says.
Table of Contents
Slope Gauge ....................................................... 3
Safe Operation Practices ................................... 4
Setup and Adjustment ....................................... 6
Operating Your Lawn Mower .............................. 8
Maintaining Your Lawn Mower ......................... 10
Troubleshooting ................................................ 12
Safety Labels .................................................... 13
Parts List ........................................................... 14
Warranty ............................................ Back Cover
MTDLLCreservesthe righttochangeproductspecifications,designs,andequipmentwithoutnoticeandwithoutincurringobligation.
Finding and Recording Model Number
BEFOREASSEMBLINGYOURNEW EQUIPMENT,please
locatethe model plateon the equipmentandcopy the infor-
mationto thesample modelplate providedto the right.You
can locatethe modelplate by standing atthe operatingposi-
tion andlookingdown atthe rear ofthe deck. This information
will be necessaryto usethemanufacturer'swebsite, to obtain
assistancefromthe CustomerSupportDepartment,orwhen
contactingan authorizedservice dealer.
Model Number Serial Number
,'_ IVITD LLC
P. O. BOX ;3611;31
CLEVELAND,OH 44136
www.yardman.com 330-220-4683
800-800-731 0
% J
Customer Support
Please do NOTreturn the unit to the retailer from which it was
purchased, without first contacting Customer Support.
Ifyou have difficultyassemblingthis productor have anyquestionsregardingthe controls, operation,or maintenanceof this
unit,youcanseek help from the experts.Choosefrom the options below:
= Visit www.yardman.com. Click on the Service & Support menuoption.
Ya_oMia_
o
o
Phonea CustomerSupport Representativeat 1-800-800-7310.
The engine manufacturer is responsiblefor all engine-relatedissueswith regardsto performance, power-rating,specifica-
tions,warranty and service. Pleasereferto theengine manufacturer'sOwner's/Operator's Manual,packedseparatelywith
your unit,for moreinformation.
2
O
o
1=
o
>:.
(13
O3
(13
(13
O-
O
O
(--
O5
E
O
(13
(13
o3
(13
O-
O
o3
(13
E
(]3
(13
o
(13
C5
('5
O3
O5
(13
t"b
(13
O9
o5
(13
O-
O
O3
-5
O3
O
O
E
Sightandhold this levelwith a verticaltree...
also
I
15°
RNING
This symbol points
out important safety
instructionswhich, if
notfollowed, could
endangerthe personal
i safety and/or property
ofyourself and others.
Readand follow all
instructionsinthis man-
ualbeforeattempting to
operatethis machine.
Failureto complywith
these instructionsmay
resultin personalinjury.
i When youseethis
symbol.
HEED iTS WARNING
Your
iFlesponsibility
I Restrictthe use
i of this powermachine
to personswho read.
understand
and followthewarnings
and instructions
in this manual
andon the machine.
WARNING: EngineExhaust,some of its constituents,andcertain vehiclecompo-
nentscontain or emit chemicals knownto Stateof Californiato cause cancerand
birth defectsor other reproductiveharm.
DANGER: Thismachinewas builtto be operatedaccordingto the rulesfor safe operationinthis
manual.As with anytypeof powerequipment,carelessnessor erroronthe part ofthe operatorcan
result in serious injury.This machine iscapable of amputatinghands andfeet andthrowing objects.
Failureto observethe followingsafetyinstructionscould resultin serious injury or death.
Children
Tragicaccidentscanoccurifoperatorisnotalertto presence
ofchildren.Childrenareoftenattractedtomowerand mowing
activity.Theydonot understandthe dangers.Neverassume
thatchildrenwill remainwhereyoulastsawthem.
1. Keepchildrenoutofthe mowingareaand underwatchful
careofa responsibleadultotherthanthe operator.
2. Bealertandturnmoweroffif a childentersthearea.
3. Beforeand whilemovingbackwards,lookbehindanddown
forsmallchildren.
4. Useextremecarewhenapproachingblindcorners,
doorways,shrubs,trees,or otherobjectsthat mayobscure
yourvisionofachildwhomayrunintothe mower.
5. Keepchildrenawayfromhotor runningengines.Theycan
sufferburnsfroma hotmuffler.
6. Neverallowchildrenunder14yearsoldto operateapower
mower.Children14yearsoldandovershouldreadand
understandoperationinstructionsandsafetyrulesinthis
manualandshouldbetrainedandsupervisedbyaparent.
General Operation
1. Readthisoperator'smanualcarefullyin its entiretybefore
attemptingtoassemblethismachine.Read,understand,
andfollowall instructionsonthe machineandin the
manual(s)beforeoperation.Becompletelyfamiliarwith
thecontrolsandthe properuseofthis machinebefore
operatingit. Keepthis manualin a safeplaceforfuture
andregularreferenceandfor orderingreplacementparts.
2. Thismachineisaprecisionpieceof powerequipment,
nota plaything.Therefore,exerciseextremecautionat all
times.Yourunithas beendesignedto performonejob: to
mowgrass.Do notuseit for anyotherpurpose.
3. Neverallow childrenunder14yearsoldto operatethis
machine.Children14yearsoldandovershouldreadand
understandthe instructionsinthismanualandshould
betrainedand supervisedby a parent.Onlyresponsible
individualswhoarefamiliarwiththeserulesofsafe
operationshouldbeallowedto usethismachine.
4. Thoroughlyinspectthe areawherethe equipmentisto
beused.Removeall stones,sticks,wire,bones,toysand
otherforeignobjectswhichcouldbetrippedoveror picked
upandthrownbythe blade.Thrownobjectscancause
seriouspersonalinjury.Planyourmowingpatternto avoid
dischargeof materialtowardroads,sidewalks,bystanders
andthe like.Also,avoiddischargingmaterialagainsta
wallorobstructionwhichmaycausedischargedmaterial
toricochetbacktowardtheoperator.
5. Tohelpavoidbladecontactorathrownobjectinjury,
stayinoperatorzonebehindhandlesandkeepchildren,
bystanders,helpers,and petsat least75feetfrommower
whileit is inoperation.Stop machineifanyoneenters
area.
6. Alwayswearsafetyglassesor safetygogglesduringopera-
tionandwhile performinganadjustmentor repairtoprotect
youreyes.Thrownobjectswhichricochetcancauseserious
injurytothe eyes.
7. Wearsturdy,rough-soledworkshoesand close-fitting
slacksandshirts.Shirtsand pantsthatcoverthe armsand
legsandsteel-toedshoesarerecommended.Neveroperate
this machinein barefeet,sandals,slipperyor lightweight
(e.g.canvas)shoes.
8. Do notputhandsorfeetnearrotatingpartsor undercutting
deck.Contactwithbladecanamputatehandsandfeet.
9. A missingor damageddischargecovercancauseblade
contactor thrownobject injuries.
10.Manyinjuriesoccurasa resultofthe mowerbeingpulled
overthefootduringafall causedby slippingor tripping.
Do notholdontothe mowerifyouare falling;releasethe
handleimmediately.
11.Neverpullthe mowerbacktowardyouwhileyouare
walking.If youmustbackthe mowerawayfromawallor
obstructionfirstlookdownand behindtoavoidtrippingand
thenfollowthesesteps:
a. Stepbackfrommowertofully extendyourarms.
b. Besureyouarewellbalancedwithsurefooting.
c. Pullthe mowerbackslowly,no morethanhalfway
towardyou.
d. Repeatthesestepsas needed.
12.Do notoperatethe mowerwhileunderthe influenceof
alcoholordrugs.
13.Do notengage theself-propelledmechanismon unitsso
equippedwhilestartingengine.
14.Thebladecontrolhandleisa safetydevice.Neverattempt
tobypassitsoperation.Doingso makesthe safetydevice
inoperativeandmayresultin personalinjurythrough
contactwiththe rotatingblade.Thebladecontrolhandle
mustoperateeasily in bothdirectionsandautomatically
returntothe disengagedpositionwhenreleased.
15.Neveroperatethe mowerinwetgrass.Alwaysbesureof
yourfooting. A slipand fall cancauseseriouspersonal
injury.If youfeelyouarelosingyourfooting,releasethe
bladecontrolhandleimmediatelyand the bladewillstop
rotatingwithinthreeseconds.
16.Mowonlyin daylightor goodartificiallight.Walk,neverrun.
17.Stopthe bladewhencrossinggraveldrives,walksor roads.
18.Iftheequipmentshouldstartto vibrateabnormally,stopthe
engineand checkimmediatelyfor the cause.Vibrationis
generallya warningoftrouble.
19.Shutthe engineoff andwaituntilthe bladecomesto a
completestop beforeremovingthe grasscatcheror unclog-
gingthechute.
Thecuttingbladecontinuesto rotateforafewseconds
4
after theengineisshutoff. Neverplaceanypartofthe body
inthe bladearea untilyouaresurethe bladehasstopped
rotating.
20. Neveroperatemowerwithoutpropertrailshield,discharge
cover,grass catcher,bladecontrolhandle,or othersafety
protectivedevicesin placeand working.Neveroperate
mowerwithdamagedsafetydevices.Failuretodo so can
resultin personalinjury.
21. Mufflerandenginebecomehotandcan causea burn.Do
nottouch.
22.Onlyusepartsandaccessoriesmadeforthismachineby
manufacturer.Failuretodo socanresultinpersonalinjury.
23. If situationsoccurwhich arenotcoveredin thismanual,
usecareand goodjudgment.Contactyourdealerfor
assistance.Telephone1-800-800-7310for the nameofyour
nearestdealer.
Slope Operation
Slopesareamajorfactorrelatedto slipandfallaccidentswhich
can resultinsevereinjury.Operationonslopesrequiresextra
caution.Ifyoufeeluneasyon aslope,do notmowit.Foryour
safety,usetheslopegaugeincludedaspartofthismanualto
measureslopesbeforeoperatingthisunitonaslopedor hilly
area.Iftheslopeisgreaterthan15degrees,donot mowit.
Do:
1. Mowacrossthe faceofslopes; neverup anddown.
Exerciseextremecautionwhenchangingdirectionon
slopes.
2. Watchfor holes,ruts,rocks, hiddenobjects,or bumpswhich
can causeyouto slipor trip. Tallgrasscanhideobstacles.
3. Alwaysbesureof yourfooting.A slip andfall cancause
seriouspersonalinjury.If youfeelyouarelosingyour
balance,releasethe bladecontrolhandleimmediately,and
the bladewill stoprotatingwithin3seconds.
Do Not:
1. Donot mowneardrop-offs,ditchesorembankments,where
you couldloseyourfootingor balance.
2. Donot mowslopesgreaterthan 15degreesasshownon
the slopegauge.
3. Donot mowon wetgrass.Unstablefootingcouldcause
slipping. Service
Safe HandlingOf Gasoline:
1. Toavoidpersonalinjury orpropertydamageuseextreme
care inhandlinggasoline.Gasolineisextremelyflammable
andthevaporsareexplosive.Seriouspersonalinjurycan
occurwhengasolineisspilledonyourselforyourclothes
whichcanignite.
2. Wash yourskin andchangeclothesimmediately.
3. Useonlyanapprovedgasolinecontainer.
4. Neverfillcontainersinsidea vehicleoron atruckor trailer
bedwitha plasticliner.Alwaysplacecontainersonthe
groundawayfromyourvehiclebeforefilling.
5. Removegas-poweredequipmentfromthe truck ortrailer
and refuelit onthe ground.If thisis notpossible,then refuel
suchequipmentonatrailerwitha portablecontainer,rather
thanfroma gasolinedispensernozzle.
6. Keepthe nozzlein contactwiththe rimofthefueltank or
containeropeningat alltimesuntilfuelingis complete.Do
notusea nozzlelock-opendevice.
7. Extinguishallcigarettes,cigars,pipesandothersources
of ignition.
8. Neverfuel machineindoorsbecauseflammablevaporswill
accumulatein thearea.
9. Neverremovegascap oradd fuelwhileengineishot or
running. Allowengineto coolatleasttwominutesbefore
refueling.
10.Neveroverfillfueltank. Filltankto nomorethanY2inch
belowbottomoffiller neckto provideforfuelexpansion.
11.Replacegasolinecapandtightensecurely.
12.Ifgasolineis spilled,wipeitoff theengineand equipment.
Moveunittoanotherarea.Wait5minutesbeforestarting
engine.
13.Neverstorethe machineorfuel containernearanopen
flame,sparkor pilotlightasona waterheater,space
heater,furnace,clothesdryer,orothergas appliances.
14.Toreducefire hazard,keepmowerfreeofgrass,leaves,
orother debrisbuild-up.Cleanupoil orfuelspillageand
removeanyfuel soakeddebris.
15.Allowamowertocoolat least5 minutesbeforestoring.
GeneralService:
1. Neverrunanengineindoorsorin a poorlyventilatedarea.
Engineexhaustcontainscarbonmonoxide,anodorlessand
deadlygas.
2. Beforecleaning,repairing,or inspecting,makecertainthe
bladeandall movingpartshavestopped.Disconnectthe
sparkplugwireandgroundagainstthe engineto prevent
unintendedstarting.
3. Checkthe bladeandenginemountingboltsatfrequent
intervalsfor propertightness.Also,visuallyinspectbladefor
damage(e.g.,bent,cracked,worn)Replacebladewiththe
originalequipmentmanufacture's(O.E.M.)bladeonly,listed
inthismanual."Useof partswhichdo notmeetthe original
equipmentspecificationsmayleadto improperperformance
andcompromisesafety!"
4. Mowerbladesaresharpandcancut.Wrapthebladeor wear
gloves,anduseextracautionwhenservicingthem.
5. Keepallnuts,bolts,andscrewstightto besurethe equip-
mentis insafeworkingcondition.
6. Nevertamperwithsafetydevices.Checktheirproperopera-
tionregularly.
7. Afterstrikingaforeignobject,stopthe engine,discon-
nectthesparkplugwireandgroundagainsttheengine.
Thoroughlyinspectthe mowerforanydamage.Repairthe
damagebeforestartingandoperatingthe mower.
8. Neverattemptto makea wheelor cuttingheightadjustment
whiletheengineis running.
9. Grasscatchercomponents,dischargecover,andtrail
shieldaresubjecttowear anddamagewhichcould expose
movingpartsor allowobjectsto bethrown.Forsafety
protection,frequentlycheckcomponentsandreplaceim-
mediatelywithoriginalequipmentmanufacturer's(O.E.M.)
partsonly,listedinthis manual."Useofpartswhichdo
notmeetthe originalequipmentspecificationsmayleadto
improperperformanceandcompromisesafety!"
10.Do notchangetheenginegovernorsettingor overspeedthe
engine.Thegovernorcontrolsthe maximumsafeoperating
speedoftheengine.
11.Maintainor replacesafetylabels,asnecessary.
12.Observeproperdisposallawsandregulations.Improper
disposaloffluidsand materialscanharmtheenvironment.
5
WARNING
This symbol points
out importantsafety
instructionswhich, if
notfollowed,could
endangerthe personal
safety and/or property
ofyourself andothers.
Readand followall
instructions inthis man-
ual beforeattemptingto
operatethis machine.
Failureto comply with
these instructionsmay
result in personalinjury.
Whenyousee this
symbol.
HEED iTS WARNING
Your
Responsibility
Restrictthe use
ofthis powermachine
to personswho read.
understand
and followthe warnings
and instructions
inthis manual
and onthe machine.
WARNING
Thechute retainermust
be removed and discarded
before operatingthe
mower.
Eachendofthe lower
handlemust beattached
to the handlemounting
brackets atthe same
position.
iMPORTANT:Thisunitis
shipped withoutgasoline
or oil intheengine.FUl
up gasolineandoUas
instructedinthe accom-
panyingenginemanual
BEFOREoperatingyour
mower.
Figure3-1:Removeretainerfromundersideofchute.
Figure3-2:Unfoldhandleandtightenhardware.
1. Beforeassembling,removetheunitfromthecarton.
a. Opencartonandremoveloosepartsincludedwith
unit.Donotcrimpcableswhileremovingloose
partsortheentireunitfromthecarton.
b. Cutcornersandlaycartondownflat.Remove
packingmaterial.Rollor slideunitoutofcarton.
Checkcartonthoroughlyforlooseparts.
2. Forshippingpurposes,thechutedeflectoron your
mowerisheldinan uprightpositionbya retainer.
Removetheretaineras follows:
a. Pullchutedeflectorupandbacktowardsengine.
Holdingdeflectorin thisposition,removethe
retaineranddiscard,Figure3-1.
b. Lowerthechutedeflectorcarefullykeepingyour
fingersoutoftheway.
c. If wantingtosidedischargegrassclippings,remove
themulchplug.RefertotheAdjustmentsectionon
thefollowingpageforinstructions.
_ WARNING:Thechuteretainermust be
removedand discarded before operating the
mower.
3. Performthefollowingsequenceforhandlesetup:
a. Lifttheupperhandleupfromthefoldedposition
andpullit backtotheextendedposition,Figure
3-2.Thehandleshouldclickintothisposition.
b. Makesurethecarriageboltis seatedproperlyin
thehandle.Tightenstarknobsto secureupper
handletothelowerhandle
4. Followthestepsbelowto securethelowerhandleto
thehandlemountingbrackets:
a. Positioneachhandlebracketstudintothetopor
bottomholeinthelowerhandle,Figure3-3.
b. Tightenthestarknobs.
Note:The handleheightmay be adjusted at anytime
by moving the stud on eachbracketto the other hole
on eachside of the lower handle.
f
Figure3-3:Securelowerhandleto mountingbrackets. Figure3-4:Usecabletietosecurecablestolowerhandle.
6
.
Tosecurecablesto lowerhandle,wrapcablesaround
lowerhandleusingthecabletie.Pullcabletietight
andtrimexcess,Figure3-4.
Followthestepsbelowto securetherecoilstarter,
Figure3-5.
a. Holdthebladecontrolagainsttheupperhandle.
b. Slowlypullstarterropeoutofengine.
c. Slipstarterropeintotheropeguide.
d. Tightenropeguidewingnut.
Figure3-5:Pullrecoilstarterthroughropeguideandtighten.
Adjustments
Cutting Height Adjustment
Eachwheelhasa heightadjustmentlevertochangethe
cuttingheightofthemower.Followthestepsbelowto
adjustthecuttingheight.NOTE:Allwheels must be
movedtothe sameposition.Forroughor uneven
lawns, movethe height adjustment leverto a higher
position.
1. Depressheightadjustmentlevertowardswheel,
Figure3-6.
2. Slidelevertodesiredpositionfora changeincutting
height.
3. Releaselevertowardsdeck.
Mulch Plug (if equipped)
Insteadofexpellingtheclippingsfromthesidedischarge
chute,themowerhastheoptionofrecirculatingthe
clippingsbacktothelawnbyinstallingtheoptional
mulchingplug.
1. Liftupand holdthesidedischargechute.Insertbot-
tomlip ofthemulchingpluginsidethechuteopening,
Figure3-7.
2. Snaphookson themulchingplugoverthehingepin.
Thehooksmustsnapintoplaceonthe hingepin,
lockingthe mulchingplugfirmlyontomower.Release
chutedeflector.
CUTTINGHEIGHT
Forroughor uneven
lawns,movethe height
adjustmentleverto a
higher position.Thiswill
stopscalpingof grass.
MULCHPLUG(if equipped)
Forproperassembly,
installbottom lip inside
chuteopening before
placinghooks overthe
hinge pin.
IMPORTANT:Thisunit is
shippedwithout gasoline
oroil inthe engine.Fill
up gasoline and oilas
instructedinthe accom-
panyingengine manual
BEFOREoperatingyour
mower.
Figure3-6:Usethe leverateachwheeltoadjustthecutting
height. Figure3-7:Installtheoptionalmulchplugtousethe moweras
a mulcher.
7
Your Lawn
Mower
WARNING
Theblade controlisa
safetydevice.Never
attemptto bypassits
operations.
Useextremecarewhen
ihandlinggasoline.
Gasolineisextremely
flammable andthe vapors
areexplosive.Neverfuel
the machineindoorsor
whUethe engineishot
ior running.Extinguish
cigarettes,cigars,pipes
and other sourcesof
iignition.
iKeephandsand feet
awayfromthe chutearea
on cuttingdeck.Referto
warninglabelon the unit.
Drive
Control
Recoil Starter
HeightAdjustment
Levers(oneateach
wheel)
Figure4-1:Themajorcomponentsonthe mower.
Nowthatyouhavesetupyourlawnmowerforoperation,it's importanttobecomeacquaintedwithits controlsand
features.
Blade Control
Thebladecontrolisattachedtothe upperhandleof
themower.Depressand squeezeitagainsttheupper
handletooperatetheunit. Releaseittostopengineand
blade.
_lll ARNING:Thisbladecontrolmechanismis
asafetydevice.Neverattempt to bypassits
operations.
Drive Control
Thedrivecontrolislocatedontheundersideofthe
upperhandleand isusedtoengagethedrive.Squeeze
itagainsttheupperhandleto engagethedrive; release
ittoslowdownor stopthe mowerfrompropelling.
Cutting Height Adjustment Levers
Oneadjustmentleverislocatedat eachwheelandis
usedtoadjustthecuttingheight.All fourleversmustbe
movedtothesamepositiontoensurea uniformcut.
Recoil Starter
Therecoilstarteris attachedtotherightupperhandle.
Standbehindtheunitand pullthe recoilstarterropeto
startthe unit.
Gas and Oil Fill-Up
Referto the enginemanualfor instructions.
1. Checkoillevelandaddoil if necessary.
2. Servicetheenginewithgasoline.
Mulch Plug (if equipped)
insteadofcollectingthegrassclippingsinthegrass
catcher,yourmowerhastheoptionof recirculatingthe
clippingsbacktothelawn.installthemulchplugby
followingtheinstructionsintheSetupsection.
WARNING:Useextremecarewhenhandling
gasoline.Gasolineisextremelyflammable
and thevaporsare explosive.Neverfuel the machine
indoorsor while the engineishotor running.Extin-
guish cigarettes,cigars,pipesandother sourcesof
ignition.
8
_ARNING:The operationof any lawnmower
can result inforeign objects being thrown
intothe eyes,whichcandamageyoureyesseverely.
Alwayswearsafetyglasseswhileoperatingthe
mower,or whileperforminganyadjustmentsor
repairson it.
Starting Engine
,d_lL WARNING:Be sureno one otherthanthe
operatorisstandingnear the lawnmower
whilestartingengineor operatingmower.Never
runengineindoorsor in enclosed,poorly ventilated
areas.Engine exhaustcontainscarbon monoxide,an
odorlessand deadly gas. Keephands,feet, hairand
looseclothing awayfrom any movingpartson engine
and lawnmower.
1. Pushprimerthreetimes.Waitabouttwoseconds
betweeneachpush,Figure4-2.Intemperature
around55°For below,primefivetimes.Donotprime
to restarta warmengine.
2. Standingbehindthe mower,squeezethebladecontrol
againstupperhandle,Figure4-2.
3. Holdingthesetwo handlestogetherfirmly,grasprecoil
starterhandleand pullropeoutwitha rapid,continu-
ous,fullarm stroke,Figure4-2.Keepinga firmgripon
thestarterhandle,letthe roperewindslowly.Repeat
untilenginecranks.Letthe roperewindeachtime
slowly.
.
2.
Stopping Engine
Releasebladecontroltostoptheengineand blade.
Disconnectsparkplugwirefromsparkplugand
groundagainsttheengine.
,_ WARNING:Waitfor the blade to stopcom-
pletelybeforeperforminganywork on the
mower.
Figure4-2:Thestepsinvolvedinstartingtheengine.
Using Your Lawn Mower
Besurelawnisclearofstones,sticks,wire,orother
objectswhichcoulddamagelawnmoweror engine.
Suchobjectscouldbeaccidentlythrownbythemower
inanydirectionandcauseseriouspersonalinjurytothe
operatorandothers.
_bk WARNING:ifyou strike aforeign object,
stop the engine. Removewire from the spark
plug,thoroughly inspectmower for anydamage,
and repair damagebefore restarting and operating.
Extensive vibration of mowerduring operation isan
indicationof damage.The unit should be promptly
inspectedand repaired.
1. Oncetheengineisrunning,squeezethedrive
controlagainsttheupperhandleto propelmower.
*Forbest results,do notcut wetgrass.
*Fora healthierlawn,nevercut offmorethanone-
thirdofthetotallengthofthegrass.
Using as Mulcher
Formulchinggrass,installmulchplugfollowingthe
instructionsin theSetupsection.
*Foreffectivemulching,do notcut wetgrass.
*Newor thickgrassmayrequirea narrowercut.
Adjustgroundspeedaccordingtoconditionoflawn.
*If thegrasshasbeenallowedto growinexcessof
fourinches,mulchingisnotrecommended.
Your LaWn
MoWer
WARNING
The operationofany
lawnmower canresult
inforeign objectsbeing
thrown intothe eyes,
which candamageyour
eyesseverely.Always
wearsafety glasses whUe
operatingthe mower,
or while performingany
adjustments or repairs
on it.
Besure no one otherthan
theoperator is standing
nearthe lawn mower
whilestartingengine or
operatingmower.Never
run engine indoorsor
inenclosed,poorly
ventilatedareas.Engine
exhaustcontainscarbon
monoxide,an odorless
and deadlygas.Keep
hands,feet, hair and
loose clothingawayfrom
anymoving partson
engine and lawnmower.
9
Deck Care
WARNING
Alwaysstopenginel
disconnect spark plug
andgroundagainst
engine before performing
any typeof maintenance
!
Donotuseapressure
washer orgardenhose
to cleanyour unit. These
may causedamageto
electriccomponents,
spindles, pulleys bear,
rags,ortheengine.The
useofwaterw resutn
shortenedlifeand reduce
serViceability'
_ ARNING:Nevertipthemower morethan90°
inanydirectionanddonotleavethemower
tippedfor any lengthof time.Oil can drain intothe
upper partof the enginecausing a startingproblem.
1. Disconnectsparkplugwire.Draingasolinefromlawn
mower,or placea pieceof plasticunderthegascap.
2. Tipmowersothat itrestsonthe housing.Keepthe
sidewiththeaircleanerfacingup.Holdmowerfirmly.
3. Scrapeandcleantheundersideofthedeckwitha
suitabletool.Donotspraywithwater.
4. Putthemowerbackonits wheelsontheground.If
youhadputplasticunderthegascapearlier,make
sureto removeitnow.
Figure5-1:Areasto lubricateonmower.
General
Recommendations
Alwaysobservesafetyruleswhenperforming
anymaintenance.
Thewarrantyon thislawnmowerdoesnotcover
itemsthathavebeensubjectedtooperatorabuse
ornegligence.Toreceivefullvaluefromwarranty,
operatormustmaintainthelawnmoweras
instructedhere.
•Changingofengine-governedspeedwillvoid
enginewarranty.
•Alladjustmentsshouldbecheckedat leastonce
eachseason.
•Periodicallycheckallfastenersand makesurethese
aretight.
_ARNING:Always stop engine, disconnect
sparkplug,and ground against engine
before performinganytype of maintenance.
Lubrication
• Lubricatepivotpointson thebladecontrolanddrive
controlatleastoncea seasonwithlightoil.These
controlsmustoperatefreelyinbothdirections,
Figure5-1.
•Lubricatethewheelsatleastoncea seasonwith
lightoil (ormotoroil). If wheelsareremovedforany
reason,lubricatesurfaceofthepivotarmandinner
surfaceof thewheelwithlightoil,Figure5-1.
• Lubricatethetorsionspringandpivotpointoneach
endofthesidedischargechuteperiodicallywithlight
oilto preventrust,Figure5-1.
• Thetransmissionispre-lubricatedandsealedatthe
factoryanddoesnotrequirelubrication.
• Followtheaccompanyingenginemanualforengine
lubricationinstructionsand schedule.
Engine Care
Referto the engine manualfor specific instructions.
• Maintainoil levelasinstructedin enginemanual.
• Serviceaircleanerevery25 hoursundernormal
conditions.Cleaneveryfewhoursunderextremely
dustyconditions.
•Cleansparkplugand resetthegaponcea season.
Checkenginemanualforcorrectplugtype andgap
specifications.
• Cleanengineregularlywitha clothorbrush.Keepthe
coolingsystem(blowerhousingarea)cleantopermit
properaircirculation.Removeall grass,dirt, and
combustibledebrisfrommufflerarea.
Blade Care
_ ARNING:Whenremovingcuttingblade
for sharpeningor replacement, protectyour
handswith a pairof heavygloves or usea heavy rag
to hold blade.
1. Disconnectsparkplugwirefromsparkplug.Turn
moweronitssidemakingsurethattheair filterand
thecarburetorare facingup.
2. Removebolt,bellbladesupport,andbladefromthe
enginecrankshaft,Figure5-2.
3. Thebladecanbesharpenedwitha fileor ona grind-
ingwheel.Donotattempttosharpenthebladewhile
itisstillonthemower.Whensharpeningblade,follow
originalangleofgrindand removemetalfromthe
heavysideuntilitbalancesevenly.Balancetheblade
ona roundshaftscrewdrivertocheckforbalance.
Grindcuttingedgesequallytokeepbladebalanced.
,_ WARNING:An unbalanced blade will cause
excessivevibration whenrotating at high
speeds.It maycause damageto mower and could
breakcausing personal injury.
10
4. Placethebladeon theadaptersuchthattheside
oftheblademarked"Bottom"(orwithpartnumber)
facesthegroundwhenthemowerisin theoperating
position.Makesurethatthebladeisalignedand
seatedon thebladeadapterflanges.
5. Placebell bladesupportonthe blade.Alignnotches
on thesupportwithsmallholeson blade.Replacehex
boltandtightenhexbolttotorque:450in.Ibs.rain.,
600 in.Ibs.max.
Toensuresafeoperationofyourmower,periodically
checkthebladeboltforcorrecttorque.
Changing the Belt
1. Removethefrontdrivecoverbyslidingoffthe
two plasticrivetson eachsideofthecoverwitha
screwdriver,Figure5-3.
2. Unhooktheextensionspringfromtheheightadjust-
mentplate,Figure5-3.Thiswill loosenthetensionon
thebelt.
3. Pushtransmissionup a littleandslidebeltoffthe
transmissionpulley,Figure5-3.
4. Liftmowertoaccessbeltfromundersideof mower.
Slidebeltoffofenginepulleyandaroundtheblade,
Figure5-4.
5. Replacewithnewbelt,workingaroundblade.Make
surebeltisfirmlyseatedon enginepulleywhilepulling
fromtheothersideand slidingit aroundthetransmis-
sionpulley.
6. Putthemowerdownwith allfourwheelsfirmlyplaced
on onelevel.Reattachtheextensionspringand
reassemblethefrontdrivecover.
Blade Adapter
BellBladeSupport
Screw_ 8
Figure5-2:Removebolt, bellbladesupport,andblade.
Off-Season Storage
Thefollowingstepsshouldbetakentoprepareyourlawn
mowerforstorage.
• Cleanandlubricatemowerthoroughlyasdescribed
in thelubricationinstructions.Donotusea pressure
washeror gardenhosetocleanyourunit.
• Refertoenginemanualforcorrectenginestorage
instructions.
• Coatmower'scuttingbladewithchassisgreaseto
preventrusting.
• Storemowerin a dry,cleanarea.Donotstorenextto
corrosivematerials,suchasfertilizer.
Whenstoringanytypeofpowerequipmentina poorly
ventilatedormetalstorageshed,careshouldbe takento
rust-prooftheequipment.Usingalightoilor silicone,coat
theequipment,especiallycablesandall movingpartsof
yourlawnmowerbeforestorage.
Figure5-3:Removecover,unhookspring,andpullbeltoffof
pulley.
Figure5-4:Removebeltfromaroundtheblade.
11
Maintaining
WAR N!NG
Whenremoving the
cuttingblade or when
slidingthe belt around it,
protectyour handswith
apairof heavyglovesor
use a heavyrag to hold
the blade,
An unbalancedblade
willcauseexcessive
vibrationwhenrotating
at highspeeds, it may
causedamageto mower
and couldbreakcausing
personalinjury.
For repairs beyond
the minor adjustments
listedhere, contact
an authorized service
!iiiiiLi i iiiiiI
i_i i i ii i i i
Problem Cause Remedy
Enginefails to start I ii Biadecontroldisengaged. Engage bladecontro!.
sparkplugWiredisconnected: i 21 c0nnect wiretosPa[kpiugl
Engineruns erratic 1. Sparkplugwireloose.
2. Blockedfuel lineor stalefuel.
3. Ventingascap plugged.
4. Wateror dirt infuel system.
5. Dirtyair cleaner.
6. Carburetorout ofadjustment.
1. Connectandtightensparkplugwire.
2. Cleanfuelline;filltank withclean,
freshgasoline.
3. Clearvent.
4. Drainfueltank. Refillwithfreshfuel.
5. Referto enginemanual.
6. Referto enginemanual.
Engineoverheats 1. Engineoil levellow. 1. Fillcrankcasewithproperoil
I 2. Airflow restricted. 2. Removeblowerhousing
I andclean.
I 3. Carburetornotadjustedpropery. 3. Referto engne manua.
I I
Occasionalskips 1. Sparkpluggap tooclose. 1. Adjust gapto .030".
(hesitates)at 2. Carburetoridlemixtureadjustment 2. Referto enginemanual.
highspeed improperlyset.
Idlesnoorlv 1 Sparkplugfouled,faultyor gap I 1. Resetgapto .030"or replace
r i I too wide. sparkplug.
I 2. Carburetorimproperlyadjusted. 2 Referto enginemanual.
3. Drtyarceaner, .3. Refertoengnemanua.
Excessive 1. Cuttingbladelooseor unbalanced. 1. Tightenbladeandadapter.Balance
Vibration blade.
2. Bentcuttingblade. 2. See anauthorizedservicedealer.
Mower will not I 1. Wetgrass. 1. Donot mowwhengrassiswet;wait
much _rass'f i , untillatertocut,
E uy _d,t I 2. Excessivelyhighgrass. I 2. Mowonce atahigh cuttingheight
q PP )Ithen mowagainatdesiredheightor
I I makeanarrowercuttingpath,
I 3. Dub ado. 3. Sharpenor replaceblade.
Unevencut 1. Wheelsnotpositionedcorrectly. 1. Placeallfour wheelsin same
heightposition.
2. Dullblade. 2. Sharpenor replaceblade.
Mower will not I 1. Beltnotinstalledproperly. I 1. Checkbeltfor properpuleyinstallation
seIfpropeI ' andmovement.
I 2. Debrsclogg ngdriveoperation. 2, Stopengine,disconnectsparkplug
I wireandcleanoutdebris.
.3. Damagedorworn belt. .3. Inspectand replacebelt.
12
Safety Labels Found On Your Lawn Mower
13
Safety
WARNING
DO NOT remove safety
(or any)labels from
mowerfor any reason,
\\
q_
14
1 747-1161A BladeControl
2 746-1114 ControlCable50.56-inch
3 725-0157 CableTie
4 631-04045 MulchPlug
5 731-1035B SideDischargeChute
6 17032A ChuteDeflectorAdapter
7 732-1014 TorsionSpring
8 747-0710 HingePin
9 931-1034B SideDischargeChuteAssy
10 7510042823 ShoulderScrew#10x .457
11 731-04525 EngineShroud
12 687-02051 LeverAssembly
13 682-3065 HandleBracketAssy- LH
14 732-04049 ExtensionSpring
15 987-02141 LeverAssembly-RH
16 717-1761 SpurGear-LH
17 782-0585A HeightAdjustmentPlate- LH
18 731-04636 TransmissionCover
19 750-04407 SleeveSpacer.550x2.22
20 618-04375 Transmission22-inch
21 750-04406A SleeveSpacer.550x8.51
22 716-0198 RetentionRing
23 748-0390 BearingSpacer
24 754-04100 V-Belt
25 748-04016A BladeAdapter
26 710-1044 HHCapScrew3/8-24x 1.50
27 736-0524B BellBladeSupport
28 742-0742A 22-inchMulchingBlade
29 782-0584 HeightAdjustmentPlate- RH
30 728-0199 PlasticRivet
31 687-02139 PivotArmAssembly
32 732-1026 SpringLever
33 736-0741 BellWasher.760x 1.25x.041
34 731-04643 WheelDustCover
35 715-0221 DowelPin3/16x.75
36 717-1762 SpurGear- RH
37 716-0865 SnapRing.500
38 634-04100 Wheel8 x 1.8SPKBARFWD
39 712-04065 FlangeLockNut3/8-16
40 720-0426 HeightAdjustmentKnob
41 710-0216 HHCapScrew3/8-16x .75
42 748-0455 BearingSupport
43 741-0710 SleeveBearing502x .627x 1
44 710-0599 TT Screw1/4-20x .500
45 736-0270 BellWasher.265x .75x.062
46 710-0654A TT Screw3/8-16x 1
47 682-3064 HandleBracketAssy-RH
48 741-0751 HeightAdjustmentBearing
49 738-1173 ShoulderScrew.75x.625
50 734-04087 Wheel8 x 1.8SPOKEBAR
51 687-02094 PivotArmAssembly
52 687-02046 22-inchSide DischargeDeck
53 17098 HingeClip
54 731-04019 Trailshield
55 720-0408 StarKnob
56 749-04037 LowerHandle
57 710-1174 CarriageBolt5/16-18x2
58 710-1205 EyeBolt
59 720-0279 HandleKnob
60 749-1092A UpperHandle
61 747-1214 DriveControl
15
Parts List
Toorder
replacement parts;
contact
1:8ooL8oo.73 o
orvisit
wwwiyar man:co.
IMPORTANT:Foraproper
workingmachine,use
FactoryApprovedParts.
V-BELTSare specially
designedto engage and
disengagesafely.A
substitute(non-OEM)
V-Beltcanbe dangerous
by not disengaging
completely.
MANUFACTURER'S LiMiTED WARRANTY FOR
ThelimitedwarrantysetforthbelowisgivenbyMTDLLCwithrespectto
newmerchandisepurchasedandusedin theUnitedStates,itsposses-
sionsandterritories.
"MTD"warrantsthisproductagainstdefectsin materialandworkmanship
fora periodoftwo(2) yearscommencingonthedateoforiginalpurchase
andwill,atits option,repairor replace,freeofcharge,anypartfoundto
bedefectiveinmaterialsor workmanship.Thislimitedwarrantyshallonly
applyifthis producthasbeenoperatedandmaintainedinaccordance
withtheOperator'sManualfurnishedwiththeproduct,andhasnotbeen
subjectto misuse,abuse,commercialuse,neglect,accident,improper
maintenance,alteration,vandalism,theft,fire,water,ordamagebecause
ofotherperilor naturaldisaster.Damageresultingfromtheinstallationor
useofanypart,accessoryorattachmentnotapprovedbyMTDforuse
withtheproduct(s)coveredbythis manualwillvoidyourwarrantyasto
anyresultingdamage.
Normalwearpartsarewarrantedto befreefromdefectsinmaterialand
workmanshipfora periodofthirty(30)daysfromthedateof purchase.
Normalwearpartsinclude,butare notlimitedto itemssuchas: batteries,
belts,blades,bladeadapters,grassbags,riderdeckwheels,seats,snow
throwerskidshoes,shaveplates,augerspiralrubberandtires.
NOWTOOBTAINSERVICE:Warrantyserviceisavailable,WITH
PROOFOFPURCHASE,throughyourlocalauthorizedservicedealer.To
locatethedealerin yourarea,checkyourYellowPages,orcontactMTD
LLCatRO.Box361131,Cleveland,Ohio44136-0019,or call1-800-800-
7310or logon toourWebsiteatwww.mtdproducts.com.
Thislimitedwarrantydoesnot providecoverageinthefollowingcases:
a. Theengineor componentpartsthereof.Theseitemsmaycarrya
separatemanufacturer'swarranty.Refertoapplicablemanufacturer's
warrantyfortermsandconditions.
b. Logsplitterpumps,valves,andcylindershavea separateoneyear
warranty.
c. Routinemaintenanceitemssuchaslubricants,filters,blade
sharpening,tune-ups,brakeadjustments,clutchadjustments,deck
adjustments,andnormaldeteriorationoftheexteriorfinishduetouse
orexposure.
d. Servicecompletedbysomeoneotherthananauthorizedservice
dealer.
e. MTDdoesnotextendanywarrantyforproductssoldor exported
outsideofthe UnitedStates,itspossessionsandterritories,except
thosesoldthroughMTD'sauthorizedchannelsofexportdistribution.
f. ReplacementpartsthatarenotgenuineMTDparts.
g. Transportationchargesand servicecalls.
No impliedwarranty,includinganyimpliedwarranty of merchant-
ability of fitness for a particularpurpose,applies after the applicable
periodof expresswritten warranty aboveas to the partsas identi-
fied. Noother expresswarranty, whether written or oral, exceptas
mentionedabove,givenby anypersonor entity,includingadealer
or retailer,with respect to anyproduct,shallbind MTD.Duringthe
periodof the warranty, the exclusive remedyisrepairor replacement
of the productas set forth above.
Theprovisionsas set forth inthis warranty providethe sole and
exclusive remedyarising from the sale. MTDshall not be liable
for incidentalor consequential loss or damageincluding,without
limitation, expensesincurredfor substitute or replacementlawncare
services or for rentalexpensesto temporarily replacea warranted
product.
Somestatesdo notallowtheexclusionor limitationofincidentalor
consequentialdamages,or limitationson howlonganimpliedwarranty
lasts,sotheaboveexclusionsor limitationsmaynotapplytoyou.
Innoeventshallrecoveryofanykindbegreaterthantheamountofthe
purchasepriceoftheproductsold.Alterationof safetyfeatures of the
productshallvoid this warranty. Youassumetheriskandliabilityfor
loss,damage,or injurytoyouandyourpropertyand/ortoothersandtheir
propertyarisingoutofthemisuseor inabilitytousetheproduct.
Thislimitedwarrantyshallnotextendto anyoneotherthantheoriginal
purchaseror tothepersonforwhomitwaspurchasedasa gift.
HOWSTATELAWRELATESTOTHISWARRANTY: Thislimitedwar-
rantygivesyouspecificlegalrights,andyoumayalsohaveotherrights
whichvaryfromstatetostate.
IMPORTANT:OwnermustpresentOriginalProofofPurchasetoobtain
warrantycoverage.
MTD LLC, P.O. BOX 361131 CLEVELAND, OHiO 44136-0019; Phone: 1-800-800-7310

Other manuals for 263

2

Other Yard-Man Lawn Mower manuals

Yard-Man 247.375590 User manual

Yard-Man

Yard-Man 247.375590 User manual

Yard-Man 13698U User manual

Yard-Man

Yard-Man 13698U User manual

Yard-Man 435 User manual

Yard-Man

Yard-Man 435 User manual

Yard-Man 122898B User manual

Yard-Man

Yard-Man 122898B User manual

Yard-Man 13B-325-401 User manual

Yard-Man

Yard-Man 13B-325-401 User manual

Yard-Man 1040-8 Operation manual

Yard-Man

Yard-Man 1040-8 Operation manual

Yard-Man 999 Series User manual

Yard-Man

Yard-Man 999 Series User manual

Yard-Man 131784G User manual

Yard-Man

Yard-Man 131784G User manual

Yard-Man 1040-6 Operation manual

Yard-Man

Yard-Man 1040-6 Operation manual

Yard-Man 13875A-8 User manual

Yard-Man

Yard-Man 13875A-8 User manual

Yard-Man 11A-589C401 User manual

Yard-Man

Yard-Man 11A-589C401 User manual

Yard-Man 107 User manual

Yard-Man

Yard-Man 107 User manual

Yard-Man 131754F User manual

Yard-Man

Yard-Man 131754F User manual

Yard-Man 3380-1 Operation manual

Yard-Man

Yard-Man 3380-1 Operation manual

Yard-Man 100 Series User manual

Yard-Man

Yard-Man 100 Series User manual

Yard-Man 13780-0 User manual

Yard-Man

Yard-Man 13780-0 User manual

Yard-Man 565 User manual

Yard-Man

Yard-Man 565 User manual

Yard-Man 950-959 User manual

Yard-Man

Yard-Man 950-959 User manual

Yard-Man 989 series User manual

Yard-Man

Yard-Man 989 series User manual

Yard-Man 53AA1A3G401 User manual

Yard-Man

Yard-Man 53AA1A3G401 User manual

Yard-Man 979 Series User manual

Yard-Man

Yard-Man 979 Series User manual

Yard-Man Series 844 User manual

Yard-Man

Yard-Man Series 844 User manual

Yard-Man 2260-0 Operation manual

Yard-Man

Yard-Man 2260-0 Operation manual

Yard-Man Series 844 User manual

Yard-Man

Yard-Man Series 844 User manual

Popular Lawn Mower manuals by other brands

Toro TimeCutter 5000 manual

Toro

Toro TimeCutter 5000 manual

Husqvarna AUTOMOWER 440 Operator's manual

Husqvarna

Husqvarna AUTOMOWER 440 Operator's manual

Craftsman 917.288320 Operator's manual

Craftsman

Craftsman 917.288320 Operator's manual

Troy-Bilt 440 Series Operator's manual

Troy-Bilt

Troy-Bilt 440 Series Operator's manual

Makita DLM463 instruction manual

Makita

Makita DLM463 instruction manual

Amazone PH04 Operating manual and maintenance notebook

Amazone

Amazone PH04 Operating manual and maintenance notebook

AL-KO Solo Heckauswurf Comfort 220 I manual

AL-KO

AL-KO Solo Heckauswurf Comfort 220 I manual

Craftsman 138.98818 Operator's manual

Craftsman

Craftsman 138.98818 Operator's manual

Craftsman 917.272248 owner's manual

Craftsman

Craftsman 917.272248 owner's manual

Toro Super Bagger 20192 Operator's manual

Toro

Toro Super Bagger 20192 Operator's manual

Craftsman 917.374544 owner's manual

Craftsman

Craftsman 917.374544 owner's manual

McConnel PA5054 VERSI Operator's manual

McConnel

McConnel PA5054 VERSI Operator's manual

Husqvarna LGTH22V48 Operator's manual

Husqvarna

Husqvarna LGTH22V48 Operator's manual

Hayter Spirit 41 Owner's handbook

Hayter

Hayter Spirit 41 Owner's handbook

Trolla 12002 operating manual

Trolla

Trolla 12002 operating manual

SNOWJOE Sun Joe MJ401C Operator's manual

SNOWJOE

SNOWJOE Sun Joe MJ401C Operator's manual

Craftsman 16 HP ELECTRIC START 42" MOWER 6 SPEED TRANSAXLE LAWN TRACTOR... owner's manual

Craftsman

Craftsman 16 HP ELECTRIC START 42" MOWER 6 SPEED TRANSAXLE LAWN TRACTOR... owner's manual

Toro Recycler 20012 Operator's manual

Toro

Toro Recycler 20012 Operator's manual

manuals.online logo
manuals.online logoBrands
  • About & Mission
  • Contact us
  • Privacy Policy
  • Terms and Conditions

Copyright 2025 Manuals.Online. All Rights Reserved.