Standard Location with Operator, Designator & Serial Number
1.) When selecting this option use the dropdown menu to select the country you
wish to program it for.
2.) Enter the operator designator alpha-numeric code using the up and down
buttons.
3.) Enter the serial number of the ELT.
4.) Click the “Program” button and monitor the progress bars.
5.) After completing programming the “Verify” button highlights yellow, select
“Verify” and monitor the progress bars.
6.) If the “Verify” button highlights green it was successfully programmed, and
review programmed data in the fields below to make sure it is correct.
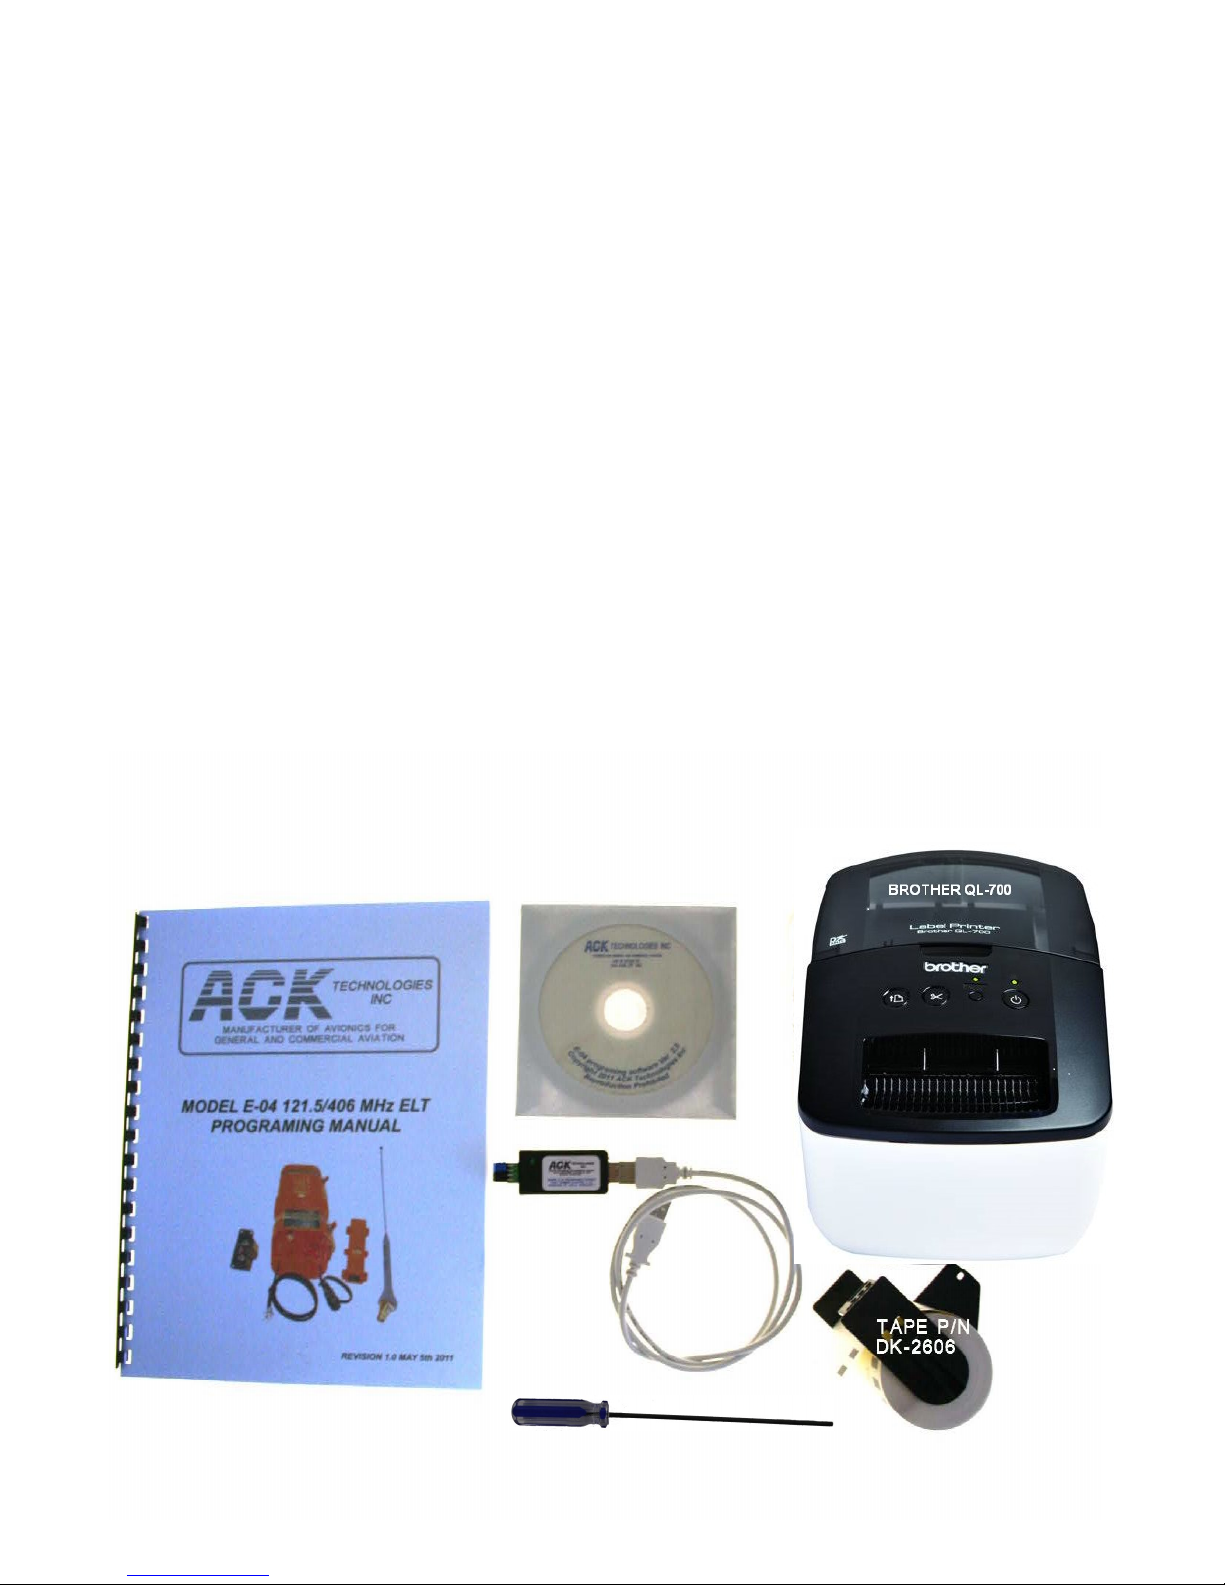
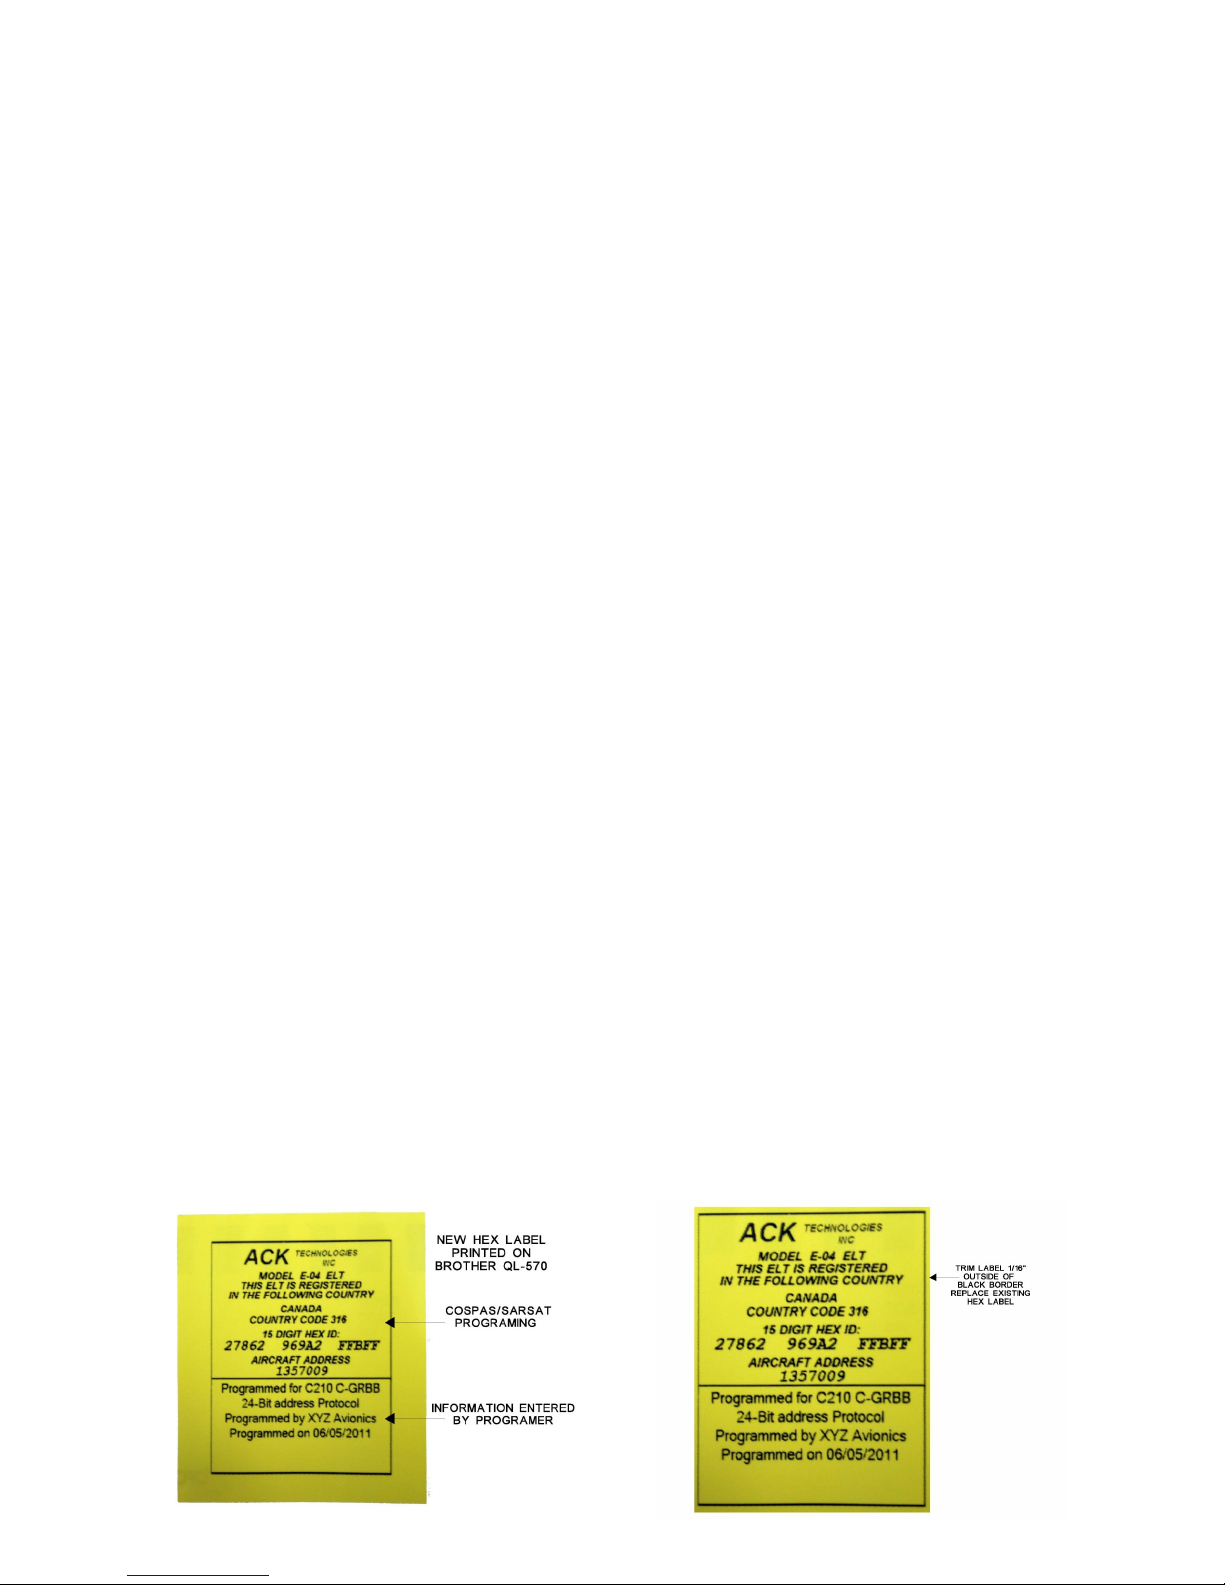
7.) make sure to select the Brother QL-700 printer from the drop down list.
8.) Click on the “Print HEX Label” button a box will appear that will allow you to
enter up to six lines of text we recommend that you record what aircraft
identification number it is programmed for, the facility doing the programming
or any other information you would like to include.
6.) Click on the “Print Label” button to print the new Hex label.
9.) Trim the edges of the label to just outside of the black box, remove the old
Hex label, and replace it with the new label.
Programming Serial Number Protocol
In the serial number protocol you are only allowed to change the country code.
1.) When selecting this option use the dropdown menu to select the country you
wish to program it for.
2.) Click the “Program” button and monitor the progress bars.
3.) After completing programming the “Verify” button highlights yellow, select
“Verify” and monitor the progress bars.
4.) If the “Verify” button highlights green it was successfully programmed, and
review programmed data in the fields below to make sure it is correct.
5.) make sure to select the Brother QL-700 printer from the drop down list.
5.) Click on the “Print Hex Label” button a box will appear that will allow you to
enter up to six lines of text we recommend that you record what aircraft
identification number it is programmed for, the facility doing the
programming or any other information you would like to include.
6.) Click on the “Print Label” button to print the new Hex label.
7.) Trim the edges of the label to just outside of the black box, remove the old
Hex label, and replace it with the new label.
Programming 24-Bit address Protocol
1.) When selecting this option use the dropdown menu to select the country you
wish to program it for.
2.) Click on the “Select Base Number Format” this option allows you to enter the
24 bit address as a decimal, Hex, Octal or Binary format.
3.) Enter the 24-Bit address in the proper format for the country it is being
programmed for.
4.) Click the “Program” button and monitor the progress bars.
6