ACTAtek 3 Original operating instructions

BIOMETRIC
,
SMARTCARD
& INTERNET
APPLIANCETECHNOLOGIES
DoorStrike
TerminalsNO -COMNormal Open(Internal Relay)
TerminalsNC-COMNormal Close(Internal Relay)
Theseterminalsareconnecteddirectlytotheinternal relay,
whichrating at 30V/5A.Ifthedoorstrikerates withinthis
currentlimit,itcanbeconnectedtotheseterminalsdirectly. If
thesystemisusedsolelyfor TimeAttendance,leave these
terminalsdisconnect.
Alarm
TerminalsA&BTamper Switchfor ExternalAlarm
Thisisusedfor connectinganoptional external alarm.Ifin the
caseofaforcedopeningduringoperation(suchasabreak-in),
aninternalsensor will triggerthisconnection,andit will
soundtheexternal alarm.
NetworkConnections
Youcanconnect ACTAtekunit directlytoyourcorporate
computernetworkvia standard RJ-45 cabling &TCP/IP
pro
tocols.Byconnectingit tothenetwork,you canmanage&
monitor theunit via anystandard Web Browser(suchas
MicrosoftInternet Explorer or
First,makesuretheTCP/IPprotocolshave beeninstalledand
configuredcorrectlyonthePCor Notebookwhichyouwantto
usetoaccessACTAtek.
Setting the Network &TCP/IPaddress
Press Menu”, enter A999”(Super adminID), thenpress 1”
(Defaultpassword), select the IPSetting”icon.
Enter IPaddress Press Enter”tocontinue.
Enter Subnet maskPress Enter”tocontinue.
Enter Default GatewayPress Enter”tocontinue.
Enter DNS (ifrequired) Press Enter”tocontinue.
Or
:Enable DHCP(ifrequired) Press Enter”tocontinue.
OpenyourPC’swebbrowserandkeyintheACTAtek’sIP
address intothebrowser’saddress bar.
Press Enter”ACTAtek’swebinterface shouldbeappearing
inthebrowserwindows.
*Ifyouhaveanyproblemsduringabovesteps,pleaseconsult
your networkadministrator.
BeforeBeginning
PowerRequirement
TheACTAtekSeriesrequiresa12VDC/2.25A(or above)Switching
PowerSupply.Please DONOT sharethepowersupplywith any
otherdevices,includingDoor Lock.Unstable powersupply
woulddamagetheACTAtekseriously.
Warning: ModificationofPowerSupply/DCJackor Extension
oftheDCCord ofPowerSupplymayaffect thestabilityof
ACTAtek.
Deciding whereto install
ACTAtekisawall-mountable unit withaverysmallfootprint,
andcanbeconvenientlyinstalledanywhere.Ifusedasan
access controlsystem,theproduct shouldbeinstalledclosetothe
door, sotheuser canopenthedoor withinthetimeoutperiodafter
authentication(8sec. bydefault).
InstallingYourACTAtek
Power&ExternalControlsConnections
ACTAtekprovideseasy-access terminalsfor connectionsto
externalcontrols,includingDoor Strikes,Door ,Door
ReleaseSwitch, andExternalAlarm.
Ifthedevice worksasAccess ControlSystem,anadditional
diodeisrequired,toavoidtheBackEMFfromtheDoor Lock,
whichmaydamagetheACTAtekunit. Refertothediagram
attached.
Power(12VDC):
DCJ
ack +12VDC
DoorSwitch
TerminalsA&B
Anoptional door switch(Door ReleaseButton) canbeconnected
totheseterminals. Itisusedtoopenthedoor fromtheinsideof
thebusiness premises, or fromthereceptionarea.
Itishighlysuggested to connectthe DoorReleaseButtonto
Electric Lockdirectly, and leavetheseterminalsdisconnect.
Quick Installation
Thissheetwill guideyouthrough thebasicstepsneededtoinstall the
ACTAtekand connect withyournetwork.Ifyouhaveanyproblems
duringinstallation,refertothemanual inCDformoreinformation.
EmbeddedWebServer
ACTAtek System
Access ControlTimeAttendance
3
Bell
Mozilla Firefox)
Door Bell
Connect both ends of the door bell switch to COM and NO.
Door bell will ring once the door bell button (Top right corner of
the keypads) is pressed.
&
Video Output
The camera of ACTAtek is able to output CVBS signal.i.e. TV out
version 1.2 (Nov. 2011)

AddingUser
1) Press Menu”button, thenenter A999”(admin. ID) and
password 1”(default password), select NewUser”icon.
2) Select Fingerprint”.
3) Enter theIDNo., press Enter”.
4) Place theright-handthumband place it onthesensor until the
screendisplays TemplateStored”, thenremoveyourfinger.
5) Press "Enter", repeat theabovestepfor the2ndfingerprint
image.
6) Press "Enter", repeat theabovestepfor the3rd fingerprint
image.
7) Ifall imagesareOK, anacknowledgemessage UserAdded”
willappear. Press Enter”toquit.
GuideforUsingFingerprintSensor
Place yourfingerfirmlyon thesensor and
alignthecoreofthefingerprinttothecenter
ofthesensor.Thesensor willscanyour
fingerprintautomatically.
FingerRotationshouldbekepttoaminimum
duringenrollmentandverification
Note: Inordertoobtainrequiredqualityfingerprintimages,you
mayneedtomoveandrotate your finger alittle.
AVOIDRUBBINGTHESENSOR ASTHISWOULDDISTORTTHEIMAGE.
Verification
IDMatch:KeyinyourUserIDNo.place yourenrolledfingeron
thesensor. Ifyouareauthenticated, thedevice will openthedoor.
Auto Match:Place yourenrolledfingeronthesensor,thesystem
willscanyourfingerprintautomatically.
WARNING
Pleaseberemindedtocleanthesensor surface withacottoncloth
or tissue, using alcoholor contact cleaner.
DoNOT useanysharp or ruggedmaterial tocleanthesensor.
FCCSTATEMENT
Thisequipmenthas beentestedand foundtocomplywiththelimitsfora
Class Adigitaldevice,pursuanttopart 15 oftheFCC Rules.These limits
aredesignedtoprovidereasonableprotectionagainstharmfulinterference
whentheequipmentisoperatedinacommercialenvironment.This
equipmentgenerates,uses,and canradiateradiofrequencyenergyand,if
notinstalledandusedinaccordance withtheinstructionmanual, maycause
harmfulinterference toradiocommunications.Operationofthisequipment
inaresidentialarea islikelytocause harmfulinterference inwhichcase the
userwill berequiredtocorrecttheinterference athisownexpense.
FingerprintEnrollment
FingerPosition.Place thecenteroffingerinthesensor
center.Thefingerprintmaybepositionedfarleft,farright,far
upor fardown.For instance,ifauserenrolledafarleft
fingerprint.Duringverification,theusermaypress farright.
Since thereisnooverlapbetweenenrollmentandverification
templates,theusermayberejected.Iftheuserenrollsthe
finger inthemiddle, thereisabetter chance ofbeingaccepted.
Fingerarea.Thebestadvice istocoverthesensor area
completelywithfingertoensurethemaximumfingerprint
surface contact area.Acommonmistakeistotouchthe
sensor withthetipofthefinger,whichcontainstoo few
information(ie., minutiae). Itisalsopreferable tousethe
thumbsrather thanotherfingers.
Fingerrotation.Itwill begood for theusertokeepthe
fingerprintrotationminimalduringtheenrollment.The
rotationshouldbewithin+-10degreesduringenrollment.
Fingerpressure.Usemediumpressure.Excessivepressure
maydistorttheimageandadhereridgestogether.Toolittle
pressurewouldlead toasmall fingerprintarea ordry
fingerprint.
Fingercondition,verydryorwetfinger.Although
ACTAtek'sfingerprintsensor isdesignedtohandle dryor wet
conditions,it iswisetohandle speciallyofverydryor wet
fingers.Theusercanwipewet fingerswithclothor paper
towel.For dryfinger,theusercanmoisturize thefingerby
br
eathingon it,bytouchingtheforeheadtopickupsurface oil,
or byapplyingsmallamountofskin-moisturizinglotion.The
imagequalitycouldbeimprovedtremendouslybytakingcare
ofthedry/wet conditionduringenrollment.
Itisimportantthat theuserstoreahighqualityimagewhen
enrollingafingeprint,becausethisisthefingerprintthat the
userwill becomparedwithinall theverificationsafterwards.
Iftheusersenrolledfingerpirntimageisoflowquality, theuser
mayget unexpectedresultsduring theverificationstage.
Pleasenote that during theless critical verificationstage,the
fingerpirntimagedoesnothavetobeperfect.Theonly
requirementistoobtainenoughunique information”(ie.,
minutiae)tomatchthefingerpirnt.Therefore,theabovesteps
areusuallynecessaryfor theenrollmentstageonly.
Instruction
It ishighlyrecommendedforthefingerprintcorebebigand
clear for asuccessfulenrollmentofaclear andgood image.
Makesurethefingerprintimageca
p
turedisof thecoreof the
fingerpresented.Afingerprintcoreisapointlocatedwithinthe
innermostrecurving ridgeofanygivenfinger.
Also,toobtainahighersuccess rate,enroll thesamefinger3
timesinaslightlyadjustedangle,onetothecenter,one
inclinedslightlytotheleftand thethird inclinedslightlytothe
right.
Ifyoufollowingenrollmentprocedure,thesuccessrate will
increasedramatically.
IP65 Water &Dust proofApproved
(e.g. FingerPrint User)
Table of contents
Popular Server manuals by other brands
Dell
Dell PowerEdge R220 owner's manual
Supermicro
Supermicro SuperServer 5039MD8-H8TNR user manual
NEC
NEC NECCare Platinum Express5800/A1160 installation guide
Microsemi
Microsemi SyncServer S600 user guide
Sun Microsystems
Sun Microsystems Blade X8400 installation guide
Supermicro
Supermicro SuperWorkstation 740GP-TNRT user manual
Sun Microsystems
Sun Microsystems Sun Fire V440 installation guide
NEC
NEC Express5800/R320e-M4 Configuration guide

Meinberg
Meinberg LANTIME M150/GPS Technical reference

Fujitsu
Fujitsu Primergy RX600 S2 operating manual
Sun Microsystems
Sun Microsystems Sun Enterprise 4500 installation guide
Moxa Technologies
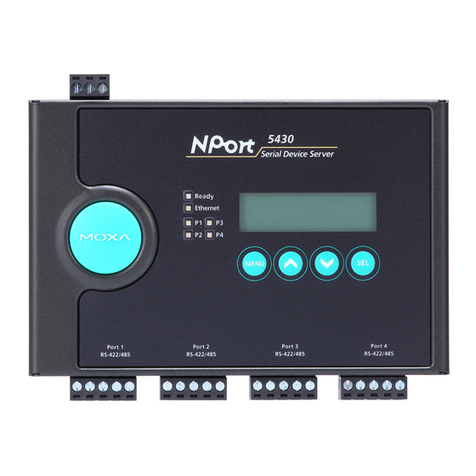
Moxa Technologies nport 5400 series user manual
