24
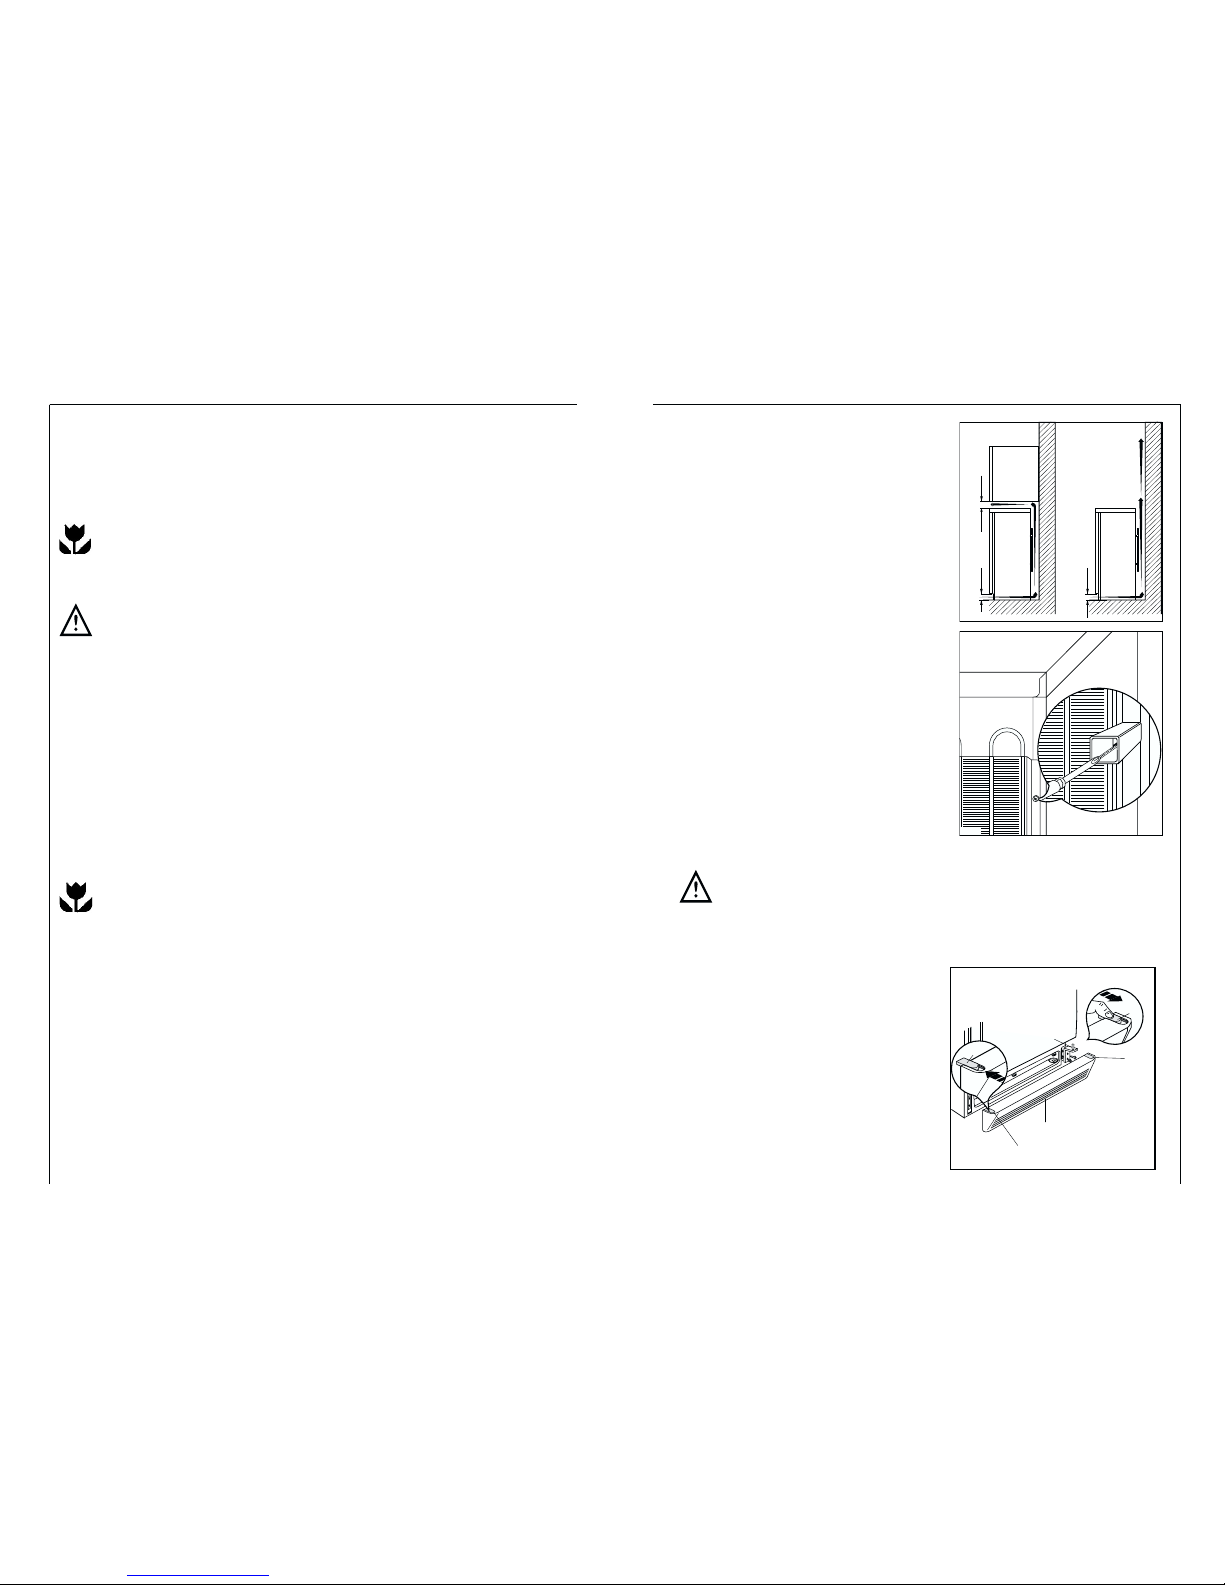
If installation next to a source of heat is unavoidable, the follo ing mini-
mum clearances must be maintained at the sides of the appliance:
– for electric cookers 3 cm;
– for oil and coal fired ranges 30 cm.
If these clearances cannot be maintained a heat insulating pad is required
bet een the cooker and the refrigeration appliance.
If the refrigeration appliance is installed next to another refrigerator or free-
zer a clearance of 5 cm at the sides is required, in order to prevent the for-
mation of condensation on the outside of the appliance.
Installation
Installation Location
The appliance should be set up in a ell ventilated, dry room.
Energy use is affected by the ambient temperature. The appliance should
therefore
– not be exposed to direct sunlight;
– not be installed next to radiators, cookers or other sources of heat;
– only be installed at a location hose ambient temperature corresponds to
the climate classification, for hich the appliance is designed.
The climate classification can be found on the serial plate, hich is located
at the left on the inside of the appliance.
The follo ing table sho s hich ambient temperature is correct for each
climate classification: each climate classification:
Climate classification for an am ient temperature of
SN +10 is +32 °C
N+16 is +32 °C
ST +18 is +38 °C
T+18 is +43 °C
33
What to do if ...
Correcting Malfunctions
A malfunction may be caused by only a minor fault that you can rectify
yourself using the follo ing instructions. Do not perform any other ork on
the appliance if the follo ing information does not provide assistance in
your specific case.
Warning! Repairs to refrigerators/freezers may only be performed by quali-
fied service engineers. Improper repairs can give rise to significant hazards
for the user. If your appliance needs repairing, please contact your speciali-
st dealer or our Customer Service.
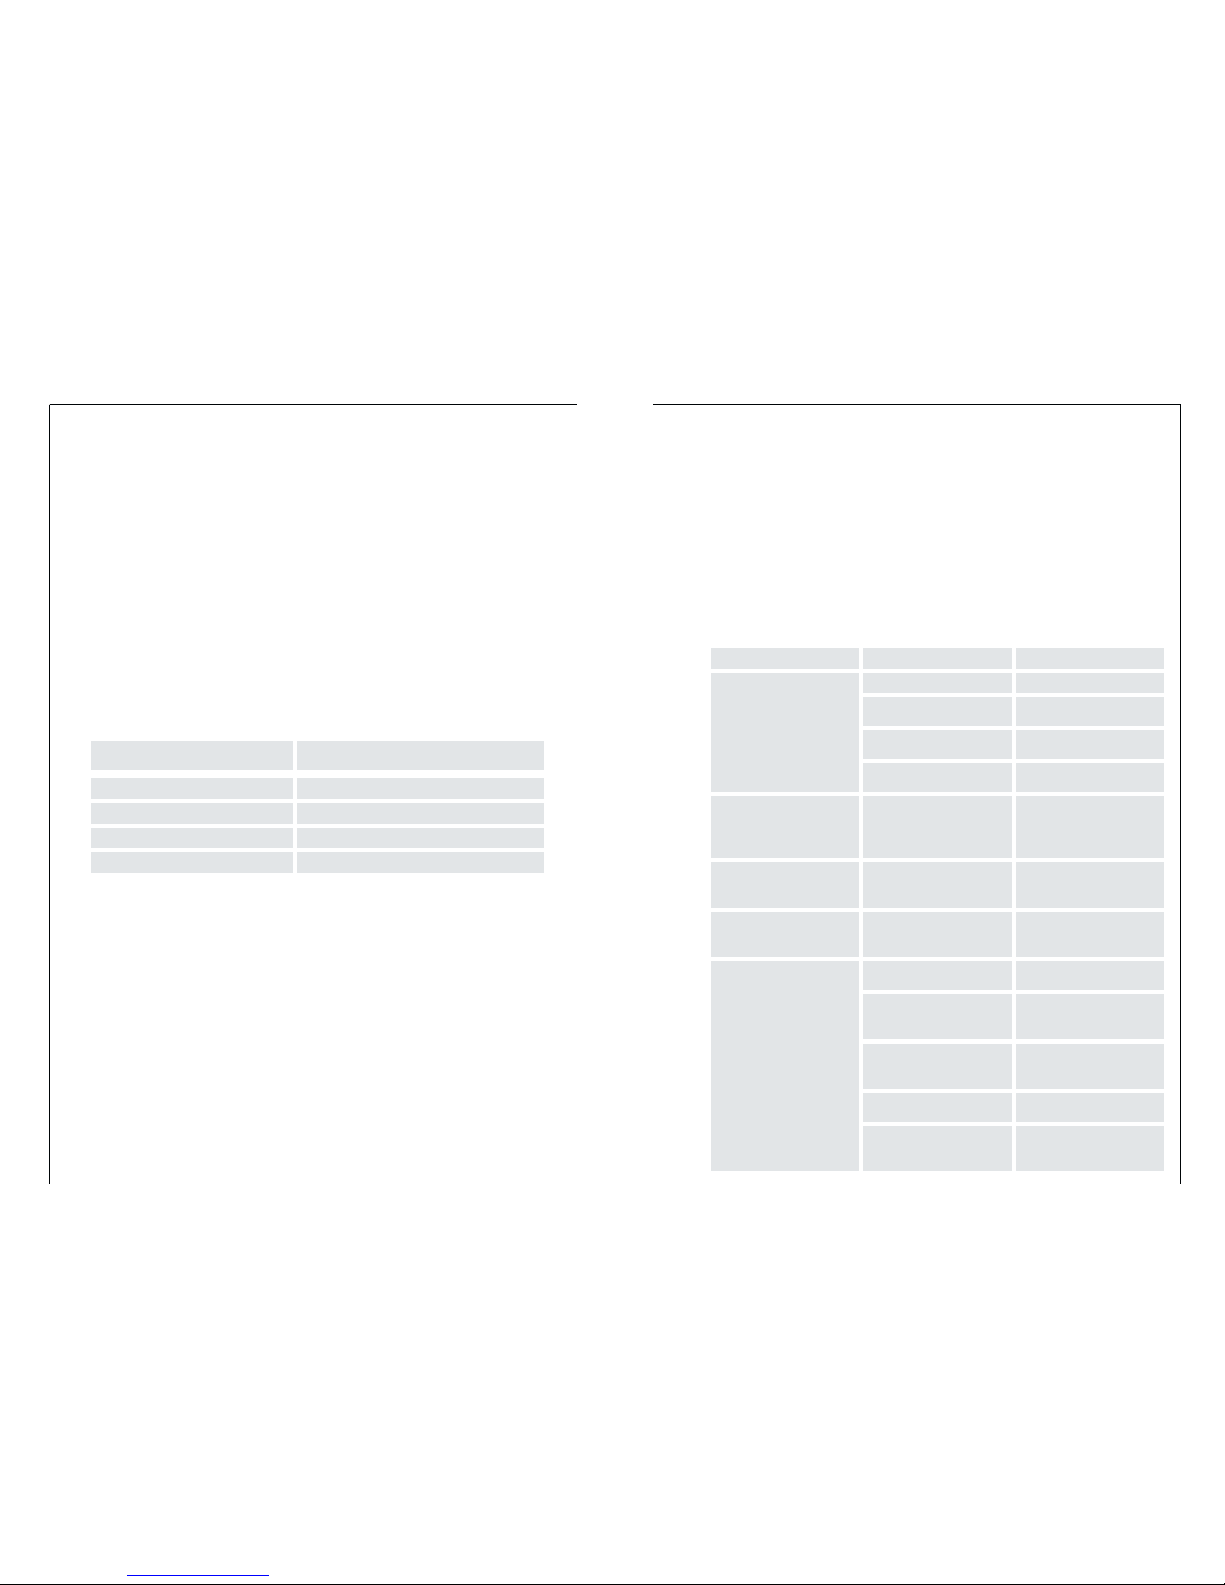
Malfunction Possi le Cause Remedy
Appliance does not ork, no
pilot light is illuminated.
Appliance is not s itched on S itch on the appliance.
Mains plug is not plugged in
or is loose. Insert mains plug.
Fuse has blo n or is defective. Check fuse, replace if neces-
sary.
Socket is defective. Mains malfunctions are to be
corrected by an electrician.
The freezer temperature is not
sufficient, red light lights up,
temperature signal sounds
The appliance is near a heat
source.
Temperature is not properly
adjusted.
Please look in the "Initial Start
Up" section.
Press the fast freeze s itch
Door as open for an exten-
ded period.
Please look in the "Installation
location" section.
Disturbance on the appliance
S itch on the fast freeze s it-
ch, keep the freezer closed,
inform your customer service
A large quantity of arm food
as placed in the appliance
ithin the last 24 hours.
Open the door only as long as
necessary. Press the fast free-
ze s itch
Green light does not light up,
yello light lights up hen
fast freeze fuction is activa-
ted, appliance is on.
Green light faulty. Please inform your customer
service
Appliance cools too much. Temperature is set too cold.
Turn the temperature regula-
tor to a armer setting tem-
porarily.
Yello light does not light up,
hen fast freeze fuction is
activated, appliance is on.
Yello light faulty. Please inform your customer
service