manuals.online logo
Brands
  1. Home
  2. •
  3. Brands
  4. •
  5. AEG
  6. •
  7. Freezer
  8. •
  9. AEG ARCTIS G 9 88 50-4 i Specification sheet

AEG ARCTIS G 9 88 50-4 i Specification sheet

Other AEG Freezer manuals

AEG SCE818C5TC User manual

AEG

AEG SCE818C5TC User manual

AEG RDB72721AX User manual

AEG

AEG RDB72721AX User manual

AEG RCB53421LW User manual

AEG

AEG RCB53421LW User manual

AEG ATF851 User manual

AEG

AEG ATF851 User manual

AEG ARCTIS 70110 User manual

AEG

AEG ARCTIS 70110 User manual

AEG S95200XZM0 User manual

AEG

AEG S95200XZM0 User manual

AEG S83820CTX2 User manual

AEG

AEG S83820CTX2 User manual

AEG ARCTIS 0833-6i Specification sheet

AEG

AEG ARCTIS 0833-6i Specification sheet

AEG SANTO 75320 DT User manual

AEG

AEG SANTO 75320 DT User manual

AEG SCE818E6NS User manual

AEG

AEG SCE818E6NS User manual

AEG ARCTIS User manual

AEG

AEG ARCTIS User manual

AEG Santo 2992-6 i User manual

AEG

AEG Santo 2992-6 i User manual

AEG ARCTIS G 78850-4 i User manual

AEG

AEG ARCTIS G 78850-4 i User manual

AEG RCB636E4MX User manual

AEG

AEG RCB636E4MX User manual

AEG AGN2141 User manual

AEG

AEG AGN2141 User manual

AEG A72700GNX0 User manual

AEG

AEG A72700GNX0 User manual

AEG ABB66011AS User manual

AEG

AEG ABB66011AS User manual

AEG ARCTIS 1283-7 GS User manual

AEG

AEG ARCTIS 1283-7 GS User manual

AEG A42220GSW0 User manual

AEG

AEG A42220GSW0 User manual

AEG S72300DSW0 User manual

AEG

AEG S72300DSW0 User manual

AEG SCE81911TS User manual

AEG

AEG SCE81911TS User manual

AEG A80230GT User manual

AEG

AEG A80230GT User manual

AEG A61900HLW0 User manual

AEG

AEG A61900HLW0 User manual

AEG ARCTIS User manual

AEG

AEG ARCTIS User manual

Popular Freezer manuals by other brands

LG freezer owner's manual

LG

LG freezer owner's manual

Whirlpool EH221FXRQ00 parts list

Whirlpool

Whirlpool EH221FXRQ00 parts list

Ryobi P3370 Operator's manual

Ryobi

Ryobi P3370 Operator's manual

Iceking IK2022WE Installation and operating manual

Iceking

Iceking IK2022WE Installation and operating manual

SEVERIN DT 8760 Instructions for use

SEVERIN

SEVERIN DT 8760 Instructions for use

mykin MCF146W quick start guide

mykin

mykin MCF146W quick start guide

Haier HCM070EA user manual

Haier

Haier HCM070EA user manual

Haier DW-86L486 After-sales Service Manual

Haier

Haier DW-86L486 After-sales Service Manual

DAEWOO ELECTRONICS DAEMA DFZ-685CG user manual

DAEWOO ELECTRONICS

DAEWOO ELECTRONICS DAEMA DFZ-685CG user manual

Siemens GU..D SERIES Instructions for use

Siemens

Siemens GU..D SERIES Instructions for use

Omcan FR-CN-0155 instruction manual

Omcan

Omcan FR-CN-0155 instruction manual

Electrolux ARCTIS G 8 60 50-6I user manual

Electrolux

Electrolux ARCTIS G 8 60 50-6I user manual

Frigidaire FV 1246 H Instruction book

Frigidaire

Frigidaire FV 1246 H Instruction book

Electrolux EUF2042AOX user manual

Electrolux

Electrolux EUF2042AOX user manual

Dometic CoolFreeze CFX95DZ operating manual

Dometic

Dometic CoolFreeze CFX95DZ operating manual

Electrolux EUF7000W1 user manual

Electrolux

Electrolux EUF7000W1 user manual

SAF PRESTOTIG 200AC/DC Installation and instruction manual

SAF

SAF PRESTOTIG 200AC/DC Installation and instruction manual

Zanussi ZFT11407WA user manual

Zanussi

Zanussi ZFT11407WA user manual

manuals.online logo
manuals.online logoBrands
  • About & Mission
  • Contact us
  • Privacy Policy
  • Terms and Conditions

Copyright 2025 Manuals.Online. All Rights Reserved.

ARCTIS G 9 88 50-4 i
Integrierbares Gefriergerät
Integreerbare diepvrieskast
Integrating Freezer
Gebra chs- nd Einba anweis ng
Gebr iks- en montageaanwijzing
Operating and Installation Instr ctions
AEG Ha sgeräte GmbH
Postfach 1036
D-90327 Nürnberg
http://www.aeg.ha sgeraete.de
© Copyright by AEG Änder ngen vorbehalten
2222 107-15 08/03 S bject to change witho t notice
Wijzigingen voorbeho den
2
Sehr geehrte Kundin, sehr geehrter Kunde,
bevor Sie Ihr ne es Kältegerät in Betrieb nehmen, lesen Sie bitte diese
Gebra chsanweis ng a fmerksam d rch. Sie enthält wichtige Informatio-
nen z m sicheren Gebra ch, z m A fstellen nd z r Pflege des Gerätes.
Bewahren Sie bitte die Gebra chsanweis ng z m späteren Nachschlagen
a f. Geben Sie sie an event elle Nachbesitzer des Gerätes weiter.
Hinweis: Diese Gebra chsanweis ng ist für mehrere technisch vergleichba-
re Modelle mit nterschiedlicher A sstatt ng bestimmt. Beachten Sie bitte
n r die Hinweise, die Ihre Gerätea sführ ng betreffen.
Mit dem Warndreieck nd/oder d rch Signalwörter (Warnung!, Vorsicht!,
Achtung!) sind Hinweise hervorgehoben, die für Ihre Sicherheit oder für die
F nktionsfähigkeit des Gerätes wichtig sind. Bitte nbedingt beachten.
Nach diesem Zeichen erhalten Sie ergänzende Informationen z r Bedie-
n ng nd praktischen Anwend ng des Gerätes.
Mit der Bl me sind Tips nd Hinweise z m wirtschaftlichen nd mwelt-
schonenden Einsatz des Gerätes gekennzeichnet.
Für evtl. a ftretende Stör ngen enthält die Gebra chsanweis ng Hinweise
z r selbständigen Beheb ng, siehe Abschnitt "Was t n, wenn ...". Sollten
diese Hinweise nicht a sreichen, haben Sie jederzeit zwei Anla fstellen, bei
denen Ihnen weitergeholfen wird:
Wir sind für Sie da:
montags bis freitags
8.00 bis 20.00 Uhr
samstags
10.00 bis 14.00 Uhr.
Hier erhalten Sie Antwort a f jede Frage, die die A sstatt ng nd den Ein-
satz Ihres Gerätes betrifft. Natürlich nehmen wir a ch gerne Wünsche,
Anreg ngen nd Kritik entgegen. Unser Ziel ist es, z m N tzen nserer K n-
den nsere Prod kte nd Dienstleist ngen weiter z verbessern.
Bei technischen Problemen steht Ihnen nser WERKSKUNDENDIENST in
Ihrer Nähe jederzeit z r Verfüg ng (Adressen nd Telefonn mmern finden
Sie im Verzeichnis Garantiebeding ngen / K ndendienststellen).
Beachten Sie daz den Abschnitt „K ndendienst“
*(Telekom 0,12 Euro/min.)
INFO SERVICES 0180 - 555 4 555*
Gedr ckt a f mweltschonend hergestelltem Papier
– wer ökologisch denkt, handelt a ch so ...
51
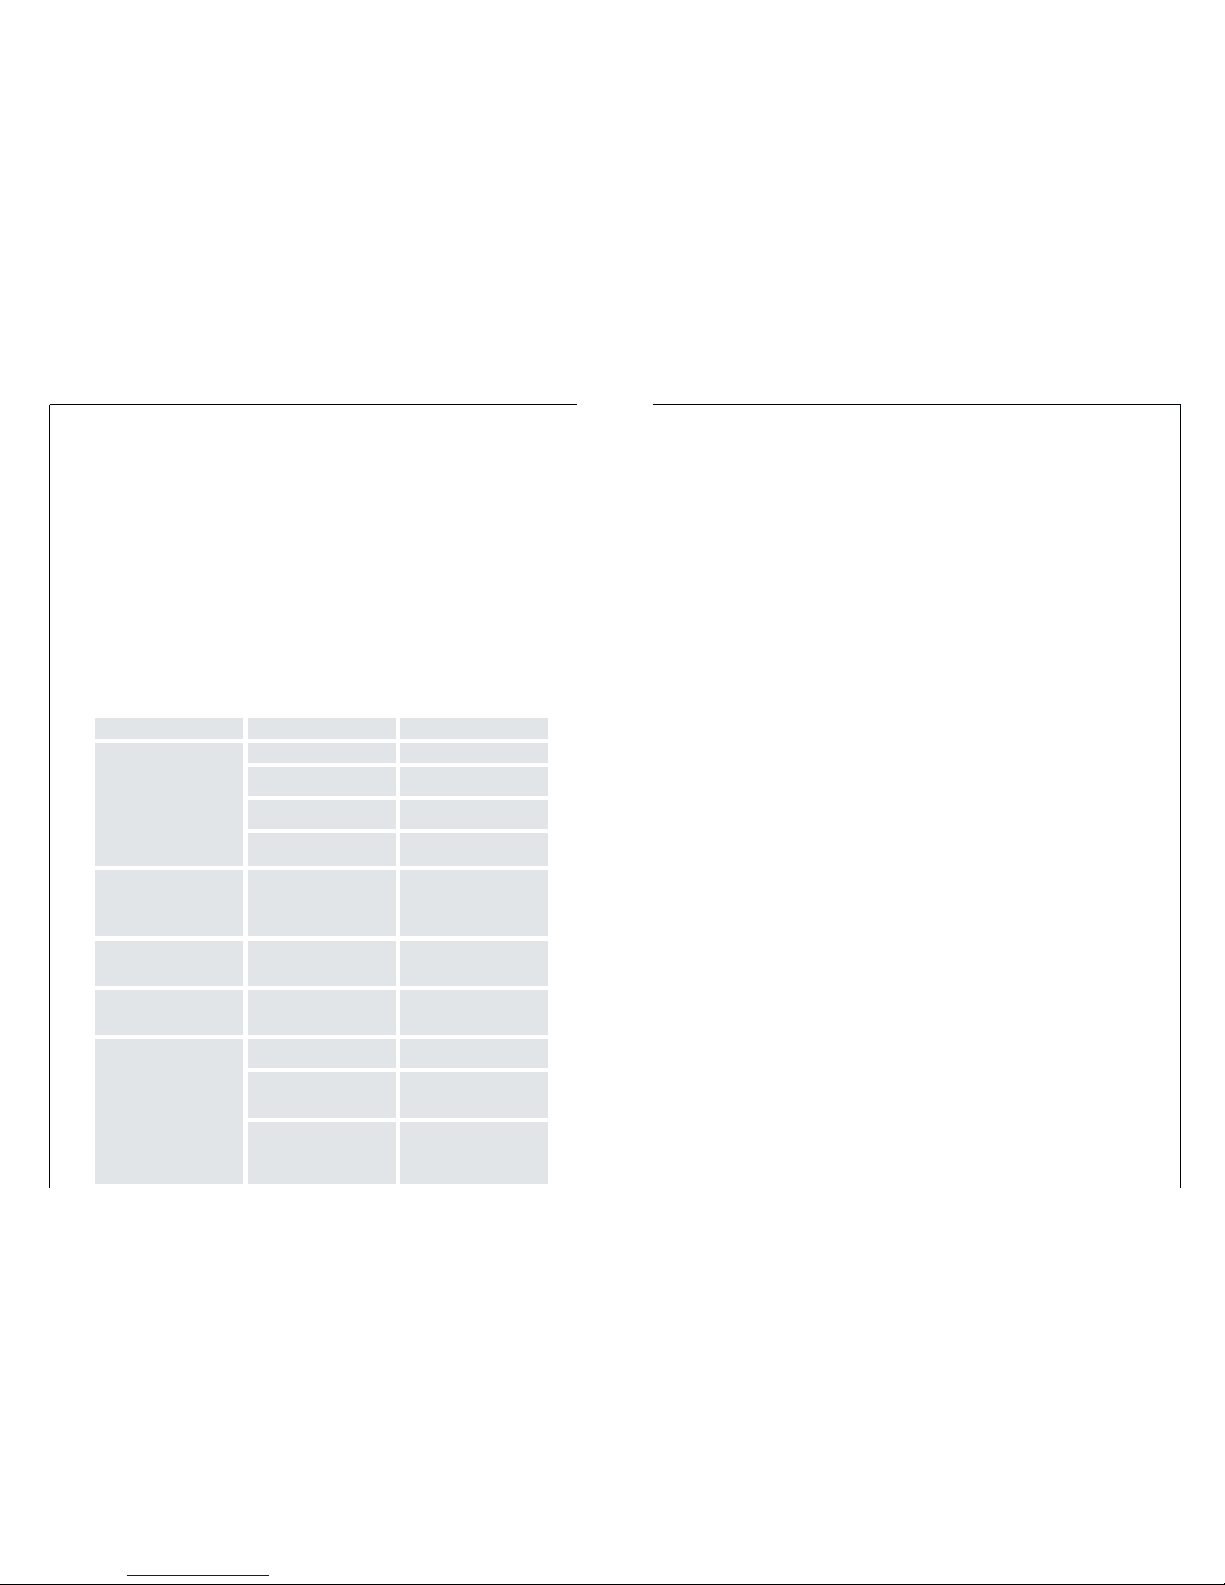
Heavy b ild p of frost, possi-
bly also on the door seal.
Door seal is not air tight (pos-
sibly after changing over the
hinges).
Caref lly warm the leaking
sections of the door seal with
a hair dryer (not hotter than
approx. 50 °C). At the same
time shape the warmed door
seal by hand s ch that it sits
correctly.
The freezer temperat re is not
s fficient, red light lights p,
temperat re signal so nds
The appliance is near a heat
so rce.
Please look in the "Installation
location" section.
Dist rbance on the appliance
Switch on the fast freeze
switch, keep the freezer clo-
sed, inform yo r c stomer
service
Un s al noises.
The appliance is to ching the
wall or other objects.
Appliance is not level.
A component, e.g. a pipe, on
the rear of the appliance is
to ching another part of the
appliance or the wall.
If necessary, caref lly bend
the component o t of the
way.
Move the appliance slightly.
Readj st the feet.
The compressor starts after a
period of time.
This is normal, no error has
occ rred.
The compressor does not start
immediately after changing
the temperat re setting.
Malfunction Possible Cause Remed
Regulations, Standards, Guidelines
This appliance was designed for ho sehold se and was man fact red in
accordance with the appropriate standards. The necessary meas res in
accordance with appliance safety legislation reg lations (GSG), accident
prevention reg lations for refrigeration appliances (VBG 20) and the reg -
lations of the German Society of Electrical Engineers (VDE) were observed in
the man fact re of this appliance.
The refrigerant circ it has been checked for leaks.
This appliance is in accordance with the following EU g idelines:
– 73/23/EWG dated 19 Febr ary 1973 - low voltage g idelines.
– 89/336/EWG dated 3 May 1989
(incl ding g ideline change notice 92/31/EWG) - EMV g ideline
3
Inhalt
Sicherheit . . . . . . . . . . . . . . . . . . . . . . . . . . . . . . . . . . . . . . . . . . . . . . .4
Entsorgung . . . . . . . . . . . . . . . . . . . . . . . . . . . . . . . . . . . . . . . . . . . . . .6
Information z r Geräteverpack ng . . . . . . . . . . . . . . . . . . . . . . . . . . . . . .6
Entsorg ng von Altgeräten . . . . . . . . . . . . . . . . . . . . . . . . . . . . . . . . . . . .6
Transportschutz entfernen . . . . . . . . . . . . . . . . . . . . . . . . . . . . . . . . .6
Aufstellen . . . . . . . . . . . . . . . . . . . . . . . . . . . . . . . . . . . . . . . . . . . . . . .7
A fstellort . . . . . . . . . . . . . . . . . . . . . . . . . . . . . . . . . . . . . . . . . . . . . . . . . .7
Ihr Kühlgerät bra cht L ft . . . . . . . . . . . . . . . . . . . . . . . . . . . . . . . . . . . . .8
Einbau . . . . . . . . . . . . . . . . . . . . . . . . . . . . . . . . . . . . . . . . . . . . . . . . . .8
Elektrischer Anschluß . . . . . . . . . . . . . . . . . . . . . . . . . . . . . . . . . . . . .8
Vor Inbetriebnahme . . . . . . . . . . . . . . . . . . . . . . . . . . . . . . . . . . . . . . .9
Bedienungs- und Kontrolleinrichtung . . . . . . . . . . . . . . . . . . . . . . . .9
Inbetriebnahme - Temperatur einstellen . . . . . . . . . . . . . . . . . . . .11
Einfrieren und Tiefkühllagern . . . . . . . . . . . . . . . . . . . . . . . . . . . . .12
Eiswürfel bereiten . . . . . . . . . . . . . . . . . . . . . . . . . . . . . . . . . . . . . . .13
Lagerguts mbole/Gefrierkalender. . . . . . . . . . . . . . . . . . . . . . . . . . .13
Abtauen . . . . . . . . . . . . . . . . . . . . . . . . . . . . . . . . . . . . . . . . . . . . . .13
Gerät abschalten . . . . . . . . . . . . . . . . . . . . . . . . . . . . . . . . . . . . . . .14
Reinigung und Pflege . . . . . . . . . . . . . . . . . . . . . . . . . . . . . . . . . . . .15
Tips zur Energie-Einsparung . . . . . . . . . . . . . . . . . . . . . . . . . . . . . . .16
Was tun, wenn . . . . . . . . . . . . . . . . . . . . . . . . . . . . . . . . . . . . . . . . . .16
Abhilfe bei Stör ngen . . . . . . . . . . . . . . . . . . . . . . . . . . . . . . . . . . . . . . .16
Bestimmungen, Normen, Richtlinien . . . . . . . . . . . . . . . . . . . . . . . .18
50
Malfunction Possible Cause Remed
Appliance does not work, no
pilot light is ill minated.
Appliance is not switched on Switch on the appliance.
Mains pl g is not pl gged in
or is loose. Insert mains pl g.
F se has blown or is defective. Check f se, replace if neces-
sary.
Socket is defective. Mains malf nctions are to be
corrected by an electrician.
Green light does not light p,
yellow light lights p when
fast freeze f ction is activa-
ted, appliance is on.
Green light fa lty. Please inform yo r c stomer
service
Yellow light does not light p,
when fast freeze f ction is
activated, appliance is on.
Yellow light fa lty. Please inform yo r c stomer
service
The freezer temperat re is not
s fficient, red light lights p,
temperat re signal so nds
Temperat re is not properly
adj sted.
Please look in the "Initial Start
Up" section.
Press the fast freeze switch
Door was open for an exten-
ded period.
A large q antity of warm
food was placed in the
appliance within the last 24
ho rs.
Open the door only as long as
necessary. Press the fast free-
ze switch
Appliance cools too m ch. Temperat re is set too cold.
T rn the temperat re reg la-
tor to a warmer setting tem-
porarily.
What to do if ...
Correcting Malfunctions
A malf nction may be ca sed by only a minor fa lt that yo can rectify
yo rself sing the following instr ctions. Do not perform any other work on
the appliance if the following information does not provide assistance in
yo r specific case.
Warning! Repairs to refrigerators/freezers may only be performed by q ali-
fied service engineers. Improper repairs can give rise to significant hazards
for the ser. If yo r appliance needs repairing, please contact yo r speciali-
st dealer or o r C stomer Service.
4
Sicherheit
Die Sicherheit nserer Kältegeräte entspricht den anerkannten Regeln der
Technik nd dem Gerätesicherheitsgesetz. Dennoch sehen wir ns veran-
laßt, Sie mit folgenden Sicherheitshinweisen vertra t z machen:
Bestimmungsgemäße Verwendung
• Das Kältegerät ist für die Verwend ng im Ha shalt bestimmt. Es eignet
sich z m Einfrieren nd Tiefkühllagern von Lebensmitteln sowie z r
Eisbereit ng. Wird das Gerät zweckentfremdet oder falsch bedient, kann
vom Hersteller keine Haft ng für event elle Schäden übernommen wer-
den.
• Umba ten oder Veränder ngen am Kältegerät sind a s Sicherheits-grün-
den nicht z lässig.
• Sollten Sie das Kältegerät gewerblich oder für andere Zwecke als z m
Tiefkühllagern nd Einfrieren von Lebensmitteln ben tzen, beachten Sie
bitte die für Ihren Bereich gültigen gesetzlichen Bestimm ngen.
Vor der ersten Inbetriebnahme
• Überprüfen Sie das Kältegerät a f Transportschäden. Ein beschädigtes
Gerät a f keinen Fall anschließen! Wenden Sie sich im Schadensfall bitte
an den Lieferanten.
Kältemittel
Das Gerät enthält im Kältemittelkreisla f das Kältemittel Isob tan (R600a),
ein Nat rgas mit hoher Umweltverträglichkeit, das jedoch brennbar ist.
• Achten Sie beim Transportieren nd A fstellen des Gerätes dara f, daß
keine Teile des Kältemittelkreisla fs beschädigt werden.
• Bei Beschädig ng des Kältemittelkreisla fs:
– offenes Fe er nd Zündq ellen nbedingt vermeiden;
– den Ra m, in dem das Gerät steht, g t d rchlüften.
Sicherheit von Kindern
• Verpack ngsteile (z. B. Folien, Styropor) können für Kinder gefährlich
sein. Erstick ngsgefahr! Verpack ngsmaterial von Kindern fernhalten!
• A sgediente Altgeräte bitte vor der Entsorg ng nbra chbar machen.
Netzstecker ziehen, Netzkabel d rchtrennen, event ell vorhandene Sch-
napp- oder Riegelschlösser entfernen oder zerstören. Dad rch verhindern
Sie, daß sich spielende Kinder im Gerät einsperren (Erstick ngsgefahr!)
oder in andere lebensgefährliche Sit ationen geraten.
49
1. Remove frozen food and the food from the refrigerator. Wrap frozen food
in several layers of newspaper. Store it in a cool place, well covered.
2. Defrost the freezer compartment prior to cleaning (see "Defrosting" section).
3. Switch the appliance off and remove the pl g from the mains, or switch off
or t rn o t the circ it breaker or f se.
4. Clean the appliance and the interior accessories with a cloth and l kewarm
water. Commercially available dish washing detergents may also be sed.
5. After cleaning wipe with fresh water and r b dry.
Acc m lation of d st at the condenser increases energy cons mption. For
this reason caref lly clean the condenser at the back of the appliance once
a year with a soft br sh or a vac m cleaner.
Energy Saving Tips
• Do not install the appliance near cookers, radiators or other so rces of
warmth. High ambient temperat res ca se longer, more freq ent opera-
tion of the compressor.
• Ens re s fficient air circ lation and exha st at the appliance base and at
the back wall of the appliance. Never cover air vent openings.
• Do not place warm foods into the appliance. Allow warm foods to cool
first.
• Only leave door open as long as necessary.
• Do not set temperat re any colder than necessary.
• P t frozen food in the fridge to defrost. The cold in the frozen food will
then be sed to cool the fridge.
• Keep the heat emitting condenser, the metall grille on the rear wall of
yo r appliance, always clean.
5
• Kinder können Gefahren, die im Umgang mit Ha shaltsgeräten liegen,
oft nicht erkennen. Sorgen Sie deshalb für die notwendige A fsicht nd
lassen Sie Kinder nicht mit dem Gerät spielen!
Im Alltagsbetrieb
• Behälter mit brennbaren Gasen oder Flüssigkeiten können d rch Käl-
teeinwirk ng ndicht werden. Explosionsgefahr! Lagern Sie keine Behäl-
ter mit brennbaren Stoffen, wie z.B. Spraydosen, Fe erze g-Nachfüllkar-
t schen etc. im Kältegerät.
• Flaschen nd Dosen dürfen nicht in den Gefrierra m. Sie können sprin-
gen, wenn der Inhalt gefriert - bei kohlensä rehaltigem Inhalt sogar
explodieren! Legen Sie nie Limonaden, Säfte, Bier, Wein, Sekt sw. in den
Gefrierra m. A snahme: Hochprozentige Spirit osen können im Gefrier-
ra m gelagert werden.
• Speiseeis nd Eiswürfel nicht nmittelbar a s dem Gefrierra m in den
M nd nehmen. Sehr kaltes Eis kann an Lippen oder Z nge festfrieren nd
Verletz ngen ver rsachen.
• Tiefkühlg t nicht mit nassen Händen berühren. Die Hände könnten daran
festfrieren.
• Keine Elektrogeräte (z. B. elektrische Eismaschinen, Rührgeräte etc.) im
Kältegerät betreiben.
• Vor Reinig ngsarbeiten das Gerät gr ndsätzlich abschalten nd den
Netzstecker ziehen oder Sicher ng in der Wohn ng abschalten bzw.
hera sdrehen.
• Netzstecker immer am Stecker a s der Steckdose ziehen, nie am Kabel.
Im Störungsfall
• Sollte einmal eine Stör ng am Gerät a ftreten, sehen Sie bitte z erst in
dieser Gebra chsanweis ng nter "Was t n, wenn ..." nach. Falls die dort
a fgeführten Hinweise nicht weiterhelfen, führen Sie bitte keine weite-
ren Arbeiten selbst a s.
• Kältegeräte dürfen n r von Fachkräften repariert werden. D rch nsach-
gemäße Reparat ren können erhebliche Gefahren entstehen. Wenden
Sie sich im Reparat rfall bitte an Ihren Fachhändler oder an nseren
K ndendienst.
48
Switching off the appliance
If the appliance is not going to be used for an extended period:
1. Remove all deep-frozen packages as well as ice trays.
2. Switch off the appliance by t rning the temperat re reg lator to position "0".
3. Remove the mains pl g or switch off or t rn o t the circ it breaker or f se.
4. Defrost freezer compartment and clean thoro ghly (see section: “Cleaning
and Care”).
5. Leave the door open to avoid the b ild p of odo rs.
Cleaning and Care
For hygienic reasons the appliance interior, incl ding interior accessories,
sho ld be cleaned reg larly.
Warning
• The appliance may not be connected to the mains d ring cleaning. Danger
of electrical shock! Before cleaning switch the appliance offand rem ve the
pl g from the mains, or switch off or t rn o t the circ it breaker or f se.
• Never clean the appliance with a steam cleaner. Moist re co ld acc m -
late in electrical components, danger of electrical shock! Hot vapo rs can
lead to the damage of plastic parts.
• The appliance m st be dry before it is placed back into service.
Attention!
• Ethereal oils and organic solvents can attack plastic parts, e.g.
– lemon j ice or the j ice from orange peals;
– b tyric acid;
– cleansers which contain acetic acid.
Do not allow s ch s bstances to come into contact with appliance parts.
• Do not se any abrasive cleansers.
Warning!
Never se metal tools to scrape off the frost
Do not se a mechanical device or any artificial means to speed p the
thawing process other than those recommended by the man fact rer.
A temperat re rise of the frozen food packs, d ring defrosting , may shor-
ten their safe storage life.
6
Entsorgung
Information zur Geräteverpackung
Alle verwendeten Werkstoffe sind mweltverträglich! Sie können gefahrlos
deponiert oder in der Müllverbrenn ngsanlage verbrannt werden!
Z den Werkstoffen: Die K nststoffe können a ch wiederverwertet werden
nd sind folgendermaßen gekennzeichnet:
>PE< für Polyäthylen, z. B. bei der ä ßeren Hülle nd den Be teln im Innern.
>PS< für geschä mtes Polystyrol, z. B. bei den Polsterteilen, gr ndsätzlich
FCKW-frei.
Die Kartonteile werden a s Altpapier hergestellt nd sollten a ch wie-der
z r Altpapiersamml ng gegeben werden.
Entsorgung von Altgeräten
A s Umweltsch tzgründen müssen Kältegeräte fachgerecht entsorgt wer-
den. Dies gilt für Ihr bisheriges Gerät nd - nachdem es eines Tages a sge-
dient hat - a ch für Ihr ne es Gerät.
Warnung! A sgediente Altgeräte bitte vor der Entsorg ng nbra ch-bar
machen. Netzstecker ziehen, Netzkabel d rchtrennen, event ell vorhande-
ne Schnapp- oder Riegelschlösser entfernen oder zerstören. Dad rch
verhindern Sie, daß sich spielende Kinder im Gerät einsperren (Erstick ng-
sgefahr!) oder in andere lebensgefährliche Sit ationen geraten.
Entsorgungshinweise:
• Das Gerät darf nicht mit dem Ha s- oder Sperrmüll entsorgt werden.
• Der Kältemittelkreisla f, insbesondere der Wärmeta scher an der Gerä-
terückseite, darf nicht beschädigt werden.
• A sk nft über Abholtermine oder Sammelplätze erhalten Sie bei der örtli-
chen Stadtreinig ng oder der Gemeindeverwalt ng.
Transportschutz entfernen
Das Gerät sowie Teile der Innena sstatt ng sind für den Transport
geschützt.
• Klebebänder links nd rechts an den Türa ßenseiten abziehen.
• Alle Klebebänder sowie Polsterteile a s dem Geräteinnenra m entfernen.
47
Storage Goods Symbols/Freezing Calendar
• The symbols on the drawers show
different types of frozen goods.
• The n mbers indicate storage times
in months for the appropriate
types of frozen goods.
Whether the pper or lower val e of the indicated storage time is valid
depends on the q ality of the foods and pre-treating before freezing. The
lower val e applies to foods with high fat content.
Defrosting
The freezer compartment, however, will become progrssively covered with
frost. This sho ld be removed with the special plastic scraper provided, whe-
never the tickness of the frost exceeds 4 mm. D ring this operation it is not
necessary to switch off the power s pply or to remove the foodst ffs.
However when the ice becomes very thick on the inner liner, complete
defrosting sho ld be carried o t as follows:
1. Remove the frozen food from the freezer, wrap it in several layers of new-
spaper and p t it in a very cool place.
2. Switch off the appliance and p ll o t the pl g, or remove or nscrew the
safety f ses.
3. Leave the freezer compartment door
open.
4. Insert the plastic scraper into the
recess provided nder the defrost
water channel and place a collecting
basin nder it.
5. Once defrosting is completed keep
the scraper for f t re se;
6. T rn the thermostat knob to the
req ired setting or replace the pl g
in the power socket.
2. To loosen the frozen c bes, either bend the ice c be tray or hold it nder
r nning water for a few seconds.
Important! Never try to free an ice tray that is frozen to the freezer com-
partment sing pointed or sharp edged objects. Use the ice scraper s pplied.
D068
7
Aufstellen
Aufstellort
Das Gerät soll in einem g t belüfteten nd trockenen Ra m stehen.
Die Umgeb ngstemperat r wirkt sich a f den Stromverbra ch nd die
einwandfreie F nktion des Gerätes a s. Daher sollte das Gerät
– nicht direkter Sonneneinstrahl ng a sgesetzt sein;
– nicht an Heizkörpern, neben einem Herd oder sonstigen Wärmeq ellen
stehen;
– n r an einem Ort stehen, dessen Umgeb ngstemperat r der Klimaklasse
entspricht, für die das Gerät a sgelegt ist.
Die Klimaklasse finden Sie a f dem Typschild, das sich links im Innenra m
des Kühlra mes befindet.
Nachstehende Tabelle zeigt, welche Umgeb ngstemperat r welcher Kli-
maklasse z geordnet ist:
Klimaklasse für Umgebungstemperatur von
SN +10 bis +32 °C
N+16 bis +32 °C
ST +18 bis +38 °C
T+18 bis +43 °C
Ist die A fstell ng neben einer Wärmeq elle nvermeidbar, sind folgende
seitliche Mindestabstände einz halten:
– z Elektroherden 3 cm;
– z Öl- nd Kohleherden 30 cm.
Können diese Abstände nicht eingehalten werden, ist eine Wärmesch tz-
platte zwischen Herd nd Kältegerät erforderlich.
Steht das Kältegerät neben einem anderen Kühl- oder Gefriergerät, ist ein
seitlicher Abstand von 5 cm erforderlich, damit sich an den Geräte-A ßen-
seiten kein Schwitzwasser bildet.
46
zing capacity is the maxim m q antity of fresh food that can be frozen
within a period of 24 ho rs. If yo wish to freeze food several days in a
row, please observe a maxim m capacity of only 2/3 to 3/4 of that on the
rating plate. The q ality of the food is best preserved when it is frozen
right thro gh to the core as q ickly as possible.
• Allow warm food to cool down before freezing. The warmth will ca se
increased ice formation and increase the power cons mption.
• Please note the maxim m storage times specified by the man fact rer.
• Thawed foods which have not been processed f rther (cooked into meals)
may not nder any circ mstances be frozen a second time.
• Containers with flammable gases or liq ids can leak at low temperat res.
There is a risk of an explosion! Do not store any containers with flamma-
ble materials s ch as, for example, spray cans, fire exting isher refill car-
tridges etc in the refrigerator/freezer.
• Bottles and cans m st not be placed in the freezer. They can b rst when
the contents freeze, high carbonate content drinks can even explode!
Never store lemonade, j ices, beer, wine, sparkling wine etc. in the free-
zer. Exception: high alcohol content spirits can be stored in the freezer.
• All foods m st be packed air tight prior to freezing, so that they do not
dry o t or lose their flavo r, and so that no flavo r contamination of
other frozen goods occ rs.
Caution! Do not to ch frozen food with wet hands. Yo r hands co ld free-
ze to the food.
1. Place the packed food in the drawers.
Place food to be frozen As shown in
fig re. Unfrozen food m st not to -
ch items already frozen, otherwise
the frozen food co ld begin to
defrost.
2. Press the fast freeze b tton 24 ho rs
before introd cing fresh food for
freezing of fresh food. The yellow
light comes on.
3. Place frozen foods in the drawers sorted by type, as far as possible.
D670
9 Kg
7 Kg
Preparation of Ice Cubes
1. Fill the ice c be tray 3/4 f ll with cold water, place it in the freezer com-
partment and leave to freeze.
8
Elektrischer Anschluß
Für den elektrischen Anschl ß ist eine vorschriftsmäßig installierte
Sch tzkontakt-Steckdose erforderlich. Sie sollte so gesetzt sein, daß ein
Ziehen des Netzsteckers möglich ist. Die elektrische Absicher ng m ß min-
destens 10/16 Ampere betragen.
Ist die Steckdose bei eingeba tem Gerät nicht mehr z gänglich, m ß eine
geeignete Maßnahme in der Elektroinstallation sicherstellen, daß das Gerät
vom Netz getrennt werden kann (z. B. Sicher ng, LS-Schalter, Fehlerstrom-
Sch tzschalter oder dergleichen mit einer Kontaktöffn ngsweite von min-
destens 3 mm).
• Vor Inbetriebnahme am Typschild des Gerätes überprüfen, ob Anschl ß-
spann ng nd Stromart mit den Werten des Stromnetzes am A fstellort
übereinstimmen.
Z. B.: AC 220 ... 240 V 50 Hz oder
220 ... 240 V~ 50 Hz
(d. h. 220 bis 240 Volt Wechselstrom, 50 Hertz)
Das Typschild befindet sich links im Innenra m des Gerätes.
Ihr Kühlgerät braucht Luft
A s Gründen der Sicherheit m ß
eine Mindestbelüft ng gewährleistet
sein, wie a s der Abb. hervorgeht:
Achtung:
Die Lüft ngs-Öffn ngen müssen
immer sa bergehalten werden.
Damit die L ft zirk lieren kann, die
Lüft ngsöffn ngen niemals
abdecken oder verstellen.
Einbau
Siehe beiliegende Montageanwei-
s ng.
Prüfen Sie bitte nach dem Einba des Gerätes, insbesondere nach Türansch-
lagwechsel, ob die Türdicht ng rings m richtig abdichtet. Eine ndichte Tür-
dicht ng kann z verstäkter Reifbild ng nd dad rch z höherem Energie-
verbra ch führen (siehe a ch Abschnitt “Abhilfe bei Stör ngen”).
542
873
880 + 0
- 6
556
50
560 min.
45
nics switch off the FROSTMATIC f nction after 24 ho rs. The yellow light
goes o t.
2. The FROSTMATIC f nction can be ended man ally at any time by pressing
the FROSTMATIC b tton again. The yellow light goes o t.
Alarm reset button
In the event of an abnormal temperat re rise inside the freezer (e.g. power
c t) warning light (H) will start to flash and a b zzer will so nd.
After the temperat re has ret rned to normal, the warning light (H) will
contin e to flash, altho gh the b zzer has stopped.
When the alarm b tton is pressed, the warmest temperat re reached in the
compartment flashes on the indicator.
Switching the Appliance off
To switch off, hold down the ON/OFF b tton for approx. 5 seconds. This will
res lt in a co ntdown from "3" to "1" taking place in the temperat re
display. On reaching "1" the fridge will switch off. The temperat re display
will go off.
Note:
The appliance cannot be switched on or off if npl gged, or if there is no
power being s pplied to it. Following connection to the mains power s p-
ply, the appliance ret rns to the same operating state as before the inter-
r ption of main power.
If the appliance is not going to be sed for an extended period:
1. Switch off the appliance, holding down the ON/OFF b tton ntil the display
goes off (see above).
2. Remove the mains pl g or switch off or t rn o t the circ it breaker or f se.
3. Defrost the freezer compartment and clean the appliance thoro ghly (see
section: “Cleaning and Maintenance”).
4. Finally, leave the doors open so as to avoid a b ild p of odo rs.
Freezing and storing frozen food
Yo can se yo r freezer for freezing fresh food yo rself.
Important!
• The temperat re in the freezer compartment m st be –18 °C or colder
before freezing food.
• Please observe the freezing capacity given on the rating plate. The free-
9
Bedienungs- und Kontrolleinrichtung
A. Netzkontrollanzeige (grün)
B. ON/OFF Taste
C. Taste z r Temperat reinstell ng (+ )
D. Temperat ranzeige
E. Taste z r Temperat reinstell ng (-)
F. Anzeige für eingeschaltete FROSTMATIC F nktion (gelb)
G. FROSTMATIC Taste
H. Warnanzeige (rot)
I. Taste ALARMOFF
ABCDEFGHI
+
°C °C
-
ON/OFF
FROSTMATIC ALARMOFF
Tasten zur Temperatureinstellung
Die Temperat reinstell ng erfolgt d rch die Tasten C nd E.
Die Tasten stehen in Verbind ng mit der Temperat ranzeige.
• D rch Dr ck a f eine der beiden Tasten C oder E wird die Temperat ranzei-
ge von der IST-Temperat r (Temperat ranzeige le chtet) a f die SOLL-Tem-
perat r (Temperat ranzeige blinkt) mgeschaltet.
• Mit jedem weiteren Dr ck a f eine der beiden Tasten wird die SOLL- Tem-
perat r m 1 ÞC weiter gestellt. Die SOLL- Temperat r m ss innerhalb 24
St nden erreicht werden.
• Wird keine Taste gedrückt, schaltet die Temperat ranzeige nach k rzer Zeit
(ca. 5 sec.) a tomatisch wieder a f die IST-Temperat r z rück.
Vor Inbetriebnahme
• Das Geräteinnere nd alle A sstatt ngsteile bitte vor Erstinbetriebnahme
reinigen (siehe Abschnitt "Reinig ng nd Pflege").
44
ACTUAL temperature means:
The temperat re display indicates the c rrent temperat re inside the freezer.
The ACTUAL temperat re is indicated with ill minated n mbers.
Temperature display
The temperat re display can indicate several pieces of information.
• D ring normal operation, the temperat re c rrently present in the freezer
(ACTUAL temperat re) is displayed.
• When the temperat re is being adj sted a flashing display indicates the
freezer temperat re c rrently set (DESIRED temperat re).
Starting Up - Setting the Temperature
1. Pl g the mains pl g into the mains socket.
2. Press ON/OFF b tton. The green mains pilot indicator ill minates. The alarm
light flashes since the temperat re is reached. The b zzer so nds.
3. Press either the „C“ or „E“ b tton. The temperat re display switches over and
the DESIRED temperat re c rrently set flashes on the temperat re display.
4. Set the req ired temperat re by pressing the „C“ or „E“ b ttons (see section
"Temperat re setting b ttons"). The temperat re display will immediately
show the changed setting. Each time the b tton is pressed the temperat -
re is adj sted by 1 °C.
From a food safety point of view -18 °C sho ld be considered s fficiently
cold for storing food in the freezer.
5. The b zzer stops,when the set temperat re is reached.Press the alarm b t-
ton to t rn off the alarm light
Ice pack
There is an ice pack in one drawer of the freezer.
In the event of a power fail re or malf nction, the ice pack will lengthen
the amo nt of time it takes for the frozen food to become too warm by
several ho rs. The ice pack can only f lfil this task optimally if it is placed in
the ppermost drawer, at the front, above the frozen food. Yo can se the
ice pack for cooling cold bags.
FROSTMATIC
The FROSTMATIC f nction accelerates the freezing of fresh food and, at the
same time, protects foodst ffs already stored from ndesirable warming.
1. The FROSTMATIC f nction is switched on by pressing the FROSTMATIC b t-
ton. The yellow light ill minates.
If the FROSTMATIC f nction is not ended man ally, the appliance electro-
10
SOLL-Temperatur bedeutet:
Die Temperat r, die im Gefrierra m vorhanden sein soll. Die SOLL-Tempera-
t r wird d rch blinkende Zahlen angezeigt.
IST-Temperatur bedeutet:
Die Temperat ranzeige zeigt die Temperat r an, die momentan tatsächlich
im Gefrierra m vorhanden ist. Die IST-Temperat r wird d rch le chtende
Zahlen angezeigt.
Temperaturanzeige
Die Temperat ranzeige kann mehrere Informationen anzeigen.
• Bei normalem Betrieb wird die Temperat r angezeigt, die momentan im
Gefrierra m vorhanden ist (IST-Temperat r).
• Während der Temperat reinstell ng wird blinkend die im Moment einge-
stellte Gefrierra mtemperat r angezeigt (SOLL-Temperat r).
Inbetriebnahme - Temperatur einstellen
1. Netzstecker in die Steckdose stecken.
2. Taste ON/OFF (B) drücken. Die grüne Netzkontrollanzeige (A) le chtet. Die
Temperat ranzeige (D) zeigt die momentan im Gefrierra m vorhandene IST-
Temperat r an. Die rote Warnanzeige (H) signalisiert blinkend, daß die erfor-
derliche Lagertemperat r noch nicht erreicht ist. Ein Warnton ist z hören.
3. A f eine der Tasten C oder E drücken. Die Temperat r-anzeige schaltet m
nd zeigt blinkend die momentan eingestellte SOLL-Temperat r an.
4. Gewünschte Temperat r d rch Drücken der Tasten C nd E einstellen (siehe
Abschnitt "Tasten z r Temperat reinstell ng"). Die Temperat ranzeige zeigt
sofort die geänderte Einstell ng an. Mit jedem Tastendr ck wird die Tem-
perat r m 1 ÞC weitergestellt.
A s ernähr ngswissenschaftlicher Sicht ist -18ÞC für den Gefrierra m als
a sreichend kalte Lagertemperat r anz sehen.
5. Der Warnton schaltet sich ab, wenn die vorgegebene Temperat r im
Gefrierra m erreicht wird. Die rote Warnanzeige blinkt weiter. Taste ALARM
OFF drücken, m die rote Warnanzeige abz schalten.
FROSTMATIC-Taste (G)
Die FROSTMATIC-F nktion beschle nigt das Einfrieren frischer Lebensmittel
nd schützt gleichzeitig die bereits eingelagerte Ware vor nerwünschter
43
Operating and indicator panel
ABCDEFGHI
+
°C °C
-
ON/OFF
FROSTMATIC ALARMOFF
A. Mains pilot indicator (green)
B. Freezer b tton ON/OFF
C. Temperat re setting b tton (+)
D. Temperat re display
E. Temperat re setting b tton (-)
F. FROSTMATIC f nction "on" indicator (yellow)
G. FROSTMATIC b tton
H. Alarm reset light
I. Alarm reset b tton
Temperature setting buttons
The temperat re is adj sted sing the „C“ and „E“ b ttons. These b ttons are
connected to the temperat re display.
• The temperat re display is switched over from the display of the ACTUAL
temperat re (Temperat re display is ill minated) to the display of the DESI-
RED temperat re (Temperat re display flashes) by pressing one of the two
b ttons, „C“ or „E“.
• Each time one of the two b ttons is pressed again the DESIRED temperat -
re is adj sted by 1 °C. The DESIRED temperat re m st be reached within 24
ho rs.
If neither b tton is pressed, the temperat re display a tomatically switches
back after a short period (approx. 5 sec.) to the display of the ACTUAL tem-
perat re.
DESIRED temperature means:
The temperat re that has been selected for inside the freezer. The DESIRED
temperat re is indicated by flashing n mbers.