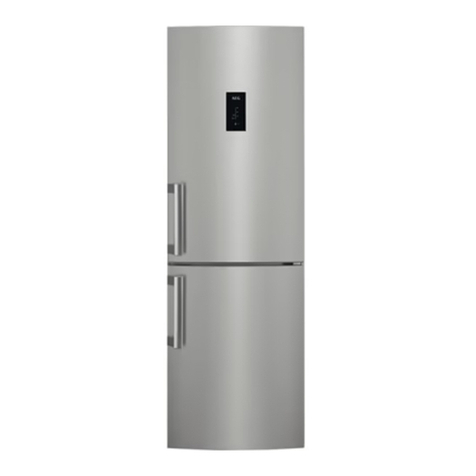
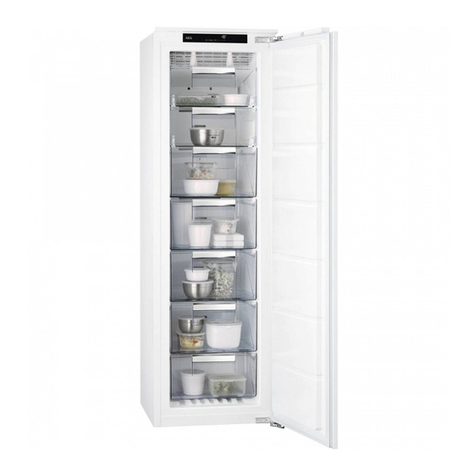
AEG SANTO 3250-6 KG User manual

ÖKO-SANTO 3250-6 KG
SANTO 3288-6 KG
Fridge Freezer
Operating Instructions
AEG Hausgeräte GmbH
Postfach 1036
D-90327 Nürnberg
http://www.aeg.hausgeraete.de
2222 006-65

2
Dear customer,
Before placing your new refrigerator/freezer into operation please read the-
se operating instructions carefully. They contain important information for
safe use, for installation and for care of the appliance.
Please keep these operating instructions for future reference. Pass them on
to possible new owners of the appliance.
Notes which are important for your safety or for the proper functioning of
the appliance are stressed with a warning triangle and/or the words (War-
ning!, Important!, Attention!). Please observe the following instructions
carefully.
Additional information regarding operation and practical applications of
the appliance appear after this symbol.
Tips and notes concerning economical and environmentally sound use of
the appliance are marked with the flower.
In the event of a malfunction, these operating instructions contain infor-
mation on how to rectify faults yourself, see the “Something Not Working”
section.
For futher assistance contact your local AEG service Force Centre, see the
chapter “Service and Spare parts.
Printed on paper manufactured with environmentally sound processes.
who thinks ecologically acts accordingly ...
23
Regulations, Standards, Guidelines
This appliance was designed for household use and was manufactured in
accordance with the appropriate standards. The necessary measures in
accordance with appliance safety legislation regulations (GSG), accident
prevention regulations for refrigeration appliances (VBG 20) and the regu-
lations of the German Society of Electrical Engineers (VDE) were observed in
the manufacture of this appliance.
The refrigerant circuit has been checked for leaks.
This appliance is in accordance with the following EU guidelines:
– 73/23/EWG dated 19 February 1973 - low voltage guidelines.
– 89/336/EWG dated 3 May 1989
(including guideline change notice 92/31/EWG) - EMV guideline

3
Contents
Safety . . . . . . . . . . . . . . . . . . . . . . . . . . . . . . . . . . . . . . . . . .4
Disposal . . . . . . . . . . . . . . . . . . . . . . . . . . . . . . . . . . . . . . . . . . . . . .5
Appliance Packaging Information . . . . . . . . . . . . . . . . . . . . . . . . . . . . .5
Disposal of old Appliances . . . . . . . . . . . . . . . . . . . . . . . . . . . . . . . . . . .5
Remove Transport Packaging . . . . . . . . . . . . . . . . . . . . . . . . . . . . . .6
Operating and indicator panel . . . . . . . . . . . . . . . . . . . . . . . . . . . . .7
Starting up and Temperature regulation . . . . . . . . . . . . . . . . . . . . .7
Interior Accessories . . . . . . . . . . . . . . . . . . . . . . . . . . . . . . . . . . . . .8
Storage shelves . . . . . . . . . . . . . . . . . . . . . . . . . . . . . . . . . . . . . . . . . . . .8
Adjusting the upper door rack . . . . . . . . . . . . . . . . . . . . . . . . . . . . . . . .9
Fresh food refrigeration . . . . . . . . . . . . . . . . . . . . . . . . . . . . . . . . . .9
Freezing and Storing frozen food . . . . . . . . . . . . . . . . . . . . . . . . .10
Frozen food Symbols/Freezing calendar . . . . . . . . . . . . . . . . . . . . .11
Preparation of Ice Cubes . . . . . . . . . . . . . . . . . . . . . . . . . . . . . . . .11
Defrosting . . . . . . . . . . . . . . . . . . . . . . . . . . . . . . . . . . . . . . . . . . .11
Switching off the appliance . . . . . . . . . . . . . . . . . . . . . . . . . . . . .12
Cleaning and Care . . . . . . . . . . . . . . . . . . . . . . . . . . . . . . . . . . . . .13
Energy Saving Tips . . . . . . . . . . . . . . . . . . . . . . . . . . . . . . . . . . . .14
Something Not Working . . . . . . . . . . . . . . . . . . . . . . . . . . . . . . . .14
Changing the light bulb . . . . . . . . . . . . . . . . . . . . . . . . . . . . . . . . . . . .16
Service and Spare parts . . . . . . . . . . . . . . . . . . . . . . . . . . . . . . . . .17
Guarantee Conditions . . . . . . . . . . . . . . . . . . . . . . . . . . . . . . . . . .17
Installation . . . . . . . . . . . . . . . . . . . . . . . . . . . . . . . . . . . . . . . . . .19
Electrical Connection . . . . . . . . . . . . . . . . . . . . . . . . . . . . . . . . . . . . .19
Installation Location . . . . . . . . . . . . . . . . . . . . . . . . . . . . . . . . . . . . . . .20
Your appliance needs air . . . . . . . . . . . . . . . . . . . . . . . . . . . . . . . . . . .20
Rear spacers . . . . . . . . . . . . . . . . . . . . . . . . . . . . . . . . . . . . . . . . . . . . .21
Levelling the appliance . . . . . . . . . . . . . . . . . . . . . . . . . . . . . . . . . . . .21
Reversing the door . . . . . . . . . . . . . . . . . . . . . . . . . . . . . . . . . . . . . . . .21
Regulations, Standards, Guidelines . . . . . . . . . . . . . . . . . . . . . . . .23
2222 006-65
22
4. Unscrew the middle hinge and
remove the refrigerator compart-
ment door by pulling it
downwards.
5. With a screwdriver, unscrew the
two masking plugs covering the
holes on the left-hand side and
refit them on the right-hand side.
6. Unscrew the pin from the top
hinge and refit it on the left-
hand side. Remember to fit the
washers.
7. Slide the refrigerator compart-
ment door onto the top pin.
8. Insert the middle hinge into the
bottom of the refrigerator com-
partment door. Remember to fit
the washers.
9. Refit middle hinge screws.
10. Fit the freezer compartment door
onto the middle hinge.
11. Unscrew the bottom hinge pin
and refit it on the opposite side of
the hinge
12. Insert the bottom hinge into the
bottom of the freezer compart-
ment door.
13. Refit bottom hinge and insert the
cover (G).
14. Refit ventilation grille (D) clipping
it into place.
15. Unscrew the handles. Refit them
on the opposite side after having
pierced the plugs with a punch.
Cover the holes left open with
the plugs contained in the docu-
mentation pack.
PR228
D
D590
H

4
Safety
Please read this instruction book before using the appliance and retain for
future reference. These warnings are provided in the interests of your safe-
ty, ensure you understand them fully before using the appliance.
Intended use
• The appliance is intended for use in the home. It is suitable for the coo-
ling, freezing and storage of frozen food, as well as for making ice. If the
appliance is used for purposes other than those intended or used incor-
rectly, no liability can be accepted by the manufacturer for any damage
that may be caused.
• Alterations or changes to the appliance are not permitted for reasons of
safety.
Prior to initial start–up
• Check the appliance for transport damage. Under no circumstances
should a damaged appliance be plugged in! In the event of damage, plea-
se contact your retailer.
Refrigerant
The refrigerant isobutane (R600a) is contained within the refrigerant circuit
of the appliance, a natural gas with a high level of environmental compat-
ibility, which is nevertheless flammable.
• During transportation and installation of the appliance, be certain that
none of the components of the refrigerant circuit become damaged.
• If the refrigerant circuit should become damaged:
– avoid open flames and sources of ignition;
– thoroughly ventilate the room in which the appliance is situated.
Safety of children
• Keep packaging material away from children.
• Please make old appliances unusable prior to disposal. Pull out the mains
plug, cut off the mains cable and remove any locks or catches, to prevent
young children being trapped inside.
• Do not allow children to tamper with the controls or play with the pro-
duct.
Daily Operation
• Containers with flammable gases or liquids can leak at low temperatures.
21
Levelling the appliance
Place the appliance on a flat hard
floor. Two adjustable feet on the
front of the appliance enable it to
be accurately levelled by screw-
ing them in or out as required.
Reversing the door
The side the door opens can be changed from the right side (factory fitted)
to the left side.
Warning! When changing the side the door opens, the appliance must not
be connected to the mains. Remove plug from the mains before reversing
the door.
AEG70
D594
Rear spacers
Fit the rear spacers contained in
the documentation bag to ensure
escape of heat generated during
operation. Proceed in the
sequence illustrated in figures.
Proceed as follow:
1. Pull off ventilation grille (D) and
remove cover (G).
2. Remove blanking cover (F) from
ventilation grille by pushing it in
the direction of the arrow and
refit it on the opposite side.
3. Unscrew the bottom hinge and
remove the freezer compartment
door by pulling it downwards.
FD
PR185
F
F
F
E
E
G

5
There is a risk of an explosion! Do not store any containers with flamma-
ble materials such as, for example, spray cans, fire extinguisher refill car-
tridges etc in the refrigerator/freezer.
• Bottles and cans must not be placed in the freezer compartment. They can
burst when the contents freeze, high carbonate content drinks can even
explode! Never store lemonade, juices, beer, wine, sparkling wine etc. in
the freezer compartment.
• Ice cream or ice cubes can cause “frost/freezer” burns if consumed strai-
ght from the freezer.
• Do not touch frozen food with wet hands. Your hands could freeze to the
food.
• Do not operate any electrical appliances in the refrigerator/freezer (e.g.
electric ice cream makers, mixers etc.).
• Before cleaning the appliance, always switch off the appliance and
disconnect from the electricity supply.
• When unplugging always pull the plug from the mains socket, do not pull
on the cable.
Service
• Under no circumstances should you attempt to repair the appliance your-
self. Repairs carried out by inexperienced persons may cause injury or
serious malfunctioning. Contact your local AEG Service Force Centre.
Disposal
Appliance Packaging Information
All materials are environmentally sound.
The plastics can be recycled and are identified as follows:
>PE< for polyethylene, e.g. the outer covering and the bags in the interior.
>PS< for polystyrene foam, e.g. the pads, which are all free of chlorofluo-
rocarbon.
The carton parts are made from recycled paper and should be disposed of
at a waste-paper recycling collection location.
Disposal of old Appliances
For environmental reasons, refrigeration appliances must be disposed of
properly. This applies to your old appliance, and - at the end of its service
life - to your new appliance as well.
20
Installation Location
The appliance should be set up in a well ventilated, dry room.
Energy use is affected by the ambient temperature. The appliance should
therefore
– not be exposed to direct sunlight;
– not be installed next to radiators, cookers or other sources of heat;
– only be installed at a location whose ambient temperature corresponds to
the climate classification, for which the appliance is designed.
The climate classification can be found on the rating plate, which is locat-
ed at the left on the inside of the appliance.
The following table shows which ambient temperature is correct for each
climate classification:
Climate classification for an ambient temperature of
SN +10 to +32 °C
N+16 to +32 °C
Your appliance needs air
Air flows in from under the door,
at the front, and flows out
upwards, over the back. For cor-
rect air circulation, it is important
that the ventilation openings are
not covered or obstructed.
Important: If the appliance is
positioned under a kitchen wall
unit, a minimum clearance of 10
cm must be left between the top
of the appliance and the over-
hanging wall unit.
This manual suits for next models
2
Table of contents
Other AEG Freezer manuals

AEG
AEG RCB53724MX User manual

AEG
AEG A72020GNW0 User manual

AEG
AEG A 70120 GS4 User manual

AEG
AEG SCE8182XNC User manual

AEG
AEG AGB728E6NW User manual

AEG
AEG SANTO C 7 18 40-4I User manual

AEG
AEG SCS51600S0 User manual

AEG
AEG SCE818E6TS User manual

AEG
AEG OKO ARCTIS 3383 User manual

AEG
AEG ABE6822VAF User manual