English - 5 -
the TV, the following message will be displayed: “TV
switched to stand-by mode automatically because
no operation was made for a long time.” Before the
TVswitches into standby modea dialogue windowwill
be displayed. If you do not press any button the TV
willswitch into the standbymode after a waiting period
of about 5 minutes. You can highlight Yes and press
OK to switch the TV into standby mode immediately.
If you highlight No and press OK, the TV will remain
on. You can also choose to cancel the Auto Power
Down function from this dialogue. Highlight Disable
and press OK, the TV will remain on and the function
will be disabled. You can enable this function again by
changing the setting of the Auto Power Down option
from the Settings>System>More menu.
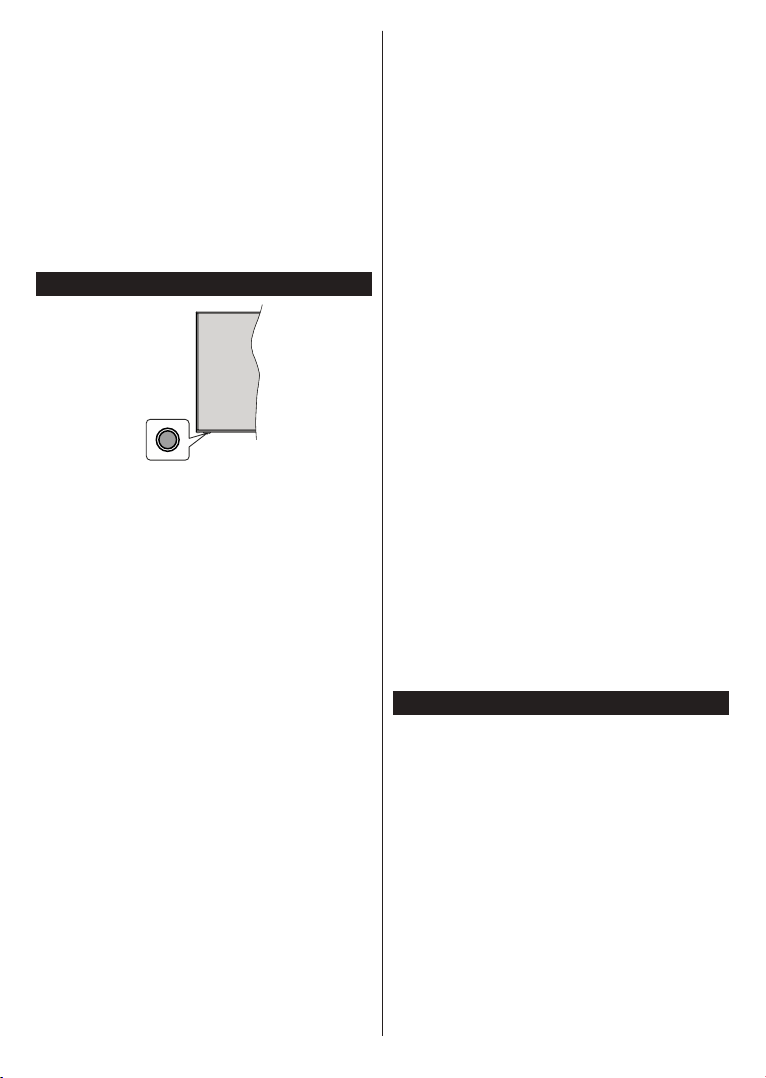
TV Control Button & Operation
Note:
on the model.
YourTV has a single control button. This button allows
you to control the Standby-On / Source / Programme
and Volume functions of the TV.
Operating with the Control Button
Press the control button to display the function
options menu.
Then press the button consecutively to move the
focus to the desired option if needed.
Press and hold the button for about 2 seconds to
activate the selected option. The icon colour of the
option changes when activated.
Press the button once again to use the function or
enter the sub menu.
To select another function option, you will need to
hold the button to deactivate it. The icon colour of
the option changes when deactivated.
To close the function options menu do not press the
button for a period of about 5 seconds. The function
options menu will disappear.
Press the control button to display
the function options menu, the focus will be on the
Standby option. Press and hold the button for about
2 seconds to activate this option. The icon colour of
the option changes when activated. The TV will turn
To turn on the TV: Press the control button, the TV
will turn on.
To change volume: Pressthecontrolbuttontodisplay
the function options menu and then press the button
consecutively to move the focus to Volume + or
Volume - option. Press and hold the button for about
2 seconds to activate the selected option. The icon
colour of the option changes when activated. Then
press the button to increase or decrease the volume.
To change channel: Press the control button to
display the function options menu and then press the
buttonconsecutivelyto move the focus to Programme
+or Programme - option. Press and hold the button
for about 2 seconds to activate the selected option.
Theicon colour of the option changes when activated.
Thenpress the button to switch to the next or previous
channel in the channel list.
To change source: Pressthe control button to display
the function options menu and then press the button
consecutively to move the focus to Source option.
Press and hold the button for about 2 seconds to
activate this option. The icon colour of the option
changes when activated. The sources list will be
displayed when the button is released. Scroll through
the available sources by pressing the button. TV will
automatically switch to the highlighted source.
Note: Main menu OSD cannot be displayed via the control
button.
Operation with the Remote Control
Press the Home button on your remote control to
display main menu. Use the directional buttons and
OK button to navigate and set. Press Back/Return,
Exit or Home button to quit a menu screen.
Input Selection
Once you have connected external systems to your
Source button on your remote control consecutively
Changing Channels and Volume
You can change the channel and adjust the volume
by using the Programme +/- and Volume +/- buttons
on the remote.
Using Main TV Menu
When the Home button is pressed, the main TV menu
will appear on the screen. You can navigate through
the menu items using the directional buttons on the
remote.To selectan item or seethe sub-menu options
of the highlighted menu press OK button. When you
highlight a menu option some of the sub-menu items
of this menu may appear on the upper side of the
menubar for quick access.To use a quick accessitem
highlightit,press OK and set as desiredusing the Left/
OK or
Back/Return button to exit.
You can also see information on location, weather,
timeand date on the mainTV menuscreen.Thegreen
smalliconsindicatethe current status for time, network
and sync for apps. If these icons appear in green, it
means that the time information is updated, network
is connected and sync is successfully completed.
Otherwise the icons will appear in white.