AmazonBasics B010QZD6I6 User manual

AmazonBasics Notebook Arm Mount Tray
Support pour ordinateur portable AmazonBasics
AmazonBasics Notebook-Ablage zur Armmontage
Sostegno per notebook per braccio di montaggio AmazonBasics
Bandeja de portátil para montaje en brazo AmazonBasics
亚马逊倍思笔记本托架安装托板
Amazonベーシック ノートパソコン用アームマウントトレイ
B010QZD6I6

English..................................... 3
Français................................... 9
Deutsch ................................... 15
Italiano..................................... 21
Español.................................... 27
中文 .......................................... 33
日本語....................................... 39

3
Instruction Manual •English
AmazonBasics Notebook Arm Mount Tray
Contents
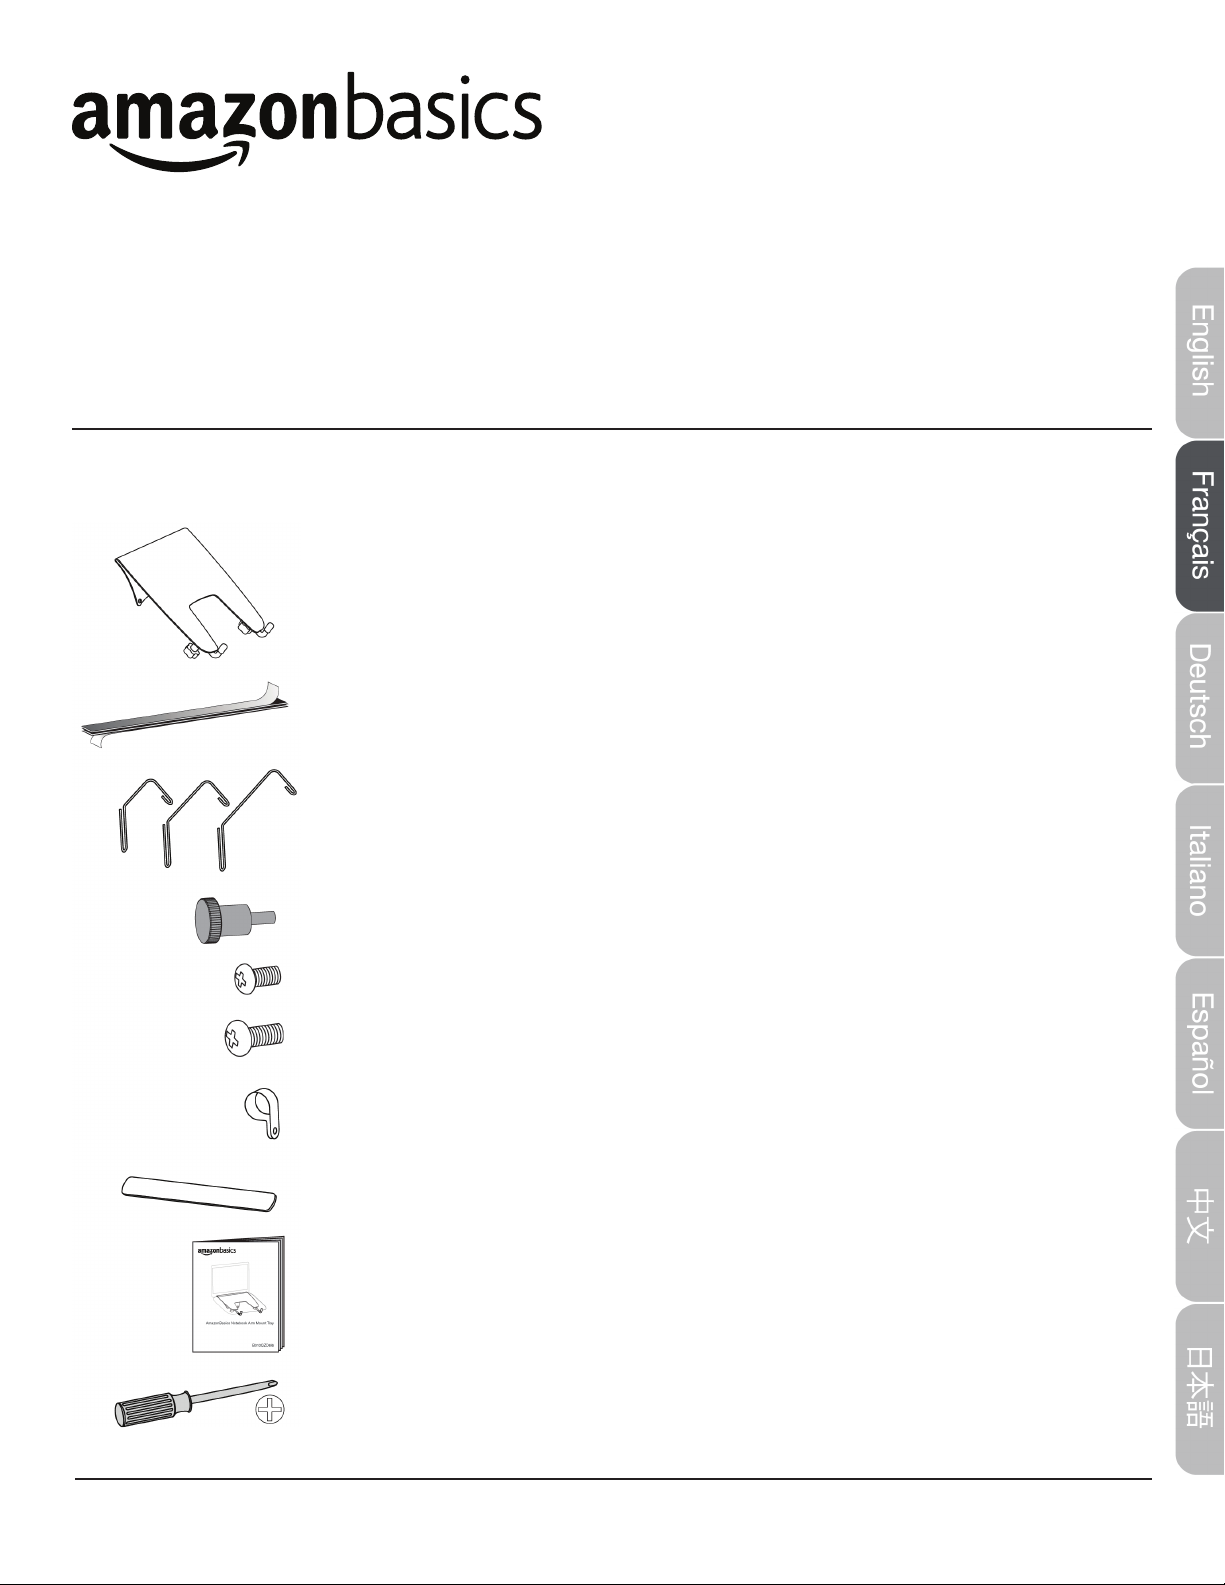
Make sure that the package contains the following parts:
p
Notebook Tray (1 pc)
Adhesive strips (3 pc)
Hooks (3 sets of 2)
M4 × 10 mm knobs (4 pc)
M3 × 6 mm screws (1 pc)
M4 × 10 mm screws (4 pc)
Cable clip (2 pcs)
Non-slip pads (2 pc)
Instruction manual
Tools needed:
Phillips screwdriver
4
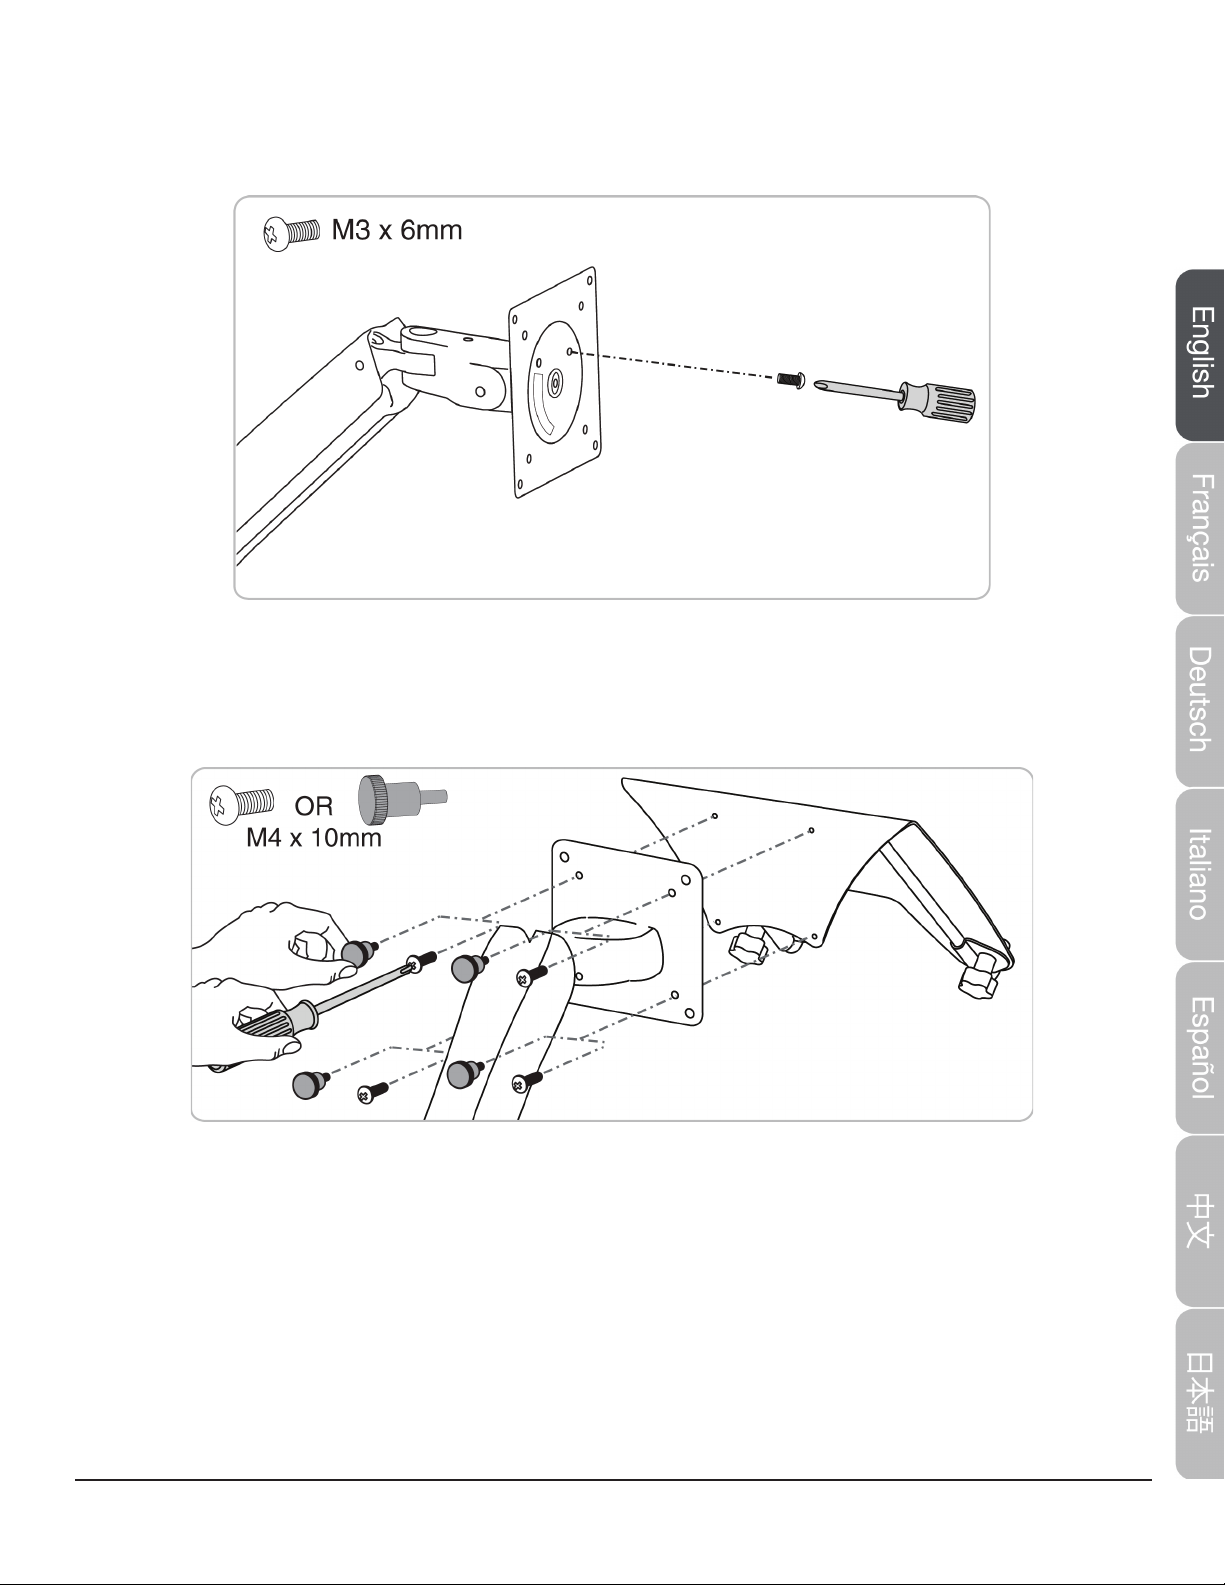
Step 1: Lock the arm orientation
On your existing mount arm (not included), insert the M3 × 6 mm screw into the front of the plate to
lock its orientation.
Step 2: Attach the notebook tray
Attach the notebook tray to the mounting plate with either the M4 × 10 mm screws and a Phillips
screwdriver or the M4 × 10 knobs. Hand-tighten the knobs.
Step 3: Determine the connection method
You can place your notebook:
•Directly on the notebook tray. Go to “Notebook tray” on page 5.
•On a docking station (not included) that is mounted to the notebook tray. Go to “Docking
Station” on page 6.
5
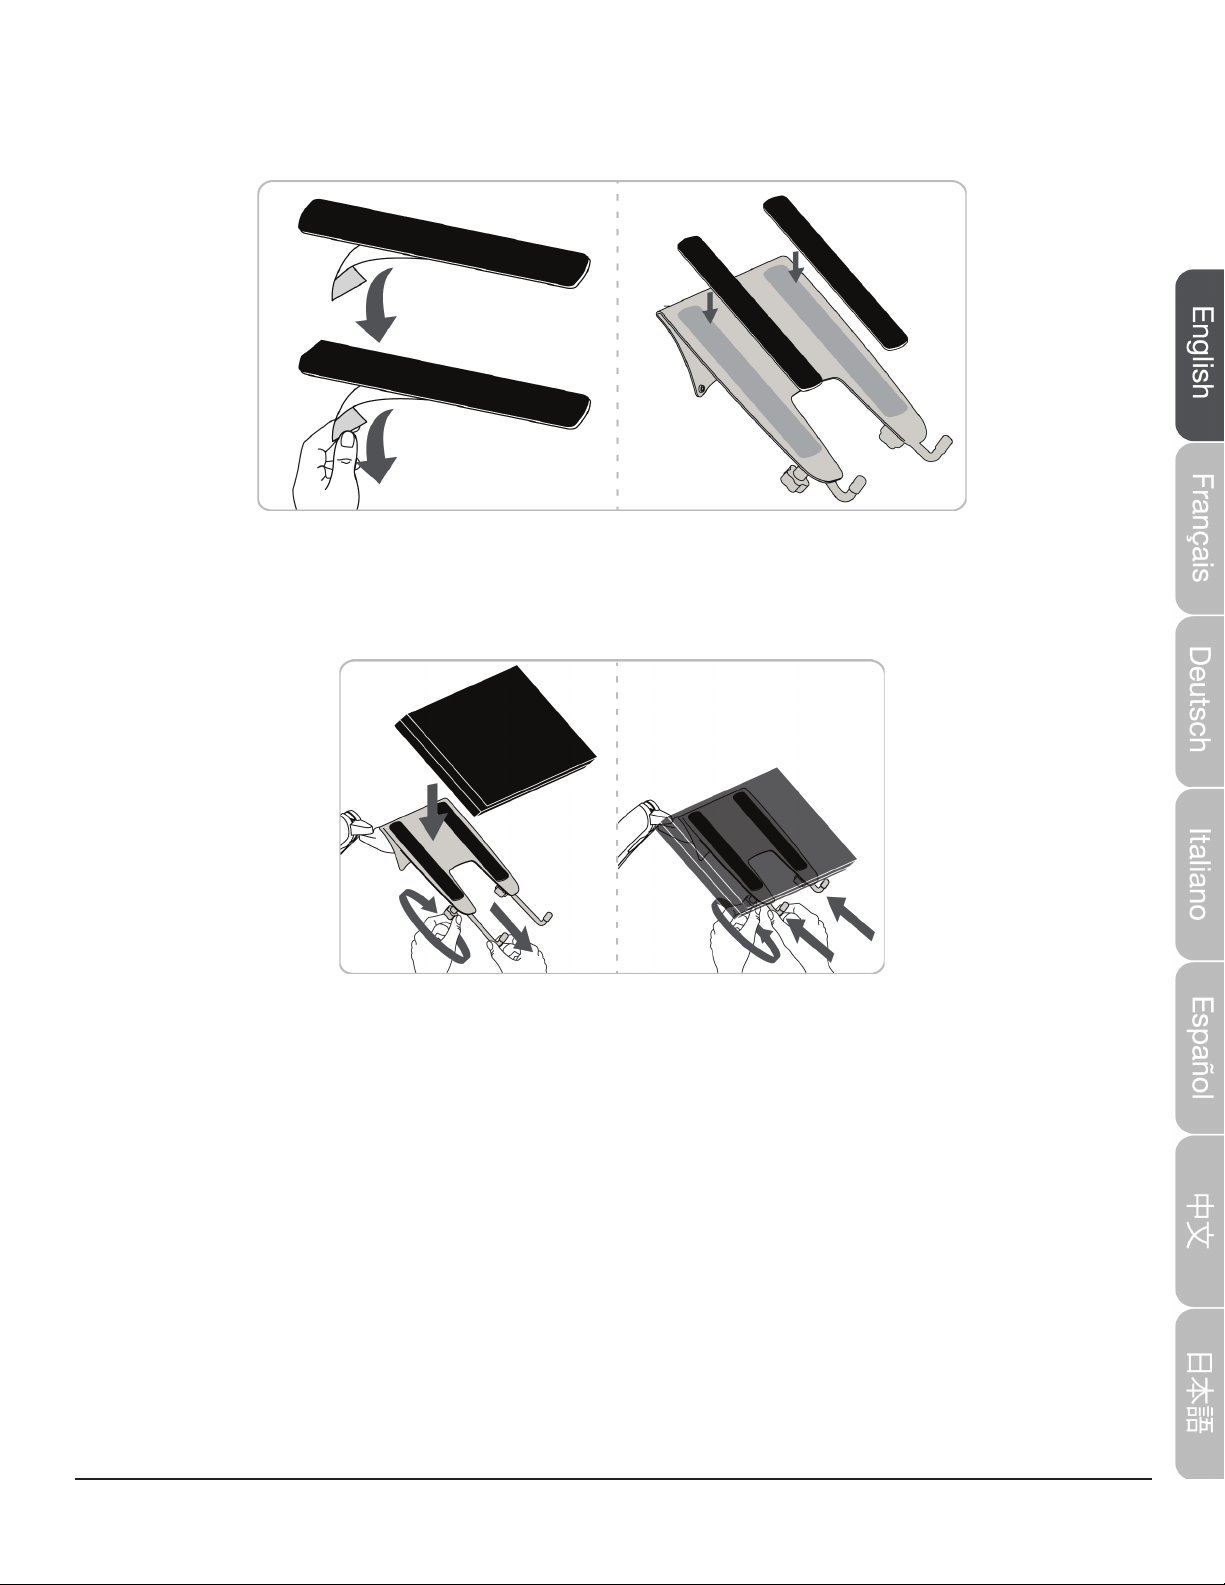
Notebook tray
Step A: Remove the backing from the non-slip pads, then place them on the notebook tray (as
shown).
Step B: Loosen the adjustment knobs underneath the notebook tray to adjust the length of the
notebook tray legs, place notebook on the tray. Then tighten to secure. Your notebook should t
snugly against the notebook tray legs.
Step C: See “Step 4: Adjust your arm’s tension” on page 7to adjust your notebook arm’s tension.

6
Docking Station
Step A: Cut the non-slip pads in half, remove the backing, then place them on the notebook tray (as
shown).
Step B: Remove the backing from the three adhesive strips on the notebook tray, then rmly press
your docking station onto the strips. The back of the docking station should be ush with the back
of the notebook tray.
Step C: Loosen the adjustment knobs underneath the notebook tray to adjust the length of the
notebook tray legs, place notebook on the tray. Then tighten to secure. Your notebook should t
snugly against the notebook tray legs.

7
Step D: Measure a small, medium, and large hook against the back of the notebook tray and
docking station, then pick the hook that ts around it best. One at a time, loosen the top mounting
screws on the arm, then slide the hook around the screw and your docking station. Tighten the
mounting screw to hold the hook in place.
NOTE: You can also remove a mounting screw to attach the cable clip.
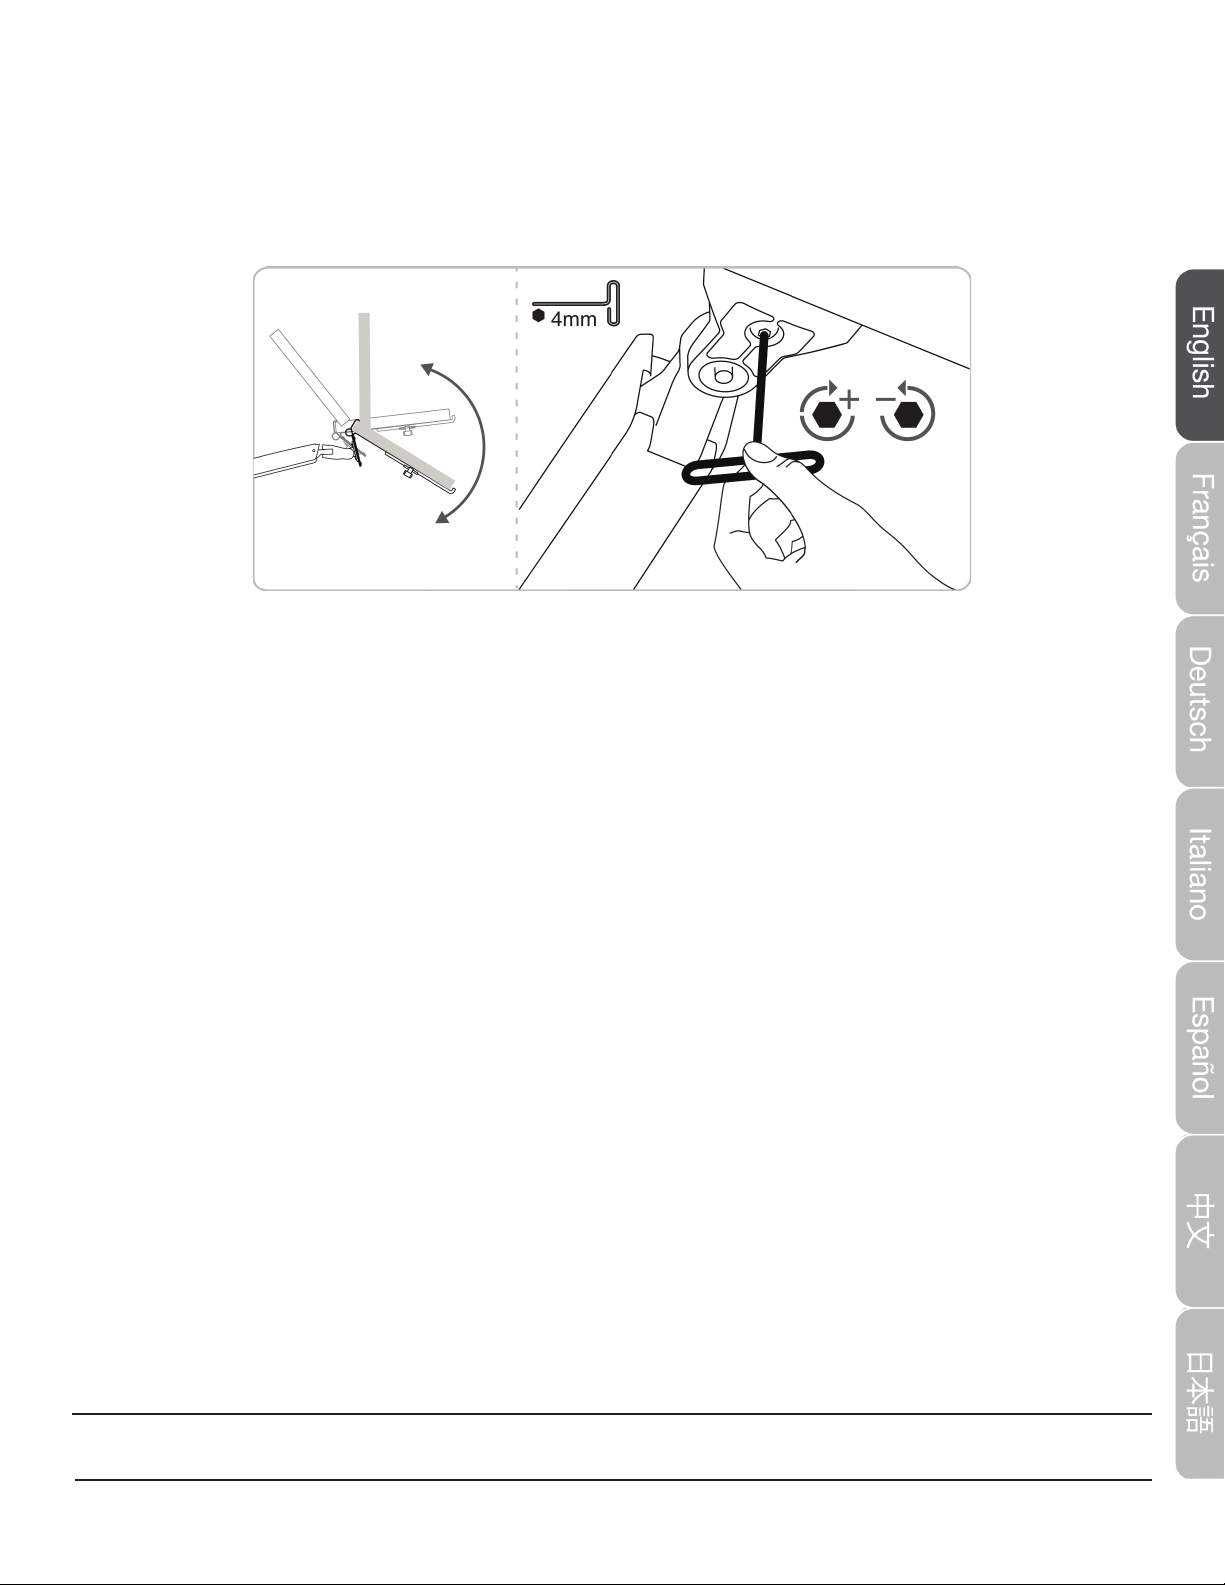
Step 4: Adjust your arm’s tension
Adjust your notebook mount’s tension. You can adjust the vertical, tilt, and arm tension so that the
notebook stays in place when you move it.
Adjusting the vertical tension
Tilt the notebook down to access the screw. If the notebook is rising up, loosen the screw by
turning it to the left. If the notebook is falling down, tighten the screw by turning it to the right.
Caution: Do not over-tighten the screw. You might damage your notebook mount.
8
Adjusting the tilt tension
If the notebook tray is falling forward (tilts towards oor), loosen the screw by turning it to the left. If
the notebook tray is falling back (tilts toward ceiling), tighten the screw by turning it to the right.
Caution:
•Do not remove the screw. The notebook tray might fall.
•Do not over-tighten the screw. You might damage your notebook mount.
Safety and Compliance
IMPORTANT: This product will need tension adjustments after installation is complete. Make
sure that all equipment is properly installed on the product before attempting range of motion
or tension adjustments. Any time equipment is added or changed on this product resulting in a
different mounted weight, you should repeat the adjustment steps to ensure safe and optimum
operation. This product should move smoothly and easily through the full range of motion and
stay where you set it. If movement is difcult or the product does not stay where you set it,
follow the adjustment instructions to loosen or tighten the tension to create a smooth, easy
motion. Depending on your product and the adjustment, it may take many turns to notice a
difference.
© 2015 Amazon.com, Inc. or its affiliates. All Rights reserved. Amazon and the AmazonBasics logo are trademarks of
Amazon.com, Inc. or its affiliates. Made in China
9
Manuel d’instructions •Français
Support pour ordinateur portable AmazonBasics
Contenu
Assurez-vous que l'emballage contient les pièces suivantes:
Support pour ordinateur portable (1)
Bandes adhésives (3)
Crochets (3 jeux de 2)
Boutons M4 × 10 mm (4)
Vis M3 × 6 mm (1)
Vis M4 × 10 mm (4)
Attache de câbles (2)
Tampons antidérapants (2)
Manuel d’instructions
Outils requis :
Tournevis cruciforme
10
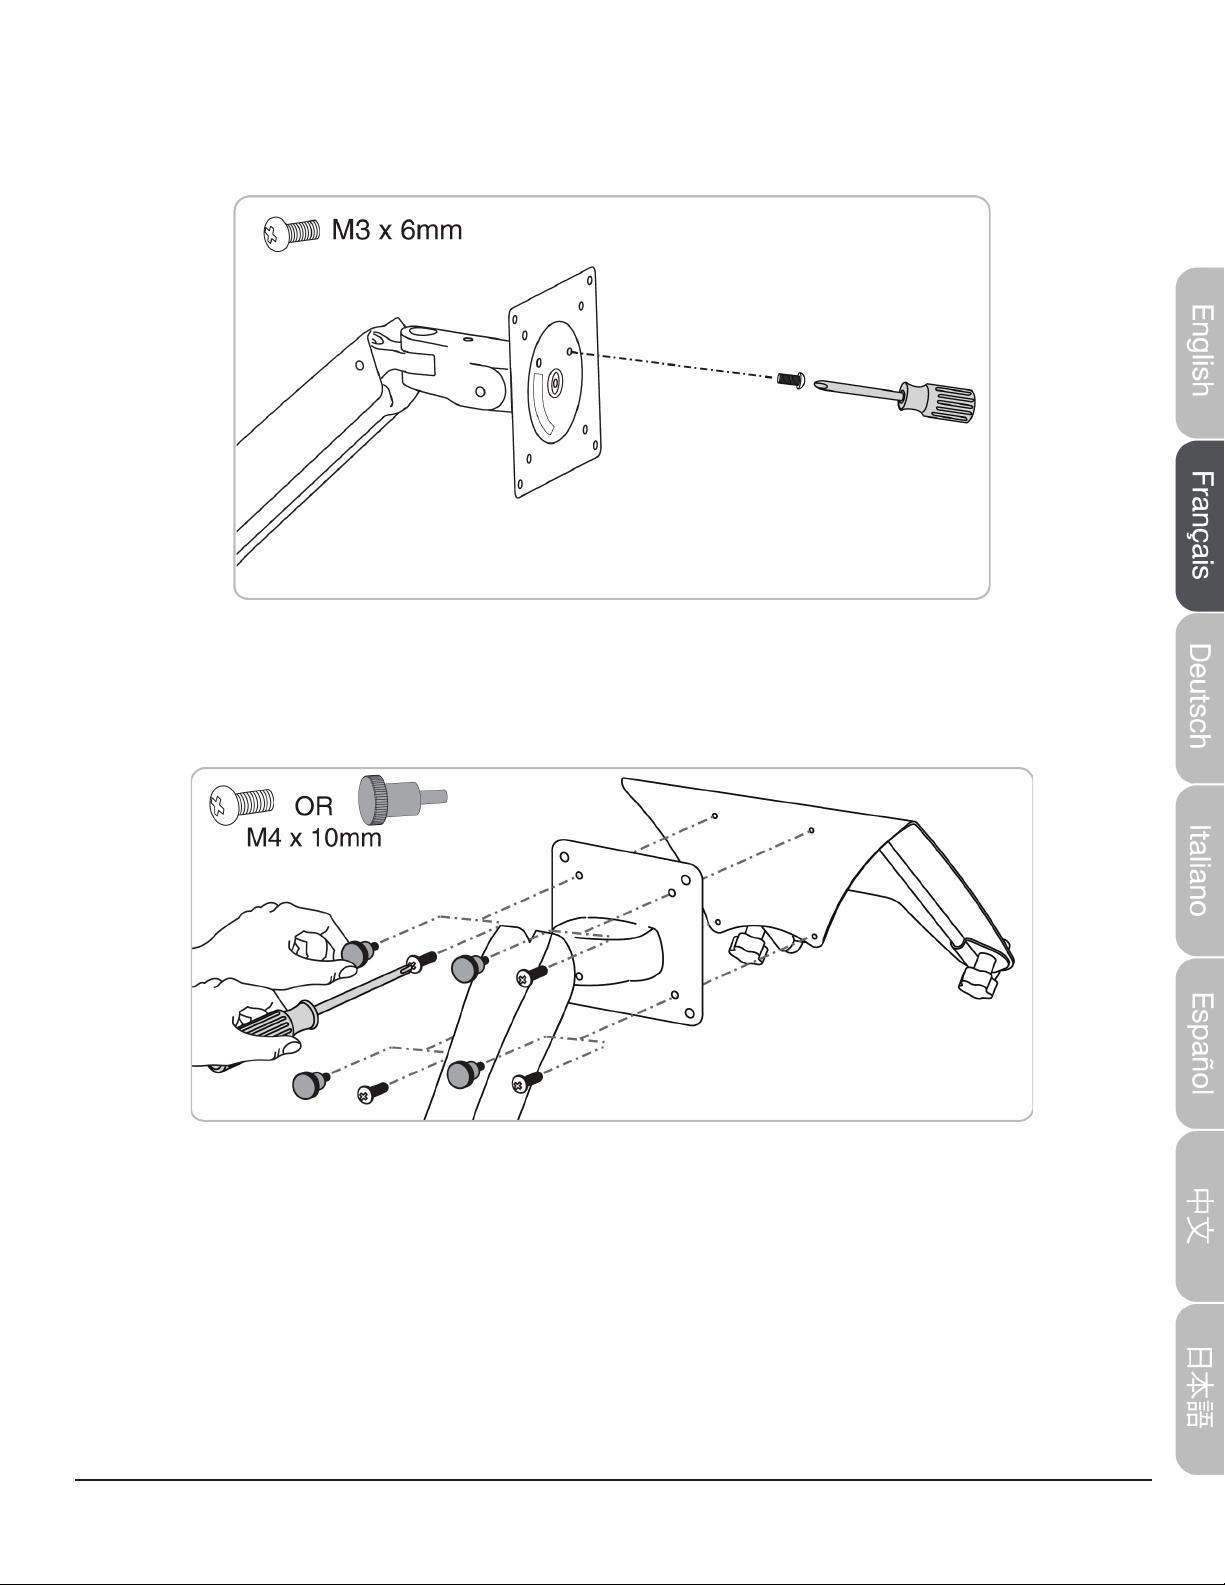
Étape 1 : Verrouillage de l'orientation du bras
Sur votre bras de montage existant (non inclus), introduisez la vis M × 6 mm dans l'avant de la
plaque pour verrouiller son orientation.
Étape 2 : Fixation du support pour ordinateur portable
Fixez le support pour ordinateur portable sur la plaque de montage avec les vis M4 × 10 mm et un
tournevis cruciforme ou avec les boutons M4 × 10. Serrez les boutons à la main.
Étape 3 : Détermination de la méthode de connexion
Vous pouvez placer votre ordinateur portable :
•Directement sur le support pour ordinateur portable. Rendez-vous « Support pour ordinateur »
portable à la 11.
•Sur une station d'accueil (non comprises) montée sur le support pour ordinateur portable.
Rendez-vous sur un « Station d’accueil » à la 12.
Table of contents
Languages:


