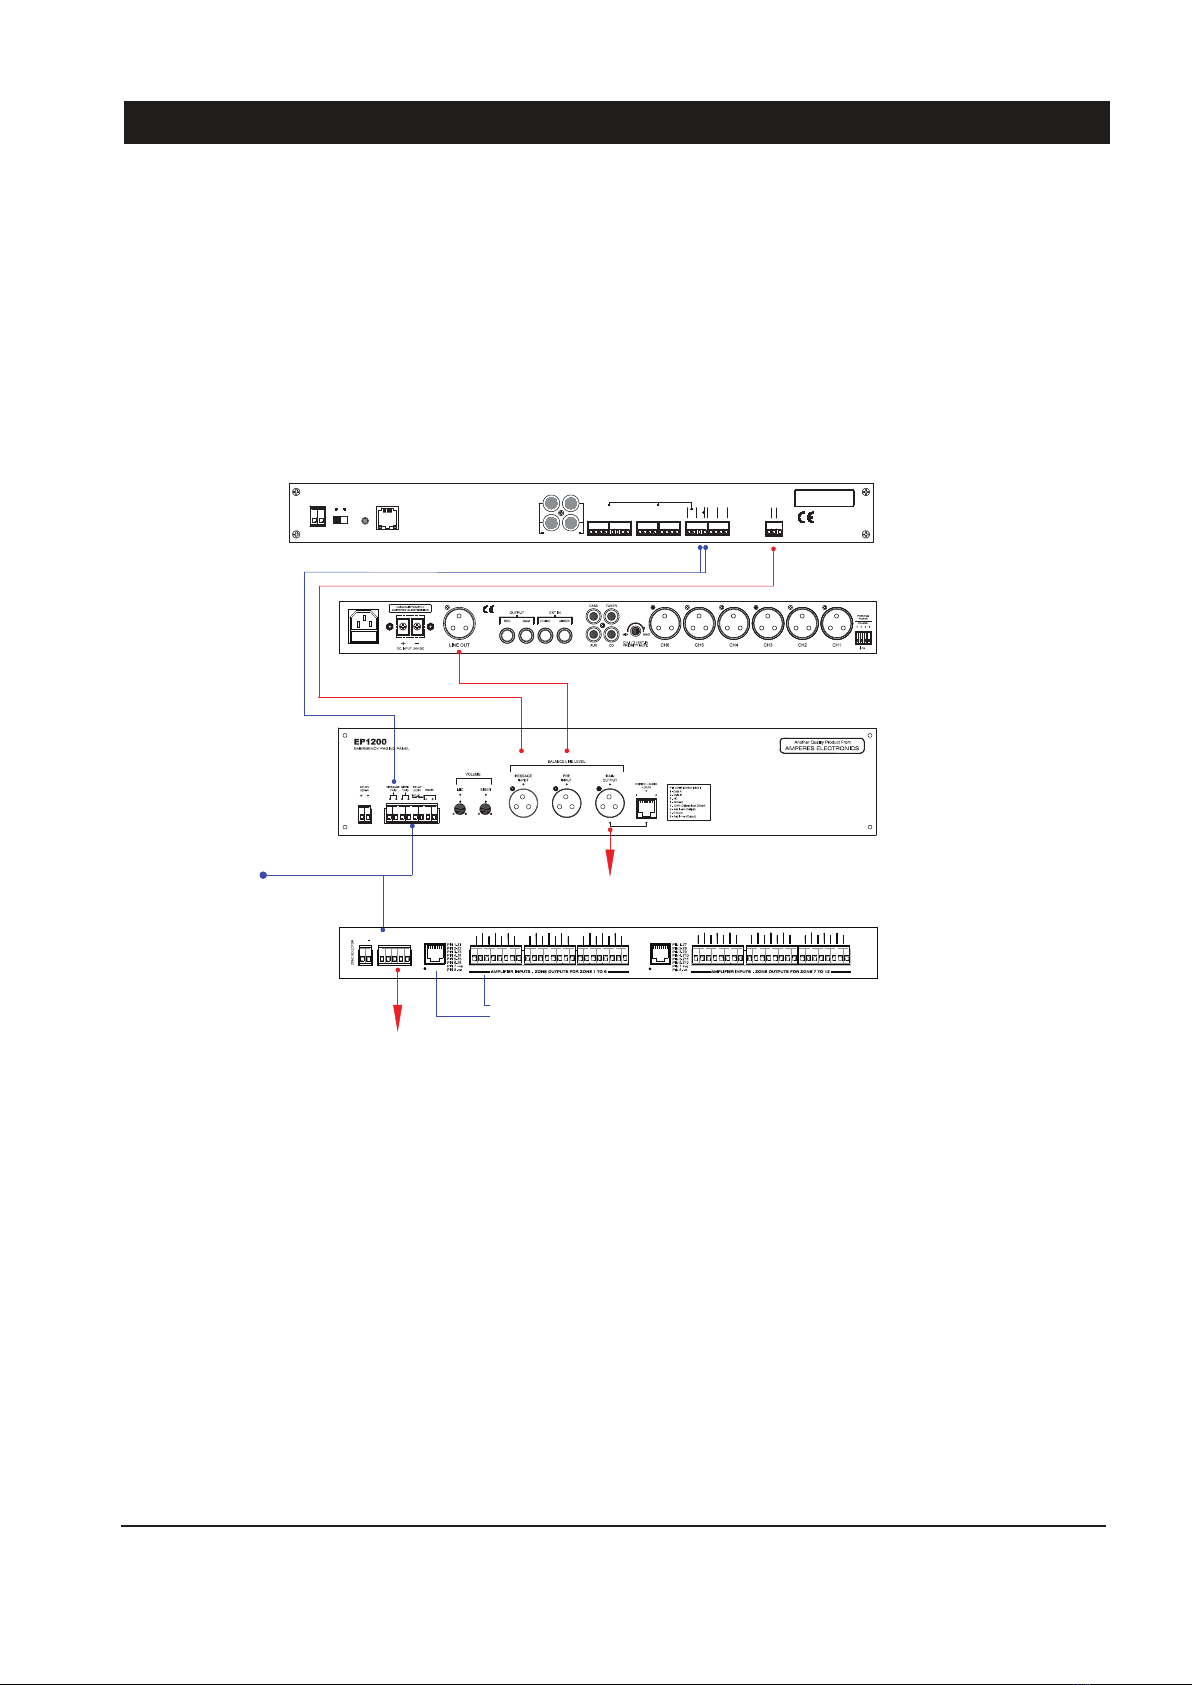
Connecting the Unit
PAGE 5
PT1801
PROG.TIMER
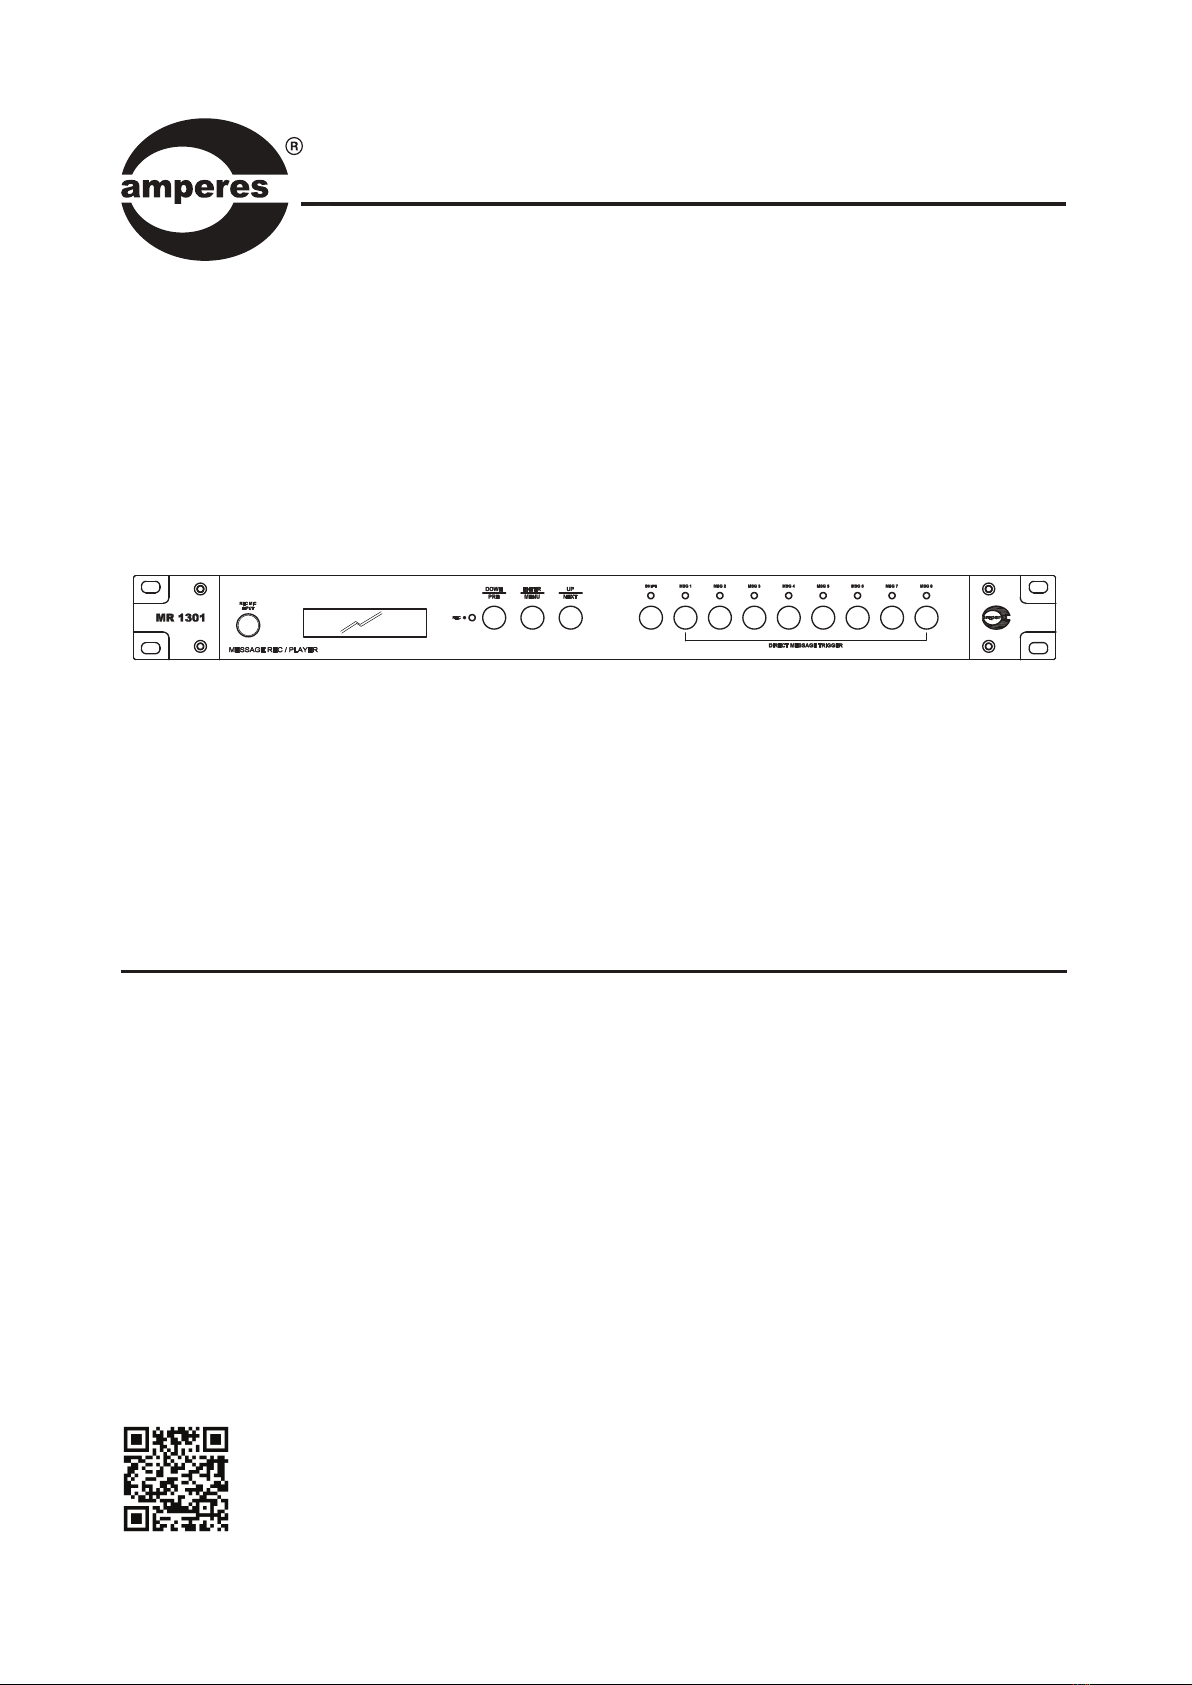
MR1301
MESSAGE
RECORDER / PLAYER
Audio output to Power
Amplifiers, etc
Option A :
Using MR1301 for Normal Message Source
Stored messages can be played either from the front buttons or via the remote triggering ports.
The above diagram shows connections of 3 output channels of PT1801 connected to 3 individual triggering ports of
MR1301. It is intended to perform 3 different times to playback 3 different messages. Activation of each message is
via
negative grounding.
Note :
MR1301 can be used as :
- Source playback unit, for delivering pre-recorded messages or songs, and if repetitive playback at certain times is
required,
it can be used together with a timer.
-Emergency broadcast message playback unit, which is linked to external triggering devices or systems, such as
alarm, BAS or emergency push button.
Connections of both applications are shown in the diagrams below.
REMOTE MESSAGE ( COM -VE TRIGGER )
ON/OFF
RESET
+
-
DC 24V
100mA IN OUT
REC MESS
LEFT
RIGHT
MR 1301
MESSAGE REC / PLAYER
amperes electronics
Another Quality Product From
MADE IN MALAYSIA
ETHERNET
BALANCE OUT
1 2 3 4 5 6 7 8
[ MESSAGE 1-8 ] [ MESSAGE 9-16 ]
9 10 11 12 13 14 15 16
TRIG
COM
-B+A
COM
CONTACT
NO
MESS TRIG
RS485RECORD
GND
+OUT
-OUT
MK II
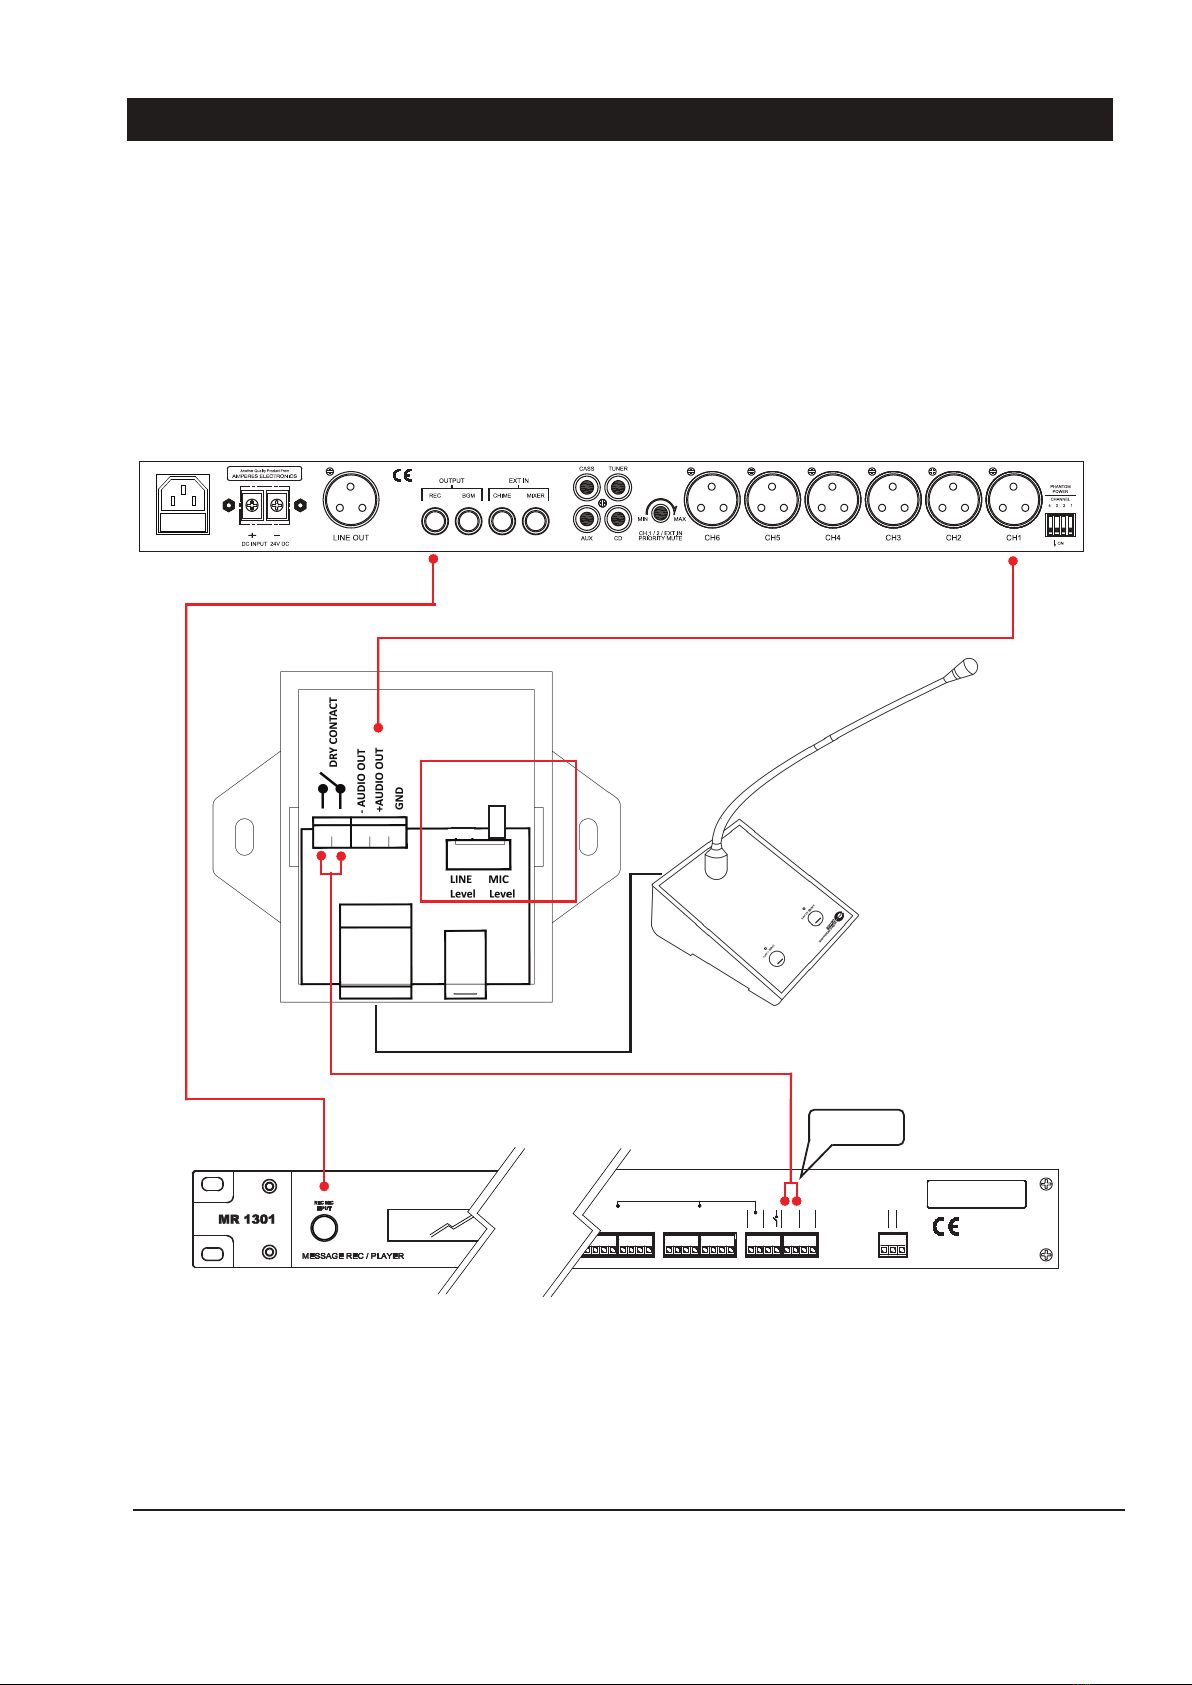
Output from MR1301 can be unbalanced using RCA jack, or balanced signal using mini phoniex connector. Both outputs
are in mono
mode, with line level signal.
Activation of a stored message can be either momentarily or latched contact to ground. To activate from PT1801 timer,
we recommend that the contact option at the channel output to be set to Pulse. By default, MR1301 shall consider a
pulse that less than 8 sec as a momentary contact otherwise it shall be regarded as a latched contact. The 8 sec can be
changed in System configuration of MR1301.
L
R
L
R
CH9CH10
LINE
LINEMIC
( PM1030 )
REMOTE MIC
12
PHANTOM
POWER
CHANNEL
3
4
PHANTOM
POWER
CHANNEL
5
6
PHANTOM
POWER
CHANNEL
7
8
PHANTOM
POWER
CHANNEL
INPUT
+IN
GND
-IN
INPUT
+IN
GND
-IN
INPUT
+IN
GND
-IN
INPUT
+IN
GND
-IN
INPUT
+IN
GND
-IN
INPUT
+IN
GND
-IN
INPUT
+IN
GND
-IN
INPUT
+IN
GND
-IN
CH1CH2CH3CH6 CH5 CH4CH7CH8
-
+
DC 24V
CH-B
+OUT
GND
-OUT
CH-A
+OUT
GND
-OUT
OUTPUT
+OUT
GND
+OUT
GND
+IN
GND
+IN
GND
CH-B
REC OUT
CH-A
WARNING !
TO REDUCE THE RISK OF FIRE OR
ELECTRIC SHOCK DO NOT EXPOSE THIS
EQUIPMENT TO RAIN OR MOISTURE.
RISK OF ELECTRICAL SHOCK
DO NOT OPEN
CAUTION
CH12
PRIORITY
CH11
4) GND
3) NC
2) COM
1) NO
8) +AUDIO
7) GND
6) -AUDIO
5) +24V
LINEMICLINEMICLINEMICLINEMICLINEMICLINEMICLINEMIC
500mA
RJ45 PIN CONFIGURATION: AMPERES ELECTRONICS
amperes
R
MODEL : MX2322
PRE AMPLIFIER MIXER
MADE IN MALAYSIA
SER.
AC220-240V 50/60Hz 12W
AC220-240V 50/60Hz
FUSE: 500mA
Option 1 : Unbalanced Audio Option 2 : Balanced Audio
MX2322
MIXER
Dry Contact Balanced Audio
MESSAGE INPUT MAIN OUTPUT
SIRENMIC
BALANCE LINE LEVEL
VOLUME
RESET
ETHERNET
-
+
DC 24V
NO
AB
RS485
SIREN
TRIG
MESSAGE
TRIG
RELAY
CONT
iEP 1200
ETHERNET EMERGENCY PAGING PANEL
PRE-AMP INPUT
amperes electronics
Another Quality Product From
MADE IN MALAYSIA
iEP1200 / EP1200
EMERGENCY PAGING
MICROPHONE PANEL
NO
COM
NO
COM
NO
COM
NO
COM
CH1 CH2 CH3 CH4
NO
COM
NO
COM
NO
COM
NO
COM
CH5 CH6 CH7 CH8
RELAY DRY CONTACT
RS485
A - B
WEEKLY PROGRAM TIMER
PT 1801
MK II
GND
+OUT
-OUT
ON/OFF
RESET
+
-
DC 24V
100mA
ETHERNET
amperes electronics
Another Quality Product From
MADE IN MALAYSIA
MR1301 MK II EVAC MESSAGE PLAYER