Arcus INCANTARE Music Station User manual

USER´S MANUAL
incantare MusicStation
Version 06.2009
You can download the latest version of this manual from the arcus website at
www.arcus-HighEnd.de

Dear arcus customer,
The “arcus” brand is synonymous with technically well-devised and highly
innovative products. arcus opens up new perspectives which need to be
experienced at close hand. Thank you for purchasing our incantare
MusicStation. We are delighted by your trust in our products.
Your arcus team
CONTENTS
Section Page
1. Safety Information 01
2. Legal Notice on Copyright 03
3. Scope of Delivery 03
4. Environmental Protection 04
Information
5. Operating Elements on the 05
Front
6. Installation 06
7. Remote Control 08
8. General Information 09
Section Page
9. Quick Start 11
10. Menue system 12
11. Trouble Shooting 32
12. Terms and Conditions of 34
Guarantee
13. Technical Data 35
14. Important Note 36
15. Imprint 36

1
1.SAFETYINFORMATION
Electrical devices are not toys
Never let your children use electrical devices without supervision.
Cells/rechargeble batteries can endanger life when swallowed.
Therefore keep the device and batteries out of the reach of small children.
If a battery has been swallowed, medical assistance must be sought immediately.
Moisture and cleaning
The device must be set up and operated in dry rooms only. Attention – this product is
not waterproof. Do not immerse the device in water and do not allow it to make
contact with water. Water seeping into the device can cause serious damage. Do not
use any cleaning products that contain alcohol, ammonia, benzene or abrasive
products, as these products may damage the device. The mains plug must be pulled out
before the device is cleaned. To clean, only use a soft, dry cloth to wipe the surfaces of
the device.
Heat
Do not expose the device to direct sunlight. Take care to ensure that the device is not
exposed to any direct sources of heat, such as heating or an open fire. Ensure that the
ventilation slits on the device are not obstructed.
Important information about hearing protection
Caution:
Your hearing is as important to us as it is to you.
Therefore please be careful when using this device.
The device has enormous power reserves and is capable of generating extreme
volumes.If the device is used by children, take care to ensure that the device is not
turned up too loud.
Attention!
Excessive volumes can cause irreparable damage in children and adults.

2
Setting a safe volume level
•When loud music is listened to on a continuous basis, your hearing gradually becomes
used to this and gives you the impression that the volume is lower.
•What appears normal to you can, however, be damaging in reality.
•To protect yourself, set the volume to a low level.
•Increase the volume slowly, until you can hear clearly and without effort.
•Your hearing can undergo many types of damage, which cannot be reversed.
•If you become aware of an ear complaint, please contact a doctor.
Additional safety instructions
Do not allow any objects to fall onto, or any liquids to seep into the device.
If this occurs, pull the mains plug out of the socket and have the device examined by a
professional.
Place the device horizontally on a stable, even surface.
Take care to ensure that the device’s cooling system is not impaired.
Position the device so that the connections cannot be touched.
When the device is exposed to low temperatures (during transportation, for example), it
must only be switched on once it has reached room temperature and any condensation
that may have formed has evaporated.
The plug should be pulled out of the socket if the device is not in use for a while. Before
operating the device again, ensure that there are no short-circuits at the connection points
and that all connections are properly attached.
The user should carry out no works on this device other than the measures described in
this user’s manual.
Apart from the manual interventions described in the user’s manual, no works of any kind
must be performed on the device by the user. The device may only be opened by a
qualified professional. Repairs and fuse changes must be carried out by a specialist repair
shop.
In the event of damage or if an irregular function is suspected, it is mandatory to pull out
the plug immediately and have the device examined by a specialist repair shop.
If you have sensitive furniture on which you wish to place the device, we recommend a
neutral underlay in order to prevent potential colour staining by the device’s feet.
Always switch off the device using the standby switch on the front before cutting it off
from the electrical supply by activating the mains switch (on the rear of the housing) or
pulling out the plug.

3
2.LEGALNOTICEONCOPYRIGHT
Intellectual property, including music, is subject to worldwide copyright protection.
It is legal in most countries to create copies of legally acquired recording media (e.g. CDs) or
music files (e.g. from the Internet) for personal use.
It is prohibited to offer these copies commercially or to give them to a third party.
Caution when downloading MP3 files from the Internet: Please make sure that the files are
properly licensed, i.e. that the provider also has rights to the respective titles.
If you are not the originator yourself or you have not been grated the appropriate rights of use
by the originator or rights holder, you should note that if you infringe on this right, there is a
risk that beneficial owners may take action against this possible criminal act and assert their
rights.
3.SCOPEOFDELIVERY
Whenunpacking,checkthesystem’scompletenessintermsof:
Remote control (illustrated for
demonstration
p
ur
p
oses) and
User’s manual

4
4.ENVIRONMENTALPROTECTIONINFORMATION
Professional recycling
Batteries and packaging materials have no place in domestic refuse.
Batteries must be handed in at a collection point for used batteries.
Conserve the environment by disposing of packaging material separately
.
This product must not be disposed of via the normal household waste at
the end of its useful life, but must be handed in at a collection point for the
recycling of electrical and electronic devices. The symbol on the product, in
the user’s manual or on the packaging recalls this fact. The materials can be
used again according to their description. By reusing, recycling materials or
using spent devices in any other form you make an important contribution
to protecting our environment. Please ask your local municipality for
information on the relevant disposal point.

5
5.OPERATINGELEMENTSONTHEFRONT
1 2 3 4 5
1. Control Panel Back Key Starts the previous track when playing
Go back to the previous step in menu
Deletes letters when entering text
Next Key Turn on and play tracks at random from standby
Starts the next track when playing
Goto next step in menu – used when setting the time,
finding a track, picking a CD name etc.
Start/Stop key Start playing or unpause
Stop playing/pause – enters standby after ~ 5 minutes
Start playing currently displayed track, album or playlist
Press and hold to Stop everything – Music playback,
CD loading, USB transfer, Recording
Eject Key Eject CD
Delete track from playlist
2. USB Port Compatible with USB mass storage class devices, including most MP3
players, MP3 mobile phones, USB memory and USB hard disk drives.
USB 2.0 Full Speed 12Mbits/sec
3. CD Slot Insert CD gently until it is pulled inside. Use Eject Key to eject.
4. Infra Red Window used by remote control
5. Volume and Menu Control Push to start the on screen menu
Rotate to scroll through menu choices
Push to select the item displayed
Rotate to pick up letter during text searches
Volume Control
1

6
6.INSTALLATION
When connecting the MusicStation it is mandatory that you observe the following indications:
•Never open the housing of the power supply unit. Your life is at risk
from electrocution when the housing is open. There are no components
to be cleaned or repaired inside the device.
•Operate the device using only an earthed socket with 100-240V~/ 50-60
Hz alternating current. Information about your power supply ratings can be
obtained from your local electricity provider.
•Only use the supplied mains cable, or a derivative of identical
construction.
•The mains socket should be located in the vicinity of the device and
within reach of the mains cable.
AVOID a situation where you have to stretch the mains cable in
order to reach the socket.
•Arrange the cable of the Muiscstation so that it cannot be tripped over
or trodden on.
•Place no objects or furniture on the cable, in order to avoid damage.
It is essential that you switch off the MuiscStation along with the rest of your system at
all times when working on the cabling!
3
1

7
1. Line Out
Assymetric pre-amplifier output. An output stage or an active loudspeaker with
asymmetric inputs can be connected here.
2. Aux In
Your choice of high-volume devices such as tuners, CD players, tape decks etc.
can be connected here. Turntables cannot be connected as they require an extra
amplifier stage in addition. However, special phono pre-amplifiers for turntables
can be connected to these inputs again.
3. Digi Out
Digital output for digital playback units
4. Power Supply Switch
This is the amplifier’s principal mains connection switch. If the switch is ON the
unit is connected with the electricity mains.
5. Power Supply Input Cord
The mains cable is inserted here
6. Speaker
The loudspeaker is connected to these terminals. Please take care to ensure that
the loudspeaker does not fall lower than a minimum impedance of 4 ohm. Also
ensure that there is no short-circuit at this port, so that no damage results for the
output stage.
Connecting the loudspeakers:
1. Rotate the screwing terminal anti-clockwise until the cable
opening becomes visible.
2. Insert the cable end into the opening and rotate the screwing
terminal clockwise until the cable is secure.
Attention!
In doing so, make sure that each of the loudspeakers is correctly connected with the relevant
amplifier output. Also pay attention to the correct polarity (+ -).
5

8
7.REMOTECONTROL
Play/Stop
same as on front panel – starts or
pauses the music –plays selected track,
album or playlist. Press and hold this
key to stop all operations, CD loading,
USB transfer & recording.
Find
starts track search – finds tracks
containing a string of letters
Rip
transfers the current track to the USB
device
Rec
starts recording from aux input to a
track on the hard disk
Vol+ Vol-
adjusts the volume
Next
same as next on front panel. Start
playing the next track or advance to
next step in menu. Also used as cursor
right when editing text
Prev
similar to back key on front panel.
Starts playing the previous track or
returns to previous in menu. Also used
as cursor left when text editing.
History
lets you scroll through previously
played tracks
0-9
Used to enter text when searching or
naming tracks and albums. Uses the
same convention as mobile phone
headsets. 0 key turns off playlist.
Red-Violet
These keys correspond to each of seven
playlists. One press display the playlist.
A second press starts playing the
playlist. Press and hold a key and the
current track is added to the playlist.
Up / Down
Scrolls through menu options and
choices
OK
selects the displayed menu item or
choice – the same as pushing the main
control on the front panel
Menu
starts the top level menu
Info
displays disk statistics or context
dependent information
Intro
turns intro mode on and off. First press
shows the current state. Subsequent
presses changes the mode. Intro mode
plays just the start of each track
Random
turns random mode on and off. First
press shows the current state.
Subsequent presses changes the mode.
Random Mode plays tracks in a random
order. Random Mode is turned off
when an album is played
HDD / USB
selects music from the hard disk and
the attached USB device. Track search
will scan both. Random mode will
embrace both sources.
CD
selects music from CD
USB
selects music from the attached USB
device. Track search and random
restricted to music on the USB
Aux
selects the aux input. The aux input
must be selected before the record
function will start
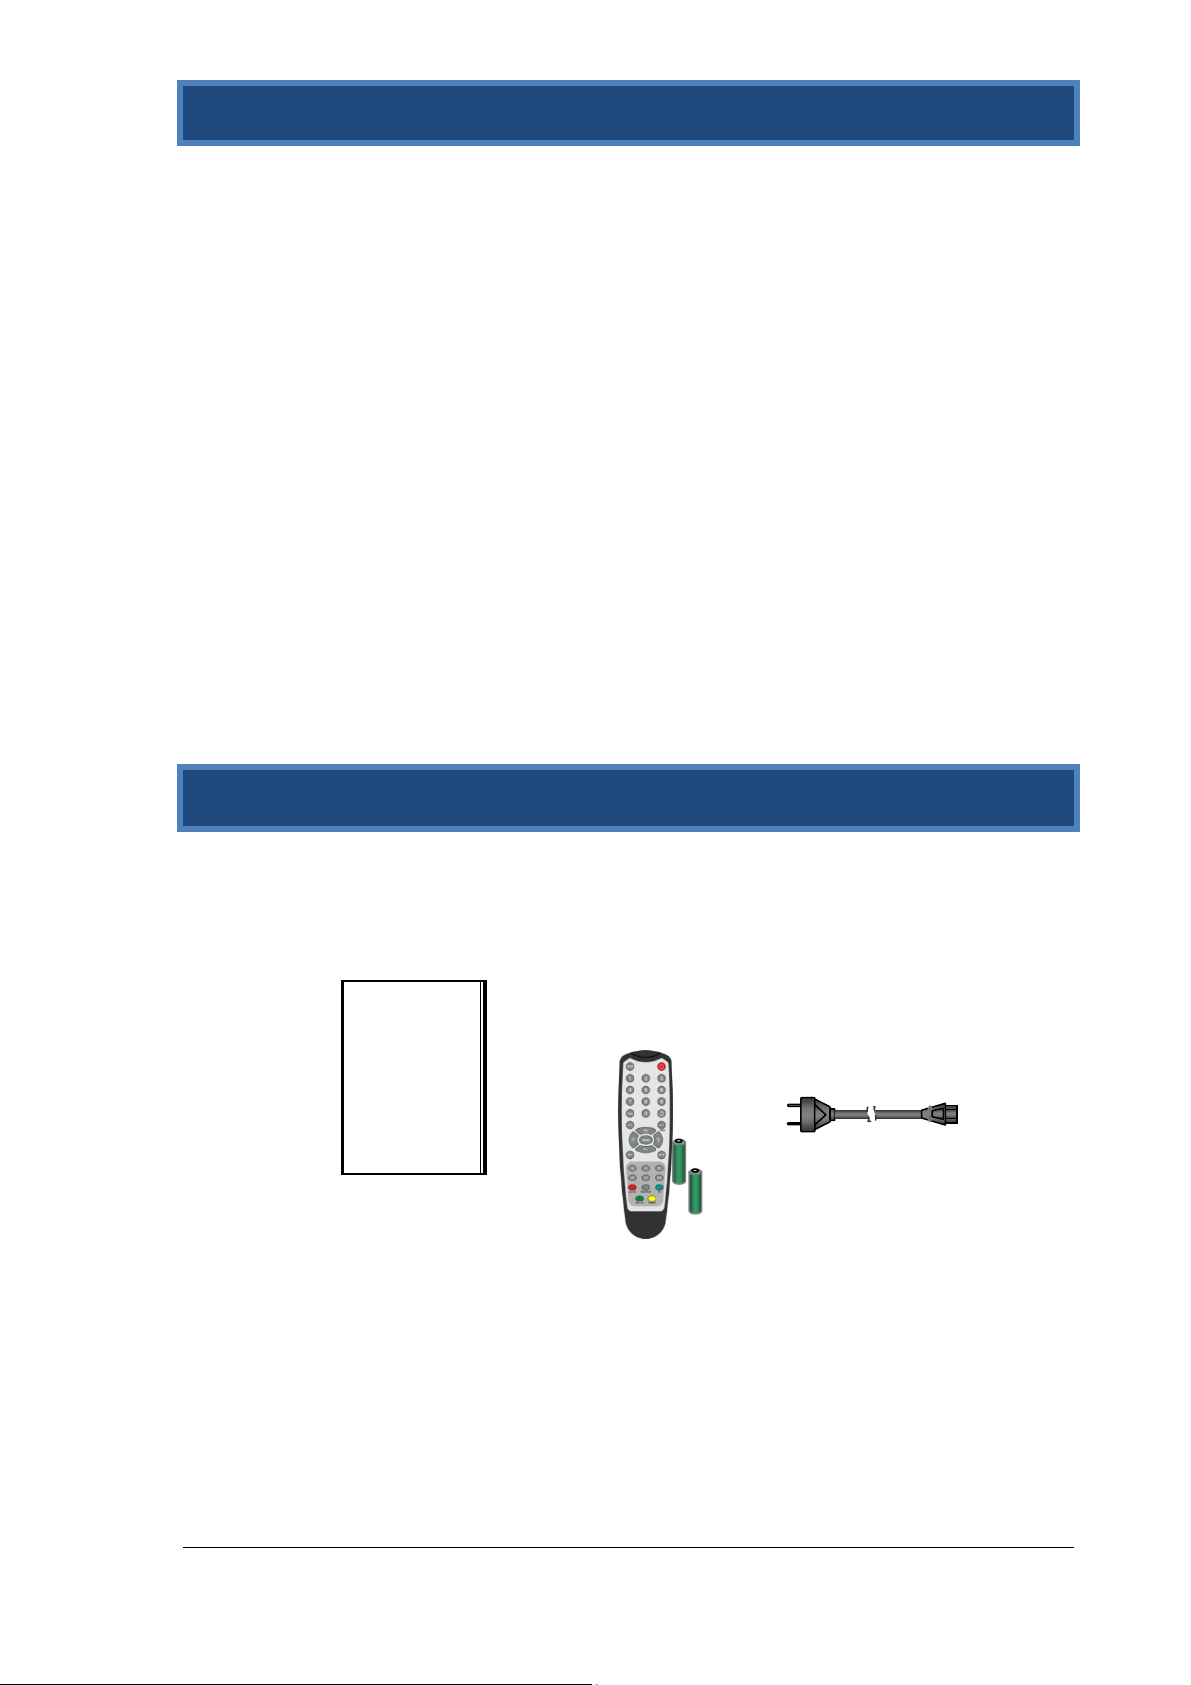
Inserting the Batteries in
the Remote Control
Make sure that the polarities are
correct. There should be no large
objects blocking the way between the
remote control and the unit.
Under normal circumstances the
remote control should be used within a
range of 6 metres, straight in front of
the sensor and within a 30 degree
range. To operate the device, direct the
remote control towards the sensor
window. There must be nothing
blocking the way between the remote
control and device.
If the remote control sensor is exposed
to direct sunlight, it may lose its
reception function. In this case you
should place the unit in a different
location.
If the remote control is not working or
operating ranges are becoming shorter
and shorter, you should check whether
the remote control is still making
contact or whether the batteries need to
be changed. Never use batteries of
different types together, or new
batteries with used batteries. If the
remote control is not going to be used
for a while, remove the batteries in
order to avoid damage due to battery
fluid leakage

9
8.GENERALINFORMATION
Music Organisation
Music on the hard disk is arranged as tracks in albums.
Most of the time the album and track names correspond to a CD you loaded and the album and
track names come from the album database. You can rename album and track names.
If there is no entry in the database for a CD when it is loaded then MuiscStation will provide a name
like “Album 123” that you can use or edit to make it more memorable.
Music recorded from the Aux input is put into a special album called “Recordings”. You can rename
this album and subsequent recordings will be put into a freshly created “Recordings” album.
Each time you upload music from the USB port it is put into a new “album” that you can name.
Compression
arcus MuiscStation can compress music to MP3 so you can store more music on the hard disk..
Compression is slower than loading from the CD so music is loaded quickly in a raw form then
compressed to MP3 when MuiscStation is in standby. During compression MusicStation displays the
percentage progress and the number of remaining uncompressed tracks. You can choose the level of
compression or disable compression. Any CDs loaded when compression is disabled will not be
compressed. Some people may use this to keep an exact copy of a CD or just to have the best
quality.
Playlist
MuiscStation lets you compile lists of tracks called playlists. You might compile a playlist for a special
occasion or to create a mood. You can send all the tracks in a playlist to an MP3 player.
To make life simple there are seven playlists named after the colours of the rainbow -red, orange,
yellow, green, blue, indigo, violet. The playlists are linked to seven number keys on the remote
control. Press Once -to see how many tracks are in that playlist. Press Twice -to start playing the
playlist. Press and hold - to add the current track to the playlist.
USB
arcus MusicStation is compatible with USB mass storage class devices including MP3 players, iPods,
USB memory, USB hard disks and many MP3 mobile phones. (Note that iPods will only play music
loaded into them by iTunes). arcus MusicStation lets you treat an attached USB device as a separate
source of music or as an extension to the internal hard disk. If USB is selected on the remote then
track search will only search the USB for tracks and arcus MusicStation will only play tracks on the
USB device. If HDD+USB is selected on the remote then track search will search the internal disk
and the USB device and play tracks from both. There is no notion of albums on the USB device
because tracks on a USB device have no fixed organisation. So there is no USB album search.
The Rip button on the remote transfers the current track to the USB device. The USB, PLAYLIST,
ALBUM and CD menus support other functions like ripping a whole CD to the USB device.

10
Only MP3 files may be transferred to the USB device. If a track has already been compressed this is
quite rapid but will be slower if ripping direct from CD or from an uncompressed raw track on hard
disk. You cannot add a track on a USB device to a playlist - you must upload it onto the hard disk
first.
Album database
The album database is derived from freedb - a public domain album database. The database is
updated regularly and can be obtained through the arcus website. The database has been compiled by
members of the public over the years so may contain misspellings and other oddities. CDs do not, in
general, contain information about album and track names and a CD has to be identified by the
pattern of track lengths - measured to the nearest 75th of a second. This pattern is a kind of
fingerprint used to find the details in the album database. Often several CDs share the same
fingerprint so you have to pick the right details when loading a CD. On occasions a music publisher
releases different recordings of a CD so the fingerprint on your CD does not match the details in
the database. If that happens you can enter the album name by hand and you may choose to name
favourite tracks by hand.
Standby
arcus MusicStation enters standby mode after several minutes of inactivity. The hard disk is stopped
but the only outward sign is that the source information is removed from the display.
If there are music tracks to be compressed -it happens during standby.
You don’t have to do anything special to turn it back on - just press a button - the hard disk starts
automatically.

11
9.QUICKSTART
Switching MusicStation on and off
The central mains switch is located on the rear of the device above the mains plug. Turn this switch
to ON (symbol I) once all components have been connected.
arcus MusicStation enters standby mode after several minutes of inactivity. The hard disk is stopped
but the only outward sign is that the source information is removed from the display. You don’t have
to do anything special to turn it back on - just press a button - the hard disk starts automatically.
How to Load a CD onto the Hard Disk
Insert the CD
Push the knob to select “Load CD to HD”
Turn the knob to find the album name then push.
How to find and play a track by name
Push the knob to start the menu system.
Turn the knob to select “Track Search” then push.
Turn the knob to pick a letter then push - repeat.
Press Next to see the matches.
Turn the knob to select a matching track

12
10.MENUSYSTEM
arcus MusicStation has a menu system for less immediate operations - like renaming tracks or setting
the clock. The menu system also lets you operate the system entirely from the front panel - without
the remote control. To start the menu from the front panel push the main control knob then turn it
to see the choices - push again to select a choice. To start the menu from the remote press either the
menu button then press up or down to see the choices - press the OK button to select a choice.
The next button takes you from one step to the next. In track search it takes you from text entry to
the matching tracks. If you change your mind and want to go back press the back button - on the
front panel or the remote. Press and hold the back button if you want to exit the menu system
completely. You can often access functions in several ways. It helps to know that you can jump to
the album menu from the track menu or pick a track from the album menu.
The Track search function is found in the main menu and is also started by the Find key on the
remote. Track Search searches the hard disk and/or the USB device for track names containing a
string of letters. Track search is a two step process and you can go back and forth.
Step 1 -enter some letters
Enter letters from the front panel by rotating the main control knob to see the letters then push to
select. Enter letters on the remote using the numeric keys in the same way as texting on a mobile
phone. (Press the “2” key once for “a”, twice for “b” and so on).
arcus MusicStation searches after every letter is entered and displays the number of matching tracks
found.

13
The search is case insensitive and the letters can appear anywhere in the track name so “elv” will
match with “Elvis” and with “velvet”.
Delete the last letter you entered with the Back button on the front panel or the Del button on the
remote.
When the number of matches is low enough press the Next button to look at them -remember you
can come back and add-to or change the letters.
Step 2 -look at the matches
On the front panel turn the main control knob to see matching track names.
On the remote press the up and down keys to see the matching track names.
If you simply want to play the track shown press the Play/ Stop button on the front panel or the
remote.
If you want to do something else with the track - like transfer it to the USB - then push the main
control knob or OK on the remote. This goes to the track menu.
The back key takes you back to step 1.
The Album search function is found in the main menu.
Album search is almost identical to track search except that.
• arcus MusicStation does not search the USB device because USB tracks are not necessarily
organised in albums.
• When you play a matching album arcus MusicStation starts playing the first track on the
selected album - and will turn off random mode so you hear the tracks in order.
• arcus MusicStation starts the album menu - as opposed to the track menu - when you select
a matching album.

14
The History function is found in the main menu and is also started by the History key on the remote.
This function allows you to scroll through tracks you have previously played and replay them.
The track index is shown as a negative number - so minus one means the last track and minus two
means the track before that.
You scroll through the list of previous tracks by turning the main control knob or using the up down
keys on the remote.
The History will record tracks from the internal disk or the USB device but not tracks played from a
CD. Tracks are only recorded once in the history so if you replay a track don’t expect to see it appear
many times.
Browse albums - in the main menu - lets you scroll through the albums stored on the internal disk.
Albums are stored in the order you loaded them.
If you want to play the album press Play.
Press OK or push the main control knob to start the Album menu for more album related functions.

15
This entry in the main menu starts the Playlist menu.
The most common Playlist functions - Add Track and Play - can be done directly on the remote.
The Playlist menu also lets you edit, clear and send playlists to the USB.
This option selects the currently playing track and starts the Track menu. This option only works for
tracks on the internal hard disk.
The Track menu lets you play, delete, rename, add to playlist and copy to usb.
An important option in the track menu is the album menu option. This allows you to select the
album containing the current track - the current album.
This option starts the CD Menu - which lets you play, load to hard disk, rip to USB, update the
album database and play specific CD tracks.
This option starts the USB Menu - which lets you play, load to hard disk, transfer to USB, backup,
restore and related functions.
This option starts the Settings Menu. In the settings menu you will find occasionally needed
functions like setting the time and alarm, setting the compression level and upgrading the firmware.

16
This option selects the Aux. input and starts the Recording Menu. This is used to start and stop
recordings and to set the level and maximum duration of recordings.
You can start recordings directly from the remote control - press the Aux key then press the Rec key.
This option displays a summary of the hard disk usage including number of tracks and albums,
number of mp3 encoded tracks, disk space used and available space.
This option deletes the selected track. You will be asked to confirm the deletion.
This option plays the selected track - you can also press Play anytime in the Track menu.
This option adds the selected track to a playlist.

17
Its quicker to add the currently playing track to a playlist by pressing and holding the corresponding
number key on the remote. The menu option allows you to do it from the front panel - without the
remote. Tracks are added to the end of the playlist.
This option lets you change a track name. This is most useful if an unknown CD is loaded - no entry
in the album database. In that case the tracks are called track1, track2 and so on.
After renaming you will be able to find the track more easily.
New Text
Editing text on the remote is slightly different and offers a bit more flexibility than the front panel.
Front Panel:
You add letters or delete at the cursor -positioned at the end of the text.
Add letters by turning the main control knob to see the letters then push.
Press Back on the front panel to delete letters and press
Next on the front panel when complete.
You cannot add capitals from the front panel.
Remote:
You can add or delete letters and move the cursor - so you can change a single letter in the middle of
a track name for instance.
Enter letters on the remote using the numeric keys in the same way as texting on a mobile phone.
(Press the “2” key once for “a”, twice for “b” and so on).
Capital letters appear after the lower case letters on the same key - so keep pressing.
Delete with the Del key on the remote.

18
Move the cursor left and right with the Prev and Next keys on the remote - these have a two way
arrow underneath as a reminder.
Press OK on the remote when done.
The name of the track will generally be longer than the display can accommodate so only part of the
name near the cursor may be shown.
This option selects the album for the selected track and starts the Album menu.
The Album menu lets you play, delete & rename albums or copy the whole album to usb.
This option transfers the selected track to the USB device.
You can also transfer the current track to the USB by pressing the Rip key on the remote.
Sometimes you may want to specify a target directory on the USB device. For instance some mobile
telephones will only play MP3s if they are in the correct directory -like “music” or “mp3”.
The target directory can be specified using the USB directory option in the USB menu.
This option deletes the selected album. You will be asked to confirm the deletion.
This option plays the selected album -you can also just press Play at any point in the Album menu.
This option allows you to pick a track from the selected album.
Table of contents