Aria STUDIOTRACK IIII R504 User manual

ARIA STUDIOTRACK IIII R504
4-Channel Multi-Track Recorder
ARIA STUDIOTRACK IIII R504
Page 1of 9
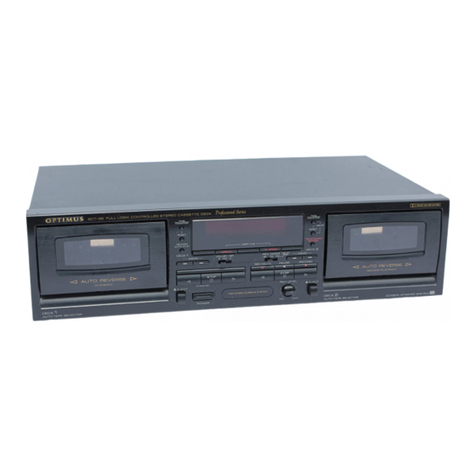
The ARIA STUDIOTRACK IIII 504 is a high-quality multi-track cassette recorder
capable of producing professional musical recordings and demo tapes. It is
recommended for rack-mounting in a standard 18” equipment rack, or can be
used as a stand-alone unit on a desktop.
All user inputs and control surfaces are on the front of the unit, providing easy
access while recording. Standard ¼” jacks are used for inputs and headphones.
Multiple RCA outputs on the rear of the unit allow for mix monitoring, separate
track monitoring, effects loops and master mixes. A footswitch jack is provided
for punch-in recording.
Each channel has an individual VU Meter to monitor recording and playback
levels, reducing the possibility of distortion during tracking. A pitch knob adjusts
the speed of pre-recorded material to matchthe tuning of different instruments.
Recorded channels can be “bounced” to other tracks, allowing more than four
tracks to be recorded in a single mix. Individual or multiple tracks can be
monitored “solo” to listen to a performance without background instruments.
Front
Panel
Rear Panel

ARIA STUDIOTRACK IIII R504
4-Channel Multi-Track Recorder
ARIA STUDIOTRACK IIII R504
Page 2of 9
Setup Connections
The Aria Studiotrack IIII R504 is designed to be rack-mounted in a standard 18”
rack. The unit requires 110V AC power. Make all audio connections before
applying power to the unit.
Monitor and Mix Connections
Connect MONITOR OUT to a local monitoring system or power amplifier for
monitoring playback during recording. MONITOR OUT is an optional connection.
Connect MIXDOWN OUT to a final recording device such as a computer,
MiniDisc recorder,or tape recorder.
Line Out Connections
The LINE OUT connections provide an RCA line-level output for each channel.
These areuseful if you want to output each channel separately, instead of
outputting a stereo mix.
MONITOR and MIX Connections
R
L
MONITOR
OUT
M
IXDOWN
OUT
R
L
LINE OUT
2134

ARIA STUDIOTRACK IIII R504
4-Channel Multi-Track Recorder
ARIA STUDIOTRACK IIII R504
Page 3of 9
The EFFECT RETURN and EFFECT SEND connections are normally
connected. The unit ships with normallyclosed “U-Joint” connections. To use
outboard effects such as reverb, compression or delay, remove the “U-Joint”
connection, and connect the EFFECT SEND to the input of the effect. Then
return the signal from the effect to the EFFECT RETURN.
The Remote Foot Switch is a ¼” connection designed for“punch-in”during
recording. The connection is for a momentary contact, normally open switch.
When closed, this switch activates the record function of the unit, and begins
recording on all channels that are in record mode.
When all audio connections are made, plug the unit into a standard wall socket or
filtered power connection.
EFFECT RETURN
EFFECT SEND
2
Effects Loop Connections
13
4
2134
REMOTE FOOT
SWITCH
Foot Switch Connection

ARIA STUDIOTRACK IIII R504
4-Channel Multi-Track Recorder
ARIA STUDIOTRACK IIII R504
Page 4of 9
Front Panel Connections
Each channel has Front Panel connections which are designed to be easy to
view andaccess.
The VU Meter displays input and playback levels.
The REC PLAY SEND switch chooses the function of eachchannel:
•REC arms the channel for recording. When record is pressed, or
punched-in from the foot switch, this channel will begin to record.
•PLAY disarms the channel for recording, and monitors playback. When in
this mode, the channel can not be recorded over. When in PLAY mode,
the recording on that channel is safe. It will not be recorded over when
recording other tracks.
•SEND routes the channel for bouncing tracks to a different channel.
The OUT-PAN knob is two controls in one. The middle knob is the output level
for mixdown or playback during recording. The outer knob pans the channel to
the left or right.
Each channel provides a¼” unbalanced line-level (guitar or bass) input and a ¼”
mic-level input. Connect microphones to the MIC input, and line-level signals to
the LINE Input.Never connect a line-level input to theMIC input, as distortion
may occur.
Adjust the input volume by applying a signal (playing your instrument or talking
into your microphone) and turning theINPUT knob until the VU meter begins to
bounce around. Levels in the red zone are subject to distortion, so it is good to
have the average needle position somewhere in the middle.
REC PLAY SEND
INPUT
OUT PAN
MIC
LINE
VU

ARIA STUDIOTRACK IIII R504
4-Channel Multi-Track Recorder
ARIA STUDIOTRACK IIII R504
Page 5of 9
Monitoring and Output Controls
The monitoring and output control section determines what you hear during
playback, and how loud the volume is. This section also includes controls for
pitch and counter.
•PITCH CONTROL changes the speed of the tape to adjust for minor pitch
corrections of different instruments.
•COUNTER shows the position of the tape.
•RESET returns the counter to 000.
•MEMORY STOP causes the rewind function to stop at 000,and not
continue rewinding to the beginning of the tape.
•The 4 MONITOR buttons choose which channel(s) you are monitoring, or
choose the MIX button to hear all channels.
•The MONITOR knob adjusts the volume of the headphone monitoring.
•The OUTPUT knob adjusts the volume of the MIX OUT on the back of the
unit.
•The PHONES jacks are two stereo headphone outputs for individual
monitoring.
MEMORY STOP
PITCH CONTROL
COUNTER
0
0
0
RESET
MIX
1234
MONITOR
MONITOR
OUTPUT
PHONES

ARIA STUDIOTRACK IIII R504
4-Channel Multi-Track Recorder
ARIA STUDIOTRACK IIII R504
Page 6of 9
Tape Transport Section
The Tape Transport section controls playback and recording of the tape, and
power to the unit. It uses standard transport buttons:
•POWER turns on AC power to the unit
•EJECT ejects the tape. EJECT will not function while the tape is moving.
•STOP stops the tape transport, including playback and recording.
•REW rewinds the tape. If MEMORYSTOP is enabled, the tape will stop
rewinding at 000.
•FF fast-forwards the tape.
•PAUSE releases the tape transport for playback or recording. Releasing
the PAUSE button when the recorder is armed for recording begins the
recording.
•PLAY starts playback of the tape transport. If PAUSE has beenpressed,
the transport will wait to begin playback until PAUSE is released.
•REC arms the unit for recording. When the tape is stopped, REC must be
pressed in conjunction withPLAY to arm the system.
•The FOOT SWITCH input on the rear of the unit causes the unit to go into
REC mode during playback.
EJECT
REW
PAUSE
REC
STOP
PLAY
FF
POWER

ARIA STUDIOTRACK IIII R504
4-Channel Multi-Track Recorder
ARIA STUDIOTRACK IIII R504
Page 7of 9
Using the Unit for Multi-Track Recording
The ARIA STUDIOTRACK IIII can be used to make high-quality multi-track
recordings.
Example 1, Simultaneously record 3 tracks at once
Input a Drum Machine to Channel 1
Input a Bass Player to Channel 2
Input a Guitar Player to Channel 3
Set the input switch on channels 1, 2, and 3 toREC
Set the Input switch on channel 4 toPLAY
Set the levels on tracks 1, 2, and 3 by playing the instrument, and turning the
input knob so that the VU meter is at an acceptable level.
Reset the tape counter to 000 by pressingRESET
Place the unit inmemory stop mode, by pressing the MEMORY STOP button.
Press PAUSE
Simultaneously press REC and PLAY.
The REC and PLAY buttonsilluminate, and the unit is armed for
recording, but does not start.
Connect stereo headphones to the two headphone jacks, and adjust the volume
to a comfortable level by using the MONITOR knob.
When you are ready to record, press the PAUSE button. The tape mechanism
begins. Wait to begin playing, leaving room for the un-recordable tape leader at
the beginning of the tape.
Press the RESET button just before you begin to play your song.
Begin playing your song. The unit will record each track separately.
When you are finished playing, press STOP to stop the tape mechanism.
Press REW, and the tape will rewind to 000 (in memory stop mode)
Switch channels 1, 2, and 3 to PLAY mode, then press PLAY to hear the
playback. Adjust the mix by turning the OUTPUT knobs on each track. For a
stereo effect, pan each channel left or right using thePAN knobs.

ARIA STUDIOTRACK IIII R504
4-Channel Multi-Track Recorder
ARIA STUDIOTRACK IIII R504
Page 8of 9
Example 2, Bounce 3 tracks to one track
Record a song as in Example 1, leaving track4 unrecorded.
Press STOP, thenREW to return the tape to the beginning of the song.
Press PLAY on the tape transport to start playback.
Use theOUTPUT knobs of each channel to get a good mix. Set PAN controls to
center.
NOTE: Each channel is a MONO channel. ThereforePAN controls should be set
to the center when bouncing tracks.
Switch channels 1, 2, and 3 toSEND, and switch channel 4 to REC
(You will be SENDing the 3 channels to beRECorded on Track 4)
When you are ready to bounce tracks, press PAUSE, then simultaneously press
REC and PLAY on the tape transport. To start recording, press PAUSE again.
Monitor the recording with headphones
Wait until the song finishes, and rewind the tape.
Switch channel 4 intoPLAY mode, and press the MONITOR button for track 4.
This puts track 4 in “Solo” mode.
(NOTE: The same function can be accomplished by turning the OUTPUT knob of
track 4 to an acceptable level, and turningchannels 1, 2, and 3 OUTPUT knobs
all the way down to zero.)
Listen to the playback on Channel 4 to be sure the mix and pan is right. If it
needs tweaking, start from the top again.
When you have bounced tracks 1, 2, and 3 over to track 4, you may record new
material on tracks 1, 2, and 3. Track 4 remains as the mix of tracks 1, 2, and 3.
Remember, switching a track toPLAY mode prevents that track from being
recorded. It is a “safety” switch to prevent accidentally erasing the track.
Tracks can be bounced as many times as you like. However to prevent sound
degradation, it is recommended that tracks only be bounced once. In the
example above, track 4 should not be sent to another track. Using this method,
your 4-track recorder can produce a high-quality mix with as many as 7 different
takes.

ARIA STUDIOTRACK IIII R504
4-Channel Multi-Track Recorder
ARIA STUDIOTRACK IIII R504
Page 9of 9
Mixing-Down Tracks to a Master Copy
Whenyou have recorded, bounced, mixed and panned each track, you should
output the mix to a “master” recording. The master can be recorded on a
Computer, MiniDisc Recorder, tape recorder, or any device which records audio.
On the rear of the unit are the MIXDOWN OUT jacks. Use these outputs to
connect to your master recording device.
Be sure all tracks are in PLAY mode, and begin playback. Record the master
mix with your computer or other recording device. Adjust the recording volume
on the recording device, and use the OUTPUT knob on the front of the unit to
control the output volume of the 4-track recorder.
With a master mix, your song canquicklybe duplicatedfor your friends and fans,
or made into a CD.
Table of contents

