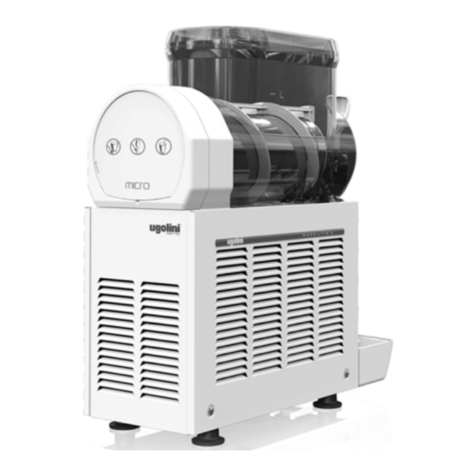
ASM SSM52 Installation manual

CHECK IF SEALS LUBED BY LOOKING (IF HANDLES DON’T STICK IT IS GENERALLY LUBED FROM FACTORY
TO YOU). BEFORE FIRST USE, WASH OUT BOWLS WITH WATER & LUBRICATE THE SEALS ONLY IF REQUIRED
– Refer to Maintenance Instructions if lubrication required. Allow extra time to freeze up on initial use.
ONLY PULL HANDLES FORWARD GENTLY (NEVER FORCE). IF MIX IS COMING OUT TOO SLOWLY DISLODGE
ANY ICE OBSTRUCTION IN BOTTOM OF TAP POURER WITH THE END OF A STRAW WHILST HOLDING
HANDLE DOWN & IN EXTREME CASES TEMPORARILY TURN OFF MIDDLE “ICEY” SWITCH FOR APPROX 30
MINS ONLY TO ALLOW MIX TO THIN OUT. When mixture is low adding alcohol will also free up remaining
mix (water will not – do not add any more water) Please always mix concentrate STRICTLY 1:4 (2 litres
concentrate to 8 litres clean clear water) Any deviation from this WILL damage the unit.
Always turn unit oby rear power button or Power Point before adding mix or alcohol. If unit is not
freezing up on one side after 60-90 mins then turn oswitches at side and wait 15 seconds then turn back
to reset freeze mechanism please.
Ensure the 2 switches (looking from side) on each chamber are set during use to on position (up) freeze
and auger is also turning and on. Provided mix is correctly made up the unitwill not over-freeze during use.
Unit may experience some drips via the tap valves – this is normal and the drip trays will catch any drips.
You may pour back in or discard dripped mix…once the mix is frozen the drips will generally cease.
Never add extra water or cordial or any other material as results will be unpleasant and you will risk
permanently damaging the machine – ADD 8 litres per side (12 litre units) – alcohol can be added after mix
freezes as it is an anti-freezant but extra water will cause the unit to freeze up breaking internal gearing
mechanisms. We would usually suggest adding 700ml of alcohol (say rum, tequila, gin, etc) to each side
after it has frozen – On extremely hot days allow plenty of extra time to freeze up.
EMPTY & RINSE UNIT WITH COLD WATER & RADICATE* AND FLUSH
START UP
INSTRUCTIONS
WATCH VIDEO ON OUR HOME PAGE FIRST AS THIS MAKES IT EASY!
IMPORTANT
NOTE
6 Litre (SSM52) Machines require only 1 litre mix: 4 litres water
12 Litre Machines (SSM180, SSM280, SSM420, SSM520) require 2 litres mix: 8 litres water
The Cocktail Slush unit weighs approximately 54kg without the mix
in it – extreme care should be taken when moving the unit and a
rm secure base is required for the unit to sit on – plastic tressle
tables are not appropriate. It is recommended the unit have its’ own
power supply as it has a high amperage. You have been provided
with a new unit. Unit should only take 45 to 90 minutes to freeze
the mix into frozen slushees - if it is to used outdoors it is highly
recommended it is used under heavy shade or frozen indoors rst
as this will eect the unit's ability to freeze the mix.
Any Questions Regarding Use of the Cocktail unit from Australian Slush Machines
1.1
1.2
1.3
1.4
1.5
1.6
IMPORTANT
NOTE
www.australianslushmachines.com.au
MAINTENANCE
INSTRUCTIONS
IMPORTANT
NOTE Note: for 6 litre Mini Slush units half the recommended bottle (syrup) allowance
Thoroughly clean unit after each use and regularly clean and lubricate all the seals. We recommend
Radicate *to clean the units.
View Our Easy Cleaning & Set Up Video - Go to our Home Page: www.australianslushmachines.com.au
To Clean Use Warm (Not Hot) Soapy Water and rinse unit thoroughly – refer to instruction manual for
further instructions and maintenance.
Remove bowl and wash thoroughly – also remove and clean the rear rubber seal and the tap mechanism
and rubbers as well as the handle and pin and the white turning auger and stopper. Lubricate all the
rubber seals on and behind and for ease of removing bowl next time simply rub some lube on the circular
rear base of the bowl prior to reattachment – when reattaching ensure rubber is not pinched or caught in
the rear of the plastic bowl as this can cause unnecessary leakages.
Lie bowl on a table on its side and remove the spring and tap mechanism to clean. It is recommended to
pull one handle mechanism apart at a time so you can see how to put it back together exactly. Also lubri-
cate the shaft seals at the front of the cylinder prior to reattaching the white plastic auger.
Do not get water into the workings of the actual machine.
Available from us at $25 per bottle of concentrate (plus freight).
(email : [email protected] to order)
*
Lubrication
Proper lubrication of machine parts must be done to manufacturers’ instructions to ensure proper opera-
tion of soft serve machines and prevent damage.
Only approved food-grade lube must be used on all machine parts.
Ensure that you replace the cap after lubrication because dirt and dust will stick to it if left open. This may
pose a potential risk for contamination.
Ensure that you also sanitize outside of tube before handling machine parts for lubrication and re-assem-
bly.
should be directed to 044SLUSHGO or 0447587446 or [email protected]
IMPORTANT: Always get electrical equipment tagged and tested by an electrician prior to use.

Sanitizing and Hygiene
-
fectant soap and dry with a paper towel.
the outside of the tube before handling it to lubricate machine parts.
regulations must also be checked.
Strictly follow the guidelines and recommendations for operation and cleaning
of your machine
The bowl lifts up and moves forward to come and you remove the rear white seal and lube behind it
-
semble...
Lube rear of bowl where it meets ring at rear to assist re assembly.....white auger can be removed from
cylinder for cleaning...lube the spindle and seal where the auger meets the cylinder.
To reattach simply place back over silver cylinder and turn gently until you
feel the spring move into place and then reattach bowl and ensure it snugly
clips back down into place and rear seal does not get pinched during
reattachment.
As far as maintaining the machine - you of course need to keep them clean
and cleaning them takes minutes - every hire you need to rinse the bowls
with the petroleum jelly lubricant and ensure you lubricate the shaft seals to
avoid wear and tear and leakage - all parts however are replaceable and we
have some very good people who can do it if ever necessary. Parts are not
expensive by any means.
You can use any Granita mix but we wholesale it for $59 a case plus freight
so we are very cheap for the concentrate (6 x 2 litre concentrate per case -
makes 60 litres 4:1 water)
Bacteria needs water to survive. Air-Dry all machine parts after cleaning and sanitizing
should be directed to 044SLUSHGO or 0447587446 or [email protected]

The main thing is to ensure you adequately lubricate the shaft seals at the end of the shaft where the
bowl attaches and the ring behind the bowl and this should take around 10 mins - this is essential to
maintain the unit and ensure trouble free use and that no leaks occur.
the bowl lifts up and moves forward to come and you remove the rear white seal and lube behind it
reassemble...
Lube rear of bowl where it meets ring at rear to assist re assembly.....white auger can be removed from
cylinder for cleaning...lube the spindle and seal where the auger meets the cylinder.
To reattach simply place back over silver cylinder and turn gently until you feel the spring move into
place and then reattach bowl and ensure it snugly clips back down into place and rear seal does not get
pinched during reattachment.
Troubleshooting
stretched/pinched rear seal
Check all switches are up & on – auger needs to be turning and freeze switch needs to be
loosen 2 screws on cover each side with a Philips screwdriver to allow arm to move and
turn unit back on, you should hear a click when freezing mechanism comes into play.
If unit will not dispense please check outlet hole near tap and dislodge any ice gently by
inserting the end of a plastic straw up through the nozzle to clear any obstruction.
Leaking
Not
freezing up
Thankyou...
should be directed to 044SLUSHGO or 0447587446 or [email protected]

Warranty
Warranty oered by ASM applies to machines that have been used with Professional Granita
concentrate syrup supplied by ASM. Other product or use of non compatible products may render
warranty void.
-
tive in any way…if the unit is not defective the customer will need to pay return freight
period of 12 months…further warranty applies to bowls, pins, handles and motor/com-
Unit needs to be sent in original packaging (or near to as can be reasonably expected &
packed well) and insured at sender's expense one way to us (ASM , 64 Baden Powell Dve ,
Frankston Sth 3199). We must be pre warned to expect unit and it is to be booked in for
repair with serial number and copy of original tax invoice showing full details and date of
purchase & where purchased. If unit is damaged in transit the onus is on the sender.
Customer needs to be using prescribed slush mix from ASM to qualify for full warranty
and needs to have read and fully complied with instruction manual provided by ASM at
time of purchase.
Failure to comply with any of the above will result in a warranty claim being denied..
www.AustralianSlushMachines.com.au
should be directed to 044SLUSHGO or 0447587446 or [email protected]
This manual suits for next models
4
Table of contents
Popular Beverage Dispenser manuals by other brands

Cornelius
Cornelius IntelliCarb Cold Beverage Dispenser Training manual

Bunn
Bunn JDF-2S Specification sheet

Cornelius
Cornelius 2 Flavor Post-Mix Cold Coffee Dispenser Quest... Technical specifications

Coca-Cola
Coca-Cola Post Mix System manual

Crathco
Crathco G23-2B Operator's manual

Cecilware
Cecilware MT-1P-UL Operator's manual

By The Glass
By The Glass Standard Series Instructions for use

Cornelius
Cornelius R-404A REFRIGERANT Service manual

Bunn
Bunn FMD-1 OPERATING & SERVICE MANUAL

Elkay
Elkay SmartWell Replacement manual

Polar Refrigeration
Polar Refrigeration GF489 instruction manual

Benchmark USA
Benchmark USA 21011 owner's manual