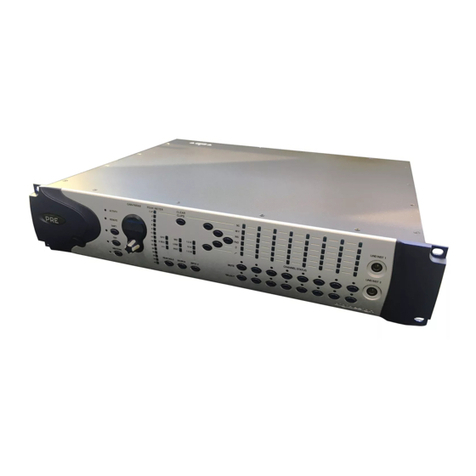
Avid Technology Eleven Rack User manual

User Guide
Version 8.0.1

Legal Notices
This guide is copyrighted ©2009 by Avid Technology, Inc, with
all rights reserved. Under copyright laws, this guide may not be
duplicated in whole or in part without the written consent of
Avid Technology, Inc.
003, 96 I/O, 96i I/O, 192 Digital I/O, 192 I/O, 888|24 I/O,
882|20 I/O, 1622 I/O, 24-Bit ADAT Bridge I/O, AudioSuite,
Avid, Avid DNA, Avid Mojo, Avid Unity, Avid Unity ISIS,
Avid Xpress, AVoption, Axiom, Beat Detective, Bomb Factory,
Bruno, C|24, Command|8, Control|24, D-Command, D-Control,
D-Fi, D-fx, D-Show, D-Verb, DAE, Digi 002, DigiBase,
DigiDelivery, Digidesign, Digidesign Audio Engine, Digidesign
Intelligent Noise Reduction, Digidesign TDM Bus, DigiDrive,
DigiRack, DigiTest, DigiTranslator, DINR, D-Show, DV Toolkit,
EditPack, Eleven, Eleven Rack, HD Core, HD Process, Hybrid,
Impact, Interplay, LoFi, M-Audio, MachineControl, Maxim,
Mbox, MediaComposer, MIDI I/O, MIX, MultiShell, Nitris, OMF,
OMF Interchange, PRE, ProControl, Pro Tools M-Powered,
Pro Tools, Pro Tools|HD, Pro Tools LE, QuickPunch, Recti-Fi,
Reel Tape, Reso, Reverb One, ReVibe, RTAS, Sibelius,
Smack!, SoundReplacer, Sound Designer II, Strike, Structure,
SYNC HD, SYNC I/O, Synchronic, TL Aggro, TL AutoPan, TL
Drum Rehab, TL Everyphase, TL Fauxlder, TL In Tune, TL
MasterMeter, TL Metro, TL Space, TL Utilities, Transfuser,
Trillium Lane Labs, Vari-Fi Velvet, X-Form, and XMON are
trademarks or registered trademarks of Digidesign and/or Avid
Technology, Inc. Xpand! is Registered in the U.S. Patent and
Trademark Office. All other trademarks are the property of their
respective owners.
This product is subject to the terms and conditions of a
software license agreement provided with the software. The
product may only be used in accordance with the license
agreement.
Product features, specifications, system requirements, and
availability are subject to change without notice.
Guide Part Number 9324-61285-00 REV A July, 2009
Documentation Feedback
At Digidesign, we're always looking for ways to improve our
documentation. If you have comments, corrections, or
suggestions regarding our documentation, email us at
Communications and Safety Regulation Information
Compliance Statement
This model Digidesign Eleven Rack complies with the following
standards regulating interference and EMC:
• FCC Part 15 Class B
• EN 55103-1 E1 Class B
• EN 55103-2 E1 Class B
• AS/NZS 3548 Class B
• CISPR 22 Class B
Radio and Television Interference
This equipment has been tested and found to comply with the
limits for a Class B digital device, pursuant to Part 15 of the
FCC Rules.
Any modifications to the unit, unless expressly approved by
Digidesign, could void the user's authority to operate the
equipment.
DECLARATION OF CONFORMITY
We Digidesign,
2001 Junipero Serra Boulevard, Suite 200
Daly City, CA 94014 USA
tel: 650-731-6300
declare under our sole responsibility that the product
Eleven Rack
complies with Part 15 of FCC Rules.
Operation is subject to the following two conditions: (1) this
device may not cause harmful interference, and (2) this
device must accept any interference received, including
interference that may cause undesired operation.
Communication Statement
NOTE: This equipment has been tested and found to comply
with the limits for a Class B digital device, pursuant to Part
15 of the FCC Rules. These limits are designed to provide
reasonable protection against harmful interference in a
residential installation. This equipment generates, uses,
and can radiate radio frequency energy and, if not installed
and used in accordance with the instructions, may cause
harmful interference to radio communications. However,
there is no guarantee that interference will not occur in a
particular installation. If this equipment does cause harmful
interference to radio or television reception, which can be
determined by turning the equipment off and on, the user is
encouraged to try and correct the interference by one or
more of the following measures:
• Reorient or locate the receiving antenna.
• Increase the separation between the equipment and
receiver.
• Connect the equipment into an outlet on a circuit
different from that to which the receiver is connected.
• Consult the dealer or an experienced radio/TV technician
for help.
Eleven Rack

CE Compliance Statement:
Digidesign is authorized to apply the CE (Conformité
Europénne) mark on this compliant equipment thereby
declaring conformity to EMC Directive 89/336/EEC and Low
Voltage Directive 73/23/EEC.
Safety Statement
This equipment has been tested to comply with USA and
Canadian safety certification in accordance with the
specifications of UL Standards: UL60065 7th /IEC 60065 7th
and Canadian CAN/CSA C22.2 60065:03. Digidesign Inc., has
been authorized to apply the appropriate UL & CUL mark on its
compliant equipment.
Warning
Important Safety Instructions
1) Read these instructions.
2) Keep these instructions.
3) Heed all warnings.
4) Follow all instructions.
5) Do not use this apparatus near water.
6) Clean only with dry cloth.
7) Do not block any ventilation openings. Install in accordance
with the manufacturer’s instructions.
8) Do not install near any heat sources such as radiators, heat
registers, stoves, or other apparatus (including amplifiers) that
produce heat.
9) Do not defeat the safety purpose of the polarized or
grounding-type plug. A polarized plug has two blades with one
wider than the other. A grounding type plug has two blades and
a third grounding prong. The wide blade or the third prong are
provided for your safety. If the provided plug does not fit into
your outlet, consult an electrician for replacement of the
obsolete outlet.
10) Protect the power cord from being walked on or pinched
particularly at plugs, convenience receptacles, and the point
where they exit from the apparatus.
11) Only use attachments/accessories specified by the
manufacturer.
12) Unplug this apparatus during lightning storms or when
unused for long periods of time.
13) Refer all servicing to qualified service personnel. Servicing
is required when the apparatus has been damaged in any way,
such as power-supply cord or plug is damaged, liquid has been
spilled or objects have fallen into the apparatus, the apparatus
has been exposed to rain or moisture, does not operate
normally, or has been dropped.
14) The apparatus shall not be exposed to drippings or
splashing and no objects filled with liquids (such as vases)
shall be placed on the apparatus.
Warning! To reduce the risk of fire or electric shock, do not
expose this apparatus to rain or mositure.
15) The apparatus should be connected to a properly-grounded
(earthed) receptable.
16) The mains switch is located on the front of the Eleven
Rack. It should remain accessible after installation.

Contents v
Contents
Part I Playing Guitar through Eleven Rack
Chapter 1. Introduction . . . . . . . . . . . . . . . . . . . . . . . . . . . . . . . . . . . . . . . . . . . . . . . . . . . . . . . . 3
Quick Start Instructions . . . . . . . . . . . . . . . . . . . . . . . . . . . . . . . . . . . . . . . . . . . . . . . . . . . . 3
System Requirements and Compatibility . . . . . . . . . . . . . . . . . . . . . . . . . . . . . . . . . . . . . . . . 4
Getting Around This Guide . . . . . . . . . . . . . . . . . . . . . . . . . . . . . . . . . . . . . . . . . . . . . . . . . . 5
Conventions Used in This Guide . . . . . . . . . . . . . . . . . . . . . . . . . . . . . . . . . . . . . . . . . . . . . . 5
Chapter 2. Hardware Overview. . . . . . . . . . . . . . . . . . . . . . . . . . . . . . . . . . . . . . . . . . . . . . . . . . . 7
Eleven Rack Front Panel . . . . . . . . . . . . . . . . . . . . . . . . . . . . . . . . . . . . . . . . . . . . . . . . . . . 7
Eleven Rack Back Panel . . . . . . . . . . . . . . . . . . . . . . . . . . . . . . . . . . . . . . . . . . . . . . . . . . 10
Chapter 3. Exploring Rigs. . . . . . . . . . . . . . . . . . . . . . . . . . . . . . . . . . . . . . . . . . . . . . . . . . . . . . 13
Overview . . . . . . . . . . . . . . . . . . . . . . . . . . . . . . . . . . . . . . . . . . . . . . . . . . . . . . . . . . . . . 13
Rig Select Mode . . . . . . . . . . . . . . . . . . . . . . . . . . . . . . . . . . . . . . . . . . . . . . . . . . . . . . . . 13
Rig Organization . . . . . . . . . . . . . . . . . . . . . . . . . . . . . . . . . . . . . . . . . . . . . . . . . . . . . . . . 14
Selecting Rigs Live . . . . . . . . . . . . . . . . . . . . . . . . . . . . . . . . . . . . . . . . . . . . . . . . . . . . . . 14
What’s In A Rig? . . . . . . . . . . . . . . . . . . . . . . . . . . . . . . . . . . . . . . . . . . . . . . . . . . . . . . . . 15
Rig View. . . . . . . . . . . . . . . . . . . . . . . . . . . . . . . . . . . . . . . . . . . . . . . . . . . . . . . . . . . . . . 15
Rig Device and Utility Settings in Rig View . . . . . . . . . . . . . . . . . . . . . . . . . . . . . . . . . . . . . . 16
Signal Routing . . . . . . . . . . . . . . . . . . . . . . . . . . . . . . . . . . . . . . . . . . . . . . . . . . . . . . . . . 18
Control Pages . . . . . . . . . . . . . . . . . . . . . . . . . . . . . . . . . . . . . . . . . . . . . . . . . . . . . . . . . . 19
Saving Your Work . . . . . . . . . . . . . . . . . . . . . . . . . . . . . . . . . . . . . . . . . . . . . . . . . . . . . . . 19
The Amps. . . . . . . . . . . . . . . . . . . . . . . . . . . . . . . . . . . . . . . . . . . . . . . . . . . . . . . . . . . . . 20
General Amp Controls . . . . . . . . . . . . . . . . . . . . . . . . . . . . . . . . . . . . . . . . . . . . . . . . . . . . 24
The Speaker Cabinets . . . . . . . . . . . . . . . . . . . . . . . . . . . . . . . . . . . . . . . . . . . . . . . . . . . . 25
The Microphones. . . . . . . . . . . . . . . . . . . . . . . . . . . . . . . . . . . . . . . . . . . . . . . . . . . . . . . . 26
The Effects . . . . . . . . . . . . . . . . . . . . . . . . . . . . . . . . . . . . . . . . . . . . . . . . . . . . . . . . . . . . 27
General Effects Controls. . . . . . . . . . . . . . . . . . . . . . . . . . . . . . . . . . . . . . . . . . . . . . . . . . . 32
Don’t Forget to Save!. . . . . . . . . . . . . . . . . . . . . . . . . . . . . . . . . . . . . . . . . . . . . . . . . . . . . 32
Chapter 4. Eleven Rack Live Setup . . . . . . . . . . . . . . . . . . . . . . . . . . . . . . . . . . . . . . . . . . . . . . 33
Basic Live Setup . . . . . . . . . . . . . . . . . . . . . . . . . . . . . . . . . . . . . . . . . . . . . . . . . . . . . . . . 34
Using an Amp Onstage . . . . . . . . . . . . . . . . . . . . . . . . . . . . . . . . . . . . . . . . . . . . . . . . . . . 35
Effects and Foot Controllers . . . . . . . . . . . . . . . . . . . . . . . . . . . . . . . . . . . . . . . . . . . . . . . . 37
External Foot Controllers . . . . . . . . . . . . . . . . . . . . . . . . . . . . . . . . . . . . . . . . . . . . . . . . . . 38
Display Mode and Visibility. . . . . . . . . . . . . . . . . . . . . . . . . . . . . . . . . . . . . . . . . . . . . . . . . 38

Eleven Rack User Guidevi
Part II Setting Up and Using Pro Tools With Eleven Rack
Chapter 5. Installing Pro Tools on Mac . . . . . . . . . . . . . . . . . . . . . . . . . . . . . . . . . . . . . . . . . . 41
Installation Overview. . . . . . . . . . . . . . . . . . . . . . . . . . . . . . . . . . . . . . . . . . . . . . . . . . . . . 41
Installing Pro Tools LE and Connecting Eleven Rack. . . . . . . . . . . . . . . . . . . . . . . . . . . . . . . 41
Launching Pro Tools LE. . . . . . . . . . . . . . . . . . . . . . . . . . . . . . . . . . . . . . . . . . . . . . . . . . . 43
Additional Software on the Pro Tools Installer Disc . . . . . . . . . . . . . . . . . . . . . . . . . . . . . . . 43
Uninstalling Pro Tools . . . . . . . . . . . . . . . . . . . . . . . . . . . . . . . . . . . . . . . . . . . . . . . . . . . . 44
Chapter 6. Installing Pro Tools On Windows . . . . . . . . . . . . . . . . . . . . . . . . . . . . . . . . . . . . . . 45
Installation Overview. . . . . . . . . . . . . . . . . . . . . . . . . . . . . . . . . . . . . . . . . . . . . . . . . . . . . 45
Installing Pro Tools LE and Connecting Your Interface . . . . . . . . . . . . . . . . . . . . . . . . . . . . . 46
Launching Pro Tools LE. . . . . . . . . . . . . . . . . . . . . . . . . . . . . . . . . . . . . . . . . . . . . . . . . . . 48
Additional Software on the Pro Tools Installer Disc . . . . . . . . . . . . . . . . . . . . . . . . . . . . . . . 48
Uninstalling Pro Tools . . . . . . . . . . . . . . . . . . . . . . . . . . . . . . . . . . . . . . . . . . . . . . . . . . . . 50
Chapter 7. Pro Tools Configuration. . . . . . . . . . . . . . . . . . . . . . . . . . . . . . . . . . . . . . . . . . . . . . 51
Starting Up or Shutting Down Your System . . . . . . . . . . . . . . . . . . . . . . . . . . . . . . . . . . . . . 51
Configuring Pro Tools LE . . . . . . . . . . . . . . . . . . . . . . . . . . . . . . . . . . . . . . . . . . . . . . . . . . 52
Optimizing a Mac System for Pro Tools. . . . . . . . . . . . . . . . . . . . . . . . . . . . . . . . . . . . . . . . 59
Optimizing a Windows System for Pro Tools . . . . . . . . . . . . . . . . . . . . . . . . . . . . . . . . . . . . 62
Chapter 8. Eleven Rack Studio Setup. . . . . . . . . . . . . . . . . . . . . . . . . . . . . . . . . . . . . . . . . . . . 67
Listen to Your Sound . . . . . . . . . . . . . . . . . . . . . . . . . . . . . . . . . . . . . . . . . . . . . . . . . . . . 68
Analog Audio Inputs . . . . . . . . . . . . . . . . . . . . . . . . . . . . . . . . . . . . . . . . . . . . . . . . . . . . . 68
Digital Audio Input and Output. . . . . . . . . . . . . . . . . . . . . . . . . . . . . . . . . . . . . . . . . . . . . . 69
MIDI Connections . . . . . . . . . . . . . . . . . . . . . . . . . . . . . . . . . . . . . . . . . . . . . . . . . . . . . . . 70
Using Eleven Rack with a Pro Tools|HD or M-Powered System . . . . . . . . . . . . . . . . . . . . . . . 71
Chapter 9. Eleven Rack with Pro Tools . . . . . . . . . . . . . . . . . . . . . . . . . . . . . . . . . . . . . . . . . . 75
Pro Tools LE Capabilities . . . . . . . . . . . . . . . . . . . . . . . . . . . . . . . . . . . . . . . . . . . . . . . . . . 75
The Eleven Rack Control Window . . . . . . . . . . . . . . . . . . . . . . . . . . . . . . . . . . . . . . . . . . . . 76
Accessing the Eleven Rack Control Window . . . . . . . . . . . . . . . . . . . . . . . . . . . . . . . . . . . . 77
Rig View Section . . . . . . . . . . . . . . . . . . . . . . . . . . . . . . . . . . . . . . . . . . . . . . . . . . . . . . . 78
Master Control Section . . . . . . . . . . . . . . . . . . . . . . . . . . . . . . . . . . . . . . . . . . . . . . . . . . . 82
Recording Guitars. . . . . . . . . . . . . . . . . . . . . . . . . . . . . . . . . . . . . . . . . . . . . . . . . . . . . . . 83
Embedding Rig Settings in Audio Regions. . . . . . . . . . . . . . . . . . . . . . . . . . . . . . . . . . . . . . 84
Re-Amping. . . . . . . . . . . . . . . . . . . . . . . . . . . . . . . . . . . . . . . . . . . . . . . . . . . . . . . . . . . . 86
Controlling Eleven Rack Parameters with MIDI Data . . . . . . . . . . . . . . . . . . . . . . . . . . . . . . 87

Contents vii
Part III Reference
Chapter 10. User Options. . . . . . . . . . . . . . . . . . . . . . . . . . . . . . . . . . . . . . . . . . . . . . . . . . . . . . 91
Exploring the User Options . . . . . . . . . . . . . . . . . . . . . . . . . . . . . . . . . . . . . . . . . . . . . . . . . 91
User Options . . . . . . . . . . . . . . . . . . . . . . . . . . . . . . . . . . . . . . . . . . . . . . . . . . . . . . . . . . . 91
Chapter 11. Controlling Eleven Rack with MIDI. . . . . . . . . . . . . . . . . . . . . . . . . . . . . . . . . . . . 95
Eleven Rack MIDI CC Controllers. . . . . . . . . . . . . . . . . . . . . . . . . . . . . . . . . . . . . . . . . . . . . 95
Chapter 12. Hard Drive Configuration and Maintenance . . . . . . . . . . . . . . . . . . . . . . . . . . . . . 99
Avoid Recording to the System Drive. . . . . . . . . . . . . . . . . . . . . . . . . . . . . . . . . . . . . . . . . . 99
Supported Drive Formats and Drive Types . . . . . . . . . . . . . . . . . . . . . . . . . . . . . . . . . . . . . . 99
Formatting an Audio Drive . . . . . . . . . . . . . . . . . . . . . . . . . . . . . . . . . . . . . . . . . . . . . . . . 100
Partitioning Drives. . . . . . . . . . . . . . . . . . . . . . . . . . . . . . . . . . . . . . . . . . . . . . . . . . . . . . 101
Defragmenting an Audio Drive . . . . . . . . . . . . . . . . . . . . . . . . . . . . . . . . . . . . . . . . . . . . . 102
Using Mac Drives on Windows Systems . . . . . . . . . . . . . . . . . . . . . . . . . . . . . . . . . . . . . . . 103
Hard Disk Storage Space . . . . . . . . . . . . . . . . . . . . . . . . . . . . . . . . . . . . . . . . . . . . . . . . . 104
Chapter 13. Troubleshooting . . . . . . . . . . . . . . . . . . . . . . . . . . . . . . . . . . . . . . . . . . . . . . . . . . 105
Backing Up Your Work . . . . . . . . . . . . . . . . . . . . . . . . . . . . . . . . . . . . . . . . . . . . . . . . . . . 105
Common Issues . . . . . . . . . . . . . . . . . . . . . . . . . . . . . . . . . . . . . . . . . . . . . . . . . . . . . . . 105
Performance Factors . . . . . . . . . . . . . . . . . . . . . . . . . . . . . . . . . . . . . . . . . . . . . . . . . . . . 106
Before You Call Digidesign Technical Support . . . . . . . . . . . . . . . . . . . . . . . . . . . . . . . . . . 106
Chapter 14. Resources. . . . . . . . . . . . . . . . . . . . . . . . . . . . . . . . . . . . . . . . . . . . . . . . . . . . . . . 109
About the Pro Tools Guides . . . . . . . . . . . . . . . . . . . . . . . . . . . . . . . . . . . . . . . . . . . . . . . 109
About www.digidesign.com . . . . . . . . . . . . . . . . . . . . . . . . . . . . . . . . . . . . . . . . . . . . . . . 110

Eleven Rack User Guideviii

1
Part I: Playing Guitar through Eleven Rack

2

Chapter 1: Introduction 3
Chapter 1: Introduction
Quick Start Instructions
You’ve Got Eleven Rack, You’ve
Got Your Guitar. What’s Next?
Eleven Rack is a high-quality audio and MIDI in-
terface, with classic guitar amp and effects pro-
cessing built right in. This means that Eleven
Rack is useful both when recording, and when
playing guitar live or in practice.
At home or in the studio, you can plug guitars,
microphones, and other instruments into
Eleven Rack, and record directly into Pro Tools.
You can use the amp and effects modelling ca-
pabilities of Eleven Rack to process signals as
you record them, or to process previously re-
corded audio.
When away from the computer, you can use
Eleven Rack as a standalone guitar processor,
sending classic guitar tones straight to a venue’s
PA system, to a guitar amp, or both. You can also
simply plug in a pair of headphones and prac-
tice by yourself.
You’re probably excited to start playing with
your new Eleven Rack right away, so let’s get
started!
To get started playing guitar with Eleven Rack:
1 Connect outputs from Eleven Rack to your
monitors or headphones:
• If you’re connecting to self-powered studio
monitors, a stereo power amp and speakers,
or mixer inputs, use the Main outputs.
– or –
• If you’re using a pair of headphones, con-
nect them to the Phones output.
2 Connect your guitar to the Guitar Input on
the front panel of Eleven Rack.
Eleven Rack Main outputs (back panel)
Phones output (front panel)
Guitar input (front panel)

Eleven Rack User Guide4
3 Connect the power cable and set the Power
switch to On. The Eleven Rack logo will appear.
As Eleven Rack warms up, check your guitar to
make sure that its volume is turned up.
4 When the name of the first Rig is displayed,
try playing your guitar. How’s it sound? You may
want to adjust the output volume of Eleven Rack
by turning the Volume knob on the front panel.
5 You can browse through Eleven Rack’s various
preset sounds, called Rigs, by turning the Scroll
wheel.
6 Try adjusting the lit Control Knobs to change
the featured amp or effects settings. You can see
what kind of control each knob is assigned to on
the display.
7 Try pressing the Effects Bypass buttons, like
Dist, Mod, Delay, and Rev, to toggle the various
effects on and off.
System Requirements and
Compatibility
To use Eleven Rack with Pro Tools, you need.
• One of the following:
• A qualified Mac or Windows computer
(when using Eleven Rack with
Pro Tools LE)
– or –
• A qualified Pro Tools|HDTM system run-
ning Pro Tools HD 8.0.1 software or higher
(when using Eleven Rack as an external sig-
nal processing device)
• DVD drive for Installation disc
• Internet access for registration purposes
Avid can only assure compatibility and provide
support for hardware and software it has tested
and approved.
For complete system requirements and a list of
qualified computers, operating systems, hard
drives, and third-party devices, refer to the latest
information on the Digidesign website:
www.digidesign.com/compatibility
Volume knob (front panel)
Scroll wheel (front panel)

Chapter 1: Introduction 5
Getting Around This Guide
There are two main ways to use Eleven Rack. In
Part 1, we’ll cover using Eleven Rack as a live gui-
tar processor, and in Part 2, we’ll get into how to
use Eleven Rack as an audio and MIDI interface,
and effects processor with Pro Tools.
Part 1: Eleven Rack for Guitar
You’re looking at it. In Part 1, we take you
through the hardware features of Eleven Rack in
Chapter 2, “Hardware Overview,” show you
how to edit and create your own Rigs in
Chapter 3, “Exploring Rigs,” and teach you how
to use Eleven Rack as a live guitar processor in
Chapter 4, “Eleven Rack Live Setup.”
Part 2: Working With Pro Tools LE
In Part 2, you can learn how to set up and use
Eleven Rack as part of a Pro Tools system. We
cover installation details in Chapter 5, “Install-
ing Pro Tools on Mac,” and Chapter 6, “Install-
ing Pro Tools On Windows,” setting up your stu-
dio in Chapter 8, “Eleven Rack Studio Setup,”
and getting the most out of Eleven Rack with
Pro Tools in Chapter 9, “Eleven Rack with Pro
Tools.”
Part 3: Reference
In Part 3, we get into the technical details be-
hind the scenes. Learn all about Eleven Rack’s
User Options in Chapter 10, “User Options,”
and how to control Eleven Rack with MIDI in
Chapter 11, “Controlling Eleven Rack with
MIDI.” Hard drive setup for Pro Tools, general
troubleshooting and how to get help with
Eleven Rack are covered in Appendixes C, D,
and E.
Conventions Used in This
Guide
Digidesign guides use the following conven-
tions to indicate menu choices and key com-
mands:
:
The names of Commands, Options, and Settings
that appear on-screen are in a different font.
The following symbols are used to highlight im-
portant information:
Convention Action
File > Save Choose Save from the File
menu
Control+N Hold down the Control key
and press the N key
Control-click Hold down the Control key
and click the mouse but-
ton
Right-click Click with the right mouse
button
User Tips are helpful hints for getting the
most from your Pro Tools system.
Important Notices include information that
could affect your data or the performance of
your system.
Shortcuts show you useful keyboard or
mouse shortcuts.
Cross References point to related sections in
this guide and other Digidesign guides.

Eleven Rack User Guide6

Chapter 2: Hardware Overview 7
Chapter 2: Hardware Overview
Eleven Rack Front Panel
The Eleven Rack front panel provides the follow-
ing:
Power Switch
Use the heavy-duty Power switch to turn Eleven
Rack on and off. Eleven Rack will take a few sec-
onds to warm up. When the Rig name appears
on the display, you’re ready to rock.
Volume Knob
Turning the Volume knob will simultaneously
adjust the output level of the Main outputs and
the Headphone outputs.
Edit/Back and Save Buttons
Use the Edit/Back button to enter Rig View,
which gives you access to the inner workings of
the current Rig (preset). When in Rig View or
any other special mode, press Edit/back to step
backwards to the previous view. When you’re
satisfied with the changes you’ve made, press
the Save button to save your settings.
Figure 1. Eleven Rack front panel
Scroll Effects Control Mic input and controls
Power
switch Volume
knob
Edit/Back
and Save
buttons
SW1 and SW2
buttons wheel buttons
Control knobs
Tap Te mpo
and Tuner button
Phones
output
Guitar
input
Output
To Am p
1 (L)
For more information on Rig View, see
Chapter 3, “Exploring Rigs.”

Eleven Rack User Guide8
User Options Mode
Hold the Edit/Back button to enter User Options
mode, where many settings that change the be-
havior and configuration of Eleven Rack can be
found.
SW1 and SW2 Buttons
Use the SW1 and SW2 buttons to toggle various
switched behaviors and navigate through edit-
ing views in Eleven Rack. The part of the display
next to the SW1 and SW2 buttons shows the
current function of the buttons.
When one of the SW buttons are actively usable
in the current screen, they will be lit.
Scroll Wheel
Use the Scroll wheel to browse through Rigs,
and navigate through sections in Rig View,
along with other miscellaneous scrolling tasks
throughout Eleven Rack.
Effects Control Buttons
Use the Effects Control buttons to toggle effects
on and off by type. Press and hold any of the ef-
fects buttons to access the controls for that ef-
fect. Pressing the FX1 and FX2 buttons simulta-
neously toggles the Wah effect on and off.
Tap Tempo/Tuner Button
Tap the Tap Tempo/Tuner button at quarter-
note intervals to set the current Rig’s FX tempo.
Time-based effects like Delay and Tremolo can
be set to synchronize with the new tempo. If
you want to save the new tempo setting with
the current Rig, press the Save button.
To access the built-in guitar tuner, hold the Tap
Tempo/Tuner button down for one second. The
display shows the Tuner view.
The guitar signal can be muted by pressing SW1.
The reference pitch can be adjusted by turning
the lit Control knob.
When you’re finished tuning, press any button
to return to the previous screen.
Mic Input and Controls
Use the Mic input to record and/or process mic-
level signals. Controls for preamp gain, phan-
tom power, and pad are provided.
About Phantom Power
Dynamic microphones (such as a Shure SM57)
do not require phantom power, but are not
harmed by it. Most condenser microphones (like
an AKG C3000) do require phantom power to
operate.
If you are not sure about the phantom power re-
quirements for your microphone, consult your
microphone’s documentation or contact the
manufacturer.
For information on User Options mode, see
Chapter 10, “User Options.” Tuner view
Although phantom power is safe for most
microphones, it is possible to damage some
ribbon mics with it. Always turn off phan-
tom power and wait at least ten seconds be-
fore connecting or disconnecting a ribbon
microphone.

Chapter 2: Hardware Overview 9
Control Knobs
Use the Control knobs to access amp and effects
controls, as well as other settings throughout
Eleven Rack. The controls are pre-assigned, de-
pending on the current mode. The knobs light
up in different colors, depending on their state:
Amber The current knob is assigned to an amp,
cab, or FX loop parameter.
Green The current knob is assigned to an effects
parameter.
Red The current knob is positioned differently
than the assigned control’s saved position in the
current Rig. You can match the knob position to
the saved parameter by turning the knob until it
lights Amber or Green again.
When a Control knob isn’t active in the current
screen, it is not lit.
Phones Output
The Phones output is a 1/4-inch TRS jack that
drives a pair of headphones with the same signal
that is being sent out of the Main outputs of
Eleven Rack. This can be either the output of the
current Rig when using Eleven Rack, or the out-
put of Pro Tools or other applications when us-
ing Eleven Rack as an audio interface.
The headphone output level is adjusted in tan-
dem with the Main volume when you turn the
Volume knob on the front panel of Eleven Rack
or adjust the Main volume from within
Pro Tools. If you want the headphone volume to
differ from that going to your speakers, you can
adjust the Headphone Offset setting in User Op-
tions mode.
Output To Amp 1 (L)
The Output To Amp 1 (L) is one of two outputs
specifically designed for connecting to the input
of a guitar amplifier. Since most amplifier input
jacks are located on the amp’s front panel, we
put one of these jacks on the front panel of
Eleven Rack for easy patching.
The other Output to Amp jack is located on the
back of Eleven Rack. It can be used indepen-
dently of Output 1, or along with it for stereo
amplifier configurations. The Output to Amp
jacks can output a live guitar signal in real time
as you play, or a pre-recorded signal from
Pro Tools, for re-amping purposes.
You can select from specific points in the signal
chain to feed each Output To Amp jack. This lets
you choose the amount of processing you want
on the output signal.
Guitar Input with True-Z
The Guitar input is a 1/4” TS, instrument-level
input. Designed for electric guitars, the jack also
works well with bass and acoustic guitars with
pickups, or even vintage electric pianos.
Eleven Rack features a special variable-imped-
ance circuit called True-Z, which automatically
changes the input impedance of the Eleven Rack
guitar input depending on which amp or effects
model is first in the signal chain of the current
Rig.
True-Z alters the frequency response of your gui-
tar signal by loading your pickups in the same
manner as plugging into a real amp or effect.
This feature can also be manually controlled
and saved as part of a Rig setting.
For more information on Headphone Offset,
see“Headphone Volume” on page 94.
Most recent keyboards have line-level out-
puts and should be connected to the Line in-
puts on the back panel of Eleven Rack.

Eleven Rack User Guide10
Eleven Rack Back Panel
Figure 2 identifies each port on the back panel of the Eleven Rack.
The Eleven Rack back panel provides the
following:
FX Loop I/O
The FX Loop I/O is a pair of 1/4-inch TRS inputs
and outputs, which can be used to insert a mono
or stereo external effects processor into the gui-
tar signal. A switch is provided to adjust the sig-
nal level to be suitable for either a line-level ef-
fects processor (Rack FX) or a guitar-level effects
processors (Stompbox FX).
Main Outputs
The Main output section includes a stereo, XLR,
line-level analog output pair. Connect these to
studio monitors, a power amp, mixer, or PA sys-
tem.
The Gnd Lift switch is useful for suppressing
hum in some situations, but should usually be
left switched off unless it is really needed.
Output To Amp 2 (R)
The Output To Amp 2 (R) is one of two outputs
specifically designed for connecting to the input
of a guitar amplifier or effect. It can be used in-
dependently of Output 1 (located on the front
panel), or along with it for stereo amplifier con-
figurations.
Digital Inputs and Outputs
AES/EBU
The AES/EBU In and Out ports are balanced
three-conductor XLR connectors that can run at
up to 24-bit, 96 kHz resolution.
The AES/EBU format is used in many profes-
sional digital converters, recorders, and signal
processors.
Figure 2. Eleven Rack back panel
FX Loop
Main output
I/O Output To AES/EBU AC power input
USB
S/PDIF
Exp. Pedal/
MIDI I/O
Line input
digital I/O
port
digital I/O
Footswitch
input
Amp 2 (R)

Chapter 2: Hardware Overview 11
S/PDIF
The S/PDIF In and Out ports are unbalanced
two-conductor phono (RCA) connectors that
can run at up to 24-bit, 96 kHz resolution.
The Sony/Philips Digital Interface Format
(S/PDIF) is used in many professional and con-
sumer CD recorders and DAT recorders. To
avoid RF interference, use 75-ohm coaxial cable
for S/PDIF transfers and keep the cable length to
a maximum of 10 meters.
AC Power Input
The AC power input accepts a standard IEC
power cable (one is included with Eleven Rack).
The power supply in Eleven Rack is universal, so
wherever you go, all you need is a standard IEC
power cable with the correct plug for your re-
gion.
Line Inputs
The Line inputs accept one stereo or two mono
line-level analog signals. The Level switch lets
you choose between +4 or –10 dBV, for compat-
ibility with professional and consumer gear.
MIDI I/O
The MIDI In and MIDI Out ports are standard
5-pin MIDI ports, each providing 16 channels of
MIDI input or output. These ports can interface
with a variety of MIDI devices
When Eleven Rack is used as a standalone pro-
cessor, the MIDI jacks are used to communicate
with MIDI foot controllers, sending and receiv-
ing program changes and continuous controller
data.
Exp Pedal/Ext Footswitch Input
The Exp Pedal/Ext Footswitch input supports an
expression pedal or a momentary footswitch
(single or dual). You can control sweepable pa-
rameters (like Wah, Volume and Multi FX) with
an expression pedal, or switchable settings (like
Rig switching, amp channel switching, and ef-
fects on/off) with a footswitch.
Eleven Rack can use either AES/EBU or
S/PDIF, but not both at once. For informa-
tion on switching between digital formats,
see “Digital Format” on page 58.

Eleven Rack User Guide12
Other manuals for Eleven Rack
1
Table of contents
Other Avid Technology Amplifier manuals

Avid Technology
Avid Technology PELLAR PHONO PRE-AMPLIFIER User manual

Avid Technology
Avid Technology AVIDHIFI User manual

Avid Technology
Avid Technology ML530 User manual

Avid Technology
Avid Technology AVIDHIFI User manual

Avid Technology
Avid Technology DigiDesign PRE User manual

Avid Technology
Avid Technology HD OMNI User manual