Awanti NIMD3313S-IS User manual

1
Model / Modelo / Modelé:
NIMD3313S-
IS
NIMD3314BS-
IS
NUGGET ICE MAKER
MÁQUINA DE HIELO EN PEPITAS
MACHINE À PÉPITES DE GLACE
INSTRUCTION MANUAL
MANUAL DE INSTRUCCIONES
MANUEL D’INSTRUCTIONS
BEFORE USE, PLEASE READ AND FOLLOW ALL SAFETY RULES AND OPERATING INSTRUCTIONS.
Avanti has a policy of continuous improvement on its products and reserves the right to change materials and
specifications without notice.
Avanti Products LLC
3265 Meridian Pkwy # 114
Weston, FL 33331
www.avantiproducts.com

2
TABLE OF CONTENTS
Ice-Maker Safety
3
Important Safeguides
4
Help Us Help You
5
Parts and Features
6
Important Safety Instructions
7
Installation Instructions
7
Before Using Your Appliance
7
Installation of Your Appliance
7
Electrical Connection
8
Operating Your Appliance
9
Control Panel Description
9
Operating Instructions
9
Getting Ice from Ice-bin
10
Care and Maintenance
11
Cleaning Your Appliance
11
Space Requirements
11
Power Failure
11
Troubleshooting Guide
12
Service for Your Appliance
12
Your Avanti Products Warranty
13
Instrucciones en Español
14-25
Instructions en Français
26-37
Registration Information and Registration Card
Last
Page

3
ICE MAKER SAFETY
YOUR SAFETY AND THE SAFETY OF OTHERS ARE VERY IMPORTANT.
We have provided many important safety messages in this manual for your appliance. Always read and
obey all safety messages.
This is the safety alert symbol. This symbol alerts you to
Potential hazards that can kill or injure you and others.
All safety messages will follow the safety alert symbol
And either the words” DANGER”, “WARNING” or “CAUTION”.
DANGER Danger means that failure to heed this safety statement may result in
severe personal injury or death.
WARNING Warning means that failure to heed this safety statement may result in
extensive product damage, serious personal injury, or death.
CAUTION Caution means that failure to heed this safety statement may result in
minor or moderate personal injury, property or equipment damage.
All safety messages will alert you to know what potential hazard is, tell you how to reduce the chance of
injury, and let you know what can happen if the instructions are not followed.

4
IMPORTANT SAFEGUIDES
Before the appliance is used, it must be properly positioned and installed as
described in this manual, so read the manual carefully. To reduce the risk of fire,
electrical shock or injury when using the appliance, follow basic precaution,
Including the following:
DANGER
•Plug into a grounded 3-prong outlet, do not remove grounding prong, do not use an adapter, and do not use an
extension cord.
•It is recommended that a separate circuit, serving only your appliance be provided. Use receptacles that
cannot be turned off by a switch or pull chain.
•Never clean appliance parts with flammable fluids. These fumes can create a fire hazard or explosion. And do
not store or use gasoline or other flammable vapors and liquids in the vicinity of this or any other appliance.
The fumes can create a fire hazard or explosion.
•Before proceeding with cleaning and maintenance operations, make sure the power line of the unit is
disconnected.
•Do not connect or disconnect the electric plug when your hands are wet.
•Unplug the appliance or disconnect power before cleaning or servicing. Failure to do so can result in electrical
shock or death.
•Do not attempt to repair or replace any part of your appliance unless it is specifically recommended in this
manual. All other servicing should be referred to a qualified technician.
WARNING
FOLLOW WARNING CALL OUTS BELOW ONLY WHEN APPLICABLE TO YOUR MODEL
•Use two or more people to move and install appliance. Failure to do so can result in back or other injury.
•To ensure proper ventilation for your appliance, the front of the unit must be completely unobstructed. Choose
a well-ventilated area with temperatures above 60°F (16°C) and below 90°F (32°C). This unit must be installed
in an area protected from the element, such as wind, rain, water spray or drips.
•The appliance should not be located next to ovens, grills or other sources of high heat.
•The appliance must be installed with all electrical connections in accordance with state and local codes. A
standard electrical supply (115 v ac only, 60 hz), properly grounded in accordance with the national electrical
code and local codes and ordinances is required.
•Do not kink or pinch the power supply cord of appliance.
•The fuse (or circuit breaker) size should be 15 amperes.
•It is important for the appliance to be leveled in order to work properly. You may need to make several
adjustments to level it.
•Check for leaks after connection.
•Never allow children to operate, play with the appliance.
•Although the unit has been tested at the factory, due to long-term transit and storage, the first batch of cubes
must be discarded.
•Do not use solvent-based cleaning agents of abrasives on the interior. These cleaners may damage or discolor
the interior.
•Do not use this apparatus for other than its intended purpose.

5
Read this guide carefully.
Help us help you…
Write down the model and serial numbers.
You'll find them on a plate located on the rear
It is intended to help you operate and maintain
your new ice maker properly.
Keep it handy to answer your questions.
wall of the ice maker.
Please write these numbers here:
If you don't understand something or you need
more help, please call:
Avanti customer service
800-220-5570
Keep proof of original purchase date (such as
your sales slip) with this guide to establish the
warranty period.
Date of purchase
Model number
Serial number
Use these numbers in any correspondence or
service calls concerning your ice maker.
If you received a damaged ice maker,
immediately contact the dealer (or builder) that
sold you the ice maker.
Save time and money. Before you call for
service, check the troubleshooting guide. It lists
causes of minor operating problems that you
can correct yourself.
If you need service
We're proud of our service and want you to be
pleased. If for some reason you are not happy
with the service you receive, here are some
steps to follow for further assistance.
First, contact the people who serviced your ice
maker. Explain why you are not pleased. In
most cases, this will solve the problem.
Next, if you are still not pleased, write all the
details, including your telephone number, and
send it to:
Customer Service
Avanti Products
3265 Meridian Pkwy # 114
Weston, Fl 33331 USA

6
PARTS AND FEATURES
1
Top Lid
5
Water Reservoir
2
Ice Window
6
Drip Pan
3
Control Panel
7
Air Vent
4
Cabinet
PRODUCT SPECIFICATIONS
Model No.:
NIMD3313S-IS
NIMD3314BS-IS
Voltage:
110-120V
Frequency:
60Hz
Current:
1.39A (167W)
Refrigerant/Weight:
R134a/58g
Net Weight:
34lbs
Dimensions:
16.5” x 10.6” x 16.5”
Certifications:
ETL
Control Panel Features
1 – Indicator Light – Power On/Off
2 – Power On/Off button
3 – Ice Full Alarm Indicator Light (Green)
4 – Indicator Light – Ice Making System
5 – Ice Making/Dispense Button
6 – Add Water Alarm Indicator Light (Red)

7
IMPORTANT SAFETY INSTRUCTIONS
WARNING
To reduce the risk of fire, electrical shock, or
injury when using your ice maker, follow these
basic precautions:
•
Read all instructions before using the ice maker.
•
Danger or Warning: Risk of child entrapment.
•
Child entrapment and suffocation are not problems of the past. Junked or abandoned
appliances are still dangerous…even if they will “just sit in the garage a few days.”
•
Never allow children to operate, play with, or crawl inside the appliance.
•
Never clean ice maker parts with flammable fluids. The fumes can create a fire hazard or
explosion.
•
Unplug the ice maker before cleaning or making repairs.
•
Exercise caution and use reasonable supervision when appliance is used near children.
Do not tip over.
•
Do not store or use gasoline or any other flammable vapors and liquids in the vicinity of this
or any other ice maker. The fumes can create a fire hazard or explosion.
•
This appliance is intended to be used in household and similar applications, such as:
Staff kitchen areas in shops, offices, and other working environments; Farmhouses and
by clients in hotels, motels, and other residential type environments; Bed and breakfast
type environments; Catering and similar non-retail applications.
•
If the ice maker is brought indoors from outdoors during the winter time, give it a few
hours to warm up to room temperature before plugging it in.
•
Fill with portable water only.
-save these instructions-
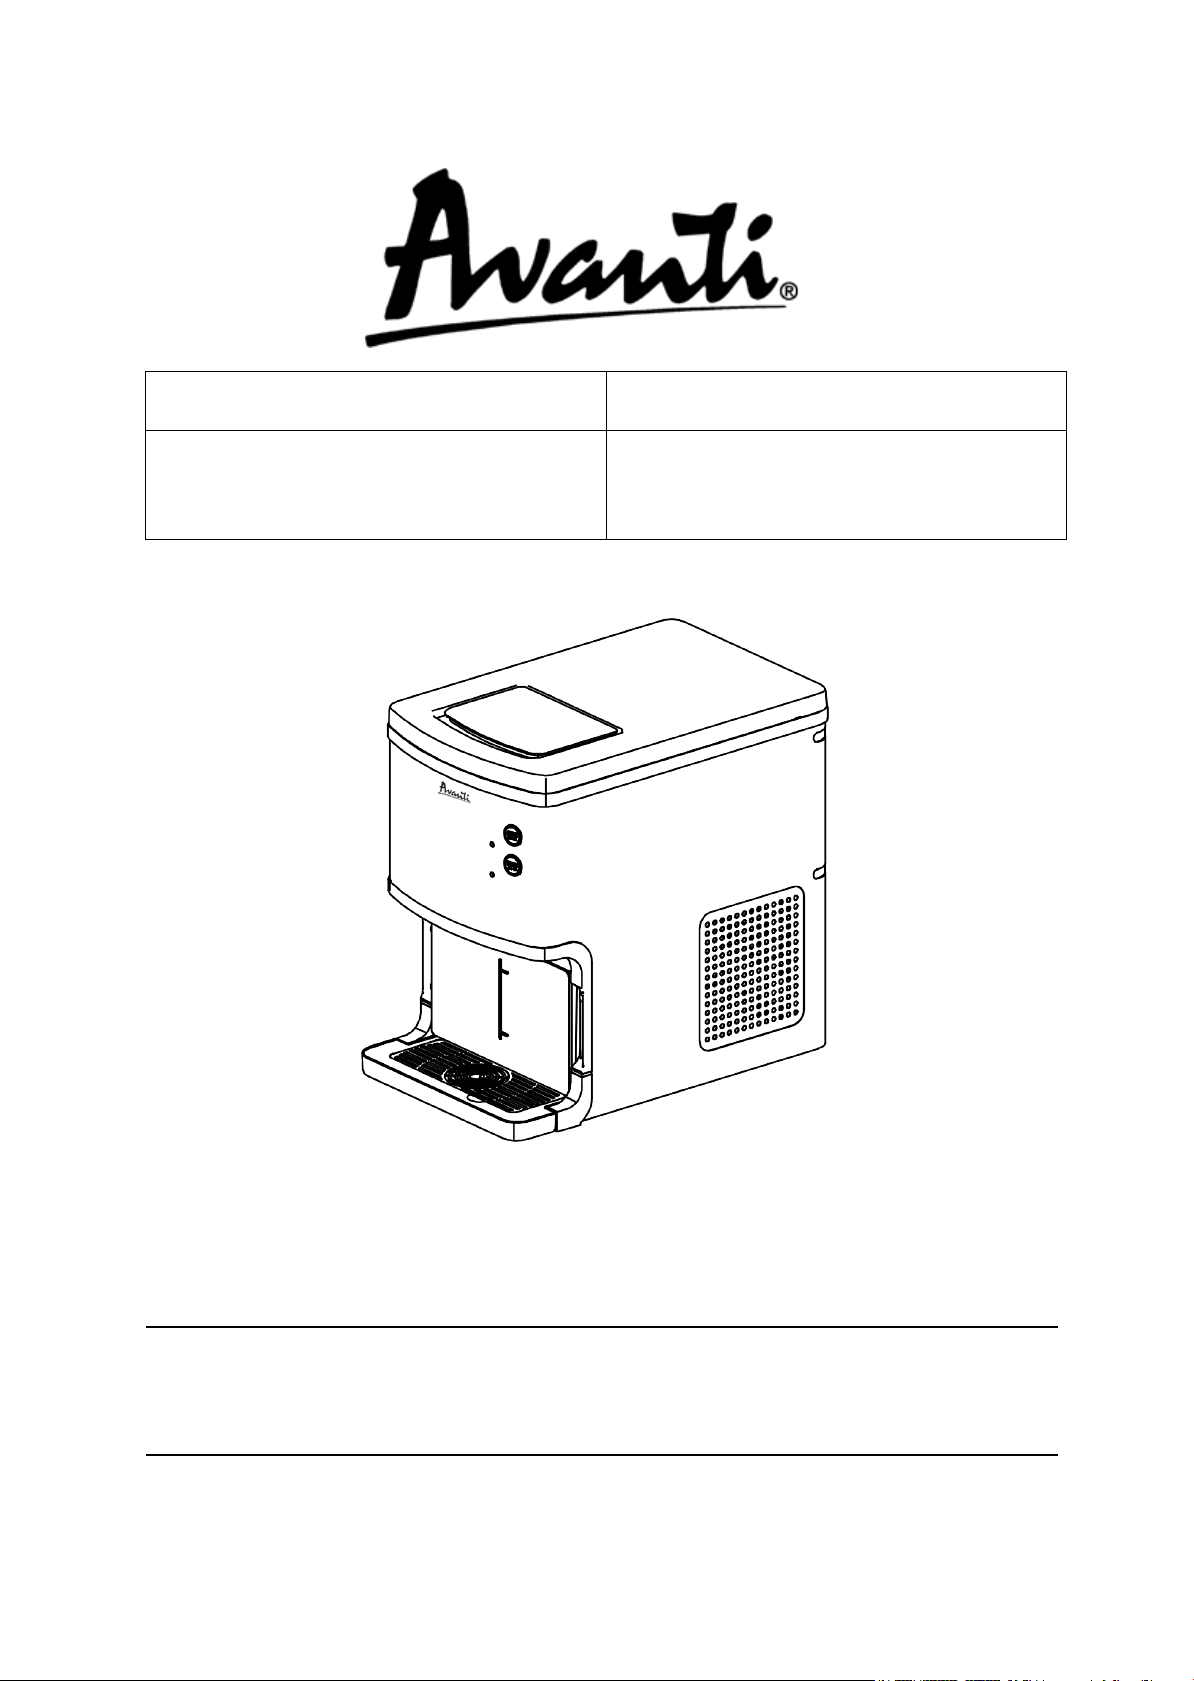
INSTALLATION INSTRUCTIONS
Before Using Your Ice Maker
•Remove the exterior and interior packing.
•Check to be sure you have all of the following parts:
•1 Instruction Manual
•1 Ice Maker
•1 Water Bin
•Before connecting the ice maker to the power source, let it stand upright for approximately 2
hours. This will reduce the possibility of a malfunction in the cooling system from handling during
transportation.
•Before using this product, place the machine on a platform.
•Please keep the ice maker stewing 24 hours after receiving the machine.
•Please make sure that the rear drain is firmly plugged before adding water to the water tank.
•Clean the interior surface with lukewarm water using a soft cloth.
Installation Of Your Ice Maker
•Locate the ice maker away from direct sunlight and sources of heat (stove, heater, radiator, etc.).
Direct sunlight may affect the painted coating and heat sources may increase electrical
consumption. Extreme cold ambient temperatures may also cause the ice maker not to perform
properly.
•Plug the ice maker into an exclusive properly installed-grounded wall outlet. Do not under any
circumstances cut or remove the third (ground) prong from the power cord. Any questions
concerning power and or grounding should be directed toward a certified electrician or an
authorized Avanti products service center.
IMPORTANT: Do not install the Ice maker near an oven, radiator, or other heat source.

8
WARNING
Improper use of the grounded plug can result in the risk of electrical shock. If the power cord is
damaged, have it replaced by an authorized Avanti Products service center.
ELECTRICAL CONNECTION
This appliance should be properly grounded for your safety. The power cord of this appliance is
equipped with a three-prong plug which mates with standard three prong wall outlets to minimize the
possibility of electrical shock.
Do not under any circumstances cut or remove the third ground prong from the power cord supplied.
For personal safety, this appliance must be properly grounded.
This appliance requires a standard 115/120 Volt AC ~/60Hz electrical ground outlet with three-prong.
Have the wall outlet and circuit checked by a qualified electrician to make sure the outlet is properly
grounded. When a standard 2-prong wall outlet is encountered, it is your responsibility and obligation
to have it replaced with a properly grounded 3-prong wall outlet.
The cord should be secured behind the appliance and not left exposed or dangling to prevent
accidental injury.
The appliance should always be plugged into its own individual electrical outlet which has a voltage
rating that matches the rating label on the appliance. This provides the best performance and also
prevent overloading house wiring circuits that could cause a fire hazard from overheated. Never
unplug the appliance by pulling the power cord. Always grip the plug firmly and pull straight out from
the receptacle. Repair or replace immediately all power cords that have become frayed or otherwise
damaged. Do not use a cord that shows cracks or abrasion damage along its length or at either end.
When moving the appliance, be careful not to damage the power cord.
EXTENSION CORD
Because of potential safety hazards under certain conditions, it is strongly recommended that you
do not use an extension cord with this appliance. However, if you must use an extension cord it is
absolutely necessary that it be a UL/CUL-Listed, 3-wire grounding type appliance extension cord
having a grounding type plug and outlet and that the electrical rating of the cord be 115 volts and at
least 10 amperes.
SURGE PROTECTOR
Most electrical appliances use a series of electric control boards to operate. These boards are very
susceptible to power surges and could be damaged or destroyed.
If the appliance is going to be used in an area or if your city / country is prone to power surges /
outages; it is suggested that you use a power surge protector for all electrical devices / appliances
you use. The surge protector that you select must have a surge block high enough to protect the
appliance it is connected to. If you have any questions regarding the type and size of surge protector
needed contact a licensed electrician in your area.
Damages due to power surges are not considered a manufacturer covered defect and will void your
product warranty.

9
GETTING TO KNOW YOUR ICE MAKER
1. Water Bin: Used for storing water.
2. Ice Window: Allows you to check how much ice has been produced without having to open the
top and letting warm air in.
3. Air Vents: Located on the back and sides of the unit, these vents help prevent the ice maker
from overheating. Please leave at least six inches of space all around the unit for proper
ventilation.
4. Water Drain: Allows you to empty the water from the tank easily.
5. Max Fill Line: Inside the water tank below the ice tray is a line marking labeled “MAX”. Do not
fill the water tank above this line.
OPERATING YOUR ICE MAKER
Controls/Indicator Lights:
STANDBY MODE
Once you plug in your ice maker, three red LED rings will light up to
indicate the unit is waiting to produce ice. It will not make batches until
the unit has been activated with the power button.
POWER BUTTON
Press the power button once to turn on your ice maker. Once on, a blue
LED ring will light up and the unit will begin to make ice. To turn the unit
OFF, hold the power button for 3 seconds. The red LED ring will light up
and the ice maker will to back to standby mode.
DISPENSE
Press “DISPENSE” button and hold on during any mode, “ice out” light flicker and ices come out
after 2 seconds.
ICE FULL
There is an infrared sensor that helps detect when the ice tray is full. When the tray is full, ice
production will be kept on 20 minutes, then the ice machine will show to "ice full", the unit will turn
off, and the “Ice Full” indicator will light up. To restart the ice production process, empty the ice
basket, and machine will restart the ice production automatically.
ADD WATER
When the “Add Water” indicator light up, the unit will turn off and you will need to pour more water
into the water tray below the ice basket. After you have refilled the water tray, press the power
button once to restart the ice production process. The unit will continuously produce ice if there is
water in the tank and the ice tray is not full.

10
Operating Instructions
Unpacking Your Ice Maker
1. Remove all exterior and interior packaging. Make sure that the ice basket and ice scoop are
included. If any part or accessory is missing, please contact our customer service department.
2. Clean the interior with lukewarm water and a soft cloth. Remove the ice basket and wash it in
warm water.
3. Clean the evaporator rods using a water/vinegar solution.
4. Find a location for your ice maker that is protected from direct sunlight and you will need six inches
of space between the back and sides of your ice maker and the wall.
Connecting Your Ice Maker
1. This unit should be properly grounded for your safety.
2. Plug the appliance directly into an appropriate 120V AC outlet that is properly installed and
grounded in accordance with all local codes and ordinances.
WARNING: Improper use of the grounded plug can result in the risk of electrical shock. If the power
cord is damaged, please call our customer service department.
Using Your Ice Maker
1. Press the “ON/OFF” button after plugging in the ice maker machine and it will begin to run.
Tip: You can use drinking water.
2. Open the cover, remove the ice basket and pour water into the tank, make sure it does not surpass
the maximum water level. Put the ice basket back into the machine and close the lid.
Tip: Keep the water below the ice basket.
3. While the ice maker is on, check the water level periodically. If the water pump cannot inject
water, the ice maker will stop automatically and the “Add water” indicator will be on. Press the
“ON/OFF” button, fill water up to the level mark and press the “ON/OFF” button again.
4. The ice maker automatically stops working when the ice basket is full. The “ICE FULL” indicator
will light up when the ice bucket is full. To restart ice making, please remove the ice and then press
“ON/OFF”.
5. Change the water in the water reservoir every twenty-four hours to ensure a reasonable hygiene
level. If the unit is not in use for a few days, drain all the water in the tank reservoir and refill
before operating again.
6. Minimum water level is 1.5” and the max water level is 3”. The “ADD WATER” indicator will light up
when the water level is low. To restart, please add water and then press “ON/OFF” button.
7. For best performance, water temperature should be between 7°C (45°F) and 35°C (95°F) and
ambient between 15°C (59°F) and 25°C (77°F).
8. Actual ice making capacity will depend on the ambient temperature of the surroundings of the ice
maker as well as the temperature and quality of the water used to make the ice.

11
CARE AND MAINTENANCE
CAUTION: Failure to unplug the ice maker could result in electrical shock or personal injury.
Cleaning Your Ice Maker
Before using your ice maker, it is strongly recommended that you clean it thoroughly.
•To ensure the cleanliness of the ice cubes, it is recommended that you use filtered water.
•Remove the ice basket.
•Remove the drain cap to drain remaining water from the water reservoir when the ice maker will not be
used for long period of time. Put the drain cap back in place after the water has been drained.
•Always change with fresh water before starting ice production at initial installation or after long shut-off
periods.
•Dry the interior and exterior with a soft cloth.
•Please clean your ice maker regularly. When cleaning, unplug the unit and remove the ice cubes. Use
a diluted solution of water and vinegar to clean the inside and the outside surface of the Ice maker. Do not
spray Ice maker with chemicals or diluted agents such as acids, gasoline or oil. Rinse thoroughly before
starting.
•When the machine is not in use, open the drain cap to drain water completely from the water reservoir.
Space Requirements
•During transportation, the incline angle of the cabinet should not be over 45°
•Do not turn the Ice maker upside down. Problems could occur in the compressor and sealed system.
•The Ice maker should be placed horizontally on a properly leveled surface.
•To ensure proper ventilation for your Ice maker allow 6” of space at the top, the back and on each side.
•Before using the Ice maker for the first time, please wait 2 hours after positioning it.
•Clean the inner liner, ice-bin, and water bin.
IMPORTANT: Do not install the Ice maker near an oven, radiator, or other heat source.
Power Failure
Most power failures are corrected within a few hours and should not affect the temperature of your ice
maker if you minimize the number of times the ice-bin is opened. If the power is going to be OFF for a
longer period of time, you need to take the proper steps to disconnect your appliance.
ELECTRICAL SCHEMATIC DIAGRAM

12
PROBLEMS WITH YOUR ICE MAKER?
You can solve many common ice maker problems easily, saving you the cost of a possible service
call. Try the suggestions below to see if you can solve the problem before calling the servicer.
TROUBLESHOOTING GUIDE
Problem
Possible Cause
Suggested Solutions
“ADD WATER” indicator
is on.
Water level is low.
Stop the ice maker, fill water, and
restart.
“ICE FULL” indicator is
on.
The ice basket is full.
The ice sensor is broken.
The ice scoop is stuck.
Remove the ice from the basket.
Press “ON/OFF” to start the ice maker
forcibly or contact us to change the
sensor.
Check if ice is blocking the ice shovel
and remove the ice.
Ice cubes stick together.
The ice making cycle is too
long.
The part of the evaporator
rods in the ice box is too large.
The water temperature in the
inner tank is too low.
Stop the ice maker and restart when the
ice blocks melt.
Change the water in the reservoir. Use
water between 46°F and 89°F.
Ice is full but the light is
off.
The location of the ice maker’s
light is too strong and it effects
the infrared detection.
Move the ice maker near a darker
location.
Indicator lights are off.
Blown fuse/ no power/blown
breaker
Replace fuse / turn power on.
Ice making cycle is
normal but there is no
ice.
Ambient temperature or water
temperature is too high.
Refrigerant liquid leakage
The pipe in the cooling system
is blocked.
Please operate the ice maker below
ambient temperature of 89°F and use
cold water.
Contact customer service.
Note: The noises are normal when operating this ice maker: a click sound when the machine was
turned on or off; a boiling, gurgling, or knocking sound when refrigerant is circulating through the
pipes; loud click sound when ice cubes are dropped into the bucket.
Service For Your Ice Maker
We are proud of our customer service organization and the network of professional service
technicians that provide service on your Avanti ice maker. With the purchase of your Avanti ice
maker, you can be confident that if you ever need additional information or assistance, the Avanti
Products Customer Service team will be here for you. Just call us toll-free.
Avanti Products Customer Services
Product information
800-323-5029
Whatever your questions are about our products,
help is available.
Part orders
800-220-5570
You may order parts and accessories that will be
delivered directly to your home, by personal
check, money order, master card, or visa.
In-home repair service
800-220-5570
An Avanti Products authorized service center will
provide expert repair service, scheduled at a time
that is convenient for you. Our trained servicers
know your ice maker inside and out.

13
YOUR AVANTI PRODUCTS
WARRANTY
Staple your sales receipt here. Proof of original
purchase date is needed to obtain service under
warranty.
WHAT IS COVERED – LIMITED ONE-YEAR WARRANTY
Avanti Products warrants that the product is free from defects in materials and/or workmanship for a period of
twelve (12) months from the date of purchase by the original owner. The foregoing timeline begins to run upon the
date of purchase, and shall not be stalled, tolled, extended, or suspended for any reason whatsoever unless
described in detail in the warranty document. For one year from the date of purchase by the original owner, Avanti
products will, at its option, repair or replace any part of the product which proves to be defective in material or
workmanship under normal use. Avanti Products will provide you with a reasonably similar product that is either
new or factory refurbished. During this period Avanti Products will provide all parts and labor necessary to correct
such defects free of charge, so long as the product has been installed and operated in accordance with the written
instructions in this manual. In rental or commercial use, the warranty period is 90 days. All Avanti appliances of 3.5
cubic feet capacity or less must be brought/sent to the appliance service center for repair.
LIMITED SECOND THROUGH FIFTH YEAR WARRANTY
For the second through the fifth year from the date of original purchase, Avanti Products will provide a replacement
compressor free of charge due to a failure. You are responsible for the service labor and freight charges. In rental
or commercial use, the limited compressor warranty is one year and nine months. Costs involved to move the
product to the service center and back to the user’s home, as maybe required, are the user’s responsibility.
WARRANTY EXCLUSIONS / WHAT IS NOT COVERED:
The warranty coverage described herein excludes all defects or damage that are not the direct fault of Avanti
Products, including without limitation, one or more of the following:
•
A failure to comply with any applicable state, local, city, or county electrical, plumbing and/or building codes,
regulations, or laws, including failure to install the product in strict conformity with local fire and building codes
and regulations.
•Any external, elemental and/or environmental forces and factors, including without limitation, rain, wind, sand,
floods, fires, mud slides, freezing temperatures, excessive moisture or extended exposure to humidity, lightning,
power surges, structural failures surrounding the appliance, and acts of God.
•
Content losses of food or other content due to
spoilage.
•Incidental or consequential damages
•Parts and labor costs for the following will not be
considered as warranty:
•Plastic cabinet liners.
•Punctured evaporator that voids the warranty on
the complete sealed system.
•Shipping and handling costs associated with the
replacement of the unit.
•Repairs performed by unauthorized servicers.
•Service calls that are related to external problems,
such as abuse, misuse, inadequate electrical power,
accidents, fire, floods, or any other acts of God.
•Failure of the product if it is used for other than it
intended purpose.
•The warranty does not apply outside the Continental
USA.
•Surcharges including but not limited to, any after
hour, weekend, or holiday service calls, tolls, ferry
trip charges, or mileage expense for service calls to
remote areas.
In no event shall Avanti Products have any liability or responsibility whatsoever for damage to surrounding property,
including cabinetry, floors, ceilings, and other structures and/or objects around the product. Also excluded from this
warranty are scratches, nicks, minor dents, and other cosmetic damages on external surfaces and exposed parts;
Products on which the serial numbers have been altered, defaced or removed; service visits for customer
education, or visits where there is nothing wrong with the product; correction of installation problems (you are solely
responsible for any structure and setting for the product, including all electrical, plumbing and/or other connecting
facilities, for proper foundation/flooring, and for any alterations including without limitation cabinetry, walls, floors,
shelving etc., as well as the resetting of breakers or fuses.
OUT OF WARRANTY PRODUCT
Avanti Products is under no obligation, at law or otherwise, to provide you with any concessions, including repairs,
pro-rates, or product replacement, once this warranty has expired.
WARRANTY – REFRIGERATION - COMPRESSOR

14
TABLA DE CONTENIDO
Seguridad de la máquina de hielo
15
Guías de seguridad importantes
16
Ayúdanos a ayudarte
17
Piezas y características
18
Instrucciones de seguridad importantes
19
Instrucciones de instalación
19
Antes de usar su electrodoméstico
19
Instalación de su electrodoméstico
19
Conexión eléctrica
20
Funcionamiento de su electrodoméstico
21
Descripción del panel de control
21
Instrucciones de operación
21
Obtención de hielo del cubo de hielo
22
Cuidado y mantenimiento
23
Limpieza de su electrodoméstico
23
Requisitos de espacio
23
Fallo de alimentación
23
Guía para resolver problemas
24
Servicio para su electrodoméstico
24
La garantía de sus productos Avanti
25
Información de registro y tarjeta de registro
Última
página

15
SEGURIDAD DE LA FABRICACIÓN DE HIELO
SU SEGURIDAD Y LA DE LOS DEMÁS SON MUY IMPORTANTES.
Hemos proporcionado muchos mensajes de seguridad importantes en este manual para su
electrodoméstico. Siempre lea y obedezca todos los mensajes de seguridad.
Éste es el símbolo de alerta de seguridad. Este símbolo le advierte
sobre peligros potenciales que pueden causarle la muerte o lesiones
a usted y a otras personas. Todos los mensajes de seguridad
seguirán al símbolo de alerta de seguridad
Y las palabras "PELIGRO", "ADVERTENCIA" o "PRECAUCIÓN".
PELIGRO Peligro significa que el incumplimiento de esta declaración de seguridad puede
provocar lesiones personales graves o la muerte.
ADVERTENCIA Advertencia significa que el incumplimiento de esta declaración de
seguridad puede provocar daños importantes al producto, lesiones personales graves o la muerte.
PRECAUCIÓN Precaución significa que el incumplimiento de esta declaración de
seguridad puede provocar lesiones personales leves o moderadas, daños a la propiedad o al equipo.
Todos los mensajes de seguridad lo alertarán para saber cuál es el peligro potencial, le indicarán
cómo reducir la posibilidad de lesiones y le informarán qué puede suceder si no se siguen las
instrucciones.

16
GUÍAS DE SEGURIDAD IMPORTANTES
Antes de usar el aparato, debe colocarse e instalarse correctamente como se
describe en este manual, así que lea el manual cuidadosamente. Para reducir el
riesgo de incendio, descarga eléctrica o lesiones al usar el aparato, siga las
precauciones básicas, incluidas las siguientes:
PELIGRO
•Enchufe en un tomacorriente de 3 clavijas con conexión a tierra, no quite la clavija de conexión a tierra, no
use un adaptador y no use un cable de extensión.
•Se recomienda que se proporcione un circuito separado, que sirva solo a su electrodoméstico. Use
receptáculos que no se puedan apagar con un interruptor o una cadena.
•Nunca limpie las piezas del aparato con líquidos inflamables. Estos vapores pueden crear un riesgo de
incendio o explosión. Y no almacene ni use gasolina u otros vapores y líquidos inflamables cerca de este o
cualquier otro aparato. Los vapores pueden crear un riesgo de incendio o explosión.
•Antes de proceder con las operaciones de limpieza y mantenimiento, asegúrese de que la línea de
alimentación de la unidad esté desconectada.
•No conecte ni desconecte el enchufe eléctrico con las manos mojadas.
•Desenchufe el aparato o desconecte la energía antes de limpiarlo o darle servicio. Si no lo hace, puede
sufrir una descarga eléctrica o la muerte.
•No intente reparar o reemplazar ninguna pieza de su electrodoméstico a menos que se recomiende
específicamente en este manual. Todos los demás servicios deben ser referidos a un técnico calificado.
ADVERTENCIA
SIGA LAS LLAMADAS DE ADVERTENCIA A CONTINUACIÓN SÓLO CUANDO
CORRESPONDA A SU MODELO
•Use dos o más personas para mover e instalar el electrodoméstico. Si no lo hace, puede sufrir lesiones en la
espalda o de otro tipo.
•Para garantizar la ventilación adecuada de su electrodoméstico, la parte frontal de la unidad debe estar
completamente despejada. Elija un área bien ventilada con temperaturas superiores a 60 °F (16 °C) e
inferiores a 90 °F (32 °C). Esta unidad debe instalarse en un área protegida de los elementos, como viento,
lluvia, rocío de agua o goteos.
•El aparato no debe ubicarse junto a hornos, parrillas u otras fuentes de calor intenso.
•El aparato debe instalarse con todas las conexiones eléctricas de acuerdo con los códigos estatales y
locales. Se requiere un suministro eléctrico estándar (solo 115 V CA, 60 Hz), correctamente conectado a
tierra de acuerdo con el código eléctrico nacional y los códigos y ordenanzas locales.
•No doble ni pellizque el cable de alimentación del aparato.
•El tamaño del fusible (o disyuntor) debe ser de 15 amperios.
•Es importante que el aparato esté nivelado para que funcione correctamente. Es posible que deba
hacer varios ajustes para nivelarlo.
•Compruebe si hay fugas después de la conexión.
•Nunca permita que los niños operen o jueguen con el aparato.
•Aunque la unidad ha sido probada en la fábrica, debido al tránsito y almacenamiento a largo plazo, se debe
desechar el primer lote de cubos.
•No use agentes de limpieza a base de solventes o abrasivos en el interior. Estos limpiadores pueden dañar
o decolorar el interior.
•No utilice este aparato para otro fin que no sea el previsto.

17
Lea esta guía detenidamente.
Ayúdanos a ayudarte…
Anote el modelo y los números de serie.
Los encontrará en un plato ubicado en la pared
trasera de la fábrica de hielo.
Su objetivo es ayudarlo a operar y mantener
correctamente su nueva máquina de hielo.
Manténgalo a mano para responder a sus
preguntas. Si no entiende algo o necesita
Por favor escriba estos números aquí:
más ayuda, llame al:
Atención al cliente Avanti
800-220-5570
Conserve una prueba de la fecha de compra
original (como su recibo de compra) con esta
guía para establecer el período de garantía.
Fecha de compra
Número de modelo
Número de serie
Utilice estos números en cualquier
correspondencia o llamada de servicio
relacionada con su máquina de hielo.
Si recibió una máquina de hielo dañada,
comuníquese de inmediato con el distribuidor (o
constructor) que le vendió la máquina de hielo.
Ahorre tiempo y dinero. Antes de llamar al
servicio técnico, consulte la guía de resolución
de problemas. Enumera las causas de
problemas operativos menores que puede
corregir usted mismo.
Si necesitas servicio
Estamos orgullosos de nuestro servicio y
queremos que esté satisfecho. Si por alguna
razón no está satisfecho con el servicio que
recibe, aquí hay algunos pasos a seguir para
obtener más ayuda.
Primero, comuníquese con las personas que
repararon su máquina de hielo. Explique por
qué no está satisfecho. En la mayoría de los
casos, esto resolverá el problema.
A continuación, si aún no está satisfecho,
escriba todos los detalles, incluido su número
de teléfono, y envíelo a:
Atención al cliente
Productos Avanti
3265 Meridiano Pkwy # 114
Weston, Florida 33331 EE. UU.

18
PIEZAS Y CARACTERÍSTICAS
1
Tapa superior
5
Reserva de agua
2
Ventana de hielo
6
Bandeja de goteo
3
Panel de control
7
Salida de aire
4
Gabinete
ESPECIFICACIONES DEL PRODUCTO
Modelo:
NIMD3313S-ES
NIMD3314BS-ES
Voltaje:
110-120V
Frecuencia:
60Hz
Actual:
1.39A (167W)
Refrigerante/Peso:
R134a/58g
Peso neto:
34 libras
Dimensiones:
16.5” x 10.6” x 16.5”
Certificaciones:
ETL
Características del panel de control
1 – Luz indicadora – Encendido/apagado
2 – Botón de encendido/apagado
3 – Luz indicadora de alarma de hielo lleno (verde)
4 – Luz indicadora – Sistema de fabricación de hielo
5 – Botón para hacer hielo/dispensar
6 – Añadir luz indicadora de alarma de agua (roja)

19
INSTRUCCIONES DE SEGURIDAD IMPORTANTES
ADVERTENCIA
Para reducir el riesgo de incendio, descarga
eléctrica o lesiones al usar su máquina de
hielo, siga estas precauciones básicas:
•
Lea todas las instrucciones antes de usar la máquina de hielo.
•
Peligro o Advertencia
: Riesgo de atrapamiento de niños.
•
El atrapamiento y la asfixia de los niños no son problemas del pasado. Los electrodomésticos
desechados o abandonados siguen siendo peligrosos... incluso si "simplemente se quedarán en
el garaje unos días".
•
Nunca permita que los niños operen, jueguen o gateen dentro del aparato.
•
Nunca limpie las piezas de la máquina de hielo con líquidos inflamables. Los vapores pueden
crear un riesgo de incendio o explosión.
•
Desenchufe la fábrica de hielo antes de limpiarla o hacer reparaciones.
•
Tenga cuidado y utilice una supervisión razonable cuando utilice el aparato cerca de niños.
No se vuelque.
•
No almacene ni use gasolina ni ningún otro vapor o líquido inflamable cerca de esta o cualquier
otra máquina de hielo. Los vapores pueden crear un riesgo de incendio o explosión.
•
Este electrodoméstico está diseñado para usarse en aplicaciones domésticas y similares, tales
como: áreas de cocina para el personal en tiendas, oficinas y otros entornos de trabajo; Granjas
y por clientes en hoteles, moteles y otros entornos de tipo residencial; Ambientes tipo bed and
breakfast; Catering y aplicaciones no minoristas similares.
•
Si la máquina de hielo se lleva al interior desde el exterior durante el invierno, espere unas horas
para que alcance la temperatura ambiente antes de enchufarla.
•
Llénelo solo con agua potable.
-Guarda estas instrucciones-
INSTRUCCIONES DE INSTALACIÓN
Antes de usar su máquina de hielo
•Retire el embalaje exterior e interior.
•Compruebe que tiene todas las piezas siguientes:
•1 manual de instrucciones
•1 fabricador de hielo
•1 depósito de agua
•Antes de conectar la fábrica de hielo a la fuente de alimentación, déjela en posición vertical
durante aproximadamente 2 horas. Esto reducirá la posibilidad de un mal funcionamiento en el
sistema de enfriamiento debido al manejo durante el transporte.
•Antes de usar este producto, coloque la máquina en una plataforma.
•Mantenga la máquina de hielo guisando 24 horas después de recibir la máquina.
•Asegúrese de que el drenaje trasero esté firmemente tapado antes de agregar agua al tanque
de agua.
•Limpie la superficie interior con agua tibia usando un paño suave.
Instalación de su máquina de hielo
•Ubique la máquina de hielo lejos de la luz solar directa y fuentes de calor (estufa, calentador,
radiador, etc.). La luz solar directa puede afectar el revestimiento pintado y las fuentes de
calor pueden aumentar el consumo eléctrico. Las temperaturas ambientales extremadamente
frías también pueden hacer que la fábrica de hielo no funcione correctamente.
•Enchufe la fábrica de hielo en un tomacorriente de pared exclusivo debidamente instalado y
conectado a tierra. No bajo ningún corte o extraiga la tercera clavija (tierra) del cable de
alimentación. Cualquier pregunta relacionada con la alimentación o la conexión a tierra debe
dirigirse a un electricista certificado o a un centro de servicio de productos Avanti autorizado.
IMPORTANTE: No instale la fábrica de hielo cerca de un horno, radiador u otra fuente de calor.

20
ADVERTENCIA
El uso inadecuado del enchufe con conexión a tierra puede resultar en riesgo de descarga eléctrica. Si el cable
de alimentación está dañado, haga que lo reemplace un centro de servicio autorizado de Avanti Products.
CONEXIÓN ELÉCTRICA
Este aparato debe estar correctamente conectado a tierra para su seguridad. El cable de
alimentación de este electrodoméstico está equipado con un enchufe de tres clavijas que se
acopla a los tomacorrientes de pared estándar de tres clavijas para minimizar la posibilidad de
descarga eléctrica.
Bajo ninguna circunstancia corte o retire la tercera clavija de conexión a tierra del cable de
alimentación suministrado. Por seguridad personal, este aparato debe estar correctamente
conectado a tierra.
Este aparato requiere una toma de tierra estándar de 115/120 voltios CA ~/60 Hz con tres clavijas.
Haga que un electricista calificado verifique el tomacorriente y el circuito para asegurarse de que
el tomacorriente esté correctamente conectado a tierra. Cuando se encuentra un tomacorriente de
pared estándar de 2 clavijas, es su responsabilidad y obligación reemplazarlo por un
tomacorriente de pared de 3 clavijas debidamente conectado a tierra.
El cable debe asegurarse detrás del aparato y no dejarse expuesto o colgando para evitar
lesiones accidentales.
El electrodoméstico siempre debe estar enchufado en su propio tomacorriente eléctrico individual
que tenga una clasificación de voltaje que coincida con la etiqueta de clasificación del
electrodoméstico. Esto proporciona el mejor rendimiento y también evita la sobrecarga de los
circuitos de cableado de la casa que podrían causar un riesgo de incendio por
sobrecalentamiento. Nunca desenchufe el aparato tirando del cable de alimentación. Sujete
siempre el enchufe con firmeza y sáquelo del receptáculo. Repare o reemplace inmediatamente
todos los cables de alimentación que se hayan deshilachado o dañado. No utilice un cable que
muestre grietas o daños por abrasión a lo largo o en cualquiera de los extremos. Al mover el
aparato, tenga cuidado de no dañar el cable de alimentación.
CABLE DE EXTENSIÓN
Debido a los peligros potenciales para la seguridad bajo ciertas condiciones, se recomienda
enfáticamente que no use un cable de extensión con este aparato. Sin embargo, si debe usar un
cable de extensión, es absolutamente necesario que sea un cable de extensión para
electrodomésticos de 3 hilos con conexión a tierra, listado por UL/CUL, que tenga un enchufe y un
tomacorriente con conexión a tierra y que la clasificación eléctrica del cable sea de 115 voltios y al
menos 10 amperios.
PROTECTOR CONTRA SOBRETENSIONES
La mayoría de los aparatos eléctricos utilizan una serie de tableros de control eléctrico para funcionar.
Estas placas son muy susceptibles a las sobrecargas de energía y podrían dañarse o destruirse.
Si el electrodoméstico se va a utilizar en un área o si su ciudad/país es propensa a
sobretensiones/cortes de energía; se sugiere que use un protector contra sobretensiones para todos los
dispositivos/aparatos eléctricos que use. El protector contra sobretensiones que seleccione debe tener
un bloque de sobrevoltaje lo suficientemente alto como para proteger el aparato al que está conectado.
Si tiene alguna pregunta sobre el tipo y el tamaño del protector contra sobretensiones necesario,
comuníquese con un electricista certificado en su área.
Los daños debidos a subidas de tensión no se consideran defectos cubiertos por el fabricante y
anularán la garantía del producto.
This manual suits for next models
1
Table of contents
Languages: