Blizzard bcm1800 Technical manual

Microwave Oven
MANUAL OF INSTRUCTIONS FOR USE AND INSTALLATION

Read these instructions carefully before using your microwave oven,
and keep it carefully.
If you follow the instructions, your oven will provide you with many
years of good service.
SAVE THESE INSTRUCTIONS CAREFULLY
PRECAUTIONS TO AVOID POSSIBLE EXPOSURE TO EXCESSIVE
MICROWAVE ENERGY
(a) Do not attempt to operate this oven with the door open since this
can result in harmful exposure to microwave energy. It is important
not to break or tamper with the safety interlocks.
(b) Do not place any object between the oven front face and the door
or allow soil or cleaner residue to accumulate on sealing surfaces.
(c) WARNING: If the door or door seals are damaged, the oven must
not be operated until it has been repaired by a competent person.
ADDENDUM
If the apparatus is not maintained in a good state of cleanliness, its
surface could be degraded and affect the lifespan of the apparatus and
lead to a dangerous situation.

Specifications
Model: MWO01-3418
Rated Voltage: 230V~50Hz
Rated Input 3000W
Power(Microwave):
Oven Capacity: 34L
External Dimensions: 574.2 528.4 367.5mm
Net Weight Approx. 30.5kg
IMPORTANT SAFETY INSTRUCTIONS
To reduce the risk of fire, electric shock, injury to persons
WARNING or exposure to excessive microwave oven energy when
using your appliance, follow basic precautions, including the following:
1. Warning: Liquids and other foods must not be heated in sealed containers since they are liable to
explode.
2. Warning: It is hazardous for anyone other than a competent person to carry out any service or
repair operation that involves the removal of a cover which gives protection against exposure to
microwave energy.
3. Warning: Only allow children to use the oven without supervision when adequate instructions
have been given so that the child is able to use the oven in a safe way and understand the hazards of
improper use.
4. Warning: When the appliance is operated in the combination mode, children should only use the
oven under adult supervision due to the temperatures generated.
(only for grill series)
5. Only use utensils suitable for use in microwave ovens.
6. The oven should be cleaned regularly and any food deposits should be removed. 7. Read and follow
the specific:"PRECAU TIONS TO AVOID POSSIBLE EXPOSURE TO EXCESSIVE MICROWAVE
ENERGY". 8. When heating food in plastic or paper containers, keep an eye on the oven due to the
possibility of ignition.
9. If smoke is observed, switch off or unplug the appliance and keep the door closed in order to stifle
any flames.
10. Do not overcook food.
11. Do not use the oven cavity for storage purposes. Do not store items, such as bread, cookies, etc.
inside the oven.
12. Remove wire twist-ties and metal handles from paper or plastic containers/bags before placing
them in the oven.
13. Install or locate this oven only in accordance with the installation instructions provided.
14. Eggs in the shell and whole hard-boiled eggs should not be heated in microwave ovens since they
may explode, even after microwave heating has ended.
15. Use this appliance only for its intended uses as described in manual. Do not use corrosive
chemicals or vapors in this appliance. This oven is especially designed to heat. It is not designed for
industrial or laboratory use.
16. If the supply cord is damaged, it must be replaced by the manufacturer, its service agent or
similarly qualified persons in order to avoid a hazard. 17. Do not store or use this appliance outdoors.

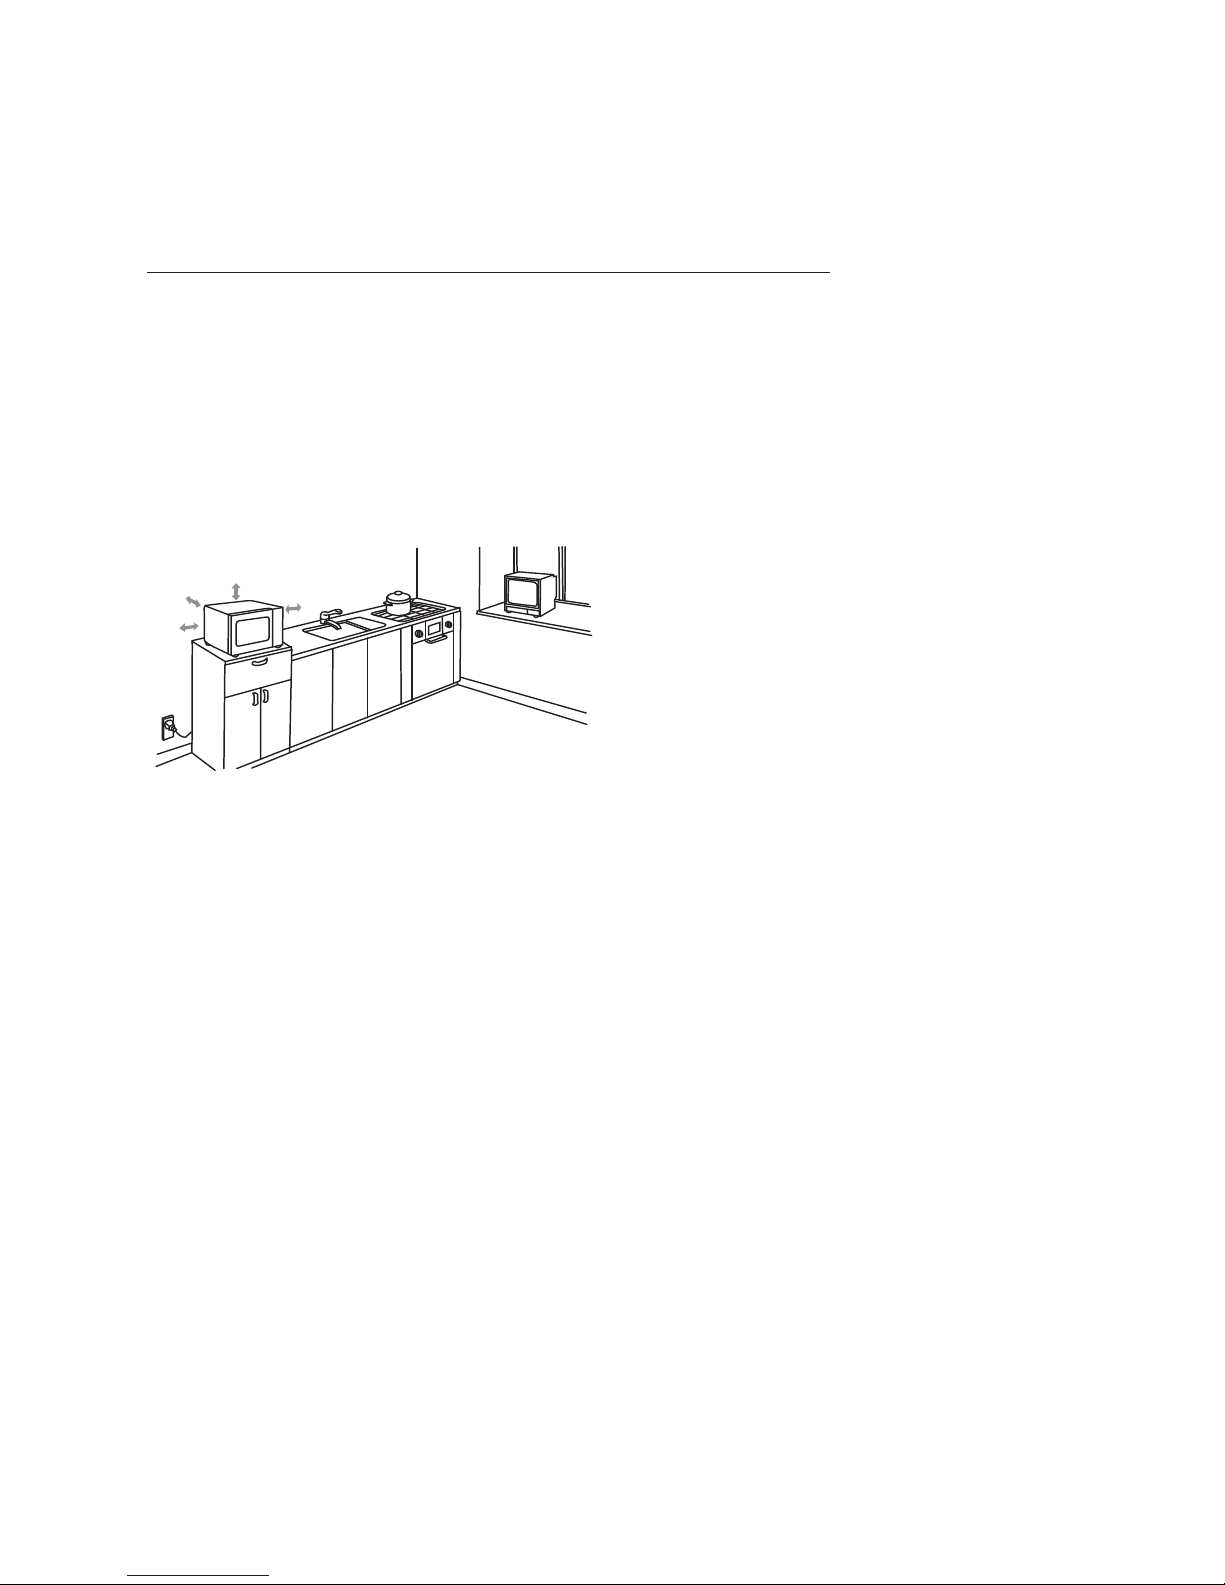
18. Do not use this oven near water, in a wet basement or near a swimming pool.
19. The temperature of accessible surfaces may be high when the appliance is operating. The
surfaces are liable to get hot during use.Keep cord away from heated surface, and do not cover
any vents on the oven.
20. Do not let cord hang over edge of table or counter.
21. Failure to maintain the oven in a clean condition could lead to deterioration of the
surface that could adversely affect the life of the appliance and possibly result in a hazardous
situation. 22. Warning:The contents of feeding bottles and baby food jars shall be stirred or shaken
and the temperature checked before consumption, in order to avoid burns.
23. Warning:Microwave heating of beverages can result in delayed eruptive boiling, therefore
care must be taken when handling the container.
24.The appliance is not intended for use by persons (including children) with reduced physical ,
sensory or mental capabilities, or lack of experience and knowledge, unless they have been given
supervision or instruction concerning use of the appliance by a person responsible for their
safety.
25.Children should be supervised to ensure that they do not play with the appliance.
26.The microwave oven shall not be placed in a cabinet unless it has been tested in a cabinet.
27.Appliances are not intended to be operated by means of an external timer or separate remote-
control system.
28.The door or the outer surface may get hot when the appliance is operating.
29.The means for disconnection from the supply mains having a contact separation in all poles that
provide full disconnection under over-voltage category III conditions
must be incorporated in the fixed wiring in accordance with the wiring rules.
To Reduce the Risk of Injury to Persons
Grounding Installation DANGER
Electric Shock Hazard
Touching some of the internal components can cause serious personal injury or
death. Do not disassemble this appliance.
WARNING
Electric Shock Hazard Improper use of the grounding can result in electric shock. Do
not plug into an outlet until appliance is properly installed and grounded.
CLEANING
Be sure to unplug the appliance from the power supply.
1. Clean the inside of the oven after using with a slightly damp cloth.
2. Clean the accessories in the usual way in soapy water.
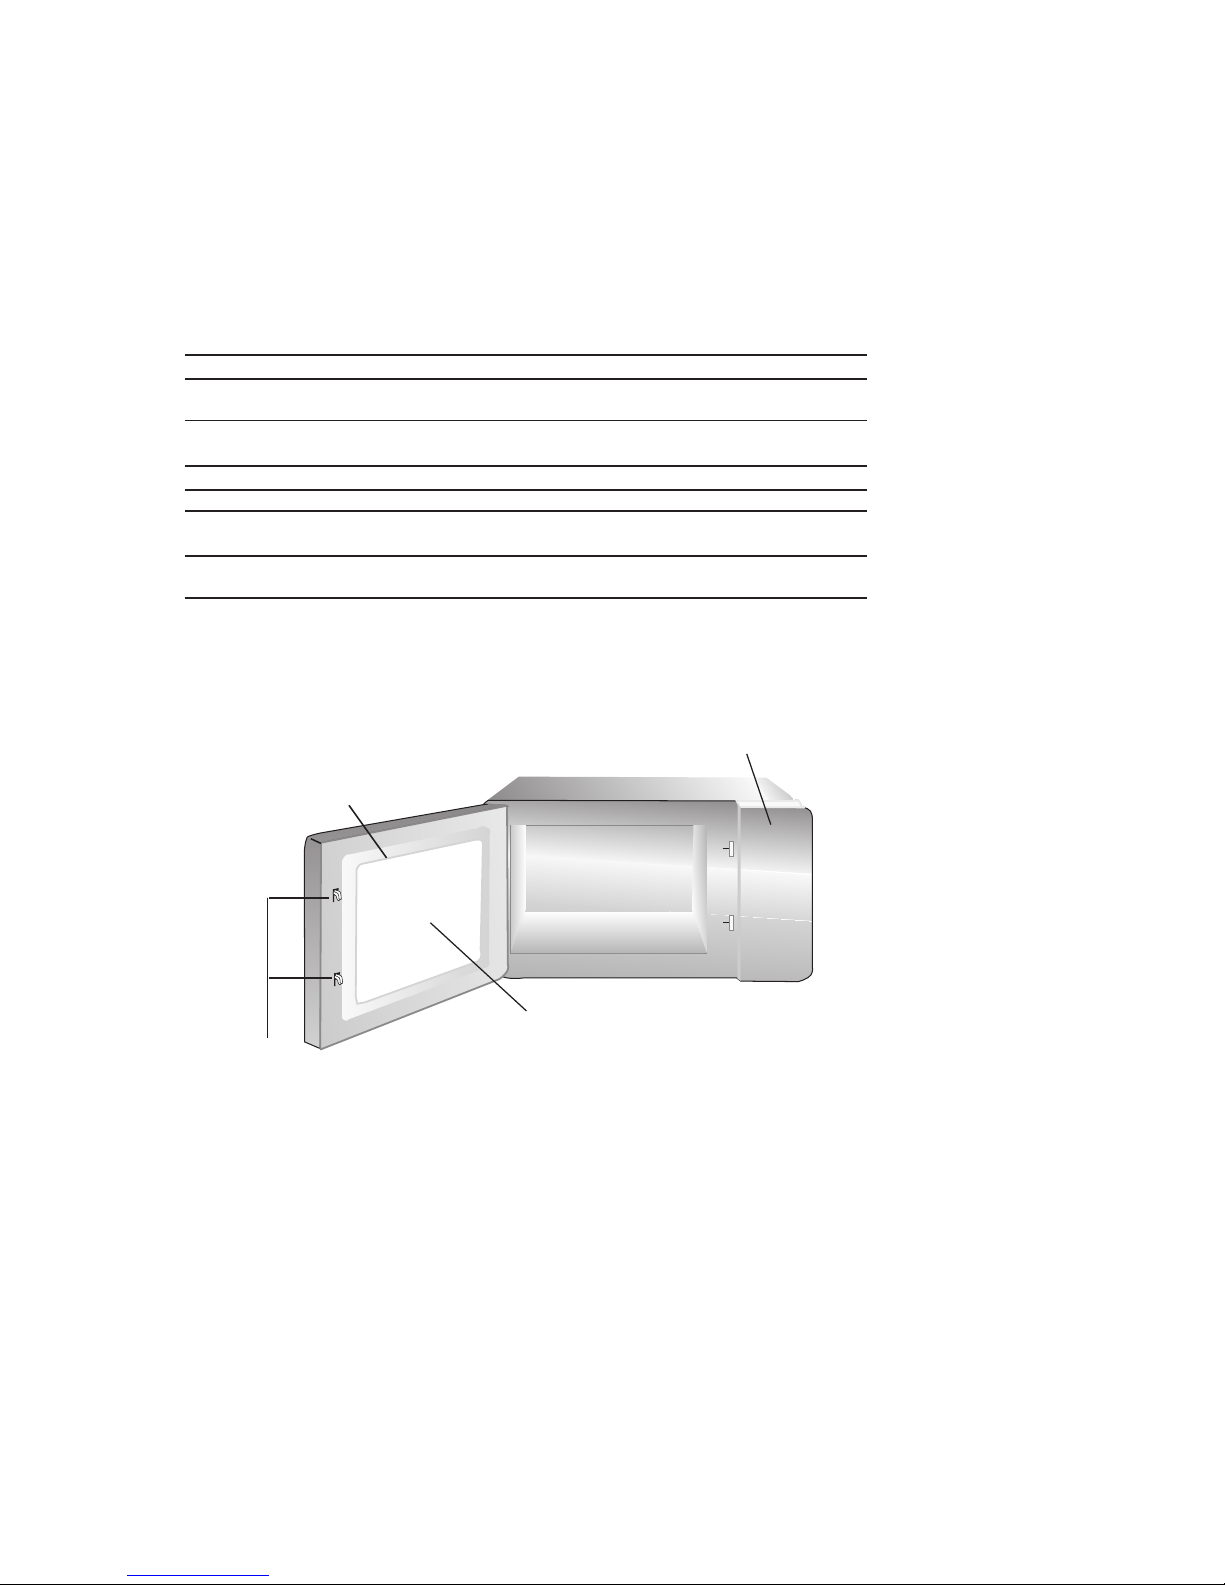
3. The door frame and seal and neighboring parts must be cleaned carefully with a
damp cloth when they are dirty.
This appliance must be grounded. In the event of an electrical short circuit, grounding
reduces the risk of electric shock by providing an escape wire for the electric current.
This appliance is equipped with a cord having a grounding wire with a grounding plug.
The plug must be plugged into an outlet that is properly installed and grounded.
Consult a qualified electrician or serviceman if the grounding instructions are not
completely understood or if doubt exists as to whether the appliance is properly
grounded. If it is necessary to use an extension cord, use only a 3-wire extension cord

1. A
short
power
-
supply
cord
is
provided
to
reduce
the
risks
resulting
from
becoming
entangled
in
or
tripping
over
a
longer
cord.
2.
If
a
long
cord
set
or
extension
cord
is
used:
1)The
marked
electrical
rating
of
the
cord
set
or
extension
cord
should
be
at
least
as
great
as
the
electrical
rating
of
the
appliance.
2)The
extension
cord
must
be
a
grounding
type
3
-
wire
cord.
3)The
long
cord
should
be
arranged
so
that
it
will
not
drape
over
the
counter
top
or
tabletop
where
it
can
be
pulled
on
by
children
or
tripped
over
unintentionally.
CAUTION
Personal
Injury
Hazard
It
is
hazardous
for
anyone
other
than
a
competent
person
to
carry
out
any
service
or
repair
operation
that
involves
the
removal
of
a
cover
which
gives
protection
against
exposure
to
microwave
energy.
UTENSILS
See
the
instructions
on
"Materials
you
can
use
in
microwave
oven
or
to
be
avoided
in
microwave
oven."
There
may
be
certain
non
-
metalic
utensils
that
are
not
safe
to
use
for
microwaving.
If
in
doubt,
you
can
test
the
utensil
in
question
following
the
procedure
below.
Utensil
Test:
1. Fill
a
microwave
-
safe
container
with
1
cup
of
cold
water
(2
5
0ml)
along
with
the
utensil
in
question.
2. Cook
on
maximum
power
for
1
minute.
3. Carefully
feel
the
utensil.
If
the
empty
utensil
is
warm,
do
not
use
it
for
microwave
cooking.
4. Do
not
exceed
1
minute
cooking
time.
Materials you can use in microwave oven Utensils
Remarks
Aluminum foil Shielding only. Small smooth pieces can be used to cover thin parts of meat or
poultry to prevent overcooking. Arcing can occur if foil is too close to oven walls.
The foil should be at least 1 inch (2.5cm) away from oven walls.
Follow manufacturer’s instructions. The bottom of browning dish must be at least
3/16 inch (5mm) above the turntable. Incorrect usage may cause the turntable to
break.
Microwave-safe only. Follow manufacturer's instructions. Do not use cracked
or chipped dishes.
Always remove lid. Use only to heat food until just warm. Most glass jars are not
heat resistant and may break.
Heat-resistant oven glassware only. Make sure there is no metallic trim. Do not
use cracked or chipped dishes.
Follow manufacturer’s instructions. Do not close with metal tie. Make slits to
allow steam to escape.
Use for short–term cooking/warming only. Do not leave oven unattended while
cooking.
Use to cover food for reheating and absorbing fat. Use with supervision for a
short-term cooking only.
Use as a cover to prevent splattering or a wrap for steaming.
Microwave-safe only. Follow the manufacturer’s instructions. Should be labeled
"Microwave Safe". Some plastic containers soften, as the food inside gets hot.
"Boiling bags" and tightly closed plastic bags should be slit, pierced or vented as
directed by package.
Microwave-safe only. Use to cover food during cooking to retain
moisture. Do not allow plastic wrap to touch food.
Thermometers Microwave-safe only (meat and candy thermometers).
Wax paper Use as a cover to prevent splattering and retain moisture.
Browning dish
Glass jars
Glassware
Oven cooking
bags
Paper plates
and cups
Paper towels
Parchment
paper
Plastic
Plastic wrap
Dinnerware

Metal shields the food from microwave energy. Metal trim may
cause arcing.
May cause a fire in the oven.
Plastic foam may melt or contaminate the liquid inside when exposed
to high temperature.
Wood will dry out when used in the microwave oven and may split
or crack.
May cause arcing. Transfer food into microwave-safe dish.
May cause arcing and could cause a fire in the oven.
SETTING UP YOUR OVEN
Names of Oven Parts and Accessories
Remove the oven and all materials from the carton and oven cavity.
Your oven comes with the following accessories:
Instruction Manual 1
A)) Control pan
B)) Observation wind
C)) Door assemb
D)) Safety interlock syst
C
D
A
B
Aluminum tray
Food carton with
metal handle
Metal or metal-
trimmed utensils
Metal twist ties
Paper bags
Plastic foam
Wood
Materials to be avoided in microwave oven
Utensils Remarks
Note: 1) Don't press the ceramic board forcibly.
2) Take and put the utensils gently during the operation in order to avoid damage to the ceramic board.
3) After using, dont touch the ceramic board by hand in order to avoid high temperature scald

Countertop Installation
Remove all packing material and accessories.
Examine the oven for any damage such as
dents or broken door. Do not install if oven is
damaged.
Cabinet: Remove any protective film found
on the microwave oven cabinet surface.
Do not remove the light brown Mica cover
that is attached to the oven cavity to
protect the magnetron.
Installation
Installation
Select a level surface that provide enough open
space for the intake and/or outlet vents.
(3) ) Blocki the intake and/or outlet openings can damage the oven.
(4) ) Pla the oven as far away from radiosandTVaspossible.
Operation of microwave oven may cause interference to your radio or TV
reception.
2. Plug your oven into a standard household
outlet. Be sure the voltage and the frequency isthe
same asthe voltage and the frequency on the rating
label.
WARNING: Do not install oven over a range cooktop or
other heat-producing appliance. If installed near or over a
heat source, the oven could be damaged and the
warranty would be void.
1.
The rear surface of appliance shall be placed against a wall.
A minimum clearance of 3.0 inches
(7.5cm) isrequired between the oven and any adjacent walls.
One side must be open.
(1) ) eave a minimum clearance of 12 inches (30cm)
above the oven.
(2) ) not remove the legs from the bottom of the
oven.
3.0 inch(7.5cm)
3.0 inch(7.5cm)
12 inch(30cm)
OPEN

Cleaning Instructions
Always keep the oven clean
1. Cleaning the glass viewing window, the inner door panel and oven front face.
For best performance and to maintain the high degree of safety, the inner door panel and oven front face
should be free of food or grease build-up. Wipe these parts with a mild detergent, rinse and wipe dry. Never
use abrasive powders or pads.
2. Cleaning the control panel and plastic parts.
Do not apply a detergent or an alkaline liquid spray to the control panel and plastic parts, as this may cause
damage to these parts.
Use a dry cloth (not a soaked cloth) to clean these parts.
3. Cleaning the oven interior
After use be sure to clean up spilled liquids, spattered oil and food debris as quickly as possible. If the
oven is used when dirty, efficiency drops and the dirt gets stuck on the oven surface and may cause bad
odours. Clean the interior with a cloth soaked in luke-warm water with a mild detergent dissolved in it,
then rinse the soap off with a damp cloth.
CAUTION: Do Not wipe plastic and painted sections of the oven with bleach, thinners or other cleaning
agents, as this may cause these parts to dissolve or change sharp.

OPERATION
Control Panel and Features
(1)
(2)
(3)
(4)
(5)
(6)
(1) Power Buttons
(2) Time cook Button
(3) Stp/Cancel Button
(4) Start Button
(5) X2 Button
(6) Number Button

Option Setting Discription
1
EOC Tone
2
Beeper
Volume
3
Beeper
On/Off
5
On the Fly
6 Door Reset
8 Manual
Programming
9
Double Digit
0
Clean Filter
O
P
:
10
OP:11
OP:12
OP:20
OP:21
O
P
:
22
OP:23
OP:30
O
P
:
31
OP:40
OP:41
O
P
:
42
OP:43
OP:50
O
P
:
51
O
P
:
60
OP:61
O
P
:
70
OP:71
OP:80
O
P
:
81
O
P
:
90
OP:91
OP:00
O
P
:
01
OP:02
OP:03
4
Keyboard
Window
7 Max time
3 seconds beep
Continuous beep
5 quick beeps,Repeating
Beeper Off
Low
Medium
High
Keybeep Off
Keybeep On
15 seconds
30 seconds
60 seconds
120 seconds
On-the-Fly Disable
On-the-Fly Enable
Door reset Disable
Door Reset Enable
60 Minute Maximum Cook Time
10 Minute Maximum Cook Time
Manual Programming Disable
Manual Programming Enable
Single Digit Mode-10 programs
Doule Digit Mode-100 programs
Off-Never Display Clean Filter
Weekly-Display every 7 days
Monthly-Display every 30 days
Quarterly-Display every 90 days.
OPERATION INSTRUCTION
Five power levels
are available.
Level
Power
High
100% 70% 50%
Defrost
20%
Hold
0%
PL10 PL7 PL5 PL2 PL0
M. High Med.
Display
Appendix. A User Options
Items bolded below are the default values.

Appendix. B Default Cook Times
The oven shall ship with the following Preset Cook Times unless otherwise noted in the product Specification.
Button Display (Time) Power
1
2
3
4
5
6
7
8
9
0
0:10
0:20
0:30
0:45
1:00
1:30
2:00
3:00
4:00
5:00
100%
100%
100%
100%
100%
100%
100%
100%
100%
100%
Cook Factors
80%
80%
80%
80%
80%
80%
80%
80%
80%
80%

" displays when the oven is electrified for the first time. If "" "
pressed, the oven will change to idle mode. Note: Under idle mode,
no button can be pressed.
1) ) Ent .The oven shall enter idle mode after a set of seconds have expired in Ready Mode without a keyboard press or a door
open and close. The number of seconds is determined by the keyboard Timeout Window, set by User Option 4.
2) ) During idle mode, LED is blank.And there shall be no oven activi .
3) ) Opening and then closing the oven do , the oven will exit the idle mode and into
ready mode.
1) In this mode, the oven is ready to either begin a manual or preset cook cycle.
2) ) Opening and closing the door while the oven is in Idle Mode will put the ov into Ready Mode.
2) ) During Ready Mode, "0:00" display
3) ) From the Ready Mode, the oven can go to almost all of the other mode
1) ) While the door of the oven is open, the oven shall be in Door Open Mod
This shall also allow for entry into Programming Mode. Whenever the door is open, the oven shal enter this mode.
2) ) During this mode, LED is blank And the fan and oven lamp work.
3) ) When the door is closed, if User Option OP:60 is selected and the oven w running a manual or preset cook
cycle, the oven shall enter Pause Mode.
In all other cases, the oven shall return to Ready Mode with User Option OP:61 set,opening and closing the door
will clear out any information about a Manual or Preset Program which was running.
2.. Idle Mo
3.. Ready Mo
4.. Door Open Mo
1.. Power
" _ _ _ _
1) ) While the door of the oven is open, the oven shall be in Door Open Mod
This shall also allow for entry into Programming Mode. Whenever the door is open, the oven shal enter this mode.
2) During this mode, LED is blan And the fan and oven lamp work.
3) ) When the door is closed, if User Option OP:60 is selected and the oven w running a manual or preset cook
cycle, the oven shall enter Pause Mode.
In all other cases, the oven shall return to Ready Mode with User Option OP:61 set,opening and closing the
door will clear out any information about a Manual or Preset Program which was running.

1) This mode allow the users to temporarily stop the cooking cycle to inspect or
stir the food item.
2)) While in Manual Cook Mode, or Preset Program Cook Mode, if the door is op
or closed, or if the " " pad is pressed, the oven will enter Pause Mode.
3)) While paused, LED will display the remaining cooking tim
4)) Pause Mode will expire back to Idle Mode in the exact fashion as Ready Mod
dependent on User Option 4. Additionally,if the " " button is pressed, the
oven shall immediately enter Ready Mode.OR if press " " button,
the oven will go into working mode.
2)) While the oven is in the Ready Mode,pressing t
put the oven into Manual Cook Entry Mode.
3)) During this mode, "00:00" displa
4)) If you press " "," "," " or " " button to select power leve
LED will display the related power. If the same button pressed twice, the power
will change to PL10. If no power chosen, "PL0" is default.
5) During setting process, press " " to enter Manual Cook Mod
Press " " to enter Ready Mode.
1) This mode allows cooking of the food items.While in Manual Cook Entry Mode, pressing
the " " pad will cause to the oven to begin Manual Cook Mode.
2)) During this mode, remaning cooking time displays The fan and oven lamp will light.
3)) When cooking program finish, the oven will enter End of Cook Cycle Mod
" button under this mode,the oven will enter Pause Mode.If you press "
6.. Manual Cook Entry Mo
1) The user may manuallly enter a cook time and power level while in this mode.
2) While the oven is in the Ready Mod
5.. Pause Mo
7.. Manual Cook Mo

the
1) After the time has expired in a Manual Cook Mode, or a Preset Program Cook
Mode, the oven shall go into The End of Cook Cycle Mode.
2)) During this mode, "End" display
3)) If either User Option OP 1 or "OP:12" is selected, the oven shall continue to sound until
the user acknowledges this by either opening and closing the door or pressing the "
pad. If User Option OP:12 is selected, after the 3 seconds beep, the oven shall go into
Ready Mode.
1) This mode allows cooking of food items through a one pad touch operation.
While in Ready Mode,pressing one of ten digit keys on the keyboard will cause
the oven to run the Preset Program associated with that key.
2)) LED displays the remaining cooking time. If it is multi-stage cooking, the total remani
cooking time displays not a particular stage cooking time.
3)) If the program chosen exceeds the maximum time allowed by User Option 7, then t
oven shall beep three times rapidly and display 00:00 to indicate that the program
is unacceptable.
4)) When cooking program finish, the oven will enter End of Cook Cycle Mod
" button under this mode,the oven will enter Pause Mode.If you press "
If you press " " button under this mode,the oven will enter Pause Mode.
8.. End of Cook Cycle Mo
9.. Preset Program Cook Mo
10.0. On the Fly Cook
1) The use may start another cook cycle while the oven is cooking or paused.
2)) While the oven is cooking or under Pause Mode, if User Option OP:51 is select
press number buttons, the preset cooking program will start automatically.
3)) LED displays the remaining cooking tim
4)) When cooking program finish, the oven will enter End of Cook Cycle Mod

11. Programming Mode
This mode allows the user to assign cook times and power levels to the once touche button.
1) Open the door and press "1" for 5 seconds,the buzzer will sound once and enter
Programming Mode.
2)) "ProG" display
3) Press " " button, LED will display the saved time, then you can inpu3)) Press
you need.
4)) Press " "," "," " or " " to input the power leve
LED will display the related power. If the same button pressed twice, the power
will change to PL10. If no power chosen, "PL0" is default.
5) To change the cooking fators: If press "X2",LED will display "CF:XX". The default factor is
80%. "CF:80" displays. If you need to change the cooking power, just press one of
the number buttons to set.
6) After setting the time and power, press ", press " ", the cooking program will
When the program saved, "ProG" displays.
7)) If all the cooking time exceeds the MAX.time User Option 7, when pre
" " to save the program, the buzzer will sound three times briefly and LED will diaply
"00:00" to tell you the time is no use. And then LED turn back to show "ProG". The time
set before will be no change.
8)) Close the do , the oven will turn back to Ready Mode.
If press " " button during setting process, the oven turn to Door Open Mode.
The program that not saved will be lost. If there is program saved as memory procedure,
press the related number button, the saved program will start. If no saved program,
the buzzer will alarm when pressing number button and it will not work.
For example: set the program as memory cooking.
Program; Power level PL7 and cooking time is 1 minute and 25 seconds.
Step1: In waiting state, press number button "1" for 5 seconds,"ProG" displays.
Step 2: Press number button "3", the program will be saved in "3".
Step 3: Press " ", "0:00" displays.
Step 4: Press number buttons "1", "2" and "5" to input the cooking time.
Step 5: Press "Step 5: Press
Step 6: Press "Step 6: Pre
" " button," PL7" displays. Se
ss " " to save. When use the program next time,
the related program will start.
Note:
1.. If the electricity is cut f, the saved program will not lost.
2.. If the program need to reset , just repeat the aboved step
3.. If press3. If press " " at the last step, it will turn back to The setting will be no use.

1) Through the use of the X2 pad, the user can easily set the time two of a particalar
food item.
2) Under waiting state, press "X2" button and then press number buttons 0-9 in 5 seconds,
the oven will start cooking with the quantity preset cooking time.
3)) Press "X2", "doub" displays. When press number buttons, LED will display the quanti
preset time.
For example, number button "5" and its preset time is 1 minute. Then press "X2", then time
will change to 1:00*(1+0.8)=1:48
4)) When cooking program finish, the oven will enter End of Cook Cycle Mod
Note: This function cannot be used under memory mode.
13.. Stage Cooking Programm
This allows the user to cook food items at combination of various Power Levels.
1) Three stages can be set at most under cooking mode or memory mode.
" to set the second stage.Aftet setting the power and time for the first stage, press "
And the same step to set the third stage.
2)) When setting the second or the third stage, press2) When setting the second or the th
3)) Press " " button to start cookin
Example: To set three stages as memory mode. The first stageis PL7 and time is 1 minute
25 seconds. The second stage is PL5 and 5 minutes and 40 seconds. The steps are follow.
a.. aiting state, press "1" for 5 seconds, LED displays "ProG".
b.. Press number buttons "3" to save the program in "3
c. Press " ","00:00"c.. Press
d.. Press "1","2","5" to input the cooking time. "1:25" display
e. Press " ", "PL7" displays.
The first stage is finished.
Press " ", LED displa
f. Press "
g.. Press "5", "4","0" button, "5:40" display
" ", "PL5" displayh.. Press
The second stage is finished.
12. Double Quantity cookin

14.. Use Option M
This allows the user choose between various ways for the oven to operate.
1) Open the oven door and press "2" for 5 seconds The buzzer sounds once and enter
this mode.
2) LED displays "OP: - -
3)) Press any number button to enter related mode settin
For example: to set the voice of the buzzer to medium. Press " 2 ", "OP:22" displays.
If you want to change, keep pressing "2", LED displays "OP:20", "OP:21","OP:22","OP:23",
"OP:20" .....in cycle.
4)) Press4) Press " " to save the current After saved, "OP: - -" display again.
5)) During setting process, press5) During setting process, press " " to enter Door Op
Ready Mode.
6) If " " button not pressed at the last step, the program cannot be saved but stay at p6)) If
way.
15.. Service M
1) Open the oven door and press "3" for 5 seconds to enter service mod
2) LED displays "SErU
3) To check the times of closing or opening the door, just press number button "3",
LED will display the times.
4)) Press " " and then press number button "4" in 4 seconds, the message will be cancelle
"4-CL" displays.
5) Press " " to enter Door Open Mode. Close the door will enter R5)) Press
16.. Inqury Funct
During microwave cooking process, press " " to check the power level.
LED display the power for 3 seconds then turn back to previous state.
It is available for multi-stage cooking.
17.. Factory-default sett
In power up and ready mode, press"In power up and ready mode, press" " a

Maintenance
Troubleshooting
Check your problem by using the chart below and try the solutions for each problem. If the
microwave oven still does not work properly, contact the nearest authorized service center.
TROUBLE
Oven will not start
POSSIBLE CAUSE POSSIBLE REMEDY
a.. Electrical cord for oven
not plugged in.
b.. Door is ope
c.. rong operation is set.
a.. Plug into the outle
b.. Close the door and t
again.
c.. Check instruction
Arcing or sparking
a.. Materials to be avoided
microwave oven were
used.
b. The oven is operated when
empty.
c.. Spilled food remains in t
cavity.
a.. Use microwave-sa
cookware only.
b.. Do not operate with ov
empty.
c.. Clean cavity with wet towe
Unevenly cooked
foods
a.. Materials to be avoided
microwave oven were
used.
b.. Food is not defrost
completely.
c.. Cooking time, power lev
is not suitble.
d.. Food is not turned or stirre
a.. Use microwave-sa
cookware only.
b.. Completely defrost foo
c.. Use correct cooking tim
power level.
d. Turn or stir food.
Overcooked foods Cooking time, power level is
not suitable.
Use correct cooking time,
power level.
Undercooked foods
a.
b.
. Materials to be avoided
microwave oven were used.
Food is not defrosted
completely.
c.. Oven ventilation ports a
restricted.
d.. Cooking time, power level
not suitable.
a.. Use microwave-sa
cookware only.
b.. Completely defrost foo
c.. Check to see that oven vent
lation ports are not restricted.
d.. Use correct cooking tim
power level.
Improper defrosting
a.. Materials to be avoided
microwave oven were used.
b.. Cooking time, power level
not suitable.
c.. Food is not turned or stirre
a.. Use microwave-sa
cookware only.
b.. Use correct cooking tim
power level.
c. Turn or stir food.
Other manuals for bcm1800
2
Table of contents
Other Blizzard Microwave Oven manuals