Blood Blood K-tab User manual

1
USER MANUAL
MODELNAME:BloodK-tab
FCCID:AYWBLOODK-TAB

2
Directory
Important Notice ............................................................................................................................2
Note .................................................................................................................................................2
The main function ......................................................................................................................... 4
Understanding of the machine .....................................................................................................4
Chapter 1,Getting started .............................................................................................................5
1-1 on / off ................................................................................................................................. ..5
1-2 Solve the problem of machine runs slow ...............................................................................6
1-3 Charge ...................................................................................................................................6
1-4 Connected to the computer and file transfer ..........................................................................7
1-5 How to use the touch screen ..................................................................................................7
1-6 Gravity sensing .......................................................................................................................7
1-7 The main interface introduction ...............................................................................................8
1-8 Additional features .................................................................................................................10
1-9 Installation .............................................................................................................................11
1-10 Text input .............................................................................................................................12
1-11 OTG functions ......................................................................................................................13
Chapter 2,Internet .........................................................................................................................13
2-1 Network Settings ...................................................................................................................13
2-2 Web browser .........................................................................................................................14
2-3 Email .....................................................................................................................................15
2-4 Instant Messaging .................................................................................................................16
Chapter 3 , entertainment,multimedia ........................................................................................16
3-1 Music ....................................................................................................................................16
3-2 Video .....................................................................................................................................17
3-3 Recording ..............................................................................................................................18
3-4 Camera .................................................................................................................................19
Chapter 4,the basic settings ........................................................................................................20
Chapter 5,Troubleshooting ..........................................................................................................22
Chapter 6,Technical Specifications ............................................................................................23

3
Instructions
Important Notice :
♦Before using must charge for five minutes at least .
♦Before using this product, please carefully read this manual. When you start using this product we admit that
you have read this manual carefully.
♦Second, the instructions of the copyright of the Company are not free to copy or translate this manual in whole or in
part for commercial activities.
♦Covered by the manual,this manual is writing the latest information,such as content or parameters
change,subject to the current product without notice.If necessary,please download the latest content on our
website .
♦As mobile audio and video products, the company recommends that you back up data for use due to any
cause loss of data,the company of the data does not bear any responsibility .Then Company may only have
a limited warranty responsibility for product hardware .
Note :
♦This manual contains important safety measures and proper use of information in order to avoid accidents,we are
sure that you read the manual carefully before using the product.
♦Do not use the product in a hot ,damp or dust;especially the summer,not to the product on the screens off the
car ,or place of sun exposure.
♦Avoid dropping or strong impact please ,do not let the display was a violent shock,it may cause display damage or
not displayed properly.
♦Please select the appropriate volume using headphones is not too large volume,if they feel a ringing in the ears ,
please turn down the volume or stop using.
♦The machine is formatted or ongoing upload and download information ,please do not suddenly disconnected, or it
may result in equipment damage .
♦For those erase memory loss due to damage , maintenance or other reasons , the Company assumes no
responsibility .
♦Do not disassemble the product , do not use alcohol,thinner or benzene to clean the surface of the product .
♦Do not driving or walking down the street to use the product may cause a car accident .
♦The Company reserves the right to improve products,product specifications and design are subject to change
without notice !
★This Machine is not water resistant .

4
The Main Function
· 7.0-inch high-definition true color TFT capacitive touch screen;resolution 800*480
·Support OTG function ; U disk,mobile hard drives and other USB peripherals connected through
the OTG function for data transmission and to read and write . Internet access to multiple
network access methods,Support Wifi,anytime,anywhere to enjoy the network life
·Gravity sensor(G-sensor)in addition can be horizontal,vertical screen switch can be installed
on a variety of software extensions.For example,document flip,switch songs,fun games
·Support the vibration function
·Latest Android 4.0.4 operating system,you can install software extensions,or create a personalized
space as far as you want
·Support the installation and application of the APK application software is available through
a flood of “ applied markets”,or their own from the network to download and install
·With only a machine to get application of both office and entertainment;resourceful software
you can e-mail,documents,web browsing,news,instant messaging,finance,micro-blogging
online games,online video,stock quotes,mobile television,maps,fun software,etc.,everything
·Support MP3,MP4,APE,FLAC,AAC,WAV,AMR,OGG and so on audio format playback,support
part of the LRC lyrics display
·Full HD video decoding support (1080P,720P,480P);Video supported formats
MKV,AVI,RM/RMVB,3GP,MOV,MP4,ASF,MPG,DAT,VOB,FLV,etc.
·Support JPG,JPEG,BMP ,PNG,etc.formats picture browsing
·Support for memory expansion(TF Card),capacity support up to 128MB-32GB
·Personalized settings,be free to adjust the brightness,turn on or turn off the key tone, replace the wallpaper.

5
Shape and key
Chapter 1, Getting Started:
1-1. Switch and unlock: When the device is in shutdown mode, long press Key for 3
seconds to boot, the boot time a little longer, please wait a moment. LCD display, lock mode takes
about 36 seconds into the desktop, right light paddling unlock icon To the left of the display will
unlock; paddling unlock icon, it will enter the camera interface. As shown below :

6
Power saving mode and lock mode: The equipment in the course of the system into power
saving mode and lock mode, press Key-on wakeup screen, the system will be within one
second to go in lock mode, slide Unlock.
Note: the main operation of the device in sleep mode will not stop, but the LCD screen will close
with
a black screen. Music, movies, etc. will continue to run.
Shutdown: When the device is in use, press and hold Button for three seconds will be
displayed
on the screen to turn off the power connector, select the "Shutdown" option to confirm your choice
and the system will automatically shut down.
Tap Button to cancel the shutdown operation.
Note: When the device running the battery is low, an alarm sound will automatically close the case
not connected to the power supply and start charging. In the case of the device cannot start, check
the battery power.
1-2. Solve the problem of the machine running slow
Although the program shut down after using the machine for some time, but the background
of system is still running the those softwares which makes the machine run very slow.So you
need to close those unnecessary softwares and applications in Advanced Task Manager to make
your device run faster.
1-3. Charge
Charge through the Company recognized the charger before charging the charger to the mains,
then the other end into the machine's mini-USBcharging jack to charge the battery. When charging
the
battery is displayed as the lightning icon, battery power after charging is completed for the full grid.
In the process of charging, the charger and the machine has a certain degree of warming
which is a normal phenomenon.
1-4. Connected to the computer and File Transfer
The unit through the USBcable and computer connection, display the bottom right status bar
prompts the USB is connected, native USBconnection default "as a media device, the user can
access to this machine as a removable disk; If you need to connect other mobile phones APK
software, You need to open "USB debugging" mode through the "Settings" - "System" - "developer
options" .
USB storage state system will be limited to application users need to access the local disk, and
disconnect the USBstorage status will return to normal, as shown below:

7
1-5. The use of touch screen
Mode of operation of the machine, you can browse the home screen, menus and applications.
1-5-1. Click
When you want to use the screen keyboard to enter, and want to select items on the Home interface of the
application, as long as (invalid) Click to nail operation with the pulp.
1-5-2. Press and hold
To delete the shortcut on the main menu, move in a use of procedures, or the Home screen, hold the item.
1-5-3. Rapid slide or slide
The rapid slide or slide action on the screen with your fingers to make rapid vertical or horizontal stroke.
1-5-4. Drag
Before you start to drag, you must touch with the pulp points and has maintained a sliding touch screen
surface, loosen until you drag the desired position.
1-6. Gravity sensor (G-Sensor)
This machine has a gravity sensor, turn on this feature in the settings (on by default), the machine rotate 90
degrees, the screen display will automatically switch horizontal, vertical screen; such as rotation in the cross
screen when browsing the web after 90degrees vertical screen display, web pages automatically switch from
horizontal screen.
1-7. Main Interface Introduction
Long press the power button to boot in, after turned on the screen is in a locked state. Pad unlock icon to
unlock entered as shown below the main interface, this interface can browse the most recently used menu,
replace the wallpaper and add widgets to add program shortcut to open the operating procedures.

8
1-7-1. TThe status bar: the position of the fingers tap the lower right corner of the status bar to open the
notification bar to read the message, network status, battery status, and you can see today's date and time.
1-7-2. The return key: pointing hand touch Icon that can be returned to an operation or exit the
application procedures.
1-7-3. The main interface: tap the main interface buttons The main interface:
●Add: This feature can add a small icon of a variety of functions, or widgets, folders, wallpaper; icon added to the
main interface can also be removed, has been holding down the delete icon will appear above a Remove icon
icon, and direct this icon you can drag to delete the icon .
Management application: View all the procedures of this machine, and you can uninstall the installed programs;
●Wallpaper: In this menu can be set up with your favorite pictures as the background of the main interface.
●Search: enter search Web search to a wait state, enter the URL here.
●Settings: Click directly into the system settings menu interface.
1-7-4. Using the menu button: Click Button to pop-up menu of recently used functions, as follows:

9
This shortcut, you can quick access to the use of program running in the
background, browse the latest traces.
1-7-5. Main course one-button: Click Button brings up a full-featured menu is as follows:
This screen shows all the features this machine icon and click on any icon to go to the relevant
functional interface to the functionality of the related icon is briefly as follows:
The APK installed: You can install new programs, management installed on the machine
10
within the APK program. The method of operation, please refer to (1-9 Installation), introduced.
Browser: Click into the online interface, browse the Web.
Camera: The method of operation, please refer to the introduction of the (3-4 cameras).
Explorer: card, U disk and memory, file preview, copy, playback, select the corresponding
apkfiletoinstall.
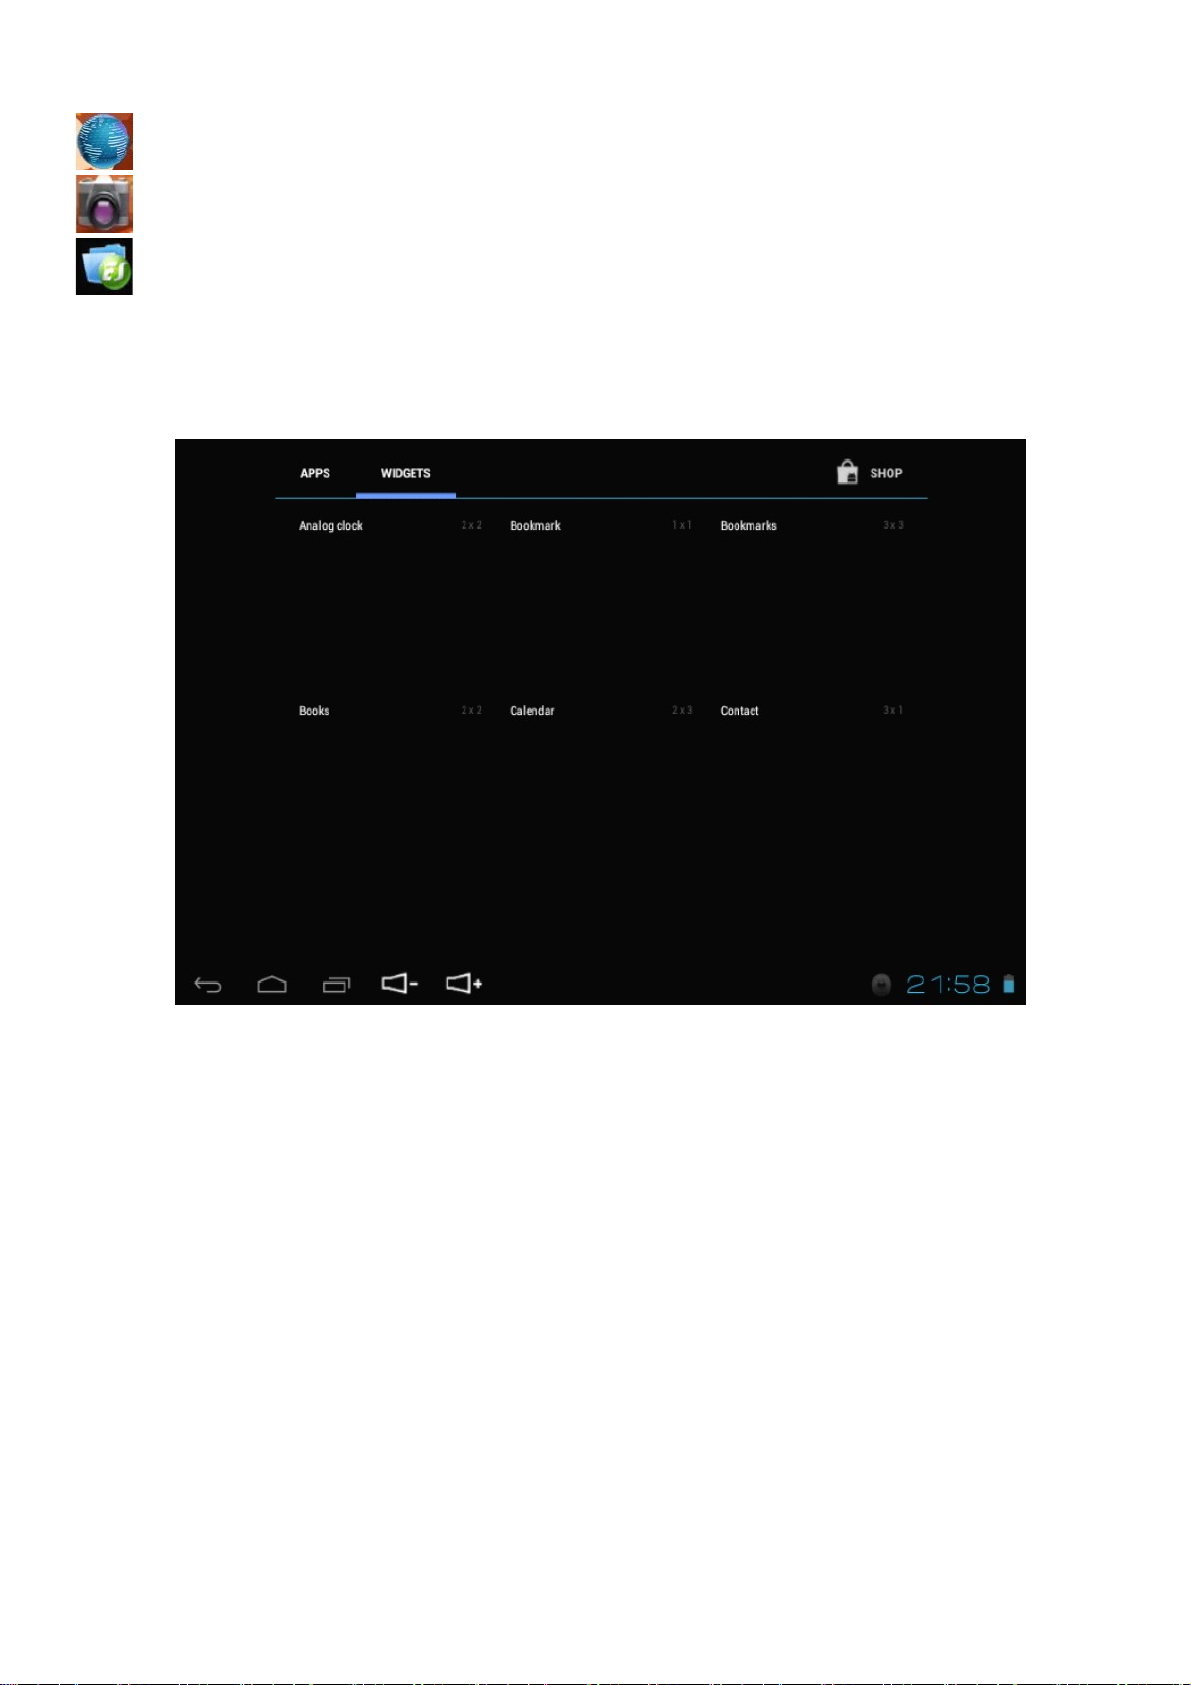
1-8. Additional features
The machine built many useful widgets, in the light of the main interface "menu" key to
Select "Add", then select The "gadgets" to the following interface :
Users will be added to the above components in the main screen, the main screen will
show widgets, for example, to add analog clock to the main screen will be displayed.
1-9. Installation
The machine is free to install the APK (Android Package abbreviation Android install package)
program, you can get third-party applications for the Android system in an electronic market or
on the Internet, and can be installed on the machine.
In order to download other APKs, please open "settings, chose "security", chose "unknown source".

11
1-9-1. Program access to:
Method 1: download via the Internet, then copy the application to the TF card or U disk and
then inserted into the machine; or copy files from your computer through the USB cable into
the machine.
Method 2: native "applied markets," the application to download to your TF card.
1-9-2. Installation:
Method 1: Click on the main interface shortcuts, select the "APK Installer" and then select
the "Installer" into the TF card, corresponding to the root directory to a local disk, select the
application you want to install, pop-up installation options, click on "Install" the apk. Can be run in
accordance with the completion of the installation wizard.
Method 2: Click on the main interface shortcuts, select the "Explorer" and then enter the MEMORY
CARD Internal the Memory or USB (root directory of the corresponding U disk), and then click to
install the application can be installed in accordance with the Installation Wizard.
Note: The search for third-party programs on the Internet. Apk file with the extension.
1-9-3. Uninstall:
Click on the main interface shortcuts, APK Installer "and then select the" Management Manager,
enter the software list, click on the program to uninstall, select "Uninstall Uninstall" in the pop-up
check box, then click on "OK" to uninstall namely can.
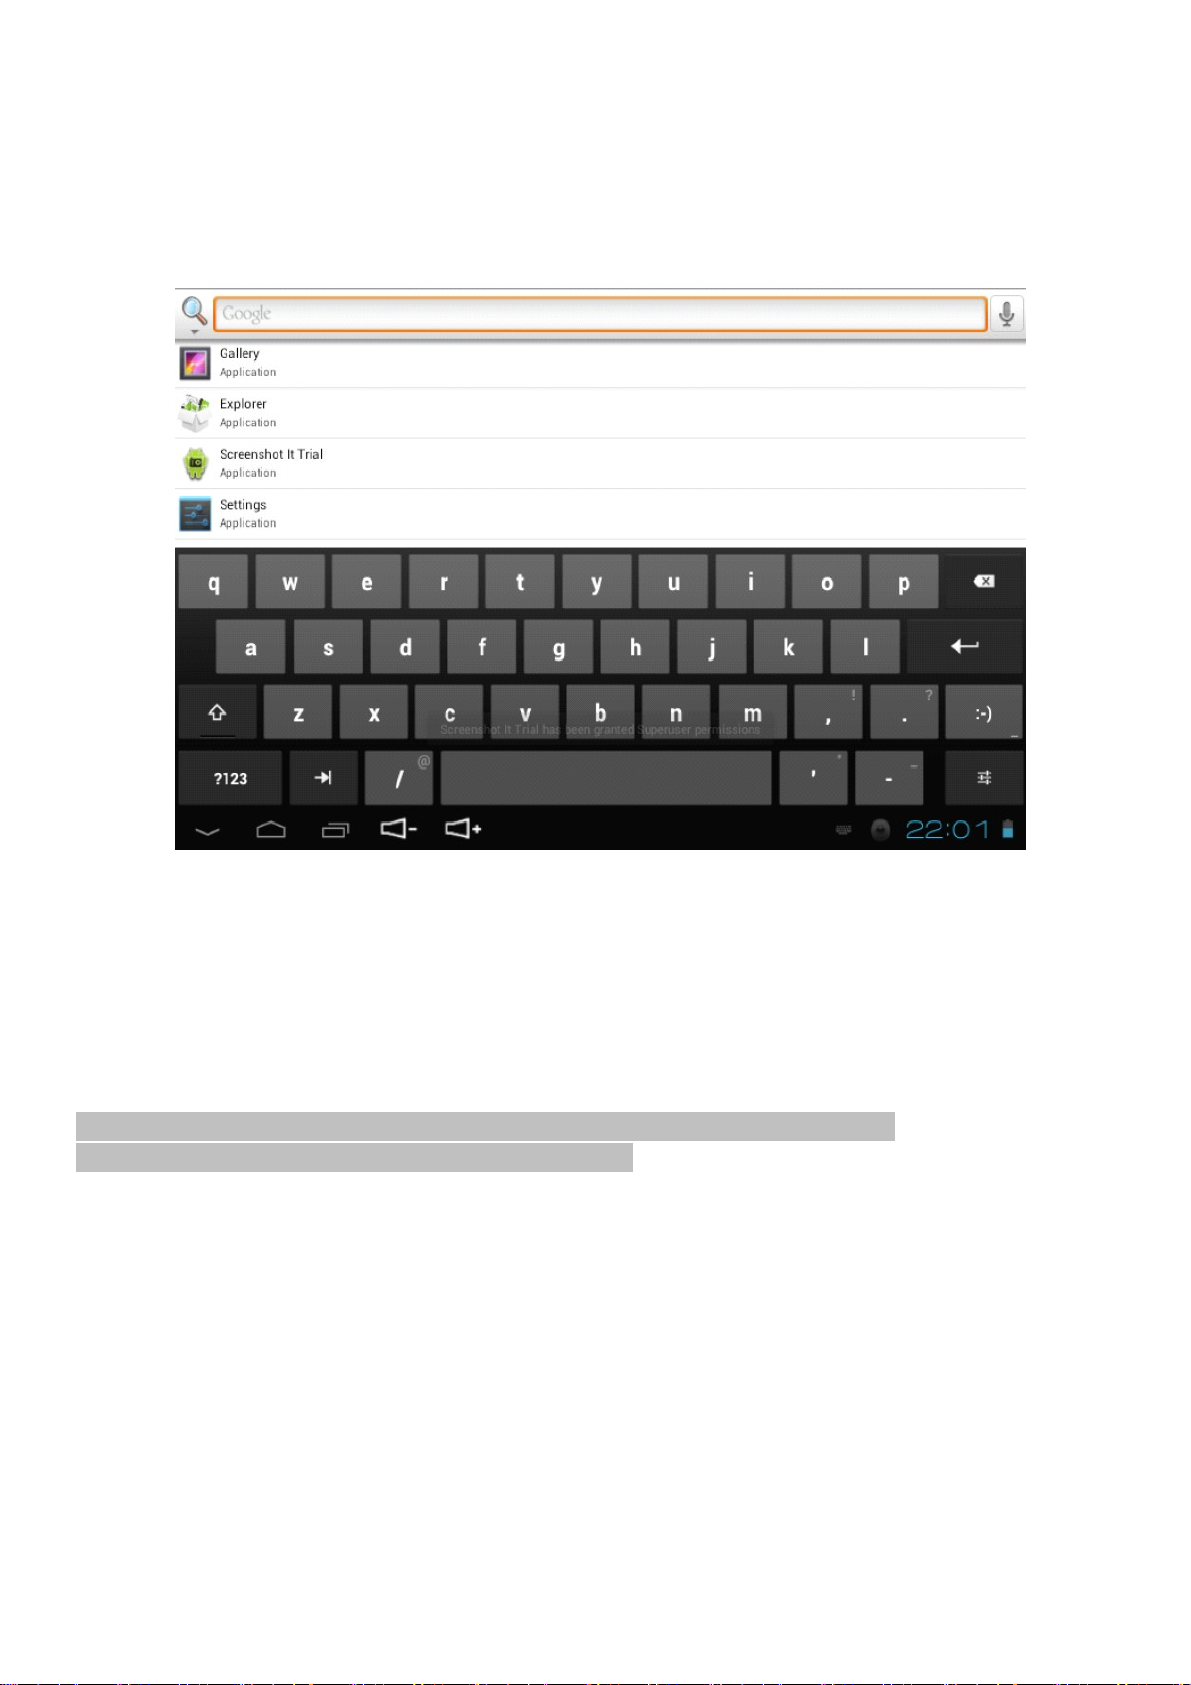
1-10. Text input
When you start a program or select the text edit box will need to enter text or numbers will
appear on-screen keyboard. The keyboard has the following input method selection:
●the Android keyboard
●Android Pinyin input method
1-10-1. Select the input method
By default, when you want to enter text, the machine will display the Android keyboard.
(1) Home screen, press the Menu key, and then click settings.
(2) Click on the language and keyboard.
(3) in the language and keyboard settings area lists your machine has been installed input method.
12
(4) in the input method you need to play bait.
1-10-2. Use and switch the input method
A. In the text input interface, press and hold the text edit box area, until the pop-up edit the text
menu.
Then click the "input method". Two. Select your desired input method.
Android Pinyin input method keyboard panel
1-11. OTG function
Native OTG function, support U disk, as well as some MP3, MP4, self-powered hard disk boxes and
other equipment; The native USB interface device with the OTG - USB cable connected, the
machine can automatically detect the device inserted. As like this machine memory access inside
the file.
External disk file is located in the root directory of the USBfolder, USBfile within the File Manager to
view and manage.
When battery power is low, do not use the OTG function since it may result in
power insufficient and unit will turn off automatically
Chapter 2, the Internet
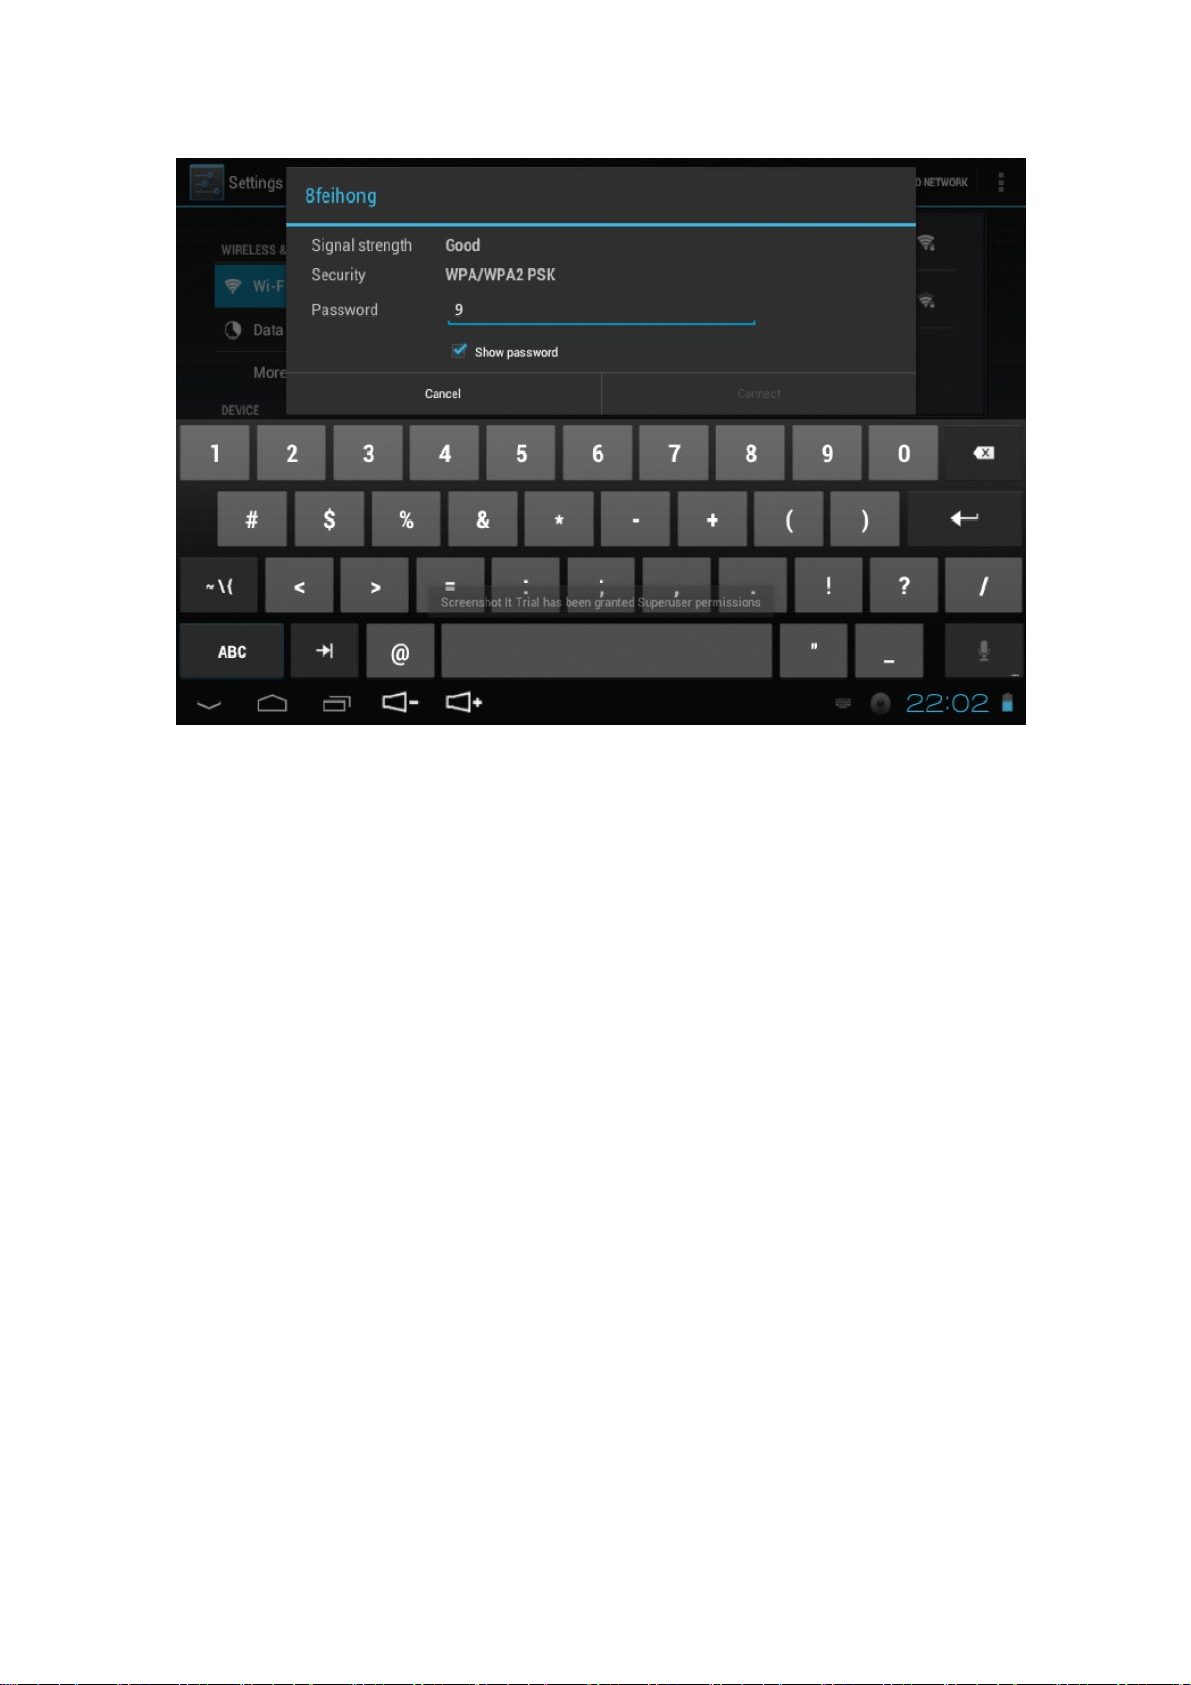
2-1. Network settings
Click the bottom right status bar, select "Settings / Wireless Network, enter the network settings
interface: Interface in the wireless and network settings, hold down the "WI-FI" drag the right to
open WI-FI. WI-FI Open will automatically find the wireless router network, and displayed in the list,
click on the wireless router to connect to the network (for example, the native sample d-link wireless
router network), enter the password input interface, enter the network password then click the
"Connection", after a while, this machine will automatically connect to a wireless router. You can
connect to the Internet.
13
In order to change from WIFI connection to 3G dongle (accessory not included) ,please turn off and
on unit before connecting 3G dongle .
Tips: WI-FI turned on the machine about 1/4 power, do not use WI-FI, turn off the WI-FI, to save
power to extend battery life.
2-2 Web browser
Set up the network according to the method of 2-1 chapters, you can use the browser to navigate
pages.
Click on the main interface shortcuts, select the "browser" into the browser interface, click the
"Menu" button, pop-up browser settings menu; Click "Start" pop-up address bar, enter the URL can
be determined. Open a Web page, you can screen up and down, slide your finger to browse and
view the page, and support multiple screens open simultaneously, switch freely changed past
Android2.2/2.3 single screen a lot of inconvenience.
2-2-1. Manage bookmarks
●Set a bookmark for a web page
In the browser interface, if you want to bookmark the current web page address.
Click on the "menu" button and click on the "Bookmarks", then click "Add Bookmark".
Edited and then click "OK".
●open a bookmark
Browser interface, click the "Menu" button and click on the "Bookmarks", click the
bookmark you want to open a Web page.
●Edit Bookmark
Browser interface, click the "Menu" key and click on the "Bookmarks", click and hold the bookmark
to open the menu options. Click on "Edit Bookmarks" to edit it, then click "OK."
2-2-2. Open aa new screen
●open a new browser screen
In the browser screen, click the "Menu" key and click on "new screen" to open a new browser
screen.

14
●Switching the browser screen
In the browser screen, click the "Menu" key and click on the "screen" and click on the screen
you want to open a new screen.
2-2-3. Change your browser homepage
Browser interface, click the "Menu" button, pop-up browser settings menu, and click the "More"
then click "Settings", click in the settings interface to set the home page and then enter the URL,
click OK completed.
2-2-4. Set your browser
In the browser interface, click the menu key and click on "More", then click the "Settings" to set the
browser.
2-3 E-mail
E-mail program can receive and send e-mail. E-mail application is accompanied by e-mail setup
wizard, you can add external POP3 or IMAP e-mail account of the common Web-based email
service providers (such as vendors such as Yahoo, Gmail, Hotmail, and Netease).
Note: E-mail Setup Wizard, make sure your network is connected to the time setting is correct.
2-3-1. Mailbox setup wizard
Click the main interface shortcuts, select the "Email" icon, mailbox setup wizard will help you set up.
Click "Next" button, enter your E-mail accounts e-mail address and password. Then click "Next"
button, select your mailbox type POP3 or IMAP.Then click "Next" button, to check whether the
E-mail sending and receiving server is available, enter your account name and you want to display
with the names of the
e-mail, then click "Finish". If the mailbox is available, will be automatically entered to your inbox.
2-3-2. Income, e-mail
Click the main interface shortcuts, select "email" icon into your inbox will automatically refresh
the message, click to read.
In the Inbox, click on "Menu" key to pop-up menu. Click "Compose" into the compose
new mail interface. Enter your recipient's email address in the To field, enter the

15
theme and content; If you want to add an attachment, click the "Menu" key to pop-up menu option,
click the "Add attachment" select you want to send attachments ( such as pictures, video, etc.).
Then click the "Send" to send out e-mail.
Note: If you have more than one account, and hope that an e-mail, send an account before you
click on the main course single and compose a message in advance click the account name.
2-3-3. Delete the mail account
You can delete from your e-mail program to set a good POP3 or IMAP mail account.
Click on the main interface shortcuts, select "email" icon into your inbox, click the "Menu" button,
then click the "Account", press and hold the account you want to remove the pop-up menu list,
click "Delete account" click on "OK" can be removed.
2-4 Instant Messaging
Please install third-party instant messaging software for instant messaging with your friends.
Chapter 3, entertainment, multimedia
3-1 Music
Select the music icon, and click into the music file list, click in the list you want to play music,
as shown below:
/ Select / next song, rewind / fast forward; directly paddling progress bar
canalsorewind/fastforward.
/ : Play / Pause music;
Sound settings: Touch Into the sound settings interface

16
3-2 Video
Select the video player icon, click the video file list, video list, you can always hold down the bottom
of the video files will pop up a delete menu, click Delete to delete the video file. Select the video
Click the video player interface;
/ : Volume plus / minus ;
/ : Select / next video in the current video rewind / fast-forward;
directlyclicktheprogress bar can also rewind / fast forward functions
/ : Play / pause the video;

17
: Return to the previous menu;
Touch " Into more humane settings:
3-3 Recording
Select the recording icon, click to enter the recording interface:
In the recording interface, click on " " To start recording, sound recording Finished and then

18
click on" " Automatically save the audio file will recordingxxxxx.mp3 file format is saved in the
Recordings folder in the root directory of the recording file can play all the music player mode.
3-4. Camera
Select the camera icon, into the shooting of the mode.
3-4-1. Self-timer photos
In the shooting of mode, click on " "Icon to take pictures photographs files stored in the
Internal Memory / DCIM / Camera directory, file name to the month, day, minutes and seconds.
Jpg in accordance with the order is automatically generated. Click The icon can also browse
all the photos shot.
3-4-2. Self-timer video
In the shooting of mode, click on Icon for the video mode, then click Icon to start
recording, recorded after the click " "Icon to save the video, and then return to the viewfinder
status (if set to record video time to time will be automatically saved) shooting video files stored in
the DCIM / Camera directory, the file name to video date when minutes and seconds. 3gp
automatically generated in
order to click The icon can also play the video shoot. Click on the Icon to return to the
main interface.
Chapter 4,the basic settings
Select the Settings icon, click into the settings menu: wireless and network equipment (sound,

19
display, storage, battery application), personal (account synchronization, location services, security,
language input method, backup and reset), the system (date and time, accessibility, developers and
options, on the Tablet PC).
4-1. wireless and network: in this setting can be set up the network connection;
described in detail in the methods of operation in the previous (2-1 Network Settings).
4-2. Sound: You can set the media volume, notification ringtones, select the operating sound,
the screen lock tone;
4-3 Display: automatically rotate the screen (rotating MID automatically change
direction), wallpaper (choose from a dynamic wallpaper, photo gallery, wallpaper
gallery), brightness (adjust the screen brightness), sleep (screen saver settings).
4-4 location and security: can be set to use the network to show me the location, set screen
unlock pattern and enter the password when its characters and settings are allowed to install
third-party applications from "unknown sources".
4-5 applications: In this menu you can view the memory space, management /Remove the
installed applications, view and manage running services.
4-6. Privacy: whether to display my position, I back up my settings and restore factory settings.
Memory available capacity of 4-6. Storage: View MEMORY CARD or the machine, uninstall
the MEMORY CARD, format the MEMORY CARD.
4-7. Language and input method: Select the area (language, region selection), the input
method settings.
4-8. Date and time: You can set the date, time, time zone, like the time display format.
4-9. On the Tablet PC: View the status of the machine, power usage, legal information,
and model and software version number.

20
Chapter 5, Troubleshooting
A machine for the first time boot slow
1. machine system after the upgrade, restore the factory settings, the first start-up need to install
the pre-installed software applications, time is about 2-3 minutes, then open the opportunity to
more rapid.
2. cannot connect WIFI or signal difference
●Make sure the wireless router to provide network services work properly.
●Make sure to enter your user name and password are correct.
●The guarantee does not block the machines built-in antenna location.
●ensure that the distance between the machine and the wireless router to keep within a certain
range, and between not separated by walls or other obstructions.
3.cannot copy files
- Make sure the equipment connected to the computer correctly.
- Make sure the memory space is full.
- Please confirm whether the USB cable is broken
4. Headphone no sound
- Check that the volume is set to 0.
- Check the headset connection is normal, the headphone cable is damaged. If the
audio file has changed or bad, may also cause noise or mute.
5. System anomalies not work properly
- When you install some third-party applications may cause the system to normal operation. You
can reboot the system or uninstall this application.
6. Cannot set the e-mail or registration application
●Make sure your network connection, you can connect to the Internet.
●Make sure the e-mail to set up the right way.
●Make sure your system time and local time consistent.
●entering the "Advanced Task Manager will be the end of some of the programs running in the
background. This can make the machine run fast.
Table of contents


