BluCube CXC Series Troubleshooting guide

Unit 12, Teddington Business Park
Station Road
TEDDINGTON, TW11 9BQ
Phone: 020 8977 8633
Email: info@blucubespeakers.co.uk
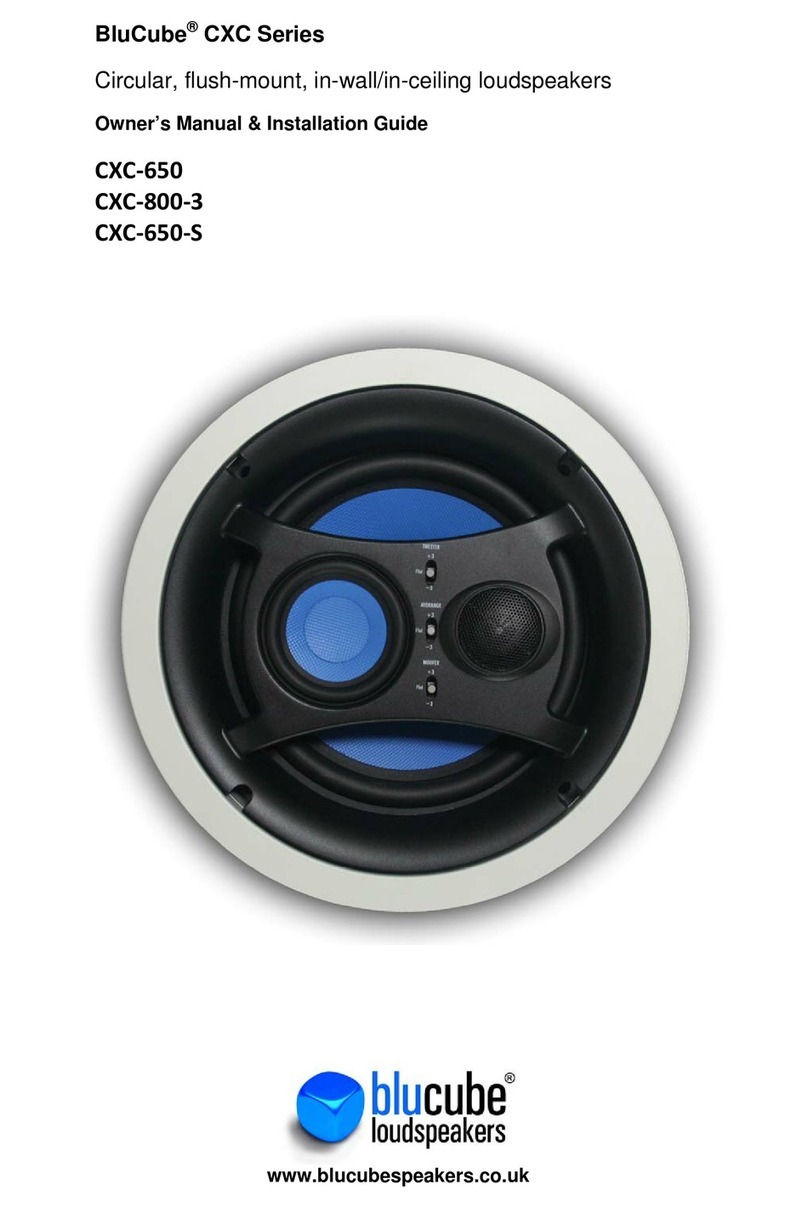
BluCube®CXC, CXCL & CXRL Series
Circular, ush-mount, in-wall/in-ceiling loudspeakers
Owner’s Manual & Installation Guide
CXC-650
CXC-800
CXC-800-3
CXC-650-S
CXCL-650
CXCL-800
CXCL-650-S
CXRL-650-LCR

Unit 12, Teddington Business Park
Station Road
TEDDINGTON, TW11 9BQ
Phone: 020 8977 8633
Email: info@blucubespeakers.co.uk
Introduction
Thank you for your purchase and welcome to the growing number of satised BluCube listeners. Please read the following installation
and operation guidelines carefully to ensure enjoyment of your home audio system for years to come.
Although we recommend that BluCube ush-mount loudspeakers should be tted by competent installation technicians or qualied
electricians, installation is also well within the means of a competent DIY enthusiast when performed with the aid of this instruction
guide. You may also nd it useful to visit our web site for the latest tips and techniques on installation.
Your BluCube ush-mount loudspeakers are designed to blend into your home interior while providing superior sound quality. At Blu-
Cube we continuously strive to improve our products and it is for this reason that we reserve the right to change product specications
without notice.
The information concerning product specications and instructions in this manual do not necessarily set forth all technical or other
specications of BluCube products.
ImportantSafetyInformation
•Do not use this or other electrical equipment near water or other liquids
•Clean only with a dry cloth
•Do not block any ventilation openings. Install in accordance with all safety standards and regulations
•Do not install near any heat sources such as cooking hobs, radiators, heat registers, ampliers or any other apparatus producing heat
•Use attachments and accessories as indicated by the manufacturer
•No user-serviceable parts inside. Refer all servicing to qualied service personnel
•Warning: To reduce the risk of re or electrical shock, do not expose this apparatus to rain, moisture or other liquids
•Warning: To prevent injury, this apparatus must be securely attached to the wall/ceiling in accordance with the installation instruc-
tions. No naked ame sources such as candles should be placed close to the product
•Caution: Changes or modications not expressly approved by the manufacturer could void the warranty on the apparatus

Unit 12, Teddington Business Park
Station Road
TEDDINGTON, TW11 9BQ
Phone: 020 8977 8633
Email: info@blucubespeakers.co.uk
Features
Your BluCube®loudspeakers feature the following:
•Woven Kevlar® Cones: Kevlar® has physical properties that make it ideal for loudspeaker drivers and consequently is found in many
of the world’s nest loudspeakers. Its combination of stiness and strength-to-weight ratio means that it results in a more precise and
dened sound reproduction
•Titanium tweeters: Another feature often found in the world’s nest loudspeakers. The stiness and lightness of a titanium dome
tweeter results in cleaner, brighter audio denition. (CXRL-650-LCR features a silk dome tweeter)
•Adjustable tweeters (N/A for CCL-650 model): The tweeters in your BluCube loudspeakers are mounted in an orbital socket and can be
adjusted by gently pressing on their edge. This adjustment allows for directing the sound when the speaker may need to be oset from an
ideal listening position due to aesthetic or physical reasons
•Stable tweeter housing: The tweeters in our circular ush-mount loudspeakers are mounted on a supremely stable bridge rather than on
a central pole as found in many current designs. This allows the speaker to handle more power with increased cone stability resulting in
lower harmonic distortion
•4/8 ohm impedance switching on the circuit board: The ability to switch between 4 ohms and 8 ohms impedance is useful to match the
speakers to your amplier and is also useful if you wish to set up multiple pairs of speakers connected to a single amplier. (Not on CXCL-
650-S or CXRL-650-LCR)
•Attenuation Switches: Your BluCube loudspeakers are tted with high frequency (tweeter) and low frequency (woofer) attenuation
switches (and midrange on CXCL-650-S). These enable you to adjust the sound properties of the speaker to suit your personal listening
preferences and the acoustic properties of the room in which you are installing them. (Not on CXCL-650-S or CXRL-650-LCR)
•Cut-out template: BluCube loudspeakers come with a cut out template to allow the installer to accurately measure the hole to be cut out
in the wall or ceiling surface resulting in an easier installation process
•Paint Mask: BluCube loudspeakers come with a paint mask to allow the installer to protect the surface of the tweeter and the woofer
cone while (optionally) painting the surrounding speaker bae (CXCL Range)
•Pre-construction bracket: All BluCube loudspeakers come with tough, plastic pre-construction brackets. Their use is optional, but can
be very helpful to the installation process at the time the plasterboard is about to be attached to the wall/ceiling. Therefore they would be
used only during more extensive renovations and not when tting the loudspeakers into an existing surface
•Paintable Grilles: Your BluCube loudspeakers come with steel grilles pre-painted in white. These may be painted a dierent colour if
required. Important: Please refer to the section later in this manual on painting grilles before embarking on this
•Grille removal tool: Your (CXC) BluCube loudspeakers come with a pair of nger hooks to facilitate the removal of the grilles in the event
that you wish to adjust or remove your loudspeakers. CXCL and CXRL loudspeaker grilles are magnetically attached
•Installation Guide: This installation guide is included with your BluCube loudspeakers. From time to time we will publish updates to the
guide and so you may wish to refer to our web site for the most up to date version

Unit 12, Teddington Business Park
Station Road
TEDDINGTON, TW11 9BQ
Phone: 020 8977 8633
Email: info@blucubespeakers.co.uk
InstallationGuide
It is BluCube’s aim to continuously improve our products. We therefore reserve the right
to change product specications without notice. The information concerning product
specications in this manual do not necessarily set forth all technical or other specica-
tions of BluCube products. Additional information may be obtained from our web site: www.
blucubespeakers.co.uk.
Speaker Placement
The pivoting tweeters in BluCube loudspeakers are able to compensate for unusual place-
ments of the speakers themselves. However, the ideal positioning of the speakers should be
at equal distances from the intended listening area and along a common wall. This helps to
ensure the best stereo eect.
Naturally, intended listening positions are rarely static and they may vary quite consider-
ably within a room. In these circumstances, you can condently compromise on the ideal
location and use the pivoting tweeter to assist without impacting your listening pleasure.
2-ChannelAudio Placement
In standard two channel audio systems, the ideal distance between the left and right chan-
nel speakers should be in the range of 1.8m to 3.0m apart. If the layout of the joists and light
ttings permit, the speakers should be equidistant from the most commonly envisaged
listening position.
Ceiling Height Standing Listener Seated Listener
2.4m Ceiling height 1.7m 2.8m
3.0m Ceiling height 2.9m 4.0m
3.6m Ceiling height 4.1m 5.2m
4.2m Ceiling height 5.3m 6.4m
DistributedAudio Placement
In some cases, where the room is large, you may wish to consider the use of two (or more) pairs of speakers in order to provide a wider
and more even dispersion of sound. A more even dispersion in this way means that people within the room are more likely to be equidis-
tant from the speakers so that there are no hot or cold spots of audio volume.
BluCube loudspeakers possess extremely smooth and predictable o-axis frequency response. The chart below shows how far apart the
speakers can be placed in a distributed audio system. Again, this is a guide and should not be treated as mandatory. The calculations
are based on a +/- 45 degree coverage from the speaker and listener ear heights using 1.5 metre for a standing and 0.6 m for a seated
listener.

Unit 12, Teddington Business Park
Station Road
TEDDINGTON, TW11 9BQ
Phone: 020 8977 8633
Email: info@blucubespeakers.co.uk
When connecting more than one pair of speakers to an amplier it is vital to ensure that
impedances are matched. Your amplier will specify an impedance range with which it can
handle and you must ensure you do not drop the total impedance below the minimum level
or you may damage your amplier. Conversely if the total impedance is too high, sound
quality will be adversely aected. If in doubt you should consult a professional installer or
contact BluCube directly before commencing installation.
As an example, a typical amplier may specify an operational acceptable impedance range
of 4 to 8 ohms. If you connect two pairs of BluCube Loudspeakers (set to 8 ohm impedance
on the circuit board) in parallel, the impedance you will present to the amplier is 4 ohms.
This is within limits. If you connect them in series, you will present 16 ohms resistance to
the amplier which will have a negative eect on sound quality.
If you switch the impedance of your BluCube loudspeakers to 4 ohms and connect two of
them in parallel, then the impedance will be 2 ohms and may damage your amplier. If they
are connected in series, the impedance will be 8 ohms and therefore within acceptable
limits.
Please note that, much like attaching a trailer to the back of a car, attaching a second set of
speakers to an amplier will put additional load on the amplier (or engine). This makes it
work harder for the same performance or it may simply not have the power to perform at all.
You need to check the capability of your chosen amplier before tackling this.
HomeTheatrePlacement
When using the speakers as rear channel speakers in a home cinema environment, they
should be ideally located between 0.4 to 1.8m behind the main listening position. They
should be separated approximately 1.8m to 3.0m apart.
Wire Gaugeand Quality
A good rule of thumb to consider when installing speakers is that the total wire resistance
should be less than 10% of the speaker impedance. If using an 8 ohm speaker, your wire
resistance should therefore be no more than 0.8 ohms.
The resistance of any wire is directly proportional to its length. So if you double the length,
you double its resistance.

Unit 12, Teddington Business Park
Station Road
TEDDINGTON, TW11 9BQ
Phone: 020 8977 8633
Email: info@blucubespeakers.co.uk
Additional resistance has an increasingly negative eect on sound quality of a speaker. The sound becomes less dynamic, the denition
of the bass frequencies can be reduced and, in more extreme cases, the high frequencies can be attenuated. Amplier power is wasted in
the wire, reducing the maximum power output of the system.
You may nd the following chart helpful when deciding on the appropriate wire gauge for your installation.
RunningSpeaker wires
Each BluCube loudspeaker will require a separate two-core speaker cable run from the speaker to the chosen location of your amplier.
In the case of the CXC-650-S and CXCL-650-S (a single-stereo loudspeaker incorporating both left and right channels) you must treat this
as a pair and run two 2-core speaker cables from the speaker to the amplier.
Running cables during a renovation or a new construction project is obviously more straightforward than running cables after decora-
tion has been completed. Here are some thoughts on how to make the wiring easier and most discrete.
Are youusingaregular infra-redcontrolled amplifier?
An infra-red controlled amplier requires line of sight between the infra-red remote control and the infra-red receiver. This means the
amplier needs to be on display or an infra-red extender needs to be used to relay the infra-red signal to the amplier. The location of the
amplier in this case is determined by the control system and is thus less exible in terms of the cable runs.
Are youusingawireless-controlled amplifier?
If you use a system such as Sonos®, that uses wireless technology for remote control and audio distribution, you can position the ampli-
er in a location that minimises cable runs as well as the disruption to the decor of your property. For example, in the case of Sonos®,
you could locate the amplier in a cupboard, adjacent room, or even the attic. This is because the amplier does not need to be visible in
order for it to be controlled as it is controlled and receives the audio content wirelessly. For more information visit www.blucubespeak-
ers.co.uk/sonos
Wireresistance (Ohms) versuslength of cablerun
WireGauge CableLength (metres)
AWG mm2 15m 30m 45m 60m 75m 90m
20 gauge 0.52 0.86 1.73 2.59 3.45 4.32 5.18
18 gauge 0.82 0.65 1.30 1.94 2.59 3.24 3.89
16 gauge 1.31 0.43 0.85 1.28 1.71 2.14 2.56
14 gauge 2.08 0.27 0.54 0.81 1.08 1.35 1.62
12 gauge 3.31 0.17 0.34 0.51 0.68 0.85 1.02
10 gauge 5.26 0.11 0.22 0.33 0.44 0.56 0.67

Unit 12, Teddington Business Park
Station Road
TEDDINGTON, TW11 9BQ
Phone: 020 8977 8633
Email: info@blucubespeakers.co.uk
Installingyourloudspeakers duringa new construction/
renovation
If you are installing your ush-mount BluCube loudspeakers during a renovation or new
construction, you will probably have the benet of exposed joists, ceilings and stud walls.
This makes the running of the speaker cables very much more straightforward.
The mounting surfaces used should be at least 10mm thick to ensure safety and speaker
stability.
Your BluCube loudspeakers come with pre-construction brackets. These can be optionally
used to assist with installation. They can be nailed or stapled between the joists or studs in
the planned speaker position with the ange of the speaker cutout facing out.
As the plasterboard is tted you will nd it easier to accurately cut out the necessary hole
for your BluCube loudspeaker reducing installation time and debris when the speakers are
being tted.
Installingyourloudspeakers inan existingconstruction
If you are installing your ush-mount BluCube loudspeakers after a renovation or new
construction has been completed, installation may be a little more challenging as you may
have to sh cables to minimise any disruption to the decor of your home.
Note: Wirelessly Controlled ampliers. The use of wireless ampliers (such as those found
in the Sonos® Music System) will greatly assist the installation of ush-mount speakers
in homes where construction is already completed. For instance, if you are wishing to
install your BluCube loudspeakers in upstairs rooms, consider whether the attic space is a
suitable location for your amplier. This would greatly reduce the cable runs required and
almost certainly avoid redecoration needs. Alternatively, consider whether the cables may
be run across the attic and down into an adjacent room.
If you wish to install your BluCube loudspeakers in downstairs rooms, identify their desired
positioning and consider what room is above this location. For instance, maybe it is a
bedroom and maybe it is possible to lift the carpet and oorboards to access the void and
hence to enable the cable runs to the speakers below. It may then be possible to locate the
amplier conveniently in the room above
The benet of using wireless technology in this context is the ability to locate the ampliers
in locations that will minimise the need for disruption to and redecoration of the wall or
ceiling surfaces. For more information visit: www.blucubespeakers.co.uk/sonos.

Unit 12, Teddington Business Park
Station Road
TEDDINGTON, TW11 9BQ
Phone: 020 8977 8633
Email: info@blucubespeakers.co.uk
The rst step in installing ush-mount loudspeakers in a pre-existing construction is to establish the location of the ceiling joists or
wall studs. You may be able to do this by lifting upstairs oorboards or stud nding tools. If not, you may need to make pilot holes and a
probe but recognise this may entail making good afterwards.
Once a suitable location is identied, you will need to cut out the correct size opening in the surface of the plasterboard using the
supplied cut-out template and a padsaw. You should make a pilot hole rst and take care not to cut into pre-existing electrical cables or
pipe-work.
You will need to run speaker cable from the opening back to the amplier (in the case of the Single-stereo model CXC-650-S and CXCL-
650-S you will need two cables). Ensure you comply with any building codes that may apply in your location.
Fittingthe speakerinto the cut-outopening
Before inserting the speaker into the opening in the wall/ceiling, attach the speaker cable(s) to the speaker, taking utmost care to
ensure the correct polarity of the speaker wires as this is critical to the correct operation of the speakers.
Insert the speaker housing into the opening and tighten the mounting screws to engage the “swing-dog” fasteners. Be careful to not
over-tighten. The “swing-dog” fasteners will clamp the speaker frame and the mounting surface together.
To insert the speaker grille (CXC range only), start on one edge and slowly work your ngers around the grille edges to ease into the
groove. Make sure all edges are in the groove before applying pressure to insert. It is a snug t. Do not push on the centre of the grille. If
the grille is not going in, it means that not all edges are in the groove. Ease the grille o and start again.
If the grille needs to be removed, use the supplied nger hook tools to gently ease it out of the housing.
The CXCL and CXRL range have magnetically attached grilles for ease of installation and removal.

Unit 12, Teddington Business Park
Station Road
TEDDINGTON, TW11 9BQ
Phone: 020 8977 8633
Email: info@blucubespeakers.co.uk
Paintingthespeakers and grilles
Both the speaker frames and the grilles can be painted, if desired. We recommend doing this before installation to avoid a paint scar or
meniscus forming around the frame edge. If the speaker frame is painted after installation, use the supplied paint mask to protect the
speaker drivers during painting.
Always paint the grilles separately from the speaker itself. The grilles should only be spray painted and with the use of thinned paint to
avoid clogging of the ne mesh of the grille. Thin the paint with 5 parts thinning agent to 1 part paint.
Only install the speakers and grilles once the paint has dried thoroughly.
Single-Stereo(CXC-650-S andCXCL-650-S) model
The 650-S model uses the same installation procedure as other models but needs two speaker cables as it produces both left and right
channel audio signals from one speaker housing. It is ideally suited to smaller rooms such as bathrooms. The crossover circuit board on
the speaker features two sets of push-to-connect terminals and it is essential that the correct polarity of the connections to your ampli-
er is maintained. If the sound from the speaker lacks denition, it is highly likely the polarity is incorrect. It does not matter which
speaker terminals are connected to the left or right channel on your amplier, but the correct polarity is critical.
Left-Centre-Right (CXRL-650-LCR)model
The CXRL-650-LCR model is suitable for use in home theatre installations as left, right or centre channel speakers. The speaker can be
mounted in a portrait or landscape orientation.
Settingthe Tone Control
Blucube CX-series loudspeakers feature bae-mounted level controls for both bass and treble frequencies. The level control will help
you to ne-tune the performance of the crossover to meet any demanding room acoustic issues or listener preferences.
Each level control adjusts an octave wide band of frequencies most aected by the interaction between the drivers. The controls can be
adjusted to provide 3dB of boost or 3dB of reduction on each of the drivers in any CX-series loudspeaker.
The level controls are able to help you maximise sound quality regardless of room setup and speaker placement.
Adjustingyourspeakers
Note: Do not apply pressure to the tweeter dome itself. The pivoting tweeter can be used to direct sound towards or away from a listening
area. To pivot the tweeter, apply light pressure to the plastic ring around the outside edge of the tweeter.
If your speakers are widely separated and the music fails to blend into a central image when the system is operated in stereo mode, you
should orientate the tweeters toward the listening area.
If you are using your BluCube loudspeakers in a home theatre environment, you can point the pivoting tweeter towards a wall or window
to create a diuse surround eect.

Unit 12, Teddington Business Park
Station Road
TEDDINGTON, TW11 9BQ
Phone: 020 8977 8633
Email: info@blucubespeakers.co.uk
Woofer: 6.5” woven Kevlar cone, rubber surround, 22oz magnet, bumped back plate, 1” voice coil, vented
pole piece
Tweeter: 1” Titanium Dome Tweeter, Ferro-uid cooled, Neodymium magnet, 30° swivel & pivot
Crossover: FR4 board, 18dB per octave for both woofer and tweeter sections, Polyimide auto-protective reset
switch for tweeter, 16AWG wire connection to woofer section, gold plated terminal posts will accept
14AWG wire
Attenuation Switches: ± 3dB on woofer and tweeter
Frequency Response: 45Hz – 22KHz
Sensitivity: 88dB 1W/1M
Recommended amplier power: 10-125 watts per channel
Impedance: 4 / 8 ohm switchable on PCB
Cut-out size: 200mm
Depth behind surface: CXC-650: 100mm, CXCL-650: 104mm
Weight (pair package): CXC-650: 5.7 kg, CXCL-650: 5.8 kg
BluCube®CX-Series Specifications
CXC-650 &CXCL-650 6.5”2-WayCircularFlush-Mountloudspeakers
Woofer: 8.0” woven Kevlar cone, rubber surround, 25oz magnet, bumped back plate, 1.25” voice coil, vented
pole piece
Tweeter: 1” Titanium Dome Tweeter, Ferro-uid cooled, Neodymium magnet, 30° swivel & pivot
Crossover: FR4 board, 18dB per octave for both woofer and tweeter sections, Polyimide auto-protective reset
switch for tweeter, 16AWG wire connection to woofer section, gold plated terminal posts will accept
14AWG wire
Attenuation Switches: ± 3dB on woofer, midrange and tweeter
Frequency Response: 40Hz – 22KHz
Sensitivity: 89dB 1W/1M
Recommended amplier power: 10-150 watts per channel
Impedance: 4 / 8 ohm switchable on PCB
Cut-out size: 239mm
Depth behind surface: CXC-800: 118 mm, CXCL-800: 137mm
Weight (pair package): CXC-800: 7.16 kg, CXCL-800: 7.26 kg
CXC-800 &CXCL-800 8.0”2-WayCircularFlush-Mountloudspeakers

Unit 12, Teddington Business Park
Station Road
TEDDINGTON, TW11 9BQ
Phone: 020 8977 8633
Email: info@blucubespeakers.co.uk
Woofer: 8.0” woven Kevlar cone, rubber surround, 25oz magnet, bumped back plate, 1.25” voice coil, vented
pole piece
Midrange: 3” woven Kevlar cone, rubber surround
Tweeter: 1” Titanium Dome Tweeter, Ferro-uid cooled, Neodymium magnet, 30° swivel & pivot
Crossover: FR4 board, 18dB per octave for both woofer and tweeter sections, Polyimide auto-protective reset
switch for tweeter, 16AWG wire connection to woofer section, gold plated terminal posts will accept
14AWG wire
Attenuation Switches: ± 3dB on woofer, midrange and tweeter
Frequency Response: 40Hz – 22KHz
Sensitivity: 89dB 1W/1M
Recommended amplier power: 10-150 watts per channel
Impedance: 4 / 8 ohm switchable on PCB
Cut-out size: 239 mm
Depth behind surface: 118 mm
Weight (pair package): 7.6 kg
BluCube®CX-Series Specifications
CXC-800-3 8.0” 3-Way CircularFlush-Mount loudspeakers
Woofer: 6.5” woven Kevlar cone, 22oz magnet, bumped back plate, dual 1” voice coil, vented pole piece
Tweeter: Dual 19mm Titanium Dome Tweeters, Ferro-uid cooled, Neodymium magnet, 30° swivel & pivot
Crossover: FR4 board, 18dB per octave for both woofer and tweeter sections, Polyimide auto-protective reset
switch for tweeter, 16AWG wire connection to woofer section, gold plated terminal posts will accept
14AWG wire
Frequency Response: 45Hz – 22KHz
Sensitivity: 88dB 1W/1M
Recommended amplier power: 10-100 watts per channel
Impedance: 8 ohm per channel
Cut-out size: 200mm
Depth behind surface: CXC-650-S: 96mm, CXCL-650-S: 104mm
Weight (pair package): CXC-650-S: 3.0 kg , CXCL-650-S: 3.1kg
CXC-650-S &CXCL-650-S 6.5”Single-StereoImageCircularFlush-Mountloudspeaker

Unit 12, Teddington Business Park
Station Road
TEDDINGTON, TW11 9BQ
Phone: 020 8977 8633
Email: info@blucubespeakers.co.uk
Woofer: 6.5” woven Kevlar cone, rubber surround, 22oz magnet, bumped back plate, 1” voice coil, vented
pole piece
Tweeter: 1” Silk Dome Tweeter, Ferro-uid cooled, Neodymium magnet, 30° swivel & pivot
Crossover: FR4 board, 18dB per octave for both woofer and tweeter sections, Polyimide auto-protective reset
switch for tweeter, 16AWG wire connection to woofer section, gold plated terminal posts will accept
14AWG wire
Frequency Response: 40Hz – 22KHz
Sensitivity: 89dB 1W/1M
Recommended amplier power: 10-150 watts per channel
Impedance: 8 ohm
Cut-out size: 483 x 194mm
Depth behind surface: 102mm
Weight (pair package): 4.98kg
Single Pack Carton Dimensions: 266mm(D) x 561mm(W) x 155mm(H)
BluCube®CX-Series Specifications
CXRL-650-LCR 6.5” RectangularLeft-Centre-Right Flush-MountLoudspeaker

Unit 12, Teddington Business Park
Station Road
TEDDINGTON, TW11 9BQ
Phone: 020 8977 8633
Email: info@blucubespeakers.co.uk
Warranty
BluCube warrants this product to the original purchaser to be free from defects in materials and workmanship (subject to the terms set
forth below), for a period of ve years from the date of purchase. BluCube will repair or replace (at BluCube’s option) this product or any
defective parts (excluding electronics and ampliers) in this product. For products that have electronics or ampliers, the warranty on
those parts is two years from the date or purchase.
Your authorised BluCube dealer will inspect the product and, if your dealer is not equipped to perform the repair of your BluCube
product, they will replace your product or return it to BluCube for repair, at their discretion. Proof of purchase in the form of a receipted
invoice, which is evidence that this product is within the warranty period, must be presented to obtain warranty service.
This warranty is invalid if the factory applied serial number has been altered or removed from this product. This warranty is invalid if
this product was not purchased from an authorised BluCube dealer. Cosmetic damage or damage due to accident, acts of God, misuse,
abuse, negligence, commercial use, or modication of, or to any part of the product are not covered in this warranty. This warranty does
not cover damage due to improper installation, maintenance or operation, or any repair attempted by anyone other than BluCube or a
BluCube authorised dealer. Any unauthorised repairs will invalidate the warranty.
WarrantyRegistration
To register your BluCube product for warranty purposes, please email the following information to: warranty@blucubespeakers.co.uk
•Serial number of the product
•Your name and address
•The date and the retailer from where your purchase was made
Alternatively, if you prefer, you may post the above information to us at:
BluCubeLoudspeakers
Unit 12, Teddington Business Park
Station Road
TEDDINGTON
Greater London TW11 9BQ
United Kingdom
This manual suits for next models
10
Table of contents
Other BluCube Speakers manuals
