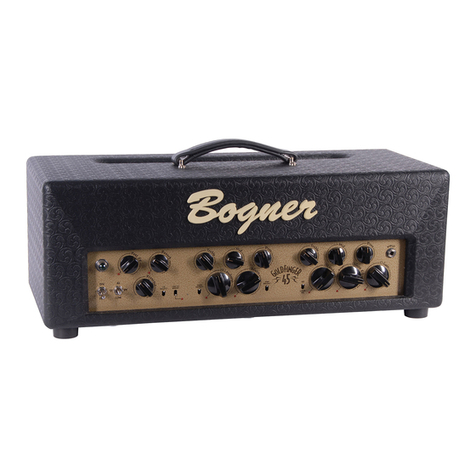
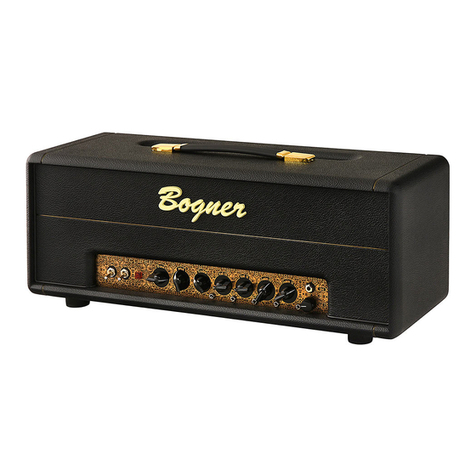
Bogner GOLDFINGER 45 User manual

BOGNER AMPLIFICATION
1
αGOLDFINGER ΩUSER MANUAL α
αVintage Valve ΩGuitar System α
Please read safety instructions before you use this amplifier!!!
Make sure you turn your amp off when you switch tubes and be careful the tubes might
be very hot!! Do not touch tube sockets with fingers! Even after turning your amp off and
unplugging it from the power outlet there could be enough voltage stored in the
capacitors to give you a lethal electrical shock!

BOGNER AMPLIFICATION
2
1) power on/off switch 30) pre boost gain 60) V1
2) standby hi/low 31) pre fx loop send 61) V2
3) presence 32) pre fx loop return 62) V3
4) channel select 33) footswitch connector 63) V4
5) pre fx boost 37) post fx on/off 64) V5
6) αloudness 38) post fx series/parallel 65) V6
7) αgain 39) post fx +4/-20db 66) V7
8) 80 – 69 mode 40) post fx send 67) V8
9) Ωloudness 41) post fx return 68) V9
10) Ωgain eq 42) post fx loop gain 70) V6/7 bias adjust
11) Ωgain 44) dual speaker outs 71) bias test point
13) instrument input 45) ohm selector for 44) 72) V8/9 bias adjust
14) Ωbass 46) 16 ohm speaker out
15) Ωmid 47) h.t. fuse
16) Ωtreble 48) ½Pwr Switch
17) αbass 49) power cable connector
18) αmid 50) main fuse
19) αtreble
20) reverb
21) post fx
22) pilot lamp power indicator
23) αpost bright
24) αpre bright

BOGNER AMPLIFICATION
3
1. Features:
•2 Channel Tube Amplifier
•Choice of variable Boost or Pre FX loop
•Boost or Pre FX individually footswitchable for each channel
•Footswitch controllable Tube-buffered series or parallel Post FX-Loop
•Footswitch controllable spring reverb*
•αCh.: Bass, Middle, Treble, Gain & Loudness controls, Pre & Post Bright switches
•ΩCh.: Bass, Middle, Treble, Gain EQ, Gain & Loudness controls, 69/80 mode switch
•Full and Low output power switch
•Functions on footswitch: α/Ωch. select, αboost/pre-fx, Ωboost/pre-fx, reverb, post-fx
•½Output Power Mode – 4 Step- from 45W to 9W
OPTIONS:
•Available as a Head or 1x12” open back combo*
•45 watt 6V6 or 90 watt EL34 Power Amp Section
•Matching open 1x12 cabinet
•Matching open or closed 2x12 cabinet
* Goldfinger 90 is not available as combo
DIMENSIONS and WEIGHTS: Are subject to change anytime, Please measure your amp carefully if a
Custom Case is being made. Add ¾inch for each, handle and rubber feet.
GF45 Head: 9” H 25.50” W 10.25” D 42 pounds
GF90 Head: 9.75” H 25.50” W 10.25” D 47 pounds
GF45 1x12 Combo: 19.50” H 25.50” W 10.75” D 66 pounds
1x12 open Cabinet: 19.50” H 25.50” W 10.75” D 43 pounds
2x12 open Cabinet: 24.50” H 25.75” W 10.25 “ D 60 pounds
2. How to use it:
Read this owner manual completely before use to fully understand your Goldfinger’s functions. This
manual is written for the 45 Karat Goldfinger. If you have the 90 Karat version keep on reading as almost
all the functions are the same and then refer to i) for additional information.
a) Power, Standby and Half Power 1), 2), 48), 49)
To operate your Goldfinger hook up the power cable. If you have a head version you need to hook up a
speaker cabinet, refer to j). Flip the big toggle switch located all the way on the left of the front panel from
off to on. Give it a minute or two for the tubes to reach operating temperature. Your Goldfinger has a Hi
(howdy) high as well as a Low power mode, flip the toggle next to the power switch from Stand By to
either position. Hi gives you the full power available while Low gives you approximately 1/3 less.
Remember it is not always necessarily about volume, it is a different feel as well. In Hi the amp has more
punch with a tighter feel and the most available clean headroom. Low gives the amp a sagging loose feel,
much like a tube rectifier.
On the back panel is a Half Power switch to disengage two of the power tubes.
Output Power
Goldfinger
4x 6V6
Full
1/2 Pwr
Stand By
Hi
45W
23W
Low
30W
15W

BOGNER AMPLIFICATION
4
b) Presence Control
The Presence control works in both channels, use to tweak power amp high frequency response.
c) The Alpha αChannel 6), 7), 17), 18), 19), 23), 24)
You can refer to this as your clean channel. You have your commonly known EQ controls Treble, Middle
and Bass as well as a gain control. Loudness sets your Volume. Two different Bright switches let you set
the overall feel. The Pre Bright works in conjunction with the Gain control and gives you a very dynamic
open bright feel versus the Post Bright which works in conjunction with the Loudness control and gives a
more flat EQ and overall bright feel. At low Loudness levels the Post Bright works great to inject some
liveliness. Both bright switches get less effective the higher the level is set, remember Gain for Pre Bright,
Loudness for Post Bright.
d) The Omega ΩChannel 8), 9), 10), 11), 14), 15), 16), 73)
This will be your gain oriented channel. You have your commonly known EQ controls Treble, Middle and
Bass. With the Gain EQ you set the overall feel. In the first half it gives you a bright open tone, while in
the second half it increases fullness for fatter tones. This control effects both Gain and EQ. The other
Gain control increases the gain while going clockwise. Loudness sets your Volume.
The 80 – Loud 69 mode switch gives you the choice of an 80’s compressed more saturated feel, versus a
60’s – 70’s feel of the good old Rock tones. The pop while switching between positions is normal and
should be of no concern since this is not a footswitch able function.
e) Deep Mode 12)
This switch is in the pre amp circuit and affects both channels. Set to Deep will give you a lower voicing
with less attack. The idea is to have the option to get a more 3D sound at lower volumes.
Only a few early Goldfingers had this function, it is not available as upgrade or option due to the
changes made in the channels after the few early models!
f) Boost Function and Pre FX Loop 5), 30), 31), 32)
This circuit can be either used as a pre channel Boost or Pre FX loop. If you use it as a Pre FX Loop you
most likely will have a gain boost type of effects pedal in the signal chain anyways.
With nothing plugged into the Pre FX send or return connector the circuit defaults to the Boost. The Boost
can be engaged via the Pre FX/Boost switch on the front panel or individually for each channel if the foot
controller is hooked up, a Led will indicate that the Boost is on.
The foot controller overrides the panel switch which will have no function at that point!!
All the way on the left side of the back panel, you will find the Pre Boost Gain control. Turn clockwise to
increase the boost level.
The Pre FX loop is rather special and if you can’t wait to play your new amplifier skip to the next subject.
Pre FX Loop? In 1995 Reinhold Bogner came out with a 60 unit limited run of the Caveman Amplifier. A
first in guitar amplifier designs, one of the unique features was its tube buffered Pre FX loop. Now how
does your Goldfinger’s Pre FX loop differ? It is not a loop in the sense we know and with the loop off your
guitar keeps its sound with the same detail and sensitivity like it would with just a cable directly into the
amps channels. Even with all effect pedals having True Bypass your signal will degrade, while buffered
circuits are great to not degrade your tone they will make certain pedals react and feel differently as well
as your amp. For example a Wahwah or Fuzz pedal. >>>

BOGNER AMPLIFICATION
5
After this brief Pre Loop education, let’s get into its use. You can choose to use your Goldfinger’s Pre FX
Loop to hook up effect pedals you would normally place before the amplifier’s input. The advantage is
that with the loop off, your Goldfinger reacts and feels exactly the same as it does with just a cable
between guitar and amplifier.
To hook up your Pre FX Loop you connect the send to your effect input and the output to the next effects
input and so on until your reach your last effect and you feed the signal back into the amp’s return
connector. As a general rule, overdrives, distortions, fuzz, Wahwah etc…or any effect designed for guitar
level input is used before the amplifier’s input.
You can engage the Pre FX loop the same way you can if you use the Boost circuit.
Another way the loop can be used, is to just utilize the loop’s return, you can feed another sound source,
guitar, into your Goldfinger. For example if your guitar Tech is better at laying down a Bebop solo then
you just have him plugged in the loops return from backstage and when the time comes you just turn the
loop on and fake upfront while your guitar tech does the work.
Remember, if you use the Pre FX Loop in any above described way, your Pre Boost functions are
disabled!
g) Post FX Loop or Volume Boost 21), 37), 38), 39), 40), 41), 42)
This loop is between pre and power amp and can be used to hook up further effect units or you can use it
as a volume boost.
To avoid coloration of your tone and feel it is important to set the levels correctly. The loop has a push
button switch for +4db or -20db level, commonly -20db is used for input sensitive effects like pedals while
+4db works well for line level and rack effects.
You have the choice of either using the loop in parallel or series mode. In parallel your effects get mixed
via the Post Fx control to the internal dry signal. In series the entire preamp signal gets routed through the
effects unit and the Post FX control works as a volume control.
Please note that volume pedals only work in the series mode.
The loop can be engaged via the on off switch on the back panel or via the foot controller,
Please note that with the foot controller hooked up the switch (37-Loop On/Off)) on the amp must
be set to on (Out)! This is unique in the way that it is the opposite with all of our other amplifiers!!
To use the Post FX loop as a volume boost, it is best to switch to parallel mode, set level to +4db and
then set the desired volume boost via the Post Fx control on the front panel.
On the back panel you will find a recessed trim pot labeled Loop Gain, to change the factory setting
(about 50%). It sets the loops return tube gain factor. In general the factory setting works for all
applications and this should not be adjusted.
Primary use would be to adjust unity volume for loop on and off in parallel mode. To adjust, you hook up
your effects unit; turn the loop on, set sensitivity via the db push button switch, set your effect to ideally
100% effect, then use the amps Post FX control on the front panel to dial in the amount of effect you
want. Then switch the loop on and off, if you do not have unity volume you can adjust it via the Loop Gain
trim pot while the loop is on.
While it is meant to be for the parallel mode it is also in the circuit in the series mode, if the range of the
Post FX control is not enough, you can shift it with this trim pot.

BOGNER AMPLIFICATION
6
h) Reverb 20)
The lush reverb amount can be dialed in via the Reverb control on the front panel. A 17” 3 spring tank is
used. With no foot controller hooked up the reverb is always on and can only be dialed out by turning the
Reverb control all the way down. With the foot controller hooked up you have the option to switch the
reverb in and out. Please note the 90W EL34 model does not feature reverb!
i) 90 Karat Goldfinger
The 90 Karat Goldfinger utilizes a quartet of EL34’s for 90 watts of power. This model has an entirely
different power amp which includes a different power and output transformer then the 45 Karat version.
EL34’s and 6V6’s can not be interchanged. The 1x12 combo option is not available.
Output Power
Goldfinger
4xEL34
Full
1/2 Pwr
Stand By
Hi
90W
45W
Low
60W
30W
j) Speaker Outputs 44), 45), 46)
If you put the amp off Stand By, make sure you have a speaker cabinet or any other load hooked up.
Otherwise you could damage the output transformer and the power tubes. Only use a cable made for
speakers, instrument and line level cables can not be used!! The Goldfinger has a single 16 ohm output
as well as a set of dual outputs which are switchable to either 4 or 8 ohm. Make sure you set the
impedance on the amplifier so it matches the cabinet. Remember if you hook up two speaker cabinets,
they need to have both the same impedance, either both 16 and 8 ohms. Plug them into the dual output
only, then select 8 if two 16 ohm cabinets and 4 if two 8 ohm cabinets are used. The cabinets run in
parallel which halves the total impedance!!
Full Power
Speaker Enclosure Amp Impedance
one 16 ohm cabinet 16 ohm output
one 8 ohm cabinet 8 ohm output
one 4 ohm cabinet 4 ohm output
two 16 ohm cabinets 8 ohm output
two 8 ohm cabinets 4 ohm output
Switching to ½Power creates an impedance mismatch, use the speaker
output with half the impedance of the cabinet, see below!!
Half Power
Speaker Enclosure Amp Impedance
one 16 ohm cabinet 8 ohm output
one 8 ohm cabinet 4 ohm output
two 16 ohm cabinets 4 ohm output

BOGNER AMPLIFICATION
7
k) Foot Controller 5), 4), 33), 37)
To hook up the foot controller, align the XLR type plug properly with the foot controller’s connector and
then push the plug in until it snaps and you won’t be able to pull it out. To detach, press the release
button on the plug before pulling on it. The other connector on the cable plugs into the amplifiers Foot
Switch connector on the back panel. Align the plug properly then push it in; this plug has a barrel nut to
secure the connection, screw clockwise hand tight, do not over tighten!
Each of the 5 functions has a LED which correlates with a LED on the amplifier to tell you visually what is
engaged and what is not. Keep in mind, like mentioned before, the foot controller overrides the CH.
Select and Pre FX Boost switches on the amplifier. The Post FX loop must be switched to “on” on the
amplifier itself in order for the function to work via the foot controller.
3. Tubes 60), 61), 62), 63), 64), 65), 66), 67), 68), 70), 71), 72)
Your 45W Goldfinger comes with JJ 6V6 while your 90W comes with JJ EL34 power tubes.
The Goldfinger has a set of bias adjust trim pots with the according test points. These are set by the
factory and should not be touched as they can make your power tubes run hot resulting to short out and
fail! If you need to retube the power amp have a knowledgeable Technician set the bias correctly.
With the exception of V4 all pre amp tubes are 12AX7/ECC83. V4 uses a JJ12AT7/ECC81.
While we use the JJ brand others work as well.
The Goldfinger has 5 pre amp tubes:
V1 12AX7 Tungsol - α+ Ωchannel > check that one if your amp gets noisy or microphonic.
V2 ECC803S JJ Tesla - Ωchannel > another candidate for microphonics.
V3 12AX7B Chinese - phase inverter
V4 ECC81 JJ Tesla - Post FX Loop, standard a 12AT7 or ECC81 type
V5 12AX7B Chinese - α+ Ωchannel
- Tube selection subject to change
- Feel Free to experiment using different brands according to individual taste
Warning!
Make sure you turn your amp off when you switch tubes and be careful the tubes might be very
hot!! Do not touch tube sockets with fingers! Even after turning your amp off and unplugging it
from the power outlet there could be enough voltage stored in the capacitors to give you a lethal
electrical shock.
Read safety instructions again!
4. Speakers and Cabinets
While you can use your Goldfinger with any cabinets we have special designed matching types. Please
make sure you match the amps impedance with your cabinet like explained in j).
The 2x12 open back cabinet has a Celestion G12H30 and GB25 at 8 ohms total impedance, the 1x12
combo and cabinet uses a Celestion V30 at 16 ohms.
2x12 closed back speakers TBA at release!
Subject to change, depending on availability of Speakers!
For Ultimate Classic Rock tones Reinhold prefers our 4x12 cabinet loaded with Celestion Greenbacks.

BOGNER AMPLIFICATION
8
5. Troubleshooting
Make sure you read and understand the safety instructions!! Repairs should be done only by
knowledgeable Technicians!! Always make sure your Cables, Guitars, Effects and Extension Cabinets
are working and hooked up correctly. If you think something is wrong with your Amp, play straight into the
Amp with nothing else hooked up other than a Guitar. That way you make sure it is the Amp. If you own a
combo unplug the internal speaker and hook up an external speaker cabinet to make sure it's only the
amp which is faulty. For noise check the appropriate preamp tubes (refer to 3.). Tubes are delicate and
have a limited life span depending on operating time, temperature and mechanical influences. 99% of all
sound and noise problems come from preamp tube failure. We let our amps run for at least two days
before we ship them to make sure that the tubes work properly but since they have glass housing and
delicate little plates inside them it happened that they got damaged during shipping. Please don't feel
discouraged. We don't manufacture tubes and can only retest them to make sure they're okay.
6. Fuses 47), 50)
To check the fuses, use an Ohmmeter to make sure they're blown because sometimes you can't see if
they're blown. Only 5x20mm types are used. The Main fuse for 100 and 117 volt models should be 3A
(2A for 220-240 volt). The HT fuse should be ½A. The HT fuse blows usually if your power tubes are bad
to protect the power amp circuit from getting damaged. If the Main fuse blows it could be just a voltage
peak from your power outlet. Put a new one in and see what happens. If it blows again give us a call.
Reinhold Bogner
”It’s not just an amp, it’s a Guitar System”
Table of contents
Other Bogner Amplifier manuals
