Bontempi 43 9970 User manual

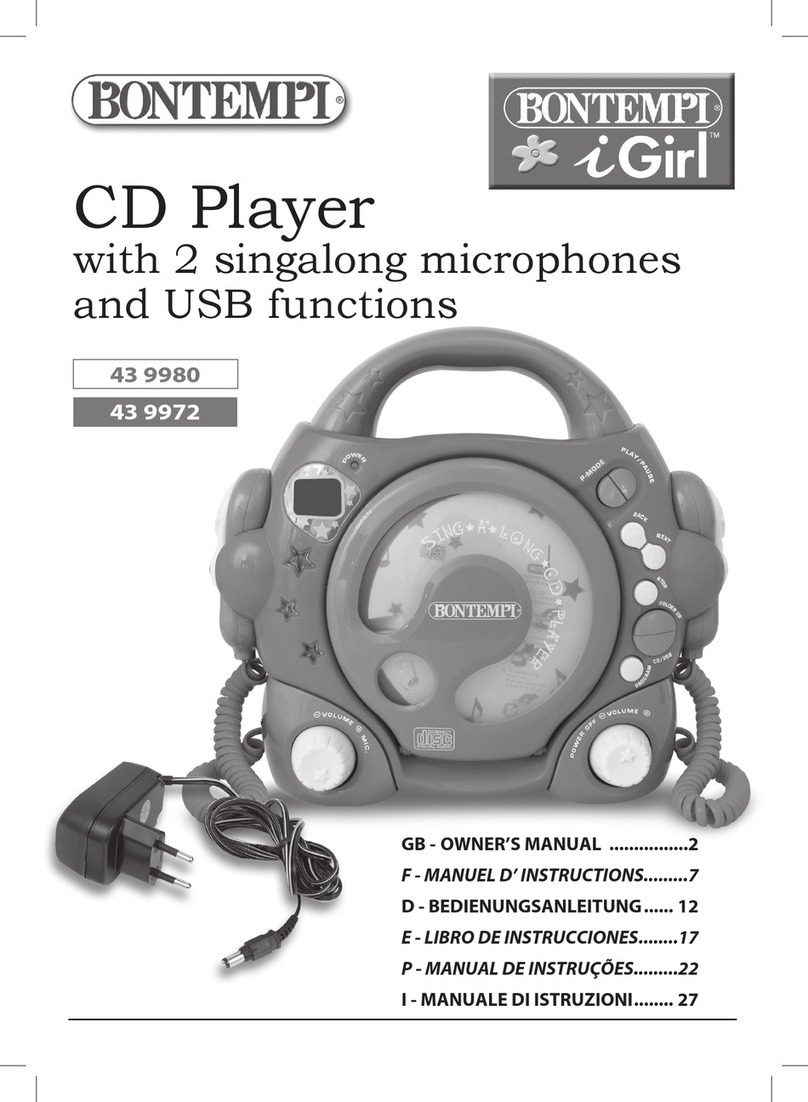
CD Player
with 2 singalong microphones
and flashing lights
43 9971
SD 9971/AD
43 9970
SD 9970.2/AD
GB - OWNER’S MANUAL ................2
F - MANUEL D’ INSTRUCTIONS.........7
D - BEDIENUNGSANLEITUNG...... 12
E - LIBRO DE INSTRUCCIONES........17
P - MANUAL DE INSTRUÇÕES.........22
I - MANUALE DI ISTRUZIONI........ 27

2
E N G L I S H
1. Open the CD compartment lifting the lid from
the OPEN side
2. Remove the protection cardboard
4. Close the CD door
Unscrew and remove the battery door
HOW TO INSERT A COMPACT DISC (CD)
HOW TO OPEN THE BATTERIES DOOR
3. Insert a CD with the printed side outward
Note: Do not touch the lens

3
POWER SUPPLY
Battery supply
Open the battery compartment. Insert 4 x 1,5 V batteries R14/C (not supplied).
Re-fit battery cover. Replace batteries when the quality of sound becomes bad. Use
alkaline batteries to obtain a longer duration.
ATTENTION - BATTERY CARE: • Non-rechargeable batteries are NOT to be recharged.
• Rechargeable batteries must be removed from the product before being charged. •
Rechargeable batteries are only to be charged under adult supervision. • Different types
of batteries or new and old batteries are not to be mixed. • Use only batteries of the same
or equivalent type. • Batteries are to be inserted with correct polarity. • Remove exhausted
batteries to prevent leakage. • Do not short circuit supply terminals. • Remove batteries
during long periods of non-use.
Mains supply
This instrument can be powered by a mains adaptor (included in /AD models)
with the following characteristics in output: VDC = 6V - 600 mA (ne-
gative central terminal).
• The toy is not intended for children under 3 years old. • The toy must only be used
with the recommended adaptor • The toy is to be disconnected from the adaptor before
cleaning • The mains adaptor is NOT a toy.
WASTE DISPOSAL STANDARDS
For information regarding the disposal of the items mentioned here below, please refer to Council Administration office
regarding specialised waste collection centres.
1. DISPOSAL OF BATTERIES - Protect the environment. Batteries can be recycled and should be disposed
of in the right containers. Do not throw them in the ordinary rubbish.
2. PACKAGING DISPOSAL -Take the paper, cardboard and corrugated board to the appropriate waste collection centres.
Plastic material must be placed in the relevant collection containers.
The symbols indicating the various types of plastic are:
Key for the different types of plastic materials:
• PET = Polyethylene terephtalate • PE= Polyethylene, code 02 for PE-HD, 04 for PE-LD • PVC= Polyvinyl chloride • PP=
Polypropylene • PS= Polystyrene, Polystyrene foam • O= Other polymers (ABS, Laminates, etc.)
3. DISPOSING OF ELECTRICAL APPLIANCES - The wheelie bin symbol with a cross indicates that the product must
not be disposed of in the domestic waste at the end of its useful life. Instead, it should be taken to your nearest
designated collection point or recycling facility. Alternatively, check with your retailer and return the product when
buying a replacement, on a one-to-one basis or as free of charge in case the size is smaller than 25cm. Appro-
priate disposal promotes the recycling of parts and materials, as well as helping to protect the environment and
human health. Under current legislation, strict penalties are enforced against those disposing of products illegally.
For more information about the collection of special waste, contact your Local Authority.
SOCKET FOR HEADPHONES
This socket allows you to connect a STEREO headphones (not included).
SWITCH ON AND SWITCH OFF
To switch on the recorder turn the POWER OFF ⊖VOLUME ⊕knob and adjust
the volume. After use, turn the knob back to the OFF position to prevent unnecessary
consumption of batteries.
01
PET
02
PE
03
PVC
05
PP
06
PS
07
O

4
HOW TO LISTEN TO A CD
1. Open the CD compartment lifting the
lid from the OPEN side. (remove the
cardboard protection disc if present).
2. Insert the CD with the printed side fa-
cing outwards.
3. Close the lid manually.
4. Switch on by turning the POWER OFF
⊖VOLUME ⊕knob, the display will
list the pieces contained on the CD.
5. To listen press the PLAY/PAUSE
button.
6. Adjust the volume by turning the
POWER OFF ⊖VOLUME ⊕button.
7. To pause the piece press the PLAY/
PAUSE button (the display indicator
light Awill blink).
8. To stop listening press STOP.
SELECTING PIECES
To select the music pieces use the two B. SKIP and F. SKIP buttons, the display will show the number of the chosen
piece. Keeping the +/– buttons pressed continuously. The piece being played will go forwards or back fast.
REPEAT BUTTON
By pressing the REPEAT button once the piece being played will be repeated
without interruption (the display indicator light Bwill blink).
Pressing the REPEAT button twice all the pieces will play without interruption (the indicator light Bstays on).
To return to normal operation press the REPEAT button again (the indicator light Bwill turn off).
PROGRAM BUTTON
Creates a personalised program of the pieces.
Press the PROGRAM button (the PROGRAM indicator light blinks).
Choose the piece with +/– buttons, press the PROGRAM button again to store the chosen piece.
Repeat the operation to store other pieces.
To start listening press the PLAY/PAUSE button (the PROGRAM button indicator light stays on to indicate that only
the stored pieces will be played).
N.B. Pressing the STOP button the music stops. Pressing it again the program is reset and the PROGRAM light
turns off.
MICROPHONES
The instrument comes with 2 microphones which can be used individually or together
with or without the CD in operation.
Turn on the microphone positioning the cursor upwards.
Speak close to the microphone; the amplified voice will be diffused by the loudspeaker.
Adjust the volume turning the ⊖VOLUME ⊕MIC knob.
NOTE: Do not bring the microphone too close to the loudspeaker. This can cause noisy
interference.
POWER
indicator light
MICROPHONE
SWITCH
PROGRAM PIECES
REPEAT PIECE
POWER ON OFF
VOLUME
MICROPHONE
VOLUME
MICROPHONE
SWITCH
STOP
DISPLAY SELECT PIECES
PLAY /PAUSE
PIECES
Indicator light B
Indicator light A

5
CLEANING THE CASE
Rub with a soft cloth. If the case is very dirty, dampen the cloth with a natural detergent solution
and water, then rub.
CLEANING THE LENS OF THE LASER RAY
Switch the device off before cleaning. If the lens is dirty there will be skips during playback and,
if it is very dirty, the CD may not function. Open the CD compartment and clean the lens as
follows:
a. DUST OR DIRT
Use a brush and jet of air used to clean camera lenses. Blow the lens repeatedly, and then
rub gently with the brush to remove any dust. Blow on the lens again.
b. FINGER PRINTS
Use a ball of cotton wool to remove fingerprints from the lens. Start to clean from the centre
towards the edge. Press lightly on the lens. Do not allow it to exit from its axis.
CLEANING THE DISC
When the disc is dirty, clean it with a special cloth.
Always clean from the centre towards the outside.
1. Clean the device with a damp soft cloth, using only delicate soap and water. Do not use more
aggressive detergents such as petrol, solvents or similar products as they damage the surface
of the casing.
2. If there is a problem with the device, consult the troubleshooting guide shown below before
requesting technical assistance.
3. Protect wooden or varnished furniture if the device is place on them. Insert a cloth or protective
material between the device and the furniture.
ATTENTION
• Never leave the device in direct sunlight, in a car parked in the sun, or near a heat source.
(Excessive heat may cause deformation, change in colour and malfunctioning of the de-
vice).
• The toy and adapter must be periodically checked by an adult, in order to verify any possible
damages.
WARNING
1. THIS LASER COMPACT DISC PLAYER FUNCTIONS BY HELP OF INVISIBLE LASER LIGHT AND
IS EQUIPPED WITH SAFETY SWITCHES TO AVOID EXPOSURE WHEN DOOR IS OPEN AND
SAFETY INTERLOCKS ARE DEFEATED. IT IS DANGEROUS TO DEFEAT OR BYPASS SAFETY
SWITCHES.
2. NEVER LOOK DIRECTLY AT THE RAY OR LOOK DIRECTLY AT IT USING OPTICAL INSTRU-
MENTS.
3. INVISIBLE LASER RADIATION CLASS 1M WHEN OPEN).
4. UNINSULATED DANGEROUS VOLTAGE, THAT MAY BE OF SUFFICIENT MAGNITUDE TO
CONSTITUTE A RISK OF ELECTRIC SHOCK TO PERSONS, IS PRESENT WITHIN THIS PRO-
DUCT’S ENCLOSURE.
5. IF THE CD PLAYER UNDERGOES BLOWS OR SUDDEN MOVEMENTS, THE SOUND COULD
BE FAULTY.
6. THIS CD PLAYER IS NOT EQUIPPED WITH AN ANTI-SHOCK ELECTRONIC MEMORY.
MAINTENANCE AND REMARKS

6
TROUBLE SHOOTING GUIDE
Problem
The CD does not
function with the
network adaptor.
The device is
switched on but the
volume is low or
non-existent.
The device works
but the music
cannot be heard.
The CD does not
turn.
The CD does not
playback.
Music cannot be
heard through the
headphone
(not included).
Irregular
functioning.
Probable cause Solution
- Try and connect the device to another
socket.
- Connect the device to another socket.
- Do not use a socket that is controlled
by a wall switch.
- Check.
- Control the under part of the disc and
clean if necessary with a soft cloth;
always work from the centre to the
edge of the CD.
- Increase the volume with the relative
control.
- Replace the batteries with new
alkaline-type.
- Replace the batteries with new
alkaline-type.
- Replace the batteries with new
alkaline-type.
- Remove the batteries and insert new
ones into the correct position as
indicated in the compartment.
- Re-insert the CD correctly.
- Close the CD compartment.
- Try using another disc.
- Disc: clean with a soft cloth
(see cleaning of the lens).
- Re-insert the headphone plug correctly.
- Increase the volume.
- Replace the batteries with new
alkaline-type.
- Try with another disc.
- Clean or replace the disc.
- The device is disconnected from the
AC socket.
- The AC socket is not supplying
current.
- The AC socket is controlled by a wall
switch that is in the OFF position.
- The AC adaptor is not correctly
inserted into the socket.
- The disc is dirty or faulty.
- The volume is at minimum.
- The batteries are flat.
- The batteries are flat.
- The batteries are flat.
- The batteries have been inserted
incorrectly.
- The disc has been inserted incorrectly.
- The CD compartment is not closed
correctly.
- The disc is dirty or damaged.
- Moisture or condensation has
collected on the disc or lens.
- The headphone plug has not been
inserted correctly.
- The VOLUME control is set at
minimum.
- The batteries are flat.
- The disc is damaged.
- The disc is dirty or damaged.
TROUBLE SHOUTING GUIDE
ATTENTION: in the case of malfunctioning remove and re-insert the batteries

7
1. Ouvrir la porte en correspondance de l’inscrip-
tion OPEN
2. Enlever, s’il y a lieu, le disque de protection en
carton
4. Fermer la porte manuellement
Dévisser et enlever la porte du boîtier piles
COMMENT INTRODUIRE UN COMPACT DISC (CD)
COMMENT OUVRIR LE BOITIER PILES
3. Insérer le CD avec le côté imprimé tourné vers
l’externe
F R A N Ç A I S
N.B. Ne pas touches les lentilles

8
ALIMENTATION
Alimentation par piles
Ouvrir l’emplacement porte-piles. Brancher 4 piles de 1,5V type R14/C (non
fournies) et remettre le couvercle. Substituer les piles quand la qualité du son devient
mauvaise. Utiliser des piles alcalines pour obtenir une longue durée.
CONSEILS POUR L’UTILISATION DES PILES: • Enlever les piles déchargées de l’emplace-
ment porte-piles. • NE PAS recharger des piles qui ne sont pas “rechargeables”. • Pour
recharger les piles, les enlever de leur emplacement. • Recharger les piles avec la supervi-
sion d’un adulte. • Insérer les piles avec la polarité correcte. • Ne pas utiliser des types de
piles différents ou des piles neuves et piles déchargées en même temps. • Utiliser seulement
des piles du type recommandé ou équivalentes. • Ne pas court-circuiter les terminaux
d’alimentation. • Enlever les piles quand l’instrument n’est pas utilisé pendant une longue période.
Alimentation sur secteur
L’appareil peut être alimenté avec adaptateur de réseau (inclus pour les versions
“/AD)” qui aura en sortie les caractéristiques suivantes: VDC = 6V - 600 mA
(terminal négatif central).
• Le jouet ne convient pas aux enfants de moins de trois ans. • Le jouet doit être utilisé
avec l’adaptateur de réseau conseillé. • Le jouet doit être débranché de l’adaptateur
avant un éventuel nettoyage. • L’adaptateur sur secteur N’EST PAS un jouet.
REGLES POUR ECOULEMENT DES ORDURES
Pour l’écoulement des matériaux indiqués ci-dessous, se renseigner auprès des Administrations Communales au sujet des
centres d’écoulement spécialisés.
1. ECOULEMENT DES PILES: Pour aider à la protection de l’environnement ne pas jeter les piles déchargées
avec les déchets journaliers, mais dans des conteneurs spéciaux situés dans les centres de ramassages.
2. ECOULEMENT DES EMBALLAGES - Remettre les emballages en papier, carton et carton ondulé dans les centres d’écou-
lement spécifiques. Les parties en plastique de l’emballage doivent être placées dans les conteneurs pour la récolte prévus
à cet effet.
Les symboles qui repèrent les différents types de plastique sont:
Légende relative au type de matériau plastique:
PET= Polyéthylène téréphtalate • PE= Polyéthylène, le code 02 pour PE-HD, 04 pour PE-LD • PVC= Chlorure de Polyvinyle
• PP= Polypropylène • PS= Polystyrène, Polystyrène expansé • O= Autres polymères (ABS, Couplés, etc.)
3. DISPOSITION POUR APPAREILS ÉLECTRIQUES - Le symbole de la poubelle à roues avec une croix indique
que le produit ne doit pas être déposé dans les ordures ménagères à la fin de son cycle. Il doit être mis dans un
point de collecte ou de recyclage approprié. A défaut, vérifier avec votre revendeur et retourner le produit lors de
l’achat du produit de remplacement ou, si la dimension est inferieur à 25 cm, on peut le retourner gratuitement..
La disposition appropriée promeut le recyclage des parties et des matériels, aussi bien quel ‘aide pour protéger
l’environnement et la santé humaine. Conformément à la législation actuelle, des pénalités
strictes sont faites contre ceux disposant des produits illégalement. Pour plus d’informations
sur la collecte de déchets spéciaux, contacter la Collectivité locale.
PRISE POUR CASQUE
Cette prise permet le branchement d’un casque STEREO (non fourni).
MISE EN MARCHE ET ARRET
Pour allumer l’enregistreur tourner le bouton POWER OFF ⊖VOLUME ⊕et régler
le volume. Après utilisation, pour éviter de consommer inutilement les batteries,
tourner le bouton dans la position OFF.
01
PET
02
PE
03
PVC
05
PP
06
PS
07
O

9
COMMENT ECOUTER UN CD
1. Ouvrir le porte-CD en tirant sur le cou-
vercle qui correspond à l’inscription
OPEN (enlever, s’il y a lieu, le disque
de protection en carton).
2. Insérer le CD avec le côté imprimé
tourné vers l’externe.
3. Fermer la porte manuellement.
4. Allumer en tournant le bouton POWER
OFF ⊖VOLUME ⊕; sur le panneau
d’affichage s’affiche le nombre des
morceaux contenus dans le CD.
5. Pour écouter appuyer sur la touche
PLAY/PAUSE.
6. Régler le niveau du volume en tournant le
bouton POWER OFF ⊖VOLUME ⊕.
7. Pour mettre en pause le morceau ap-
puyer sur la touche PLAY/PAUSE (le
voyant lumineux Adu panneau d’affi-
chage clignote).
8. Pour arrêter la lecture appuyer sur STOP.
SELECTION DES MORCEAUX
Pour sélectionner les morceaux musicaux utiliser les deux touches B. SKIP et F. SKIP, sur le panneau d’affichage
sélectionner le numéro du morceau choisi. En tenant les touches enfoncées +/– on peut avancer ou retourner en
arrière dans le morceau en cours.
TOUCHE REPEAT
En appuyant une seule fois sur la touche REPEAT le morceau en cours est répété sans interruption (le voyant lumineux
Bdu panneau d’affichage clignote). En appuyant deux fois sur la touche REPEAT tous les morceaux sont exécutés
sans interruption (le voyant lumineux Breste allumé). Pour retourner au fonctionnement normal appuyer encore une
fois sur la touche REPEAT (le voyant lumineux Bs’éteint).
TOUCHE PROGRAMME
Permet de programmer une liste personnalisée de morceaux.
Appuyer sur la touche PROGRAMME (le voyant lumineux PROGRAMME clignote).
Choisir le morceau souhaité avec les touches +/–, appuyer encore une fois sur la touche PROGRAMME pour mémo-
riser le morceau choisi. Répéter l’opération pour mémoriser d’autres morceaux. Pour commencer l’écoute appuyer
sur la touche PLAY/PAUSE (le voyant lumineux de la touche PROGRAMME reste allumé pour indiquer que seront
exécutés seulement les morceaux en mémoire).
Faire Attention : En appuyant sur la touche STOP on arrête l’exécution. En appuyant une autre fois sur la même
touche on met à zéro le programme et le voyant PROGRAMME s’éteint.
MICROPHONE
L’appareil est pourvu de deux microphones qui peuvent être utilisés séparément ou en même
temps, avec ou sans le lecteur CD en fonction.
Allumer le microphone en positionnant le curseur vers le haut.
Parler tout près du microphone; la voix, amplifiée, sera diffusée par le haut-parleur.
Régler le niveau du volume en tournant le bouton ⊖ VOLUME ⊕MIC.
ATTENTION : Eviter de trop approcher le microphone du haut-parleur. Cela pourrait causer de
interférences désagréables.
Voyant POWER
INTERRUPTEUR
MICROPHONE
PROGRAMMATION DES MORCEAUX
REPETITION DU MORCEAU
ALLUMER
ETEINDRE
VOLUME
VOLUME DU
MICROPHONE
INTERRUPTEUR
MICROPHONE
STOP
DISPLAY SELECTION DES MORCEAUX
LECTURE /
PAUSE MORCEAUX
Voyant B
Voyant A

10
ENTRETIEN ET DIVERS
NETTOYAGE DU BOITIER
Nettoyer avec un chiffon doux. Si le boitier est très sale, humidifier le chiffon avec une solution
délicate d’eau et de savon, et nettoyer en frottant.
NETTOYAGE DE LA LENTILLE DU RAYON LASER
Avant de procéder au nettoyage, éteindre l’appareil. Si la lentille est sale il y aura des sauts pen-
dant l’écoute, mais si elle est très sale, le CD pourrait ne pas fonctionner. Ouvrir le couvercle du
plateau porte-CD et nettoyer la lentille comme indiqué ci-dessous :
a. POUSSIERES OU PARTICULES DE SALETE
Utiliser une brosse et un jet d’air qu’on utilise pour les objectifs des appareils photo. Souffler
plusieurs fois sur la lentille, et frotter délicatement avec la brosse pour enlever la poussière,
souffler de nouveau sur la lentille.
b. EMPREINTES DIGITALES
Pour enlever les empreintes digitales de la lentille, utiliser un morceau de coton en commençant
à nettoyer du centre vers l’extérieur. Appuyer légèrement sur la lentille en évitant de forcer pour
ne pas la faire sortir de l’axe.
NETTOYAGE DU DISQUE
Lorsque le disque se salit, le nettoyer avec un chiffon spécial.
Le nettoyage se fait toujours du centre vers l’extérieur.
1. Nettoyer l’appareil avec un chiffon doux et humide avec un peu d’eau et de savon délicat. Ne
pas utiliser de détergents agressifs comme l’essence, les solvants ou des produits similaires qui
pourraient endommager la surface du boîtier.
2. Si un problème survient à l’appareil, consulter le guide aux solutions des problèmes indiqué
ci-après avant d’appeler le service après vente.
3. Protéger les meubles en bois naturel ou vernis à l’endroit ou est installé l’appareil. Mettre un
morceau de tissu ou de matériel protecteur entre l’appareil et le meuble.
ATTENTION
• Ne pas laisser l’appareil sous la lumière directe du soleil, dans une voiture stationnée en plein so-
leil, ou près de sources de chaleur. (La chaleur excessive peut causer des déformations à l’appareil,
des changements de couleur et provoquer un mauvais fonctionnement.)
• Le jouet et l’adaptateur doivent être contrôlés périodiquement par un adulte, afin de vérifier des
dommages eventuels.
ATTENTION
1. CE LECTEUR DE CD FONCTIONNE AVEC L’AIDE D’UN RAYON LASER INVISIBLE ET EST
DOTÉ D’ INTERRUPTEURS DE SÉCURITÉ AFIN D’EVITER L’EXPOSITION AU RAYON QUAND
LE COUVERCLE EST OUVERT ET LES DISPOSITIFS DE BLOCAGE SONT ANNULÉS. IL EST
DANGEREUX D’ANNULÉR OU D’ÉVITER L’UTILISATION DES INTERRUPTEURS DE SÉCURITÉ.
2. NE PAS ARRETER LE REGARD SUR LE RAYON ET NE PAS REGARDER DIRECTEMENT AVEC
DES INSTRUMENTS OPTIQUES.
3. RADIATIONS LASER CLASSE 1M INVISIBLES S’IL EST OUVERT.
4. VOLTAGE NON ISOLÉ DANGEREUX, AVEC RISQUE POUR LES PERSONNES DE DÉCHARGE
ÉLECTRIQUES, A L’INTÉRIEUR DU PRODUIT.
5. SI LE LECTEUR CD EST SOUMIS À DES CHOCS OU À DES MOUVEMENTS BRUSQUES, L’ÉCO-
UTE PEUT RÉSULTER DÉFECTUEUSE.
6. CE LECTEUR CD NE POSSÈDE PAS DE MÉMOIRE ÉLECTRONIQUE ANTICHOC.

11
Problème
Le CD ne fonctionne
pas avec
l’adaptateur pour le
courant.
L’appareil est allumé
mais le volume est
bas ou inexistant.
L’appareil fonctionne
mais on n’entend
pas la musique.
L’appareil ne fait
pas tourner le CD.
Le CD ne fonctionne
pas.
On n’entend pas la
musique dans le
casque (qui n’est
pas fourni).
Fonctionnement
irrégulier.
Cause probable Solution
- Essayer de brancher l’appareil à une
prise de courant.
- Essayer de brancher l’appareil à une
autre prise de courant.
- Ne pas utiliser une prise contrôlée par
un interrupteur mural.
- Contrôler.
- Contrôler le dessous du disque et le
nettoyer si nécessaire avec un chiffon
doux, en procédant toujours du centre
vers l’extérieur du CD.
- Augmenter le volume en utilisant la
touche de volume.
- Changer les piles en utilisant des piles
neuves alcalines.
- Changer les piles en utilisant des piles
neuves alcalines.
- Changer les piles en utilisant des piles
neuves alcalines
- Enlever les piles et les remettre dans la
position voulue comme indiqué dans le
logement piles.
- Remettre le CD dans la position
correcte.
- Fermer le couvercle porte-CD.
- Essayer avec un autre disque.
- Disque: nettoyer avec un chiffon doux
(voir nettoyage de la lentille).
- Replacer correctement la prise du
casque.
- Augmenter le volume.
- Changer toutes les piles en utilisant des
piles neuves alcalines.
- Essayer avec un autre disque.
- Nettoyer ou changer le disque.
- L’appareil est débranché de la prise
de courant de CA (courant alternatif)
- La prise de CA ne fournit pas
d’énergie.
- La prise de CA est contrôlée par un
interrupteur mural en position OFF.
- L’adaptateur de CA n’est pas branché
correctement à la prise.
- Le disque est sale ou défectueux.
- Le volume principal est réglé au
minimum.
- Les piles sont usées.
- Les piles sont usées.
- Les piles sont usées.
- Les piles ont été mal insérées.
- Le disque a été mal mis.
- Le couvercle porte-CD n’est pas fermé.
- Le disque est sale ou défectueux.
- Il y a de l’humidité ou de la
condensation sur le disque ou sur la
lentille.
- La prise du casque n’est pas insérée
correctement.
- La commande du VOLUME est réglée
au minimum.
- Les piles sont usées.
- Le disque est défectueux.
- Le disque est sale ou défectueux.
GUIDE AUX SOLUTIONS DE PROBLEMES EVENTUELS
ATTENTION ! En cas de dysfonctionnement, enlever puis remonter le piles.

12
1. Das Fach auf der Höhe der Aufschrift OPEN
öffnen
2. Die eventuelle Schutz-CD aus Karton entfernen,
falls vorhanden
4. Die Abdeckung mit der Hand wieder schließen
Den Deckel des Batteriefachs abschrauben und entfernen.
WIE WIRD EINE COMPACT DISC (CD) EINGELEGT
WIE WIRD DAS BATTERIEFACH GEÖFFNET
3. Die CD mit der bedruckten Seite nach außen
gerichtet einlegen
D E U T S C H
ANM.: Die Linsen nicht berühren

13
STROMVERSORGUNG
Batteriebetrieb
Das Batteriefach öffnen. Dann werden 4 Batterien á 1,5V (Typ R14/C) einlegen.
Batterien sind nicht im Lieferumfang enthalten. Batteriefach schließen. Batterien
auswechseln, sobald die Klangqualität abnimmt. Um die Lebensdauer des Instru-
mentes zu verlängern, wird die Verwendung von Alkalibatterien empfohlen.
HINWEISE BEI BATTERIEBETRIEB: • Erschöpfte Batterien aus dem Produkt herausnehmen! •
Nichtaufladbare Batterien dürfen nicht aufgeladen werden! • Batterien vor dem Laden aus
dem Spielzeug entnehmen! • Batterien nur unter Aufsicht Erwachsener laden! • Batterien
mit der richtigen Polarität einlegen! • Ungleiche Batterietypen oder neue und gebrauchte
Batterien dürfen nicht zusammen verwendet werden! • Nur die empfohlenen (oder gleichwertige) Batterien verwenden! •
Endverschlüsse nicht kurzschließen! • Wenn das Produkt über längere Zeit nicht benutzt wird, Batterien entfernen.
Netzanschluss
Der Netzanschluß erfolgt über einem handelsüblichen Netzadapter (nur in Versio-
nen ”/AD” enthalten) mit folgenden Eigenschaften: VDC = 6V - 600 mA
(negativer mittlerer Steckerkontakt). • Das Spielzeug ist für Kinder unter 3
Jahren nicht geeignet. • Das Spielzeug kann nur mit dem empfohlenen Transformator benutzt
werden. • Das Spielgerät muss mit Flüssigkeit gereinigt werden. Vor der Reinigung muss
das Spielgerät vom Trasformator getrennt werden. • Der Netzadapter ist KEIN Spielzeug.
RICHTLINIEN ZUR ENTSORGUNG
Bzgl. der Entsorgung der unten aufgeführten Sondermaterialien informieren Sie sich bitte bei den Gemeindeverwaltungen
der spezialisierten Entsorgungszentren.
1. BATTERIEENTSORGUNG - Aus Umweltschutzgründen sind leere Batterien gemäß den gesetzlichen
Bestimmungen in die dafür vorgesehenen Sammelbehälter zu werfen.
2. ENTSORGUNG VON VERPACKUNGEN - Verpackungen aus Papier, Karton und Wellpappe sind in den entsprechen-
den Sammelstellen abzugeben. Plastikbestandteile der Verpackungen müssen in den dafür vorgesehenen Sammelbehälter
entsorgt werden.
Die Symbole der verschiedenen Plastikarten sind:
Legende der Plastiktypen:
• PET = Polyäthylenterephthalat •PE= Polyäthylen, Code 02 für PE-HD, 04 für PE-LD • PVC= Polyvinylchlorid • PP=
Polypropylen • PS= Polysterol, Polysterolschaum • O= Andere Polymere (ABS, Verbindungen, etc.)
3. ENTSORGUNGSHINWEIS FÜR ELEKTRONISCHE GERÄTE - Das Symbol der Mülltonne mit Kreuz bedeutet,
das der Artikel am Ende seiner Laufzeit nicht im Hausmüll entsorgt werden darf. Geben sie diesen bei ihrem
nächstgelegenen Sondermülldepot oder dafür vorgesehne Rücknahmestellen ab. Oder fragen sie ihren zustän-
digen Fachhändler nach der Rücknahme des Artikels, wenn sie einen Ersatzartikel kaufen oder kostenlos im
Falle, daß die Größe weniger als 25cm ist. Fachgerechte Entsorgung trägt zum Umweltschutz, zum Schutz der
Gesundheit und zur Resourcenschonung bei. Illegale Entsorgung verstößt gegen geltendes
Gesetz und wird mit Geldstrafen geahndet. Für mehr Informationen über fachgerechte
Entsorgung fragen sie die zuständigen Behörden.
BUCHSE FÜR KOPFHÖRER
Hier kann ein STEREO Kopfhörer angeschlossen werden (nicht enthalten).
EINSCHALTEN UND AUSSCHALTEN
Zum Einschalten des Aufnahmegeräts den Knopf POWER OFF ⊖VOLUME ⊕
drehen und die Lautstärke einstellen. Nach der Verwendung den Knopf wieder auf
OFF stellen, damit die Batterien nicht unnötig verbraucht werden.
01
PET
02
PE
03
PVC
05
PP
06
PS
07
O

14
CDs ABSPIELEN
1. Das CD-Fach öffnen, indem die Abde-
ckung von der Seite mit der Aufschrift
OPEN aus herausgezogen wird (die
eventuelle Schutz-CD aus Karton
entfernen, falls vorhanden).
2. Die CD mit der bedruckten Seite nach
außen gerichtet einlegen.
3. Die Abdeckung mit der Hand wieder
schließen.
4. Den Knopf POWER OFF ⊖VOLUME
⊕drehen, um das Gerät einzuschal-
ten; auf dem Display wird die Anzahl
der Musikstücke angezeigt, die auf der
CD vorhanden sind.
5. Zum Abspielen den Druckknopf
PLAY/PAUSE betätigen.
6. Die Lautstärke mit dem Knopf POWER
OFF ⊖VOLUME ⊕einstellen.
7. Um ein Musikstück auf Pause zu stellen den Knopf PLAY/PAUSE betätigen (die Display-
Kontrollleuchte Ablinkt).
8. Zur Unterbrechung des Abspielvorgangs STOPP drücken.
MUSIKSTÜCKAUSWAHL
Zur Auswahl der Musikstücke die zwei Knöpfe B. SKIP und F. SKIP drücken, und auf dem Display wird die Nummer
des gewählten Musikstücks angezeigt. Werden die Knöpfe +/– länger betätigt, dann laufen die abgespielten Musi-
kstücke rasch vorwärts oder rückwärts durch.
DRUCKKNOPF REPEAT
Wird der Druckknopf REPEAT einmal betätigt, dann wird das abspielte Musikstück ohne Unterbrechung wiederholt
(die Display-Kontrollleuchte Bblinkt). Wird der Druckknopf REPEAT zweimal betätigt, werden alle Musikstücke ohne
Unterbrechung abgespielt (die Kontrollleuchte Bbleibt eingeschaltet). Um zur normalen Funktion zurückzukehren,
den Druckknopf REPEAT noch einmal betätigen (die Kontrollleuchte Bschaltet sich aus).
DRUCKKNOPF PROGRAM
Ermöglicht die Erzeugung eines individuellen Musikstück-Programms.
Den Druckknopf PROGRAM drücken (die PROGRAM-Kontrollleuchte blinkt).
Das gewünschte Musikstück mit den Druckknöpfen +/– wählen, den Druckknopf PROGRAM erneut drücken, um das
gewählte Musikstück zu speichern. Diese Schritte wiederholen, um weitere Musikstücke zu speichern. Um mit dem
Abspielen zu beginnen, den Druckknopf PLAY/PAUSE drücken (die Kontrollleuchte des Druckknopfs PROGRAM
bleibt eingeschaltet, um anzuzeigen, dass nur die gespeicherten Musikstücke abgespielt werden).
HINWEIS: Die Betätigung des STOP-Knopfs führt zur Beendigung des Abspielvorgangs. Wird er noch einmal
betätigt, wird das Programm nullgestellt und die PROGRAM-Kontrollleuchte schaltet sich aus.
MIKROFONE
Das Instrument ist mit 2 Mikrofonen ausgestattet, die getrennt oder gemeinsam verwendet werden
können, mit oder ohne Abspielen einer CD. Das Mikrofon einschalten, indem der Cursor nach
oben geschoben wird. Nahe am Mikrofon sprechen; die verstärkte Stimme wird vom Lautsprecher
wiedergegeben. Die Lautstärke regeln, indem der Knopf ⊖VOLUME ⊕MIC. gedreht wird.
HINWEIS: Das Mikrofon nicht zu sehr an den Lautsprecher annähren. Dies kann zu lästigen
Interferenzen führen.
Kontrollleuchte
POWER
MIKROFON-
SCHALTER
PROGRAMMIERUNG MUSIKSTÜCKE
WIEDERHOLUNG MUSIKSTÜCK
EINSCHALTEN /
AUSSCHALTEN /
LAUTSTÄRKE
MIKROFON-
LAUSTÄRKE
MIKROFON-
SCHALTER
STOP
DISPLAY AUSWAHL MUSIKSTÜCKE
ABSPIELEN /
PAUSE MUSIKSTÜCKE
Kontrollleuchte BKontrollleuchte A

15
WARTUNG UND BESONDERE HINWEISE
GEHÄUSEREINIGUNG
Mit einem weichen Tuch abreiben. Wenn das Gehäuse sehr schmutzig ist, das Tuch mit einer milden
Lösung aus natürlichem Reinigungsmittel und Wasser befeuchten und abreiben.
REINIGUNG LASERSTRAHL-LINSE
Vor der Reinigung das Gerät ausschalten. Wenn die Linse verschmutzt ist, kommt es zum Überspringen von
Abschnitten während des Anhörens, und wenn sie stark verschmutzt ist, könnte es auch vorkommen, dass
die CD nicht funktioniert. Die Klappe des CD-Fachs öffnen und die Linse wie folgt reinigen:
a. STAUB ODER SCHMUTZPARTIKEL
Eine Bürste und einen Luftstoß verwenden, wie man sie für die Linsen von Fotoapparaten ver-
wendet. Wiederholt auf die Linse blasen, dann sanft mit der Bürste reinigen, um den Staub zu
entfernen. Erneut auf die Linse blasen.
b. FINGERABDRÜCKE
Zum Entfernen der Fingerabdrücke von der Linse einen Wattebausch verwenden und bei der
Reinigung von der Mitte nach außen hin vorgehen. Leichten Druck auf die Linse ausüben, je-
doch nicht zu stark, damit sie nicht aus ihrer Achse springt.
REINIGUNG DER CD
Wenn die CD schmutzig ist, mit einem geeigneten Tuch reinigen.
Immer von der Mitte nach außen hin reinigen.
1. Das Gerät mit einem weichen Tuch reinigen, das lediglich mit milder Seife und Wasser befeuchtet
wurde. Keine aggressiveren Reinigungsmittel wie Benzin, Lösungsmittel oder ähnliche Produkte ver-
wenden, denn sie beschädigen die Gehäuseoberfläche.
2. Wenn das Gerät Probleme aufweist, den folgenden Führer zur Fehlersuche konsultieren, bevor der
Kundendienst kontaktiert wird.
3. Möbel aus natürlichem oder lackiertem Holz, in denen das Gerät untergebracht wird, schützen. Ein
Tuch oder anderes Schutzmaterial zwischen Gerät und Möbel einfügen.
ACHTUNG
• Das Gerät nicht an einem Ort lassen, an dem es direkter Sonneneinstrahlung ausgesetzt ist, nicht in
einem in der Sonne geparkten Auto oder in der Nähe von Wärmequellen lassen. (Zu starke Hitze
kann zu Verformungen des Geräts, Farbänderungen und Funktionsstörungen führen).
• Spielzeug und Adapter müssen regelmäßig von einem Erwachsenen auf etwaige Schäden überprüft
werden.
WARNHINWEIS
1. DIESER CD-PLAYER FUNKTIONIERT MIT EINEM UNSICHTBAREN LASERSTRAHL UND VERFÜGT
ÜBER SICHERHEITSSCHALTER, UM DIE EXPOSITION GEGENÜBER DEM STRAHL ZU VERMEIDEN,
WENN DAS FACH OFFEN IST UND DIE SPERRVORRICHTUNGEN NICHT IN FUNKTION SIND. ES
IST GEFÄHRLICH, DIE VERWENDUNG DER SICHERHEITSSCHALTER ZU ANNULLIEREN ODER ZU
VERMEIDEN.
2. NICHT IN DEN STRAHL SEHEN UND AUCH NICHT DIREKT MIT OPTISCHEN INSTRUMENTEN
ANSEHEN.
3. LASERSTRAHLUNGEN KLASSE 1M, UNSICHTBAR, WENN GERÄT OFFEN IST.
4. IM GERÄT IST EINE GEFÄHRLICHE, NICHT ISOLIERTE SPANNUNG VORHANDEN. GEFAHR
ELEKTRISCHER ENTLADUNGEN FÜR PERSONEN.
5. WENN DER CD-PLAYER STÖSSEN ODER ABRUPTEN BEWEGUNGEN AUSGESETZT IST, KANN ES
BEIM ABSPIELEN ZU STÖRUNGEN KOMMEN.
6. DIESER CD-PLAYER HAT KEINEN ELEKTRONISCHEN ANTI-SHOCK-SPEICHER.

16
Problem
Die CD funktioniert mit
dem Netzadapter
nicht.
Das Gerät ist
eingeschaltet, doch die
Lautstärke ist schwach
oder fehlt vollkommen.
Das Gerät funktioniert,
es ist jedoch keine
Musik zu hören.
Das Gerät lässt die CD
nicht laufen.
Die CD funktioniert
nicht.
Man hört die Musik
über die Kopfhörer
nicht.
(Die Kopfhörer ist nicht
enthalten).
Funktionsstörungen.
Mögliche Ursache Lösung
-Versuchen, das Gerät an die Buchse
anzuschließen.
-Versuchen, das Gerät an eine andere
Buchse anzuschließen.
-Keine Buchse verwenden, die über
einen Wandschalter gesteuert wird.
-Kontrollieren.
-Den Teil unter der CD kontrollieren und
im Bedarfsfall mit einem weichen Tuch
reinigen; dabei stets von der Mitte in
Richtung Außenseite der CD vorgehen.
-Die Lautstärke durch Betätigung der
entsprechenden Steuerung erhöhen.
-Alle Batterien durch neue
Alkaline-Batterien ersetzen.
-Alle Batterien durch neue
Alkaline-Batterien ersetzen.
-Alle Batterien durch neue
Alkaline-Batterien ersetzen.
-Die Batterien herausnehmen und
neuerlich in der richtigen Stellung laut
Angabe im Batteriefach einlegen.
-Die CD erneut korrekt einlegen.
-Das CD-Fach schließen.
-Mit einer anderen CD probieren.
-CD: mit einem weichen Tuch reinigen
(siehe Reinigung der Linse).
-Den Stecker der Kopfhörer korrekt
einstecken.
-Die Lautstärke erhöhen.
-Alle Batterien durch neue
Alkaline-Batterien ersetzen.
-Mit einer anderen CD versuchen.
-Die CD reinigen oder austauschen.
-Das Gerät ist nicht an die
AC-Buchse angeschlossen.
-Die AC-Buchse liefert keinen
Strom.
-Die AC-Buchse wird von einem
Wandschalter gesteuert, der auf
OFF gestellt ist.
-Der AC-Adapter wurde nicht
korrekt in die Buche gesteckt.
-Die CD ist verschmutzt oder defekt.
-Die Hauptlautstärke ist auf den
Mindestwert eingestellt.
-Die Batterien sind schwach.
-Die Batterien sind schwach.
-Die Batterien sind schwach.
-Die Batterien wurden falsch
eingelegt.
-
Die CD wurde falsch eingelegt.
-Das CD-Fach ist nicht geschlossen.
-Die CD ist verschmutzt oder defekt.
-Auf CD oder Linse haben sich
Feuchtigkeit bzw. Kondenswasser
gebildet.
-Der Stecker der Kopfhörer ist nicht
korrekt eingesteckt.
-Die LAUTSTÄRKE ist auf den
Mindestwert eingestellt.
-Die Batterien sind schwach.
-Die CD ist defekt.
-Die CD ist verschmutzt oder defekt.
STÖRUNGSBESEITIGUNG
Im Falle einer Funktionsstörung die Batterien entfernen und wieder einlegen.

17
1. Abrir la tapa a la altura de la inscripción
OPEN
2. Quitar, si está presente, el disco de protección
de cartón
4. Volver a cerrar la tapa manualmente
Destornillar la portezuela del alojamiento baterías
y extraerla.
CÓMO INTRODUCIR UN DISCO COMPACTO (CD)
CÓMO ABRIR EL ALOJAMIENTO BATERÍAS
3. . Introducir el CD con el lado grabado hacia
exterior
E S P A Ñ O L
Nota: No tocar las lentes.

18
ALIMENTACION
Alimentación con pilas
Abran el hueco destinado a las pilas. Coloquen 4 pilas de 1,5V del tipo R14/C
(que no se entregan con el aparato). Cierren la tapa. Sustituya las baterías cuando
la calidad del sonido se convierta mediocre. Para una larga duración se aconseja
usar baterías alcalinas.
ADVERTENCIAS: • Quiten las pilas descargadas del sitio en el que se colocan las pilas. •
No recarguen pilas que sean del tipo no recargables. • Para recargar las pilas, quítenlas
del sitio en el que están colocadas. • Recarguen las pilas bajo la supervisión de una persona
adulta. • Coloquen las pilas respetando la correcta colocación de los polos. • No usen pilas
de tipo diferente ni pilas nuevas y usadas juntas. • Usen solamente pilas del tipo recomendado o equivalentes. • No pongan
en cortocircuito los terminales de alimentación. • Quiten las pilas si el instrumento no se usa durante largos períodos.
Alimentación con la corriente
El aparato puede conectarse a la corriente mediante un adaptador (incluido en las
versiones /AD) que tenga las siguientes caracteristicas: VDC = 6V - 600 mA
(terminal negativo central). • El juego no está destinado a niños inferiores
de 3 años de edad. • El juego puede ser utilizado sólo con el transformador recomen-
dado. • Los juegos que deban limpiarse con líquido, antes de efectuar su limpieza deben
desconectarse del transformador. • El adaptador de red NO es un juguete.
NORMAS PARA LA GESTIÓN INTEGRAL DE LOS RESIDUOS SÓLIDOS
Para la gestión de los residuos detallados a continuación, informarse en el Ayuntamiento de la propia ciudad sobre la
actividad de las entidades responsables especializadas en la gestión integral de los residuos.
1. ELIMINACION DE LAS PILAS: - Para ayudar a la protección del ambiente, las pilas descargadas no
se tiran nunca a la basura normal sino a los contenedores especiales situados en los centros de recogida.
2 - GESTIÓN DE LOS EMBALAJES - Depositar los embalajes de papel, cartón y cartón ondulado en los centros de recogida
específicos. Las partes de plástico del embalaje deben colocarse en los contenedores apropiados para la recogida.
Los símbolos que identifican los distintos tipos de plástico son:
Leyenda relativa al tipo de material plástico:
PET = Polietileno tereftalato • PE = Polietileno, el código 02 es para el PE-HD y el 04 para el PE-LD • PVC = Polivinil cloruro
• PP = Polipropileno • PS = Poliestireno, espuma de poliestireno • O= Otros polímeros (ABS, Acoplados, etc.)
3. DESECHO DE APARATOS ELECTRÓNICOS - El símbolo del contenedor tachado con una cruz indica que
el producto no debe de secharse en la basura doméstica una vez finalizada su vida útil, sino en un punto de
recogida de residuos o centro de reciclaje. Como alternativa, consulte con su distribuidor para devolver el
producto en el momento de adquirir un aparato equivalente o, si la dimención está inferior a 25 cm, se puede
devolver sin cargo . La recogida de residuos adecuada favorece el reciclaje de piezas y materiales, y ayuda a
proteger el medio ambiente y la salud. Según la legislación vigente, la disposición ilegal
de residuos por parte del usuario, puede suponerle penas estrictas. Para obtener más
información acerca de la recogida selectiva de residuos especiales, póngase en contacto
con la autoridad local.
ENCHUFE PARA LOS AURICULARES
Este enchufe permite la conexión de unos auriculares ESTEREOFONICOS (que no se
entregan con el aparato).
ENCENDIDO Y APAGADO
Encender el grabador girando el pomo POWER OFF ⊖VOLUME ⊕y regular el
volumen.
Después del uso, para evitar un consumo inútil de las baterías, poner el pomo en la
posición de OFF.
01
PET
02
PE
03
PVC
05
PP
06
PS
07
O

19
CÓMO ESCUCHAR UN CD
1. Abrir el compartimiento CD tirando
la tapa por el lado de la inscripción
OPEN (quitar, si está presente, el
disco de protección de cartón).
2. Introducir el CD con el lado grabado
hacia exterior.
3. Volver a cerrar la tapa manualmente.
4. Encender girando el pomo POWER
OFF ⊖ VOLUME ⊕; en el display
aparece el número de las pistas con-
tenidas en el CD.
5. Para escuchar pulsar el botón PLAY/
PAUSE.
6. Regular el nivel del volumen girar el
pomo POWER OFF ⊖ VOLUME ⊕.
7. Para poner en pausa la pista pulsar el
botón PLAY/PAUSE (el testigo lumi-
noso Adel display parpadea).
8. Para interrumpir la escucha pulsar
STOP.
SELECCIÓN DE LAS PITAS
Para seleccionar las pistas musicales usar los dos botones B. SKIP y F. SKIP, en el display aparece el número de la
pista elegida. Manteniendo presionado de modo continuo los botones +/– se obtiene un avance o retroceso rápido
de la pista que se está ejecutando.
BOTÓN REPEAT
Pulsando una sola vez el botón REPEAT la pista que se está ejecutando se repite sin interrupción (el testigo luminoso
Bdel display parpadea).
Pulsando dos veces el botón REPEAT se ejecutan todos las pistas sin interrupción (el testigo luminoso Bperma-
nece encendida). Para volver al funcionamiento normal pulsar otra vez el botón REPEAT (el testigo luminoso Bse
apaga).
BOTÓN PROGRAM
Permite crear un programa personalizado de las pistas.
Pulsar el botón PROGRAM (el testigo luminoso PROGRAM parpadea).
Elegir la pista deseada con los botones +/–, pulsar otra vez el botón PROGRAM para memorizar la pista elegida.
Repetir la operación para memorizar otras pitas.
Para empezar la escucha pulsar el botón PLAY/PAUSE (el testigo luminoso del botón PROGRAM permanece
encendida para indicar que se ejecutarán solo las pistas en memoria).
N.B. Pulsando el botón STOP termina la ejecución. Pulsándolo otra vez se pone a cero el programa y el testigo
PROGRAM se apaga.
MICRÓFONOS
El instrumento está equipado por 2 micrófonos que pueden ser utilizados separadamente o
conjuntamente, con o sin el CD en marcha.
Encender el micrófono desplazando el cursor hacia arriba.
Hablar cerca del micrófono; la voz, amplificada, será difundida por el altavoz.
Regular el volumen girando el pomo ⊖ VOLUME ⊕MIC.
NOTA: No acerquen demasiado el micrófono al altavoz, podría causar interferencias.
Testigo POWER
INTERRUPTOR
MICRÓFONO
PROGRAMACIÓN PISTAS
REPETICIÓN PISTA
ENCENDIDO
APAGADO
VOLUMEN
INTERRUPTOR
MICRÓFONO
STOP
DISPLAY SELECCIÓN PISTAS
REPRODUCCIÓN
/ PAUSA PISTAS
VOLUMEN
DEL
MICRÓFONO
Testigo B
Testigo A

20
MANTENIMIENTO Y ADVERTENCIAS
LIMPIEZA DEL ENVOLTORIO
Frotar con un paño suave. Si el envoltorio está muy sucio, humedecer el paño con una solución delicada
de detergente natural y agua y limpiar frotando.
LIMPIEZA DE LA LENTE DEL RAYO LÁSER
Antes de efectuar la limpieza, apagar el instrumento. Si la lente está sucia se producirán saltos durante
la escucha y, en caso de que esté muy sucia , el CD podría hasta no funcionar. Abrir la tapa del com-
partimiento porta-CD y limpiar la lente como sigue:
a. POLVO O PARTÍCULAS DE SUCIEDAD
Usar un cepillo y un soplo de aire que se utilizan para las lentes de las máquinas fotográficas.
Soplar en la lente repetidamente, luego limpiar frotando delicadamente con el cepillo para
quitar el polvo. Soplar otra vez en la lente.
b. HUELLAS DACTILARES
Para eliminar las huellas dactilares de la lente, utilizar un copo de algodón empezando a
limpiar del centro hacia el exterior. Ejercer una ligera presión sobre la lente evitando forzar
para no hacerla salir del eje.
LIMPIEZA DEL DISCO
Cuando el disco se ensucia, limpiarlo con un paño al efecto.
Limpiar siempre desde el centro hacia el exterior.
1. Limpiar el aparato con un paño suave humedecido solo con jabón delicado y agua. No usar deter-
gentes más agresivos como gasolina, disolventes o productos similares porque dañan la superficie
del envoltorio.
2. Si se nota un problema con el aparato, consultar la guía a la solución de los problemas que se
recoge a continuación antes de llamar para la asistencia.
3. Proteger los muebles de madera natural o lacada donde se coloca el aparato. Introducir un paño o
material protectivo de otro tipo entre el aparato y el mueble.
ATENCIÓN
• No dejar el aparato en un lugar con la luz solar directa, en un coche aparcado al sol, o cerca de
fuentes de calor. (El calor excesivo puede causar deformaciones del aparato, cambios de color y
funcionamiento incorrecto).
• El juguete y el adaptador han de ser controlados periódicamente por un adulto, para averiguar
eventuales daños.
ADVERTENCIA
1. ESTE LECTOR CD FUNCIONA CON EL AUXILIO DE UN INVISIBLE RAYO LÁSER Y ESTÁ DOTADO
DE INTERRUPTORES DE SEGURIDAD PARA EVITAR LA EXPOSICIÓN AL RAYO CUANDO LA TAPA
ESTÁ ABIERTA Y LOS DISPOSITIVOS DE BLOQUEO ESTÁN ANULADOS. ES PELIGROSO ANULAR
O EVITAR EL USO DE LOS INTERRUPTORES DE SEGURIDAD.
2. NO FIJAR LA VISTA EN EL RAYO Y NO MIRAR DIRECTAMENTE CON INSTRUMENTOS ÓPTI-
COS.
3. RADIACIONES LÁSER CLASE 1M INVISIBLES SI ESTÁ ABIERTO.
4. VOLTAJE PELIGROSO NO AISLADO, CON RIESGO DE DESCARGA ELÉCTRICAS PARA PERSO-
NAS, PRESENTE EN EL INTERIOR DEL PRODUCTO.
5. SI EL LECTOR DE CD SE SOMETE A GOLPES O MOVIMIENTOS REPENTINOS, LA ESCUCHA PUEDE
SER DEFECTUOSA.
6. ESTE LECTOR DE CD NO ESTÁ DOTADO DE UNA MEMORIA ELECTRÓNICA ANTI-SHOCK.
This manual suits for next models
3
Table of contents
Languages:
Other Bontempi CD Player manuals
