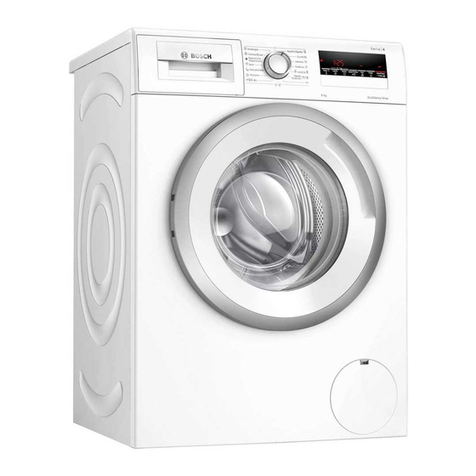
Bosch WUU28T41 User manual

en
More information and explanations can be
found online:
Table of Contents
1 Safety ..................................... 4
1.1 General information ..................... 4
8 keys ........................................ 23
9 programs ..................................... 24
10 Accessories .................................... 28
1.2 Intended
use ........................................................ 4
1.3 Restriction of the group of
users ........................................ 4 11 Laundry ..................................... 28
11.1 Preparing the laundry ................ 28
1.4 Secure Installation ..................... 5
1.5 Safe use ..................................... 7 12 Detergents and care products
phone ................................................ 29
1.6 Safe cleaning and
maintenance ............................................ 9
13 Basic operation ....... 29
13.1 Switching on the device ................... 29
13.2 Setting the program .............. 30
2 Avoiding property damage ........ 11
3 Environmental Protection and Saving ........ 12
3.1 Disposing of the packaging......... 12 13.3 Adjust program
settings................................................. 30
3.2 Saving energy and
resources ........................................ 12 13.4 Loading the laundry.................... 30
3.3 Energy saving mode .................... 13 13.5 Using the dosing aid for liquid
detergent ............ 30
4 Setting up and connecting ...... 13
4.1 Unpacking the device........................ 13
4.2 Scope of delivery........................ 13
13.6 Using a dosing aid for liquid
detergent .......... 30
13.7 Filling in detergent and care
products ........................ 31
4.3 Requirements for the installation
site ........................................ 13 13.8 Starting the program .................. 31
4.4 Remove transport
locks................................................. 14 13.9 Change activated Ready in
time ........................................ 31
4.5 Connecting the device ..................... 16
4.6 Align the device....................... 17
4.7 Connecting the device electrically.... 17
13.10 Soaking laundry ............ 32
13.11 Adding laundry........................ 32
13.12 Abort program .......... 32
13.13 Continuing the program when the rinse
is stopped ........................ 32
5 Getting to know each other ..................... 18
5.1 Device........................................ 18
5.2 Detergent drawer ............ 19
5.3 Control panel ..................... 19
13.14 Removing laundry ............ 32
13.15 Switching off the device ................ 32
14 Parental Control ........................ 32
14.1 Activating child lock..... 32
6 Before first use ........ 20
6.1 Start empty wash cycle ............ 20 14.2 Deactivating child
safety ................................................ 33
7 Screen ...................................... 21
2

en
15 Basic settings ................ 33
16 Cleaning and care ................ 33
16.1 Cleaning the drum ..................... 33
16.2 Cleaning the detergent
drawer....................................... 33
16.3 Cleaning the drain pump .......... 34
17 Eliminate faults ................ 38
17.1 Emergency release ........................ 48
18 Transport, storage and
Dispose of ..................................... 48
18.1 Dismantling the device ................ 48
18.2 Insert transport
locks ................................................ 48
18.3 Putting the device into operation
again ........................................ 48
18.4 Disposing of the old device.................... 49
19 Customer Service ..................... 49
19.1 Product number (E number)
and production number
(F.D.) ........................................ 49
19.2 AQUA-STOP guarantee......... 50
20 Consumption values ..................... 51
21 Specifications ..................... 52
3

ensecurity
1 security
Observe the following safety instructions.
1.1 General information
¡Read this guide carefully.
¡Keep the instructions and the product information for yourself
later use or re-owner.
¡Do not connect the device if it has been damaged in transit.
1.2 Intended use
Only use the device:
¡about machine-washable textiles and hand-washable wool
wash according to care label.
¡with tap water and commercial, washing machine
suitable detergents and care products.
¡in private households and in closed rooms of the domestic
chen environment.
¡up to an altitude of 4000 m above sea level.
1.3 Restriction of the group of users
This device can be used by children aged 8 years and over and by
persons with reduced physical, sensory or mental abilities or lack of
experience and/or knowledge if they are supervised or have been
instructed in the safe use of the device and understand the
resulting hazards to have.
Children must not play with the device.
Cleaning and user maintenance shall not be made by children
without supervision.
Keep children under 3 years and pets away from the device.
4

securityen
1.4 Secure Installation
When installing the device, observe the safety instructions.
WARNING - DANGER OF ELECTRIC SHOCK!
Improper installations are dangerous.
▶Only connect and operate the device in accordance with the
information on the type plate.
▶Connect the equipment to an AC power supply only through a
properly installed, grounded outlet.
▶The protective conductor system of the electrical house installation must
be installed in accordance with the regulations. The installation must have
a sufficiently large cable cross-section.
▶When using a residual current circuit breaker, only use a type
with the symbol .
▶Never supply the device via an external switching device, e.g.
B. timer or remote control.
▶When the device is installed, the mains plug of the mains
connection cable must be freely accessible, or if free access is not
possible, an all-pole separator must be installed in the
permanently installed electrical installation in accordance with the
installation regulations.
▶When setting up the device, make sure that the power cord
is not pinched or damaged.
Damaged insulation of the power cord is dangerous.
▶Never bring the power cord into contact with hot parts of the
device or sources of heat.
▶Never bring the power cord into contact with sharp points or
edges.
▶Never kink, crush or modify the power cord.
5

ensecurity
WARNING - Fire Hazard!
Using an extended power cord and unapproved adapters is
dangerous.
▶Do not use extension cords or multiple socket strips.
▶If the power cord is too short, contact customer service.
▶Only use adapters approved by the manufacturer.
WARNING - Risk of injury!
The high weight of the device can lead to injuries when lifting.
▶Do not lift the device alone.
If this device is improperly installed in a washer-dryer stack, the
installed device may fall down.
▶Stack the dryer on top of a washing machine using only the dryer
manufacturer's connection kit. Any other installation method is
not permitted.
▶Do not install the machine in a washer-dryer stack unless the
dryer manufacturer offers a suitable connection kit.
▶Do not install devices from different manufacturers and with
different depths and widths in a washer-dryer stack.
▶Do not set up a washer-dryer column on a pedestal, the devices
can tip over.
WARNING - CHOKING HAZARD!
Children can pull packing material over their heads or get
wrapped up in it and suffocate.
▶Keep packaging material away from children.
▶Do not let children play with packaging material.
6

securityen
CAUTION - Risk of injury!
The device may vibrate or move during operation.
▶Place the device on a clean, level and solid surface.
▶Align the device using the device feet and a spirit level.
There is a risk of stumbling if hoses and mains connection cables
are not laid properly.
▶Lay the hoses and mains connection cables in such a way that
there is no risk of tripping.
If the device is moved by protruding components, e.g. B. the
appliance door, the parts can break off.
▶Do not move the device by protruding components.
CAUTION - Danger of cuts!
Sharp edges on the device can cause cuts when touched.
▶Do not touch the device on sharp edges.
▶Use protective gloves when installing and transporting the
device.
1.5 Safe Use
WARNING - DANGER OF ELECTRIC SHOCK!
A damaged device or a damaged power cord is dangerous.
▶Never operate a damaged device.
▶Never pull on the power cord to disconnect the device from the
power supply. Always pull on the mains plug of the mains
connection cable.
▶If the device or the power cord is damaged, immediately unplug
the power cord or switch off the fuse in the fuse box and turn
off the water tap.
▶Call customer service. →
page 49
Penetrating moisture can cause an electric shock.
▶Only use the device in closed rooms.
7

ensecurity
▶Never expose the device to extreme heat and moisture.
▶Do not use steam cleaners, high-pressure cleaners, hoses or
showers to clean the device.
WARNING - Danger of damage to health!
Children can lock themselves in the device and endanger their
lives.
▶Do not install the appliance behind a door that blocks or prevents the
appliance door from being opened.
▶If the appliance is no longer used, pull the mains plug from the mains
connection cable, then cut through the mains connection cable and
destroy the lock on the appliance door so far that the appliance door no
longer closes.
WARNING - CHOKING HAZARD!
Children can breathe in or swallow small parts and thereby
choke.
▶Keep small parts away from children.
▶Do not let children play with small parts.
WARNING - Danger of poisoning!
Detergents and care products can lead to poisoning if consumed.
▶In case of accidental ingestion seek medical advice.
▶Store detergents and care products out of the reach of children.
WARNING - Danger of explosion!
If laundry has been pre-treated with solvent-based detergents, it
can cause an explosion in the appliance.
▶Rinse pre-treated laundry thoroughly with water before washing.
CAUTION - Risk of injury!
When climbing or climbing onto the device, the cover plate may
break.
▶Do not step or climb on the device.
8th

securityen
The device may tip over when sitting or leaning on the open
door.
▶Do not sit or lean on the appliance door.
▶Do not place any objects on the appliance door.
Reaching into the rotating drum can lead to hand injuries.
▶Wait for the drum to come to a complete stop before
intervening.
CAUTION - Danger of scalding!
The suds get hot when washing at high temperatures.
▶Do not touch the hot suds.
CAUTION - Risk of chemical burns!
Detergent and care products can spray out of the appliance when
the detergent drawer is opened. Contact with eyes or skin may
cause irritation.
▶In case of contact with detergents or care products, rinse eyes
or skin thoroughly with clear water.
▶In case of accidental ingestion seek medical advice.
▶Store detergents and care products out of the reach of children.
1.6 Safe cleaning and maintenance
When cleaning and maintaining the device, observe the safety
instructions.
WARNING - DANGER OF ELECTRIC
SHOCK! Improper repairs are dangerous.
▶Only trained specialists may carry out repairs on the device.
▶Only original spare parts may be used to repair the device.
▶If the power cord of this device is damaged, it must be replaced
by the manufacturer or its customer service or a similarly
qualified person in order to avoid hazards.
9

ensecurity
Penetrating moisture can cause an electric shock.
▶Do not use steam cleaners, high-pressure cleaners, hoses or
showers to clean the device.
WARNING - Risk of injury!
The use of non-original spare parts and original accessories is
dangerous.
▶Only use original spare parts and original accessories from the
manufacturer.
WARNING - Danger of poisoning!
Toxic fumes can be produced when using cleaning agents
containing solvents.
▶Do not use cleaning agents containing solvents.
10

Avoid property damageen
▶Make sure that the valve housing of the
water inlet hose is installed so that it
does not come into contact with the
environment and is not exposed to any
external forces.
▶Make sure that the inner
diameter of the tap is at least 17
mm.
▶Make sure that the length of the
thread on the connection to the
water tap is at least 10 mm.
Water pressure that is too low or too
high can impair the function of the
device.
▶Ensure that the water pressure at
the water supply system is at least
100 kPa (1 bar) and at most 1000
kPa (10 bar).
▶If the water pressure exceeds the
specified maximum value, a
pressure reducing valve must be
installed between the drinking
water connection and the unit's
hose set.
▶Do not connect the device to the
mixer tap of an unpressurized hot
water heater.
Modified or damaged water hoses
can lead to property damage and
damage to the device.
▶Never kink, crush, modify or cut
water hoses.
▶Only use the supplied water hoses
or original replacement hoses.
▶Reuse water hoses that have
never been used.
Operation with dirty water or water that
is too hot can lead to property damage
and damage to the device.
▶Only operate the device with cold
tap water.
2 Avoid property damage
the
Follow these instructions to avoid
property damage and damage to the
device.
ATTENTION!
Incorrect dosing of fabric softeners,
detergents, care products and
cleaning agents can impair the
function of the appliance.
▶Observe the manufacturer's dosage
recommendations.
Exceeding the maximum load
impairs the function of the device.
▶Observe the maximum load for each
program and do not exceed it.
→
"programs", page 24
The device is secured for transport
with transport locks. Transport locks
that are not removed can lead to
property damage and damage to the
device.
▶Before commissioning, completely
remove and store all transport
locks.
▶Install all transport locks
completely before each transport
in order to avoid transport
damage.
Improper connection of the water
inlet hose can cause property
damage.
▶Tighten the screw connections on the
water inlet hand-tight.
▶Connect the water inlet hose as
directly as possible to the tap
without additional connecting
elements such as adapters,
extensions, valves or similar.
11

enenvironmental protection and savings
Unsuitable cleaning agents can
damage the surfaces of the device.
▶Do not use harsh or abrasive
cleaning agents.
▶Do not use cleaning agents with a
strong alcohol content.
▶Do not use hard scouring pads or
cleaning sponges.
▶Only clean the device with water
and a soft, damp cloth.
▶In the event of contact with the appliance,
immediately remove any detergent
residue, spray mist or residue.
Use economical program settings.
aIf you
If you adjust the settings for a
program, the display shows the
expected consumption.
Dose detergent according to how
dirty the laundry is.
aFor light to normal soiling
a smaller amount of detergent is
sufficient. Observe the dosage
recommendations of the detergent
manufacturer.
Reduce the washing temperature for
lightly and normally soiled laundry.
3 environmental protection and
Save up aAt lower temperatures
the device uses less energy. Lower
temperatures than indicated on
the care label are sufficient for
light to normal soiling.
3.1 Dispose of packaging
The packaging materials are
environmentally friendly and recyclable.
▶Dispose of the individual components
separately according to type. Set the maximum spin speed if the
laundry is then to be dried in the
tumble dryer.
3.2 Save energy and resources
aDryer laundry shortens the
program duration during drying
and reduces energy consumption.
The higher the spin speed, the
lower the residual moisture in the
laundry and the volume of the spin
noise increases.
If you follow these instructions, your
device will use less electricity and
water.
Use programs with low temperatures
and longer washing times and use the
maximum load.
Wash laundry without prewash.
aThe energy consumption and water
server usage is most efficient. aWashing with prewash
extends the program duration and
increases energy and water
consumption.
12

Set up and connecten
The device has an automatic quantity
control.
4.2 Scope of Delivery
After unpacking, check all parts for
transport damage and that the
delivery is complete.
aThe quantity automatic fits the
water consumption and the
duration of the program optimally
to the type of fabric and the load. ATTENTION!
Operation with incomplete or
defective accessories can impair the
function of the device or lead to
property damage and damage to the
device.
▶Do not operate the device with
incomplete or defective
accessories.
▶Replace relevant accessories before
operating the device.
→
"Accessories", page 28
3.3 Energy Saving Mode
If you do not operate the device for a
long time, it automatically switches to
energy-saving mode. The energy
saving mode is ended by operating
the device again.
4 set up and
Connect
A notice:The device was tested at the
factory to ensure it is working
properly. Water stains may remain in
the device. The stains disappear after
the first wash.
4.1 Unpack the device
ATTENTION!
Objects left in the drum that are not
intended for operation in the device
can lead to property damage and
damage to the device.
▶Remove these items and the
supplied accessories from the drum
before operation.
The delivery consists of: ¡
Washing machine
¡accompanying documents
¡transport locks
→
"Remove transport locks",
page 14
¡cover caps
¡Elbow for fixing the water
water drain hose
1.Completely remove the packaging
material and protective covers from the
device.
4.3 Site Requirements
→
"Dispose of packaging",
page 12
WARNING
Electric shock hazard!
The device contains live parts.
Touching live parts is dangerous.
▶Do not operate the device without a
cover plate.
2.Check the device for visible damage.
3.Open the appliance door.
→
"Basic operation", page 29
4.Remove the accessories from the
drum.
5.Close the appliance door.
13

enSet up and connect
WARNING
Risk of injury!
When operating on a base, the device
can tip over.
▶Before using the device for the first
time on a base, be sure to fasten it
with the retaining tabs →
page 28
of
the manufacturer.
location
kitchenette
requirements
The device only
under
hender working
put up a plate
which are fixed to
the neighboring
connected
is. Required
niche width:
60 cm.
ATTENTION!
Freezing residual water in the
device can damage the device.
▶Do not set up and operate the device
in areas where there is a risk of frost
or outdoors.
If the device is tilted more than 40°,
residual water in the device may leak
and cause property damage.
▶Tilt the device carefully.
▶Transport the device in an upright position.
A notice:if
the cover plate
Will get removed,
must the
sheet metal cover plate
te
→
"Accesories",
page 28
before
the installation
be strengthened.
location
base
requirements On a wall No hoses
between wall
and device
jam.
The device with
retaining tabs
→
page 28
be
consolidate.
4.4 Remove transport locks
wooden beam ceiling The device on a
water-
standing wooden
plate (strength
at least 30 mm)
put up that
firmly to the floor
is screwing.
The device is secured for transport
with transport locks on the back of
the device.
A notice:Keep the screws of the
transport locks and the sleeves for
later transport →
page 48
on.
14

Set up and connecten
1.Pull the hoses out of the holders. 4.Remove the 4 sleeves.
5.Insert the 4 cover caps.
2.Loosen and remove all screws of
the 4 transport locks with a SW13
wrench.
6.Press down the 4 cover caps.
3.Remove the power cord from the
bracket.
15

enSet up and connect
4.5 Connecting the device ATTENTION!
When pumping out, the water drain
hose is under pressure and can detach
from the installed connection point.
▶Secure the water drain hose
against unintentional loosening.
water inlet hose
connect
WARNING
Electric shock hazard!
The device contains live parts.
Touching live parts is dangerous.
▶Do not immerse the electric
Aquastop valve in water.
A notice:Note the pump heights.
The maximum pumping height is 1
The connection
place with one
hose clamp
(24-40 mm)
chern.
A notice:Make sure that you connect
the device to a water supply with a
safety device against drinking water
contamination through backflow
(according to DIN EN 1717). The
connection valves/water taps
provided for this purpose are
equipped with this safety device if the
house is properly installed.
bathroom sink the water
running hose with
a manifold
→
page 28
fix and
secure.
1.Connect the water inlet hose to the
tap (26.4 mm = 3/4").
plastic pipe
with rubber sleeve
or gully
the water
running hose with
a manifold
→
page 28
fix and
secure.
2.Open the tap carefully and check
whether the connection points are
tight.
Connection types water drainage
The information helps
Connect this device to
the Wa.
en you, the-
water flow
16

Set up and connecten
4.6 Align device 3.Hand-tighten the lock nuts against
the housing using a SW17 wrench.
Orient the device correctly to reduce
noise and vibration and to prevent the
device from wandering.
1.Loosen the counter nuts clockwise
with a SW17 wrench.
Hold the base of the device and
do not adjust the height.
4.7 Connecting the device
electrically
2.To align the device, turn the device
feet. Check alignment with a spirit
level.
A notice:Your domestic electrical
installation for this device must
comply with local legal and safety
regulations and should include an
earth leakage circuit breaker.
1.Plug the mains plug of the device's
power cord into a socket near the
device.
The connection data of the device
can be found in the technical data
→
page 52
.
2.Check that the mains plug is firmly
seated.
All device feet must stand firmly
on the floor.
17

enTo get to know
5 getting to know each other
5.1 Device
Here you will find an overview of the components of your device.
3 4 5 6 7
28th 8th
19
Depending on the device type, details in the image may vary, e.g. B. Color and
shape.
1maintenance hatch of the caustic
pump →
Se e 34
p
it
e7power cord
→
page 17
2door 8th transport locks
→
page 14
3detergent drawer
→
page 19
cH 9water inlet hose
→
page 16
4control panel →
page 19
cover plate
e
5
6water drain hose
→
page 16
18

To get to knowen
5.2 Detergent drawer 1Chamber II:
¡Detergent for the main
Laundry
¡softener
¡bleach
¡stain salt
2Chamber :
¡softener
¡liquid starch
¡waterproofing agent
3Chamber I:
¡Detergent for the pre-
she
¡hygiene detergent
1 2 3
5.3 Control panel
You can use the control panel to set all the functions of your device and receive
information about the operating status.
2 3
1 1
4
1programs →
page 24
program
pla →
in
2selector →
Spage 29
3Dis y
Page 2 1
4button →
Page 2 3
19

en use
G6
use
Before the first
use
5.Pour powder detergent into
compartment II.
GB
use
prepare the device for use.
6.1 Start empty wash cycle
Your device has been thoroughly
tested before leaving the factory. To
remove any residual water, wash
without laundry for the first time.
1.Open the program selectorClean
drumplace.
To avoid foaming, use only half the
amount of detergent recommended
by the detergent manufacturer for
light soiling. Do not use wool
detergent or mild detergent.
2.Close the door.
3.Pull out the detergent drawer.
4.Fill about 1 liter of tap water into
chamber II. 6.Push in the detergent drawer.
7.To start the program, click Start/
Reloadto press.
aThe display shows the remaining
program duration.
aThe display shows after program
end:end .
8th.Start the first wash cycle or open
the program selector Out ofto turn
off the device.
→
"Basic operation", page 29
20
Table of contents
Other Bosch Washer manuals

Bosch
Bosch WUU24T62ES User manual

Bosch
Bosch WAX32E90ME User manual

Bosch
Bosch WAN28020SN User manual

Bosch
Bosch WGA1440XKE User manual

Bosch
Bosch WAX32EH0ES User manual

Bosch
Bosch WGB256A90 User manual

Bosch
Bosch WAY32890AU Specification sheet

Bosch
Bosch Vision 500 series User manual

Bosch
Bosch WLT Series Specification sheet

Bosch
Bosch WGG242F0ES User manual

Bosch
Bosch WAV28M00NL User manual

Bosch
Bosch WAY28540EE Specification sheet

Bosch
Bosch WAN280F2CH User manual

Bosch
Bosch WAV28KHXGC User manual

Bosch
Bosch WAN28286DN User manual

Bosch
Bosch WMH6Y790GB Specification sheet

Bosch
Bosch WGB244ATGR User manual

Bosch
Bosch WAV28L91ME User manual

Bosch
Bosch WUU24T72ES User manual

Bosch
Bosch WAN24217GR User manual