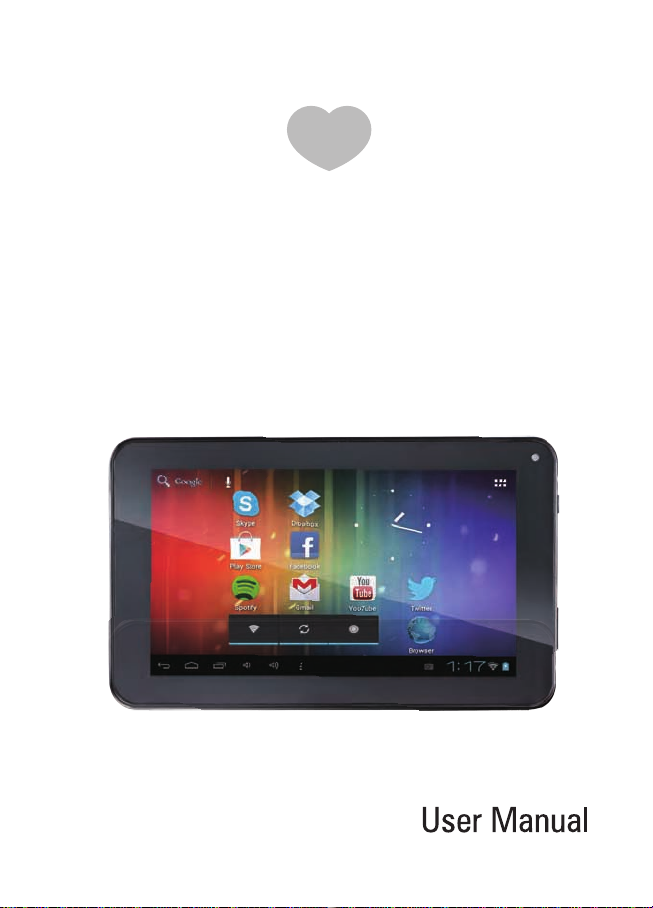
Brilliant Pad TPC7026C User manual

BRILLIANT
Model name:TPC7026C
FCC ID:2AAM5TPC7026C
PAD
7 Inch Tablet PC

1
Instruction Manual
1 What’s Included
The following components are included with your purchased product:
7 inch Tablet PC
Power Adapter
USB Cable
Instruction Manual
2 Getting Started
Before operating your Tablet PC for the first time, please read this manual
carefully and follow the instructions as described below.
3 Battery charging
The tablet is equipped with a built-in rechargeable Lithium battery. It is
suggested to fully charge the battery before use.
We strongly recommend to use the power adapter included in the
packaging, using other adapter may damage the tablet and void the
warranty.
Charging Process
Connect the power adapter to your tablet, and plug the power
adapter into the nearest electrical outlet.
Users can still use the tablet while it is being charged.

2
4 Appearance and buttons
4.1 Camera
4.2 Volume +, Volume-
Press on the Volume +, Volume –buttons to increase or decrease the
sound volume.
4.3 Micro SD card slot
4.4 Power Socket
4.5 Micro USB port
You can use it to connect to PC for data transmission, charging or
connection with external USB devices.
4.6 Headphone Socket
3.5 mm standard earphone jack
4.7 Power Switch
Turn on/off tablet

3
5 Turn ON/OFF Tablet
5.1 Turn On: after the battery has been fully charged, press & hold the power
switch for around 3 seconds to turn on the device. Screen lock will be
showed after starting up.
5.2 Turn Off: When the tablet is ON, press & hold the power switch for around
3 seconds and the system will popup out power off option, tap OK to turn
off the tablet.
5.3 Lock screen: quickly press Power Switch and release to lock screen.
5.4 Unlock screen: slide the lock icon rightward onto the unlock icon to unlock
the screen and go to main desktop; Slide the lock icon onto the other icon
(Settings/Player/Search/Main Desktop) to run that app accordingly.

4
Remarks:
When battery power has been used up, the tablet will shut down itself
automatically.
If you illegally turn off the device, restart will scan and restore the disk, it
may take longer time to enter into system.

5
6 Connection with PC
6.1 Using the USB cable provided to connect the tablet with PC, an icon
will appear at the bottom of screen, tap on it, then tap on the again,
then below USB connection screen interface will pop up, click “Turn on
USB storage”to connect to PC, in the connection mode, you can copy or
delete the file from/to PC.
7 Tablet Desktop Interface
7.1 After starting up, you will enter into below main desktop screen interface:
7.2 In the main desktop interface, you can manage main interface app icons:
press the icon and hold it for 3 seconds, then you can drag anywhere in
the main interface.

6
7.3 Delete icons: press the icon and hold it for 3 seconds, and drag the icon
onto the “”icon, then you can delete that icon from desktop.
7.4 Touch the screen and hold for around 3 seconds, the dialog box
“Choose wallpaper from” will pop out as shown below:

7
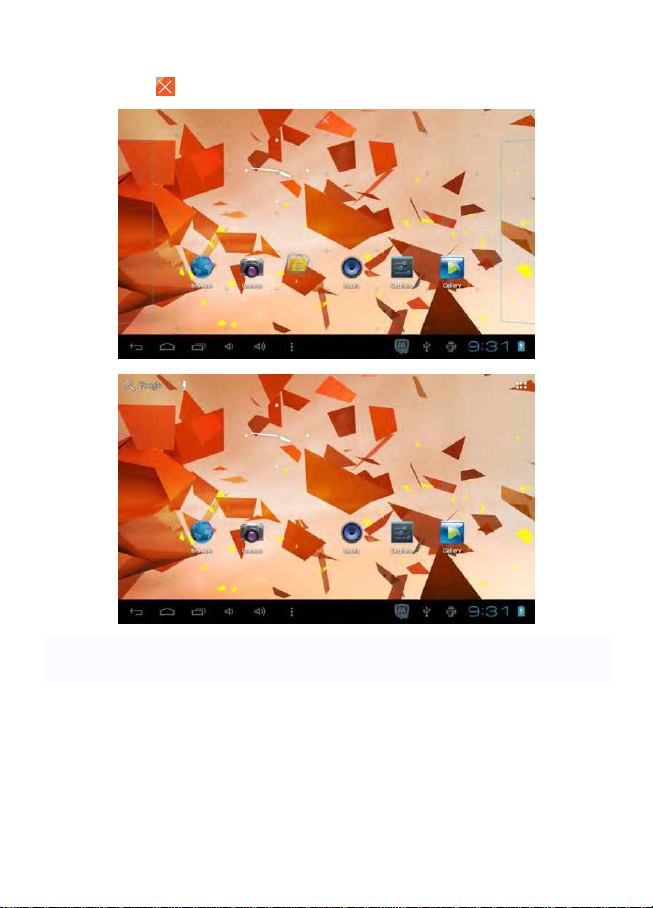
You can choose the wallpaper from different sources and change the
wallpaper.
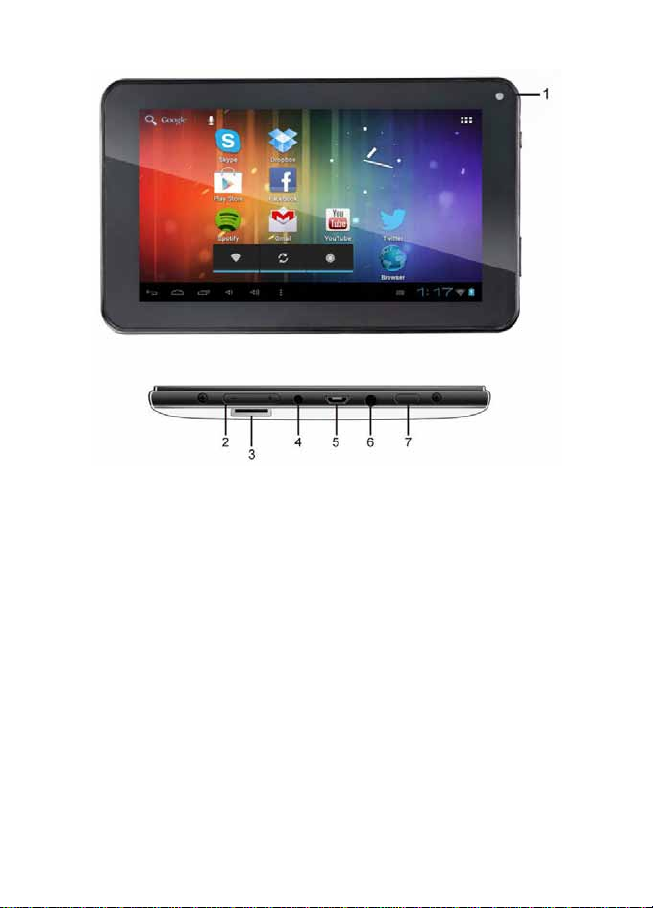
7.5 Status Bar Descriptions
From left to right: Back to previous interface, Back to main desktop screen,
Display the Apps performed previously, Volume decrease, Volume
increase, Menu key, USB connected, USB debugging connected, Current
time, Battery charge icons.
7.6 Quick Guide For Touch Operations
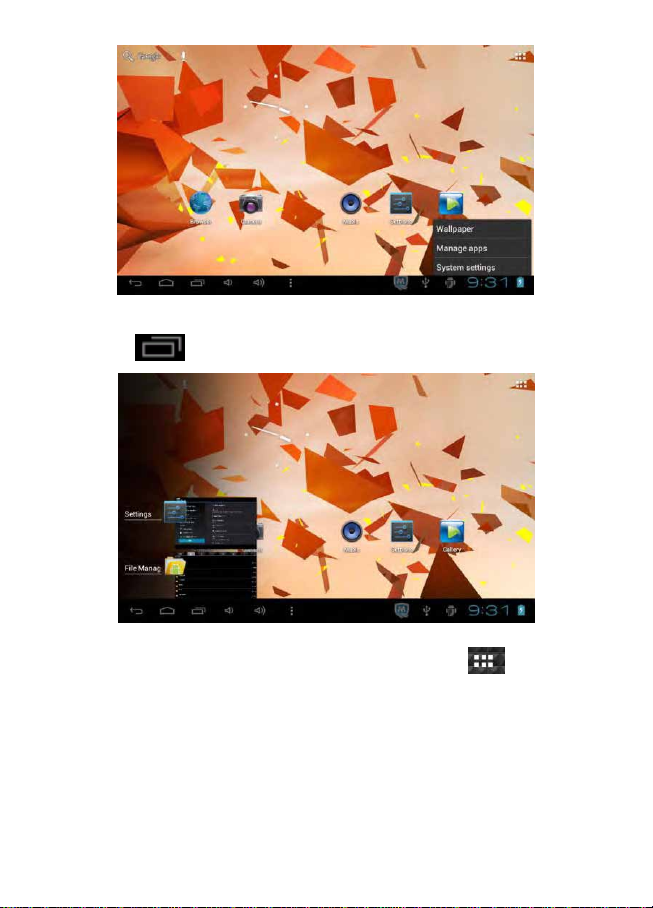
During operations, by tapping the back icon at the left bottom
corner of the touch screen, you can return to previous screen interface.
No matter which interface you are on the screen, you can go back to main
desktop screen by tapping the icon located at the left bottom
corner of the main screen.
Tapping the icons at to increase or decrease the sound volume.
When at the main desktop screen, by tapping the menu icon on the
bottom corner of touch screen, the screen will pop out the below interface:

8
Click to see all history of Apps performed previously.
In the main desktop interface, you can touch the icon to see all the
APPS, tap on any App icon and hold it for around 3 seconds, you can
drag that App icon onto main screen interface.

9
8 Basic Settings
8.1 WIRELESS & NETWORKS
Wi-Fi
Tap on setting icon, then tap on the “OFF”to open Wi-Fi, all available
Wi-Fi networks will be listed, tap on your Wi-Fi network and start to
connect. If the Wi-Fi network does not need a password, tap "connect" to
start the connection. If the Wi-Fi network needs a password, then input the
password and tap “connect” to start the connection. If the Wi-Fi network
has been successfully connected before, that information will be stored,
connection will be done automatically. Once your tablet connects to Wi-Fi
successfully, the Wi-Fi icon will appear on the status bar at the below
of the screen.

10
Data Usage
Select to turn on/off Mobile data, tick or untick the “Set mobile data limit”.
More…
Select to turn on/off Airplane mode, to setup Ethernet connection, VPN,
USB tethering and Mobile networks. By tapping on “3G Support information”
You can see a list of external 3G USB dongle supported by this tablet.
8.2 DEVICE
Sound
Settings on Volume, Silent mode, Ringtone & Notifications, you can also

11
tick to select or untick to unselect for Touch sounds, Screen lock sound.
Display
Settings on LCD Panel brightness, Wallpaper, Auto-rotate screen, Sleep,
Font size, Accelerometer coordinate system, Screen adaption, Smart
backlight
Storage
To select the option of enabling media scanning of external SD card or
external USB devices and to view the internal storage details, Erase this
storage(Erase all data on the storage, such as music and photos), you can
also check the storage details of external SD card or external USB devices

12
and you can unmount the SD card or external USB devices safely here.
【Remarks】:
1. If you want to safely remove the Micro SD card or USB disk,
please tap on the option “Unmount shared storage”, and confirm the
selection, after this, you can safely remove SD card/USB disk.
2. Make sure to tick the option of “Enable media scanning on SD”and
“Enable media scanning on USB”, this way, your tablet can scan and
display the files in the external Micro SD card and USB devices.
Battery
To display the battery usage details.

13
Apps
To Manage the applications. Tap on the directories(DOWNLOADED, ON
SD CARD, RUNNING or ALL) and select the application which you want to
uninstall, you will enter into the following interface, tap on Uninstall, then
you can remove that application from tablet.
8.3 PERSONAL
Accounts & sync
You can add account by tapping “ADD ACCONT”at the right corner of the
screen. You can also turn on/off synchronization of your accounts by
tapping on the “ON”in blue bar.

14
Location services
Options for you to select “Google’s location service”and “Location &
Google search”
Security
Settings for Screen lock, Owner info, Encrypt tablet, Make passwords
visible, Device administrators, Unknown sources, Trusted credentials,
Install from SD card, Clear credentials.
Language & input
Language selection, option of spelling correction, select your desired
Keyboard & Input methods, and settings on Voice Search, Pointer speed.

15
Backup & reset
Option of “Backup up my data”, to perform Factory data reset(erase all
data on tablet) and Recovery Mode.
Warning: once you perform the “Factory data reset”, it will erase all
personal data in tablet, make sure to back up your personal data
before performing this function.

16
8.4 SYSTEM
Date & time
You can use network-provided time or time zone, or you can manually
setup date, time, select time zone and you can also select time format and
date format
Accessibility
Option of TalkBack, TalkBack provides spoken feedback help blind and
low-vision users.(You need to download Google TTS Engine to active this
function)
You can also setup system settings here. You can choose the options of
Large text, Auto-rotate screen, Speak passwords, Touch & hold delay time
and Install web scripts.

17
Developer options
Some advanced settings for the tablet.
About tablet
Additional informations about the Tablet
9 Apps Installation
You can download the Apps from Google Play Store and install them online,
or you can install the Apps from your Micro SD card or USB devices. Just
tap on the APK file and run the installation, you can finish the installation
and run that App right away.

18
10 Introductions of Typical Applications
Browser
After connecting your tablet to Wi-Fi network, tap the Browser icon on
desktop to open web browser. The following interface pops up
immediately:
Then you can start web surfing now, during web surfing, tap on the menu
icon located at the right top corner of the screen to get more options:
Refresh: to refresh the page
Forward: if you go back to previous page, use Forward to go to the page
just visited.
Bookmarks: to see the Bookmarks, Most visited websites and History
Save to bookmarks: save your current site to Bookmarks.
Share Page: share the page with your friends via mail.
Find on page: to search on page.
Request desktop site: to set the page as desktop site.
Save for offline reading: to save the page for offline reading.
Settings: more settings on Privacy&security, Accessibility, Advanced,
Bandwidth management, Labs, Debug.

19
Calculator
The tablet is with built-in calculator, tap on the Calculator icon to carry
out your calculations:
Calendar
Users can use the Calendar to check date, time and memorandum or add
memorandum etc. But before doing this, you have to sign in the Google
Account.
1 Tap on the Calendar icon, then a dialog box of “Make it Google” will
pop up.
Table of contents
Popular Tablet manuals by other brands

HANNspree
HANNspree HANNSpad SN97T4 user manual

Lenovo
Lenovo YOGA Tablet 2 Pro-1380F Safety, warranty & quick start guide

Samsung
Samsung Galaxy Tab A7 user guide

Rocket Education Content
Rocket Education Content 3652222 user manual

Nextbook
Nextbook NXW101QC232 user manual

Medion
Medion LIFETAB E7310 instruction manual