manuals.online logo
Brands
  1. Home
  2. •
  3. Brands
  4. •
  5. Brother
  6. •
  7. Sewing Machine
  8. •
  9. Brother DB2-B797 User manual

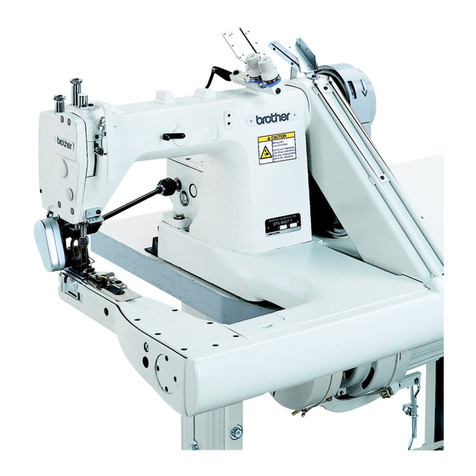
Brother DB2-B797 User manual

(
UPPER
AND
LOWER
FEED
LOCK
STITCHER
AUTOMATIC
THREAD
TRIMMER
SINGLE
NEEDLE
SEWING
MACHINE
WITH
UPPER
AND
LOWER
FEED
LOCK
STITCHER
OBER-
UNO
UNTERTRANSPORT-VERRIEGELUNGSSTICHMASCHINE
VERRIEGELUNGSSTICHMASCHINE
MIT
OBER-
UNO
UNTERTRANSPORT
UNO
AUTOMATISCHEM
FADE-
NABSCHNEIDER
MACHINE
A
POINT
PIQURE
AVEC
ENTRAINEMENTS
SUPERIEUR
ET
INFERIEUR
MACHINE
A
COUDRE
AVEC
COUPE
-
FILS
AUTOMATIQUE
ET
POINTS
RIQURE
AVEC
ENTRAINEMENTS
SUPERIEUR
ET
INFERIEUR
MAQUINA
DE
COSER
DE
TIPO
DOBLE
PESPUNTE
CON
ALIMENTACION
SUPERIOR
E
INFERIOR
MAQUINA
DE
COSER
DE
TIPO
DOBLE
PESPUNTE
DE
UNA
SOLA
AGUJA
CON
ALIMENTACION
SUPERIOR
E
INFERIOR
Y
CORT
AHILOS
AUTOMATICO
INSTRUCTION
MANUAL
BEDIENUNGSANLEITUNG
MANUEL
D'INSTRUCTIONS
MANUAL
DE
INSTRUCCIONES
082-8797
~....-
1
_
__J
082-8798
From the library of: Superior Sewing Machine & Supply LLC
Ill
Th
ank you ve
ry
much f
or
yo
ur
purchase of a
BR
OT
HER
sewi
ng machine.
Th
e f
ul
l
pe
rf
o
rm
ance
of
you
r n
ew
se
wi
ng machine depends, above all,
on
correct
ope
ration.
Be s
ur
e
to
ca
refully read
th
e foll
ow
ing
in
s
tr
uc
ti
ons
be
fore use.
Ill Vielen Dank, daB Sie sich fi.ir eine BROTHER-Nahmasch
in
e e
nt
schieden haben.
Di
e Leis
tun
gs
fa
higk
eit
lh
rer neuen Nahmasc
hin
e hangt
vo
r allem
von
de
r ric
ht
igen
Be
di
e
nu
ng ab.
Lesen Sie daher bitte
vo
r Gebrauch diese Bedienungsanle
it
ung
sorgfa
ltig
du
rch.
Ill Nous vous r
eme
rcions
d'avo
ir
ac
hete
un
e
mac
hi
ne
a co
udr
e BROTHER.
Les pe
rf
ormances de vo
tr
e
nou
ve
ll
e mac
hin
e acoudre depende
nt
, ava
nt
to
ut. de son
utili
sation co
rr
ect
e.
Li
sez
a
tt
e
nti
veme
nt
les
in
structions s
ui
va
nt
es ava
nt
utilisation.
Ill
Mu
chas gracias p
or
haber
adqui
rido
una
maqu
in
a
de
cqser
BROTHE
R.
El buen rend
im
ie
nt
o
de
su nueva ma
quin
a de
coser
depende
so
br
e t
odo
de
su correcto
funcio
n
am
iento.
No deje de leer cui
dadosame
nte las
in
str
ucciones sig
ui
e
nt
es antes de comenzar a usarl
a.
Specifications I Technische DatenI Specifications I Especificacion
es
0
E)
0
<>
)
Needle bar
Nadelstange
Barre aigu
ill
e
Barra
de
aguja
Thread retai
ne
r
Fa
dendurc
hfli
hrung
Re
tenue de fil
Re
tenedor del hilo
P
ul
l
ey
Ri
emenscheibe
Po
uli
e
Po
lea
Use/
Verwendung
UtilisationI Uso
'< D
B2
-B
79
7>
6 Presser-regulation thu
mb
sc
r
ew
St
offd
ruckerfuB-
Reg
uIiersch
ra
ube
Vis a oreille du ni
gu
l
ateur
de
pression
Tornillo
de mar
ipo
sa para regulaci6n del
prensatelas
0 Pre·tension
Vorspann
un
g
Pre-tension
Tension pr
elimina
r
0 Feed-reverse lever
U
mke
hrhebel
Levier
d'inve
rsi
on
d
'ent
rainement
Palanca de retroceso
de Ia a
limentaci6n
0 D
ia
l
Einstellscheibe
Cad
ran des
points
Dial de
Ia
puntada
Sewing speed/ Nahgeschwi
ndigke
it
Vitesse de cou
ture
/Velocidad
de
costura
M
ax
im
um
st
it
ch length/ Max. Stichlange
Longueur
max
imale du
po
i
nt/
L
ongi
t
ud
max
i
ma
de
Ia
puntada
By presser bar
lifter
mit
Sto
ffdru
ckerfuBhebel
Presser foot height
Re
levage
de
ba
rre
pr
es
sion
Con
Ia
ba
r
ra
del lavarotador
StoffdruckerfuBhohe de presatelas
Ha
ut
eur
du presseur
By
knee
lifter
Altu
ra
de
l pie del prensatelas
mit
Kniehebel
Relevage au
geno
u
Con
el
levant
ador
de rodilla
Feed dog height/Transpor
teur
hohe
Haute
ur
de Ia
gr
i
ff
e
d'entr
a
in
ement
Altura del al
imentado
r
Needl
e/
Nad
el/
Aiguille/ Aguja
- 1 -
<
DB
2-B798>
082-
8
798
-
~-:.J
L
~E~~J
--
:
--
!
,-
I -100 -300
L.
_'
I_
_ I
Thread
trimmer
Fadenabschneider 0 0
Coupe-fils
Cortahilos
Quick reverse ,/
Schnellumkehr 0
Marche inver
se
rapide
Mare
ll
a atras rapida
D
B2
-B797 I D
B2
-B798
For thick
mate
ri
als
dicke Stoffe
Pour tissus epais
Tejidos
gru
esos
2000 s
pm
8
mm
I 9
mm
8
mm
15
mm
1.2
mm
DPx17•
23
From the library of: Superior Sewing Machine & Supply LLC
Installing
the
knee
lifter
Montage das Kniehebels
Installation du relevage gu genou
lnstalacion del levantador de rodilla
*Install
knee lifter assembly 0 on the under side.of the
table
with
four
screws
e.
*Install
the knee lifter complying bar E)
as
shown in the
figure above.
·
*.Den
Kniehebel 0
mit
vier Schrauben e
an
der Tischun-
terseite befestigen.
~
* Die Kniehebelstange 0 wie in der Abbildung gezeigt
anbringen.
* Installer le dispositif de relevage
au
genou 9 sous
Ia
table avec quater vis
e.
* Installer
Ia
barre du dispositif de relevage
au
genou E)
comme indique sur le schema ci-dessus.
* lnstalar
el
conjunto del levantador de rodilla 0
en
Ia
parte inferior de
Ia
mesa con cuatro tornillos
e.
* lnstalar
Ia
barra de conexi6n del levantai:tor de rodilla E)
tal como aparece
en
Ia
figura anterior.
Installing
the
oil pan
Montage der Olwanne
Installation du reservoir
d'huile
lnstalacion del deposito de aceite
20
mm
e
-~
I
'
*Install
oil pan 0 in the
hollow
of
the table
with
four
nails
e.
.
*Install
head cushion E) on the
four
corners
of
the
tabl.e
with nails
e.
.
*Die
Olwanne 0 in die Tischoffnung einsetzen und
mit
vier Nageln e befestigen.
* Die Dampfer E) an den vier Ecken
mit
Nageln e
befestigen.
*Installer
le reservoir d'huile 0 dans
Ia
cavite de
Ia
table
avec quatre clous
e.
* Installer l'amortisseurde
Ia
tete E) aux quatre coins de
Ia
table avec les clous
e.
* lnstalar
el
deposito 0 en el hueco de
Ia
mesa con cuatro
clavos
e.
.
* lnstalar
el
amortiguador de cabeza e en las cuatro .
esquinas de
Ia
mes~
con los clavos
e.
Setting
the
cushions
at
the
four
cornersI Aufstellung der Maschine
Mise en place des tampons aux quatre coinsI Colocacion de almohadillas en las cuatro esquinas
* Put the hinges 0 into the holes
of
the bed and adjust them
to
the rubber hinge
e.
then place the machine onto the
head cushions e
for
head at
four
corners.
* Die Scharniere 0 in die Aussparungen einsetzen und
mit
den Gummis e ausrichten.
Danach das Maschinenoberteil auf die vier Gummiunterlagen E) stellen.
*Mettre les charnieres 0 dans les trous du socle et les regler avec
Ia
base caoutchouc articulee
e.
Placer
Ia
machine sur les quatre amortisseur E) de
Ia
tete aux quatre coins.
*Ponga las bisagras 0
en
los agujeros de
Ia
base y ajuste estas a
Ia
base de hule de las bisagras 8 entonces coloque
Ia
cabeza de
Ia
maquina
en
las almohadillas de
Ia
cabeza 0 que hay en las cuatro esquinas.
-2-
From the library of: Superior Sewing Machine & Supply LLC
Rotating direction
of
machine
Drehrichtung der
Nahmaschine ·
Sens de rotation
de
Ia
machine
Direcci6n de rotaci6n
de
Ia
maquina
---=~=~~~;=-~~~--
Installation
de
Ia courroire
How
to
install
the
belt
*The
correct operating direction
of
the machine is
counterclockwise
as
viewed from the pulley side.
* Press belt 0
with
your
thumb, and adjust the belt
tension by turning
nut
e so that the belt 0 can be
depressed
13
-
16
mm
with
a finger.
Gurtmontage
*Von
der Riemenscheibe aus betrachtet muB die Mas-
chine gegen den Uhrzeigersinn Iauten.
* Den Gurt0
mit
dem Daumen drucken.
Mit
der Muttere
die Gurtspannung so einstellen, daB der Gurt 0
13
bis
16
mm
nachgibt.
*
Le
sens exact de
Ia
marche de
Ia
machine est
en
sens liverse des aiguilles d'une montre, vu du cote de
Ia
poulie.
* Appuyersur
Ia
courroie 0 avec le pouce et ajuster
Ia
tension
de
Ia
courroie
en
tournant l'ecrou ede sorte que
Ia
fhkhe
soit de
13
-
16
mm.
Manera de colocar
Ia
correa
*
El
sentido de funcionamiento correcto de
Ia
maquina
es
hacia
Ia
izquierda
si
se
mira desde el lado de
Ia
polea.
*Habra que apretar
Ia
correa 0 con
el
pulgar y regular
Ia
tension de
Ia
misma haciendo girar
Ia
tuerca e de manera tal
que
Ia
correa ceda hacia adentro de unos
13
a
16
mm. ·
Installation
du
bobineur
*Installer
le
bobineur 0 sur
Ia
table avec 2 vis
e.
How
to
install
the
bobbin
winder
*Install
the bobbin
winder
0
to
the table
with
two
screws
e.
(Install
it
so that the bobbin
winder
pulley
CD
will not
slip.)
MQntage des Spulers
*Den
Spuler 0
mit
zwei Schrauben e am Tisch befes-
tigen.
(Dis Spulerscheibe 0 dart nicht rutschen.)
*
(l'installer
de
fa~on
que
Ia
poulie du bobineur 0 ne glisse pas.)
Como instalar Ia canillera
* lnstalar
Ia
canillera 0 en
Ia
mesa mediante dos tornillos
f)
.
. (lnstalarla de forma que
Ia
polea
de
Ia
canillera 0 no
se
deslice.)
To aattach
the
spool stand (optional parts)
*Attach
the spool stand 0 at the right rear corner
of
the
table
with
the screw
e.
Montage
des Spulentragers (Sonderzubehor)
*
Den
Spulentrager 0
an
der rechten hinteren Tischecke
mit
Unterlegscheiben und Mutter
f)
befestigen.
Installation du porte-bobines (Pieces en
option)
* Placer le porte-bobbines 0 dans le coin arriere
droit
de
Ia
table avec les vis de bois atete ronde
e.
Para colocar el porta-conos (Piezas opicionales)
* Colocar
el
parta-conos 0
en
Ia
esquina trasera derecha
de
Ia
mesa con el tornillo
e.
-3-
From the library of: Superior Sewing Machine & Supply LLC
Installation du boitier des commandes
Operation
box
installation
0 Installation on the machine head (ex.: D82-748)
1.
Remove the three screws 0 in the back
of
the arm bed.
2.
Of the six long screws, use the long screws e that are
the same diameter
as
screws
0.
3.
Mount operation box bracket 8 on the back
of
the arm
bed
with
screws
e.
Einbau des Bedienungskastens
0 Montage am Maschinenoberteil (z.8. D82-748)
1.
Die
drei Schrauben 0 an der
ROckseite
des Arms losen.
2.
Von den sechs Iangen Schrauben die Iangen Schrauben
e verwenden, die den gleichen Durchmesser wie die
Schrauben 0 haben.
3.
Die
Kastenhalterung 8
mit
den Schrauben 0
an
der
ROckseite
des Arms montieren.
0 Installation sur
Ia
tete de
Ia
machine (par exemple: D82-748)
1.
Retirer les trois vis 0 sur l'arriere du socle du bras.
2.
Parmi les six longues vis, utiliser celles e
dent
Ia
section est identique acelle des vis
0.
3.
Monter le support du boitier de commande 8 sur l'arriere du socle du bras a l'aide des vis
e.
lnstalacion de
Ia
caja de controles
0 lnstalaci6n de
Ia
cabeza de
Ia
maquina (D82-8748)
1.
Quitar los tres tornillos de fijaci6n 0
en
Ia
parte trasera de
Ia
mesa del braze.
2.
De
los seis tornillos largos, usar los tornillos largos e del mismo diametro que los tornillos
0.
3.
lnstalar
Ia
mlmsula de
Ia
caja de controles 8
en
Ia
parte trasera del braze con tornillos
e.
0 8ranchement du cordon
1.
Retirer les vis 0 et deposer
Ia
plaque frontale
e.
0 Connecting the cord
1.
Remove screws
0,
and remove face plate
e.
2.
Connect operation boxconnector8
to
thecircuit board.
3.
Fit the rubber cushion G over the cord, and
fit
the cord
in thecontrol box, being careful not
to
damagethe cord.
*When removing face plate
e,
unplug
the
synchronizer.
0 KabelanschluB
1.
Die Schrauben 0 losen
um
die Stirnplatte e abzuneh-
men.
2.
Den
Kastenstecker 8
an
der Schaltplatine anschlieBen.
3.
Die GummidurchfOhrung G
Ober
das Kabel ziehen und
das Kabel sorgfaltig am Kasten befestigen.
*Zum Abnehmen der Stirnplatte e muB der Synchroni-
sator gelost werden.
~"""'\
2.
8rancher le connecteur du .boitier des commandes 8 sur
Ia
plaque de circuit.
3.
lntroduire le cordon dans
le
passe-fit
en
caoutchouc 8 et mettre
le
cordon
en
place dans le boitierdes commandes, en
veillant a
ne
pas endommager le cordon.
*Lors de
Ia
depose de
Ia
plaque frontale
e,
debrancher le synchroniseur.
0 Conexi6n del cable
1.
Quitar los tornillos 0 y desmontar
Ia
placa frontal
e.
2.
Conectar
el
conector de
Ia
caja de controles 8
en
el tablero de circuitos.
3.
Colocar
Ia
almohadilla de caucho G sobre
el
cable y encajar el cable en
Ia
caja de controles, cuidando de no daiiar el
cable.
* Cuando
se
desmonta
Ia
placa frontal e
se
debe desenchufar el sincronizador
-4-
From the library of: Superior Sewing Machine & Supply LLC

Other manuals for DB2-B797

3

This manual suits for next models

1

Other Brother Sewing Machine manuals

Brother BE-1204 User manual

Brother

Brother BE-1204 User manual

Brother 885-U02 User manual

Brother

Brother 885-U02 User manual

Brother Innov-is 40 User manual

Brother

Brother Innov-is 40 User manual

Brother T-8422A Setup guide

Brother

Brother T-8422A Setup guide

Brother BAS-300G User manual

Brother

Brother BAS-300G User manual

Brother XL-5012 User manual

Brother

Brother XL-5012 User manual

Brother S-7200A User manual

Brother

Brother S-7200A User manual

Brother 2034D User manual

Brother

Brother 2034D User manual

Brother 888-F42 User manual

Brother

Brother 888-F42 User manual

Brother Innov-is 1500D Guide

Brother

Brother Innov-is 1500D Guide

Brother BAS-300A User manual

Brother

Brother BAS-300A User manual

Brother LS2400 User manual

Brother

Brother LS2400 User manual

Brother ST4031HD User manual

Brother

Brother ST4031HD User manual

Brother DB2-DD7100A User manual

Brother

Brother DB2-DD7100A User manual

Brother 888-V58 User manual

Brother

Brother 888-V58 User manual

Brother BAS-364E User manual

Brother

Brother BAS-364E User manual

Brother Duetta 2 4750D Guide

Brother

Brother Duetta 2 4750D Guide

Brother 882-C40 Quick start guide

Brother

Brother 882-C40 Quick start guide

Brother FB-V61A User manual

Brother

Brother FB-V61A User manual

Brother XR37NT User manual

Brother

Brother XR37NT User manual

Brother PR-600C II User manual

Brother

Brother PR-600C II User manual

Brother 4234DT User manual

Brother

Brother 4234DT User manual

Brother Innov-is 500D User manual

Brother

Brother Innov-is 500D User manual

Brother LS 2125 - Sewing Machine 25 Stitch Function User manual

Brother

Brother LS 2125 - Sewing Machine 25 Stitch Function User manual

Popular Sewing Machine manuals by other brands

Singer 569U1100 Operator's guide

Singer

Singer 569U1100 Operator's guide

ELNA 2002 instruction manual

ELNA

ELNA 2002 instruction manual

Siruba DL7200D-NM1 Instruction book

Siruba

Siruba DL7200D-NM1 Instruction book

Silver Viscount 9500e instruction manual

Silver

Silver Viscount 9500e instruction manual

Pfaff 3588-05/020 instruction manual

Pfaff

Pfaff 3588-05/020 instruction manual

JUKI DDL-9000A instruction manual

JUKI

JUKI DDL-9000A instruction manual

Pfaff 284 Instruction book

Pfaff

Pfaff 284 Instruction book

Reliable MSK-335B Specification sheet

Reliable

Reliable MSK-335B Specification sheet

Kenmore 385. 19000 owner's manual

Kenmore

Kenmore 385. 19000 owner's manual

Husqvarna Viking Designer SE user guide

Husqvarna Viking

Husqvarna Viking Designer SE user guide

Singer 645 owner's manual

Singer

Singer 645 owner's manual

Riccar RL634DE user manual

Riccar

Riccar RL634DE user manual

ZOJE ZJ9800 Operation manual

ZOJE

ZOJE ZJ9800 Operation manual

Siruba C007JP Instruction book

Siruba

Siruba C007JP Instruction book

IKEA SY user guide

IKEA

IKEA SY user guide

Pfaff 571 instruction manual

Pfaff

Pfaff 571 instruction manual

Singer 15-91 Adjusters manual

Singer

Singer 15-91 Adjusters manual

Pegasus WT100 Series instructions

Pegasus

Pegasus WT100 Series instructions

manuals.online logo
manuals.online logoBrands
  • About & Mission
  • Contact us
  • Privacy Policy
  • Terms and Conditions

Copyright 2025 Manuals.Online. All Rights Reserved.