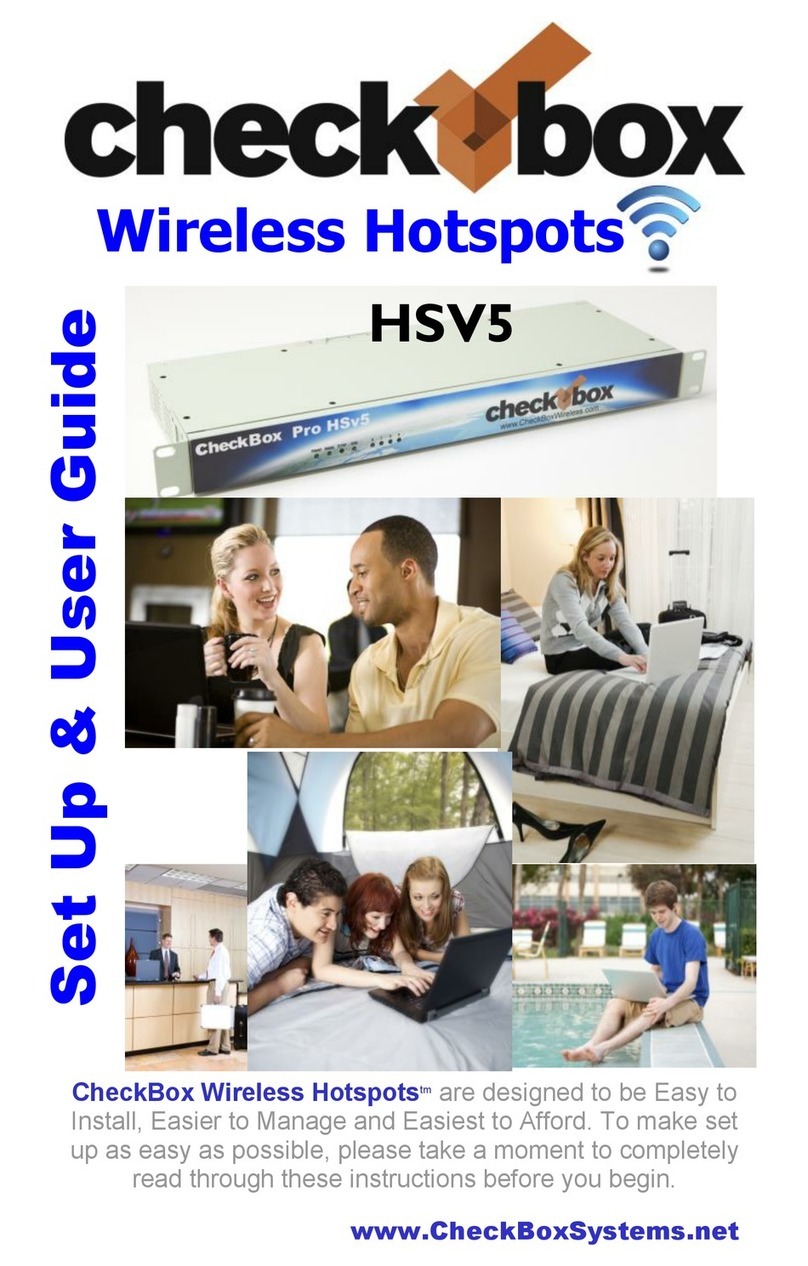
CheckBox HSOne User manual

Self-Contained Wireless
Hotspot System
Set Up & User Guide
CheckBox Wireless Hotspotstm are designed to be simple to set up & simple to use.
Please take a moment to completely read through these instructions before you begin.
HSOne

We have designed CheckBox Wireless Hotspotstm to be simple to use, easy to
manage and straight forward to install. For best results, before beginning to set up
your system, please take the time to read through this booklet completely. The answer
to most questions can be found in here. Thank you for purchasing a CheckBox
System!
Locating the equipment
Locate Checkbox in an area that is close to where your customers will be using the
network. WiFi devices have a range similar to cordless telephones; in an open area they
typically work from 100’ to 500’, but walls and other devices can cause interference and
shorten the range.
Connecting the equipment
CheckBox will connect to your cable, DSL, or local area network using a ethernet network
cable. (It looks like a telephone cord with fat plugs on each end). Depending upon your
particular DSL or Cable modem the jack may be marked “LAN”, “PC”, “Host” or something
else.
For best range place this unit at least one foot or more away from other electrical devices
and large metal objects. This unit can be wall mounted and includes a 5 foot ethernet cable.
Connect one end of the ethernet cable to the single port on the back of the CheckBox and
plug the other end of the ethernet cable into your
internet connection. Connect the power cord to a 120
volt outlet.

Logging into your Administration screens
The administration screens are used to manage your system, create and print tickets for
your users and view your system status. The administration screens also allow you to
view users on the system (Active Clients), view tickets not yet used, and to delete tickets
from the system. These screens are accessed through a web browser on your computer,
and can be accessed from inside the hotspot or from outside the hotspot from anywhere
on the internet. To learn how to access the system from outside the hotspot see
Accessing Your System from the
Internet section in this guide.
To access CheckBox from inside the
hotspot make sure your computer is
connected to the system, either by a
wireless connection or through a wired
Ethernet port connected to the CheckBox
Master. If you are connecting wirelessly
select the wireless network “hotspot”, the
default name for the CheckBox wireless
network. You can change this name later.
Open your web browser and you should
see a generic welcome screen.
This is the welcome screen your guests will see when they first log on to your hotspot.
From here they are prompted to enter a ticket before they can connect to the internet. Of

course you do not have tickets since you have not yet created them! To access the
administration screens enter the following in the address bar: http://192.168.17.1:3456/
admin
This will bring up a page warning you
that no password has yet been set for
the administration screens for your
CheckBox. Create a password that is a
combination of letters and numbers. Do
not use any spaces or special
characters (such as &,*,@, !)
Enter your chosen password twice and
press Set Password. A box will pop up
so that you can test your password. If
your are asked for a user name, leave the user name box empty.
Setting up Guest Access There are several ways your guests can gain access to the
Internet through your CheckBox system; using Access Tickets, using PermaCodes, and
using Free Access. You can choose one or more of these methods to allow your guests
to log on with.
Access Tickets allow you to create and distribute tickets to your guests that allow them
an amount of time online that you determine. These tickets can be good for an amount of
time ranging from 15 minutes to one year. You can give these tickets away or sell them.
To Create Tickets click or tap on Access Controls from the menu at the top to begin
creating tickets for your users. Select the duration of the tickets you wish to generate and

their expiry date (shelf life), and then click on the “Create Tickets” button.
Shelf Life refers to how long the ticket is good sitting in the drawer until it expires. If you
print a sheet of tickets each good for 7 days of access with a Shelf Life of 240 days and
they are not used the system will delete them from the ticket database 241 days after
their creation. If a customer activates that ticket 239 days after it is created they will still
get a full 7 days of access. If they try to activate it 243 days after it is created the ticket
will not be recognized by the system. Shelf Life is particularly handy for promotional
events, for example; “today only free 30 minutes access with each purchase”. Users can
not save up these promotional tickets as you can set their Shelf Life to 1 day for this
event. You can create tickets with different Shelf Lives and Access Times.
The Free Access System allows you to give your guests free access two different ways;
You can allow free access once per period, for example 15 minutes free every day, or 1
day free per year. This is great for a coffee shop or restaurant that wants to advertise
free internet access but prevent guests from taking up a table for hours upon hours. The
guests will still get your welcome screen when they first log on, and if they qualify for free
access (if they have not had free access already in the predefined period) then they will
be invited to try the access for free. Once the free period has expired the guest will be
required to enter a valid ticket number.
The system will automatically generate the appropriate buttons and boxes on your
welcome screen; If you have not printed any tickets and have enabled free access , then
the system will not display a box to enter access tickets. If you have not enabled free
access and have created tickets then only the ticket box will be displayed on your
welcome screen. If all of your tickets have been activated or expired then the system will
remove the ticket box from the welcome screen.

Free Access System allows you to give your guests free access two different ways:
You can allow free access once per period, for example 15 minutes free every day, or 1 day free
per year. This is great for a coffee shop or restaurant that wants to advertise free internet access
but prevent guests from taking up a table for hours upon hours. The guests will still get your
welcome screen when they first log on, and if they qualify
for free access (if they have not had free access already in
the predefined period) then they can click on Free Access.
Once the free period has expired the guest will be required
to enter a valid ticket number or Permacode.
If you wish to allow unrestricted access to your customers,
but still have the customers view your site welcome page,
you can set the Trial Time and Trial Period time to be the
same. For example; by setting the Trial Time and Trial
Period both to 60 minutes, your clients will see the site
welcome page every hour.
To enable Free Access, select Access Controls in the top
menu and then Free Access Setup from the drop down
menu. Select the Trial Time, how much time you want to allow them on the system, and then
select the Trial Period, the amount of time that must elapse before they get a new free trial.
You may also customize the message your users see by selecting “Free Access Text” on the left
hand menu and editing the message.
Note: Free Access users are treated differently than permanent, ticketed, & permacode users by
the Client Usage Policy. Free Access users will receive one-half of the bandwidth allotment of all
other categories of users set in the Client Usage Policy.

Permacodes are special Access Codes you can define yourself. Usage is similar to ticket
numbers, but these codes are reusable by multiple guests at the same time. You may
change permacodes at anytime, and any guest laptops previously activated will still remain
activated until the time set for their code has expired.
You can define two permacodes, either for different amounts of access time or for
overlapping code rotation.
For example: You change the code guests would
use, but leave the previous code active for a few
days until you are sure all guests have been given
the new access code. Both codes would have the
same amount of access time.
You can also have two different codes defined, with
different amounts of access time assigned to each
code. Guests must be given the new code when you
change it.
To set up Permacodes select on the Administration
button on the top level menu, and then select
Permacode from the drop down menu.
Create your code word(s) and select the amount of time each code word is valid for and
press update.
Guests now need to simply type the code into the box on the welcome page, and they will
be let on-line for the amount of time assigned to each code.
Permacodes can consist of letters and numbers, but not spaces or special characters.

Customizing your Welcome Screen As you add access methods the system will add
the appropriate buttons and boxes to your welcome screen. You can customize the look
of your welcome screen by uploading a picture or logo in .JPG format.
To upload an image click on Customize Site in the top menu and then select Upload
Logo on the menu on the left hand side of
the administration screen. You may also
select the options to change the welcome
messages and change the ticket graphics
as well.
For tips on how to size your
graphics see the section Tips For
Uploading Graphics.
Examples of Welcome Screens

Accessing Your System from Outside The Hotspot But Inside Your Network
If you have your CheckBox connected to your company network you can access the
Hotspot Administration Screens from any PC on your network, even if these PC’s are
not connected to the CheckBox system. In order to access your CheckBox from your
company network you will need to know the WAN IP address assigned to the CheckBox
by your network. If you have access to the Hotspot through a wireless client you can
find this address in the Hotspot Administration Screen by clicking on Network Setup in
the top menu and Current Status on the left hand menu. In the section marked “vlan1”
you will see the IP address listed immediately
after “inet addr:” This is the IP address assigned
by your ISP or internal router to our system.
Once you have determined the IP address
assigned to your CheckBox by your network you
can access it by entering the IP address in the
address bar of your web browser with http:// in front of the address and :3456/admin
after the address. For example, if the IP address assigned by your network to the
CheckBox was 10.0.0.21 then you would enter http://10.0.0.21:3456/admin.
This will bring up a password login box just as it would if you were connected from
inside the hotspot, and all administrative functions are accessible.

Accessing Your System From The Internet
There are two ways to access your CheckBox System remotely through the internet. The first
way is to log in through the CheckBox Support System at www.checkboxsystems.net. The
second way is to log on directly via the system’s IP address.
In order to access your CheckBox from the internet, you need to know the IP address
assigned to you by your internet service provider. An IP address is a unique number much
like a telephone number that identifies a unique machine on the internet. No two IP addresses
can be the same on the internet. Most ISP’s use dynamic IP addresses which may change
periodically, in order to conserve the pool of available IP addresses. Some ISP’s will provide
a static (non-changing) IP address upon request, and may charge for this service. If you
intend to regularly administer your system from off site through the internet it will be easier if
you have a static IP address.
Your ISP may need to know the MAC address of your CheckBox. The MAC address is a
unique hardware ID that your ISP will use to tie your CheckBox to the static IP address. You
will find the MAC address listed on the bottom of the unit.
If your CheckBox is connected to your cable or DSL modem through a router, you will need to
enable static routing, DMZ, or virtual servers through your router. Please refer to your router
manufacturer’s instructions for details on how to enable static routing or virtual servers.
To access CheckBox through the internet you will enter
the IP address assigned by your ISP in the address bar
of your web browser with http:// in front of the address
and :3456/admin after the address. For example, if the

static IP address for the CheckBox was 66.23.124.9 then you would enter
http:// 66.23.124.9:3456/admin .
This will then bring up a password login box just it would if you were connected from inside
the hotspot, and all administrative functions are accessible.
Accessing Your System From Anywhere - An Easier Way You can also access your
system remotely using the Remote Access provided by the CheckBox Support Server.
Accessing your system from the CheckBox Support Server does not require you to know or
remember your IP address, & works no matter how often how often your IP address changes.
To access your CheckBox System remotely you will need your site ID number, user name and
administration password. The site ID number is a four digit number assigned by CheckBox
Support. Your user name is also assigned by CheckBox Support. Your administration
password is the same password that you use to access your CheckBox System when you are
on site. To obtain a site ID number and user name, please contact
support@checkboxsystems.net to request one.

Network Setup
You probably will not need to make any changes in
the network setup of your CheckBox system as
most Internet Service Providers use DHCP,
Dynamic Host Configuration Protocol, to tell the
devices connected to their network what address
and other parameters to use.
If your Internet Service Provider uses static IP
addresses, or if you are connecting CheckBox to a an internal company network you
may need to set some network parameters manually.
To enter Network Setup click on Network Setup on the top menu. The Network Setup
page will appear. Enter the parameters as provided by your Internet Service Provider or
network administrator. After you have entered the parameters press update and then
reboot to restart the system.
Local Address refers to the IP addresses the CheckBox system assigns to users on the
system. By default this address is in the 192.168.17.xxx range. This setting should not
be changed under most circumstances. If there is a need to change this address range,
select Local from the menu on the right hand side and enter the new address range in
here, press update and reboot they system. NEVER SET THE LOCAL ADDRESS
RANGE TO BE THE SAME AS THE ADDRESS RANGE OF THE INTERNET
CONNECTION. This will cause routing errors and you will lose contact with the unit.
Your CheckBox system, like most wireless access points, announces it’s presence by

broadcasting it’s SSID. This SSID is a name that your guests will see when their
laptops connect to the CheckBox system. By default this name is hotspot, which lets
the guests know they have found a public hotspot. If you wish to change the SSID
select wireless from the drop down menu under Network Setup. Enter in the new
name and press update. It is important that your name contain only letters and
numbers - no spaces or symbols.
Under Wireless you may also change the system channel. There are 11 channels
allocated for wireless networks. By default CheckBox is set to channel 6. Different
networks can co-exist on the same channel in the same area, however if you are
running another network or there are other networks in your area you may wish to
change the channel. Simply select the channel from the drop down box and press
update.
A Note About Time & Tickets
Your CheckBox system sets it’s internal clock from a time server on the
internet. The first time the unit powers up, or after it has been unplugged, it
will attempt to connect to one of many time servers on the internet to set it’s clock,
including the date and year. Since tickets are time and date sensitive if the system
does not know what time it is it can not determine if a ticket is still valid.
If the system can not set it’s clock for some reason (i.e. your internet connection is not
set up or your internet service provider is down) it will not generate tickets or allow
users on the system. Users will receive a screen that let’s them know that the system
is temporarily unavailable. You will still be able to access the administrative pages.

Administering Active Clients Under normal
circumstances guests will get online, use their
time and then automatically be logged off the
system with out any intervention from you or your
staff. However there is an option to manually
adjust a guest’s time remaining, delete a guest
from the system, and manually add a guest.
By selecting Administration in the top menu and
then Active Clients on the drop down menu you
will see a list of all client computers currently ticketed. Client computers are listed by their
MAC address, a unique electronic serial number assigned to each network adapter. You
can see their time remaining and whether or not they are online. By clicking on their ticket
number or time left you can manually add time or delete the client from the system.
By selecting All Clients on the drop down menu under Administration you will see not
only clients with tickets but also those clients that have connected with the hotspot system
but who have not entered a ticket, permacode or free access. (Although these clients
have been recognized by the system, they have not been allowed onto the internet yet, or
have been on the internet and their time has expired.) Here you can manually allow them
online.
The third column for each client lists how much data traffic they have put through the
system. This information is in kilobytes, and is counted from the time they activate their
ticket.
The last two columns list the access point or repeater that the client is connected to, and
the strength of the signal that the system is receiving from the client. Generally the

received signal strength of the client is roughly equal the signal that the client is receiving
from the system. In most cases, signals greater than 12 to 15 should result in a good
connection. These signals are 5 minute averages, and it is normal for these to fluctuate.
For easy identification, you can change the label name for a user in the system. For
example, if you have several computers in the office that are permanent clients, and some
users that are employees with long term tickets, you can label them by their name.
To change the label of a user, simply click on their ticket number in the ticket column Enter
the new label or name in the box marked “Identity” and press update. When entering a
name or label, do not use spaces or special characters.
Client Usage Policy
With the Client Usage Policy function, you can set how
much bandwidth a guest can consume. Bandwidth is the
amount of data a guest passes through the system. The
system can only pass a finite amount of data at a time,
with the limiting factor usually being the internet connection itself. Most internet connections
such as cable or DSL pass between 3Mb to 50Mb. Fiber can pass up to 1Gb of data, while
satellite and T1 circuits can be slower than 1Mb. Some internet service providers, especially
satellite based providers, have limits on how much data can be used per day or per month.
The Client Usage Policy is a system-wide rule that sets limits for all users of the system. It
allows you to set an hourly limit on the amount of data each user can consume. Before
reaching the limit each user will have full access to the bandwidth on the internet
connection—the system will divide the available bandwidth evenly among the active users.

When a user begins to approach their hourly limit that user will be reduced to a slower speed
calculated to prevent them from exceeding the hourly limit you have set in the Client Usage
Policy.
To set the Client Usage Policy select the Administration on the top menu and then select
the Client Usage Policy on the drop down menu. Choose what type of Internet connection
you have and then choose one of the preset Policies or you can choose custom and
manually set a limit.
The last column in the Active Clients table shows the Usage Policy status of each individual
active user. If the policy box is green, the user has full access to available bandwidth. If the
policy box is yellow, the user is approaching the bandwidth limit set by the system and their
speed has been reduced. The reduced speed will be displayed in the yellow box.
You can allow exceptions to the usage policy for certain users to allow them unrestricted
bandwidth - this feature is particularly handy for your own computer or the office computers.
To set up a user for unrestricted bandwidth, simply click on the green or yellow policy box
and a screen will open that allows you to select unrestricted usage. You only need to set
unrestricted usage once per ticket, and the user will remain unrestricted until their ticket
expires. If this is for an office computer consider setting a Permanent ticket by clicking on the
ticket number and setting it to Permanent.
Free Access users are treated differently than permanent, ticketed, permacode and
credit card users by the Client Usage Policy. Free Access users will receive one-half of
the bandwidth allotment of all other categories of users set in the Client Usage Policy.

Tips for Uploading Graphics CheckBox provides the option to upload a graphic for the
welcome page and a different graphic that prints out on the tickets. For best results these
graphics should not be too large, either in pixels or file size.
Pixels refers to the number of dots in a picture, these dots make up the picture itself. If a
picture is described as 200 x 400 pixels, the picture is 200 dots wide by 400 dots tall. If
the pixel count is too big then the picture may not fit on the page or it may push other
elements of the page off the screen. It is important to remember that not all screens are
the same size! It may look fine on your screen but may not fit on somebody else’s screen!
The standard minimum screen size for computers 640 x 480.
File size refers to the amount of data used to record the picture information. Too little data
and the picture looks course, blurry or grainy. Too much information and the picture takes
too much space on the hard drive and takes too long to download.
So what is the “right” size? For the welcome screen logo generally an image that is no
bigger than 640 pixels wide and 240 pixels tall works best. You can make them less wide
or less tall. As for file size, somewhere between 20Kb and 100Kb is about right.
For the logo on your ticket, an image that is 110
pixels tall by 200 pixels wide is ideal, with a file size
around 20 kb.
There are many tools you can use to resize your
graphic, including Adobe Photoshop, Microsoft
Picture It and a shareware tool called Irfanview (http://
www.irfanview.com). Whichever tool you use, make
sure to save your graphic in a .jpg format.

Signal Strength, Power Levels & Antennas Data communication between your guest’s
laptops and the CheckBox is a two-way affair. For a successful connection not only does a
signal need to get from the CheckBox to the user’s laptop, but they need to get a signal back to
the CheckBox. Laptop wireless cards are not all created equal and few have an external
antenna. Therefore it is not unusual for a guest to “see” a signal of a few bars, or “good” on their
laptops but have a difficult time maintaining a connection. This is usually a case of the laptop
seeing the signal from the CheckBox but the CheckBox not being able to see the Laptop.
Another issue wireless users often encounter is the “signal strength” meters displayed on their
screens. These signal strength displays are an approximation of the signal strength averaged
over a period of time and do not take into account signal noise, the interference inherit in every
radio transmission. This can lead to users seeing a strong signal displayed, but still not be able
to establish a connection.
Of course just the opposite can occur; sometimes users will see a weak signal but yet make a
solid connection. Regardless of what the signal strength display reads the bottom line for the
user is always this: Can they connect and is the connection fast enough?
One way to improve the range of the signal is by adding a long range antenna to your access
point (the access point in this case is the CheckBox system). Long range antennas are rated in
“dbi” and can sometimes help and sometimes can make the situation worse. While a standard
antenna sends out radio waves equally in all directions like a balloon, long range antennas
achieve greater range by changing the shape of the signal.
Instead of sending out the signal in a balloon shape some antennas flatten out the balloon into
more of a donut, sending less of the signal straight up into the sky and more out towards the
edges. These antennas can generally extend the usable range from 10% to 30%. However they
can introduce two new problems; the case of the laptop seeing the CheckBox but the CheckBox
not being able to see the laptop mentioned above, or a case where the “donut” is so flat that it

shoots over the heads of the users, like a layer of fog traveling a few feet off of the ground.
A second type of antenna re-shapes the signal even more, sending it in a pinpoint beam. These
antennas can increase range ten-fold or more, however if the user is not in the direct path of the
signal they will not be able to see it. Even if they are in the direct path if they are not able to send
a signal back the full distance they will not be able to establish a connection. These high-gain
point-to-point antennas are best used in pairs, one on each end of the path, and while not
practical for use on laptops they are good for connecting buildings in remote locations or
repeaters in areas not contiguous to other units.
There are other ways to improve the range of the signal for users. One way is to improve the
sensitivity of the radio receiver at both ends. While we do not have control over the quality of the
user’s laptops we have made the receiver in the CheckBox very sensitive.
Another way to improve range is to increase transmit power. Again, since we do not have control
over the quality of the user’s laptops we cannot affect their transmit power, but we could boost
ours. CheckBox uses the maximum legal power for unlicensed operation in the frequencies
(channels) it occupies. There are some hotspot companies that do use higher power, but that is
a dangerous game. Unlicensed operation at higher power can result in the property owner
being fined.
When you boost the transmit power on one end of the connection but not the other you also run
into the problem of one side being able to see the signal from the other side but not being able
to send a signal back.
Using antennas that did not come with your CheckBox system or connecting your
CheckBox system to an amplifier or booster will void your warranty and could cause
illegal operation.

System Alerts
You can receive an email or text message if your CheckBox Master unit, one of your
repeaters, or your internet connection goes off-line. These System Alerts are issued by the
CheckBox Support Server, which monitors your system. This monitoring service is included
in the first year warranty that comes with every CheckBox System, and is also included in
the Extended Warranty Program.
Before you can set up alerts you will need a Remote Site log-in. If you do not have a remote
site log-in you can request one from CheckBox by sending an email to
support@checkboxsystems.net.
To set up alerts for your CheckBox;
1. Log in to the CheckBox support servers through your remote site login but do not click on
the name of your site to log all the way into your local CheckBox.
2. After logging into the support site click on "Update Site Information".
3. Set your Alerts to
either Aggressive,
Normal or Relaxed
4. Enter the email
address you want the
alerts sent to
Table of contents
Other CheckBox Wireless Router manuals
