4
ENGLISH
10
7
10
6
10
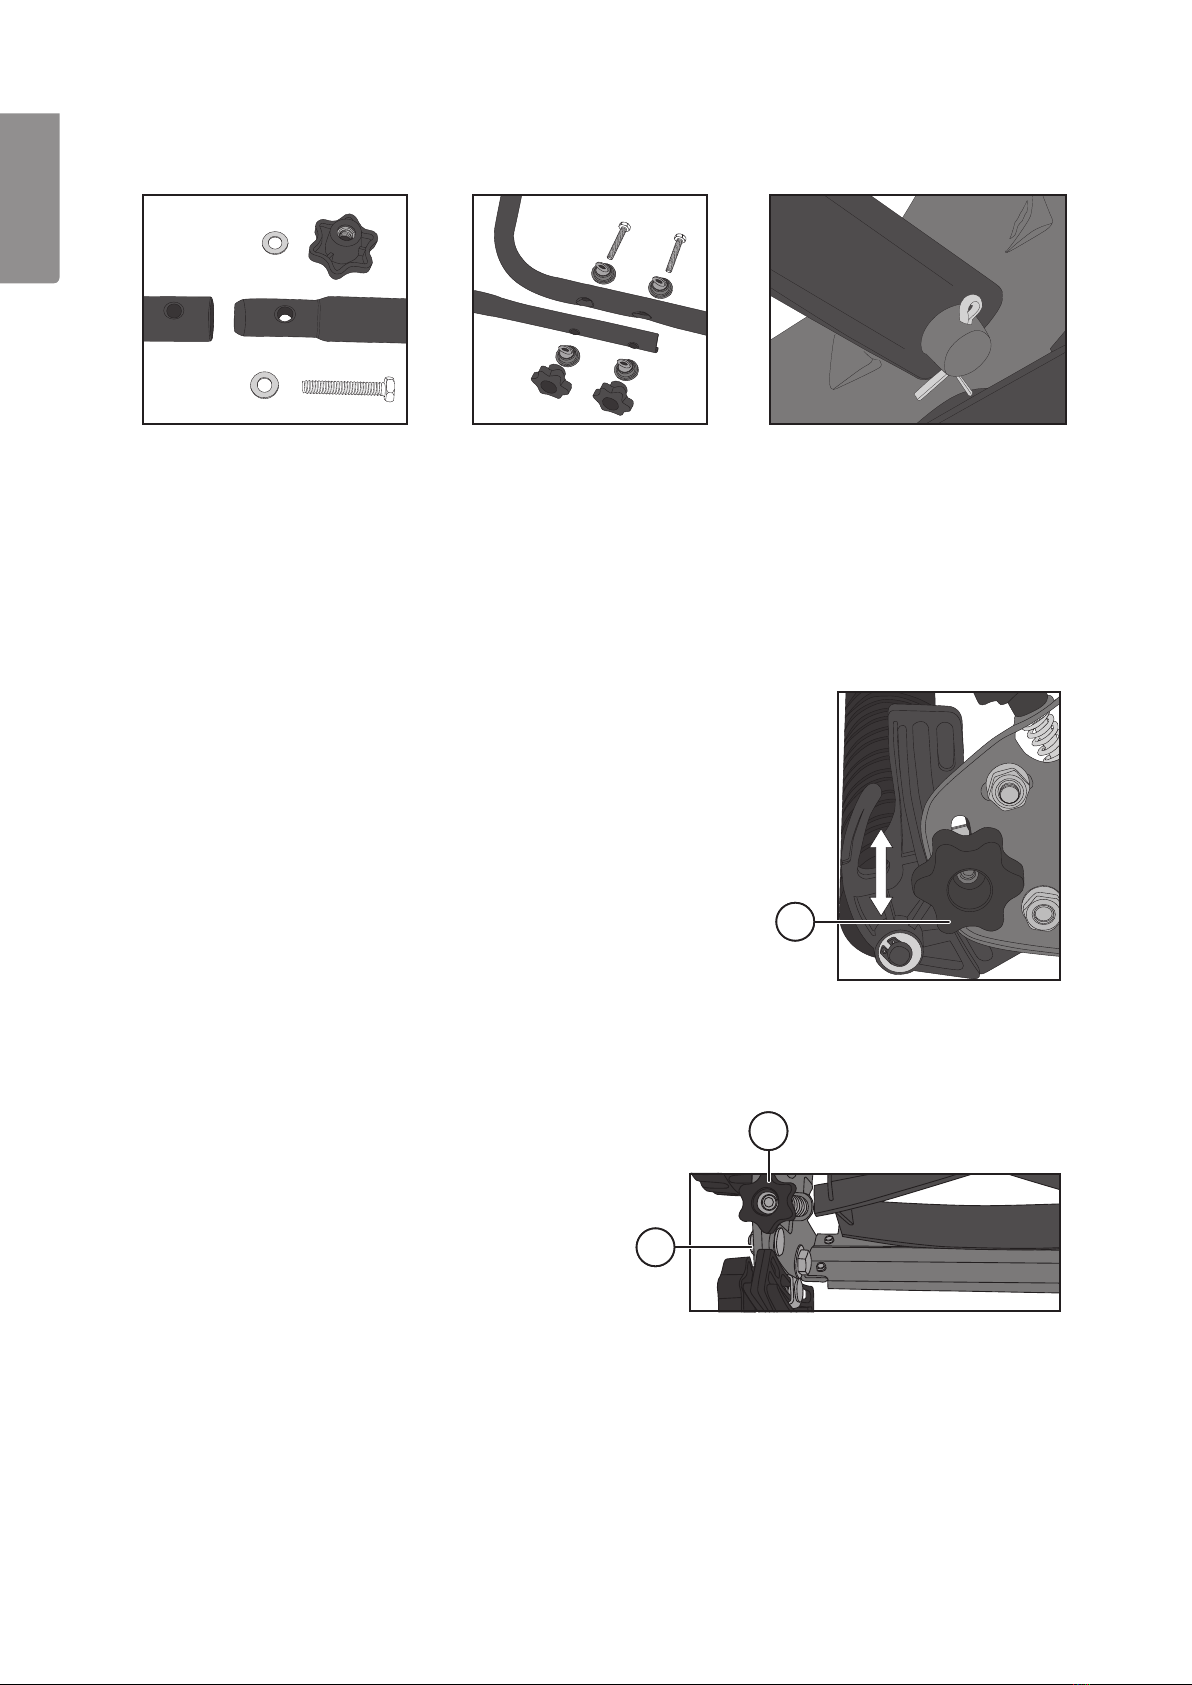
A
Assembly
2. Bolt theflattened ends of
thehandle uprights onto
thesides of thelower handle.
3. Attach theassembled handle onto
thelawnmower. Squeeze theends
of thehandle in alittle and pass
theholes over thelugs on themower
head. Insert asplit pin into thehole in
thelug and open theends out to lock
thehandle on.
Operation
Setting the cutting height
Note: Wear protective gloves.
1. Undo theknobs (7) on each side of therear roller and adjust
theheight.
2. Make sure that theheight is thesame on both sides.
3. Tighten theadjustment knobs again.
1. Join theupper handle and thehandle
uprights together using thebolts and
theprovided spanner.
Adjusting the blade cylinder to the cutting bar
Note: Wear protective gloves.
Note: Thecutting bar should be as close to theblade cylinder
as possible. Theblades should come into contact with
thecutting bar but there must be enough clearance for
thecylinder to be turned by hand.
1. Undo thenut A (one on each side) and adjust theclearance
using theknobs (6).
2. To increase theclearance, turn theknobs anticlockwise.
To reduce theclearance, turn theknobs clockwise.
3. Adjust theblade cylinder so that theentire length of
theblade touches thecutting bar. It can take abit of
adjusting to get theblade clearance right.
4. Theblades are set correctly if they cut apiece of paper
placed between thecylinder and cutting bar just as well as
apair of scissors. Test this by turning thecylinder by hand.
Note: Wear protective gloves. Bear in mind that theblades
are sharp.
5. When theadjustments have been made, retighten nut A.