manuals.online logo
Brands
  1. Home
  2. •
  3. Brands
  4. •
  5. Craftsman
  6. •
  7. Lawn Mower
  8. •
  9. Craftsman 917.380330 User manual

Craftsman 917.380330 User manual

Other Craftsman Lawn Mower manuals

Craftsman 27758 User manual

Craftsman

Craftsman 27758 User manual

Craftsman 917.28925 User manual

Craftsman

Craftsman 917.28925 User manual

Craftsman 917.271041 User manual

Craftsman

Craftsman 917.271041 User manual

Craftsman 917.378060 User manual

Craftsman

Craftsman 917.378060 User manual

Craftsman 917.20381 User manual

Craftsman

Craftsman 917.20381 User manual

Craftsman 917.374552 User manual

Craftsman

Craftsman 917.374552 User manual

Craftsman 502.255070 User manual

Craftsman

Craftsman 502.255070 User manual

Craftsman 917.379380 User manual

Craftsman

Craftsman 917.379380 User manual

Craftsman 917.388060 User manual

Craftsman

Craftsman 917.388060 User manual

Craftsman 107.289920 User manual

Craftsman

Craftsman 107.289920 User manual

Craftsman 28813 - 46 in. Lawn Tractor User manual

Craftsman

Craftsman 28813 - 46 in. Lawn Tractor User manual

Craftsman 917.27066 User manual

Craftsman

Craftsman 917.27066 User manual

Craftsman T1600 247.203743 User manual

Craftsman

Craftsman T1600 247.203743 User manual

Craftsman 25323 User manual

Craftsman

Craftsman 25323 User manual

Craftsman 917.371800 User manual

Craftsman

Craftsman 917.371800 User manual

Craftsman CMXGMAM1125499 User manual

Craftsman

Craftsman CMXGMAM1125499 User manual

Craftsman C459-60116 User manual

Craftsman

Craftsman C459-60116 User manual

Craftsman 12A-764M799 User manual

Craftsman

Craftsman 12A-764M799 User manual

Craftsman 917.374369 User manual

Craftsman

Craftsman 917.374369 User manual

Craftsman 917.251482 User manual

Craftsman

Craftsman 917.251482 User manual

Craftsman 917.379440 User manual

Craftsman

Craftsman 917.379440 User manual

Craftsman 917.274822 User manual

Craftsman

Craftsman 917.274822 User manual

Craftsman EZ3 917.386051 User manual

Craftsman

Craftsman EZ3 917.386051 User manual

Craftsman 917.25431 User manual

Craftsman

Craftsman 917.25431 User manual

Popular Lawn Mower manuals by other brands

Toro 20047 Operator's manual

Toro

Toro 20047 Operator's manual

Toro Greensmaster TriFlex 3300 Operator's manual

Toro

Toro Greensmaster TriFlex 3300 Operator's manual

Global garden products 72 Workshop manual

Global garden products

Global garden products 72 Workshop manual

EINHELL 01045 operating instructions

EINHELL

EINHELL 01045 operating instructions

Toro Greensmaster 3120 Operator's manual

Toro

Toro Greensmaster 3120 Operator's manual

Baroness LM315GC Owner's operating manual

Baroness

Baroness LM315GC Owner's operating manual

GreenWorks Tools 25157 user manual

GreenWorks Tools

GreenWorks Tools 25157 user manual

Etesia MVEHH user manual

Etesia

Etesia MVEHH user manual

Husqvarna LTH125 owner's manual

Husqvarna

Husqvarna LTH125 owner's manual

Gravely 915034 - ZT1640 Owner's/operator's manual

Gravely

Gravely 915034 - ZT1640 Owner's/operator's manual

Jacobsen 63281 Technical manual

Jacobsen

Jacobsen 63281 Technical manual

GreenWorks Pro MO802524 Operator's manual

GreenWorks Pro

GreenWorks Pro MO802524 Operator's manual

Toro TimeMaster 20976 Operator's manual

Toro

Toro TimeMaster 20976 Operator's manual

Deutz-Allis 3000 Series parts manual

Deutz-Allis

Deutz-Allis 3000 Series parts manual

jobmate YT9108 user manual

jobmate

jobmate YT9108 user manual

Yard force GM R40A instructions

Yard force

Yard force GM R40A instructions

Husqvarna R 419TsX AWD Operator's manual

Husqvarna

Husqvarna R 419TsX AWD Operator's manual

STERWINS ELM2-36P-3W.4 Assemby - Use - Maintenance Manual

STERWINS

STERWINS ELM2-36P-3W.4 Assemby - Use - Maintenance Manual

manuals.online logo
manuals.online logoBrands
  • About & Mission
  • Contact us
  • Privacy Policy
  • Terms and Conditions

Copyright 2025 Manuals.Online. All Rights Reserved.

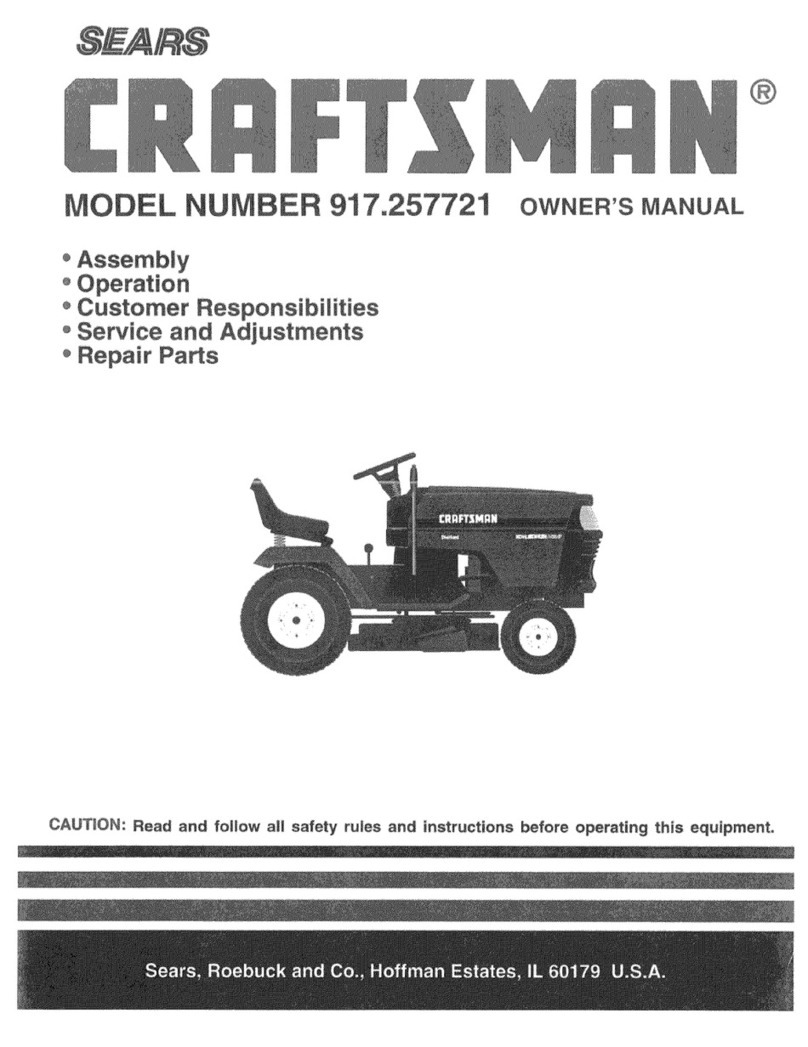
MODELNUMBER
917o380330 OWNER'S
_Assembly
_Operation
4_aintenance
a_ervice
_Adjustments
4_epairParts
¢aufio.:
Readand Follow
all SafetyRules
andInstructions
BeforeOperating
ThisEquipment
I IIII1'1 III IIIIIIIIIIIIIII1'1
SAFETYRULES
CAUTION: ALWAYS DISCONNECT SPARK PLUG WIRE AND PLACE WIRE
,_ WHERE IT CANNOT CONTACT SPARK PLUG TO PREVENT ACCIDENTAL ',_,
STARTING WHEN SETTING-UP, TRANSPORTING, ADJUSTING OR MAKING
REPAIRS TO YOUR LAWN MOWER_
IMPORTANT
FEDERAL REGULATIONS REQUIRE OPERATOR PRESENCE BLADE STOP CONTROLS TO MINIMIZE THE
RISK OF BLADE CONTACT INJURY. YOUR LAWN MOWER IS EQUIPPED WITH SUCH CONTROLS. DO
NOT ATTEMPT TO DEFEAT THE FUNCTION OF THE OPERATOR PRESENCE CONTROL UNDER ANY
CIRCUMSTANCES_
•BE CAREFUL-WHEN THE ENGINE IS RUN-
NING THE BLADE IS TURNING.
o Please read your owner's manual_ Only allow
raerSons who know the safety rules to use your
wn mower,,
° DO NOT tie the operator presence control bar
to the handle_ Control must be free to permit
brake engagement when handles and control
are released.
• DO NOT allow children to use your lawn
mower,
• Check your lawn mower over before each use.
Tighten any loose bolts, nuts, etc.
° Remove all sticks, stones, wires, cans, boards,
etc. from area to be mowed, These objects can
be thrown by the blade.
• DO NOT allow children, bystanders or pets in
the area while mowing.
°Always wear shoes when mowing._ DO NOT
operate lawn mower when barefoot or wear-
ing open sandals,
• Always wear' safety glasses or eye shields
before starting your lawn mower and while
mowing_
° Always shut off engine before trying to adjust
wheel heights.
• When engine is running, DO NOT put hands
or feet under lawn mower or' in the discharge
chute, nor' make any adjustments.
°Stay clear of discharge opening at all times_
• Do not fill gas tank when engine is running,
when indoors or when engine is hot. Allow
engine to cool for several minutes before fill-
ing gas tank. Clean off any spilled gasoline
before starting engine_
°Mow only in good light.
° Always stop blade when not cutting grass or
when crossing gravel drive, sidewalk, or
roadway.
o
o
o
°DO NOT continue to run your lawn mower if
you hit a foreign object.. Stop the engine,
disconnect the spark plug wire from the spark
plug, inspect the lawn mower for' damage and
make repairs as required.
• DO NOT use a damaged lawn mower_ Always
have damage repaired before mowing.
o DO NOT run your lawn mower if it vibrates
too much Stop engine and make repairs
Vibration is an indication of damage_
•Never use your' lawn mower" without proper
guards or deflectors in place.
° Always mow across a slope or inclined area.
DO NOT mow up or down a slope or inclined
area.
° DO NOT mow in wet grass_ Be careful of
footing when mowing in wet grass, use shoes
with good traction°
DO NOT run with the lawn mower..
DO NOT run your lawn mower indoors, Ex-
haust gases are deadly poison.
Always disconnect the spark plug wire from
spark plug to prevent accidental starting when
transporting or storing your lawn mower after
the mowing season.
°DO NOT attempt to raise engine speed above
factory settings. Engine damage or personal
injury may result.
o If a grass catcher' is used on your lawn mower,
check the catcher often for damage or
deterioration. It will wear through normal use.
Use only a recommended replacement catcher.
°Always stop blade to remove or install catcher'.
°DO NOT store your lawn mower or gasoline
where fumes may reach an open flame and
cause a fire.
°DRAIN THE GASOLINE from your lawn
mower before transporting your' lawn mower
inside your car or other vehicle.
iiiiiiiiii ii iii ii iiiiiiiii i iiiinlll
LOOKFORTHISSYMBOLTO POINT OUT IMPOR-
TANTSAFETYPRECAUTIONS,IT MEANS-- ATTEN-
TION!!! BECOME ALERT[!! YOUR SAFETY IS
INVOLVED.
CONGRATULATIONSon your purchase of a Sears Craft-
sman Lawn Mower. It has been designed,
engineered and manufactured to give you the best
possible dependability and performance.
Should you experience any problem you cannot easi-
ly remedy, please contact your nearest Sears Ser-
vice Center/DepartmenL We have competent, well-
trained technicians and the proper tools to service
or repair this unit
Please read and retain this manual. The instructions
will enable you to assemble and maintain your lawn
mower properly_ Always observe the "SAFETY
RULES'L
i,,,lllllll i i ,111, ....................
MODEL
NUMBER 917,380330
SERIAL
NUMBER
DATE OF
PURCHASE
THE MODEL AND SERIAL NUMBERS WiLL BE
FOUND ON A DECAL ATTACHED TO THE REAR
OF THE LAWN MOWER HOUSING
YOU SHOULD RECORD BOTH SERIAL NUMBER
AND DATE OF PURCHASE AND KEEP IN A SAFE
PLACE FOR FUTURE REFERENCE.
PRODUCTSPECBFICATIONS
i1,,1111111,,11.....
HORSE POWER: 4_0
iiiiiiii1,11 i i .................
DISPLACEMENT: 10o49 cu. in
GASOLINE CAPACITY: l_O.quqrt_
(Un eaded)
OIL (21 oz_ Capacity):
A.PJ., Classification
SG/SF/SE
SAE 30
(SAE10W30)
i iii ,, iq,lln -iii
SPARK PLUG (GAP .030 in ): Champion
RJ 19-LM or
Sears z_ 33312
or STD 361458
VALVE CLEARANCE: Intake: ,008 in
Exhaust: ,008 in,
,i................
SOLID STATE IGNtTION
AIR GAP: ,0125 in,
iiii, ii iii iiiiiii
BLADE BOLT TORQUE: 35-40 ft,-Ibs
MAINTENANCEAGREEMENT
A Sears Maintenance Agreement is available on this product. Contact your nearest Sears store for details
CUSTOMERRESPONStB LMES
• Read and observe the safety rules_.
• Follow a regular schedule in maintaining, caring for and using your lawn mower,
o Follow the instructions under "Maintenance" and ,,Storage, sections of this Owner's Manual_
TWOYEARSLIMaTEDWARRANTYON CRAFTSMANPOWERMOWER
For two years from the date of purchase, when thisCraftsman Lawn Mower ismaintained, kJbricated and tuned-
up according to the instructions in the owner's manual, Sears will repair, free of charge, any defect in material
and workmanship
tf this Craftsman Lawn Mower is used for commercial or rental purposes, this warranty applies for only 90
days from the date of purchase,
This warranty does not cover:
Expendable items which become worn during normal use, such as rotary mower biades, blade adapters,
belts, air cleaners and spark plug
Repairs necessary because of operator abuse or nealiaence, includin bent crankshafts and the failure to
mamta n the equipment accord ng to the mstruchons contained m the owner s manuaI_
WARRANTY SERVICE IS AVAILABLE BY RETURNING THE CRAFTSMAN POWER MOWER TO THE
NEAREST SEARS SERVICE CENTER/DEPARTMENT IN THE UNITED STATES, THIS WARRANTY APPLI ES
ONLY WHILE THIS PRODUCT IS IN USE IN THE UNITED STATES°
This warranty gives you specific legal rights, and you may also have other rights which may vary from state
to state
Sears, Roebuck and Company, D/731CR-W, Sears Tower, Chicago, IL 60684
TABLEOFCONTENTS
SAFETY RULES
PRODUCTSPECIFICATIONS
CUSTOMER RESPONSIBILITIES
WARRANTY
LAWN MOWER AccESSoRIES
ASSEMBLY
OPERATION
MAINTENANCE
ONDEX A
Adjustments:
Carburetor
Handle Height
Height of Cut
Air Filter:
Replacement
Assembly:
Handle
Accessories
2
3
3
3
5
6,7,8,9
10,11
SERVICE AND ADJUSTMENT
STORAGE .
SERVICERECOMMENDATIONS
REPAIR PARTS-LAWN MOWER
REPAIR PARTS-ENGINE
TROUBLE SHOOTING
PARTS ORDERING/SERVICE
Handle:
12 Adiustment t4
13 Assembly 5
7 Knob 6
tl
Btade:
Replacement I0
Sharpening 10
Controls:
Engine Zone Control Cable 6,7
Operator' Presence Control Bar 6
Engine Speed Control 6,7
Customer Responsibilities 3
Cutting Levels 7
Engine:
Oil Cap .6
Oil Change 11
Oil Level 8
Oil Type 8
Starting .8
Storage 14
Fuel:
Type .8
Storage ]4
Lubrication:
Discharge Guard Hinge Pin 15
Engine 15
Front Wheel Adjuster 15
Handle Bracket Mounting Pin 15
til
Maintenance:
Agreement .3
Air Filter 11
Blade Care/Replacement 10
Engine 11
Grass Catcher 1t
Lubrication 15
Spark Plug 11
Mowing Tips 9
Oil:
Engine 11
Storage 14
Operation:
Operating Lawn Mower • 6,7,8,9
Operator PresenceControl Bar 6
Options:
Attachments 5
R
Repair/Replacement Parts
Responsibilities, Customer
Safety Rules
Service and Adjustments:
Carburetor
Handle
Service Recommendation
Spark PIug
Specifications
Speed Control:
Engine
Starting the Engine
Starter Handle
Stopping Your Lawn Mower
Storage
T
Trouble Shooting Chart
W
Warranty
Wheels:
Wheel Adjusters
Parts 18-21
t2,13
14
15
16-17
18-21
23
24
18-2"/
3
12
t3
T5
1I
3
7
8
6
.8
t4
23
3
6,7
_ ........................................... ;......... _-,_ ............ Jr_ .............................................. _ ................ J.._'_ .......................................................... _.--w_,_,_,r _,_ ,! ,r_ ............................................
AC(ES$ORIE$
These accessories were available when this lawn mower was produced. They are available at most Sears retail
outlets, catalog and service centers° Most Sears stores can order repair parts for you, when you provide the
model number of your lawn mower,,
ENGINE
SPARKPLUG
6MUFFLER
©AIR FILTER
Your lawn mower has been completely assembled
at the factory,
HOWTOSETUPYOURLAWNIVtOWER
TO UNFOLDHANDLE
Remove handle padding holding operator presence
control bar to upper handle.
o Hold clown operator presence control bar to up-
per handle to allow handle to move to mowing
position.
Raise handles until lower handle section locks in-
to place in the mowing position (See Fig_ !).
o Raise upper handle section intoplace on lower
handle and tighten one (1) handle knob,,
* Release operator presence control bar and
tighten remaining handle knob,,
o Your lawn mower handle can be adjusted for your
mowing comforL Refer to "ADJUST HANDLE"
in the Service and Adjustment section of this
manual.
OPERATOR PRESENCE
CONTROL BAR
UPPEI LIFT UP 4_
LIFT UP /,.// ,"_/
;/
FIG 1
.[
KNOWYOURLAWNMOWER
READ THIS OWNER'S MANUAL AND SAFETY RULES BEFORE OPERATING YOUR LAWN MOWER. Com-
pare the illustrations with your Lawn Mower to familiarize yourself with the location of various controls
and adjustments_ Save this manual for future reference.
ENGINE ZONE CONTROL CABLE _
OIL FILLER CAP WITH DIPSTICK
DISCHARGE GUARD_
WHEEL ADJUSTER
(ON EACH WHEEL)
I-_---OPERATOR PRESENCE CONTROL BAR
STARTER HANDLE
..... HANDLE KNOB
LAWN MOWER HOUSING
FI6. 2
EETSCPSCSAFETYREqUIREmENTS
Sears Rotary Walk-Behind Power Lawn Mowers conforrn to the safety standards of the American National
Standards Institute and the U_S, Consumer Product Safety Commission, The blade turns when the engine
is running°
OPERATOR PRESENCE CONTROL BAR - must be PRIMER - pumps additional fuel from the carburetor
held down to the handle to start the engine. Release to the cylinder for use when starting a cold engine°
to stop the engine_
ENGINE SPEED CONTROL - located on the left side
of the engine which allows you to select either
"HIGH" or "LOW" engine speed.
STARTER HANDLE - used for starting the engine_
OPERATm
HOW TO USEYOURLAWNMOWER
ENGINE SPEEDCONTROL
The engine speed is controlled by a lever (red knob)
located on the left side of the engine. "HIGH" posi-
tion is for starting engine, normal cutting and better
grass bagging. "LOW" position is for light cutting,
trimming and fuel economy (See Fig.. 3)..
IIMPORTANTI
ENGINE ZONE CONTROL
W"E"THEI.
Your lawn mower is equipped with an operator
zone engine control which requires the operator
to be positioned behind the lawn mower handle
to start and operate the lawn mower.
CAUTION: FEDERALREGULATIONSREQUIRETHE
ENGINE CONTROLINSTALLEDON THIS LAWN
_b MOWER IN ORDERTO MINIMIZE THE RISKOF
BLADECONTACTINJURY. DONOT UNDERANY
CIRCUMSTANCESATTEMPTTODEFEATTHEFUNC-
TION OF THE OPERATORCONTROL.
TO ADJUST CUTTING HEIGHT
CAUTION: DISCONNECTSPARK PLUG WIRE
FROM SPARKPLUGAND PLACEWIRE WHERE
IT CANNOTCOMEIN CONTACTWITHTHESPARK
PLUG.
ENGINE SPEED CONTROL LEVE_
FIG. 3
FIG. 4
o Raise wheels for low cut and lower wheels for
high cuL
* Wheels are set in a low cut for shipping° Adjust
cutting height to suit your requirements, Medium
position is best for most lawns.
o To change cutting height, squeeze adjuster lever
toward wheel_ Move wheel up or down to suit
your requirements_ Be sure all wheels are in the
same setting (See Fig 4)_
T
BEFORESTARTfiIGENG NI ............................................................................................................................................................
01L:
oRemove engine oil cap with dipstick (See Fig_ 5)
and fill to the FULL line on the dipstick.
o Use one (1) pint or 0.5 titers of SAE 30 oil or
equivalenL SAE lOW 30 oil can also be used.
DO NOT use SAE lOW 40 oil.
NOTE: A 20 oz_ bottle of Pennzoil SAE 30 Oil is in-
cluded with your new lawn mower.
• POUR OIL SLOWLY_ DO NOT OVERFILL
o The total oit capacity of your engine is 2! ozo or
0°62 liters
o To read proper level, tighten engine oil cap each
time°
o Replace engine oil cap with dipstick and tighten.
o Check oil level before each use. Add oil if need-
ed_ Fill to FULL line on dipstick_
o The oil you use should meet A.PJ. Classification
SG/SF/SE_
NOTE: After the first two (2) hours of mowing, change
the oil, and every 25 hours thereafter. You may need
to change the oi_ more often under dusty, dirty
conditions.
GAS:
Fil! gasoline tank with fresh, clean unleaded
gasoline. DO NOT USE PREMIUM GASOLINE.
BE CAREFUL NOT TO OVERFILL TANK (SEE
FIG. 5).
WARNING:Experience indicates that alcohol blend-
ed fuels (called gasohol or using ethanol or methanol)
can affract moisture which leads to separation and
formation of acids during storage_ Acidic gas can
damage the fuel system of an engine while in storage_
To avoid engine problems, the fuel system should be
emptied before storage for 30 days or Ionger_ Drain
the gas tank, start the engine and let it run until the
fuel lines and carburetor are empty° Use fresh fuel
next season. See Storage Instructions for additional
information.
Never useengine or carburetor cleaner products in
the fuel tank or permanent damage may occur_
ENGINE OIL CAP
W/DIPSTICK
FIG. 5
TO STARTENGINE
To start a cold engine, push primer five (5) times
before trying to start. Use a firm push° This step
is not usually necessary when starting an engine
which has ah'eady run for a few minutes°
o Pushengine speed control lever forward to HIGH
position.
*Hold operator presence control bar down to the
handle and pull starter handle quickly. Do not
allow starter rope to snap back.
o To STOP engine, release operator presence con-
trol bar'.
NOTE:In cooler weather it may be necessary to
repeat priming steps. In warmer weather over' prim-
ing may cause flooding and engine will not start. If
you do flood engine wait a few minutes before at-
tempting to start and DO NOT repeat priming steps.
T
MOWING TIPS
o Under certain conditions, such as very tall grass,
it may be necessary to raise the height of cut to
red_Jce pushing effort and to keep from
overloading the engine and leaving clumps of
grass clippings.
o For extremely heavy cutting, reduce the width of
cut and raise the rear of the lawn mower hous-
ing one (1) wheel adjuster setting higher than the
front for better discharge of grass.
° For better grass bagging and most cutting con-
ditions, the engine speed should be set in the
"HIGH" (FAST) position°
oWhen using a rear discharge lawn mower in
moist, heavy grass, clumps of cut grass may not
enter the grass catcher, Reduce ground speed
(pushing speed) and/or run the lawn mower over
the area a second time_
o If a trail of grass clippings is left on the right side
of a rear discharge lawn mower, mow in a
clockwise direction with a small overlap to col-
lect the clippings on the next pass.
o For side discharge lawn mowers, cutting in a
counter-clockwise direction, starting at the outside
of the area to be cut, spreads grass clippings more
evenly and puts less load on the engine To keep
clippings off of walkways, flower beds, etco, make
the first cuts in a clockwise direction_
• Pores in cloth grass catchers can become filled
with dirt and dust with use and catchers will col-
led less grass. To prevent this, regularly hose cat-
cher off with water and let dry before using.
o The vent holes in the baffle in back of apermanex
catcher can become filled with dirt and dust with
use and the catcher will collect less grass.
To prevent this, regularly hose the catcher baffle
with water and let dry before using.
°Keep top of engine around starter clear and clean
of grass clippings and chaff. This witl help engine
air flow and extend engine life.
GENERALRECOMMENDATUON
o Once a year you should replace the spark plug,
air filter and check blade for' wear. A new spark
plug and air' filter assures proper air-fuel mixture
and helps your engine run better and last longer,
You should check all fasteners and be sure they
are tight,
Follow the Service Recommendation Schedule on
page 15o
LAWNMOWER
BLADE/BLADEADAPTERCARE
Your Iawn mower wil! work better' with a sharp
blade. CAUTION: DISCONNECTSPARK PLUG WIRE
FROMSPARKPLUGAND PLACEWIRE WHERE
IT CANNOTCOMEIN CONTACTWITH THESPARE
PLUG.
TO REMOVE BLADE:
Turn lawn mower on its side_ Make sure air filter
and carburetor are up.
o Use block of wood between blade and lawn
mower housing to prevent blade from turning
when removing the blade bolto
o Protect your hands with gloves and/or wrap
blade with heavy cloth°
o Remove blade bolt by turning counter-clockwise,
Use a 9/16" box or open-end wrench.
o Remove blade and attaching hardware (bolt,
Iockwasher and hardened washer) (See Fig° 6)_
NOTE: Remove the blade adapter' and check the key
inside hub of blade adapter_ The key must be in good
condition to work properly. Replace adapter if
damaged..
TO REPLACE BLADE:
Position the blade adapter on the engine
crankshafl_ Be sure key in adapter and key way
in crankshaft are aligned.
o Position blade on to the blade adapter aligning
the two (2) holes in the blade with the raised lugs
on the adapter.
NOTE: Be sure the word TOP (stamped on the blade)
is toward the engine (See Fig, 6)°
o Install the blade bolt with the Iockwasher and
hardened washer into blade adapter and
crankshaft (See Fig. 6)_
CRANKSHAFT
LOCKWASHER
_BLADE ADAPTER_
CRANKSHAFT KEYWAY"_----_. _ /--
FIG. 6
o Use block of wood between blade and lawn
mower housing and tighten the blade bolt, turin
ing clockwise_
o The recommended tightening torque is 35-40 ft.
Ibs_
o Torque wrenches are available at most Sears
stores and through the catalog,
!''"''_ _ CAUTION:ALOOSEBLADECANBEDANGEROUS
_ANDMAY MAKETHEENGINEHARDTO START.
Use only a Sears authorized replacement blade to
get the best cutting resutts_
NOTE: We do not recommend sharpening blade - but
if you do, be sure the blade is balance&
TO SHARPEN BLADE:
o The blade can be sharpened with a file or on a
grinding wheel. Do not attempt to sharpen while
on the lawn mower_,
o Care should be taken to keep the blade balanc-
edo An unbalanced blade will cause excessive
vibration when running and eventual damage to
lawn mower' or' engine_
oTo check blade balance, drive a nail into a beam
or wail. Leave about one inch of the straight nail
expose& Place center hole of blade over the head
of the nail If blade isbalanced, it should remain
in a horizontal position° If either end of the blade
moves downward, blade is not balanced.
Sharpen the heavy end until the blade is
balance&
10