manuals.online logo
Brands
  1. Home
  2. •
  3. Brands
  4. •
  5. Craftsman
  6. •
  7. Lawn Mower
  8. •
  9. Craftsman 917.386101 User manual

Craftsman 917.386101 User manual

Other Craftsman Lawn Mower manuals

Craftsman 917.388860 User manual

Craftsman

Craftsman 917.388860 User manual

Craftsman ZTS 7500 User manual

Craftsman

Craftsman ZTS 7500 User manual

Craftsman EZ3 917.270912 User manual

Craftsman

Craftsman EZ3 917.270912 User manual

Craftsman EZ3 917.258470 User manual

Craftsman

Craftsman EZ3 917.258470 User manual

Craftsman 917.373491 User manual

Craftsman

Craftsman 917.373491 User manual

Craftsman C459-36306 User manual

Craftsman

Craftsman C459-36306 User manual

Craftsman 917.275902 User manual

Craftsman

Craftsman 917.275902 User manual

Craftsman 247.25000 User manual

Craftsman

Craftsman 247.25000 User manual

Craftsman EZ3 917.270840 User manual

Craftsman

Craftsman EZ3 917.270840 User manual

Craftsman 917.376657 User manual

Craftsman

Craftsman 917.376657 User manual

Craftsman EZ 917.270922 User manual

Craftsman

Craftsman EZ 917.270922 User manual

Craftsman 917.374355 User manual

Craftsman

Craftsman 917.374355 User manual

Craftsman 917.376404 User manual

Craftsman

Craftsman 917.376404 User manual

Craftsman 917.374943 User manual

Craftsman

Craftsman 917.374943 User manual

Craftsman 917.378212 User manual

Craftsman

Craftsman 917.378212 User manual

Craftsman 917.370871 User manual

Craftsman

Craftsman 917.370871 User manual

Craftsman 917.272058 User manual

Craftsman

Craftsman 917.272058 User manual

Craftsman 917.255741 User manual

Craftsman

Craftsman 917.255741 User manual

Craftsman 917.377331 User manual

Craftsman

Craftsman 917.377331 User manual

Craftsman 917.272246 User manual

Craftsman

Craftsman 917.272246 User manual

Craftsman 917.370692 User manual

Craftsman

Craftsman 917.370692 User manual

Craftsman 917.28803 User manual

Craftsman

Craftsman 917.28803 User manual

Craftsman 25447 User manual

Craftsman

Craftsman 25447 User manual

Craftsman 917.388450 User manual

Craftsman

Craftsman 917.388450 User manual

Popular Lawn Mower manuals by other brands

Toro 20047 Operator's manual

Toro

Toro 20047 Operator's manual

Toro Greensmaster TriFlex 3300 Operator's manual

Toro

Toro Greensmaster TriFlex 3300 Operator's manual

Global garden products 72 Workshop manual

Global garden products

Global garden products 72 Workshop manual

EINHELL 01045 operating instructions

EINHELL

EINHELL 01045 operating instructions

Toro Greensmaster 3120 Operator's manual

Toro

Toro Greensmaster 3120 Operator's manual

Baroness LM315GC Owner's operating manual

Baroness

Baroness LM315GC Owner's operating manual

GreenWorks Tools 25157 user manual

GreenWorks Tools

GreenWorks Tools 25157 user manual

Etesia MVEHH user manual

Etesia

Etesia MVEHH user manual

Husqvarna LTH125 owner's manual

Husqvarna

Husqvarna LTH125 owner's manual

Gravely 915034 - ZT1640 Owner's/operator's manual

Gravely

Gravely 915034 - ZT1640 Owner's/operator's manual

Jacobsen 63281 Technical manual

Jacobsen

Jacobsen 63281 Technical manual

GreenWorks Pro MO802524 Operator's manual

GreenWorks Pro

GreenWorks Pro MO802524 Operator's manual

Toro TimeMaster 20976 Operator's manual

Toro

Toro TimeMaster 20976 Operator's manual

Deutz-Allis 3000 Series parts manual

Deutz-Allis

Deutz-Allis 3000 Series parts manual

jobmate YT9108 user manual

jobmate

jobmate YT9108 user manual

Yard force GM R40A instructions

Yard force

Yard force GM R40A instructions

Husqvarna R 419TsX AWD Operator's manual

Husqvarna

Husqvarna R 419TsX AWD Operator's manual

STERWINS ELM2-36P-3W.4 Assemby - Use - Maintenance Manual

STERWINS

STERWINS ELM2-36P-3W.4 Assemby - Use - Maintenance Manual

manuals.online logo
manuals.online logoBrands
  • About & Mission
  • Contact us
  • Privacy Policy
  • Terms and Conditions

Copyright 2025 Manuals.Online. All Rights Reserved.

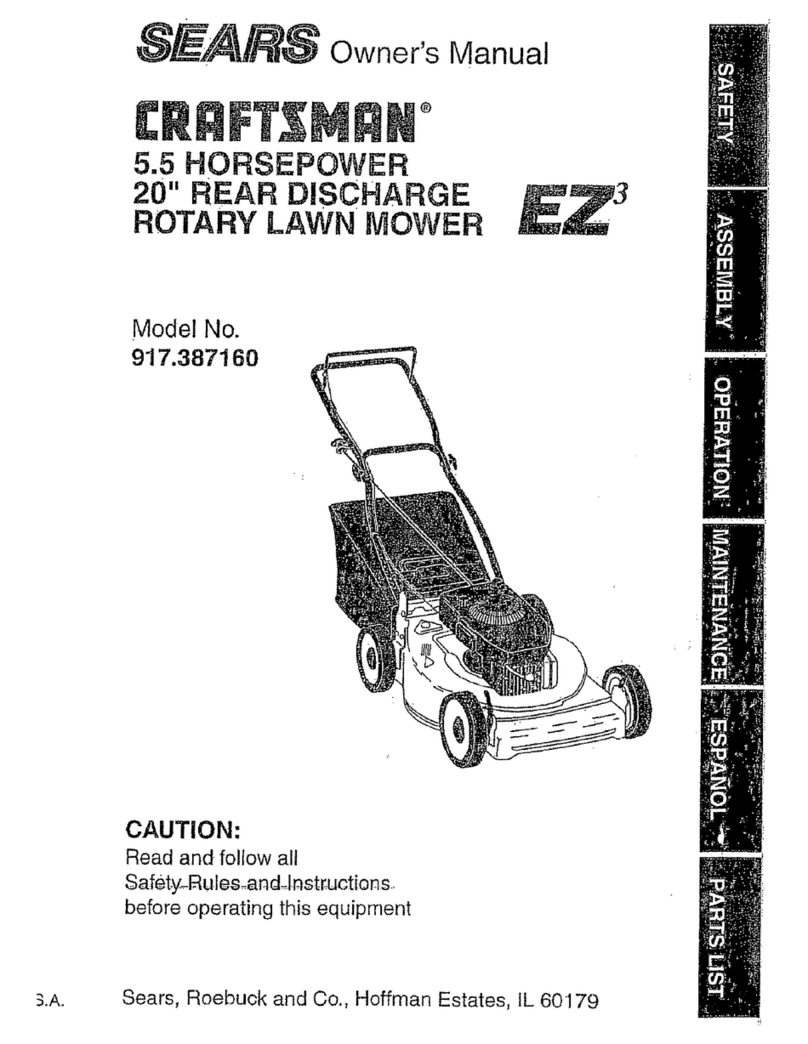
Owner's Manual
[IIIIF'I'|MIIN+
3.8 HORSEPOWER
20" SIDE DISCHARGE
ROTARY LAWN MOWER
Model No.
917.386101
•Safety
•Assembly
•Operation
•Maintenance
•EspaSol
•Repair Parts
CAUTION:
Read and follow all
Safety Rules and Instructions
before operating this equipment
Sears, Roebuck and Co., Hoffman Estates, IL 60179
Visit our Craftsman website: www.sears.com/craftsman
;Warranty: ""-2 Product Specifications 13
Safety Rules -_ .2 Service and Adjustments 15
AssemblY 7 Storage 16
Operation 9 Troubleshooting 17
Maintenance Schedule 12 Repair Parts 36
Maintenance 12 Parts Ordering Back Cover
LIMITED TWO YEAR WARRANTY ON CRAFTSMAN POWER MOWER
For two (2) years from date of purchase, when this Craftsman Lawn Mower is main-
tained, lubdcated, and tuned up according to the operating and maintenance instruc-
tions in the owner's manual, Sears will repair free of charge any defect in material or
workmanship.
If this Craftsman Lawn Mower is used for commercial or rental purposes, this warranty
applies for only 90 days from the date of purchase.
This Warranty does not cover:
• Expendable items which become worn dudng normal use, such as rotary mower
blades, blade adapters, belts, air cleaners and spark plug.
•Repairs necessary because of operator abuse or negligence, including bent crank-
shafts and the failure to maintain the equipment according to the instructions con-
tained in the owner's manual.
Warranty service is available by returning the Craftsman power mower to the nearest
Sears Service Center/Department in the United States. This warranty applies only while
this product is in use in the United States.
This Warranty gives you specific legal rights, and you may also have other rights which
vary from state to state.
SEARS, ROEBUCKAND CO. D/817 WA ESTATES ILLINOIS
Safety standards require operator pres-
ence controls to minimize the risk of injury.
Your unit is equipped with such controls.
Do not attempt to defeat the function of the
operator presence controls under any
circumstances.
TRAINING:
•Read this operator's manual carefully.
Become familiar with the controls and
know how to operate your mower
properly. Learn how to quickly stop
mower.
• Do not allow children to use your mower.
Never allow adults to use mower without
proper instructions.
•Keep the area of operation clear of all
persons, especially small children and
pets.
•Use mower only as the manufacturer
intended and as described in this manual.
•Do not operate mower if it has been
dropped or damaged in any manner.
Always have damage repaired before
using your mower.
•Do not use accessory attachments that
are not recommended by the manufac-
turer. Use of such attachments may be
hazardous.
•The blade turns when the engine is
running.
PREPARATION:
•Always thoroughly check the area to be
mowed and clear it of all stones, sticks,
wires, bones, and other foreign objects.
These objects will be thrown by the blade
and can cause severe injury.
• Always wear safety glasses or eye
shields when starting and while using
your mower.
2
•Dress properly. Do not operate mower
when barefoot or wearing open sandals.
Wear only solid shoes with good traction
when mowing.
•Check fuel tank before starting engine.
Do not fill gas tank indoors, when the
engine is running or when the engine is
hot. Allow the engine to cool for several
minutes before filling the gas tank. Clean
off any spilled gasoline before starting the
engine.
•Always make wheel height adjustments
before starting your mower. Never
attempt to do this while the engine is
running.
•Mow only in daylight or good artificial
light.
OPERATION:
• Keep your eyes and mind on your mower
and the area being cut. Do not let other
interests distract you.
•Do not mow wet or slippe_ grass. Never
run while operating your mower. Always
be sure of your footing -- keep a firm
hold on the handles and walk.
•Do not put hands or feet near or under
rotating parts. Keep clear of the discharge
opening at all times.
•Always stop the engine whenever you
leave or are not using your mower, or
before crossing driveways, walks, reads,
and any gravel-covered areas.
•Never direct discharge of material toward
bystanders nor allow anyone near the
mower while you are operating it.
•Before cleaning, inspecting, or repairing
your mower, stop the engine and make
absolutely sure the blade and all moving
parts have stopped. Then disconnect the
spark plug wire and keep it away from the
spark plug to prevent accidental starting.
•Do not continue to run your mower if you
hit a foreign object. Follow the procedure
outlined above, then repair any damage
before restarting and operating you
mower.
•Do not change the governor settings or
overspeed the engine. Engine damage or
personal injury may result.
•Do not operate your mower if it vibrates
abnormally. Excessive vibration is an
indication of damage; stop the engine,
safely check for the cause of vibration
and repair as required.
•Do not run the engine indoors. Exhaust
fumes are dangerous.
•Never cut grass by pulling the mower
towards you. Mow across the face of
slopes, never up and down or you might
lose your footing. Do not mow exces-
sively steep slopes. Use caution when
operating the mower on uneven terrain or
when changing directions -- maintain
good footing.
•Never operate your mower without proper
guards, plates, grass catcher or other
safety devices in place.
MAINTENANCE AND STORAGE:
•Check the blade and the engine mounting
bolts often to be sure they are tightened
properly.
•Check all bolts, nuts and screws at
frequent intervals for proper tightness to
be sure mower is in safe working
condition.
•Keep all safety devices in place and
working.
•To reduce fire hazard, keep the engine
free of grass, leaves or excessive grease
and oil.
•Check grass catcher often for deteriora-
tion and wear and replace worn bags.
Use only replacement bags that are
recommended by and comply with
specifications of the manufacturer of your
mower.
•Always keep a sharp blade on your
mower.
•Allow engine to cool before storing in any
enclosure.
•Never store mower with fuel in the tank
inside a building where fumes may reach
an open flame or an ignitionsource such
as a hot water heater, space heater,
clothes dryer, etc.
&Look for this symbol to point out
important safety precautions. It means
CAUTION!If BECOME ALERT!!! YOUR
SAFETY IS INVOLVED
ACAUTION: Always disconnect spark
plug wire a_ndplace wire where it cannot
contact spark plug in order to prevent
accidental starting when setting up,
transporting, adjusting or making repairs.
AWARNING
The engine exhaust from this product
contains chemicals known to the State of
California to cause cancer, birth defects, or
other reproductive harm.
3
_ccessones nthislawnmower was produced. ,arealso
availableatmostSearsretailoutletsandservicecenters.MostSearsstorescanalsoorder
repairpartsforyou,when youprovide_ modelnumberofyourlawnmower.Some ofbese
accessories may not applyto yourlawn mower.
LAWN MOWER PERFORMANCE
CUPPING DEFLECTOR
FOR REAR DISCHARGE LAWN MOWERS
GRASS CATCHERS
FOR
REAR DISCHARGE
LAWN MOWERS
MULCHER KITS
GRASSCATCHERS
FOR
SIDEDISCHARGE
LAWN MOWERS
.AWN MOWER MAINTENANCE
MUFFLERS
BELTS BLAOES BLADE ADAPTERS
AIR RLTERS
WHEELS
STABIUZER
GAS CANS
SPARK PLUGS
ENGINE OIL
4
i
Parts Bag contents shown fullsize
(4) Hex Bolts (4) Flange (4) Locknuts
3/8-16 x 1 Locknuts 3/8-16
3/8-16 (4) Washers 7/8"
(4) Shoulder Bolts
(2) Washers 1-1/4"
(2) Hex Bolts
1/4-20 x 1-1/2
(2) Washer 3/4"
@
(5) Locknuts
1/4-20 (2) Hex Bolts1/4-20 x 3/4
(1) Hex Washer Head Self-tapping Screw #10-24 x 1/2
5
Parts packed separately in carton
(1) Discharge Guard
(4) Wheels
(1) Lower Handle (1) Upper Handle
(1) Control Bar (1) Engine Zone Control Cable
Parts Bag contents not shown fullsize
(1) Rope Guide
(1) Wire Tie
(4) Spacers
(1) Upstop Bracket
6
ACAUTION:Donotoperatethisrnowerwithout
thedischargeguardoranentre approysdgrass
catcherinplace. Theseguardsarefo_your
protec_onandarereq_rsdbythe/_
NationalStandardsInstituteand Consumer
ProductsSafetyCommission.
_,CAUTION: Disconnectsparkplugwirefrom
sparkplugandplacewire whersitcannotceme in
p g.
Read these instrud_ns and this manual inits
entiretybefore you attemptto assemble or
operate your new lawn mows. Yournew lawn
mower has bean assembled at the factoq/with
the exception of those parts leftunassembled
for shippingpuq0o.ses.Allparts such as nuts,
washers, bolts,etc., necessary to completethe
assembly have bean placed in theparts bag.
To ensure safe and proper o_ d your
lawn mower, all parts and hardware you
assemble must be t_:j_ened securely. Use the
correct toolsas necessary toensure proper
_jhthess.
TOOLS REQUIRED FOR ASSEMBLY
A socket wrench set will make assemb,_
easier. Standard wrench sizes are listed.
(1) 5/16" Wrench (1) AdjustableWrench
(1)3/4"Wrench (2)7/16"Wm_P--s
(2) 9/16" Wrenches
When righthand or left hand ismentioned in
this manual, itmeans when you are standing
in the operating position,behind the handle.
UNPACK CARTON
• Remove all loose parts from carton
(See pagas 5 and 6).
• Examine all items. Compare with r_ of
unassembled parts and ham_are
(See pages 5 and 6).
•Remove lawn mower housingwith care.
Avoid touching blade under housing.
Always wear gloves or other protection
when working under or liftingmower.
ASSEMBLE LOWER HANDLE
•For ease oflower handle assembly, raise
rear of deck and blocksecurely.
• Position lower handle on deck so cot-off flat
isforward as shown.
•Alignholes in handle with holes in deck as
shown and assemble 3/8-16 x 3/4 hex bolts,
fiatwashers, and Iocknuts. Tighten
securely.
•Repeat for opposite side of _er.
Lowerhandle=Range
locknuts
Hex
bolts
washers
Cut-off fiat |onNard
ASSEMBLE UPPER HANDLE
• Position upper handle over lower handle
with small hole for mounting up-stop
bracket to left side and assemble 114-20
x 1-1/2 hex bolts and 1/4-20 Iocknuts.
Tighten securely.
ASSEMBLE UPSTOP BRACKET
•Position upstop bracket on the |eft inside
of upper handle as shown.
•Install the hex washer head screw into
the hole in up-stop bracket and upper
handle. Tighten securely.
AS VIEWED FROM FRONT OF MOWER
Locknuts
ASSEMBLE WHEELS
Cuttingheight isdetermined byassembling
the wheels inone offourpossible positionson
the mower housing. All wheels must be in the
same heightpositionfor even cutting.
•For each wheel, assemble shoulderbolt
and spacer as shown
• Assemble 1-1/4" dia. washer (rear wheels
only) and 3/8-16 Iocknut on inside of mower
housing and tighten securely. 3/8 - 16
Mower housing
Shoulder bolt
7
Wheel
1-114"DIA.
Washer(Rear
wheelsonly)
ASSEMBLE DISCHARGE GUARD
•Race discharge guard on top of lawn
mower discharge opening.
• Installtwo (2) 1/4-20 x 3/4 hex boltsthmugll.
housing and discharge guard.
•Installtwo (2) 3/4" die. washers and two (2)
1/4-20 Iocknuts. Tighten securely.
Washers
Hex bolts
.Locknuts
tP
Housing
/
ASSEMBLE ENGINE ZONE CONTROL
CABLE TO UPPER HANDLE
Assemble cable to opposite side of up-stop
bracket.
•Route cable below crossbar of lower handle
and up to control bar.
• Hook "Z"bend titlingon inner wire into hole
incontrolbar.
•Attach cable fittingto uoper handle as
shown.
•Secure cable to lower handle with cable dip.
Upper handle ,bar
INSTALL CONTROL BAR
• Position control bar soflattened section
hole isto oppositeside of up-stopbracket.
•Insertone end ofcontrolbar intohandle
hole on inside of handle. Carefully push in
on opposite end ofcontrolbar and insert
intohole on opposite side of handle.
Controlbar
Up-stop
ASSEMBLE ENGINE ZONE
CONTROL CABLE TO ENGINE
•Straighten cable and find the end with
the small plastic fitting.
•Hook the "Z" bend fitting on inner wire of
cable into hole in brake arm of engine.
•Align the tapered end of the small plastic
fitting with the hole in the mounting
bracket and push in until fitting snaps
into place.
Brake arm
Zone control
cable
INSTALL STARTER ROPE
•Put threaded end of rope guide through
hole in side of upper handle above lower
handle crossbar. Secure with 1/4-20
Iocknut.
•Hold control bar against upper handle
and slowly pull engine starter rope out
until rope will slip into loop of rope guide
Upper handle
Locknut
Engine
starter Lower
rope
Push in
\
Small Mounting
plastic bracket
fitting
8
KNOW YOUR LAWN MOWER
READ THIS OWNER'S MANUALAND SAFETY RULESBEFORE OPERATINGYOUR LAWN
MOWER. Compare the illustrationswithyour lawn mower tofamiliarize yourself withthe
locationofvarious controlsand adiustments. Save this manual for future reference.
These symbols may appear on your lawn mower or in literaturesuppliedwith the product.
Leam and understand their meaning.
CAUTION ENGINE ENGINE FAST SLOW CHOKE FUEL OIL DANGER. KEEP H/_NOS
OR WARNING ON OFF AND FEET AWAY
Enginezone control
cable peratorpresencecontrol bar
Gasolinefillercap
Starter handle
Airfilter
Engine oil
fi!lerplug Primer
Dischargeguard
Housing
MEETS CPSC SAFETY REQUIREMENTS
Sears rotary walk-behind power lawn mowers conform to the safety standards of the
American National Standards Institute and the U.S. Consumer Product Safety Commis-
sion. The blade tums when the engine is running.
Operator presence control bar - must be
held down tothe handle to start the engine.
Release to stop the engine.
Primer - pumps additionalfuel from the
carburetor to the cylinderfor use when starting
acoldengine.
Starter handle - used for starting the engine.
9
Theoperationofanylawnmowercan result in
foreignobjects thrown intothe eyes. whichcan
resultin severe eye damage. Always wear
safety glasses or eye shieldswhile operating
your lawn mower or performingany adjust-
ments or repairs. We recommend a wide
vision safety mask over spectacles or standard
safety glasses.
HOW TO USE YOUR LAWN MOWER
ENGINE SPEED
The engine speed was set at the factory for
optimum performance. Speed isnotadjust-
able.
ENGINE ZONE CONTROL
ACAUTION: Federal regulationsrequirean
engine controlto be installedon this lawn
mower in order tominimize the riskof blade
contact injury.Do not under any circumstances
attempt to defeat the function ofthe operator
control.The blade turnswhen the engine is
running.
•Your lawn mower is equipped with an
operator presence controlbar which
requiresthe operator to be positioned
behind the lawn mower handle to startand
operate the lawn mower.
TO ADJUST CUTTING HEIGHT
Adjust cuttingheight tosuityour requirements.
Medium positionisbest for most lawns. Raise
wheels for low cut and lowerwheels for high
cut.
• Remove wheel bolt, and hardware and
reassemble in desired adjustment hole,
•Reinstallwheel components inthe same
order as they were before removal. T_hten
securely.
3/8-16 Locknut
Wheel
BEFORE STARTING ENGINE
OIL
Your lawn mower is shipped without oil in
the engine.
•Be sure mower is level and area around
oil fill is clean.
•Remove engine oil plug and fillto the
top of slot in filler hole.
•Use 20 ozs. of oil. For type and grade
of oil to use, see "ENGINE" in Mainte-
nance section of this manual.
•Pour oil slowly, Do not over fill,
•Check oil level before each use. Add oil
if needed.
•Reinstall engine oil plug and tighten.
•Change the oil after every 25 hours of
operation or each season. You may
need to change the oil more often under
dusty, dirty conditions;
GAS
•I=illfuel tank. Use fresh, clean, regular
unleaded gasolinewith a minimum of 87
octane. (Use of leaded gasolinewill
increase carbon and lead oxide deposits
and reduce valve life). Do not mix oilwith
gasoline. Purchase fuel in quantities that
can be used within30 days to assure fuel
freshness.
WARNING: Experience indicatesthat alcohol
blended fuels (celled gesohol orusing ethanot
or methanol) can attract moisturewhich leads
to separation and formation ofacids during
storage. Acidic gas can damage the fuel
system of an engine while in storage. To avoi
engine problems, the fuel system should be
emptied before storage of 30 days or longer.
Drain the gas tank, startthe engine and let it
rununtilthe fuel linesand carburetor are
empty. Uselmsh fuel next season. See
Storage Instruc_onsfor additionalinformation
Never use engine or carburetor cleaner
productsinthe fuel tank or permanent
damage may occur.
Bolt Gasoline fillercap
Oil filler
10