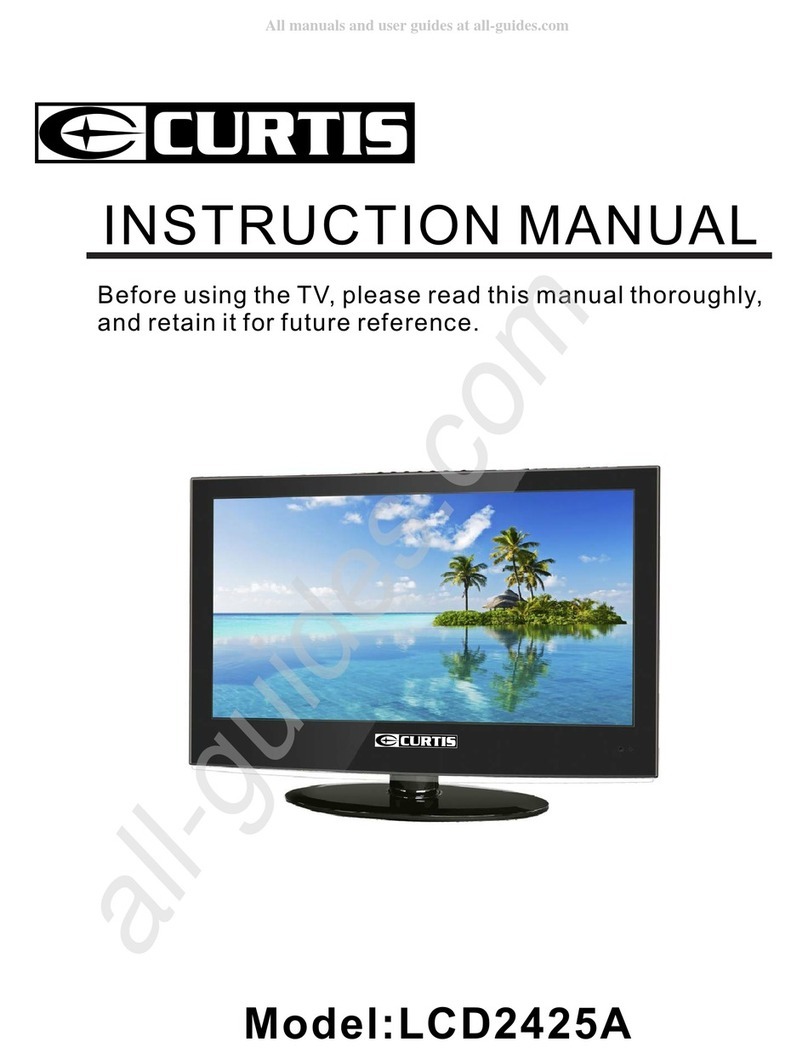
Curtis LCDVD199 User manual

MODEL: LCDVD199 1

Power Cord Connection
AV Connection
Antennas Connection
8
9
8
7
7
3
3
SAFETY
PRECAUTIONS
2
1PREFACE
FRONT AND
CONNECTIONS
OF LCD TV
6
4
5
REMOTE CONTROL
6
INSTALLATION
BASIC
IN THE CARTON 5
3
8TV Operation
13
14
15
15
17
Select Input Source
Picture Menu
Sound Menu
Function Menu
Setting Menu
Channel Menu
12
BACK
7Basic Operation
10
YPbPr Connection
9

9DVD Operation 18
29
SPECIFICATIONS
11
28
TROUBLESHOOTING
AND ADVICE
10
Wall mounting
Assembly
Instruction
1230

1. PREFACE
Thank you for buying this TV !Please read this manual throughly before operating the TV.
Make sure the TV was not damaged in transit.Should the TV is damaged,do not install
your dealer.Check that you have all the accessories according to the model.
it and contact
2. SAFETY PRECAUTIONS
Power cord and cables must be properly routed and protected to prevent
people from stepping on them and causing the TV to fall.
Minimum distances
25mm25mm60mm
Put the TV on a stable surface.
Do not place any material on the TV.
Do not block or cover the ventilation openings on the TV.
If you have a wall mount,check that it is steady.
Do not use the with fixtures other than those provided or
suggested by the manufacturer.
TV
25mm
3

Keep the TV dry and away from humidity.
Keep the TV away from heat sources.
Unplug the before cleaning it.Do not use solvent or liquidTV to clean
the TV.
Only clean the TV with a soft and dry cloth.
In case of troubleshooting,do not use spare parts other than those
suggested by the manufacturer.Using inadequate spare parts can
shocks,short-circuits fire or other incidents.lead to electric
Unplug the TV during lightening storms or when unused for long periods
of time.
4

3. IN THE CARTON
Remote Control
3. IN THE CARTON
Remote Control
TV SET
Model:LCDVD199
LIMITE D PR ODUCT WARRA NTY
This quality product is warran ted to be free from manu factur er's defects
in material and workman- ship, prov ided that the unit is us ed under the
normal operating conditions intend ed by the manu facturer.
Should you have any prob lem with this prod uct, please an d it is hi ghly
recomm ended to visit our website at ww w.curti sint.c om before you take
any other step s as we have additional co pies of in structio n ma nuals,
operat ing manual s an d tr ouble shoo ting tips on our website which gives
you the answer on most of the ques tions you coul d ha ve in oper ating the
unit.
TERMS OF WARR ANTY
C.I. Service Dept. warrants th is product to be free from defects in
materi als and workma nship for 1 year on pa rts and 90 days on l abor. If
you origin ally purchased your produc t more than 90 days ago, a repair
fee may apply.
Nothin g wi thin this warran ty shall imply that C.I. will be responsible or
liable for any damage to any items placed in this pr oduct, whether due to
any defect of the produc t, or its use, whether proper or improper.
EXCLUS IONS
Save as he rein provided, C.I. Se rvice Dept. (Can ada) or C. I. Service
Dept. (USA ), there are no other wa rranties , co nditio ns, repres entation s
or guarantees, express or impl ied, made or intended by C.I. or its
author ized distributors and all ot her warranti es, condit ions,
repres entati ons or guarantees, including any warranties, conditions,
repres entati ons or guarantees unde r an y Sa le of Good s Act or li ke
legisl ation or statue is hereby expr essly excl uded. Save as he rein
provid ed, C.I. Service Dept. (Canada) or C.I. Serv ice Dept. (USA ), shall
not be responsible for any damages to pe rsons or property, inc luding the
unit itself, howsoever caused or any consequential damages arising
from the malfunction of the unit and by the purchase of the unit, the
purcha ser does hereby agre e to indemnify and save harm less C.I. from
any claim for dama ges to persons or pr operty caused by the unit.
1.Press “POWER” button to turn standby
mode on or off.
2.Press “CH+” or “CH-” to scan through
channels.
3.Press “VOL+” or “VOL-” to increase or
decrease the volume.
4.Press “MENU” to bring up the main menu
on the screen.
5.Press “INPUT” to select the input source.
6.POWER INDICATOR: Show red in standby
mode, show blue when your TV is
switched on.
7. REMOTE SENSOR: Infrared sensor for the
remote control.
4. AND TVFRONT BACK CONNECTIONS OF LCD
Front View
123
4
5
6
7
8910
11
Coax
Insert the DVD
with the
label side
facing the back.
1
23
4
5
6
7
(HDMI cable not inclued)
Antenna Input.

Power Cord Connection
5. BASIC AINSTALL TION
Antennas Connection
To ensure good picture and sound, TV antenna system needs to be installed. The antenna system as
shown can be sourced from TV equipment shops, which will provide service for correct installation
and connection. After installation, insert the 75-OHM antenna plug into the antenna jack as shown.
- Connect the power cord and AC adaptor correctly as shown.
- Press the POWER switch of your LCD TV to switch the unit on. The power indicator on the
front panel lights up in blue.
AC Adaptor
POWER Cord

AV Connection
YPbPr Connection
Connect the VIDEO and AUDIO output jack of the DVD or VCR to the AV IN jacks on the set using
the RCA cable (Yellow [video], White and RED [left & Right audio]).
Select the AV input source using the SOURCE button on the remote control.
Connect the YPbPr output of the DVD or VCR to the YPbPr input on the set. The picture quality is improved
compared to connecting a regular VCR to the video input. Connect the Audio output of the DVD or VCR to
the Audio input jacks on the set using the RCA cable.
Match the jacks colours: Y is green, Pb is blue, Pr is red, Audio left is white and Audio right in red.
Select YPbPr input source using the SOURCE button on the remote control.
(3.5mm plug-2 X RCA plug)
YPbPr Cable

Connect the RGB output of the PC to the VGA jack on the set. Connect the AUDIO output of the PC to the PC
AUDIO jack on the set. Select the PC input source using SOURCE button on the remote control.
HDMI connection allows the user to transfer both audio and video control signals through one cable only.
These signals are transferred in digital.
HDMI Connection
VGA Cable

1.STANDBY
To switch on the Tv or make the TV into
standby mode.
2.EJECT
To open or close the DVD player loader.
3.INFO
Show the information of the program you are watching.
4.SOURCE
Press this button to select an input source.
5.PMODE
Press this button to select a picture mode for different
picture qualities.
6.SMODE
Press this button to select sound setting for different
sound effects.
7.0-9
Allows you to change the channel of the TV.
8.
Switches back and forth between the current and
previous channels.
9.SLEEP
To select the amount of time before your TV turns
Off automatically.
10.VOL+/VOL-
Increases/Decreases the Volume control.
11.CH+/CH-
Skips to the next/previous channel on TV mode.
12.UP/DOWN/LEFT/RIGHT
Moves the cursor upward/downward/to the left/to the right
when making a selection.
13.MENU
Displays the OSD Menu of the TV.
14.CC
Press the button to enter into the CC mode.
TITLE
To goto the title menu if the DVD disc has a title page.
15.MTS
To change among STEREO, MONO and SAP. If there is no
second language available for the signal received, LCD
Display audio will output to mono.
D.MENU
To show the menu of the DVD disc.
4
5
1
2
3
6
8
9
12
7
11
13
10
15
14
19
18
23
22
27
26
31
30
16
17
20
21
24
25
28
29
32
33
10
6. REMOTE CONTROL

4
5
1
2
3
6
8
9
12
7
11
13
10
15
14
19
18
23
22
27
26
31
30
16
17
20
21
24
25
28
29
32
33
16.ENTER
Enters the function selected.
17.D.SETUP
Press this button to show the DVD SETUP menu.
18.Play/Pause
Press this button to play or pause the DVD you’re watching.
19.Exit
Press this button to exit the on screen display.
Stop
Press this button to stop playing the DVD you’re watching.
20.MUTE
Press this button to mute or restore sound.
21.AUDIO
Press this button to change the audio language of the DVD.
22.
Fast reverse in DVD mode.
23.
Fast forward in DVD mode.
24.ZOOM
To select a screen display size on your TV in DVD mode.
25.GOTO
Press this button to start playing the disc program from
the time you want.
26.
Previous chapter in DVD mode.
27.
Next chapter in DVD mode.
28.ASPECT
Press this button to change the aspect of your TV.
29.SUBTITLE
To show the subtitle for the program you're watching.
30.PRO
To edit the program list of your DVD disc in DVD mode.
31.ANGLE
To select different angles to which the picture suits your
preference.
32.REPEAT
Press this button for repeat the program.
33.AB
Press this button for repeat play point A and B.
11

SELECT INPUT SOURCE
·Use INPUT button to display the input source list;
·Use 【▲】 /【▼】 button to select the input source you want to watch;
·Use ENTER button to enter the input source;
·Use MENU button to display the MAIN OSD MENU;
·Use 【▲】 /【▼】button to select the MENU you want;
·Use 【 ► 】 button to enter the sub menu;
You can use MENU or EXIT button to save and return back to the previous menu .
·Use 【▲】 /【▼】 button to select the option and then press 【◄】 /【 ► 】to adjust the value in the sub menu;
OSD Manual
INPUT SOURCE
BASIC OPERATION
7. BASIC OPERATION
12

OSD Manual
8. TV Menu
PICTURE
The PICTURE menu offers options to enhance and refine the picture displayed on your TV based on ambient room light
and personal prefer-ences. Adjustment options include , BRIGHTNESS, COLOR, TINT,
SHARPNESS, COLOR TEMP. and NOISE REDUCTION.
How to Navigate:
Press the MENU button on the remote control. Navigate using arrow buttons to select PICTURE. Press
the down arrow button to highlight PICTURE MODE, then press the arrow button to select your viewing
Preference.
The STANDARD setting is recommended for most viewing environments. Depending on the ambient light level in the
room, you may select one of the other options more pleasing.
PICTURE MODE, CONTRAST
【◄ 】 /【 ►】
▼ 【◄ 】 /【 ►】
To make more critical adjustments based on your own preferences in PERSONAL:
CATV
• Use down arrow button to highlight CONTRAST. Navigate using the arrow buttons to increase or
decrease contrast intensity.
【▼】【◄ 】 /【 ►】
• Use down arrow button to highlight BRIGHTNESS. Navigate using the arrow buttons to increase or
decrease overall brightness.
【▼】【◄ 】 /【 ►】
• Use down arrow button to highlight COLOR. Navigate using the arrow buttons to increase or decrease
color intensity.
【▼】【◄ 】 /【 ►】
• Use down arrow button to highlight TINT. Navigate using the arrow buttons to adjust colors toward
green or reddish tint.
• Use down arrow button to highlight SHARPNESS. Navigate using the arrow buttons to soften or view
crisper edges in the picture.
• Use down arrow button to highlight COLOR TEMP.. Navigate using the arrow buttons to select COOL
(more bluish tone), NORMAL or WARM. The default setting is NORMAL.
【▼】【◄ 】 /【 ►】
【▼】【◄ 】 /【 ►】
【▼】【◄ 】 /【 ►】
• Use down arrow button to highlight NOISE REDUCTION. Navigate using the arrow buttons to select
it ON or OFF.
【▼】【◄ 】 /【 ►】
13

OSD Manual
The SOUND menu offers options to make sound enhancements while listening through the built-in speakers
SOUND
How to Navigate:
Press the MENU button on the remote control. Navigate using arrow buttons to select . Press the
arrow button to highlight SOUND MODE, then press the arrow button to select your sound preference.
【◄ 】 /【 ►】SOUND
【▼】【◄ 】 /【 ►】
To make more critical sound adjustments based on your own preferences in PERSONAL:
• Use down arrow button to highlight Bass. Navigate using the arrow buttons to increase or decrease
low frequency intensity.
• Use down arrow button to highlight TREBLE. Navigate using the arrow buttons to increase or decrease
high frequency intensity.
• Use down arrow button to highlight BALANCE. Navigate using the arrow buttons to adjust sound
towards the left or right speaker.
【▼】【◄ 】 /【 ►】
【▼】【◄ 】 /【 ►】
【▼】【◄ 】 /【 ►】
• Use down【▼】arrow button to highlight AVL. Navigate using the【◄ 】 /【 ►】arrow buttons to select it ON or OFF.
14

OSD Manual
In the SETTING menu you may change the initial set up of preferences that include LANGUAGE, OSD TIMER, TRANSP-
-ARENCE, OVERSCAN, and RESET your TV back to its factory default status.
How to Navigate:
Press the MENU button on the remote control. Navigate using arrow buttons to select SETTING. Gain access
to display options by pressing the down arrow button to highlight LANGUAGE or other options, then press
arrow buttons on your remote to select.
【◄ 】 /【 ►】
【▼】【◄ 】 /
【 ►
SETTING
·Use down【▼】arrow button to highlight LANGUAGE. Navigate using 【◄】 /【 ► 】arrow button to select the OSD
language. There are 6 language for selection: ENGLISH > GERMAN> FRENCH> SPANISH> ITALIAN> PORTUGUESE.
·Use down【▼】arrow button to highlight TRANSPARENCE. Navigate using 【◄】 /【 ► 】arrow button to select the
transparence of the OSD.
·Use down【▼】arrow button to highlight OSD TIMER. Navigate using 【◄】 /【 ► 】arrow button to select the OSD
timer. There are 6 modes for selection: 5 SEC>10 SEC> 15SEC> 20SEC> 25 SEC> 30 SEC.
·Use down【▼】arrow button to highlight OVERSCAN. Navigate using 【◄】 /【 ► 】arrow button to select it ON or
OFF. But this option is only available in the HDMI source.
·Use down【▼】arrow button to highlight RESET. Navigate using【 ► 】arrow button to reset the options in the SETTING
menu.
In the FUNCTION menu you may change the function set up of preferences that include SLEEP TIMER, ASPECT, CCAPTION
PARENT CTRL and BLUE SCREEN.
How to Navigate:
Press the MENU button on the remote control. Navigate using arrow buttons to select FUNCTION. Gain
access to display options by pressing the down arrow button to highlight SLEEP TIMER or other options, then press
arrow buttons on your remote to select.
【◄ 】 /【 ►】
【▼】
【◄ 】 /【 ►】
FUNCTION
FUNCTION
15

OSD Manual
·Use down【▼】arrow button to highlight SLEEP TIMER. Navigate using 【◄】 /【 ► 】arrow button to select the sleep
timer, and the TV will turn off automatically in the setting time . There are 9 modes for selection: 15 Min>30 Min> 45 Min>
60 Min> 75 Min> 90 Min> 105 Min> 120 Min> OFF.
·Use down【▼】arrow button to highlight ASPECT. Navigate using 【◄】 /【 ► 】arrow button to select: FULL> ZOOM
> SUBTITLE > 4:3>14:9>AUTO. The default setting is FULL. .
·Use down【▼】arrow button to highlight PARENT CTRL. Navigate using 【 ► 】arrow button to select this option.
Enter your 4 digit code (factory default code is "0000") unless previously changed to enter the submenu.
·Use down【▼】arrow button to highlight V-CHIP. Navigate using 【◄】 /【 ► 】arrow button to select this option
ON or OFF. When set the system lock OFF, the locks below will be unavailable.
·Use down【▼】arrow button to highlight TV-RATING. Navigate using 【 ► 】arrow button to enter the submenu and select.
·Use down【▼】arrow button to highlight MOVIE-RATING. Navigate using 【◄】 /【 ► 】arrow button to select this option.
·Use down【▼】arrow button to highlight CHANGE PASSWORD. Navigate using 【 ► 】arrow button to change the password
of the system lock. A dialog as above will appear, the enter the new password can change the password successfully.
·Use down【▼】arrow button to highlight ENGLISH-RATING. Navigate using 【◄】 /【 ► 】arrow button to select this option
EMPTY、C、C8 +、G、PG、14 + or 18 +.
NONE、G、PG、PG-13 、R、NC-17 or X.
·Use down【▼】arrow button to highlight FRENCH-RATING. Navigate using 【◄】 /【 ► 】arrow button to select this option
EMPTY、G、8 ANS +、13 ANS +、16 ANS + or 18 ANS +.
·Use down【▼】arrow button to highlight BLUE SCREEN. Navigate using 【◄】 /【 ► 】arrow button to select this option
ON or OFF.
·Use down【▼】arrow button to highlight C.CAPTION. Navigate using 【◄】 /【 ► 】arrow button to select: OFF> Cc1
> CC2 >CC3>CC4>TEXT1>TEXT2>TEXT3>TEXT4. The default setting is OFF.
16

OSD Manual
In the CHANNEL menu you may change the channel set up of preferences that include SOURCE, AUTO SCAN and MANUAL
PROGRAM .
How to Navigate:
Press the MENU button on the remote control. Navigate using arrow buttons to select CHANNEL. Gain
access to display options by pressing the down arrow button to highlight SOURCE or other options, then press
arrow buttons on your remote to select.
【◄ 】 /【 ►】
【▼】
【◄ 】 /【 ►】
CHANNEL
CHANNEL
·Use down【▼】arrow button to highlight MANUAL PROGRAM. Navigate using 【 ► 】arrow button to enter the submenu.
·Use down【▼】arrow button to highlight SOURCE. Navigate using 【◄】 /【 ► 】arrow button to select the option
·Use down【▼】arrow button to highlight PROGRAM. Navigate using 【◄】 /【 ► 】arrow button to select the program
that you want to watch.
·Use down【▼】arrow button to highlight SYSTEM. Navigate using 【◄】 /【 ► 】arrow button to select the option.
·Use down【▼】arrow button to highlight FINE. Navigate using 【 ► 】arrow button to select this option.
·Use down【▼】arrow button to highlight AFT. Navigate using 【◄】 /【 ► 】arrow button to select this option ON or OFF.
CATV or AIR.
·Use down【▼】arrow button to highlight AUTO SEARCH. Navigate using 【 ► 】arrow button to start auto scan.
·Use down【▼】arrow button to highlight ADD/ERASE. Navigate using 【◄】 /【 ► 】arrow button to select this option.
17

18
The unit can play:
REGION MANAGEMENT INFORMATION
Region Management Information: This unit is
designed and manufactured to respond to the
Region Management Information that is encoded
on DVDs. If the region number printed on the
DVD does not correspond to the region number
of this unit, this unit cannot play that disc.
The region number of this equipment is .
DISC FUNCTION OR OPERATION
THAT IS NOT AVAILABLE
When the “ INVALID KEY ”
it indicates that the function or operation
attempted is not available at that time.
This occurs because the DVD manufacturer
determines the specific functions.
Certain functions may not be available on
some discs. Be sure to read the documentation
provided with the DVD.
ICONS USED ON DVDs
Sample Icons
Language selections for audio
Language selections for subtitles
Screen aspect ratio
Multiple camera angles
Region code indicator
TITLES, CHAPTERS AND TRACKS
•DVDs are divided into "TITLES" and "CHAPTERS".
If the disc has more than one movie on it,
each movie would be a separate "TITLE".
“CHAPTERS" are sections of titles.
•Audio CDs are divided into "TRACKS".
NOTE
Numbers identify each title, chapter and track
on a disc. Most discs have these numbers record
on them, but some do not.
NOTES ON UNAUTHORIZED DISCS
You may not be able to playback some DVDs
on this equipment if they were purchased from
outside your geographic area or made for
business purposes.
DVDs
[8cm/12cm disc]
Audio CDs
[8cm/12cm disc]
CD R CD RW--
Compatible
A "TRACK" is usually one song on an Audio CD.
NOTES ON COPYRIGHT
It is forbidden by law to copy, broadcast, show,
broadcast on cable, play in public or rent
copyrighted material without permission.
Apparatus Claims of U.S. Patent Nos. 6,836,549;
6,381,747; 7,050,698; 6,516,132; and 5,583,936
licensed for limited viewing uses only.
DVDs are copy protected, and any recordings made
from these discs will be distorted. This product
incorporates copyright protection technology that is
protected by method claims of certain U.S. patents
and other intellectual property rights owned by
Macrovision Corporation and other rights owners.
Use of this copyright protection technology must be
authorized by Macrovision Corporation, and is
intended for home and other limited viewing uses
only, unless otherwise authorized by Macrovision
Corporation. Reverse engineering or disassembly
is prohibited.
NOTE
When playing back a CD-G (Graphics) or
CD EXTRA disc, the audio portion will be played,
but the graphic images may not be shown.
symbol appears on the screen,

19
BASIC OPERATIONS
BASIC OPERATIONS
This owner's manual explains the basic instructions of this unit.Some DVDs are produced with
limited operation during playback.For example,many DVDs do not allow users to skip government
warnings,or in some cases previews or other features.This is not a defect in the unit. Refer to
the instruction notes of discs.
“ ”may appear on the screen during operation. “ ” means that the desired
operation is not permitted by the unit or disc.
INVALID KEY INVALID KEY
TURN ON AND OFF THE DVD FUNCTION
Turn on the LCD TV and then press the TV / AV button repeatedly to select DVD mode.
INSERT DISC TO DVD
Insert the Disc to the Disc door (label side of the disc has to face backwards of the unit), the player
will load the disc automatically. There will have an on screen indication “CLOSE ” then “ READ”. After
loading the disc content, it will switch to play mode automatically. If the disc is already placed inside,
the disc will be read automatically.
NOTE: For some discs, after loading the content of the disc, need to press the or select from the disc menu
to start.
Please make sure when inserting the Disc, the label side of the disc should be facing you when inserting
the Disc incorrectly, you may damage the DVD mechanism.
PLAYING A PICTURE FILE DISC
This unit can play JPG files recorded on CD-R and CD-RW discs.
1. Hold the disc by its edge and gently push it into the door, with the label side facing the front.
2. The unit will load the disc and automatically display the contents of the disc on the screen,
while also beginning to play the picture file. These files will then be played back one by one.
3. Press the button to go to the folder list.
4. Press the ▲ or ▼button to highlight a file to play. Press the button to start playback.
PAUSING /PLAYING PLAYBACK
Press the button to switch between pausing and playing.
STOPPING PLAYBACK
Press the button at the location where you want to interrupt playback. To resume playback at the
position where the disc was stopped, press the button .
If you press the button twice, the unit's memory will be cleared and pressing the button will
reset the disc to the beginning.
SKIP (FORWARD / REVERSE)
Press the PREV button to go back to previous chapters/tracks.
Press the NEXT button to advance chapters/tracks.
For an Audio CD, use the number buttons (remote control only) to jump directly to that track number.
TITLE (for DVD disc only)
Press the TITLE button, there will have an on screen indication “TITLE”.
Press the direction or numeric buttons to select your favorite title.
Table of contents
Languages:
Other Curtis TV manuals

Curtis
Curtis RT070 User manual

Curtis
Curtis LCD1933A User manual

Curtis
Curtis LED2440A User manual

Curtis
Curtis TV2740 User manual

Curtis
Curtis LCD2425A User manual

Curtis
Curtis LEDV1975A3 User manual

Curtis
Curtis RT072 User manual

Curtis
Curtis LCD2443A User manual

Curtis
Curtis LEDVD152A User manual

Curtis
Curtis TV2010 User manual

Curtis
Curtis LED2400A User manual

Curtis
Curtis LCD4686A-W User manual

Curtis
Curtis TV2710 User manual

Curtis
Curtis RT074 User manual

Curtis
Curtis LED1337A User manual

Curtis
Curtis LCDVD326A User manual

Curtis
Curtis RT069 User manual

Curtis
Curtis TV2710B User manual

Curtis
Curtis LEDV1975A4 User manual

Curtis
Curtis LCD3227A User manual