Demeter Amplication | TGA-2.1 User Guide
5
Front Panel Operation
• Power/Standby Operation : When powering up any good tube amplier, the POWER SWITCH should
be engaged FIRST (pilot lights up) to warm up the power tubes. is is known as STANDBY mode. By
letting power tubes warm up gradually, they last longer (more on power tubes later.) Wait anywhere from
1 to 10 minutes before turning o STANDBY (in the tradition of early Fender amps, STANDBY mode is
when power is ON and the STANDBY SWITCH is in the opposite direction from the POWER switch.
To turn the amp the rest of the way on, throw the STANDBY switch so it’s in the same direction as the
POWER switch.)
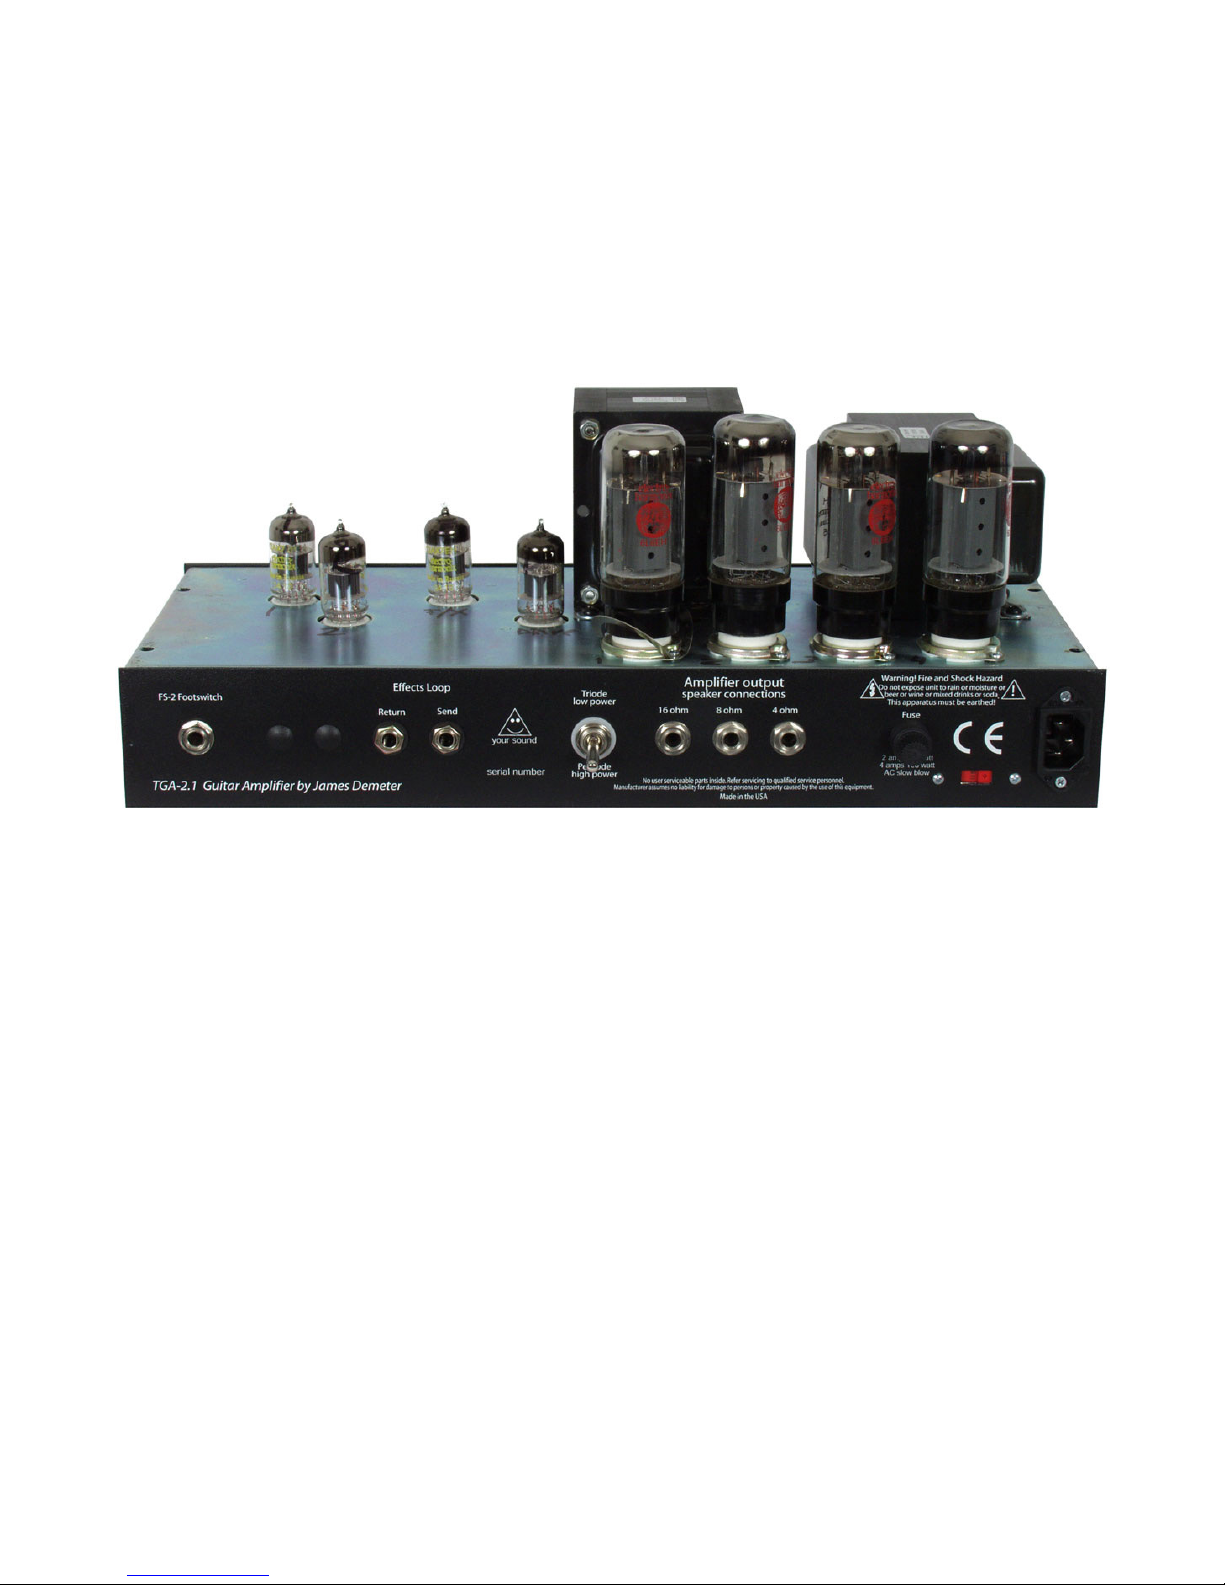
• Return & Send Controls : SEND controls the level of signal coming from the PREAMP section and into
your eects. (If no eects are connected to the EFFECTS LOOP, SEND and RETURN controls have no ef-
fect.)e output of your eect or eects chain goes to the RETURN jack (back panel) and the eect output
level is controlled by the RETURN knob. is patch point puts ambient eects (reverb, ange, delay, etc.)
where they will sound best – after the PREAMP and before the POWER AMP (see appendix.)
• Presence Control : Feeds inverted signal back into the main signal path, reinforcing certain frequencies.
It adds a subtle, glistening quality to the tone. is control makes a small amount of static-like noise when
rotated – this is normal. PRESENCE tends to brighten the signal – for a darker tone, turn this DOWN.
• Bass, Middle and Treble Controls : In common with most modern and many vintage guitar amps, these
controls GLOBALLY shape the TGA-2.1’s tone, which means they are interactive. (For example, play high
notes while turning the BASS knob. Try the same thing with both low and high notes while turning the
MIDDLE knob.) Shaping your tone is a subtle balance among all FOUR tone controls, along with GAIN,
MASTER, and the PENTODE/TRIODE switch. e tone controls are shared between the 2 channels
and all settings. ey are cut-and-boost type controls. Center position (5) is essentially at; turning up
(toward10) boosts that frequency band. Conversely, turning a control down cuts that control’s level. First,
rough in your tone, then ne tune it.
• Master Control (Channel 2) : is controls both EDGE and SOLO channel gain, ‘roughing-in’ the output
level. is also has a pull-switch on the knob, which engages a tube-driven version of Demeter’s famous Fat
Control, providing a midrange boost (makes single-coils sound like humbuckers.)
• Solo Gain (Channel 2) : Controls the gain of the solo channel.
• Edge Gain (Channel 2) : Controls the gain of the edge channel.
• Master Control (Channel 1) : Channel 1 has a glassy, shimmering range of tones, from sparkling clean with
lots of headroom, to very Tweedy, with dynamic response like vintage Fender amps and early un-modied
Marshalls. In TRIODE mode, the sound gets even more ‘vintage.’
• Clean Gain (Channel 1) : Controls the gain of the clean channel. is control also has a pullout BRIGHT
switch, for even more classic spank.
• Input : at’s right, you guessed it : this is where your instrument plugs in.
• Channel Switch : Switches channels manually. (IMPORTANT!): THIS SWITCH MUST BE IN THE
CENTER POSITION TO USE THE FS-2 FOOTSWITCH.