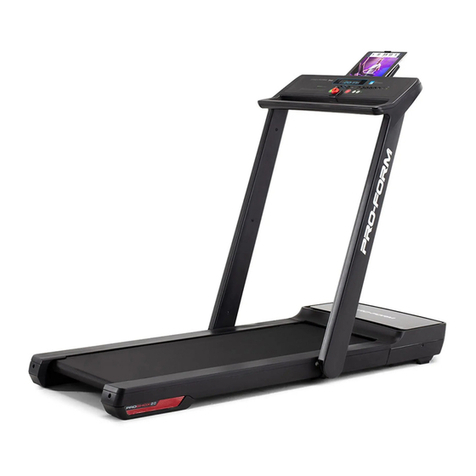
Details The Walkstation User manual

FitWork™| Walkstation
The Walkstation
User Instructions
WS_Inst uctions_T oubleShooting:Layout 1 1/7/10 10:57 AM Page 2

Walkstation Safety Instructions
3W A L K S T A T I O N U S E R I N S T R U C T I O N S
When using the Walkstation, basic safety
precautions shoul always be followe ,
inclu ing, but not limite to, the following:
• Rea an un erstan all instructions an warnings prior to use.
• Obtain a me ical exam before beginning any con itioning program.
If at any time uring the session you feel faint, izzy, or experience pain,
stop an consult your physician.
• If you are pregnant or have any me ical con ition
that coul make you izzy or off-balance, o not use the Walkstation.
• Obtain proper instruction prior to use.
• Inspect the trea mill for incorrect, worn, or loose components
an o not use until correcte , replace , or tightene prior to use.
• Always use the Magnetic Safety Clip an attach it to your clothing
at about waist height.
• Bo y orientation shoul be centere an forwar facing at all times.
• Do not look behin you while unit is in operation.
• Do not try to walk too fast. Utilize a comfortable spee .
• Do not lean forwar or roun / hunch your back an keep your hea up.
• Do not wear loose or angling clothing while using the trea mill.
• Rea , un erstan , an test the emergency stop proce ures before use.
• Care shoul be use when mounting or ismounting the trea mill.
• Do not operate electrically powere trea mills in amp or wet locations.
• Disconnect all power before servicing the trea mill.
• Use mol e front e ge as a keyboar wrist-rest an han -hol /grip.
• Footwear shoul be comfortable, close -toe, an provi e suitable
support for walking.
• Keep items within close reach.
• Keep worksurface free from clutter.
• Place unit clear of furniture an other obstructions.
• Maximum worksurface loa is 225 lbs.
• Keep all cables unobstructe an locate in Cableway
or other cable management system.
• Keep a minimum of 3 feet of clearance at the rear & both si es of the trea mill.
• While trea mill is in operation, user is multi-tasking. Avoi istraction.
• Do not excee maximum user weight of 350 lbs.
• Keep the top si e of the moving surface clean an ry.
• Keep trea mill feet securely neste in openings in the trea mill receiver.
WS_Inst uctions_T oubleShooting:Layout 1 1/7/10 10:57 AM Page 3

w w w . e t a i l s - w o r k t o o l s . c o m 4
• Do not place any object(s) on or un erneath the trea mill belt,
even when unit is not in use.
• Do not cover trea mill keypa .
• Keep chil ren an animals away.
• Moving surfaces are potentially hazar ous. If attention is not pai
to the con itions of the equipment, eath or serious injury coul occur.
Cable Management:
• When installing equipment, either on the worksurface or below,
be sure that the connecting cables are free of obstruction.
• Horizontal wire management channels are provi e as stan ar
an can be foun on the un ersi e of the worksurface.
Use these channels to minimize possible entanglements.
Accessory Power Cor Length:
• Ensure that power cor s for all accessory items – computers, lights,
monitors, etc. – are of sufficient length to reach outlets throughout the range of
worksurface height a justment. Do not subject the cor s to any strain while
a justment of the surface is taking place.
• Always check for proper operating clearance before placing any item on,
next to, above or below the worksurface.
Orientation an Space Planning:
Much insight has been gaine from early a opters on the importance of
proper placement an orientation of the Walkstation in the office environment.
Placement and orientation are critical to insuring that users feel the right
balance of privacy and accessibility as well as safety.
• Place close to the workgroup to allow for quick transitions to an from a
regular workstation.
• Orient unit so that co-workers approach the user on the Walkstation from the
front or within a 45° of front.
• Do not place where co-workers must approach the user from si e of behin .
• Do not place in heavy traffic aisles.
• Orient so that user can view co-workers if team interaction is high.
• Leave 36" behin trea mill surface to nearest panel or wall.
Visit Steelcase.com Planning Ideas for Walkstation Planning ideas.
WS_Inst uctions_T oubleShooting:Layout 1 1/7/10 10:57 AM Page 4

Walkstation Features
1Commercial gra e trea mill with maximum spee of 2 mph in 0.1 mph increments
an no incline a justability
2Patente Soft System®surface with Neoprene shock absorbers in front thir of the eck
3Stowable igital isplay an touch pa controller
4Urethane high profile soft e ge – han hol an built in wrist rest
5Magnetic Safety Clip
6Quiet high torque motor
7Trea mill receiver plate
8Optional SlatRail or Slatwall to accommo ate a justable monitor arm an worktools
9Optional Privacy Screen, Mo esty Screen an Cableway
)Trea belt roller a justment bolts
8
9
5
4
3
6
7
12
)
Full electric height-a justability
instantly a apts to ifferent users.
241⁄4" – 52"
range
Distance from floor
to top of belt - 6"
5W A L K S T A T I O N U S E R I N S T R U C T I O N S
WS_Inst uctions_T oubleShooting:Layout 1 1/7/10 10:57 AM Page 5

Walkstation Ergonomic Tips
Ergonomic tips for healthy working an walking:
• Remember to maintain an active upright walking posture.
• A just the monitor to your eye level an 18 – 23 inches away from your face.
• Your keyboar shoul be at elbow level with your wrist in a neutral position.
• Place your mouse at elbow level near to your keyboar .
• Your phone shoul be at elbow level next to your keyboar .
Use of a hea set while operating the Walkstation is strongly suggeste .
• Wear comfortable, close -toe shoes that provi e suitable support for walking.
• Keep items within close reach.
Before Getting Starte :
• Obtain a me ical exam before beginning any con itioning program.
If at any time uring the session you feel faint, izzy, or experience pain,
stop an consult your physician.
Getting Starte :
• Thoroughly stretch an warm up before operating the Walkstation;
• Follow a training / ramp-up sche ule. Most people utilize the Walkstation
at 1 mph (range of 0.3 – 2 mph). It is about comfort, NOT spee .
Everyone is ifferent an has ifferent stri e lengths.
Suggested training / ramp-up schedule:
Weeks 1-2: up to 15 min. per hr., on the hr. Weeks 5-6: up to 25 min. per hr., on the hr.
Weeks 3-4: up to 20 min. per hr., on the hr. Weeks 6-8: up to 30 min. per hr., on the hr.
W A L K S T A T I O N U S E R I N S T R U C T I O N S 6
WS_Inst uctions_T oubleShooting:Layout 1 1/7/10 10:57 AM Page 6

Walkstation Display Console Specifics
Walkstation Console Display:
• Speed: Miles per hour in 0.10 increments (2 mph maximum)
• Calories: Estimate total calories burne base on user input of weight
• ime: Time elapse in your session
• Distance: Miles travele in 0.01 mile increments
• Warning:
Rea an un erstan all irections
Consult a physician before using this equipment
Stop using this equipment if you feel pain, faint, izzy, or short of breath
Walkstation Console Keypa :
= Magnet for Magnetic Safety Clip
• Enter: Accepts session parameters
• Stop: Stops the belt an pauses session
If hel for 3 secon s, resets all session information
• Speed: Press the key to ecrease spee
Press the key to increase spee
• Start: Starts the belt an begins the session
• Desk Height: A justs the esk height up / own
+
–
WARNING read and understand all instructions. consult a hysician before using this equi ment. sto using this equi ment if you feel ain, faint, dizzy, or short of breath.
Speed Calories Time Distance
7W A L K S T A T I O N U S E R I N S T R U C T I O N S
WS_Inst uctions_T oubleShooting:Layout 1 1/7/10 10:57 AM Page 7

Walkstation User Instructions
THIS IS NOT AN EXERCISE MACHINE. Rea an follow all manufacturer’s
instructions for the proper use an operation of the Walkstation an a justable
height worksurface before initial use of this worksurface. Failure to follow
these instructions at any time coul result in serious personal injury.
To Start the Walkstation:
Review all precautions prior to using the Walkstation.
When ENTERING the workstation area, an before operating the Walking Platform:
• Ensure that the Walking Platform switch is in the ON position
but belt is not moving;
• Stra le the Walking Platform belt by stan ing on stationary si e stra le
covers an a just the worksurface to esire height;
• Never a just the worksurface height while Walking Platform is moving;
• Attach the Magnetic Safety Clip to your clothing near the center of your bo y,
just below worksurface level, attach other en to the magnetic reciever on
the console keypa ;
• For your personal safety, the Magnetic Safety Clip must remain attache
to your clothing while the Walking Platform is in operation;
• Use an to a just setting to your proper weight. Press ENTER.
• Press START button. The trea mill will beep three times an then start
at 0.3 mph. To a just spee , use FAST an SLOW keys.
When Exiting the Walkstation Area:
• Do not allow Walking Platform belt to remain running while
workstation is unoccupie .
• Stop the Walking Platform by pushing the STOP button on control panel;
• Wait for the belt to stop moving;
• Remove Magnetic Safety Clip from your clothing an exit the workstation.
Using the Worksurface an Trea mill Controls on Console:
Worksurface
• Height A justment – Worksurface up Worksurface own
–+
–+
WARNING
W A L K S T A T I O N U S E R I N S T R U C T I O N S 8
WS_Inst uctions_T oubleShooting:Layout 1 1/7/10 10:57 AM Page 8

9W A L K S T A T I O N U S E R I N S T R U C T I O N S
Walking Platform Operation
• Start – Press START to start belt moving.
• Stop – Press STOP to stop belt moving.
• Pause – Press STOP to stop belt moving & hol session information on isplay.
• Reset – Press an hol STOP for at least 3 secon s at any time
uring operation or pause.
• Emergency Stop – Pull off magnet on en of Magnetic Safety Clip from its
in icate connection on keypa . Belt will slow an stop.
3 Pre-set Programmable Height-A jusTable Table Controller
(Sit-to-Walkstation only)
Operating the Height-Adjus able able Controller
The table control panel has six buttons for user control.
• Press an hol either the Up or Down arrow to reach the esire height.
As a safety feature, the user must continuously hol own the button in
or er for the table to move.
• The buttons labele 1-3 each store a esire pre-set height into the
control panel memory.
• The S button is use to store the esire pre-set height for each button labele 1-3.
Store Height into Memory
To set into memory the esire height for either seate , stan ing, or walking
work, use the three pre-set buttons.
• Press either the Up or Down arrow until the esire height is attaine .
• Press an hol the S button along with your choice of buttons 1-3 to set that
particular height. Hol for three secon s.
• To pre-set a itional heights repeat this sequence using the remaining 1-3 buttons.
Adjust able to a Stored Memory Position
To switch to a store height in memory, use the
three pre-set buttons.
• Press an hol the numbere button that has the pre-set
height store into memory.
WS_Inst uctions_T oubleShooting:Layout 1 1/7/10 10:57 AM Page 9

O ometer:
The Walkstation keeps track of your total istance walke an estimate
calories burne . It oes so in three ways:
• Normal Accumulation in the Display: While you are walking, the isplay shows
istance an calories. If you pull the Magnetic Safety Clip or press an hol
the STOP key to reset the Walkstation, the istance an calories will reset.
• Session Odometer Function: You may be on an off the Walkstation many
times each ay but still want to keep track of your istance an calories for that
ay (or that week). The session o ometer function will work for this purpose,
which isplays accumulate istance an calories.
- To view the session odometer: while the Walkstation is running, press the
ENTER key.
- To clear the session odometer: while the Walkstation is running, press an
hol the ENTER key.
• Overall Odometer: the Walkstation also has an overall o ometer function,
which can be use for longer perio s of time such as several months.
- To view the overall odometer: while the Walkstation is prompting for
weight such as at the beginning of a session, press the STOP an
keys simultaneously.
- To clear the overall odometer: while the Walkstation is prompting for weight,
press the STOP an an keys simultaneously.
For Private Use:
The trea mill ships in “Public Use” mo e allowing the weight to return to the
efault after each use. To save the weight an set for “Private Use”, follow these
steps to enter Engineering Mo e: (It may be easier if you have 2 people.)
STEP 1: Turn off the trea mill
STEP 2: Press an hol STOP, SPEED - , & SPEED +
STEP 3: While still hol ing the buttons have someone else turn the trea mill
back on. It may take a couple secon s, but isplay will rea
“ENGINEERING MODE”
STEP 4: Press ENTER twice or until isplay rea s “WEIGHT 150”
STEP 5: Press SPEED + to toggle the to rea “WEIGHT SAVED”
STEP 6: Press START to save the change. Screen will rea “SAVED”
STEP 7: Press STOP to exit ENGINEERING MODE.
After completing these steps, the trea mill will be back in Normal Operation
Mo e. The next time the user enters a weight, it will be save for each use.
+
+ –
W A L K S T A T I O N U S E R I N S T R U C T I O N S 10
WS_Inst uctions_T oubleShooting:Layout 1 1/7/10 10:57 AM Page 10

Walkstation Troubleshooting
Symptom Cause Solution
Circuit breaker
on trea mill trips
when the power cor
is plugge into wall.
ADamage motor
BDamage or efective
motor power supply boar
CDamage motor
control circuit boar
DRestricte belt or flywheel
ETrea belt over tensione
AService require
BService require
CService require
DCheck an remove
obstruction or call ealer
ESee page 11 for Trea belt
a justment information
Computer isplay LED’s
o not illuminate.
ANo power to trea mill
BCircuit breaker trip
CUpper wire harness
not connecte or not
completely connecte
ARestore power at electrical
outlet or reset circuit
breaker if in on/off position
BCircuit breaker trip
CUpper wire harness
not connecte or not
completely connecte
Trea belt tracks
left to right.
AUneven floor
BRear roller not
properly a juste
CTrea mill feet NOT seate
properly in trea mill
receiver plates
AMove trea mill to even
surface or level with shims.
See page 11 for Trea belt
a justment information
BSee page 11 for Trea belt
a justment information
CMove trea mill feet so both
are seate through holes
in trea mill receiver plate
Trea belt feels
unsmooth,
jerks intermittently.
AObject between
belt an eck
BObject un er belt
CLoose trea motor rive belt
DLoose trea belt tension
ARemove object
between belt an eck
BRemove object
from un er belt
CService require
DSee page 11 for Trea belt
a justment information
Squeaking noise while
using the trea mill.
APoly V-belt slipping
BMotor brush noise excessive
CTrea mill feet NOT seate
properly in trea mill
receiver plates
AService require
BService require
CMove trea mill feet so both
are seate through holes
in trea mill receiver plate
Trea mill oes
not turn on.
AUnit an table aren’t
plugge into a working
electrical outlet
BInsecure cable connections
ARestore power at electrical
outlet or reset circuit
breaker if in on/off position
BSecure cable connections
11 W A L K S T A T I O N U S E R I N S T R U C T I O N S
WS_Inst uctions_T oubleShooting:Layout 1 1/7/10 10:57 AM Page 11

Error Message Cause Solution
LUBE In icates that the accumulate
istance is such that the eck
nee s to be lube
Lube eck with liqui silicone
lubricant available from Details
Inspect wax bar assembly
on commercial mo els,
if worn to less than 1⁄4"
in thickness, replace wax bar
CLEAN In icates that the accumulate
istance is such that the ma-
chine nee s to be cleane
Remove motor cover an
vacuum ust from area
Wipe own the expose
area of the eck besi e
the stra le covers with
a clean, ry cloth
MOTOR In icates that the accumulate
time on the trea mill is such
that the motor brushes nee to
be change / checke
Check / replace motor
brushes as nee e
Reset timer
CALIBRATE Micro-controller cannot
a just belt spee to target
See page 11 for Trea mill
Calibration information
EEPROM Software error uring
trea mill startup iagnostics
Restart Trea mill,
if error persists,
replace isplay console
RECALIBRATE Trea mill has lost
calibration settings
See page 11 for Trea mill
Calibration information
W A L K S T A T I O N U S E R I N S T R U C T I O N S 12
WS_Inst uctions_T oubleShooting:Layout 1 1/7/10 10:57 AM Page 12

For further information, lease go to the Details website
details-worktools.com or call 800.833.0411
P.O. Box 19 7 / CD-5E Grand Rapids, MI 49501-19 7 www.details-worktools.com
©2009 Steelcase Inc. All rights reserved. 12/09
Details Part No. 005734D Rev. D
details-worktools.com
A S t e e l c a s e C o m a n y
For a better day at work.
™
Work.
Make it a moving experience.
WS_Inst uctions_T oubleShooting:Layout 1 1/7/10 10:57 AM Page 1
Other manuals for The Walkstation
1
Table of contents


