DIMLUX XTREME LED Series User manual
1
EN
® DimLux is a registered trademark of
airSupplies
Engineered & Designed in Holland
www.dimlux.nl
Manual version 0621 2022
USER MANUAL
THE FUTURE OF GROWING
JUST GOT BRIGHTER.
XTREME SERIES LED
XTREME SERIES LED +NIR
DIMLUX
EN
KNOWLEDGE BASE
Direct link: www.dimlux.nl/knowledge-base
Scan the QR-code to go to our online
knowledge base with more tutorials
and videos.
dimlux.nl

2
EN
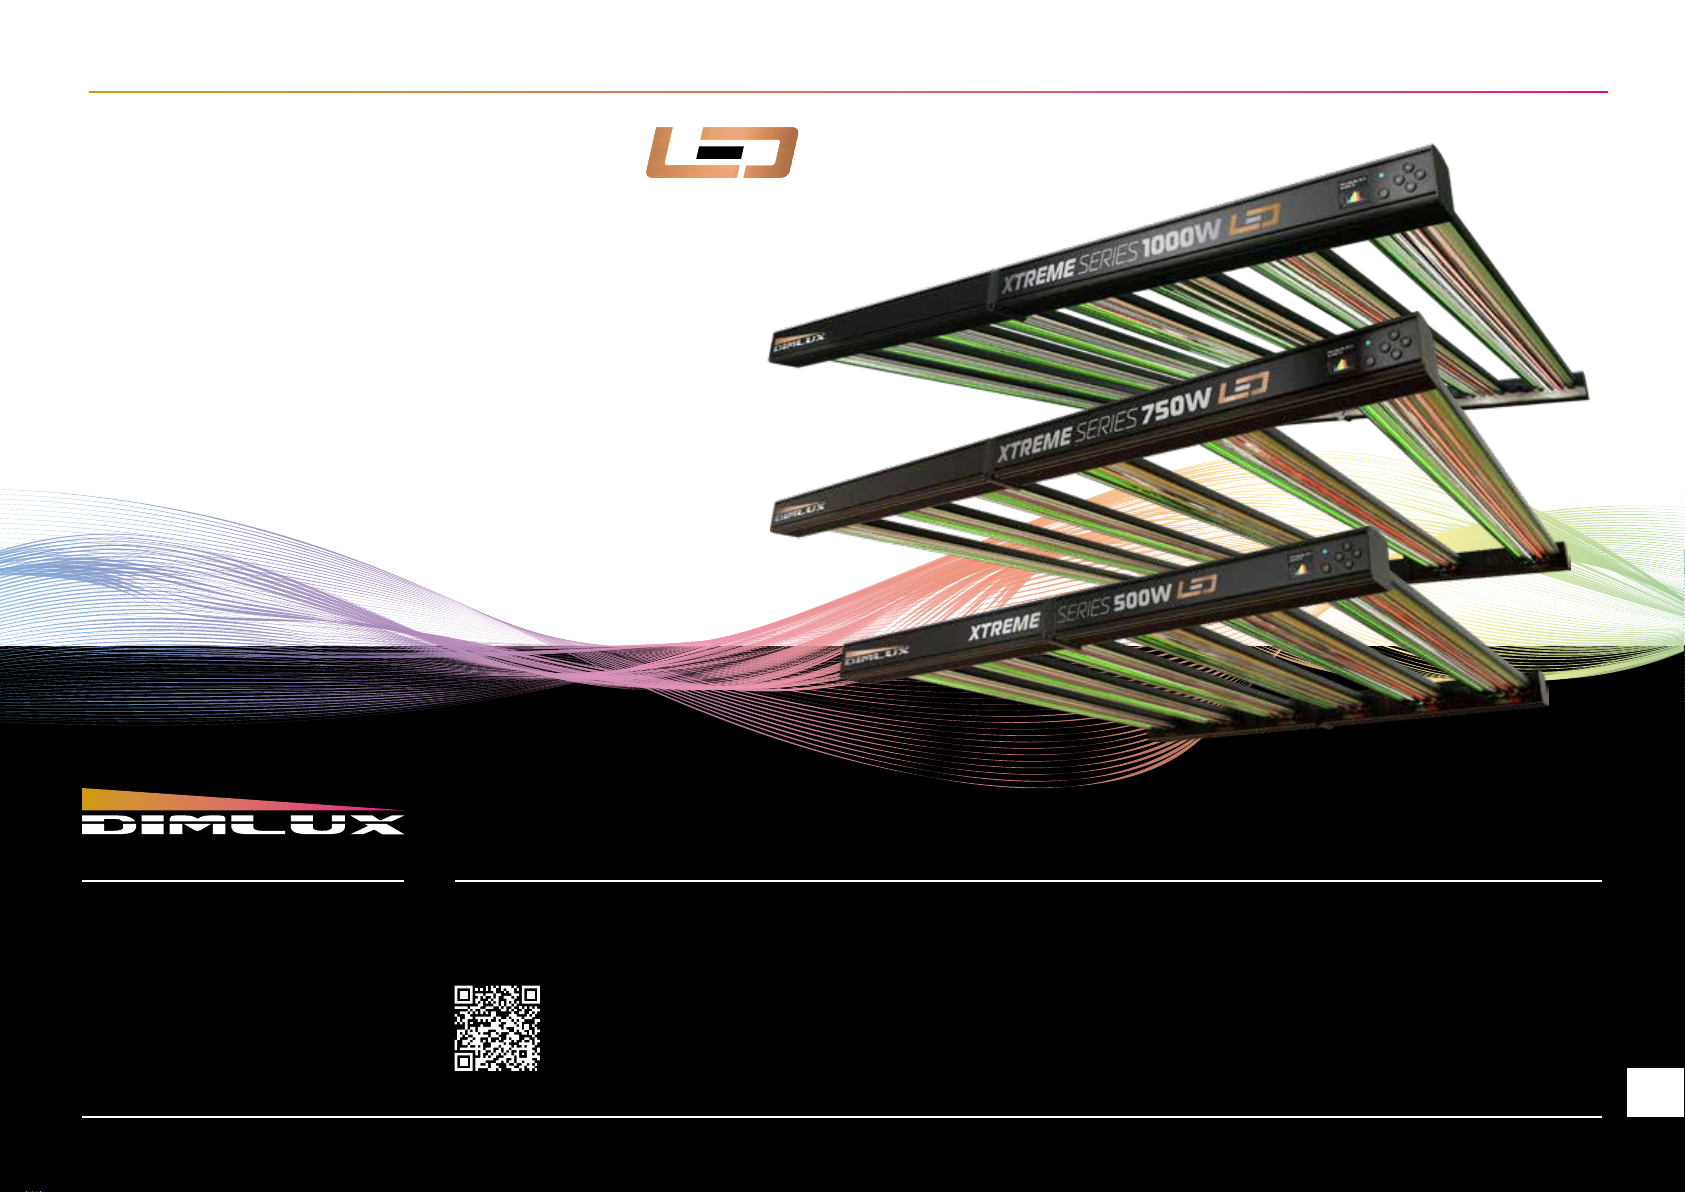
DIMLUX XTREME SERIES LED
12 Years ago, Dimlux introduced the first ever groundbreaking
remote controlled HPS ballast in combination with the Maxi
Controller; The Dimlux Xtreme Series. Today, Dimlux introduces
the smartest, most efficient and most powerful grow light on the
market, the Dimlux Xtreme Series LED!
Again we are in the forefront of innovation.
Spectrum Adjustable PhytoVegSpec®Indoor
Light Output (PPF) 1500 μmol/s
Light Output Total (PPF 350-800nm) 1571 μmol/s
PAR Photon Efficacy (400-700nm) 2.81 μmol/J @ 230-240V AC
Total Photon Efficacy (350-800nm) 2.91 μmol/J @ 230-240V AC
AC Input Power 540W @ 230-240V AC
Spectrum Adjustable PhytoVegSpec®+NIR Indoor
Light Output (PPF) 1420 μmol/s
Light Output Total (PPF 350-800nm) 1550 μmol/s
PAR Photon Efficacy (400-700nm) 2.67 μmol/J @ 230-240V AC
Total Photon Efficacy (350-800nm) 2.87 μmol/J @ 230-240V AC
AC Input Power 540W @ 230-240V AC
AC Input Voltage 120-277V AC, 50/60Hz
Beam Angle 90° × 120°
Optics Patented Deep Penetration Ultra High Transmittance Lens
Auxiliary Light Patented Light Pipe Multi Color 65k
Proximity sensor Doppler Radar
Mounting Height Above Canopy 20‒50 cm / 7.8-19.7 in
Thermal Management Passive
Max. Ambient Temperature 40°C / 105°F
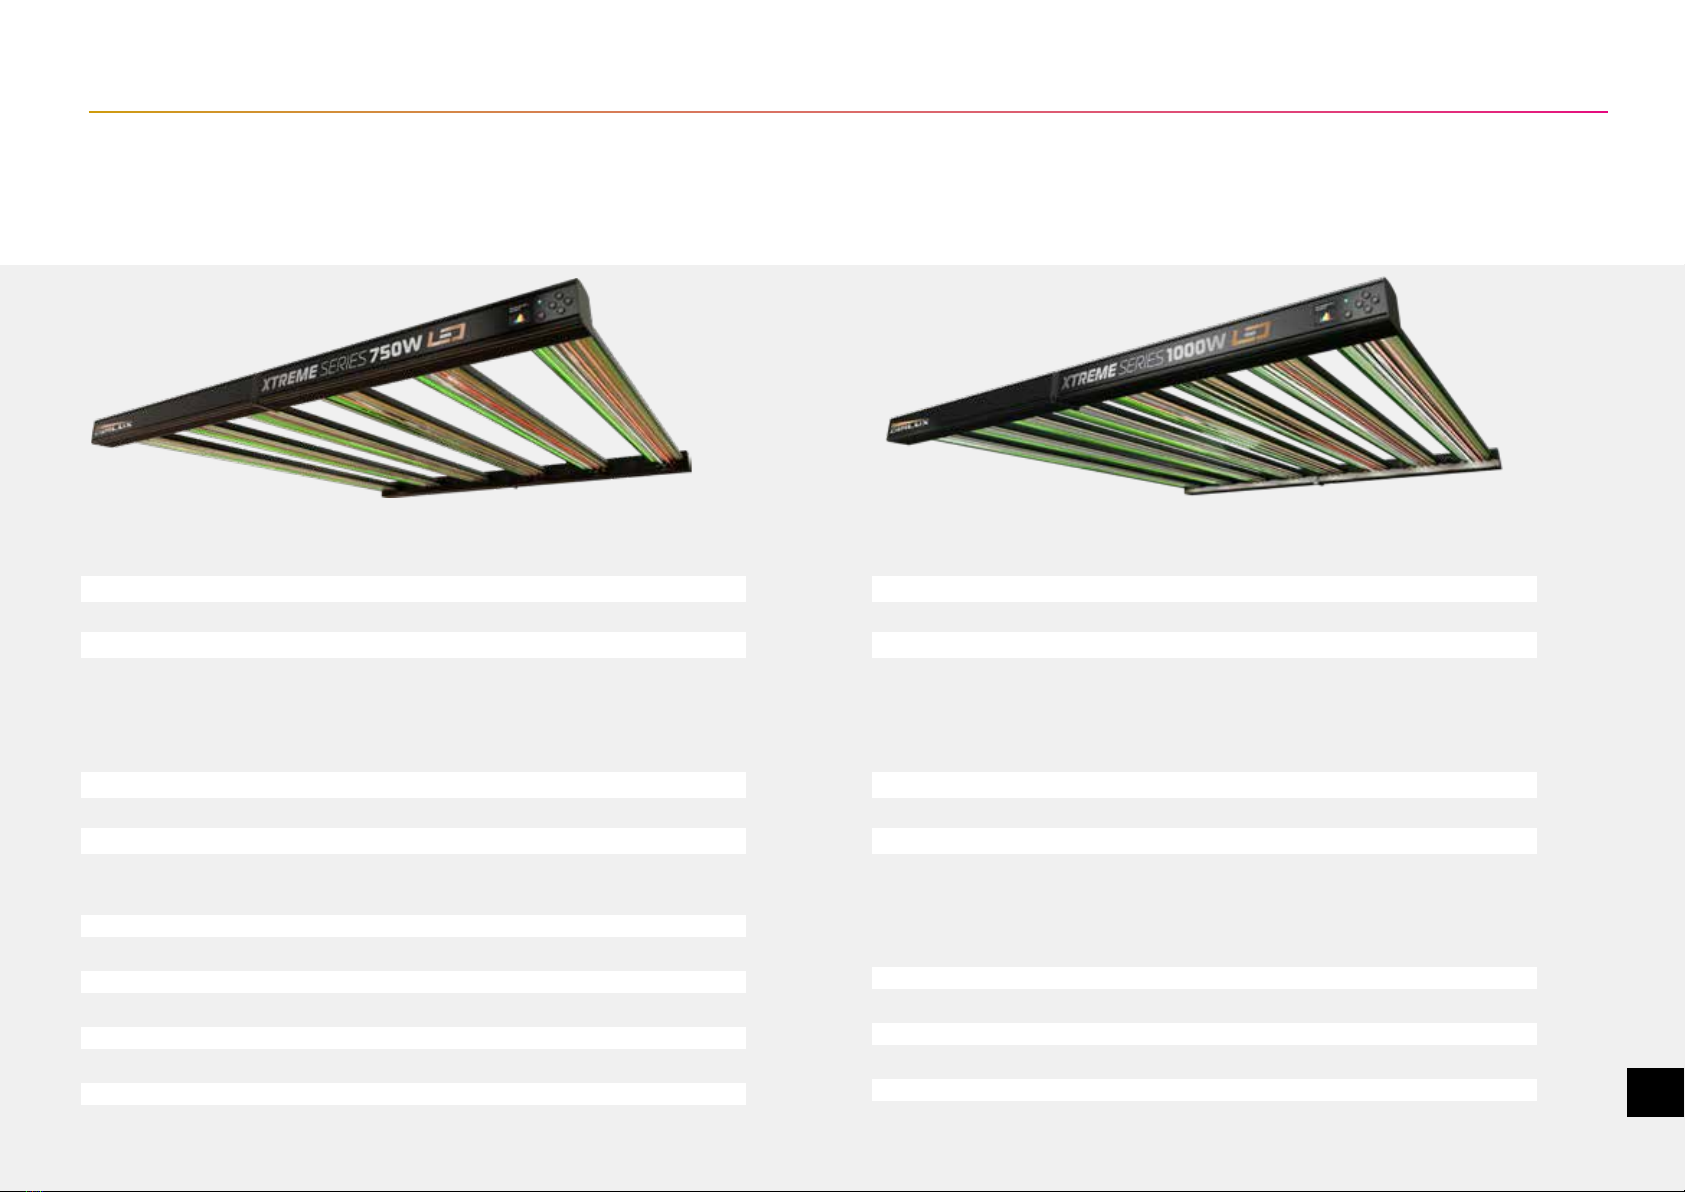
DIMLUX XTREME SERIES 500W LED
Adjustable PhytoVegSpec®(+NIR) Indoor
INTRODUCING THE
MOST POWERFUL
AND SMART LED
GROW LIGHT ON
THE MARKET!
THE DIMLUX
XTREME SERIES LED.
3
EN
dimlux.nl
USER MANUAL
Spectrum Adjustable PhytoVegSpec®Indoor
Light Output (PPF) 3035 μmol/s
Light Output Total (PPF 350-800nm) 3142 μmol/s
PAR Photon Efficacy (400-700nm) 2.85 μmol/J @ 230-240V AC
Total Photon Efficacy (350-800nm) 2.95 μmol/J @ 230-240V AC
AC Input Power 1065 @ 230-240V AC
Spectrum Adjustable PhytoVegSpec®+NIR Indoor
Light Output (PPF) 2879 μmol/s
Light Output Total (PPF 350-800nm) 3059 μmol/s
PAR Photon Efficacy (400-700nm) 2.7 μmol/J @ 230-240V AC
Total Photon Efficacy (350-800nm) 2.9 μmol/J @ 230-240V AC
AC Input Power 1065W @ 230-240V AC
AC Input Voltage 120-277V AC, 50/60Hz
Beam Angle 90° × 120°
Optics Patented Deep Penetration Ultra High Transmittance Lens
Auxiliary Light Patented Light Pipe Multi Color 65k
Proximity sensor Doppler Radar
Mounting Height Above Canopy 40-85 cm / 15.7-31.4 in
Thermal Management Passive
Max. Ambient Temperature 40°C / 105°F
DIMLUX XTREME SERIES 1000W LED
Adjustable PhytoVegSpec®(+NIR) Indoor
Spectrum Adjustable PhytoVegSpec®Indoor
Light Output (PPF) 2276 μmol/s
Light Output T 2357 μmol/s
PAR Photon Efficacy (400-700nm) 2.85 μmol/J @ 230-240V AC
Total Photon Efficacy (350-800nm) 2.95 μmol/J @ 230-240V AC
AC Input Power 799W @ 230-240V AC
Spectrum Adjustable PhytoVegSpec®+NIR Indoor
Light Output (PPF) 2159 μmol/s
Light Output Total (PPF 350-800nm) 2317 μmol/s
PAR Photon Efficacy (400-700nm) 2.7 μmol/J @ 230-240V AC
Total Photon Efficacy (350-800nm) 2.9 μmol/J @ 230-240V AC
AC Input Power 799W @ 230-240V AC
AC Input Voltage 120-277V AC, 50/60Hz
Beam Angle 90° × 120°
Optics Patented Deep Penetration Ultra High Transmittance Lens
Auxiliary Light Patented Light Pipe Multi Color 65k
Proximity sensor Doppler Radar
Mounting Height Above Canopy 30-65 cm / 11.8-25.5 in
Thermal Management Passive
Max. Ambient Temperature 40°C / 105°F
DIMLUX XTREME SERIES 750W LED
Adjustable PhytoVegSpec®(+NIR) Indoor

4
EN
IMPORTANT SAFETY PRECAUTIONS
& EXPLANATION OF SYMBOLS
• Please read this manual thoroughly before attempting to install or operate any Dimlux
Xtreme Series LED system.
• After successful installation and configuration of the system, be sure to retain this manual in a
safe place for future reference. Safety is a key component to a long lasting and trouble-free
installation.
• It is important you read, fully understand, and observe the subsequent safety precautions.
If you are not comfortable with the installation of high performance lighting systems, you
should seek the services of a qualified installation professional.
• NOTICE: Do not touch the fixture besides the control buttons near the display while in
operation.
• Connect the system only to the power sources of the appropriate voltage using the AC
plug type received. Protect power cables from being pinched, walked on, or otherwise
damaged. Be especially careful where the power cable enters the power outlet and the
unit. Only connect the system to an electrical outlet or extension cord of appropriate type
and rating. Connect the system only to the power sources of the correct voltage using the
plug received.
• DO NOT defeat the safety purpose of a grounding or polarized plug by removing ground
pins or using unsafe adapters. A polarized plug has two blades –one wider than the other.
A grounding plug has a third ground prong in addition to the two main conductors. The
wide blade or third grounding prong is provided for your safety.
If the provided plug does not fit your outlet, consult an electrician to replace your obsolete
outlet. If you replace the power cord, only use one of similar type and equal or greater
current rating.
• The system should only be cleaned as directed in the manual. You should seek service for
your system by qualified service personnel if any of the following occur:
1. The power-supply cord or the plug has been damaged
2. The unit has been exposed to rain
3. The unit exhibits a marked change in performance
4. The unit has been dropped, or its enclosure or chassis is damaged
CULTIVATION BEST PRACTICES
• Check the growth and health of your plants regularly. Dimlux lighting systems deliver
high PPFD levels, typically more than experienced in nature. Adjustments to H2O, CO2,
RH, nutrients and temperature are usually required. Because the LED fixture does not
give off radiant heat towards the plants, it is recommended to work with the Dimlux Plant
temperature camera to determine the correct plant temperature.
• The Xtreme Series LED is designed to provide a uniform light distribution in the shape of a
square. How high?
There is a very simple and unique way to determine the minimum height of the luminaire. The
rule of thumb is that the shortest distance from armature to crop is half the distance between
the armatures (centre size) in a multi-luminaire set-up. It doesn’t matter whether the LED is
500 Watt or 1000 Watt. A 1000 Watt fixture should illuminate a larger area than a 500
Watt fixture, which automatically increases the distance between reflector and crop.
• Due to the lack of radiant heat with LED, the plant temperature will be considerably lower
than with HPS. As a result, the temperature of the plant and the ambient temperature in the
room vary enormously, so controlling for ambient temperature is no longer sufficient. For
accurate results, you can measure the temperature of the leaf surface using the Dimlux plant
temperature camera that can be connected directly to the LED fixture.
• Many plants prefer higher temperatures when exposed to high PPFD Experiment with higher
temperatures to achieve higher yields. Canopy temperature and room ambient temperature
often vary for accurate results, test at the canopy level to gauge leaf surface temperature.
DIMLUX XTREME SERIES LED

5
EN
WE AT DIMLUX ADVISE TO USE THE
DIMLUX PLANT TEMPERATURE CAMERA
With this DimLux plant temperature camera, the DimLux Xtreme Series LED can indicate whether
the crop is in the ideal temperature range. If it is outside this range it will be indicated on the
display and by the auxiliary lighting. When connected to the Maxi Controller, the lighting dims
based on the plant temperature if it gets too high due to, for example, a water shortage. If the set
value is exceeded, it is dimmed first to keep the temperature under control. If the temperature rises
despite dimming, half of the dimmed lamps will switch off, if the temperature continues to rise, all
lamps will switch off for at least 20 minutes.
GENERAL CARE
• Natural convection removes heat away from the heatsink. In order for the system to properly
cool itself, at least 5cm (two inch) of space is required between the fixture and the ceiling of
your grow area. Failure to do so may shorten the fixture’s lifespan.
• To achieve the optimal lifespan and performance of your fixtures, routinely check for and
remove excess dust, debris, and mineral build up from heatsink and LED array.
• Cleaning should always be done with the fixture disconnected from the power source using
compressed air to the frame and heatsink or a damp cloth to wipe debris from light bars.
WARNING:
THESE PRODUCTS MAY REPRESENT A POSSIBLE
SHOCK OR FIRE HAZARD IF IMPROPERLY
INSTALLED OR ATTACHED IN ANY WAY.
PRODUCTS SHOULD BE INSTALLED IN
ACCORDANCE WITH THE OWNERS MANUAL,
CURRENT ELECTRICAL CODES AND/OR THE
CURRENT NATIONAL ELECTRIC CODE (NEC).
LAST AND MOST IMPORTANT,
PLEASE RECYCLE ALL PACKAGING MATERIAL.
FUTURE GENERATIONS WILL THANK YOU.
DIMLUX XTREME SERIES LED
ARE HIGH-PERFORMANCE LIGHTING SYSTEMS
DO NOT TOUCH WHILE IN OPERATION.
Direct link: dimlux.nl/product/dimlux-plant-temperature-sensor
Scan the QR-code and read more
about the Dimlux PT Camera
THE
NEW
DIGITAL PT
CAMERA
DIMLUX PLANT TEMPERATURE CAMERA
FOR THE INTRODUCTION OF THE DIMLUX XTREME SERIES
LED WE HAVE A DEVELOPED THE NEW DIGITAL DIMLUX PT
CAMERA
5
EN
dimlux.nl
USER MANUAL
6
EN
DIMLUX XTREME SERIES LED
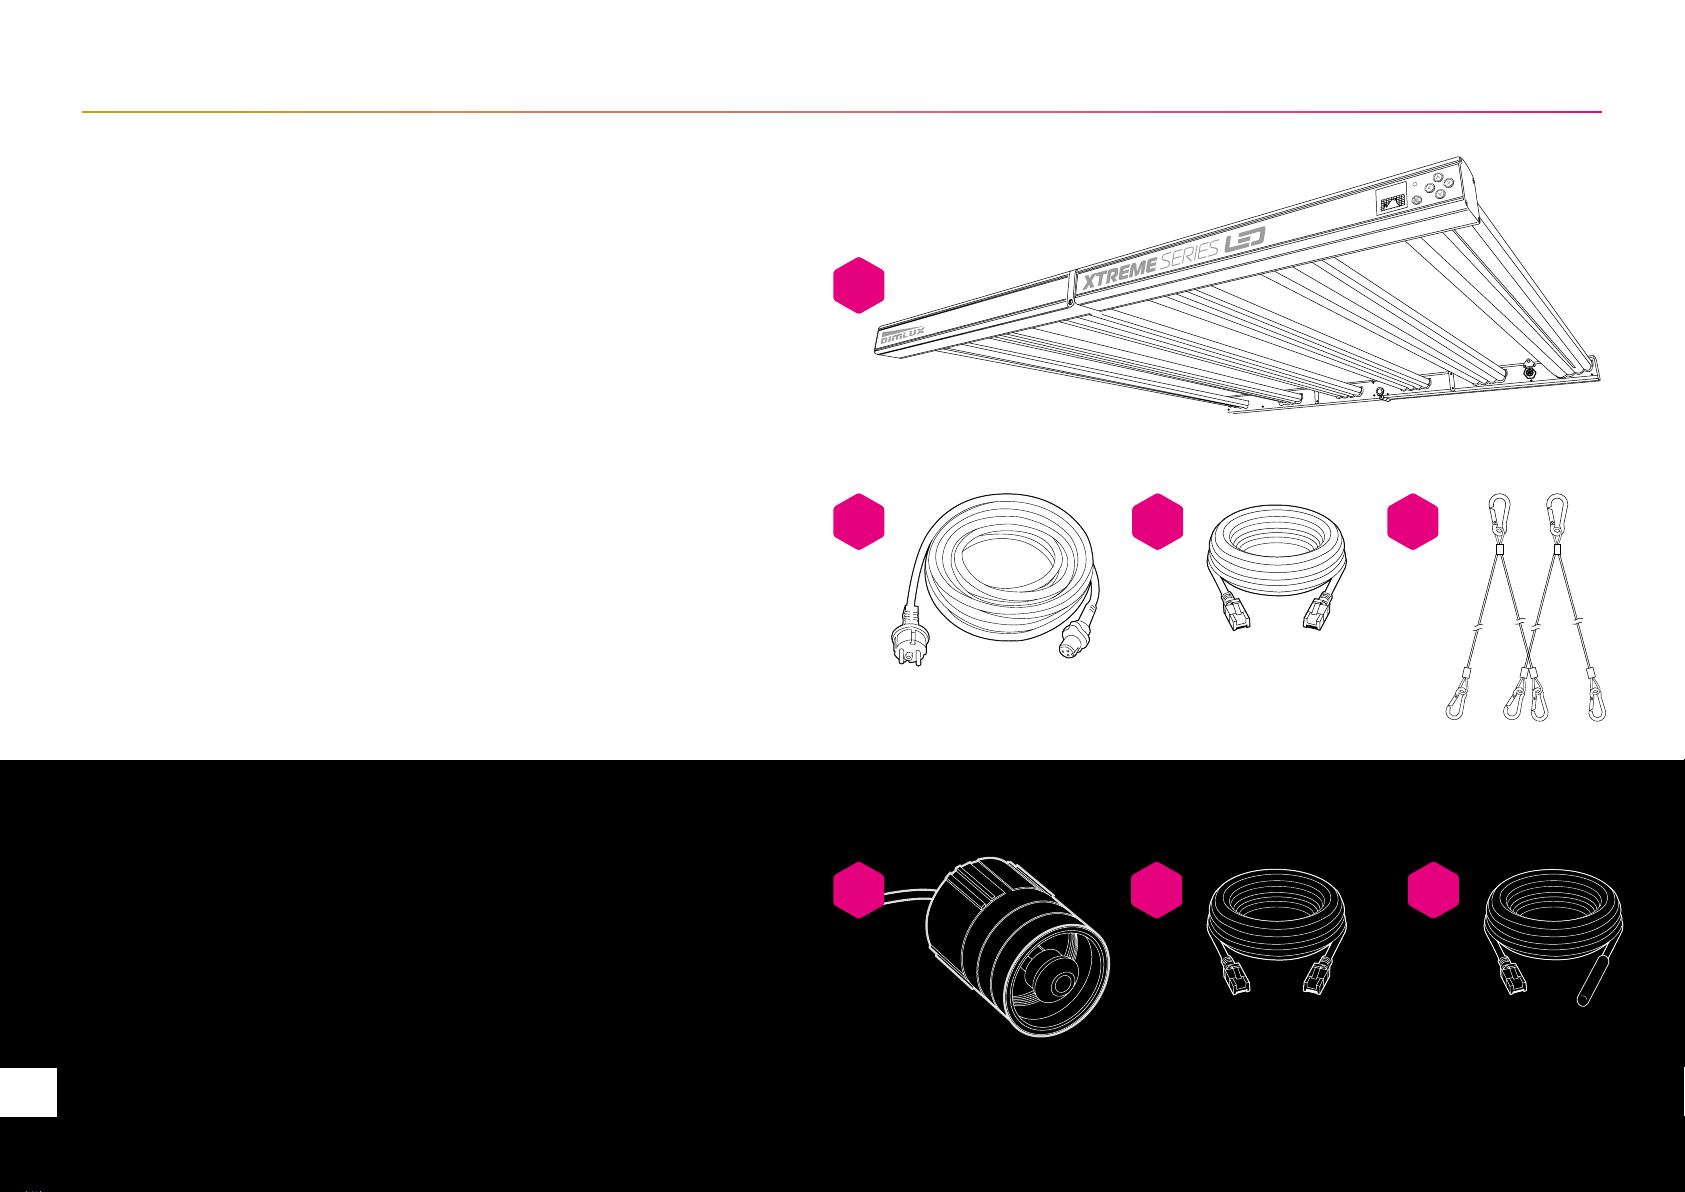
SYSTEM HARDWARE & ACCESSORIES
SYSTEM HARDWARE
(Depending on your product selection at the time of purchase)
1Xtreme 500W LED (+), Xtreme 750W LED (+) or Xtreme 1000W LED (+)
fixture pre-configured with:
2Standard DC Cable (EU/UK/USA) (based on the continent of purchase)
3Digital Interlink Cable (based on the LED fixture of purchase)
Dimlux Xtreme Series 500W LED (+) ›2 m / 80 in - Digital Interlink Cable
Dimlux Xtreme Series 750W LED (+) ›2.5 m / 100 in - Digital Interlink Cable
Dimlux Xtreme Series 1000W LED (+) ›3 m / 120 in - Digital Interlink Cable
MOUNTING HARDWARE OPTIONS
42x bayonet mounting cables
AVAILABLE ACCESSORIES
5Dimlux Digital Plant Temperature Camera
6 Digital Interlink Cables available in different lengths:
0.6 m (24 in.) 1.0 m (40 in.) 1.5 m (60 in.) 2.0 m (80 in.)
2.5 m (100 in.) 3.5 m (140 in.) 5.0 m (200 in.) 10.0 m (400 in.)
7Digital Smartport Temperature sensor
1.0 m (40 in.) 5.0 m (200 in.) 10.0 m (400 in.)
1
3 42
6 75
2X
6
EN

7
EN
dimlux.nl
USER MANUAL
ASSEMBLY INSTRUCTIONS
TAKE CAUTION WHEN HANDLING LIGHT BARS.
ENSURE THE LED/LENSES DO NOT COME IN
CONTACT WITH SHARP OBJECTS OR FORCE THAT
MAY DAMAGE THE LENSES
1Unbox The Dimlux Xtreme LED and check that all
in the indicated system and mounting hardware
are present in the box.
2Unfold module and place on flush, stable surface
then carefully turnaround the fixture so the lenses
are facing downwards.
3When unfolded use the tighten knob on both
insides of the hinge and turn counter clockwise
to fixate the Xtreme LED fixture.
4Always check whether hinge is tightly fixated.
5The Dimlux Xtreme LED Fixture is ready to be mounted.
2
2
3
2

8
EN
DIMLUX XTREME SERIES LED
MOUNTING INSTRUCTIONS
Make sure the fixture still is on a flush, stable surface with the
lenses facing downwards and follow the next steps;
1Take the supplied mounting cables.
2The Dimlux Xtreme LED fixture has 4 hang tails in
each corner of the fixture.
3Mount the mounting cable to the hang tails 1A
and 2A and the other mounting cable to 3B and 4B.
B B3 4
2
3
2X
1
1 A A2
Warning! Mounting and installing of the LED fixture may only be executed by certified service personnel, in accordance with the applicable local laws and regulations.
Warning! Mount the system to something that can hold the weight of the LED fixture.
9
EN
dimlux.nl
USER MANUAL
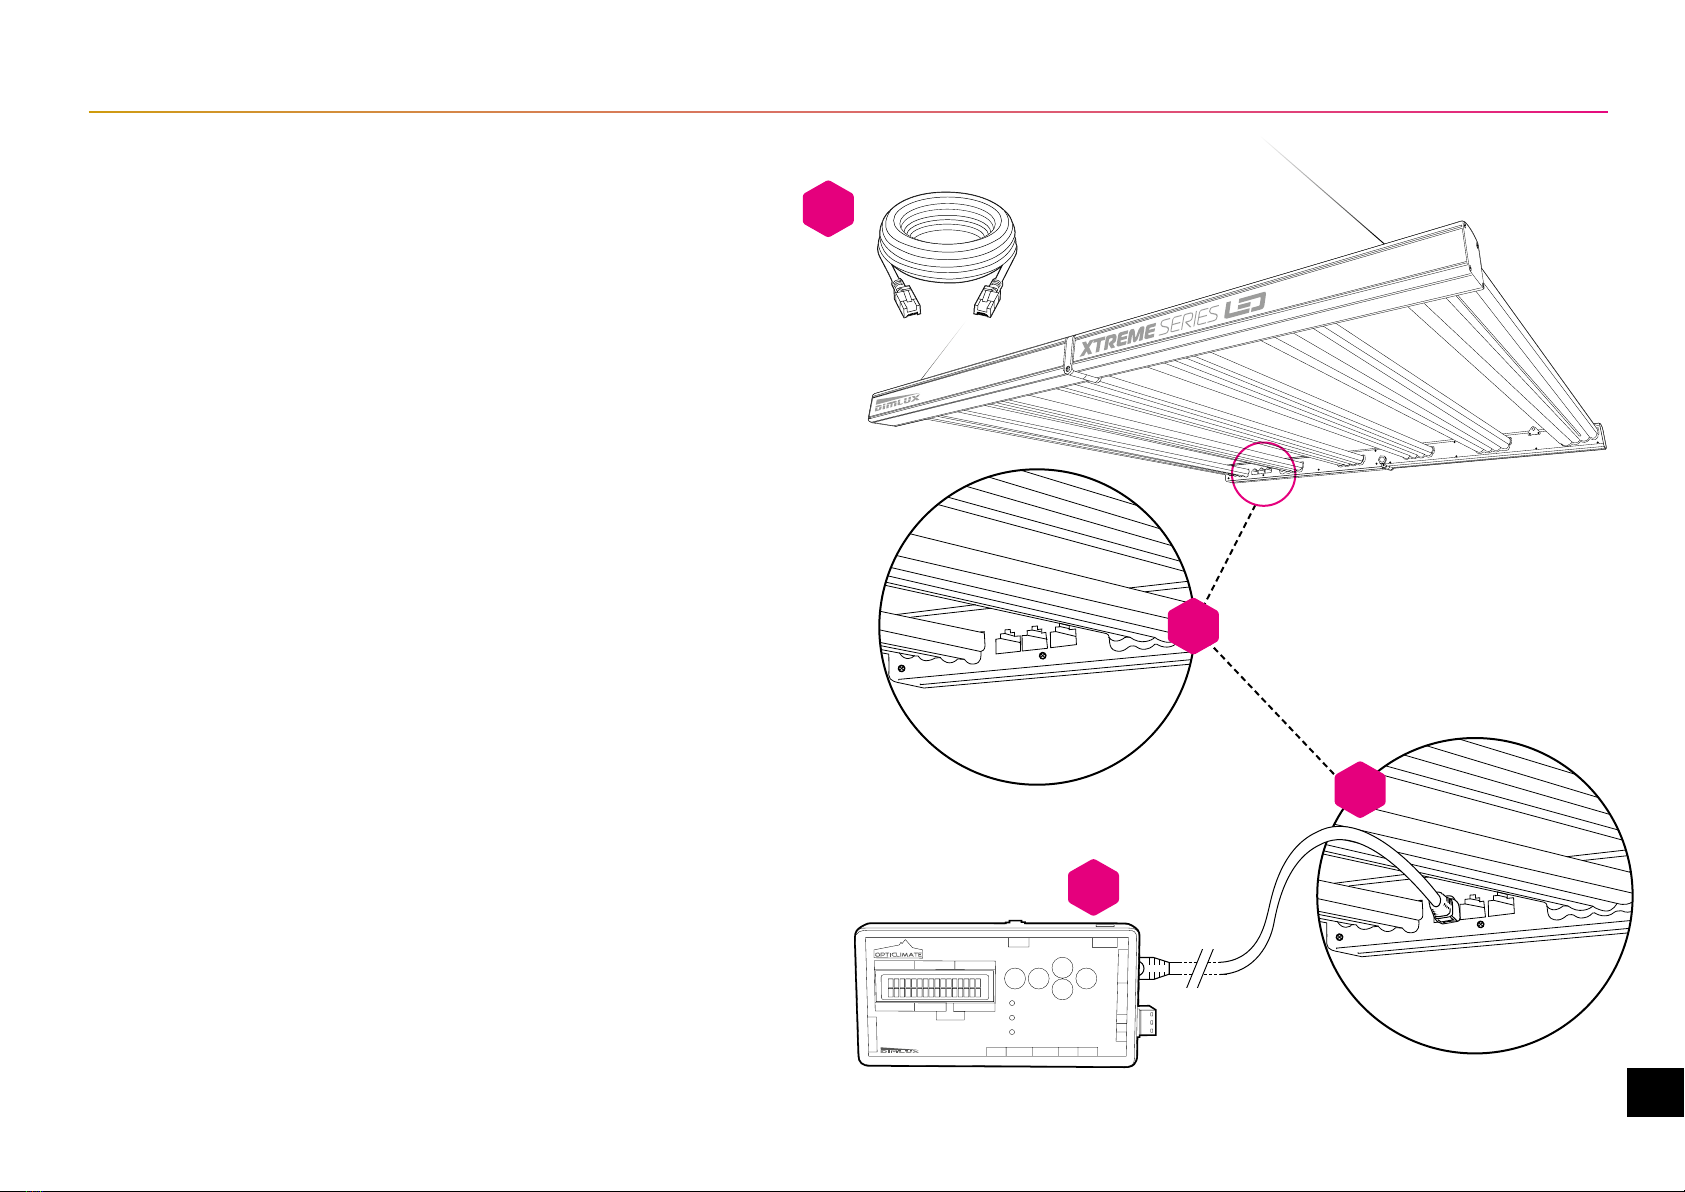
SETTING UP INTERLINK CONNECTION
SET UP YOUR LED FIXTURE INTERLINK CONFIGURATION
BEFORE CONNECTING THE DIMLUX XTREME LED FIXTURES
TO A POWER SUPPLY
Make sure the fixture still is on a flush, stable surface with the lenses facing
downwards and follow the next steps;
1Take the supplied Interlink Commmunication Cable.
2Search for the 3 Interlink sockets on the Dimlux Xtreme LED fixture.
3Insert the plug of the interlink cable from the Maxi controller into the
1st of the 3 interlink sockets on the Dimlux Xtreme LED fixture.
4You can use the Dimlux Maxi Controller to control
the Dimlux Xtreme LED (or 160 Dimlux Xtreme
LEDs connected in series).
NOTE Do not forget to set the Dimlux
Maxi Controller to LED modus
CONNECT UP TO 160 DIMLUX XTREME LED FIXTURES
The Maxi Controller sends a signal to the fixtures to switch them on or off.
There are 2 out ports on the Maxi Controller. Each port can switch up to
80 fixtures using the oem interlink cables and splitters. Interlink cables are
available in different lengths. That is 160 Dimlux Xtreme LED fixtures in total.
More information on page 15.
3
2
4
1

10
EN
CONNECTING THE LED FIXTURE TO THE MAINS
SET UP YOUR LED FIXTURE INTERLINK CONFIGURATION BEFORE
CONNECTIING THE DIMLUX XTREME LED FIXTURES TO A POWER
SUPPLY.
Warning! Make sure mains power is switched off.
1Take the supplied Power Cable. (EU/UK/USA)
2Search for the round power sockets on the Dimlux Xtreme LED fixture.
3Insert the round waterproof powerplug in to the power socket on the Dimlux
Xtreme LED fixture and make sure it is firmly and fully plugged in.
We advise you to route the cables through the top of the fixture.
NOTE make sure that power and all other electrical wiring is done by a
certified electrician.
DIMLUX XTREME SERIES LED
Warning! Make sure mains power is switched off. Warning! Ensure the cord is not coiled and does not touch any hot surfaces. Warning! Connect the cables according to local rules, safety regulations and electrical code.
Warning! Ensure external switching gear can cope with the inrush current of the LED fixture. Always use a double pole contactor suitable for switching a capacitive load. Never use household timers to switch the LED fixture!
1
3
2
UK Plug 240 V
EU Plug 230 V USA Plug 120 V USA Plug 240 V USA Plug 277 V

11
EN
USER MANUAL
LCD DISPLAY NAVIGATION
ALL SETTINGS, STATUS, ERRORS AND SPECTRA ARE SHOWN
ON 1.54” 65K COLOR IPS LCD DISPLAY
With the 5 buttons on the fixture you can easily navigate through the setting,
status, errors and spectra. Below you will find the function of each button.
You need to use the display to adjust the functionalities/settings of the fixture.
By pressing the button with the square you activate the display. Use the up/
down arrows to navigate through the settings. If you are on a setting and use the
right arrow you go to the subsettings / functionalities.
Any adjustment in setting must be confirmed with the button with square.
If the LCD display is not operated for 2 minutes, it will jump back to home and
the display will go to 50%, 25% or 10% brightness.
Escape / Menu
LED indicator
up / down / left / right
HOW TO USE OUR FIXTURE VIA THE LCD DISPLAY
For an extensive explanation of functionalities, settings,
presets and how-to’s, you can scan the QR code or
go to Dimlux.nl/knowledge-base
5 Dec 19:43:36
Output 55%
21%
400 600500 700
43% 36%
B:R = 1:1.6
dimlux.nl
12
EN
DIMLUX XTREME SERIES LED
Spectrum Adjustable PhytoVegSpec®Indoor
Light Output (PPF) 1500 μmol/s 2276 μmol/s 3035 μmol/s
Light Output Total (PPF 350-800nm) 1571 μmol/s 2357 μmol/s 3142 μmol/s
PAR Photon Efficacy (400-700nm) 2.81 μmol/J @ 230-240V AC 2.85 μmol/J @ 230-240V AC 2.85 μmol/J @ 230-240V AC
Total Photon Efficacy (350-800nm) 2.91 μmol/J @ 230-240V AC 2.95 μmol/J @ 230-240V AC 2.95 μmol/J @ 230-240V AC
AC Input Power 540W @ 230-240V AC 799W @ 230-240V AC 1065W @ 230-240V AC
Spectrum Adjustable PhytoVegSpec®+NIR Indoor
Light Output (PPF) 1420 μmol/s 2159 μmol/s 2879 μmol/s
Light Output Total (PPF 350-800nm) 1550 μmol/s 2317 μmol/s 3089 μmol/s
PAR Photon Efficacy (400-700nm) 2.67 μmol/J @ 230-240V AC 2.7 μmol/J @ 230-240V AC 2.7 μmol/J @ 230-240V AC
Total Photon Efficacy (350-800nm) 2.87 μmol/J @ 230-240V AC 2.9 μmol/J @ 230-240V AC 2.9 μmol/J @ 230-240V AC
AC Input Power 540W @ 230-240V AC 799W @ 230-240V AC 1065W @ 230-240V AC
AC Input Voltage 120-277V AC, 50/60Hz
Beam Angle 90° × 120°
Optics Patented Deep Penetration Ultra High Transmittance Lens
Auxiliary Light Patented Light Pipe Multi Color 65k
Proximity sensor Doppler Radar
Mounting Height Above Canopy 20‒50 cm / 7.8-19.7 in 30-65 cm / 11.8-25.5 in 40-85 cm / 15.7-31.4 in
Thermal Management Passive
Max. Ambient Temperature 40°C / 105°F
Control By Maxi Controller or Internal Controller
Smartports (3x) Interlink, Plant Temperature Sensor, Light Sensor
Display For Spectrum and GUI 1.54" 65k Color IPS
Total Harmonic Distortion (THD) < 10%
Lifetime L90 > 50,000h
IP Rating IP65
LIGHT SOURCE 500W LED (+NIR) 750W LED (+NIR) 1000W LED (+NIR)
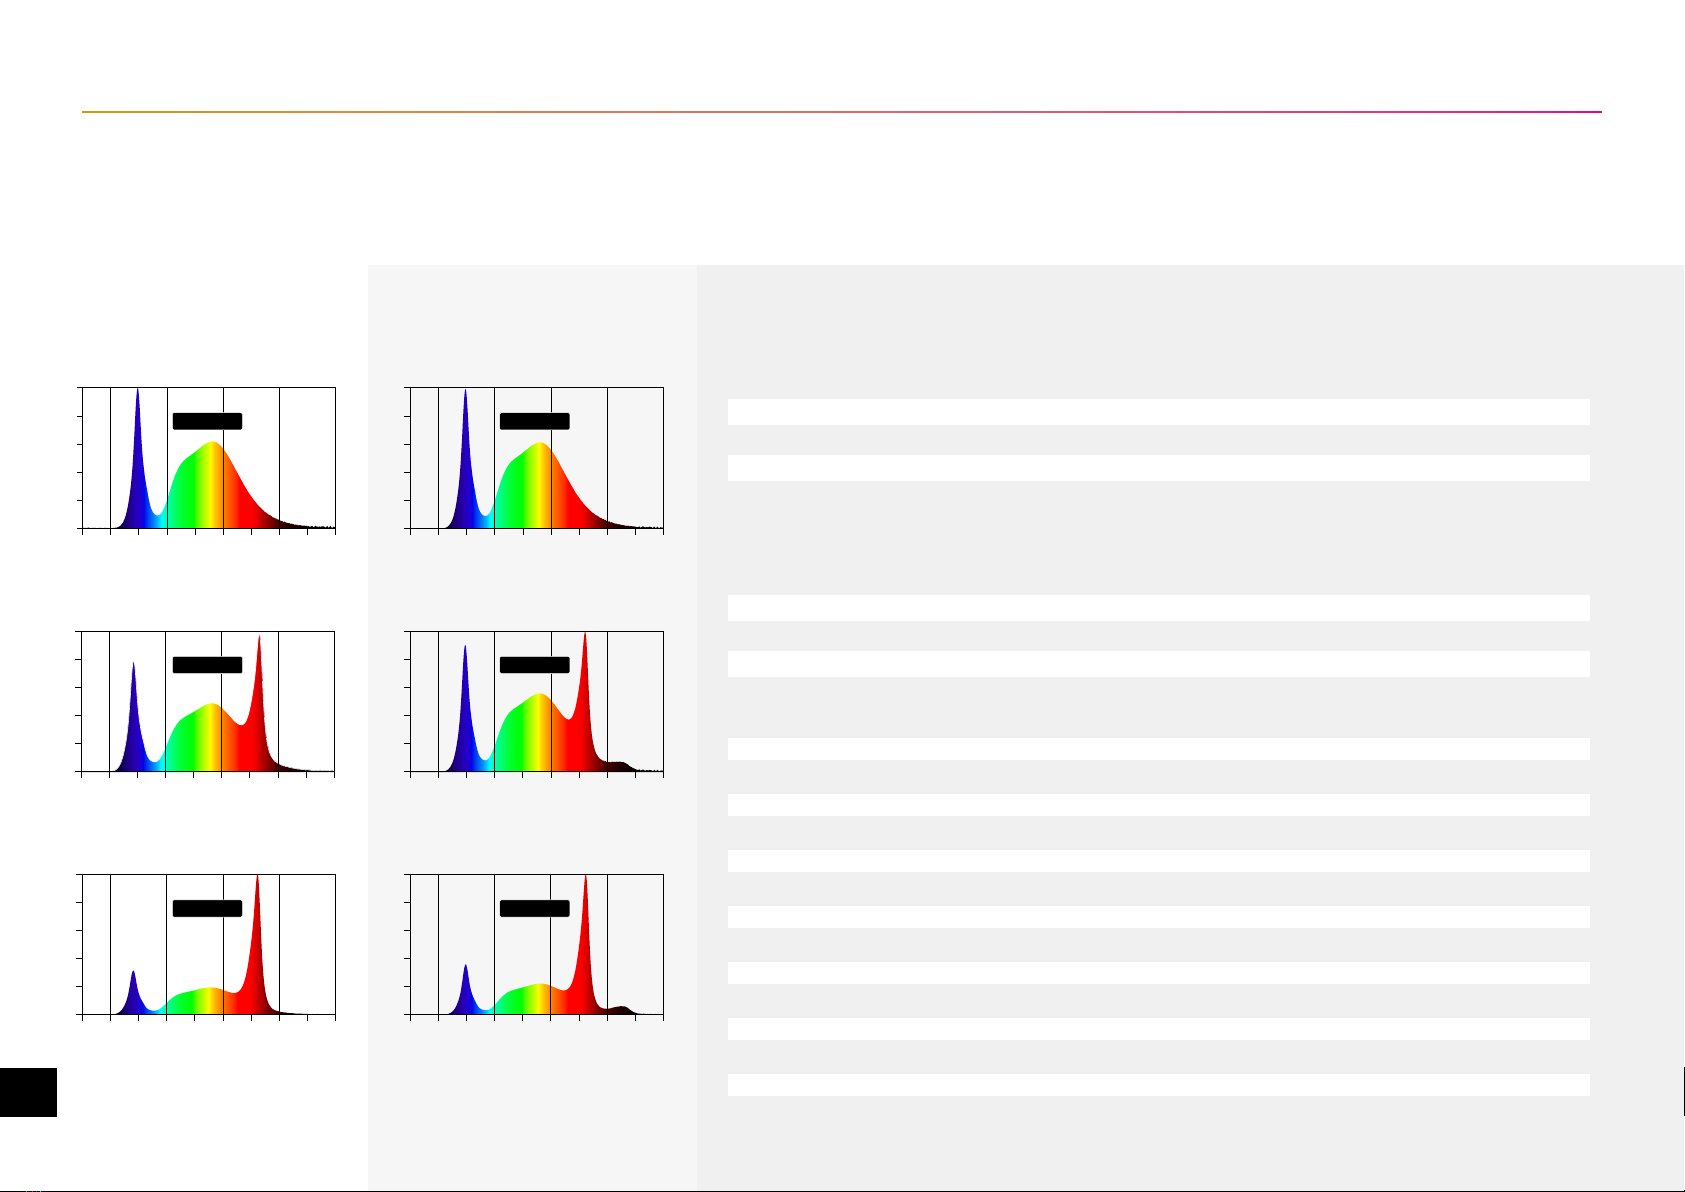
Depending on your choice of LED fixture it has been equiped with an Adjustable PhytoVegSpec® Indoor or Adjustable PhytoVegSpec® +NIR Indoor spectrum.
Please check your fixture for your specific configuration.
PhytoVegSpec® Indoor PhytoVegSpec® +NIR Indoor
31 % 54%
WAVELENGTH (nm)
RELATIVE PPF
400
0
600500 700
DIMLUX XTREME
15 %
800
32% 52%
WAVELENGTH (nm)
RELATIVE PPF
400
0
600500 700
DIMLUX XTREME +NIR
16%
800
50% 25%
WAVELENGTH (nm)
RELATIVE PPF
400 600500 700
DIMLUX XTREME
25%
800
50% 25%
WAVELENGTH (nm)
RELATIVE PPF
400 600500 700
DIMLUX XTREME +NIR
25%
800
41% 39%
WAVELENGTH (nm)
400
0
600500 700
DIMLUX XTREME
20%
800
RELATIVE PPF
42% 37%
WAVELENGTH (nm)
400
0
600500 700
DIMLUX XTREME +NIR
21 %
800
RELATIVE PPF
0 0
B:R = 1:1 B:R = 1:1
B:R = 1:2 B:R = 1:1.8
B:R = 1:3.6 B:R = 1:3.3

13
EN
USER MANUAL
XTREME SERIES 1000W LED
Adjustable PhytoVegSpec®(+NIR) Indoor
XTREME SERIES 500W LED
Adjustable PhytoVegSpec®(+NIR) Indoor
XTREME SERIES 750W LED
Adjustable PhytoVegSpec®(+NIR) Indoor
SIDE VIEW
43" (1094mm)
29.4" (784mm)
32.8" (833m)
32" (814mm)
2.2" (57mm)
22" (560mm)
32" (814mm)
2.2" (57mm)
46.9" (1193mm)
TOP VIEW
43" (1094mm)
SIDE VIEW
43” (1094mm)
29.4" (784mm)
TOP VIEW
SIDE VIEW
46.9" (1193mm)
TOP VIEW
43" (1094mm)
dimlux.nl

14
EN
DIMLUX XTREME SERIES LED
14
EN
WARNING:
Risk of electrical shock To reduce the possibility of serious injury, always
take the proper precautions and unplug the xture before performing any
maintenance, repairs. moving or cleaning. LED xture surfaces may be hot.
Allow sufcient cooling time before handling Always allow for a cool down
period of at least 30 minutes before touching the LED xture.
WARNING:
Fixture and power supply are UL 1598 Wet Location rated but are
not designed to be submerged in water In the event that the module or
power supply enclosure becomes submersed, rst disengage the circuit
breaker, then unplug submersed components before proceeding to
remove from water.
SAFETY RECOMMENDATIONS AND WARNINGS
• Always adhere to the local rules and regulations when installing or using the LED fixture.
• Do not open or disassemble the LED fixture, it contains no serviceable parts inside.
Opening or modifying the LED fixture can be dangerous and will void the warranty.
• This product may cause interference to radio equipment and should not be installed near
maritime safety communications equipment or other critical navigation or communication
equipment operating between 0.45 - 30 MHz.
• Do not use the LED fixture when either the LED fixture or its power cord are damaged.
Replace the power cord only with original certified cords.
• Modifications to the cords can lead to unwanted electromagnetic effects, which makes
the product not comply with legal requirements.
• Do not expose the LED fixture to:
- (ambient) temperatures outside the specified range;
- dust and contamination;
- direct sunlight during use or HID light that could heat up the ballast.
• Always disconnect the LED fixture from mains before performing any maintenance.
• Always allow for a cool down period of at least 30 minutes before touching the LED
rails. Touching the LED rails when the fixture is lit or immediately afterwards can result in
severe burns!
• Do not use the LED fixture near flammable, explosive or reactive substances. Do not use
sulfur vaporizers or water misters.
• The installation and use of the LED fixture is the responsibility of the end user. Incorrect
use or installation can lead to failure and damage to the LED fixture. Damage to the
LED fixture and electronic circuitry as a result of incorrect installation and use revokes the
warranty.

15
EN
dimlux.nl
USER MANUAL
15
EN
CAUTION:
Regularly check the LED xture for dust or dirt
buildup. Clean if necessary. Contamination may
cause overheating and decreased performance.
Clean the outside of the LED xture using a dry or
damp cloth.
CAUTION:
To prevent eye damage, avoid looking directly at
the unshielded LEDs
CAUTION:
To reduce the risk of overheating or re, never
place operating xtures face down on a ush
surface Always allow for adequate ventilation of
xtures and power supplies
CONNECTING UP TO 160 FIXTURES TO A MAXI CONTROLLER
Please refer to the Maxi Controller manual for specific settings information.
FOR UP TO 40 FIXTURES
Connect OUT-1 to IN of the fixture
max. 40
max. 40
max. 40
FOR MORE THAN 20 FIXTURES
It is recommended to divide equally between ports OUT-1 and OUT-2 (up to 80 fixtures)
FROM 80 UP TO 160 FIXTURES.
Use a splitter and divide equally between OUT-1 and OUT-2
max. 40
max. 40
max. 40
max. 40
ART 2-366 Dimlux Splitter Interlink Cable

DIMLUX.NL
® DimLux is a registered trademark of
airSupplies
Engineered & Designed in Holland
www.dimlux.nl
Manual version 0621 2022
USER MANUAL
THE FUTURE OF GROWING
JUST GOT BRIGHTER.
EN
KNOWLEDGE BASE
Direct link: www.dimlux.nl/knowledge-base
Scan the QR-code to go to our online
knowledge base with more tutorials
and videos.
XTREME SERIES LED
XTREME SERIES LED +NIR
DIMLUX
dimlux.nl
This manual suits for next models
3
Table of contents
Other DIMLUX Lawn And Garden Equipment manuals

Popular Lawn And Garden Equipment manuals by other brands


Toro
Toro Ultra Buggy 2500-TS Operator's manual

Exmark
Exmark Pioneer E Series Setup instructions

Simplicity
Simplicity 1694402 installation instructions

KPC
KPC CKS380 operating instructions

Toro
Toro Reelmaster 5510 Series Operator's manual

Michaelis Maschinenbau
Michaelis Maschinenbau KM 40 Operating instructions and parts list


