DIT is TV ALIVE Basic User manual
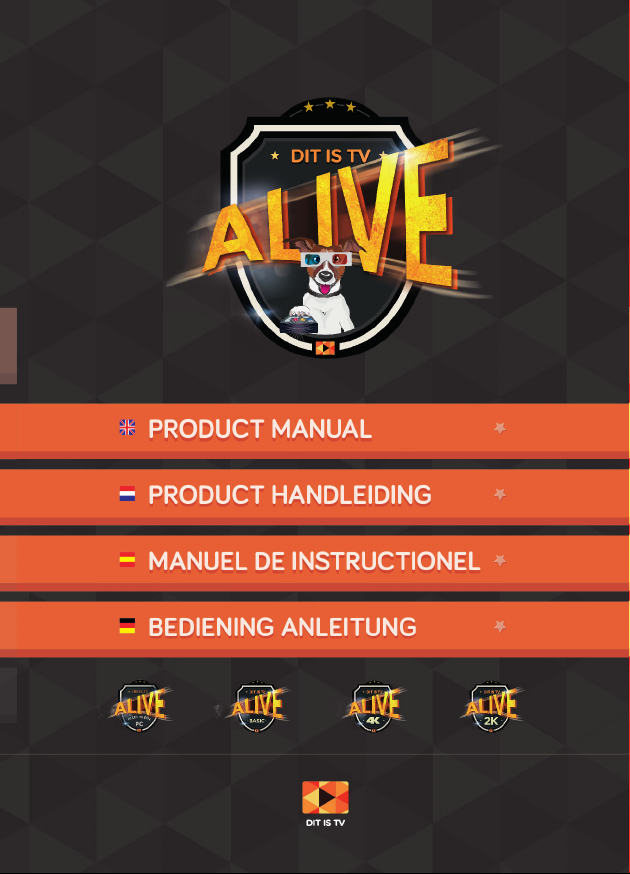
Inhoudsopgave - Contents
DIT is TV PC Stick - 4K/2K Box - DITisTV Basic
DIT is TV PC Stick - 4K/2K Box - DITisTV Basic
2
DIT is TV PC Stick - Connect - Set Up
Install DIT is TV - Install your own language - Activating Windows
Problem-solver - DIT is TV media app (XBMC)
4k/2k Box - Installing the Box
Installing the DIT is TV media app
Operating the device
Operating Apple, Android or a Windows Phone APP
Problem-solver
DITisTV Basic - Step 1: Connect
Step 2: Wireless internet
Step 3: Just a moment - Operation
Problems
DIT is TV PC Stick - Aansluiten - Set Up
DIT is TV installeren - Uw eigen taal installeren - Windows Activeren
Probleemoplosser - DIT is TV media app (XBMC)
4k/2k Box - De Box installeren
De DIT is TV Media app installeren
Bediening
Bediening Apple, Android of Windows Phone APP
Probleemoplosser
DIT is TV Basic - Stap 1: Aansluiten
Stap 2: Draadloos internet - Stap 3: Even geduld
Bediening
Probleemoplosser
6
7
8
9
10
11
12
13/14
15
16
17
18
Page
Pagina 19
20
21
22
23
24
25
26/27
28
29
30
31/32

Inhoudsopgave - Contents
Ordenador de ESTO es TELE - 4K/2K Box - DITisTV Basic
DIT is TV PC Stick - 4K/2K Box - DITisTV Basic
Contenidos - Inhaltsverzeichnis
3
ordenador de ESTO es TELE - Conexión - Set Up
lInstalar ESTO es TELE - Instalar su propio idioma - Activar Windows
Solucionar problemas - Aplicación de medios ESTO es TELE (XBMC)
4k/2k Box - Instalar el dispositivo
Instalar la aplicación de medios de ESTO es TELE
Manejar el dispositivo
Manejar Apple, Android o la aplicación de teléfono Windows Phone
Solucionar problemas
ESTO es TELE Basic - Paso 1: Conectar
Paso 2: Internet sin cable
Paso 3: Solo un momento: Manejo
Problemas
DIT is TV PC Stick - Verbinden - Einstellungen
DIT is TV installieren - Deine Sprache installieren - Windows aktivieren
Problemlöser - DIT is TV Medienapp (XBMC)
4k/2k Box - Verbinde die DIT is TV Deluxe 2K/4K
Die DIT is TV Medienapp installieren
Das Gerät bedienen
Bedienen der Apple, Android oder Windows Phone App
Problemlöser
DITisTV Basic - Schritt 1: Verbinden
Schritt 2: Kabelloses Internet
Schritt 3: Einen moment noch - Bedienung
Problems
33
34
35
36
37
38
39
40/41
42
43
43/45
46
47
48
49
50
51
52
53
54/55
56
57
57/58
59
página
Seite
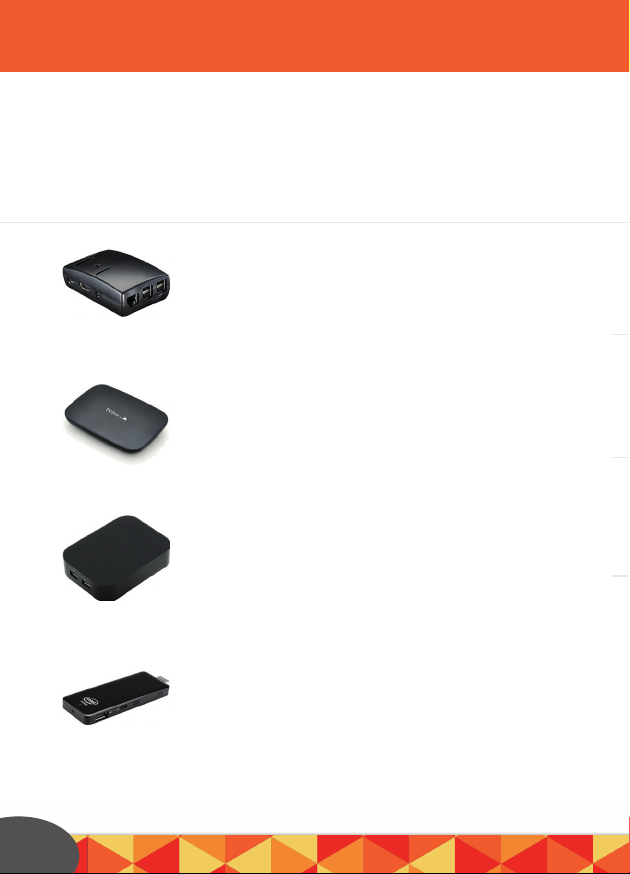
Product overview - Product overzicht - Visión
general del producto -Produktübersicht
4
Basic
2K Box
4K Box
All in one PC

Welcome
Welkom
Wilkomen
Bienvenido
Product overview - Product overzicht - Visión
general del producto -Produktübersicht
DITisTV - THISisTV
First of all we would like to wish you a great viewing experience with your new
THIS is TV product. In this guide we will guide you through, step by step, how
to install it. Have a great watching , listening & gaming experience! The DIT is TV
team.
Allereerst wensen wij u heel veel plezier met uw nieuwe DIT is TV product.
In deze welkomstbrochure leggen wij u stap voor stap uit hoe u alles aansluit.
Veel kijk - luister- en surf plezier gewenst! Het DIT is TV team.
Zunächst möchten wir dir mit deinem neuem DIT is TV produkt ein
tolles Seherlebnis wünschen. In dieser Willkommensbroschüre werden wir dir
Schritt für Schritt erklären, wie du alles anschließen kannst. Habe ein tolles
Seh- und Hörerlebnis! Das DITisTV Team.
Antes de nada nos gustaría desearle que tenga una estupenda experiencia con el
Nuevo ordenador Todo en Uno de ESTO es TELE ™. En este folleto de bienvenida
le guiaremos como conectarlo a su ordenador paso a paso. ¡Les deseamos una
maravillosa experiencia visual y auditiva! El equipo ESTO es TELE.
5
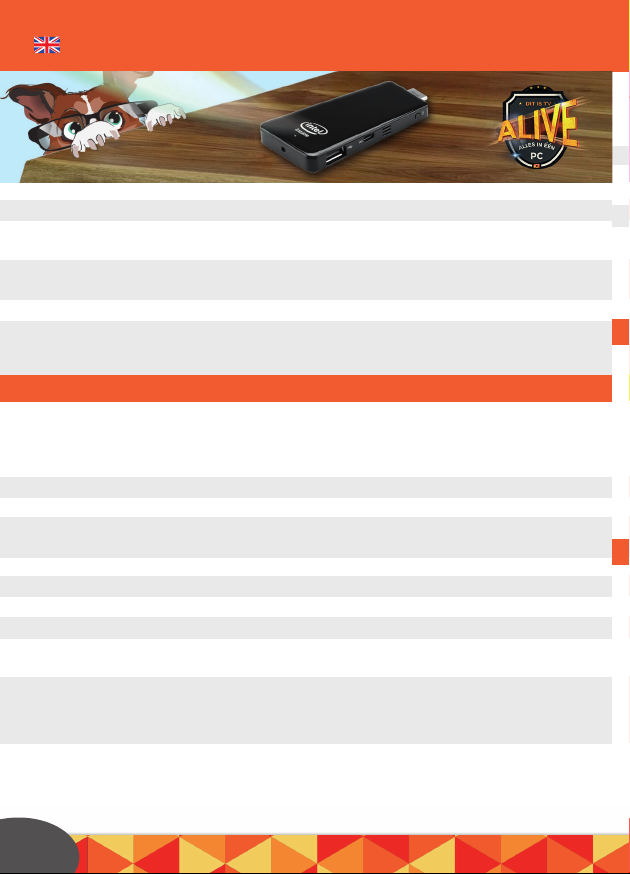
CONNECT - Connect the DIT is TV PC Stick
SET UP
Install DIT is TV
Put the USB receiver of the keyboard in the USB port
Put the HDMI ending in a HDMI port
(preferably the one which says DVI)
Put the 230V adaptor in the wall socket and the other end in the micro
USB port with the (=) sign
Press the power button for 3 seconds
Make sure that your TV is tuned to the right HDMI input.
Choose the correct HDMI (1/2/3/4) input on which your PC is connected
Set up the language to ENGLISH (in first instance). Subsequently select your own
region and language (app language) to your preference. You can also set up the
correct time zone here. N.b.: Eventually you can fully set up your own language.
Press NEXT
Press I ACCEPT
Give your new DIT is TV PC stick a name and select your favourite representation
colour
Select your WiFi network in the given list & fill in your password
Press *Use express settings*
Log in with your Microsoft account or make a new one
Your PC will now be set up for you. This will take +/- 10 min.
Subsequently it will restart automatically. DON’T turn off the electricity during this
process.
As soon as this is done you’ll see the ‘’colourful’’ windows home screen.
Tip: go to the website www.ninite.com and simply install all needed programs
for a new computer, like a virusscanner (we suggest Avast), iTunes, Flash etc!
1
2
3
4
5
1
2
3
4
5
6
7
8
9
6

CONNECT - Connect the DIT is TV PC Stick
SET UP
Install DIT is TV
Install DIT is TV
Install your own language
Activating Windows
Put the included MicroSD card in the DIT is TV PC!! BE AWARE: put the card in
the SDcard-slot with the WRITINGS ON TOP, seen from the Intel logo. Pay atten-
tion that you won’t put the card ABOVE the SD-card slot but exactly IN it!!
Open the DITisTV SD card
Press DITisTV
Press accept and then install
Press YES
Press *I accept the agreement*, then press ‘’Next’’
twice and after the installation press Finish
Now you’ll see the DIT is TV app on your deskptop.
Go to the start menu and press settings (picture of the gearwheel)
Click Time and language
Click Region and language
Click on the language you wish for (under languages) and subsequently press
*options* and then *download*
Now your language-pack will be downloaded
Tip: Are you having problems when installing your internet connection?
Check www.ditistv.com/help
The DIT is TV PC stick comes with a Windows ‘trial version’. It works just like
a complete Windows version but you will have to buy the product key via the
Microsoft Store yourself.
From the start menu, press ‘Settings’ (picture of the gearwheel!)
Click *Activate windows*
In case you have a key at your disposal you click the
*Enter Key*, if not then you click *Buy Key’* to buy yourself a key.
Tip: Via ALT + TAB you change the windows app
as soon as you use the DIT is TV (XBMC) app.
1
2
3
4
5
6
7
1
2
3
4
5
1
2
3
4
7
Problem-solver
In the corners the image disappears or is not fully visible on the screen.
Try another HDMI input on your TV, preferably the one which
has *DVI IN* next to it.
There’s no sound
Try another HDMI input on your TV, preferably the one which
states *DVI IN*.
The screen turns off after about 5 minutes.
This is the automatic screensaver. Press any button and the screen will reappear!
Your chosen language is not being shown after selection
Go to Windows update and make sure that the Microsoft.NET framework
Language Pack is being installed. - In case you can’t see it, it has already been
installed. Restart your PC and check the language settings.
Problems witch connecting to WiFi
Is your WiFi network slow or won’t it make a connection? Check our help page
under the heading *WiFi won’t connect or is very slow.*
Tip:
For more extensive help-items also check www.DITisTV.com/help
Moving images or videos which won’t play?
Manually select another stream by clicking on a movie/TV show, then
click *More…* and subsequently on *Play with* or *Choose source*
An app reports ‘’mistake in script’’. *cannot connect to server*
or *stopped playlist*
Select another stream from the streams’ list by clicking on a movie/series and
subsequently by clicking ‘’more’’ and then ‘’play with’’.
The XXX password is:
nsfw
1
1
2
2
3
3
4
5
DIT is TV media app (XBMC)
8
Problem-solver
DIT is TV media app (XBMC)
4K/2K - Installing the Box
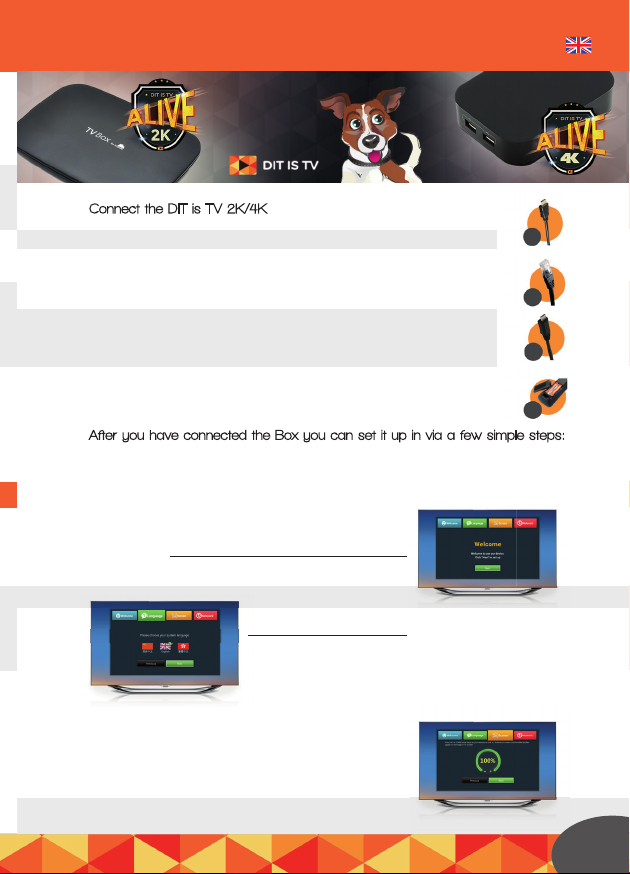
Connect the DIT is TV 2K/4K
HDMI cable/connection
Internet cable/connection. No internet cable? Then set up your WiFi
(see bottom of the page)
Power/connection
Connect the 230V adaptor
to the Deluxe and put it
in the wall socket!
Put the batteries in the remote control
After you have connected the Box you can set it up in via a few simple steps:
** In case being asked if you want to have Google checks on you apps
- press DECLINE **
Press Next
Choose English
Set up *overscan*: does the whole screen fit your
TV well? Continue. If not, use the upward and
downward arrowsto adjust the screen and press
Next.
2
A
B
C
D
A
B
C
D
Choose English
1
3
9

Connect the DIT is TV 2K/4K
Are you using wired internet?
Press Ethernet and then Finish.
Are you using WiFi? Press
WiFi and fill in your WiFi password.
Installing the DIT is TV media app
Put the SD card in the SD cardlock of the Box
Press the ‘’little robot’’
Press Appinstaller
Select *External Storage Card*
Press *downward arrow* and select the DIT is TV app; press OK
Press Settings
Select *Unknown Sources*- Press OK so it will
be ticked. Press OK if a notification appears
on your screen.
De-select *Verify apps*- make sure this is NOT ticked
Select *Unknown sources.* Press OK so it will be ticked.
Press OK if a notification appears
on your screen.
Now press the DIT is TV app again
Sequel installing the DIT is TV media app
Press install
Press Open
As soon as a pop-up appears, press install DIT is TV by using the downward
arrow of the remote control.
Press Install
Press Done
Press OK
Click the backward arrow to return to the main screen.
Scroll down, to the SPMC app - DIT is the DIT is TV media app!
Note: if *swipe down* appears on top of the screen,
4
Installing the DIT is TV media app
1
2
3
4
5
6
7
8
9
10
11
12
13
14
15
16
17
18
10
TIP:
is your remote
control not always
functioning very well?
Aim it directly to the Box,
without any obstacles.

Connect the DIT is TV 2K/4K
Installing the DIT is TV media app
Installing the DIT is TV media app
Press the ‘’mouse button’’ on the remote control
until a mouse arrow appears and use the arrows
to go to the OK button on top of the screen and press OK.
Again press the mouse button to operate everything normally again
Use the off button on the remote control
to turn off the Box.
Enjoy your viewing experience!
Tip: Are you facing any problems when installing your internet connection?
Check www.DITisTV.com/help
Are you going to use the remote control?
Here you’ll find the function of all buttons.
Red button (Android menu):
with this you’ll go to the Google Android menu
Green button: check the open apps
Blue button (settings): open the settings
Mouse button: with this you’ll activate the
mouse functions of the remote control
Stripes (context menu): with this you’ll open
the context-menu
House (home button): with this you’ll go
to the DIT is TV app or Home screen
Turned arrow (backward button): with this you’ll
go back inside the menu
OK button: with this you’ll open the play-menu
for pausing/stopping videos and for turning
on the subtitles in case it doesn’t show up
automatically. The DIT is TV software could also be operated with an iOS, Android,
Windows Phone app or a seperate keyboard; for this check our website.
Operating the device Remote control
Remote Controle the
DIT is TV media app
19
20
go back inside the menu
for pausing/stopping videos and for turning
TIP:
is your remote
control not always
functioning very well?
Aim it directly to the Box,
without any obstacles.
11

Operating Apple, Android or a Windows Phone APP
The DIT is TV software (SPMC/DIT is TV) can be operated with the Apple,
Android, Windows Phone app or a seperate keyboard or remote control.
Hereunder a short overview about the functions of the most used buttons.
`Backward’-button. With this you go back to
the last screen (you go 1 step back).
*Context-menu button* This will make a menu
appear in various apps so you can add items
to your favourites or you can watch the trailer
from a selected video. From the smartphone
app you can enter the context menu by
pressing the *gearwheels* in the top-right corner.
Subsequently press `Gesture Zone’. Press in the
middle of the screen and keep your finger pressed on it.
For more extensive help items check our helppage:
www.DITisTV.com/help
Stop playing:
When you use a keyboard without
a stop button, press OK while playing
and then press the stop button which
will appear on the screen.
MENU Esc <-backspace
back
c
Smartphone app
Backward
button
Navigation
arrows
Stop Press
forward/rewind
Play/Pause
Enter/
OK
Play menu
button
12

13
Operating Apple, Android or a Windows Phone APP
Press
forward/rewind
Enter/
OK
Play menu
button
Problem-solver
Problems with moving images or videos which won’t play?
Manually select another stream by clicking on movie/series, then on *More…’*and
finally on ‘’Play with/Select source’’. Or press the context menu button instead of
OK when selecting a movie or Tv show episode.
An app constantly displays *error in script, cannot connect to server or playlist
stopped*
Restart the DIT is TV Box one time.
In case the Box is connected to the router with a cable, try another port on your
router first and then restart the router
Select another stream out of the list with streams by clicking on a movie/series,
then on *more* and finally on *play with..*
Problems with connecting to WiFi
Is your WiFi network slow or does the Box still not connect?
Check our help page under the heading *WiFi won’t connect or is very slow*
The Box keeps on restarting or shows a black screen.
Press the (blue) settings button on the remote control and then press *Display* on
the screen.
Subsequently press the *downward arrow¡* and OK (puts HDMI auto detective on
OFF).
Press *HDMI output mode setting* and subsequently select 1080P 24Hz. This
should solve the problem.
Reset the Box (in case your Box has a reset button!)
Turn the Box off and turn it around. Keep the reset button pressed with e.g. a
paperclip. Turn the Box on, while the reset button is still pressed. Only release the
paperclip when you see the visuals on your screen again.
Set up Audio (surround) -> only if you know what you’re doing!
Press the (blue) settings button on the remote control.
Press *Advanced* Press the *downward arrow* on your
remote control to select the correct audio settings.
1
2
3
4
5
6
A
B
C
D
E
F
G
H
I
J
Problem-solver
Black rims on the screen while playing.
Do you see a very thin black rim under, above, on the left or the right of the video
while playing? Press OK on the remote control and then on the ‘’stripes’’ which
appear in the rim on the screen.
Now press *videosettings* and put the *display modus* on 16:9 and possibly
select *set up standard for all videos.* The black rims should be gone by now.
Enjoy your viewing experience!
7
K
14
Problem-solver DIT is TV BOX - BASIC
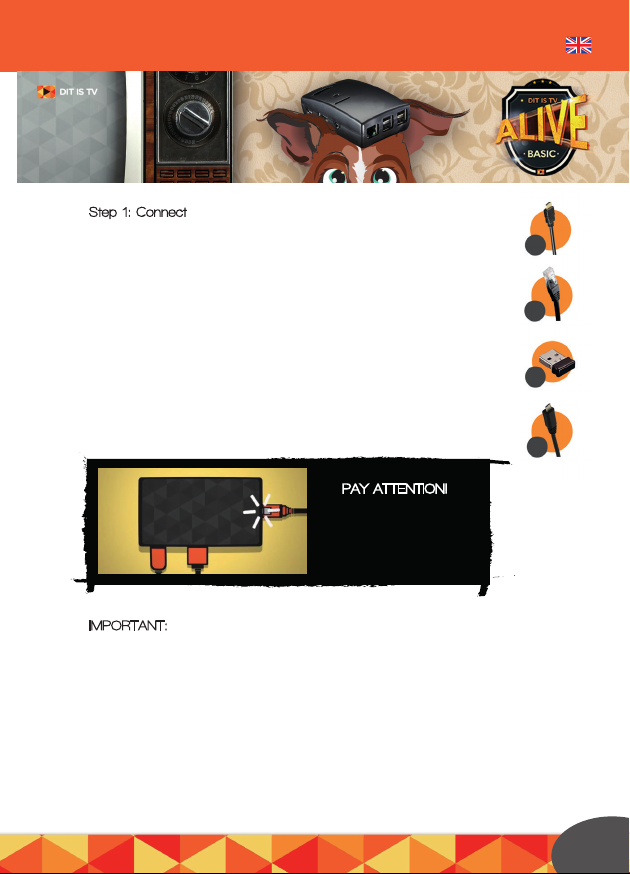
Step 1: Connect
HDMI-cable.
Internet cable or the Wifi extension for wireless internet,
you put these in a USB port on your DIT is TV Box.
When you have bought a remote control or keyboard with us,
take the USB receiver out of the battery hatch and put it in
a USB port of the Box.
Connect the 230V adaptor to the Box and put it in the wall socket.
IMPORTANT: When you press something you’ll hear a click. Always wait if the item
or the stream is being loaded. Don’t press the same thing again (for a few times);
in this case the Box will execute all sorts of things and it freezes. If this happens,
remove the power cable. Only do this when the Box completely freezes.
-> In case you use internet via a cable, continue with the section
*Just a Moment* on page ………???
1
2
3
4
1
2
3
4
LET op!
PAY ATTENTION!
connect the cables
in the following
specific order
15
Step 2: Wireless internet
When you make use of wireless internet and the by us delivered wifi extension,
follow the next steps:
Wait +/- 1 minute until the Box has started,
after you see the start-up screen, before you continue.
Press settings.
Press system settings.
Go to connections with the arrow on your remote control.
Now you’ll see an overview of all the available wifi networks.
Press the arrow to the right on your remote control.
Select your network and press OK.
Subsequently press connect, fill in your wifi password and press OK.
The Box makes a connection with your WiFi network. Do you see *status:ready*
and a star on the right of your network? Then the Box has been successfully
connected.
Still having problems with your WiFi? Check www.ditistv.com/help for the solution!
Do you see a colourful screen with apps?
Then you Box has successfully started up.
Subsequently the Box will download updates,
this will take about 15 minutes.
After these 15 minutes the Box
is ready for use.
PAY ATTENTION:
DON’T use the Box during these 15 minutes! You run the risk that
the software will be damaged.
We already wish you a great watching experience but before you continue
we would like to point out our tips and concise problem solver!
16
1
2
3
4
5
6
7
8
Step 3: Just a moment

Step 2: Wireless internet
Step 3: Just a moment
DIT is TV BOX - BASIC
Turning on:
You can permanently leave the Box on. It’s been designed to stay on and only
uses 2 Watt. However to guarantee an ideal functioning we advise you to restart
the Box once a week via the option -> restart. Would you still like to turn off your
Box every day, then it will only turn on when the power cable is being removed
and put back again.
The DIT is TV Box can be operated with the standard remote control of your TV
(in case your TV supports this), with an Apple, Android or Windows smartphone,
with a keyboard or a seperate remote control.
`Backward’-button: With this you’ll return to
the last screen (you go one step back).
Context-menu button: This will make a menu
appear in various apps so you can add items
to your favourites or watch a trailer of a selected
video. From a smartphone app you
can get to the context-menu by pressing
the *gearwheels* in the top right corner.
Subsequently press `Gesture Zone’. Press
in the middle of the screen and keep your
pushed finger on it.
Stop playing: When you use a keyboard
without a stop button, press OK while playing
and then press the stop button which will appear
on the screen.
Questions?
Do you have any questions now? Call our service office
in Holland via 0900-3484788 and in Belgium via 0900-40430.
1
Operation
Smartphone app
Backward
button
Navigation
arrows
Stop Press
forward/rewind
Play/Pause
Enter/
OK
Play
menu
button
17
Problems
Problems with internet on your DIT is TV Box?
Check the WIFI password: the Box only accepts passwords with letters and num-
bers, punctuation marks are NOT accepted.
Is the wireless network you are trying to connect secured? The Box namely
doesn’t connect to unsecured networks.
Often the Box shows an unjust error after a successful connection.
Check the network list if the Box is not as yett connected. - This is shown by the
¡°status:ready¡± notification.
Go to settings - system settings - Network and make sure that the option ¡°Con-
nect `thethered’ wireless accespoint’’ is NOT activated.
For more extensive help items also see our help page:
www.DITisTV.com/help
18
1
2
3
4

Problems
Aansluiten - DIT is TV PC Stick aansluiten
SET UP
Stop de USB ontvanger van het toetsenbord in de USB poort
Stop het HDMI uiteinde in een HDMI poort
(bij voorkeur die waar DVI bijstaat)
Stop de 230V adapter in het stopcontact en het andere uiteinde in de
micro USB poort met het (=) tekentje
Houdt de powerknop 3 seconden ingedrukt
Zorg ervoor dat uw TV op de juiste HDMI ingang is afgestemd.
Kies de juiste HDMI (1/2/3/4) ingang waarop u de PC aangesloten heeft
Stel de taal (in eerste instantie) in op ENGLISH. Vervolgens selecteert u uw eigen
region en als taal (app language) uw eigen taal. Stel eventueel de correcte
tijdzone in. N.b.: Uw volledige eigen taal kunt u later installeren
Druk op NEXT
Druk op I ACCEPT
Geef uw nieuwe DIT is TV PC stick een naam en selecteer
uw favoriete weergave kleur
Selecteer uw WiFi netwerk uit de weergegeven lijst & voer uw wachtwoord in
Druk op *Use express settings*
Log in met uw Microsoft account of maak een nieuw account aan
Uw PC wordt nu voor u ingesteld. Dit duurt +/- 10 min. Vervolgens start
deze vanzelf opnieuw op. Schakel de stroom NIET uit tijdens dit proces.
Zodra dit klaar is ziet u het “kleurrijke” windows startscherm.
Tip: ga naar de website www.ninite.com en installeer eenvoudig alle
benodigde programma’s voor een nieuwe computer, zoals een
virusscanner (wij raden Avast aan) iTunes, Flash, etc!
1
2
3
4
5
1
2
3
4
5
6
7
8
9
19

DIT is TV installeren
Uw eigen taal installeren
Windows Activeren
Stop het bijgeleverde MicroSD kaartje in de DIT is TV PC!! LET OP: stop het
kaartje met de BESCHREVEN kant naar boven ten opzichte van het Intel logo in
het SDkaart-slot. Let hierbij op dat u het kaartje niet BOVEN het SD-kaart SLOT
duwt, maar precies erin !!
Open de DITisTV SD kaart
Druk op DITisTV
Druk op accepteren en vervolgens op installeren
Druk op YES
Druk op “I accept the agreement” en vervolgens 2X op Next
en na de installatie op Finish
U vindt de DIT is TV app nu op uw bureaublad.
Ga naar het startmenu, druk op instellingen (afbeelding van tandwieltje)
Klik op Time and language
Klik op Region and language
Klik op de gewenste taal (onder languages) en vervolgens
op “options” en daarna op “download”
Uw taal-pack wordt nu gedownload
Tip: Heeft u problemen met het installeren van uw internetverbinding?
Kijk dan op www.ditistv.nl/help of www.ditistv.be/help
De DIT is TV PC stick is voorzien van een `probeerversie’ van Windows.
Deze werkt zoals een volledige versie van Windows, maar het is wel de bedoeling
dat u zelf nog een productsleutel aanschaft via de Microsoft store.
Vanuit het startmenu, druk op `Instellingen’ (afbeelding van tandwieltje!)
Klik op *Activate windows*
Indien u beschikt over een (aangekochte) sleutel, klik op
“Enter Key” anders klikt u op “Buy Key” om er een aan te schaffen.
Tip: Via ALT + TAB verandert u van windows app
zodra u de DIT is TV (XBMC) app gebruikt.
1
2
3
4
5
6
7
1
2
3
4
5
1
2
3
20
This manual suits for next models
3
Table of contents


