DMW 240 User manual

Frozen Beverage Dispenser
Models 240, 440, R400
Operations Manual
2124 0 Fo ster Roa d Bu ildi ng 4A , Sp ring, T exa s 77 388
281-67 7- 670 0 | www.dri nk ma chi new ork s.c om

DMW Dispenser Operations Manual 2
All information contained in this publication is proprietary property of Drink
Machine Works LLC. Any reproduction or use of these instructions, drawings,
or photographs without the written permission of an officer of Drink Machine
Works LLC is forbidden.
Copyright 2019, Drink Machine Works LLC
All rights reserved. Printed in the United States of America.

DMW Dispenser Operations Manual 3
Legal Notice
Drin k Mach in e Works, LL C mak es no w ar rant y or rep re sentation eith e r
exp ress ed o r imp li ed of a ny k in d reg ard ing thi s m at eria l, in cluding, bu t n ot
limit ed t o, the impl ied w a rrant ie s of it s q uality , perfo rmance , market abilit y,
and fit ness f or a parti cul a r purpos e. Drin k Machine Wor ks, L LC sha ll n ot b e
liabl e for errors contain ed he rein or for inci de ntal conseq uentia l dama ge s in
conn ect ion w ith the furni shing , pe rforman ce, or use of t hi s mat eria l.
This docu m ent c ont ains p rop rie tary in formation which i s pr ote cted b y
cop yright wi th all ri ghts reserv ed. Un d er th e Cop yright L aws, no part of th is
docum en t ma y be photocop i ed, rep rodu c ed, or t ran slated in to an oth er
languag e with out the p ri or w ritt en c onsent of Drink Machin e W orks, L LC. The
informati on cont ained in this docu men t is sub ject to change wi th out noti ce.
DRINK MACHINE WORKS, LLC
Limited Warranty
Drink Machin e Works, LLC w arrant s to Original Purch ase r/User the Dri nk
Machin e Works froz en b ev erag e di spens er f rom the dat e of i nvoi ce to b e free
from d efect s in f act ory w ork man shi p o r materi al s as f ollow s:
A) Ori gi nal Comp res so r
B) Ori gi nal Part s
C) Lim it ed Labo r
Drink Ma chi ne W or ks agrees to p erf orm full labo r warranty at n o cha rg e for
servi ces on Ori gi nal Purcha se r/User’s be ve rage di sp ens er contin gent u pon:
1) Ori gi nal Purch ase r/U ser perf orm s ord i nary cl eanin g and mainten anc e on a
regul a r basis as descri bed i n th e Op erati ons M anu al an d as outli ned .
2) Original Pu rch ase r/U ser provid es proper p ower, 120 -vol t , 20 -a mp,
dedi cat ed circu it and p roper ven ti l ati on a s descri be d in th e Op erations
Manual. Original Pu rcha se r/U ser und er stands that fai lu re to p rovide t he
prop er p ow er an d v enti l ati on will voi d t he w arrant y as set forth h er ein.
3) Ori gi nal Purch ase r/U ser agre es and u nderstan ds that da mag es caused to
the di sp enser a s a r esul t of opera tor, agent , o r custom er n egl i gen ce sh al l
not b e co vered b y th e wa rran ty as set f orth her ein. Exp en dable part s are
excl ud ed from the warr anty as s et forth herei n. S uch p arts shal l i ncl ude, but
not b e li mi ted t o rear seals , O-ri ng s, fi l ter s, gask ets , li ght bul bs, sign s,
merch an di sing materials, an d m ateri als and/ or tool s neede d to perform
servi ce.

DMW Dispenser Operations Manual 4
Origi nal Pu rch aser/Use r und er stan ds t hat the wa rran ty s et f orth h erein do es
not ap pl y to d ama g e to th e di sp ens er o ccurring i n t ran sit , or damage caus ed
by unauth ori z ed al te rati ons, fi re, ac cident s, a rti ficiall y gen erat ed el ectri cal
current s, A cts o f G od, mi su se or ab use, or b y an y ot h er cau se wha tso ev er
othe r than d efect s in fact ory w or kmanshi p or ma terial . Fu rther, th e
war rant y does not ap pl y to da mag es f or l oss of product s, ref rig eran t,
prop ert y, o r loss o f i ncome or p rofits du e t o the malfu nctioni ng of th e
dispens er , nor to t ransport ati on ( shi ppin g), or costs to and fr om fa ctory or
repa ir c ent er, or sp eci al charges of stat e sale s or othe r ta xes. Drink Machi ne
Work s L LC rese rves th e ri ght to ex chang e th e di spens er wi th an equi val ent
or upg ra ded d ispen se r in order t o pr ovide Origi nal Purch as er/User wi th the
maxi mu m servi ce va l ue an d to min imize downtime fo r Original
Purch a ser/ Us er. Th e w arr ant y for th e di spen ser i s non -tra nsf er abl e and
appl i es to O rigi nal P urchaser/Us er.
All decisi on s regardi ng the exis tence o f defects in mat eri al or workmanshi p
or other caus es sh al l be mad e by D rin k Machine Works, LLC . an d sh al l be
bindi ng upon the pa rti es .
The f or egoi ng l i mi ted w arrant y shal l not b e enlarged or a ffe cted b y, and n o
liabil i ty or o bl igati on sh al l ari se fro m, Drink Ma chi ne W or ks, LLC . r end eri ng
of techn ical or other advi c e, or of s ervi ce .
All techni c al i nqui ries to our facto ry m ust b e acco mpani ed b y you r unit s eri al
numb er.
The s eri al numb er i s l ocated on t he rea r of t he u ni t on the d ata pl at e and
engr aved on the u pp er ri ght si de of t he dispen se r.

DMW Dispenser Operations Manual 5
Table of Contents
Introduction:
Legal Notice................................................................................................. 3
Limited Warranty .........................................................................................3
Preliminary Inspection ..................................................................................6
Installation Guidelines ..................................................................................6
LID Safety Switch ........................................................................................7
SETUP AND OPERATION ............................................................................8
Initial Startup Instructions ............................................................................8
Parts, Assembly, and Lubrication ................................................................. 10
Faucet Assembly......................................................................................... 11
Beater Bar Assembly................................................................................... 12
Thickness and Consistency .......................................................................... 13
Maintenance Schedule ................................................................................. 13
CLEANING AND SANITIZING PROCEDURES............................................ 15
Cleaning Equipment and Supplies ................................................................ 15

DMW Dispenser Operations Manual 6
Preliminary Inspection
As soon as the Drink Mach in e W orks uni t i s del i vered, Un pack the uni t an d
inspect al l c ompon ents to en sur e tha t the equi pment ha s not b een damage d
in tran si t.
NOTE : If any dama ge i s app ar ent , i nf orm th e ca rri er imme di atel y. Drink
Machin e Works as sumes n o responsi bi li ty f or any pr oduct a fter i t lea ves th e
manu fa ctu rer and cannot assi st wi th da mag e claim s subm itted t o th e carri er.
Damage cl ai ms mus t be fil ed d irectl y wi th th e freight c ar rie r.
Installation Guidelines
Befo re unpa cki ng and i nstalli ng the un it , ma ke su re that th e i nstallation
surf ace i s s oli d an d wi ll support th e full weight of the m ac hi ne and mi xt ure.
Wh en f ul ly o p erati on al, t h e t otal w ei ght of a d ou b l e- fl avo r u ni t i s
approxi ma tel y 26 5 l b. Ch oose a highl y vi si bl e and a ccessi bl e l ocati on t o
display th e unit . Th e D MW di s pen ser i s designed to b e vi su al l y appeal i ng and
is a majo r c ont rib uto r to cu st omer att ra cti on an d sal es.
IMPO RT ANT : Pl ac e ea ch u ni t on i ts own 20 -amp, 120 -vol t dedicat ed
brea ker. Do not atte mpt t o use th e ma ch ine on a sh a red b rea ker. In
addi ti on, m ak e su re t hat the p ow er su pply requir emen ts shown on the
nam eplate match th e l ocal p ower sup pl y r equi rem en ts.
DMW di sp en se rs ar e ai r- co oled units th at r equi re ad equate ai r sp ace
clea ran ce a way fr om an y adj a cent wal l or equi pm ent . M ake su re that th e
locati on y ou ch oo se p rovi d es adequ at e spa ce f or air circulation around the
uni t.
NOTE : Avoi d l ocati ng the uni t in any area w here h eat f rom dir ect sun light,
cooki ng facil i ties, or other sou rc es ma y el evate the t empe rature.
NOTE : Th e to p c ov er mu st b e pl ac ed o n th e di spen s er to start t he machi ne
and acti vat e th e b eat er b ars .

DMW Dispenser Operations Manual 7
LID Safety Switch
Your DMW disp en se r wi l l b e equ ipped wit h a standard saf ety featu re th at
prev ent s th e uni t f rom functioni ng whe n th e hoppe r lid i s rem oved. Th is
featu re m eet s Unde rwri ters Labo rat ory (UL) r equi rement th at s ee ks to
prot ect operat ors from a cci dental injury. Note t he lo cat ion of th e d ri ve
moto r ki ll swi tch i n the pi ctu re bel ow.
CAUT IO N: Do not t amp er wi th or di sable th e d riv e moto r kill swi tch .
Seri ous injury may result .
LID Safety Switch

DMW Dispenser Operations Manual 8
SETUP AND OPERATION
Initial Startup Instructions
To us e th e di sp ens er f or th e fi rst
time or t o re sta rt the u ni t aft er
clean in g, ob serv e t he f ollowin g
procedu re s:
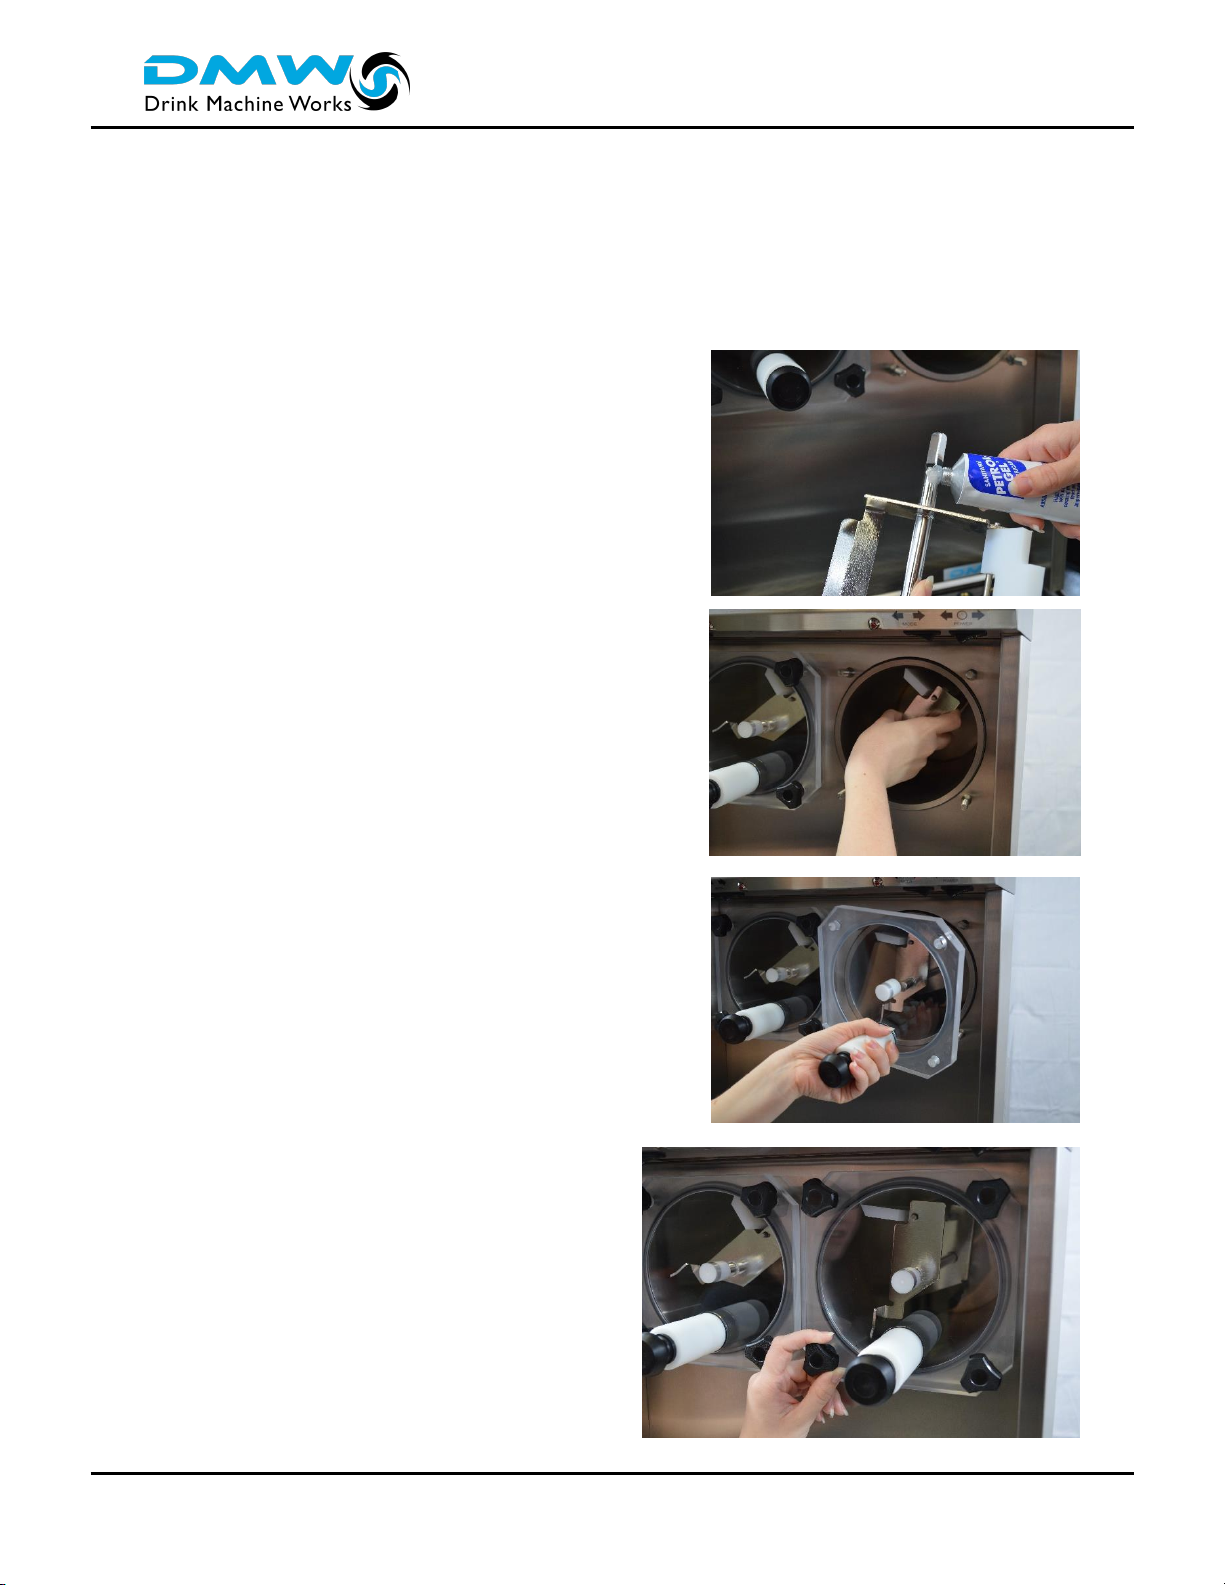
1. Remov e th e di spen s er li d s and
set th em aside.
2. Ma ke su re tha t a ll c ont rol
swit che s are i n th e cent er p osition
(OFF)
3. Pou r produ ct i nt o th e h opp er s.
4. Pl ace t he li d s on t he m achin e.
5. Te st th e cont rol switch i n the
CLEA N po sition.
NOTE: Wi th t he c ont rol s set i n th e
CLEA N p osi ti on, th e driv e mot or
turn s th e b eat er ba r and th e
comp ressor rem ai ns off.
6. Pl ace t he con trol swi tch i n th e
AUTO p osition. Al low th e unit t o
run i n FR EEZE m ode until the
comp ressor st ops .
7. Sam pl e th e pr od uct f or ta st e
and thickn ess.
8. If n ec ess ary , us e th e thi ckn es s
adjustm ent screw to adjust th e
mach in e fo r optimal p roduct
thi ckn ess. The product sh oul d be
slushy —neithe r as th in as jui ce,
nor as t hi ck as i ce cream.
NOTE : CH ILL i s an extended
defrost m od e that al l ows th e un it
to remain un at tende d for more
than 12 h ou rs . It w il l mai nt ain the
produ ct a t a ref rigerat ed
temp erature. This m od e is en ergy
effi cien t an d retai ns th e pr odu ct
freshne ss .
NOTE : You r di sp enser wil l be
equi pp ed wi th a l ow -l evel i ndicato r
light . Design ed t o activate th e li ght
when produ ct i n th e h op p er falls
belo w a ce rtain l evel. However,
addi ng mix b ef ore the l i ght goes
off will i ncreas e producti on a nd th e
rec overy rate o f you r un it.
9. When th e resul ts o f all tests an d
checks a re s ati sfa ct ory, th e unit i s
read y for operat ion.
10. Pe rform a fi nal check , ret urn
the switche s to AU TO, and wi p e
down the ou tsi d e of t he uni t.
Low Level Indicator
Light

DMW Dispenser Operations Manual 9
OFF POSITION
AUTO POSITION
CLEAN POSITION
CHILL MODE

DMW Dispenser Operations Manual 10
Parts, Assembly, and Lubrication
The D rink Ma chi ne Works un it is shippe d full y assembl ed a nd i s re ad y for
ini ti al sta rtup and o per ati on . Th e fol l owi ng instruct ion s p ro vi de st ep -by-st ep
gui dance for t rouble shooti ng an d main tenan ce p ro cedu res under n orm al
operati on c ondi ti on s.
1. Lubri cat e th e b eater ba r shaft t h oroughl y.
IMP ORTANT: Fail ur e to l ub ricate p ar ts
results in d amage t o th e machi ne. Petro Gel
or oth er sanit ar y l u bri can ts ar e
rec ommend ed f or m achi ne l ubri cati on .
2. In sert th e sh aft i nto th e whi t e rear s eal
moun t i n th e back of th e cyl i nd er.
3. Ligh tl y push and rotate the sh aft unti l i t
fully en gag es t he drive coupli ng i n th e r ear
of th e cyl i nde r.
5. Fi t th e O-ri ng i nto th e g roove of t he
faceplate.
6. In stal l t h e facepl ate as fol l ows:
a. Align the f ace pl ate bushi ng wit h th e
shaft of th e b eater bar.
b. Slide the faceplat e over the four stud s.
IMPO RT ANT : Do N OT lu bri cat e th e
faceplate O-ring. The f ace pl ate shoul d fi t
snugl y t o th e c ylin der wi thou t sl i ppage.
c. Tighten the fa cepla te b y ev enl y tur ni ng
all four fac eplat e kn obs cl oc kwi se .
NOTE : Ti ght en th e fa ceplate kn obs ONL Y b y
hand. Do not overtighten the knob s.

DMW Dispenser Operations Manual 11
Faucet Assembly
Complet e th e fol l owin g step s t o ass embl e the fau ce t.
1. Lub ri cat e t he pl un ger O- ri ng tho rou ghly.
2. Sl i de the sp rin g ont o th e plunger sh aft .
3. Ins ert the plung er i nt o th e fau cet b ody.
NOTE: Lu bri cat e th e pl un ger O- ri ng wit h Pet ro G el or other sanitary
lubricant i f th e pl un ge r do es n ot sl i de s moothl y.
4. Pu sh th e th readed end of the f au cet plu nge r th rough th e smal l hole on
the fron t of the fauc et b ody .
5. Screw the black fauc et kn ob ont o th e assembl y .
NOTE: Ti ght en f au cet parts by hand ON LY. D o not ov erti ghten p art s.
6. Screw the fauc et onto th e fac epl at e unti l i t i s tight. Mak e sure that th e
exi t hol e of th e fau cet f aces d own .

DMW Dispenser Operations Manual 12
Beater Bar Assembly
Ass embl e the beat er bar a s fol l ows:
1. Sl i de the scrap er bl ad e sp ring ont o
the sc rap er blade r od .
2. Whi l e h ol di ng th e sp rin g on t h e
scrape r bl ade rod, hook th e l arge en d o f
the sp ri ng aroun d the beate r bar f rame
and i nsert i t i nto th e fr ont m oun ti ng h ol e.
3. Rotat e th e sc rap er blade un ti l i t
poin ts st rai ght u p.
4. Pu sh th e s crap er blade r od i nto t he
front m ountin g hole u nti l the sp ri ng is
comp ressed.
5. Ins ert the opp os i te end of th e rod into
the rear mounti ng hol e.
NOTE: To d is assem bl e the b eate r bar,
re verse St eps 1 t hrou gh 5 .

DMW Dispenser Operations Manual 13
Thickness and Consistency
Product t hi ckn ess is control l ed with a n elect ron ic sma rt l ogi c sy stem.
To I NCR EAS E th ick ne s s : turn th e con tr ol s crew gently tu rn C LOCKW IS E.
To D ECR EAS E th ick ness : t urn the c ontrol screw gently turn
COUN TER CLOCK WISE .
Maintenance Schedule
Perf orm regul ar mai nten an ce p rocedu re s acc ordi ng to the S tan dard Op er ati ng
Proc edu res l i sted i n Tab le b elow.
Daily
F il l t h e d i spe nse r & c y c le t h e b e ve rage
W ip e do w n t h e f r o nt o f t h e d i spe ns er
D efro st - M i d ni g h t u nt i l o p e ni n g t i m e
Weekl y
Clean - foll ow p roc edu res f or weekl y cl eanin g
Monthl y
Deep Clea n - f ollow cl eani ng in stru cti on s li sted in
Operati on Man ual.
Insp ect th e uni t f or leaks.
Insp ect th e O-ri ng s and s eal s for def ormati on s or
tear s.
Lubricat e a s n eed ed.
Insp ect th e b eat er bar ass embl y an d bl ade sh arpne ss
Eve ry Si x Months
Repl ac e th e O- ri ng s and che ck th e fauc et, pl unger,
rear seal, and fac epl ate.
Adjustment Screws
TOP –Left side
Bottom –Right side

DMW Dispenser Operations Manual 14
Drink Ma chi ne W or ks di spen sers are d esigned to withsta nd r igorou s us e.
When o perat ed an d s ervi ced as sp eci fi ed, th e di spen ser wi ll p rovi d e man y
years of t rou bl e- free op eration.
CAUT IO N: P ow er f ai lures and su rges may damage y our mach ine. W h en you
susp ect p ot enti al l y dama gi n g c ondi ti ons i n y our area, turn o ff th e p owe r to
the un it unti l the danger pa sses.
CAUT IO N: N EVER att empt to fr eeze pl ain wate r or any mi xtu re c ont ai ni ng
artifici al s weetener in a D rink Ma chi ne W ork s di sp enser. In additi on, pou ri ng
extremely h ot wate r (12 0ºF or h ott er) i nt o th e cyl i nder wi ll cause
irreve rsible equipment damage. D am ag e cau s ed by i mp rop er u se i s n ot
cove red un der wa rr anty .
WAR NI NG: W hen i nst all i ng, cl ean in g, a dju sti ng, o r op era ti ng t hi s m a chi ne,
do not pl ace any bo dy part or oth er obj ect i n to the hopp er wh ile th e ma chi ne
is i n o perati on . D oi ng so can caus e s eri ous in ju ry.

DMW Dispenser Operations Manual 15
CLEANING AND SANITIZING PROCEDURES
For p rop er o pe rati on , equ ipmen t l ong evi ty, an d enhan ced cust omer
sati sfa cti on, it is important t o perf orm all re com mended cleanin g and
sani ti zi ng pr oc edu res f or the Drink Machi ne W ork s Uni t. Ba si c cl eanin g
procedu re s shoul d b e pe rformed weekl y and d eep cl ean ing pro cedur es should
be perfor med m onthl y.
NOTE: Th e f oll owi ng w ee kly cleani ng procedur es en su re compl i ance wit h
NSF I nt erna tion al ( N SF) sa nit iz ing r equ i re me nts f or th e D ri nk M ach ine W ork s
syst em. F ai l ure t o fol l ow th e pr oc edu re a ffects the p roduct quali ty, damag es
the di sp enser , and voi ds th e wa rranty.
Cleaning Equipment and Supplies
To pe rf orm f ul l cl eani ng and sani ti zi ng proc edu res
for th e D rink Ma chi ne W or ks Uni t, y ou w il l need
the fol l owi ng equi pmen t and su pp lies:
•two 2-oz pack ag es of St era -Sh een ®
sani ti zer and clean er (or equi valent)
•one 5-gal san it izi ng container or buck et fo r
drai ni ng and sani ti zing the disp en ser
•clean tow els
1. Pl ace cont rol s witch es to th e CL EAN posi ti on 3 0
mi nu tes b ef ore c l eani ng .
2. Pul l fau c et pl un ger , empty all p rodu ct in to an
open contain er an d D ISCA RD .
WARN IN G: Product r emo ved cannot be re-used i n
the di spens er!
3. P lac e c ont rol s wi tch es to the OFF po siti on .
4. Pou r 2.5 gal lons of cool (60 -80 F) ri nse wa ter
into th e h opp er per side .
5. Wi th a clean t owel , wipe th e h opp er clean of
an y bu il dup of p rodu ct o r d ebri s .
WARN IN G: DO NOT i ns ert fi ng er i nsid e t he i nl et
hole of the h opp er .
6. Pl ace t he lids on machi ne .
7. Plac e the c ont rol switche s to the CLE AN p osi ti on
and agitat e for 2 mi nutes , th en swi tch t o th e OFF
posi ti on.
8. Drain an d di sp ose of al l ri nse wat er. (R epeat i f
nec essary, to r emo ve debri s)

DMW Dispenser Operations Manual 16
9. Di ss olv e on e 2 oz pac ket o f St era -She en G reen Label
in 2 g al lons of hot ( 100 o F) wat er .
11. P our t he s ani tizi ng solu ti on in to th e h opp er an d
clean the h opp er , l ev el p rob es, an d inl et h ol e wi th a
clean t ow el .
12. Pl ac e control swi tch es t o C LEA N p osi ti on, p ut l i d s on
mach in e and agitat e f or a t l east 4 mi nutes.
WARN IN G: En su re th at N O Dri nk s can b e serv ed at this
time
13. Pl ac e control sw i tches to OFF position and d rai n all
sol uti on.
14. R emo ve f ac epl at e by turni ng th e four kn ob s i n a
counte r-clo ckwi s e dir ecti on un til they are re mov ed from
the studs.
15. Pull the fac epl at e away f rom the f ront of the m ac hi ne
and pull the beat er bar to remove from the cyl inder.
(Beate r Bar m ay b e hard to remov e du e t o pr evio us
lubric ant )
16. Un screw the f au cet a sse mbl y f rom t he f ace pl ate a nd
disass emble the fa u cet b od y by unsc rewi ng the bl ack
knob f rom t he plung er . ( R efer t o Faucet A sse mbl y f or
help)
17. Di sa ssembl e th e b eat er b ar. ( Refe r to
Beat er Ba r A ss embl y for help)
18. Wa sh all removed p ar ts (inclu di ng d rip
tray) i n w arm (100 *F) sanit izing sol ut ion and
all ow t o ai r d ry.
20. R eas sem bl e th e di spense r with al l parts .
(Ref er t o Parts , Ass emb ly and Lu bri cati on f or
help)
2 1. R efi ll t he d i sp e ns er w it h p rodu ct .
22. Pl ac e th e l ids on ma chi n e an d set cont rol swi tch es to AUTO p osi ti on .
This manual suits for next models
2
Table of contents