manuals.online logo
Brands
  1. Home
  2. •
  3. Brands
  4. •
  5. Eaton
  6. •
  7. Music Mixer
  8. •
  9. Eaton OnGuard User manual

Eaton OnGuard User manual

Other manuals for OnGuard

1

Popular Music Mixer manuals by other brands

Denon DN-HC5000 - Serato ITCH Hardware/Software... Service manual

Denon

Denon DN-HC5000 - Serato ITCH Hardware/Software... Service manual

Yamaha WC42260 owner's manual

Yamaha

Yamaha WC42260 owner's manual

Vertiv KMMLED156 Quick installation guide

Vertiv

Vertiv KMMLED156 Quick installation guide

Yamaha EMX3000 user manual

Yamaha

Yamaha EMX3000 user manual

Mackie Onyx Analogue Mixer brochure

Mackie

Mackie Onyx Analogue Mixer brochure

Peavey S-32 Sanctuary Series Operation guide

Peavey

Peavey S-32 Sanctuary Series Operation guide

Rane MP 4 Operator's manual

Rane

Rane MP 4 Operator's manual

True T9 Touchscreen Console owner's manual

True

True T9 Touchscreen Console owner's manual

Studiomaster Air Pro 24 instruction manual

Studiomaster

Studiomaster Air Pro 24 instruction manual

Yamaha MV802 owner's manual

Yamaha

Yamaha MV802 owner's manual

Roland SoundCanvas SC-8820 owner's manual

Roland

Roland SoundCanvas SC-8820 owner's manual

Roland M-160 owner's manual

Roland

Roland M-160 owner's manual

Yamaha MR1642 Operation manual

Yamaha

Yamaha MR1642 Operation manual

Pioneer DJM 909 - Battle Mixer W/Effects operating instructions

Pioneer

Pioneer DJM 909 - Battle Mixer W/Effects operating instructions

Veeder-Root TLS-350 Series System setup manual

Veeder-Root

Veeder-Root TLS-350 Series System setup manual

Alto APM80.QUAD user manual

Alto

Alto APM80.QUAD user manual

Omnitronic PM-211 user manual

Omnitronic

Omnitronic PM-211 user manual

SoundCraft B400 user guide

SoundCraft

SoundCraft B400 user guide

manuals.online logo
manuals.online logoBrands
  • About & Mission
  • Contact us
  • Privacy Policy
  • Terms and Conditions

Copyright 2025 Manuals.Online. All Rights Reserved.

OnGuard command console quick guide
Thank you for purchasing the OnGuard command console.Your new console was designed and manufactured
in a US facility by tenured craftsmen and engineers dedicated to providing you a quality, durable solution to
withstand the rigors of your 24/7/365 work environment.
IMPORTANT TO NOTE BEFORE ASSEMBLY
Assembly of your Eaton command console must be performed
by qualified personnel. Connecting the command console to your
building’s grounding network must be performed by a licensed
electrician.
Before assembling the console, the assembler must read and
understand all of the important safety information provided in the
OnGuard command console installation and user guide.
Eaton strongly recommends the use of personal protective
equipment during assembly, as listed in the OnGuard command
console installation and user guide.
Some of the OnGuard command console components are very
heavy. To reduce risk of personal injury and product damage,
always ensure a sufficient amount of personnel are present when
unpacking, moving and assembling the console system and
components.
Technical Support
If you need additional support with installation, email a detailed
description of the problem, as well as your contact information, to
Technical Support at: ToSupportESW[email protected].
Prepping for Assembly and Set-up
The following document is required in order to assemble the
command console. These documents are available at
Eaton.com/furniture.
• OnGuard command console installation guide, #IB210002EN
Sales Contact Information
Contact your Eaton sales representative using one of the methods
below:
Phone: 800-225-7348 (US Only) or 508-852-4300
Email: InfoESW[email protected]
Web: Visit us at www.eaton.com/wrightline
Optional Accessory Guides
In order to ensure proper installation of optional accessories for
the OnGuard command console, refer to the third party accessory
guides that may be included in your console.
Hard copy user guides are included in the accessory cartons, and
will be left by an Eaton installation contractor for future reference.
Additional copies of some guides are also available on third
party sites.
•Electric Lift System (Model DL6 lift motor, Model CBD6 control
box, and Model DP1C control pad)
Reference: Linak-US.com
•Personal Environment System (Model ME200)
Reference: www.airinnovations.com
•Monitor Poles and Arms:
Reference: http://powerquality.eaton.com/Products-services/
Technical-Office-Furniture/flat-panel-display.asp
Description # Part #
20" Monitor mounting column & base plate kit KONWLC20B
30" Monitor mounting column & base plate kit KONWLC30B
Pitch/pivot column head kit KONWLK0B
Dynamic height adjustable column arm kit KONWLK1B
Articulating column arm kit KONWLK2B
Articulating dual monitor array column arm kit KONWLK2DUOB
Large universal interface bracket TOACJSBUB
Quick guide ACCQG-17R
Eaton is a registered trademark.
All other trademarks are property
of their respective owners.
Eaton
1000 Eaton Boulevard
Cleveland, OH 44122
United States
Eaton.com
© 2017 Eaton
All Rights Reserved
Printed in USA
Publication No. SA210009EN
June 2017 ACCQG-17R
Operating the Height Adjustable Worksurface
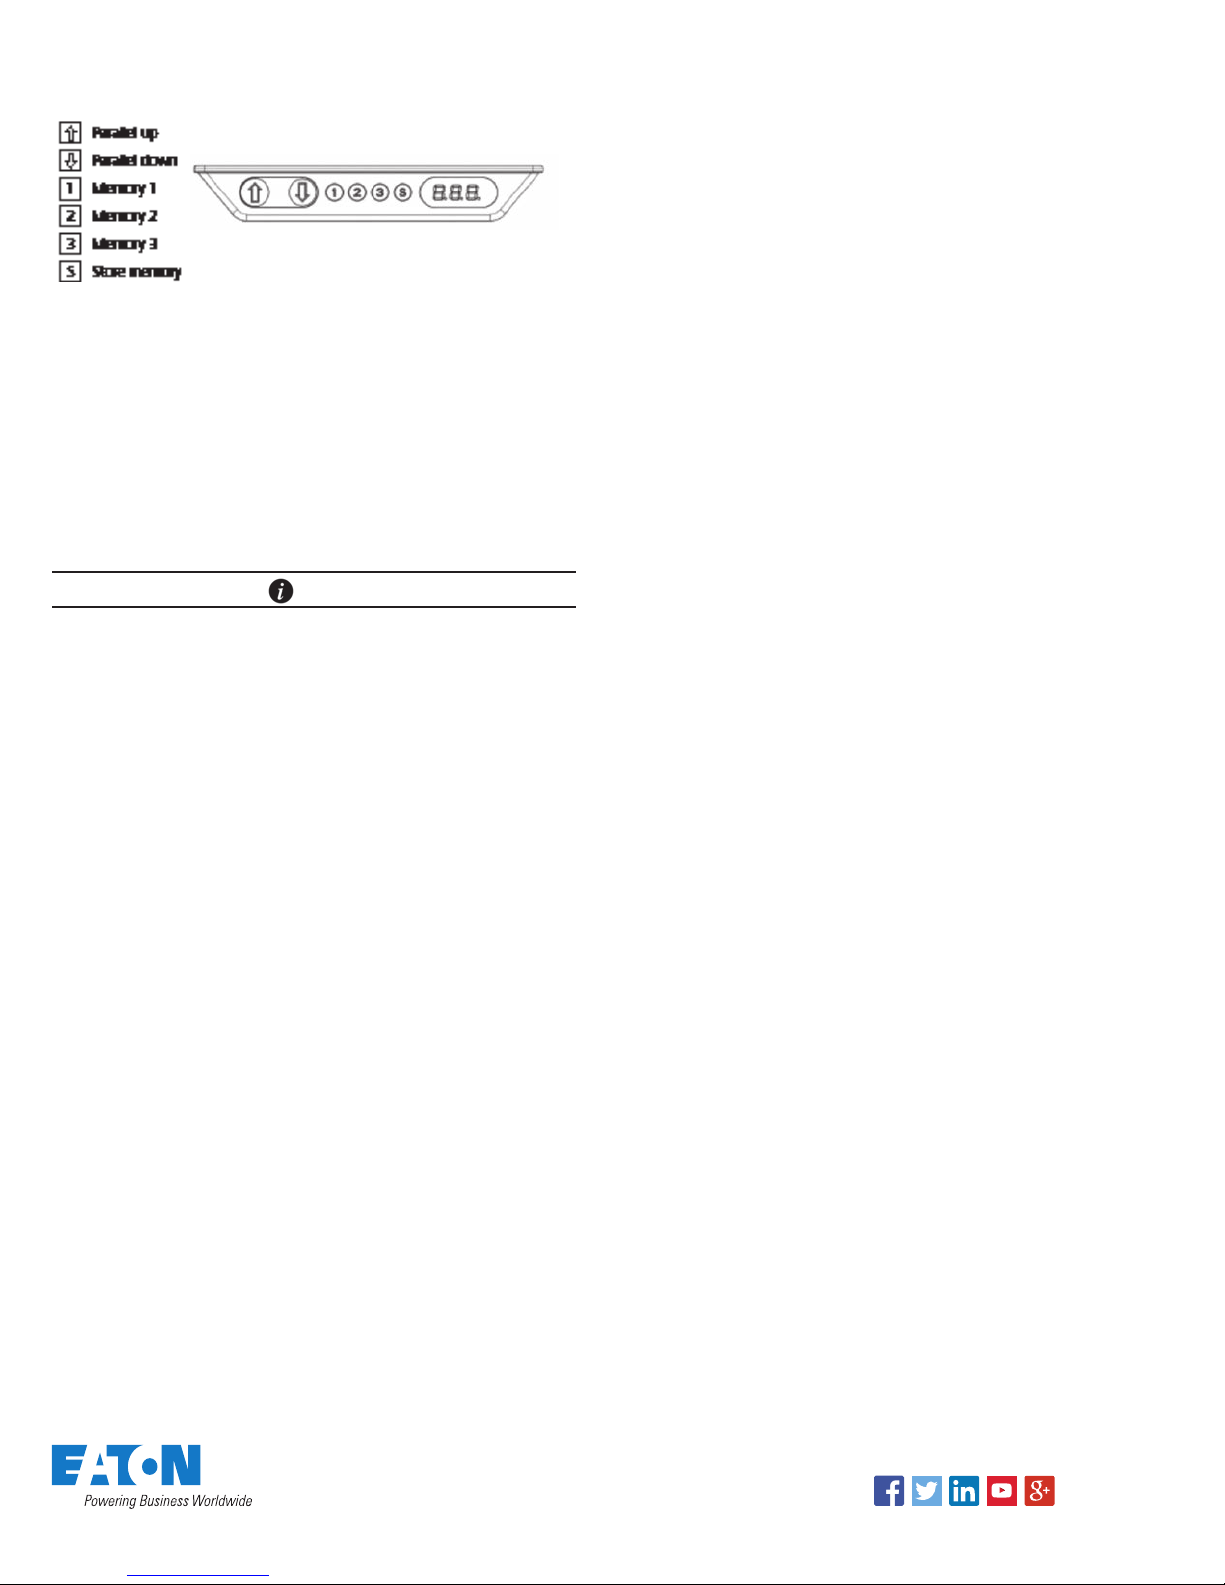
Your command console is equipped with a DP1CS control pad.
Normal operation:
To run the desk up or down press the UP or DOWN arrow button
(/\ or \/), and keep it pressed until the desk reaches the desired
height. The display will count up or down while running, and after
stopping it will continually show the current height of the desk.
As a safety precaution, your Eaton’s command console is pre-
programmed to “single reference” mode. In “single reference”
mode, the controller requires the presence of four healthy lift
motors. In the event of a lift motor fault condition, the controller
will disable the signal to the remaining motors, preventing the
movement of the worksurface.
NOTE
The console’s lift motors have sensors that will detect an
obstruction when moving. If the worksurface is jarred during
operation or an obstruction is sensed, the worksurface will stop
movement and automatically begin to move in the opposite
direction.
Store a memory position:
The four small buttons are used for storing memory.
•Press the “S” button; the display will flash “S” for two seconds
•Within these two seconds press one of the small buttons
with numbers “1”, “2” or “3” and the position will be stored
at this button.
•The panel will acknowledge the setting by showing “1”, “2” or
“3” in the display, depending on the chosen position
Memory Drive
Press and hold one of the memory buttons and the system will
start driving to the pre-programmed memory position. Keep the
button pushed until the position is reached.
Display Function
Shows the actual height either in inches or cm. The display also
shows error codes.
Adjust the display to show the correct height:
It may be necessary to adjust the height display after the initial
set up of the console. Simultaneously press the “UP” and
“DOWN” arrow buttons (/\ or \/) and keep them pressed for
five seconds. This allows the initial height to be reset. Until the
initial height is reset, the display will show three minuses (- - -).
Thereafter the display will revert to showing the height. The
height can then be adjusted by pressing either /\ or \/ until the
correct height has been set. The system will return to normal
operation (and give a short blink) after five seconds of inactivity
on the buttons. The feature can be disabled via configuration
after which pressing the /\ and \/ buttons at the same time will
be considered an illegal keypress.
Switch between cm and inches:
Your DP1CS control pad is pre-configured to display in inches.
Switching between cm and inch can only be done via the DPF
configurator.
Adjusting the light intensity of the LED display
Possible light settings are off, 6%, 12%, 19%, 25%, 37%, 50%,
75% and 100%.
The adjustment can only be done via the DPF configurator
Adjusting the light timeout
Possible light timeouts are: 0-15 sec and off.
The adjustment can only be done via the DPF configurator.
Error Code Information
Possible error codes are shown below. The errors will only be
displayed when a button is pressed. The display blinks while
showing the error. E16 overrules any other error as the detection
is registered only in the display and no message is sent to the
control box.
E01 The console has an unknown position and needs to be
initialized (see section III.D.)
E02 Overload upwards has occurred
E03 Overload downwards has occurred
E16 Illegal keys pressed
Other diagnostic error codes may get displayed. When calling
your customer service representative for technical assistance,
please take note of all displayed error codes.
Using the Personal Environment System
Refer to the instructions provided with the personal environment
system.
Follow us on social media to get the
latest product and support information.