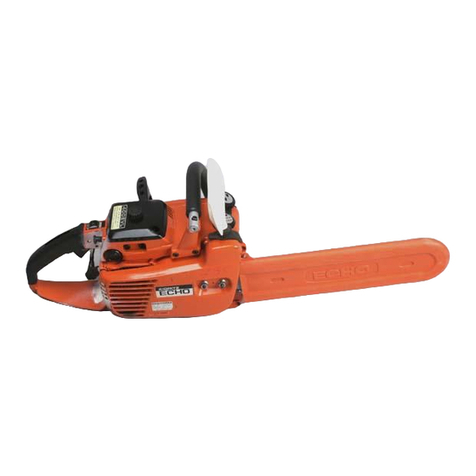
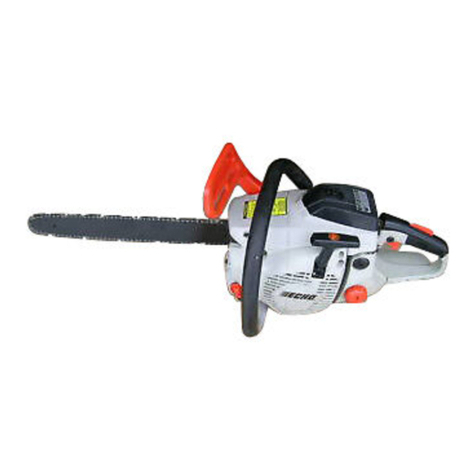
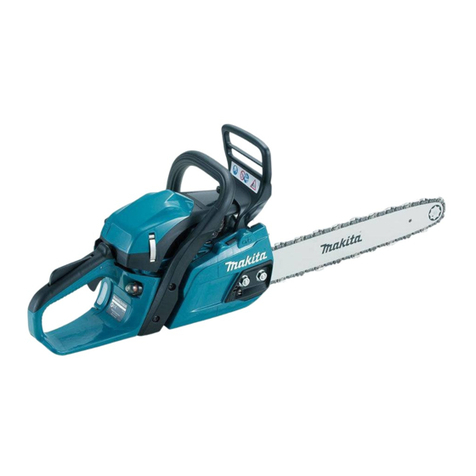
Echo CS-300, CS-340, CS-345 User manual

2
RULES FOR SAFE OPERATION
B. Other Safety Precautions
1. Do not operate a chain saw with one hand!
Serious injury to the operator, helpers, bystand-
ers, or any combination of these persons may
result from one-handed operation.Achain saw
is intended for two-handed use.
2. Do not operate a chain saw when you are
fatigued.
3. Use safety footwear; snug-fitting clothing;
protective gloves; and eye, hearing and head
protection devices.
4. Use caution when handling fuel. Move the chain
saw at least 3 m (10 feet) from the fueling point
before starting the engine.
5. Do not allow other persons to be near the chain
saw when starting or cutting with the chain saw.
Keep bystanders and animals out of the work
area.
6. Do not start cutting until you have a clear work
area, secure footing, and a planned retreat path
from the falling tree.
7. Keep all parts of your body away from the saw
chain when the engine is running.
Copyright©2004ByEcho,Incorporated
AllRightsReserved.
WARNING!
KICKBACK may occur when the nose or tip of the
guide bar touches an object, or when the wood
closes in and pinches the saw chain in the cut.
Tip contact in some cases may cause a lightning
fast reverse REACTION, Kicking the guide bar up
and back towards the operator. Pinching the saw
chain along the top of the guide bar may push the
guide bar rapidly back towards the operator. Either
of these reactions may cause you to lose control of
the saw which could result in serious personal
injury.
The Kick Guard ®device is not installed on the
guide bar when you purchase your ECHO chain
saw. The Kick Guard ® can be used in a majority of
cutting operations, and is especially recommended
for beginners, homeowners, or chain saw novices.
Most cutting operations can be accomplished with
the Kick Guard®in place.
Do not rely exclusively upon the safety devices built
into your saw. As a chain saw user, you should take
several steps to keep your cutting jobs free from
accident or injury.
1. With a basic understanding of kickback, you can
reduce or eliminate the element of surprise. Sud-
den surprise contributes to accidents.
2.Keepa goodfirm grip on thesaw with both hands,
therighthandon the rearhandle,andthelefthand
on the front handle, when the engine is running.
Usea firm gripwiththumbs and fingersencircling
the chain saw handles. A firm grip will help you
reduce kickback and maintain control of the saw.
Don’t’let go.
3. Make sure that the area in which you are cutting
is free from obstructions. Do not let the nose of
the guide bar contact a log, branch, or any other
obstructionwhich could be hit whileyouareoper-
ating the saw.
4. Cut at high engine speeds.
5. Do not overreach or cut above shoulder height.
6. Follow manufacturer’s sharpening and mainte-
nance instructions for the saw chain.
7. Only use replacement bars and chains specified
by the manufacturer or the equivalent.
A. Kickback Safety Precaution for Chain Saw Users


3
CONTENTS Page
Rulesfor SafeOperation..................................................................................................2
TechnicalData .................................................................................................................4
Emission Data .................................................................................................................5
Description ......................................................................................................................5
Nomenclatureof Parts......................................................................................................6
PreparationforUse..........................................................................................................7
Fueland Lubricant............................................................................................................8
Operation.......................................................................................................................10
CuttingInstructions .........................................................................................................12
Maintenanceand Care...................................................................................................16
Chain and Guide Bar Combinations...............................................................................19
Settingthe Saw Chain....................................................................................................19
Troubleshooting..............................................................................................................21
Storage..........................................................................................................................22
Correct Use of Chain Brake ...........................................................................................23
ServicingInformation......................................................................................................24
8. Before you start the engine, make sure that the
saw chain is not contacting anything.
9. Carry the chain saw with the engine stopped,
the guide bar and saw chain to the rear, and the
muffler away from your body.
10. Do not operate a chain saw that is damaged,
improperly adjusted, or not completely and
securely assembled. Be sure that the saw
chain stops moving when the throttle control
trigger is released.
11. Shut off the engine before setting the chain saw
down.
12. Use extreme caution when cutting small size
brush and saplings because slender material
may catch the saw chain and be whipped
toward you or pull you off balance.
13. When cutting a limb that is under tension, be
alert for spring back so that you will not be
struck when the tension in the wood fibers is
released.
14. Keep the handles dry, clean, and free of oil or
fuel mixture.
15. Operate the chain saw only in well-ventilated
areas.
16. Do not operate a chain saw in a tree unless you
have been specifically trained to do so.
17. All chain saw service, other than the items
listed in the Instruction Manual maintenance
instructions, should be performed by compe-
tent chain saw service personnel. (For ex-
ample, if improper tools are used to remove the
flywheel or if an improper tool is used to hold
the flywheel in order to remove the clutch,
structural damage to the flywheel could occur
and could subsequently cause the flywheel to
burst.)
18. When transporting your chain saw, use the
appropriate guide bar scabbard.
19. Spark arrestor mufflers approved to SAE
Standard J335b are Standard on ECHO Chain
saws to reduce the possibility of forest fires. Do
not operate the chain saw with a loose or
defective muffler. Do not remove the spark
arrestor screen.

4
TECHNICAL DATA
* Technical data subject to change without notice.
ledoM003-SC043-SC543-SC
noisnemiDHxWxLmm022x532x062542x532x083
hcni 7.8x2.9x2.016.9x2.9x0.51
thgieWyrd,daehrewoPgk)b
l1.7(2.3)bl3.7(3.3)bl5.7(4.3
rabediugdnaniahctuohtiW
enignEepyT
lm
rednilycelgnis,ekorts-owt,delooc-riA
tneme
calpsiD).ni.uc38.1(1.03).ni.uc30.2(4.33
roterubraC
otengaM
gulPkrapS
retratS
noissimsnartrewoP
epytmgarhpaiD
m
etsysIDC:otengamleehwylF
Y8-MPBKGN
retratslioceR
hctulclagufirtneccitamotuA
leuFoitarerutxiMdnelBrewoPohcEh
tiwoitar1:05
MT
.lioekorts-2
erom,lohoclalyhtemgniniatnocleufesutonoD.dedaelnuenatco98
.EBTM%51rolohoclalyhte%01naht
yti
capaCknaTL).S.Uzolf6.8(52.0
liOniahcdnaraB )liorotomro(lioniahcdnarabOHCE
yticapaCknaTL).S.U.zo.lf5(51.0
rabed
iuGdradnatS.ni21dradnatS.ni41dradnatS.ni61
niahcwaSlanoitpO.ni61,41lanoitpO.ni61,21lanoitpO.ni41,21
noitacirb
uLpmupliocitamotuaelbatsujdA
dradnatS
serutaef eldnaHpoT eldnahlanoitnevnoC
draugdnahraeR
,draugdnahtnorF
,ec
ivednoitarbiv-itnA
,ekarbniahC,tuokcollortnocelttorhT
relffumrotserrakrapS,rehctacniahC
MPRenignE
eldI 005
3-0082
)TOW(elttorhTnepOediW 00021-00001

5
DESCRIPTION
TheECHOproductyoupurchasedhasbeenfactorypre-assembledforyourconvenience.Duetopackaging
restrictions, guide bar and saw chain installation and other assembly may be necessary.
Afteropeningthe carton,checkfor damage. Immediatelynotifyyour retailerorECHO Dealer ofdamagedor
missing parts. Use the contents list to check for missing parts.
CONTENTS
1 - PowerHead
1 - GuideBar
1 - KickGuard
1 - Hex Head Bolt
1 - Hex Nut
1 - SawChain
1 - InstructionManual
1 - SafetyManual
1 - WarrantyRegistrationCard
1 - LimitedWarrantyStatement
1 - T-Wrench
1 - Echo Power Blend TM 2-stroke oil sample
EMISSIONDATA
IMPORTANTENGINEINFORMATION
ENGINEFAMILY: 4EXHS.0334RA DISPLACEMENT: 30.1CC
EMISSIONCOMPLIANCEPERIOD : 300 HRS.
THISENGINEMEETSU.S. EPA PHASE II EMISSION REGULA-
TIONS FOR S.O.R.E. REFER TO OWNER'S MANUAL FOR
MAINTENANCESPECIFICATIONSANDADJUSTMENTS.
PRODUCT EMISSION DURABILITY
The300 hour emission durabilitycompliance period isthe time spanselected by themanufacturer certifying
theengineemissionsoutput meets applicableCaliforniaand/orU.S.EPA emissionsregulations, provided
thatapprovedmaintenanceproceduresarefollowed aslisted inthe MaintenanceSection of thismanual.
EMISSION CONTROL
EPA Phase II
The emission control system for these engines are
EM(EngineModification).
An Emission Control Label is located on the
engine. (Thisis anEXAMPLEONLY, informationon
labelvariesbyengineFAMILY).

6
1. Handguard
(Chainbrakeactuatinglever)
2. Throttlecontrollockout
3. Throttlecontroltrigger
4. Sprocketguard
5. Chaincatcher
6. Aircleanercover
7. Purgebulb
8. Guidebar
9. Sawchain
10. Fronthandle
11. On / Off switch
12. Rearhandguard
13. Fuel tank cap
14. Pull starter
15. Oil tank cap
16. Throttlecontrollatch
17. Tipguard
18. Muffler
19. Lanyardring
20. SparkPlug
CS-345
NOMENCLATURE OF PARTS
CS-300, CS-340
18
18
19
20
20
20

7
H
G
I
J
PREPARATION FOR USE
KICK GUARD®TO BAR INSTRUCTIONS
For saws with Kick Guard®P/N 2894901 and symmetri-
cal or asymmetrical low-kick type guide bars.
1. Install bolt (A) in rear hole (B) of Kick Guard®and
throughfronthole(C)inguidebar.
2. IMPORTANT: Dimplein KickGuard®(D)must engage
recess in guide bar (E).
3. Tighten nut (F) and bolt (A) until snug. Make certain
Kick Guard®is flush against guide bar.
WARNING DANGER
SawChainissharp!Alwaysweargloveswhenhandling
assembly, otherwise serious personal injury may result.
GUIDE BAR AND SAW CHAIN
• Removetwoguidebarnutsandremovesprocketguard(J).
• Mount guide bar (G) on studs, and slide toward sprocket to
make saw chain installation easier.
• Install saw chain (H) as shown, with cutters on top of guide
barfacingforward.
IMPORTANT
Becertaintensioner(I)fitsintoloweradjusterholebefore
tighteningguidebarnuts.
NOTE
Movechainbrakeleverfullyrearwardtoinstallsprocket
guardto saw.
• Installsprocketguard (J),andtightenguide barnutsfinger
tight.
• Adjust saw chain tension, as instructed in “Adjustment,
ChainTension.”

8
L
50
Oil
Gaso-
line
FUEL AND LUBRICANT
FUEL STATEMENT
GASOLINE - Use89 Octane[R+M/2](mid gradeorhigher)
gasoline or gasohol known to be good quality. Gasohol may
contain up to 10% Ethyl (grain) alcohol or 15% MTBE (methyl
tertiary-butylether).Gasoholcontainingmethyl(wood)alcoholis
NOTapproved.
Two Stroke Oil - A two-stroke engine oil meeting ISO-L-EGD
(ISO/CD13738) and J.A.S.O.FC Standardsmust be used.
EchobrandpremiumPowerBlend TM Universal 2-StrokeOil
meetsthesestandards.Engine problemsduetoinadequate
lubricationcaused by failureto use anISO-L-EGD and J.A.S.O.
FC certified oil, such as Echo premium Power BlendTM, will void
the two-stroke engine warranty. (Emission related parts onlyare
coveredfortwo years,regardless oftwo-strokeoilused, perthe
statement listed in the Emission Defect Warranty Explanation.)
IMPORTANT
Echopremium PowerBlendTM Universal 2-Stroke Oilmay be
mixed at 50:1 ratio for application in all Echo engines sold in
the past regardless of ratio specified in those manuals.
ADJUSTMENT,CHAIN TENSION
• Removesparkpluglead.
• Loosen two guide bar nuts, if necessary.
• Hold the bar nose up, and turn the adjuster screw (L)
clockwise until the chain touches the bottom of the bar.
• Tightenboth guide barnuts withbar noseheld up.
IMPORTANT!
Tighten guide bar nuts to 90 – 110 kgf/cm (80 – 95 in.
lbs.) DONOT over-tighten nuts. Damageto saw
may result.
• Pull the saw chain around the guide bar by hand.
Reduce chain tension, if you feel tight spots.
• Keep chain properly tensioned at all times.
NOTE
Allchainsrequirefrequentadjustments.

9
FUELTANK OIL TANK
TANKINDICATION
).S.U()CIRTEM(
SAGLIOSAGLIO
.laG.zo.lFretiL.cc
1
2
5
6.2
1.5
8.21
4
8
02
08
061
004
Fuel Mix Chart
50:1
MixingInstructions
1. Fillanapprovedfuelcontainerwithhalfoftherequired
amountofgasoline.
2. Addthe proper amountof 2-stroke oilto gasoline.
3. Close container and shake to mix oil with gasoline.
4. Addremaininggasolineandremix.
5. Installfuel container capand wipeany spilledfuel from
containerandsurroundingarea.
IMPORTANT
Stored fuel ages. Do not mix more fuel than you expect to
use in thirty (30) days, ninety (90) days when a fuel stabi-
lizer is added.
Stored two-stroke fuel may separate. ALWAYS shake fuel
containerthoroughlybeforeeachuse.
IMPORTANT
Spilled fuel is a leading cause of hydrocarbon emissions.
Some states may require the use of automatic fuel shut-
offcontainersto reducefuelspillage.Contact yourECHO
dealerfororderinginformation.
CHAINLUBRICANT
Properlubricationofthechainwhileinoperationreducesfriction
between the chain and the guide bar to a minimum and assures
alongerservicelife.
• use bar and chain oil of high quality for this purpose.
• Donotuse usedorreclaimedoil toavoidvariousoiler prob-
lems.
• Use ECHO bar and chain oil.
• When ECHO bar and chain oil is not available:
Use motor oil, etc.
• Usebar andchain oilofthe followinggrades:
SAE NO. 30 ..... in summer
SAE NO. 10 ..... in winter or when cutting resinous trees.
• Whenrefueling, alsorefill chainoil.

10
CS-345
CS-300
CS-340
AA
B
C
Securely hold the saw.
OPERATION
WHEN THE ENGINE IS COLD
WARNING DANGER
Make sure bar and chain are not touching anything when
starting the saw.
• Movechainbrakeleverfullyforwardtoengagechainbrake
beforestarting.
• Fill the fuel tank with fuel.
• Fill the chain oil tank with lubricant.
• Turnswitch (A)to “RUN” position (I).
• Pull choke (B) all the way out (closed position).
• Push purge bulb (C) 10 times.
• Pull starter handle several times until first firing sound is
heard. (Secure unit on ground with your knee or foot.) (5 - 6
pullsmaximum.)
• Push choke (B) all the way in. (open position)
• Pullstarterhandleagain.
NOTE
If engine does not start after 5 pulls, repeat instructions.
WHEN ENGINE IS HARD TO START
WARNING DANGER
Clutchengagesandchainmayrotatewhenengineisstarted
withthrottle control latchengaged. Neverusethe throttle
control latch for cutting. Use only when starting the
engine.
• Press throttle control lockout down, squeeze throttle trigger,
and push in throttle control latch.
• Pullstarterhandle.
• When engine starts, immediately squeeze throttle trigger to
release the latch otherwise damage to clutch may result.
NOTE
Do not pull starter rope out to the maximum possible
position.
Do not allow recoil handle to snap back against the
casing.

11
CS-345
CS-300
CS-340
AA
CS-345
CS-300
CS-340
AA
STARTING WARM ENGINE
• Ensure that there is fuel and chain oil in the tanks. (If fuel
tankwasemptiedduringpreviousoperation,refilltankand
pushpurge bulb10 times.)
• Turnswitch (A)to “RUN” position (I).
• Pullstarterhandle.
• Choke may be used if necessary, but be sure to push it
back on first firing sound.
NOTE
If engine does not start after 5 pulls, use cold start
procedure.
RUNNING
WARNING DANGER
Thesaw chain shouldnot moveat idle, otherwiseserious
personalinjury may result.
NOTE
Ifsawchainmovesadjustcarburetoraccordingto
“CarburetorAdjustment”instructions inthismanual,or
seeyourdealer.
• After engine starts, allow it to return to idle.
• Movechainbrakeleverfullyrearwardtoreleasechain
brake.
• Press throttle control lockout then gradually squeeze
throttletriggertoincreaseengine speed.
• Sawchainstartsmovingwhentheenginereachesapproxi-
mately4200 rpm.
• Ensureproperaccelerationandlubricationofchainand
bar.
• Do not run the engine at high speed unnecessarily.
• Be sure that saw chain stops moving when throttle trigger
isreleased.
STOPPING
• Release throttle trigger and turn switch (A) to STOP (O)
position.
NOTE
If engine does not stop, pull choke out fully to stop
engine.
Checkand repairstopswitch beforestarting theengine
again.

12
Kickback
CUTTING INSTRUCTIONS
GENERAL WARNING DANGER
ReadtheECHO“CHAINSAWSAFETYMANUAL”included
with your chain saw for additional cutting and safety instruc-
tions. Failure to obey all instructions may result in serious or
fatalinjuries.
In all circumstances the operation of the chain saw is a one-man
job. It is difficult at times to take care for your own safety, so
don’t assume the responsibility for a helper as well. After you
have learned the basic techniques of using the saw, your best
aid will be your own good common sense...
The accepted way to hold the saw is to stand to the left of the
sawwith yourleft hand onthe fronthandlebar andyour right
handon the rearhandle so youcan operate thethrottle trigger
withyourright indexfinger.
Before attempting to fell a tree, cut some small logs or limbs.
Becomethoroughly familiarwith thecontrols andtheresponses
of the saw.
Start the engine, see that it is running properly. Squeeze the
trigger to open the throttle wide open and start the cut. If the
chainisproperly sharpened,thecutting shouldberelatively
effortless. It is not necessary to press down hard to make the
saw cut. Pushing the saw too hard will slow the engine and
cutting will actually be more difficult.
NOTE
Somematerialmayadversely affectthehousingsof your
ECHOchainsaw.
(Example:PalmTree Acid,fertilizer,etc.) Toavoidhousing
deterioration,carefullyremoveallpackedsawdustaround
clutchand guidebar area andwash withwater.
WARNING DANGER
Do not let the tip of the bar touch anything while the engine
is running. At cutting speed the chain is moving at a high
rate of speed. Should the tip contact a limb or log while the
chainis moving, thetip will bepushed upward withconsider-
able force. This is known as kickback. Avoid it!

13
2”
45°
2”
FELLING A TREE
DIRECTION
OFFALL
Direction of fall Hinge
Felling cut
First cut
Notch
Second cut
One-third tree
diameter
LIMBING
WARNING DANGER
A falling tree can seriously damage anything it may hit
- a car, a house, a fence, a power line, or another tree.
There are ways to make a tree fall where you want it,
so first decide where that is!
Before cutting, clear the area around the tree. You will
needgoodfooting whileworkingand youshouldbeable to
work the saw without hitting any obstacles. Next, select a
path of retreat. When the tree begins to fall you should
retreataway fromthe directionof fallat a45 degreeangle
to avoid the trunk kicking back over the stump.
Begin the cut on the side to which the tree is to fall. Cut a
notch about 1/3 of the way into the tree as shown. The
position of this notch is important since the tree will try to
fall “into” the notch. The felling cut is made on the side
oppositethe notchand ata levelabout 2” abovethe
bottom of the notch. Do not try to cut through to the notch
withthefellingcut.Theremainingwoodbetweenthe
notch cut and felling cut (about 2”) will act as a hinge
when the tree falls, guiding it in the desired direction.
When the tree starts to fall, kill the engine, place the saw
on the ground and make your retreat quickly.
To fell big trees with a diameter exceeding twice the bar
length, start the notching cuts from one side and draw the
saw through to the other side of the notch. Start the back
cut on one side of the tree, pivoting the saw through to
form the desired hinge on that side.
Then remove the saw for the second cut. Insert the saw in
the first cut, very carefully so as not to cause kickback.
The final cut is made by drawing the saw forward in the
cut to reach the hinge.
Limbing a fallen tree is much the same as bucking. Never
limb on the tree that you are standing. When limbing,
caution is the word. Be careful of the tip touching other
limbs. Always use both hands.

14
BUCKING
Uphill position
FINISH CUT
FIRST CUT Board or flat stones
KICKBACK
• Improper thrust cutting.
• When the bar nose hits another tree, etc.
Don’tcut with thesaw overhead orthe bar ina vertical
position. If the saw should kick back you may not have
goodenoughcontroltopreventpossibleinjury.
Bucking is the sawing of a log or fallen tree into smaller
pieces. There are a few basic rules which apply to all
buckingoperations.
Keep both hands on the handles at all times.
Support logs if possible.
When cutting on a slope or hillside, always stand uphill.
Keep in mind that the wood is heavy and that it will bend
andpinchthe sawifimproperlysupported.
The trunk will weaken at the point where you make the cut
unless the tree is lying on perfectly flat ground or supported
asshown.
If you make the cut with the tree on the ground, don’t let
the saw’s chain dig into the earth; it is harmful for the saw,
and you stand a good chance of being struck by flying
debris. To cut the trunk, use the bucking and two-cut
sequenceshown. Thefirst cutshouldbe nodeeper than
one-thirdthetrunkdiameter.
WARNING DANGER
KICKBACKISDANGEROUS
Kickback is generated when the rotation of the chain is
arrestedforsomereason.Themostdangerouseffectof
this action occurs when the nose of the bar contacts
another object, the chain is momentarily stopped and
allthe energyof the enginethrows thebar upwardsand
backwardstowardstheoperator.
Thechainsawindustryandgovernmentagencieshave
attemptedtoprescribevarious safety devices,butthe
best protection is to avoid kickback.
Comply with the Safety Precautions as listed on page 2
of this manual.

15
INFORMATION
Kickback Safety Features
Thefollowing featuresarestandard forthis modelas Kickback SafetyFeatures.
• Double Guard Low Kick Type Guide Bar or Asymmetrical Low Kick Type Guide Bar
NOTE:
Your saw chain can be equipped with either of these bars.
Reduced nose
radius
NOTE
UseECHOreplacementguidebars.
Theseguidebarsmaybeconsideredtohaveequivalentkickbackreduction:
• Sprocket nose guide bars of the same length and nose radius, same pitch and having the same number of teeth.
• A hard nose guide bar having the same length and nose radius as a sprocket nose bar.
• Low Kick Guard Link Type Saw Chain
Thelow kick, guardlink chain mustbe maintained correctly.Follow instruction “SETTINGTHE CHAIN” inthis Instruc-
tionManual.
• Front Hand Guard (Chain Brake Actuating Lever)
Thefront handle guardmust be installedcorrectly and keptin good condition.
• Chain Brake
Chainbrake must bemaintained correctly.Follow instruction “CORRECTUSE OFCHAIN BRAKE” inthis Instruction
Manual.
• KickGuard
Kick guard must be installed properly. Follow instructions.
WARNING DANGER
Usingimproperreplacementcomponentsor removing safetydevicesmayresultinserious orfatal injury.
Double Guard Bar

16
MAINTENANCE AND CARE
AIR FILTER
• Checkbeforeeveryuse.
• Pull choke (A) all the way out (close position).
• Loosenboltandremoveaircleaner(B)coverandfilter(C).
• Lightlybrush dust offfilter, andinspect fordamage.
A
B
C
D
E
F
G
H
J
AUTOMATIC OILER
• Thedischarge volume ofthe automatic oileris adjusted to3
to 4 cc/mm (@ 7000 rpm) prior to shipment from the factory.
• Always check oil discharge when in use.
• Turnadjustingscrew(D) counter-clockwiseto increaseoil
volume,clockwisetodecreaseoilvolume.
OIL STRAINER
• Checkperiodically.
- Do not allow dust to enter into oil tank.
- Cloggedoilstrainerwillaffectthenormallubricating
system.
- Pick it up through oil port.
- If the strainer (E) is dirty, wash it in gasoline.
- When the inside of the tank gets dirty, rinsing the tank
out with gasoline will clean it.
FUEL STRAINER
• Checkperiodically.
- Do not allow dust to enter fuel tank.
- Cloggedstrainerwillcausedifficultyinstartingengineor
abnormalitiesinengineperformance.
- Pickupthefuelstrainer(F)throughfuelinletportwitha
piece of steel wire, or the like.
- When the strainer is dirty, wash it in suitable cleaning
fluid.
- Whentheinsideofthefueltankisdirty,rinsingthetank
out with suitable cleaning fluid will clean it.
GUIDE BAR AND OIL HOLES
• Cleanaftereachuse
- Cleanthegrooves(G)oftheguidebarwith,forexample,
asmallscrewdriver.
- Clean oil holes (H) with a wire.
• Reverseguidebarperiodically.
SPROCKET
• A damaged sprocket (J) will cause premature damage or
wearofsawchain.
- Whenthesprockethaswornout0.5mm(.020”)ormore,
replace it.
• Check sprocket when you install new chain. Replace it if
worn.
• Cleansprocket,clutchandbarmountareabeforeinstallation
ofbar.
IMPORTANT
Sometreesapandresinsarecorrosive.Thoroughlywashthe
guidebarandsprocketareasaftereachuse,thencoatmetal
parts with light oil.

17
SPARK PLUG
• Checkperiodically
• Gap = 0.65mm (.026 in.)
• Replace if either electrode is worn, or if the insulator is
fouled by oil or other deposits.
• Torque = 145 – 155 kg*cm (125 – 135 in. lb.)
IMPORTANT
Donotover-torque.
COOLING SYSTEM CLEANING
• Removesparkpluglead.
• Removetwo(2)mufflercoverscrewsandmufflercover.
• Removefour(4)recoilstarterhousingscrewsandstarter
housing.
• Use a stiff bristle cleaning brush (do not us a metal
brush)toremovedirtfromcylinderfinsinmufflerand
ignition coil areas.

18
B
A
1. Startengineandrunforseveralminutestoreachoperat-
ingtemperature.
2. Stopengine.Removegrommetcover(A)over“H”and“L”
limiterneedles.
3. Startengineandturnthehigh-speedneedlerich(CCW)
untiltheengineruns between10,000and12,000RPM.
Thenturnthelow-speedneedlerich(CCW)until the
enginedoesnothesitate whenaccelerated.
DONOTREMOVELIMITERCAPS!
4. IdleSpeedAdjustment.
• Turn “idle” speed adjustment screw (B) CW until the saw
chain begins to move, then turn the screw CCW until saw
chainstopsmoving. TurnscrewCCW anadditional1/4
turn.
5. Accelerate to full throttle for 2-3 seconds to clear excess
fuelfrom engine thenreturn to idle.Accelerate to full
throttle to check for smooth transition from idle to full
throttle. If engine stops or stalls after full warm up return
theunit to yourauthorized ECHO dealerfor adjustment.
6. Installgrommetcover(A)over“H”and“L”limiterneedles.
HIGHALTITUDEADJUSTMENT
Highaltitudeadjustmentmayberequiredforproperoperation
ofthisengineabove2000feet.
1. Startengineandrunforseveralminutestoreachoperat-
ingtemperature.
2. Stopengine.Removegrommetcover(A)over“H”and“L”
limiterneedles.
3. Startengineand turnthe HIspeed needlelean (CW) until
theenginerunsbetween10,000and12,000RPM.Then
turnthe LO speed needle lean (CW) untilthe engine
doesnothesitatewhen accelerated.
DONOTREMOVELIMITERCAPS!
4. IdleSpeedAdjustment.
• Turn “idle” speed adjustment screw (B) CW until the saw
chain begins to move, then turn the screw CCW until saw
chainstopsmoving. TurnscrewCCW anadditional1/4
turn.
5. Accelerate to full throttle for 2-3 seconds to clear excess
fuelfrom engine thenreturn to idle.Accelerate to full
throttle to check for smooth transition from idle to full
throttle. If engine stops or stalls after full warm up return
theunit to yourauthorized ECHO dealerfor adjustment.
6. Installgrommetcover(A)over“H”and“L”limiterneedles.
CARBURETOR ADJUSTMENT
EngineBreak-In
Newenginesmustbeoperatedaminimumduration
oftwotanksoffuelbreak-inbeforecarburetoradjust-
mentscan be made.During thebreak-inperiod your
engineperformancewillincreaseandexhaust
emissions will stabilize. Idle speed can be adjusted
asrequired.
BEFOREMAKINGADJUSTMENTS:
• Thecorrect spark plugmust be cleanand properly
gapped.
• Theair filterelementmust beclean andproperly
installed.
• Themufflersparkarrestorscreenandexhaustport
must be clear of carbon.
• Thestandardbarandchaincombination(seepage
4) must be installed to the power head, and
properlytensioned.
LOWALTITUDEADJUSTMENT
Enginesthathave beenadjustedtooperate athigh
altitudesmust be readjustedto operate properlyat
altitudesbelow2000feet.

19
1/5
WARNING DANGER
Useofreplacementsawchainand/orguidebarotherthanthatspecified,oroperationwithoutthe“tipguard”inplace,may
cause severe kickback resulting in serious injury.
Onlyusesawchaindesignatedas,“LOW-KICKBACK,”thatmeetstheANSIB175.1-2000Standard,andtheEchoguide
barspecified.
CHAIN AND GUIDE BAR COMBINATIONS
*Reducednoseradiussymmetricalbars(OREGONname—DoubleGuard)
SETTING THE SAW CHAIN
For setting saw chains, round file (4 mmø: 5/32”) and flat file are used.
• To keep correct position and correct angle, use the file holder.
-RoundfileandflatfileareavailablefromyourEchoDealer.
• File cutters as below.
Type:91VG
HOLD FILE HOLDER
LEVEL
Depth
gauge
ONEFIFTH OF FILEDIAMETER
REMAINSABOVECUTTER EDGE
To sharpenother typechain, followchain manufacturer’sinstructions
30°
PUSH FILEAS SHOWN
Keep this angle
IMPORTANT
Chain and guide bar gauge size must be identical. Use Bar/Chain combinations shown in table
above.
IMPORTANT
If your kick guard is damaged or lost, contact your Echo dealer for a replacement. For the
name of the Echo dealer nearest you, Call: 1-800-432-ECHO (3246) or on the web at
www.echo-usa.com.
Refer to your Chain Saw Safety Manual for kick guard application information.
The following combinations may be used on CS-300, CS-340 or CS-345.
LEDOM RAB
HTGNEL
ELBUOD
RABDRAUG NIAHCWAS KCIK
DRAUG
N/POHCE
)N/PMEO(
OHCE
.ONTRAP SKNILEPYTHCTIPEGUAG N/POHCE
)N/PMEO
(
003-SC
043-SC
543-SC
"21
"41
"61
znetnI"21
MT
znetnI"41
MT
"61znetnI
MT
105473021
102573041
107573061
105473221
102573241
107573261
540719
250719
750719
540719
250719
750719
54
25
75
54
25
75
GV19"8/3050. 1094982
94982

20
30°
85° 60°
91
0.64 mm (0.025”)
Parallel
Number
indicates Chain
type
Number
indicates
Chain type
91S
(SPROCKET)
(DRIVE LINK)
• Properlyfiledcuttersareshownbelow.
(Top plate angle) (Sideplate angle) (Top plate cutting angle) (Depth gauge)
• When setting of the chain is finished, soak it in oil and wash away filings completely before using.
• When chain has been filed on the bar, supply sufficient oil to it, rotate the chain slowly to wash away the filings before
usingagain.
• If the chain saw is operated with filings clogged in the groove, the saw chain and the guide bar will be damaged
prematurely
• If the saw chain becomes soiled with resin, for instance, clean it with kerosene and soak it in oil.
CHAINTYPEAND SPROCKET PITCH
Sawchain shouldbe usedwith correspondingpitched
sprocket. To identify chain type and pitch of sprocket,
check as follows.
• Chain type number (A) is stamped on drive link.
• Sprocket pitch (B) is stamped on clutch drum.
AB
• Placethe depth gaugetool firmly onguide bar sothat depth gaugeprotrudes. Then filetop of depthgauge with flatfile
until flat with top of the gauge tool.
- Besure toround offthe frontedge of thedepth gauge.
Depth gauge tool
Remove
until flat
with tool
Round
off the
edge
Other manuals for CS-300, CS-340, CS-345
2
This manual suits for next models
2
Table of contents
Other Echo Chainsaw manuals

Echo
Echo CS-600P User manual

Echo
Echo DCS-1600 User manual

Echo
Echo CS-3000 TYPE 1E User manual

Echo
Echo CS-355T User manual

Echo
Echo Quickvent QV-6700 Type 1 User manual

Echo
Echo DCS-2500TN User manual

Echo
Echo CS-800P User manual

Echo
Echo CS-370ES User manual

Echo
Echo CS-360TES User manual

Echo
Echo CS-2510TES User manual