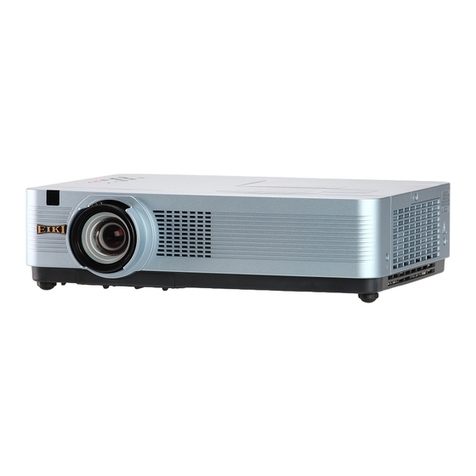
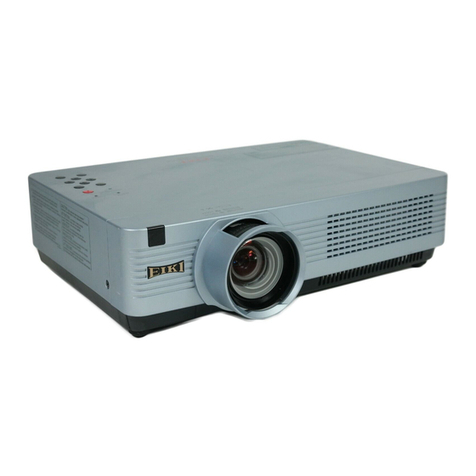
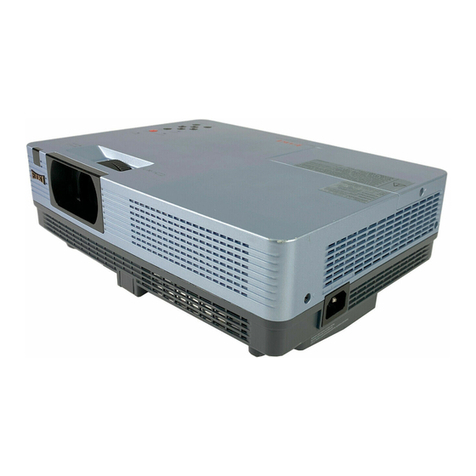
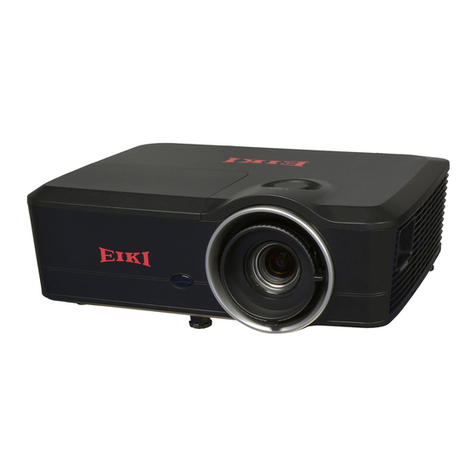
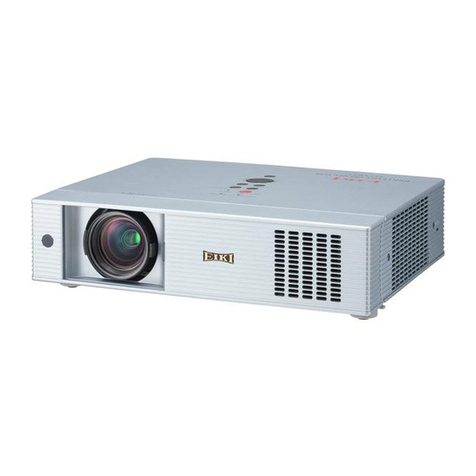
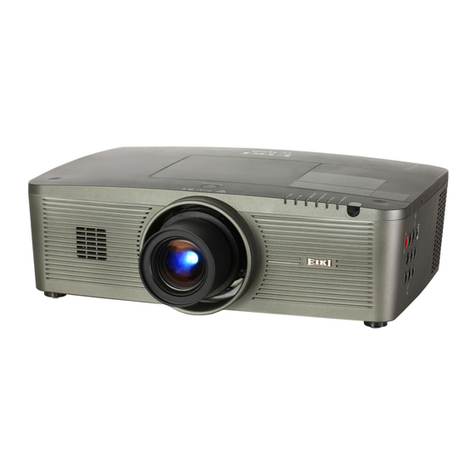
Eiki LC-WB100 User manual

Multimedia Projector
MODEL LC-WB100 Network Supported
□ WiredLAN
100-Base-TX/10-Base-T
RefertotheOwner'sManualsbelowfor
detailsaboutnetworkfunction.
□ NetworkSet-upandOperation
□ PJNetworkManager
Owner’s Manual

2
Features and Design
ThisMultimediaProjectorisdesignedwiththemostadvancedtechnologyforportability,durability,andeaseofuse.
Thisprojectorutilizesbuilt-inmultimediafeatures,apaletteof16.77millioncolors,andmatrixliquidcrystaldisplay
(LCD)technology.
♦ Compact Design
Thisprojectorisdesignedcompactinsizeandweight.
Itiseasytocarryandinstalledanywhereyouwishto
use.
♦Simple Computer System Setting
TheprojectorhastheMulti-scansystemtoconformto
almostallcomputeroutputsignalsquickly(p.29).Upto
UXGAresolutioncanbeaccepted.
♦Useful Functions for Presentations
-Thedigitalzoomfunctionallowsyoutofocusonthe
crucialinformationduringapresentation(p.36).
-Blackboards*canbeusedasaprojectionscreen.
*TheboardcolorislimitedtoGreen(pp.33,40).
♦Lamp Control
Brightnessoftheprojectionlampcanbeselected
(pp.25,55).
♦Quick Termination
TheACpowercordcanbeunpluggedimmediately
afterturningofftheprojectorwithoutwaitingforthe
terminationofthecoolingfanrotation(p.20).
♦ Logo Function
TheLogofunctionallowsyoutocustomizethescreen
logo(pp.47-49).Youcancaptureanimageforthe
screenlogoanduseitforthestarting-updisplayor
betweenpresentations.
♦ Multilanguage Menu Display
Operationmenuisavailablein17languages;English,
German,French,Italian,Spanish,Portuguese,Dutch,
Swedish,Finnish,Polish,Hungarian,Romanian,
Russian,Chinese,Korean,JapaneseandThai(p.44).
♦ Switchable Interface Terminal
Theprojectorprovidesaswitchableinterfaceterminal.
Youcanusetheterminalascomputerinputormonitor
outputconveniently.(p.50)
Note:
•TheOn-ScreenMenuandfiguresinthismanualmaydifferslightlyfromtheproduct.
•Thecontentsofthismanualaresubjecttochangewithoutnotice.
♦ Security Function
TheSecurityfunctionhelpsyoutoensuresecurity
oftheprojector.WiththeKeylockfunction,youcan
locktheoperationonthetopcontrolorremotecontrol
(p.54).PINcodelockfunctionpreventsunauthorized
useoftheprojector(pp.19,56-57).
♦
Helpful Maintenance Functions
Lampandfiltermaintenancefunctionsprovidefor
betterandpropermaintenanceoftheprojector.
♦LAN Network Function
ThisprojectorisloadedwiththeWiredLANnetwork
function.Youcanoperateandmanagetheprojector
vianetwork.Fordetails,refertotheowner’smanual
“NetworkSet-upandOperation.”
♦Auto Setup Function
ThisfunctionenablesInputsearch,AutoKeystone
correctionandAutoPCadjustmentbysimplepressing
theAUTOSETUPbuttononthetopcontrol(p.45).
♦Colorboard Function
Atthetimeofsimpleprojectiononthecoloredwall,
youcangettheclosecolorimagetothecolorimage
projectedonawhitescreenbyselectingthesimilar
colortothewallcolorfromthepresetfourcolors.
♦
Power Management
ThePowermanagementfunctionreducespower
consumptionandmaintainsthelamplife.(p.52)
♦Closed Caption
ClosedCaptionisafunctionthatdisplaystheaudio
portionofaTVprogramastextonthescreen.The
closedcaptioningserviceisavailablemainlyinthe
U.S.(p.54)
♦Picture in Picture Function
Thisprojectoriscapableofprojectingtwoimages
simultaneouslybyusingeitherbuilt-inPinPmodeorP
byPmode(p.51).

3
Table of Contents
Trademarks
Each name of corporations or products in this book is either a registered trademark or a trademark of its respective
corporation.
Features and Design . . . . . . . . . . . . . . . . . . .2
TableofContents......................3
TotheOwner..........................4
Safety Instructions. . . . . . . . . . . . . . . . . . . . .5
AirCirculation 6
InstallingtheProjectorinProperPosition 6
MovingtheProjector 6
Compliance...........................7
Part Names and Functions . . . . . . . . . . . . . .8
Front 8
Back 8
Bottom 8
RearTerminal 9
TopControl 10
RemoteControl 11
RemoteControlBatteryInstallation 12
RemoteControlOperatingRange 12
RemoteControlCode 12
Installation...........................13
PositioningtheProjector 13
AdjustableFeet 13
ConnectingtoaComputer 14
ConnectingtoVideoEquipment 15
ConnectingtoComponentVideoEquipment 16
ConnectingtheACPowerCord 17
BasicOperation......................18
TurningOntheProjector 18
TurningOfftheProjector 20
HowtoOperatetheOn-ScreenMenu 21
MenuBar 22
ZoomandFocusAdjustment 23
AutoSetupFunction 23
KeystoneCorrection 23
SoundAdjustment 24
RemoteControlOperation 25
Computer Input . . . . . . . . . . . . . . . . . . . . .27
InputSourceSelection
(Computer1:RGB) 27
InputSourceSelection
(Computer2:RGB) 28
ComputerSystemSelection 29
AutoPCadjustment 30
ManualPCadjustment 31
ImageModeSelection 33
ImageAdjustment 34
ScreenSizeAdjustment 35
VideoInput..........................37
InputSourceSelection(Video,S-video) 37
InputSourceSelection
(Component,RGBScart21-pin,HDMI) 38
VideoSystemSelection 39
ImageModeSelection 40
ImageAdjustment 41
ScreenSizeAdjustment 43
Setting..............................44
Setting 44
Information......................... 60
InputSourceInformationDisplay 60
Maintenance and Cleaning . . . . . . . . . . . . .61
WARNINGindicator 61
CleaningtheFilters 62
ResettingtheFilterCounter 62
AttachingtheLensCap 63
CleaningtheProjectionLens 63
CleaningtheProjectorCabinet 63
LampReplacement 64
Appendix............................66
Troubleshooting 66
MenuTree 70
IndicatorsandProjectorCondition 72
CompatibleComputerSpecifications 73
ListofPictureinPicture 75
TechnicalSpecifications 76
OptionalParts 77
PJLinkNotice 78
ConfigurationsofTerminals 79
PINCodeNumberMemo 80
Dimensions 81

4
To the Owner
CAUTION: TO REDUCE THE RISK OF ELECTRIC
SHOCK, DO NOT REMOVE COVER (OR
BACK). NO USER-SERVICEABLE PARTS
INSIDE EXCEPT LAMP REPLACEMENT.
REFER SERVICING TO QUALIFIED
SERVICE PERSONNEL.
THIS SYMBOL INDICATES THAT DANGEROUS
VOLTAGECONSTITUTINGARISKOFELECTRIC
SHOCKISPRESENTWITHINTHISUNIT.
THIS SYMBOL INDICATES THAT THEREARE
IMPORTANT OPERATINGAND MAINTENANCE
INSTRUCTIONS IN THE OWNER'S MANUAL
WITHTHISUNIT.
CAUTION
RISK OF ELECTRIC SHOCK
DO NOT OPEN
Before installing and operating this projector, read this
manualthoroughly.
This projector provides many convenient features and
functions. Operating the projector properly enables
youtomanage those featuresand maintains itingood
conditionformanyyearstocome.
Improperoperationmayresultinnotonlyshorteningthe
product-life, but also malfunctions, fire hazard, or other
accidents.
Ifyourprojectorseemstooperateimproperly,readthis
manualagain, checkoperations andcableconnections
and try the solutions in the “Troubleshooting” section
in the back of this booklet. If the problem still persists,
contactthedealerwhereyoupurchasedtheprojectoror
theservicecenter.
Safety Precaution
CAUTION
DO NOT SET THE PROJECTOR IN GREASY, WET, OR
SMOKY CONDITIONS SUCH AS IN A KITCHEN TO PREVENT
A BREAKDOWN OR A DISASTER. IF THE PROJECTOR
COMES IN CONTACT WITH OIL OR CHEMICALS, IT MAY
BECOME DETERIORATED.
READ AND KEEP THIS OWNER'S MANUAL FOR
LATER USE.
WARNING: ●THIS APPARATUS MUST BE EARTHED.
●TO REDUCE THE RISK OF FIRE OR
ELECTRIC SHOCK, DO NOT EXPOSE THIS
APPLIANCE TO RAIN OR MOISTURE.
–Thisprojectorproducesintenselightfromtheprojection
lens.Donotstaredirectlyintothelens,otherwiseeye
damagecouldresult.Beespeciallycarefulthatchildren
donotstaredirectlyintothebeam.
–Installtheprojectorinaproperposition.Otherwiseitmay
resultinfirehazard.
–Allowingtheproperamountofspaceonthetop,sides,
andrearoftheprojectorcabinetiscriticalforproper
aircirculationandcoolingoftheunit.Thedimension
shownhereindicatetheminimumspacerequired.
Iftheprojectoristobebuiltintoacompartmentor
similarlyenclosed,theseminimumdistancesmustbe
maintained.
–Donotcovertheventilationslotontheprojector.Heat
build-upcanreducetheservicelifeofyourprojector,and
canalsobedangerous.
–Iftheprojectorisunusedforanextendedtime,unplug
theprojectorfromthepoweroutlet.
–Donotprojectthesameimageforalongtime.The
afterimagemayremainontheLCDpanelsbythe
characteristicofpanel.
SIDEandTOP REAR
CAUTION
NotforuseinacomputerroomasdefinedintheStandard
fortheProtectionofElectronicComputer/DataProcessing
Equipment,ANSI/NFPA75.
Nepeutêtreutilisédansunesalled’ordinateurstelle
quedéfiniedanslanormeANSI/NFPA75Standard
forProtectionofElectronicComputer/DataProcessing
Equipment.
0.7’(20cm)
1.5’(50cm) 3’(1m) 3’(1m)
20cm
50cm 1m 1m
Thesymbolmarkand recyclingsystemsdescribedbelow
applytoEUcountriesanddonotapplytocountriesinother
areasoftheworld.
Yourproductisdesignedandmanufacturedwithhighquality
materials andcomponentswhichcanberecycledand/or
reused.
Thesymbolmarkmeansthatelectricalandelectronic
equipment,batteriesandaccumulators,attheirend-of-
life, should be disposed of separately from your household
waste.
Note:
If a chemical symbol is printed beneath the symbol mark,
thischemicalsymbolmeansthatthebatteryoraccumulator
contains a heavy metal at a certain concentration. This will
beindicatedasfollows:Hg:mercury,Cd:cadmium,Pb:lead
IntheEuropeanUnionthereareseparatecollectionsystems
forusedelectricalandelectronicequipment,
batteriesandaccumulators.
Please,disposeofthemcorrectlyatyourlocal
communitywastecollection/recyclingcentre.
Please,helpustoconservetheenvironment
welivein!

5
Safety Instructions
Allthesafetyandoperatinginstructionsshouldberead
beforetheproductisoperated.
Readalloftheinstructionsgivenhereandretainthem
forlateruse.UnplugthisprojectorfromACpowersupply
beforecleaning.Donotuseliquidoraerosolcleaners.
Useadampclothforcleaning.
Followallwarningsandinstructionsmarkedonthe
projector.
Foraddedprotectiontotheprojectorduringalightning
storm,orwhenitisleftunattendedandunusedforlong
periodsoftime,unplugitfromthewalloutlet.Thiswill
preventdamageduetolightningandpowerlinesurges.
Donotexposethisunittorainorusenearwater...for
example,inawetbasement,nearaswimmingpool,etc...
Donotuseattachmentsnotrecommendedbythe
manufacturerastheymaycausehazards.
Donotplacethisprojectoronanunstablecart,stand,
ortable.Theprojectormayfall,causingseriousinjury
toachildoradult,andseriousdamagetotheprojector.
Useonlywithacartorstandrecommendedbythe
manufacturer,orsoldwiththeprojector.Wallorshelf
mountingshouldfollowthemanufacturer’sinstructions,
andshoulduseamountingkitapprovedbythe
manufacturers.
Anapplianceandcartcombination
shouldbemovedwithcare.Quick
stops,excessiveforce,anduneven
surfacesmaycausetheappliance
andcartcombinationtooverturn.
Slotsandopeningsinthebackandbottomofthecabinet
areprovidedforventilation,toensurereliableoperationof
theequipmentandtoprotectitfromoverheating.
Theopeningsshouldneverbecoveredwithclothorother
materials,andthebottomopeningshouldnotbeblocked
byplacingtheprojectoronabed,sofa,rug,orother
similarsurface.Thisprojectorshouldneverbeplaced
nearoroveraradiatororheatregister.
Thisprojectorshouldnotbeplacedinabuilt-ininstallation
suchasabookcaseunlessproperventilationisprovided.
Neverpushobjectsofanykindintothisprojectorthrough
cabinetslotsastheymaytouchdangerousvoltagepoints
orshortoutpartsthatcouldresultinafireorelectric
shock.Neverspillliquidofanykindontheprojector.
Donotinstalltheprojectorneartheventilationductof
air-conditioningequipment.
Thisprojectorshouldbeoperatedonlyfromthetype
ofpowersourceindicatedonthemarkinglabel.Ifyou
arenotsureofthetypeofpowersupplied,consultyour
authorizeddealerorlocalpowercompany.
Donotoverloadwalloutletsandextensioncordsasthis
canresultinfireorelectricshock.Donotallowanything
torestonthepowercord.Donotlocatethisprojector
wherethecordmaybedamagedbypersonswalkingon
it.
Donotattempttoservicethisprojectoryourselfas
openingorremovingCoversmayexposeyouto
dangerousvoltageorotherhazards.Referallservicing
toqualifiedservicepersonnel.
Unplugthisprojectorfromwalloutletandreferservicing
toqualifiedservicepersonnelunderthefollowing
conditions:
a.Whenthepowercordorplugisdamagedorfrayed.
b.Ifliquidhasbeenspilledintotheprojector.
c.Iftheprojectorhasbeenexposedtorainorwater.
d.Iftheprojectordoesnotoperatenormallybyfollowing
theoperatinginstructions.Adjustonlythosecontrols
thatarecoveredbytheoperatinginstructionsas
improperadjustmentofothercontrolsmayresultin
damageandwilloftenrequireextensiveworkbya
qualifiedtechniciantorestoretheprojectortonormal
operation.
e.If the projector has beendroppedorthecabinethas
beendamaged.
f.Whentheprojectorexhibitsadistinctchangein
performance-thisindicatesaneedforservice.
Whenreplacementpartsarerequired,besurethe
servicetechnicianhasusedreplacementpartsspecified
bythemanufacturerthathavethesamecharacteristics
astheoriginalpart.Unauthorizedsubstitutionsmay
resultinfire,electricshock,orinjurytopersons.
Uponcompletionofanyserviceorrepairstothis
projector,asktheservicetechniciantoperformroutine
safetycheckstodeterminethattheprojectorisinsafe
operatingcondition.
NOTE FOR CUSTOMERS IN THE US
HgLAMP(S)INSIDETHISPRODUCTCONTAIN
MERCURYANDMUSTBERECYCLEDORDISPOSED
OFACCORDINGTOLOCAL,STATEORFEDERAL
LAWS.

6
Safety Instructions
Openingsinthecabinetareprovidedforventilation.To
ensurereliableoperationoftheproductandtoprotectit
fromoverheating,theseopeningsmustnotbeblocked
orcovered.
CAUTION
Hotairisexhaustedfromtheexhaustvent.Whenusing
or installing the projector, the following precautions
shouldbetaken.
–Donotputanyflammableobjectorspraycannearthe
projector,hotairisexhaustedfromtheairvents.
–Keeptheexhaustventatleast3’(1m)awayfromany
objects.
–Do not touch a peripheral part of the exhaust vent,
especiallyscrewsandmetallicparts.Theseareaswill
becomehotwhiletheprojectorisbeingused.
–Donotputanythingonthecabinet.Objectsputonthe
cabinetwillnotonlygetdamagedbutalsomaycause
firehazardbyheat.
Cooling fans are provided to cool down the projector.
The fans’ running speed is changed according to the
temperatureinsidetheprojector.
CAUTION IN CARRYING OR TRANSPORTING
THE PROJECTOR
–Donotdroporbumptheprojector,otherwisedamages
ormalfunctionsmayresult.
–Whencarryingtheprojector,useasuitablecarryingcase.
–Do not transport the projector by courier or any other
transportservicein an unsuitabletransport case.This
may cause damage to the projector. For information
abouttransportingtheprojectorbycourieroranyother
transportservice,consultyourdealer.
–Donotputtheprojectorinacasebeforetheprojector
iscooledenough.
Moving the Projector
Whenmovingtheprojector,replacethelenscapand
retractadjustablefeettopreventdamagetothelensand
cabinet.
Whentheprojectorisnotinuseforanextendedperiod,
putitintothesuppliedcarryingcasewiththelensside
up.
Air Circulation
AirIntakeVent
AirintakeVent
ExhaustVent
(Hotairexhaust)
AirIntakeVent
Donottilttheprojectormorethan30
degreesfromaboveandbelow.
Donotpointtheprojectoruptoprojectan
image.
Donotpointtheprojectordowntoproject
animage.
Donotputtheprojectoroneithersideto
projectanimage.
Install the projector properly. Improper Installation may
reducethelamplifeandcauseafirehazard.
Installing the Projector in Proper Position
ExhaustVent
(Hotairexhaust)
Donottilttheprojectormorethan20
degreesfromsidetoside.
20°
20°
30°
30°
CAUTION
Thecarryingcase(supplied)isintendedforprotection
againstdustandscratchesonsurfaceofthecabinet,
anditisnotdesignedtoprotectanappliancefrom
externalforces.Donottransporttheprojectorbycourier
oranyothertransportservicewiththiscase,otherwise
theprojectorcanbedamaged.Whenhandlingthe
projector,donotdrop,bump,subjectittostrongforces,
orputotherthingsonthecabinet.

7
Safety Instructions Compliance
Federal Communications Commission Notice
Note:ThisequipmenthasbeentestedandfoundtocomplywiththelimitsforaClassBdigitaldevice,pursuant
toPart15oftheFCCRules.Theselimitsaredesignedtoprovidereasonableprotectionagainstharmful
interferenceinaresidentialinstallation.Thisequipmentgenerates,uses,andcanradiateradiofrequency
energy,andifnotinstalledandusedinaccordancewiththeinstructions,maycauseharmfulinterference
toradiocommunications.However,thereisnoguaranteethatinterferencewillnotoccurinaparticular
installation.Ifthisequipmentdoescauseharmfulinterferencetoradioortelevisionreception,whichcanbe
determinedbyturningtheequipmentoffandon,theuserisencouragedtotrytocorrecttheinterferenceby
oneormoreofthefollowingmeasures:
–Reorientorrelocatethereceivingantenna.
–Increasetheseparationbetweentheequipmentandreceiver.
–Connecttheequipmentintoanoutletonacircuitdifferentfromthattowhichthereceiverisconnected.
–Consultthedealeroranexperiencedradio/TVtechnicianforhelp.
UseofshieldedcableisrequiredtocomplywithclassBlimitsinSubpartBofPart15ofFCCRules.
Donotmakeanychangesormodificationstotheequipmentunlessotherwisespecifiedintheinstructions.If
suchchangesormodificationsshouldbemade,youcouldberequiredtostopoperationoftheequipment.
ModelNumber :LC-WB100
TradeName :EIKI
Responsibleparty :EIKIInternational,Inc.
Address :30251EsperanzaRanchoSantaMargaritaCA92688-2132
TelephoneNo. :800-242-3454(949-457-0200)
TheACPowerCordsuppliedwiththisprojectormeetstherequirementforuseinthecountryyoupurchasedit.
AC Power Cord for the United States and Canada:
ACPowerCordusedintheUnitedStatesandCanadaislistedbytheUnderwriters
Laboratories(UL)andcertifiedbytheCanadianStandardAssociation(CSA).
ACPowerCordhasagrounding-typeAClineplug.Thisisasafetyfeaturetobesurethatthe
plugwillfitintothepoweroutlet.Donottrytodefeatthissafetyfeature.Shouldyoubeunable
toinserttheplugintotheoutlet,contactyourelectrician.
GROUND
AC Power Cord Requirement
AC Power Cord for the United Kingdom:
Thiscordisalreadyfittedwithamouldedplugincorporatingafuse,thevalueofwhichisindicatedonthepin
faceoftheplug.Shouldthefuseneedtobereplaced,anASTAapprovedBS1362fusemustbeusedofthe
samerating,markedthus
ASA
.Ifthefusecoverisdetachable,neverusetheplugwiththecoveromitted.Ifa
replacementfusecoverisrequired,ensureitisofthesamecolourasthatvisibleonthepinfaceoftheplug
(i.e.redororange).FusecoversareavailablefromthePartsDepartmentindicatedinyourUserInstructions.
Iftheplugsuppliedisnotsuitableforyoursocketoutlet,itshouldbecutoffanddestroyed.
Theendoftheflexiblecordshouldbesuitablypreparedandthecorrectplugfitted.
WARNING : A PLUG WITH BARED FLEXIBLE CORD IS HAZARDOUS IF ENGAGED IN A LIVE SOCKET
OUTLET.
TheWiresinthismainsleadarecolouredinaccordancewiththefollowingcode:
Green-and-yellowEarth
Blue . . . . . . . . . . . Neutral
Brown . . . . . . . . . Live
Asthecoloursofthewiresinthemainsleadofthisapparatusmaynotcorrespondwiththecolouredmarkings
identifyingtheterminalsinyourplugproceedasfollows:
Thewirewhichiscolouredgreen-and-yellowmustbeconnectedtotheterminalintheplugwhichismarkedby
theletterEorbythesafetyearthsymbol orcolouredgreenorgreen-and-yellow.
ThewirewhichiscolouredbluemustbeconnectedtotheterminalwhichismarkedwiththeletterNor
colouredblack.
ThewirewhichiscolouredbrownmustbeconnectedtotheterminalwhichismarkedwiththeletterLor
colouredred.
WARNING: THIS APPARATUS MUST BE EARTHED.
THE SOCKET-OUTLET SHOULD BE INSTALLED NEAR THE EQUIPMENT AND EASILY ACCESSIBLE.

8
Part Names and Functions
①⑤ ⑨③②
Front
Back
④
①Infrared Remote Receiver
②Zoom Ring
③Focus Ring
④Projection Lens
⑤Lens Cap
(Seepage63forattaching.)
⑥Speaker
⑦Exhaust Vents
CAUTION
Hotairisexhaustedfromtheexhaustvent.Donotput
heat-sensitiveobjectsnearthisside.
⑧Lamp Cover
⑨Air Intake Vent
⑩Terminals and Connectors
⑪Top Controls and Indicators
⑫ LAN Connection Terminal
⑬ Power Cord Connector
⑭Filters
⑮Adjustable Feet
Note:
⑫LANConnectionTerminalisfortheNetworkfunction.
Refertotheowner’smanualof“NetworkSet-upand
Operation”.
Kensington Security Slot
ThisslotisforaKensingtonlockusedtodetertheftof
theprojector.
KensingtonisaregisteredtrademarkofACCOBrands
Corporation.
CAUTION
Donotturnonaprojectorwithlenscapattached.High
temperaturefromlightbeammaydamagelenscapand
resultinfirehazard.
Bottom
⑦⑩
⑨
⑥
⑪
⑬
⑫
⑧
⑮
⑭

9
Part Names and Functions
Rear Terminal
⑥S-VIDEO IN
ConnecttheS-VIDEOoutputsignalfromvideo
equipmenttothisjack(p.15).
⑨AUDIO IN
Connecttheaudiooutputsignalfromvideo
equipmentconnectedto⑥or⑩tothisjack.
Foramonoaudiosignal(asingleaudiojack),
connectittotheL(MONO)jack(p.15).
⑧COMPUTER 1 / COMPUTER 2 AUDIO IN
Connecttheaudiooutput(stereo)froma
computerorvideoequipmentconnectedto②
or③tothisjack.(pp14,16)
⑩VIDEO IN
Connectthecompositevideooutputsignalto
thisjack(p.15).
②COMPUTER IN 1 / COMPONENT IN
Connectoutputsignalfromacomputer,RGBscart
21-pinvideooutputorcomponentvideooutputto
thisterminal(pp.14,16).
⑦AUDIO OUT (VARIABLE)
Connectanexternalaudioamplifiertothisjack
(pp.14-16).
ThisterminaloutputssoundfromAUDIOIN
terminal(⑧or⑨).
⑤LAN Connection Terminal
ConnecttheLANcable(refertotheowner’smanual
of"NetworkSet-upandOperation").
② ③① ⑤
⑥
⑩⑦⑨
①CONTROL PORT
WhencontrollingtheprojectorwithRS-232C,
connectthecontrolequipmenttothisconnectorwith
theserialcontrolcable.
③COMPUTER IN 2 / MONITOR OUT
–Connectcomputeroutputtothisterminal(p.14).
–Thisterminalcanbeusedtooutputtheincoming
analogRGBsignalfromCOMPUTERIN1/
COMPONENTINterminaltotheothermonitor
(p.14).
⑧
④HDMI
ConnecttheHDMIsignal(includingsoundsignal)
fromvideoequipmentortheDVIsignalfrom
computertothisterminal(pp.14,16).
④
* isregisteredtrademarksofHDMI
Licensing,LLC.
*

10
Part Names and Functions
Top Control
⑨LAMP REPLACE indicator
Lightsyellowwhentheprojectionlampreachesits
endoflife(pp.64,72).
⑧WARNING indicator
–Lightsredwhentheprojectordetectsanabnormal
condition.
–Blinksredwhentheinternaltemperatureofthe
projectorexceedstheoperatingrange(pp.61,72).
④ON/STAND-BY button
Turntheprojectoronoroff(pp.18-20).
⑤POWER indicator
–Lightsredwhentheprojectorisinstand-bymode.
–Lightsgreenduringoperations.
–BlinksgreeninthePowermanagementmode
(p.53).
③INPUT button
Selectaninputsource(pp.27-28,37-38).
⑥MENU button
OpenorclosetheOn-ScreenMenu(p.21).
②POINT ▲▼◄► (VOLUME +/–) buttons
–SelectanitemoradjustthevalueintheOn-Screen
Menu(p.21).
–PantheimageintheDigitalzoom+/-mode(p.36).
–Adjustthevolumelevel(Point◄►buttons)(p.24).
⑦AUTO SETUP button
ExecutethesettingofAutosetup(includesInput
search,AutoPCadj.andAutoKeystonefunctions)
inthesettingmenu(pp.23,45).
①SELECT button
–Executetheselecteditem(p.21).
–ExpandorcompresstheimageintheDigitalzoom
mode(p.36).
①
②
③
④
⑤
⑥
⑦
⑧
⑨

11
Part Names and Functions
Note:
Toensuresafeoperation,pleaseobservethefollowingprecautions:
–Donotbend,drop,orexposetheremotecontroltomoistureorheat.
–Forcleaning,useasoftdrycloth.Donotapplybenzene,thinner,spray,
oranychemicalmaterial.
Remote Control
⑦
㉑
④
⑲
②
⑧
⑨
⑬
⑰
⑤
⑥
⑳
⑯
③
②AUTO SET button
ExecutethesettingofAutosetup(includesInputsearch,AutoPCadj.
andAutoKeystonefunctions)inthesettingmenu.
(pp.23,45)
⑤S-VIDEO button
SelecttheS-VIDEOinputsource.(p.37)
⑥Point ▲▼◄►buttons
–SelectanitemoradjustthevalueintheOn-ScreenMenu.(p.21)
–PantheimageintheDigitalzoom+/-mode.(p.36)
⑬MUTE button
Mutethesound.(p.24)
⑦SCREEN button
Selectascreenmode.(pp.26,35,43)
⑯P-TIMER button
OperatetheP-timerfunction.(p.26)
⑩NO SHOW button
Temporarilyturnofftheimageonthescreen.(p.26)
⑰LAMP button
Selectalampmode.(pp.25,55)
⑲KEYSTONE button
Correctkeystonedistortion.(pp.23,46)
⑳SELECT button
–Executetheselecteditem.(p.21)
–ExpandorcompresstheimageinDigitalzoommode.(p.36)
⑧MENU button
OpenorclosetheOn-ScreenMenu.(p.21)
⑨FREEZE button
Freezethepictureonthescreen.(p.25)
⑫VOLUME +/- buttons
Adjustthevolumelevel.(p.24)
①ON/STAND-BY button
Turntheprojectoronoroff.(pp.18-20)
③COMPUTER 1/2 buttons
SelecttheCOMPUTER1orCOMPUTER2inputsource.(pp.27-28,38)
⑪D.ZOOM ▲▼buttons
Zoominandouttheimages.(pp.25,36)
⑭IMAGE button
Selecttheimagemode.(pp.26,33,40)
㉑COMPONENT button
SelecttheCOMPONENTinputsource.(p.38)
④VIDEO button
SelecttheVIDEOinputsource.(p.37)
⑱
⑱INFO. button
Operatetheinformationfunction.(p.60)
①
㉒
㉒HDMI button
SelecttheHDMIinputsource.(pp.25,50)
⑩
⑫
⑪⑭
⑮
⑮PIP button
OperatethePictureInPicturefunction.(pp.25,51)

12
Part Names and Functions
Toensuresafeoperation,pleaseobservethefollowingprecautions:
● Usetwo(2)AAAorLR03typealkalinebatteries.
● Alwaysreplacebatteriesinsets.
● Donotuseanewbatterywithausedbattery.
● Avoidcontactwithwaterorliquid.
● Donotexposetheremotecontroltomoistureorheat.
● Donotdroptheremotecontrol.
● Ifthebatteryhasleakedontheremotecontrol,carefullywipethecasecleanandinstallnewbatteries.
● Riskofanexplosionifbatteryisreplacedbyanincorrecttype.
● Disposeofusedbatteriesaccordingtotheinstructionsoryourlocaldisposalruleorguidelines.
Openthebattery
compartmentlid.
Installnewbatteries
intothecompartment.
Replacethe
compartmentlid.
Two AAA size batteries
Forcorrectpolarity
(+and–),besure
batteryterminalsare
incontactwithpinsin
compartment.
1 2 3
Pointtheremotecontroltowardtheprojector(Infrared
RemoteReceiver)whenpressingthebuttons.Maximum
operatingrangefortheremotecontrolisabout16.4'(5m)
and60degreesinfrontoftheprojector.
Remote Control Operating Range
Remote Control Battery Installation
16.4'
(5m)
30° Remotecontrol
30°
Remote Control Code
The2differentremotecontrolcodes(Code1-Code2)areassignedtothisprojector.Switchingtheremote
controlcodespreventsinterferencefromotherremotecontrolswhenseveralprojectorsorvideoequipment
nexttoeachotherareoperatedatthesametime.Changetheremotecontrolcodefortheprojectorfirstbefore
changingthatfortheremotecontrol.See"Remotecontrol"intheSettingMenuonpage55.
PressandholdtheMENUandIMAGEbuttonsformore
thanfivesecondstoswitchbetweentheCode 1 and Code
2.TheinitialcodeissettoCode 1.
MENU button
IMAGE button
Whilepressingthe
MENUbutton,pressthe
IMAGEbuttonmore
thanfivesecondsto
switchbetweenthe
codes.

13
Adjustable Feet
Positioning the Projector
Forprojectorpositioning,seethefiguresbelow.Theprojectorshouldbesetperpendicularlytotheplaneofthe
screen.
Installation
Note:
•Thebrightnessintheroomhasagreatinfluenceonpicturequality.Itisrecommendedtolimitambient
lightinginordertoobtainthebestimage.
•Allmeasurementsareapproximateandmayvaryfromtheactualsizes.
Projectionanglecanbeadjustedupto12.0degreeswith
theadjustablefeet.
Liftthefrontoftheprojectorandpressthefeetlocklatches
onbothsideoftheprojector.
Releasethefeetlocklatchestolocktheadjustablefeetand
rotatetheadjustablefeettoaproperheight,andtilt.
Keystonedistortioncanbeadjustedautomaticallywiththe
Autosetupfunctionormanuallybyusingtheremotecontrol
orthemenuoperation(seepages23,45-46).
--- ---
2.4’(0.74m)
8.3’(2.54m)
12.5(3.82m)
16.7’(5.10m)
25.2’(7.67m)
A
B
30" 62" 93"
124"
186"
30"
49:1
16:10 646 x 404
2.4’(0.74m)
4.0’(1.21m)
2154 x1346
8.3’(2.54m)
13.5’(4.11m)
3231 x 2019
12.5’(3.82m)
20.3’(6.18m)
4308 x 2692
16.7’(5.10m)
6462 x 4039
25.2’(7.67m)
AdjustableFeet FeetLockLatches

14
Installation
Connecting to a Computer
Cables used for connection
•VGAcables(MiniD-sub15pin)*
•Audiocables
•HDMI-DVIcable
(*Onecableissupplied;othercablesarenotsuppliedwiththeprojector.)
Note:
•InputsoundtotheCOMPUTER1/COMPUTER2AUDIOIN
terminalwhenusingtheCOMPUTERIN2/MONITOROUTand
theCOMPUTERIN1/COMPONENTINterminalasinput.
•WhentheAUDIOOUTisplugged-in,theprojector'sbuilt-in
speakerisnotavailable.
•Whenthecableisofthelongervariety,itisadvisabletousethe
COMPUTERIN1/COMPONENTINandnottheCOMPUTER
IN2.
Unplugthepowercordsofboththe
projectorandexternalequipment
fromtheACoutletbeforeconnecting
cables.
ExternalAudioEquipment
Audiocable
(stereo)
Audiocable
(stereo)
MonitorOutput
/MonitorInput
AudioOutput
COMPUTER1/
COMPUTER2
AUDIOIN
AUDIOOUT
(stereo)
AudioInput
VGA
cable
COMPUTERIN2
/MONITOROUT
COMPUTERIN1/
COMPONENTIN
VGA
cable
MonitorOutput DVIoutput
HDMI-DVI
cable
HDMI
Note:
•AnalogRGBandcomponentsignalscannotbe
outputfromtheCOMPUTERIN2/MONITOR
OUTterminalwhenusingtheCOMPUTERIN
2/MONITOROUTterminalasoutput.
•WhenDVIsignalisconnectedtoHDMIterminal
withHDMI-DVIcable,connectthesoundsignal
toCOMPUTER2AUDIOINandsetupSoundof
"HDMIsetup"to"Computer2".(p.50)

15
Installation
Connecting to Video Equipment
Cables used for connection
•VideoandAudiocable(RCAx3)
•S-Videocable
•Audiocable
(Cablesarenotsuppliedwiththeprojector.)
Unplugthepowercordsof
boththeprojectorandexternal
equipmentfromtheACoutlet
beforeconnectingcables.
Note:
WhentheAUDIOOUTisplugged-in,theprojector'sbuilt-
inspeakerisnotavailable.
L R
ExternalAudioEquipment
Audiocable
(stereo)
VIDEO
S-VIDEO
S-Videocable
Videoandaudiocable
VideoandAudioOutput
S-VideoOutput
AUDIOIN
AudioInput
AUDIOOUT(stereo)
(R)(L)
(Video)

16
Installation
Connecting to Component Video Equipment
Note:
•WhentheAUDIOOUTisplugged-in,theprojector's
built-inspeakerisnotavailable.
•Seepage77fororderingoptionalcables.
Unplugthepowercordsof
boththeprojectorandexternal
equipmentfromtheACoutlet
beforeconnectingcables.
L R
ExternalAudioEquipment
COMPUTER1/
COMPUTER2
AUDIOIN
Audiocable
(stereo)
Audio
cable
(stereo)
AudioInput
ComponentVideoOutput
(Y,Pb/Cb,Pr/Cr)
RGBScart21-
pinOutput AudioOutput
Scart-VGA
cable
Component-
VGAcable
AUDIO OUT
(stereo)
Component
cable
COMPUTERIN1/COMPONENTIN
Cables used for connection
•Audiocables
•Scart-VGAcable
•HDMIcable
•Componentcable
•Component-VGACable
(Cablesarenotsuppliedwiththisprojector.)
HDMIoutput
HDMI
cable
HDMI

17
Installation
Connecting the AC Power Cord
Thisprojectorusesnominalinputvoltagesof100-120Vor
200–240VACanditautomaticallyselectsthecorrectinput
voltage.Itisdesignedtoworkwithsingle-phasepower
systemshavingagroundedneutralconductor.Toreduce
theriskofelectricalshock,donotplugintoanyothertypeof
powersystem.
Ifyouarenotsureofthetypeofpowerbeingsupplied,
consultyourauthorizeddealerorservicestation.
Connecttheprojectorwithallperipheralequipmentbefore
turningtheprojectoron.
Note:
UnplugtheACpowercordwhentheprojectorisnot
inuse.Whenthisprojectorisconnectedtoanoutlet
withtheACpowercord,itisinStand-bymodeand
consumesalittleelectricpower.
Connect theAC power cord (supplied) to the
projector.
TotheACoutlet.
(200 - 240 V AC)
NOTE ON THE POWER CORD
ACpowercordmustmeetrequirementofthecountrywhereyouusetheprojector.
ConfirmtheACplugtypewiththechartbelowandproperACpowercordmustbeused.
IfsuppliedACpowercorddoesnotmatchyourACoutlet,contactyoursalesdealer.
Topowercord
connectoronyour
projector.
Projector side AC outlet side
Ground
TotheACoutlet.
(120 V AC)
For the U.S.A. and Canada
TotheACoutlet.
(200 - 240 V AC)
For the U.K.For Continental Europe
CAUTION
TheACoutletmustbenearthisequipmentandmustbe
easilyaccessible.

18
Thepreparationdisplaywilldisappear
after30seconds.
(Seepage55forLampcontrolstatus.)
Turning On the Projector
Connecttheprojector’sACpowercordintoanAC
outlet.ThePOWERindicatorlightsred.Openthelens
cap(seepages8,63).
PresstheON/STAND-BYbuttononthetopcontrolor
ontheremotecontrol.ThePOWERindicatorlights
greenandthecoolingfansstarttooperate.The
preparationdisplayappearsonthescreenandthe
countdownstarts.
2
3
1
4Afterthecountdown,theinputsourcethatwas
selectedthelasttimeandthelampcontrolstatusicon
(seepage55)appearonthescreen.
Completeperipheralconnections(withacomputer,
VCR,etc.)beforeturningontheprojector.
Selected Input Source and Lamp Control
Note:
•WhentheLogoselectfunctionissettoOff,thelogowill
notbeshownonthescreen(p.47).
•WhenCountdown offorOffisselected in the Display
function,thecountdownwillnotbeshownonthescreen
(p.46).
•Duringthecountdownperiod,alloperationsareinvalid.
•WhentheInputSearchfunctionissettoOn2,theinput
signalwillbesearchedautomatically(p.45)
•WhenOffisselectedintheDisplayfunction,theVideo/
PC selection window and the input signal guidance
windowarenotshownonthescreen.(p.46)
Note:
TheFilterwarningandLampreplacement
iconsmayappearonthescreendepending
ontheusagestateoftheprojector.
Basic Operation
Lampcontrolstatus
Video
Ifthereisnosignalinputwhenstartontheprojector,
orthecurrentsignalismissedwhileoperatingthe
projector,theVideo/PCselectionwindowwillbe
displayedonthescreen,pleasemovethepointerto
inputsourcedesiredbypressingthePoint▲▼buttons
andpresstheSELECTbutton.Andthenfollowthe
inputsignalguidancewindowtocorrectthesignaland
connection.
IftheprojectorislockedwithaPINcode,PINcode
inputdialogboxwillappear.EnterthePINcodeas
instructedonthenextpage.
5
Video/ PC selection window
Video / PC selection window
Input signal guidance window
Nosignal
CurrentInputsettingVideo
VIDEO S-VIDEO
Issignalprocessedcorrectly?
Iscableconnectedproperly?
Nosignal
CurrentInputsettingCOMPUTER1RGB
Issignalprocessedcorrectly?
Iscableconnectedproperly?
16
http://www.eiki.com

19
What is PIN code?
PIN(PersonalIdentificationNumber)codeisasecurity
codethatallowsthepersonwhoknowsittooperatethe
projector.SettingaPINcodepreventsunauthorizeduseof
theprojector.
APINcodeconsistsofafour-digitnumber.RefertothePIN
codelockfunctionintheSettingMenuonpages54-55for
lockingoperationoftheprojectorwithyourPINcode.
Enter a PIN code
UsethePoint▲▼buttonstoenteranumber.Pressthe
Point►buttontofixthenumberandmovetheredframe
pointertothenextbox.Thenumberchangesto.Ifyou
fixedanincorrectnumber,usethePoint◄buttontomove
thepointertothenumberyouwanttocorrect,andthen
enterthecorrectnumber.
Repeatthissteptocompleteenteringafour-digitnumber.
Afterenteringthefour-digitnumber,movethepointertoSet.
PresstheSELECTbuttonsothatyoucanstarttooperate
theprojector.
IfyouenteredanincorrectPINcode,PIN codeandthe
number()willturnredforamoment.Enterthe
correctPINcodealloveragain.
CAUTION ON HANDLING PIN CODE
IfyouforgetyourPINcode,theprojectorcanno
longerbestarted.Takeaspecialcareinsetting
anewPINcode;writedownthenumberina
columnonpage80ofthismanualandkeepit
onhand.ShouldthePINcodebemissingor
forgotten,consultyourdealerorservicecenter.
AftertheOKicondisappears,
youcanoperatetheprojector.
PIN Code Input Dialog Box
Basic Operation
Note:
•IfthePINcodenumberisnotenteredwithinthree
minutesafterthePINcodedialogboxappeared,the
projectorwillbeturnedoffautomatically.
•The“1234”issetastheinitialPINcodeatthefactory.

20
TOMAINTAINTHELIFEOFTHELAMP,ONCE
YOUTURNTHEPROJECTORON,WAITAT
LEASTFIVEMINUTESBEFORETURNINGIT
OFF.
Power off?disappearsafter4seconds.
Turning Off the Projector
PresstheON/STAND-BYbuttononthetopcontrolor
ontheremotecontrol,andPower off? appearsonthe
screen.
PresstheON/STAND-BYbuttonagaintoturnoffthe
projector.ThePOWERindicatorstartstoblinkred,and
thecoolingfanskeeprunning.(Youcanselectthelevel
offans’quietnessandspeed.See“Fan”onpage58.)
Atthistime,youcanunplugtheACpowercordevenif
thefansarestillrunning.
1
2
3Whentheprojectorhascooleddownenough,the
POWERindicatorstopsblinkingandyoucanturnon
theprojector.
Note:
•WhentheOnstartfunctionissettoOn,theprojector
willbeturnedonautomaticallybyconnectingtheAC
powercordtoanACoutlet(p.53).
•Therunningspeedofcoolingfansischangedaccording
tothetemperatureinsidetheprojector.
•Donotputtheprojectorinacasebeforetheprojectoris
cooledenough.
•IftheWARNINGindicatorblinksorlightsred,see
“WARNINGindicator”onpage61.
•WhilethePOWERindicatorisblinking,thelampis
beingcooleddownandtheprojectorcannotbeturned
on.WaituntilthePOWERindicatorstopsblinkingtoturn
ontheprojectoragain.
•ThefanrotationwillterminatedirectlyiftheACpower
cordisunpluggedimmediatelyaftertheprojectoris
turnedoff.
•TheprojectorcanbeturnedonafterthePOWER
indicatorturnsred.Thewaitingtimetorestartwillbe
shortenedwhenthenormalpower-offprocessingforfan
coolingiscompleted,comparedwiththetimetheAC
powercordisimmediatelyunpluggedafterthepower-
off.
DONOTOPERATETHEPROJECTOR
CONTINUOUSLYWITHOUTREST.
CONTINUOUSUSEMAYRESULTIN
SHORTENINGTHELAMPLIFE.TURNOFFTHE
PROJECTORANDLETSTANDFORABOUTAN
HOURINEVERY24HOURS.
Basic Operation
Other manuals for LC-WB100
1
Table of contents
Other Eiki Projector manuals