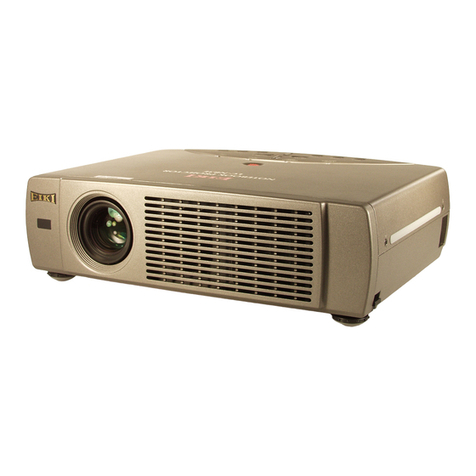
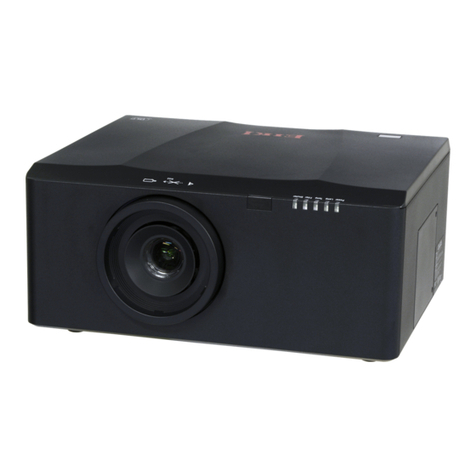
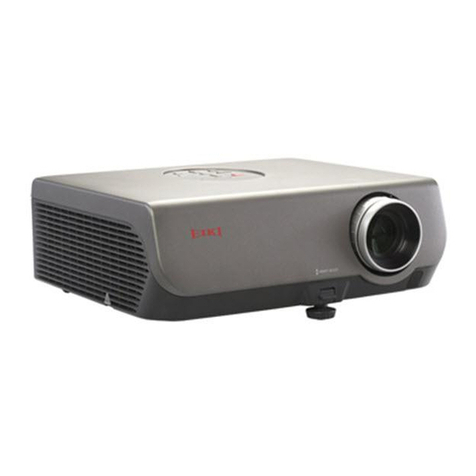
Eiki EK-501W User manual

LCD Multi-media Projector
Service Manual
EIKI Model Name:
EK-501W/ EK-502X/EK-500U

2
Contents
Contents ..........................................................2
Safety operation guideline ...............................3
Regular Maintenance ....................................11
Lamp Replacement .......................................15
Mechanical Disassembly................................16
Adjustment.....................................................30
Troubleshooting .............................................31
Appendix........................................................35

Safety operation guideline
Safety instructions
This document and your projector employ certain symbols to illustrate how to use your projector
safely. They are described below: Please get yourself familiar with them before going through this
document.
Caution Ignoring messages indicated by this symbol may lead to personal injuries
or deaths due to human errors.
Note Ignoring messages indicated by this symbol may lead to personal injuries
or property damage.
High voltage inside with risks of electric shock.
Please read this manual carefully before installing and operating your
projector.
Your projector comes with a lot of convenient features and functions. You may make the most
of these features and keep your projector in good working conditions by using it correctly.
Invalid operation of your projector may not only shorten its life cycle but also may lead to
product failure, fire, or other incidents.
In case of any operation abnormality, refer to this manual to check your operation and
connections and try solutions given in the “Troubleshooting” section at end of this manual. If
the problem persists, call your dealer or our service center.
Your projector’s lamp is a consumable and will get dimmer after long-term use. It’s normal
for an older lamp to be dimmer than a newer one. Please power on and off your projector
by strictly following steps given in “Power on your projector” and “Power off your projector”
section of this manual. Execute regular maintenance and cleaning according to instructions
set forth in “Maintaining and cleaning your projector” section of this manual. Fail to do so may
shorten life cycle of your projector and its lamps sharply or even damage your projector and
its lamps before long.
Note: DO NOT remove the casing (or back
cover) as this may result in electric shock.
Users shall not execute any maintenance
work on components within your projector
except replacing lamps. Call qualified
maintenance personnel in case of any
maintenance requirements.
Caution
Danger of electric shock
DO NOT open this.
High voltage inside with risks of
electric shock.
Operation and maintenance tips
about these components.
3

Safety operation guideline
Notes
Caution
Safety precautions:
●GROUND your projector.
●Lens of your projector projects strong light. DO NOT look at the light beam directly. You
may get your eyesight hurt. This is especially the case with children.
●Unplug the AC power plug if your projector will not be used for long time.
●DO NOT overload the socket of power cord as it may lead to fire or electric shock. DO NOT
subject the power cord to any object. DO NOT place your projector in locations where its
power cord may become damaged by treading by passersby.
●Disconnect the power plug before cleaning your projector. DO NOT apply liquid or sprays to
your projector. DO NOT wipe your projector with wet cloth.
●Please follow warnings and instructions given in labels attached to your projector. Unplug
your projector when your projector is exposed to thunderstorm weather, is unmanned, or not
in use for long periods to prevent damage caused by lightning and power surges.
●DO NOT use accessories without recommendation by the manufacturer as it may result in
potential risks.
Caution
Precautions on air outlet:
●Keep adequate clearance around your projector for its ventilation and cooling. See figure
below for the least clearance requirements. The least clearance is a MUST when your pro-
jector is placed within a cabinet or other closed environment.
0.7’(20cm)
1.5’(50cm)
3’(1m) 3’(1m)
Sides and bottom Rear
●DO NOT cover the air outlet of your projector. Poor ventilation not only shorten life cycle of
your projector but also may lead to risks.
●Slots and openings at rear and bottom of your projector are designed for ventilation. Keep
your projector from overheated to ensure its steady operation.
●DO NOT cover the air outlet with cloth or other objects. DO NOT place your projector on the
surface of bed, sofa, carpets, or similar object as this may block the air outlets at its bottom.
●DO NOT place your projector in closed environment, e.g. a bookcase, unless it is well venti-
lated.
● Keep any matter from falling in your projector through the air outlets as they may touch high
voltage parts and lead to fire or electric shock by short circuits. DO NOT splash liquid to
your projector.
4

5
Safety operation guideline
Note
Precautions on location of your projector:
●Place your projector in a proper location or it may result in fire.
●DO NOT expose your projector in rain or high humidity environments or it may result in fire
or electric shock. DO NOT your projector near water or splashing water. DO NOT place any
water container, e.g. flower vase, atop your projector.
●DO NOT place your projector in environments of soot, moisture or smoke, e.g. your kitchen,
or it may lead to product failure or accidents. Your projector may be damaged by contact with
oil or chemicals.
●DO NOT place your projector near exhaust pipe or air conditioning equipment.
●DO NOT place your projector near radiator or heating pipes.
●DO NOT place your projector atop unstable truck, rack, or table. It may fall of the surface and
lead to personal injuries and property damages. Please use cart or rack recommended by the
manufacturer or included with your product. Please follow steps given in installation guideline
included with the wall and ceiling mount racks for installation. Use installation components
approved by the manufacturer.
●Be careful when moving your projector with cart. Abrupt stops, pushing too hard and rugged
surfaces may topple your projector and the cart together.
FOR EU USERS
The symbol mark and recycling systems described below apply to EU countries and do not
apply to countries in other areas of the world.
Your product is designed and manufactured with high quality materials and components
which can be recycled and/or reused.
The symbol mark means that electrical and electronic equipment, batteries and accumulators,
at their end-of-life, should be disposed of separately from your household waste.
Note:
If a chemical symbol is printed beneath the symbol mark, this chemical symbol means
that the battery or accumulator contains a heavy metal at a certain concentration.
This will be indicated as follows: Hg: mercury, Cd: cadmium, Pb: lead In the European
Union there are separate collection systems for used electrical and electronic equipment, batteries and accumulators.
Please, dispose of them correctly at your local community waste collection/recycling centre.
Please help us to conserve the environment we live in!
Contains mercury
For more information on safe handling procedures, the measures to be taken in case of accidental
breakage and safe disposal options visit: ec.gc.ca/mercure-mercury/
Dispose of or recycle in accordance with applicable laws.

Safety operation guideline
Note:
Precautions on using your projector:
●DO NOT project the same image for long time as residual images may be left in the panel.
This is a property of LCD panel.
●Use power as indicated in tags attached to your projector. If you have doubts over available
power type, consult your dealer or local power company first.
●DO NOT open or remove the casing for maintenance as this may lead to electric shock or
other damages. Call qualified maintenance personnel in case of any maintenance require-
ments.
– In case of the following, unplug the power cord and call qualified maintenance personnel
for service immediately:
a. Damaged or broken power cord or plug
b. Liquid splashed in your projector
c. Your projector exposed to rain or water
d. If your projector fails to work as expected by following operation instructions, adjust it ac-
cording to given instructions. Other invalid operations may damage your projector, which
requires the technician to spend more time before returning it back to normal.
e. The projector falls off to ground or its casing is damaged.
f. In case of any abnormal change in your projector during its use, then maintenance ser-
vices would be required.
●In case components replacement is required, make sure the replacements have been ap-
proved by the manufacturer and features the same with the one being replaced. Use of
unauthorized parts may lead to fire, electric shock or personal injury.
●After the completion of maintenance or repair work, get the maintenance personnel to run
routine safety check to ensure your projector’s safety operation status.
Information for users in the European Union
This is a device to project images onto a screen, etc., and is not intended for use as indoor
lighting in a domestic environment. Directive 2009/125/EC.
NOTE FOR CUSTOMERS IN THE US
Hg LAMP(S) INSIDE THIS PRODUCT CONTAIN MERCURY AND MUST BE RECYCLED OR
DISPOSED OF ACCORDING TO LOCAL STATE OR FEDERAL LAWS.
6

Safety operation guideline
Air ventilation
Openings in the casing are designed for ventilation and overheating prevention. DO NOT block or
cover these openings to keep your projector in normal operation and from overheating.
Air intake
Note
Heat exhaust at the air outlet Keep the
following in mind when using or installing
your projector:
– DO NOT place flammable materials or
sprayers near your projector.
– Keep the air outlet one meter away
from other objects.
– DO NOT touch the area close to the air
outlet especially the metal components,
e.g. screws. This area and parts will get
very hot once your projector starts op-
erating.
– DO NOT place any object atop your
projector. They may not only be dam-
aged but also lead to fire after being
overheated.
Cooling fans are designed for cooling
your projector. Fan speed is auto adjusted
subject to internal temperature of your
projector.
Air outlet
(For heat exhaust)
7

Place your projector correctly
Use your projector at specified location in correct way. Invalid projector location may shorten
life-cycle of lamps or even lead to severe incidents or fire. Your projector may project upward or
downward at location perpendicular to the horizon. When installing your projector inclined down-
ward, place it in a bottom up position.
DO NOT install your projector in ways as illustrated below.
DO NOT place your projector as
illustrated above.
DO NOT tilt your projector
more than 20 degrees.
200
200
Note:
● Enable the “Ceiling” function if flip over screen is required.
Safety operation guideline
Note:
Precautions on ceiling mount
racket installation:
●Get qualified technician to install the ceiling
mount racket.
●Warranty of your projector does not cover
hazards and damage caused by using ceil-
ing mount rackets provided by unauthorized
dealers.
●Remove the ceiling mount racket when it is
not in use.
●Apply torque driver instead of power driver or
impact driver in your projector.
M6x10
10mm
M6x10
10mm
8

Safety operation guideline
Note:
Lens or your projector is electric powered.
Precautions on using your projector:
●DO NOT touch the lens when it is turning
as your fingers may get hurt.
●DO NOT let children touch the lens.
Precautions on dealing with your projector:
DO NOT lift or move your projector by holding the lens or projecting decoration ring as it may dam-
age the lens and your projector.
Be careful when handling your projector. DO NOT drop it, subject it to external forces, or place ob-
jects atop it.
DO NOT hold the lens or area around it.
Note:
Precautions on moving or shipping your projector:
●DO NOT drop or impact your projector as it may get damaged or failed in operation.
●Please employ proper container for movement.
●Prohibit express or other shipping service provider personnel from shipping your projector
with improper boxes. Your projector may become damaged. Please consult your dealers
for shipping your projector by express or other shipping service providers.
●Place your projector in box only after it has been fully cooled down.
Moving your projector:
When moving your projector close its adjustment legs as they may damage the lens and casing.
Keep your projector in suitable box when it is not to be used for a long time.
6
9

10
Safety Precautions
Caution in moving or transporting the
projector
Caution
Caution
●The projector must be grounded.
● Do not expose the projector to raindrops or
high humidity to avoid a fire or electric shock
Safety Precautions
CAUTION:
TO REDUCE THE RISK OF ELECTRIC SHOCK, DO NOT REMOVE COVER (OR BACK),
NO USER SERVICEABLE PARTS INSIDE EXCEPT LAMP REPLACEMENT. REFER
SERVICING TO QUALIFIEDSERVICE PERSONNEL.
THIS SYMBOL INDICATES THAT DANGEROUS
VOLTAGE CONSTITUTING A RISK OF
ELECTRIC SHOCK IS PRESENT WITHIN
THIS UNIT.
THIS SYMBOL INDICATES THAT THERE
ARE IMPORTANT OPERATING AND
MAINTENANCE INSTRUCTIONS IN THE
MANUAL WITH THIS UNIT.
Safety
Air Circulation
Vents in the cabinet are provided for ventilation. To ensure
reliable operation of the product and to protect it from
overheating, these openings must not be blocked or
covered.
Caution
Caution
ELECTRIC SHOCK
DO NOT OPEN
- This projector produces intense light from the projection
lens. Avoid staring directly into the lens, otherwise eye
damage could be caused. Be especially careful that
children do not stare directly into the beam.
- Place the projector in a proper position.Otherwise it
may result in fire hazard
- Leave an appropriate space from the top, sides, and
back of the shell in order to ventilate and cool down
the projector. The figures below indicate the minimum
distance to be left. It must be satisfied if the projector
is placed in sealed environment like a cabinet.
- Do not cover the vent of the projector. Poor radiation
may shorten the service life or even cause dangers.
- Remove the AC power plug if the projector is not to be
used for a long time.
- Do not project the same image for a longime;otherwise,
a residual image may appear on the LCD panel due to
its characteristic.
- Do not drop or bump the projector, otherwise damages
or malfunctions may result.
- When carrying the projector, use a suitable carrying
case.
- Do not transport the projector by courier or any other
transport service in an unsuitable transport case. This
may cause damage to the projector. For information
about transporting the projector by courier or any other
transport service, consult your dealer.
- Do not put the projector in a case before it is cooled
enough.
Hot air is exhausted from the exhaust vent. When using
or installing the projector, the following precautions should
be taken.
- Do not put any flammable objects, or spray can near
the projector. Hot air is exhausted from the air vents.
- Keep the exhaust vent at least 1 m away from any
objects.
- Do not touch a peripheral part of the exhaust vent,
especially screws and metallic part. This area will
become hot while the projector is being used.
- Do not put anything on the projector. Objects put on
the cabinet will not only get damaged but also may
cause fire hazard by heat
Cooling fans are provided to cool down the projector.
The fan’s running speed is changed according to the
temperature inside the projector.
Do not set the projector in greasy, wet, or smoky conditions
such as in a kitchen, to prevent a malfunction or accident.
If the projector comes in contact with oil or chemicals,
it may become deteriorated.
Read and keep this manual for future reference.

FILTER STATUS POWER
Regular maintenance
Status light indicator
The status light indicator shows status of projector protection function. Check status and POWER
light indicator for good maintenance operation.
Note
Unplug the AC power cord in case of any abnormality as it may lead to fire or electric
shock.
The projector turns off and the status light indicator flashes red.
Your projector powers off and the status light indicator turns red.
Your projector powers off automatically to protect components within it when it is overheated. The
POWER indicator flashes when your projector is cooling down. Press the STANDBY button to
power your projector on again when it is cooled down to normal operation temperature.
Check the following:
– Is adequate clearance provided for your projector’s ventilation? Check the installation status
and any air outlet block.
– Is your projector installed at location close to outlet of air conditioning equipment? Keep your
projector away from air outlet of air conditioning equipment.
– Is the filter in clean condition? Please clean the filter regularly.
The STATUS indicator turns red and your projector powers off to protect its internal components
whenever an abnormality is detected. Unplug the AC power cord and connect again. Restart your
projector and run checkup routine. If the problem persists, unplug the AC power cord and call your
service center for checkup and maintenance.
The status indicator
flashing red
Note:
The POWER indicator stops flashing when your
projector’s internal temperature cooled down to
normal and it is powered on again.
The status indicator
turns red
FILTER STATUS POWER
11

Regular maintenance
Clean your projector when it is contaminated by foreign matter or its display effects are getting
worse.
Note
Unplug the AC power cord before any cleaning operation.
Note:
Do not operate your projector after its filter is removed. Dust may attach to the lens
assembly and deteriorate image quality.
Do not insert any small object in the air outlet. It may fail your projector.
Clean the lens
Wipe the lens with clean cloth dampened with
non-abrasive camera lens cleaner or clean it
with lens cleaning paper or air blower.
Do not over apply cleaner to the lens. Abrasive
cleaner, solution, or other rough chemical may
scratch the lens.
Clear the filter
The filter is designed to keep dust from enter-
ing in your projector, which may lead to dusts
accumulated on surface of internal components.
Clogged filter may reduce cooling fan effects,
which, in turn, will overheat your projector and
shorten its life cycle. Clean the filter immediately
whenever the Filter Warning icon displays.
Please follow these steps to clean your filter:
1 Power off your projector and unplug from AC
power source.
2 Remove the filter.
3 Gently clean it with a brush.
4 Replace the filter. Make sure it has been fully inserted.
Clean casing of your projector
Wipe the casing surface with clean and soft cloth.
Gently wipe the casing with clean and soft cloth
dampened with small amount of neutral detergent
to remove heavy dirt. Do not over apply cleaner to
the casing. Abrasive cleaner, solution, or other rough
chemical may scratch the casing surface.
Place your projector in proper container after use to
protect it from dirt and dust and being scratched.
Dust
Filter
Bracket Dust
Filter
Cover
Dust
Filter_2
Dust
Filter_1
12

Regular maintenance
1 Press MENU button and the OSD displays.
Press button to select Setup menu,
press button or OK.
2 Press button to select "Filter Counter",
press button or OK. Press button to
select “Reset the filter counter” and press
OK. The “Reset filter counter?” message
displays. Select Yes to proceed.
3 In another pop-up dialog box, select Yes to
reset the filter counter.
Recommendations
Please do not use your projector at place of
dust and smoke. This may affects image qual-
ity. Using your projector in place of dust and
smoke may lead to piling dusts on lens, LCD
panel, and lens components within it. In case
like this, call your dealer or service center for
correct cleaning.
Note:
Reset the filter counter after its
cleaning or replacement.
Reset the filter counter
设置
Setting
Filter counter
Filter counter 1H
Timer 200H
Filter counter reset
Lamp replacement
The lamp replacement icon displays when its
use life dues. Please replace it with a new one
of the same model immediately.
The lamp replacement icon
݁സ
Lamp replacement
Note
Do not replace the lamp after it went dark as it may be broken. Always assume the
lamp of a ceiling mount your projector is broken when replacing it. Stand beside the
lamp cover instead of below it. Remove the lamp cover gently. Small piece of glass
debris may fall off when opening the lamp cover. Consult with a doctor immediately
if there is any glass debris fell in your eyes or mouth.
Note
Let your projector cool for at least 45 minutes before opening the lamp cover, as
temperature within your projector is high.
Note
Replace the lamp with a new one of the same model just in case. Do not drop or
touch the lamp! It may break and lead to personal injuries.
13

Precautions on lamp operation
Your projector employs high voltage lamp, which requires careful and correct operation.
Fail to do so may lead to accidents, personal injuries, or fire.
●Life cycle of lamp varies with environment it is in service. Life cycle of lamp varies. That is,
some lamps may last longer than their counterparts.
●If your projector prompts you to replace lamp (by showing a lamp replacing icon) then re-
place it with a new one after powering it off and it is fully cooled down. (Please replace lamp
by strictly following steps given in this manual.)
If you keep on using the lamp after being prompted to replace it then you are exposed to
greater risks of lamp explosion.
●Lamp may explode due to external impact and shock. Risks of explosion vary with projector
and use environment and status of the lamp.
In case of lamp explosion, take the following safety measures:
Disconnect your projector from power source immediately in case of lamp explosion. Call
authorized service center to inspect your projector and replace lamp. Make a thorough inspec-
tion to ensure every piece of debris after explosion has been removed. Remove every piece
of debris after explosion. No one else may inspect the internal of your projector except those
authorized and well trained technician who also are familiar with its maintenance. Or we shall
not be held liable for the consequences.
Regular maintenance
Follow steps below to replace the lamp:
1. Power off your projector and unplug the AC power cord. Let it cool down for at least 45 min-
utes.
2. Open the lamp cover after removing screws holding the cover.
3. Loose all screws fixing the lamp. Remove the lamp by holding its handle.
4. Replace with a new lamp and tighten all screws. Make sure the lamp has been installed
correctly. Close the lamp cover and tighten the screw.
5. Connect your projector to an AC power source and power it on.
Lamp cover
14

Lamp Replacement
Suggestion
If the filter is blocked by dust, the effect of cooling fan will be reduced, and heat accumulate in the projector, service life will
be shortened. shorten the service life of the lamp. Cleaning filter is suggested after lamp replacement. Replacement Refer
to "Clean the filter".
How to check Lamp Used Time
The LAMP REPLACE indicator will light yellow when the total
lamp used time (Corresponding value) reaches 4,000 hours.
This is to indicate that lamp replacement is required.
The total lamp used time is calculated by using the below
expression, Total lamp used time (Corresponding value) =
Teco + Tnormal x 1.33
Teco: used time in the Eco1 and Eco2 mode
Tnormal: used time in the Normal mode and Auto mode
You can check the lamp used time following to the below
procedure.
Press INFO. button on the remote control or press MENU
button to select Info. to display the Info. menu and check
"Lamp counter".
Reset lamp counter following to the procedure below:
1 Press and hold the button on the projector
for more than 20 seconds.
2 The projector used time and lamp used time will be displayed
on the screen at least 5 seconds.
3 Press ENTER button for 5 second.
Information menu
Projector used time
Total lamp used time
14
14
14
14
15

Mechanical Disassembly
Caution
The parts and screws should be placed exactly the same
position as the original otherwise it may cause loss of
performance and product safety.
6.
5.
Duct and Lamp Cooling Fan disassembly
4. Fan driver board and speaker disassembly
3. Main baord and LCD driver board disassembly
2. Top cover disassembly
1. Dust filter & Lamp Cover removal
7. Optial Engine and OE duct Ass'y disassembly
Mechanical disassembly should be made following procedures
in numerical order.
Following steps show the basic procedures, therefore
unnecessary step may be ignored.
Screw specifications
(Type Diameter x Length) mm
T type M type
Power supply/ AC Filter/ Ballast disassembly
16

Mechanical Disassembly
Remove the filter and lamp cover.
Loosen 2 screw A (M3X8) remove the Lamp cover.
B07-1
Dust Filter_250mm
Dust Filter Cover
Lamp cover
The chapter is only designed to show exploded image of the projector. For updated part
numbers, please refer to RSPL
1.
1-1
1-2
Loosen 2 screw A (M3X8) and remove Air filter cover
Dust Filter_50mm
A11
A10
B07-2
17

Mechanical Disassembly
Remove the Lens Ring and Top-Case cabinet.
Remove the Lens ring and Loosen 2 screw B(M3X8)
Loosen 4 screw B at the Lamp cover side. 2 screw B on rear-side, 3 screws B from Dust filter's side, and
remove the top case cabinet.
The chapter is only designed to show exploded image of the projector. For updated part
numbers, please refer to RSPL
B
B
Top
case
B
B
B
B
B
B
B
B
B
2.
2-1
2-2
A04
A09
Lens Ring
18

Mechanical Disassembly
Remove the terminal sheet and Main board.
The chapter is only designed to show exploded image of the projector. For updated part
numbers, please refer to RSPL
3.
3-1. Loosen 17 screw A (M3X8) remove the Top shield metal of Main Board (MB)
A
A
A
A
A
A
A
A
A
A
A
A
A
AA
A
A
Top shield
metal
of MB
Terminal
Board
AAA
A
3-2.Loosen 4 screw A (M3X8) remove the Terminal Board of Main Board (MB)
B25
A12
D05
PCBA-
KeyPad
19

Mechanical Disassembly
The chapter is only designed to show exploded image of the projector. For updated part
numbers, please refer to RSPL
AA
AA
A
AA
Main board
3-3. Loosen 7 screw A (M3X8) remove the Main Board
Remove the terminal sheet and Main board.
3.
3-4. Loosen 4 screw A (M3X8) remove the BTM-shield metal of Main Board
A
A
AA
D04
D07
D01
B28
BTM shield metal
B24
PCBA-IR-B
PCBA_IO BD
Main Board (MB)
20
Other manuals for EK-501W
2
This manual suits for next models
2
Table of contents
Other Eiki Projector manuals

Eiki
Eiki LC-SVGA860 Setup guide

Eiki
Eiki LC UXT1 LC-UXT1 LC-UXT1 Setup guide

Eiki
Eiki EK-600U User manual

Eiki
Eiki LC-XB21B User manual

Eiki
Eiki LC-WNB3000N User manual

Eiki
Eiki LC-WIP3000 User manual

Eiki
Eiki LC-330 Setup guide

Eiki
Eiki LC-120 Setup guide

Eiki
Eiki LC NB2UW LC-NB2UW LC-NB2UW User manual

Eiki
Eiki LC-XB43 User manual

Eiki
Eiki EK-400X User manual

Eiki
Eiki LC-W5 Installation and operation manual

Eiki
Eiki LC-NB3S User manual

Eiki
Eiki LC-NB4 User manual

Eiki
Eiki Brilliant LC-XBL30 User manual

Eiki
Eiki EK-623UW User manual

Eiki
Eiki EK-610UA User manual

Eiki
Eiki LC-XB42 User manual

Eiki
Eiki LC-SX2 Setup guide

Eiki
Eiki EK-600U User manual