Electrovaya Lithium Li-3312 User manual

/L0DQXDO

i-2
Notice
The information in this user’s manual is subject to change without notice.
THE MANUFACTURER OR RESELLER SHALL NOT BE LIABLE FOR ERRORS
OR OMISSIONS CONTAINED IN THIS MANUAL AND SHALL NOT BE LIABLE
FOR ANY CONSEQUENTIAL DAMAGES, WHICH MAY RESULT FROM THE
PERFORMANCE OR USE OF THIS MANUAL.
The information in this user’s manual is protected by copyright laws. No part of this
manual may be photocopied or reproduced in any form without prior written
authorization from the copyright owners.
Copyright June, 2004
All rights reserved.
Microsoft and Windows are registered trademarks of Microsoft Corporation. DOS,
Windows 95/98/ME/2000/NT/XP are trademarks of Microsoft Corporation.
Product names mentioned herein may be trademarks and/or registered trademarks
of their respective owners/companies.
The software described in this manual is delivered under a license agreement. The
software may be used or copied only in accordance with the terms of the agreement.
This product incorporates copyright protection technology that is protected by
method claims of certain U.S. patents and other intellectual property rights owned by
Macrovision Corporation and other rights owners. Use of this copyright protection
technology must be authorized by Macrovision Corporation, and is intended for
home and other limited viewing uses only unless otherwise authorized by
Macrovision Corporation. Reverse engineering or disassembly is prohibited.
Rev 1.0

i-3
TABLE OF CONTENTS
PREFACE
Symbols and Conventions
Protecting Your Computer - Avoid Abusive Handling and Adverse
Environment
Chapter Summaries
1. GETTING TO KNOW THE BASICS
Performance Features (1-2,3)
SystemataGlance(1-4)
Front View (1-4,5,6,7)
Rear View (1-8,9,10)
Bottom View (1-11,12,13)
AC Adapter (1-14)
LED Status Indicators (1-15,16)
Keyboard Features (1-17)
Function (Quick) Keys (1-17)
Windows Keys (1-18)
Embedded Numeric Keypad (1-18)
Touch Pad (1-19)
Graphic Subsystem (1-20)
Adjusting the Display Brightness (1-20)
Extending the Life of the TFT Display Panel (1-20)
Opening and Closing the Display Panel (1-21)
Audio Subsystem (1-22)
Adjusting the Volume in Windows (1-22)
Voice Recording (1-22)
Modem and Modem Setting (1-23)
Ethernet Adapter (1-24)
2. BIOS SETUP AND SECURITY
Entering the BIOS Setup Screen (2-3)
Leaving the BIOS Setup Screen (2-3)
BIOS Action Keys (2-3)
Modifying the BIOS Settings (2-4)

i-4
Main Setup (2-4)
Advance Setup (2-4)
Security Setup (2-5,6)
Power Setup (2-6,7)
Boot Setup (2-7,8)
Exit Setup (2-8)
3. BATTERY POWER & POWER MANAGEMENT
The Battery Pack (3-2)
Lithium-Ion Battery Technology (3-2)
Battery Low-Power Warning (3-3)
Installing and Removing the Battery Pack (3-4,5)
Charging the Battery and Charging Time (3-5)
Checking the Battery Level (3-6)
Prolonging the Battery’s Life and Usage Cycles (3-6)
Using Windows Power Options (3-7)
Windows’Power Schemes (3-7,8)
Suspend Modes (3-9,10)
Power Button Action (3-11)
Low Battery Warning (3-12)
Power Manual Quick Access (3-13)
4. UPGRADING YOUR COMPUTER
Upgrading the Hard Disk Drive (4-2,3,4,5)
Upgrading the System Memory (4-6,7,8,9)
Installing a Mini PCI Card to the System (4-10,11,12)
5. TROUBLE-SHOOTING
First Step (5-2,3)
Audio Problems (5-4)
Hard Disk Problems (5-5,6)
CD-ROM, DVD-ROM, CD-RW, or Combo Drive Problems (5-7)
DisplayProblems(5-8)
Keyboard and Mouse Problems (5-9)
CMOS Battery Problems (5-10)
Memory Problems (5-11)
Modem Problems (5-12)

i-5
Network Adapter / Ethernet Problems (5-13)
PC Card / PCMCIA Problems (5-14)
Performance Problems (5-15)
Firewire (IEEE1394) and USB2.0 Problems (5-16)
APPENDIX A Product Specification
APPENDIX B Agency Regulatory Notices
APPENDIX C Power Cinema Installation and User Manual
APPENDIX B Bluetooth Module Installation and User Manual

i-6
Preface
Using This Manual
This User’s Manual contains general information about the
hardware and software setup, troubleshooting, and technical
specifications of the notebook computer.
Symbols and Conventions
The following conventions and symbols are used in this manual:
When keys are to be pressed at the same time, a plus (+)
symbol is used. For instance, Fn+F7 means holding Fn and
F7 keys at the same time.
When a series of clicking actions is needed in Windows O/S, [ ]
and > symbols are used. For instance, [Start > Settings >
Control Panel > Display] means clicking the Start icon first,
then the Settings, then the Control Panel, then the Display
icon.
When you need to make a selection with the touch pad (or
mouse), you will be asked to ’select’or ‘click’or ‘double-click’,
‘right-click’the item.
Note: Text in this format and symbol means specific instructions, commentary,
sidelights, or any additional information or notes that you should be aware of.
Warning: Text in this format and symbol means that failures to comply with the
given instructions or information could result in damage to your computer or could
cause bodily harm or loss of life.

i-7
Protecting Your Computer - Avoid Abusive Handling and
Adverse Environment
Follow the advice below will help ensure that you get the most out
of your Investment.
Your computer will serve you well if you take good care of it.
Do not expose the computer to direct sunlight or place it near
sources of heat.
Do not subject it to temperatures below 0oC(32
oF) or above
30oC(86
oF).
Do not expose the computer to magnetic fields.
Do not expose the computer to moisture or rain.
Do not spill water or liquid on the computer.
Do not subject the computer to adverse shock and vibration.
Do not expose the computer to dust and dirt.
Do not place objects on top of the computer to avoid damaging
the computer.
Do not place the computer on rocky surfaces.
Here are some ways of taking care of your AC adapter.
Do not connect the adapter to any devices other than your
computer.
Do not let water get into the adapter.
Do not block the ventilation airway of the adapter.
Keep the adapter in a cool and ventilated place.
Do not step on the power cord or place heavy objects on top of
it.
Carefully tuck away the power cord and any cables away from
pedestrian traffic.
When unplugging the power cord, do not pull on the cord itself
but pull on the plug.

i-8
Keep the adapter away from children.
The total ampere ratings of the equipment plugged in should
not exceed the ampere rating of the cord if you are using an
extension cord.
The total current rating of all equipment plugged into a single
wall outlet should not exceed the fuse rating.
Do not connect other AC adapter to your notebook. This
Notebook uses exclusively the AC adapter LITE-ON PA-1650-08
(65W); Lishin 0202A2065 (65W); Hipro HP-OK065E13 (65W)
When cleaning the computer, observe these steps:
1. Power off the computer and remove the battery pack.
2. Disconnect the AC adapter.
3. Use a soft cloth dampened with water. Do not use liquid or
aerosol cleaners.
Contact your dealer or see your service technician if any of the
following occurs:
Computer has been dropped or the body has been damaged.
Liquid has been spilled into the product.
The computer does not operate normally.
Cleaning the Ventilation Grills:
It is suggested that you clean the ventilation grills regularly to
maintain optimal thermal regulation of the notebook. To do this, you
may use a soft brush or a vacuum cleaner (with appropriate head
adapter) to remove the dust buildup on the ventilation grills.

i-9
Chapter Summaries
The following is a summary of the available chapters and
appendices in this manual.
Chapter 1: Getting to Know the Basics
In this chapter, you will learn the basic operations and features
of your computer. It gives you a general understanding of the
components of your computer.
Chapter 2: BIOS Setup / Security
In this chapter, you will learn how to change various firmware
settings and what the settings mean. Also, you will learn how to
take advantage of the built-in security feature provided by the
BIOS.
Chapter 3: Battery Power & Power Management
In this chapter, you will learn the fundamentals of power
management and how to use them to achieve longer battery life.
Chapter 4: Upgrading Your Computer
In this chapter, you will learn how to upgrade the system
memory, the hard disk drive, and to install wireless mini PCI card.
Chapter 5: Trouble-Shooting
In this chapter, you will learn how to solve common hardware
and software problems.
Appendix A: Product Specification
In this section, you will find a list of the computer’s system
specifications.
Appendix B: Agency Regulatory Notices
In this section, you will find the general electro-magnetic and
safety regulatory information.
Appendix C: Power Cinema Installation and User Manual
In this section, you will learn how to install Power Cinema and
learn to use its features.
Appendix D: Bluetooth Module Driver Installation and User Manual
In this section, you will learn how to use the Bluetooth Module.

chapter 1 getting to know the basics
1-1
CHAPTERONE
GETTING TO KNOW THE BASICS
This chapter introduces the features and
components of the computer.

chapter 1 getting to know the basics
1-2
Performance Features
High Performance Processor
The notebook PC is equipped with a powerful Mobile Intel
Pentium M processor of the latest sub-micron process,
processor technologies, and high bus bandwidths.
Advanced Graphic Engine
An Intel Integrated Extreme Graphic 2 video processor
gives excellent graphic performance. The advanced
graphic chip also incorporates a hardware-based
motion-compensation engine, which gives you smooth
MPEG video playback. 3D graphics capability also adds
realism to PC games.
LCD Display
The computer is equipped either with a 12.1-inch TFT in
standard format (4:3 aspect ratio) or 12.1-inch TFT in Wide
format (16:10 aspect ratio) high-resolution display panel for
clear text and brilliant colors.
Expandability
The system offers upgradeable hard disk drive and 2 DDR
SDRAM sockets for expansion, allowing the user to easily
increase the storage and system capacities as the need
arises.
Built-in Multiple Card Reader
There is built-in 4-in-1 card reader to access many of the
portable media formats (SD Card, MS Card, MMC Card,
and MS-Pro Card). (Note: In some models, Card Reader
may not be available.)
Ethernet Port

chapter 1 getting to know the basics
1-3
The system provides built-in Ethernet network adapter for
high bandwidth network connection.
Firewire (IEEE1394 / 1394a) and USB2.0 ports
In addition to a full array of built-in I/O ports, the computer
offers IEEE1394 for ultra high-speed connection to high
bandwidth digital video devices and USB2.0 ports to
connect to any USB-based peripheral devices. (Note: In
some models, IEEE1394 Port may not be available.)
Wireless LAN (Optional)
The optional internal Wireless LAN module allows your
notebook to connect wirelessly to other 802.11-enabled
systems, devices, or network.
Integrated USB Devices (Optional)
The optional USB Bluetooth module or USB Thumb Drive
gives you added function to the notebook.
chapter 1 getting to know the basics
1-4
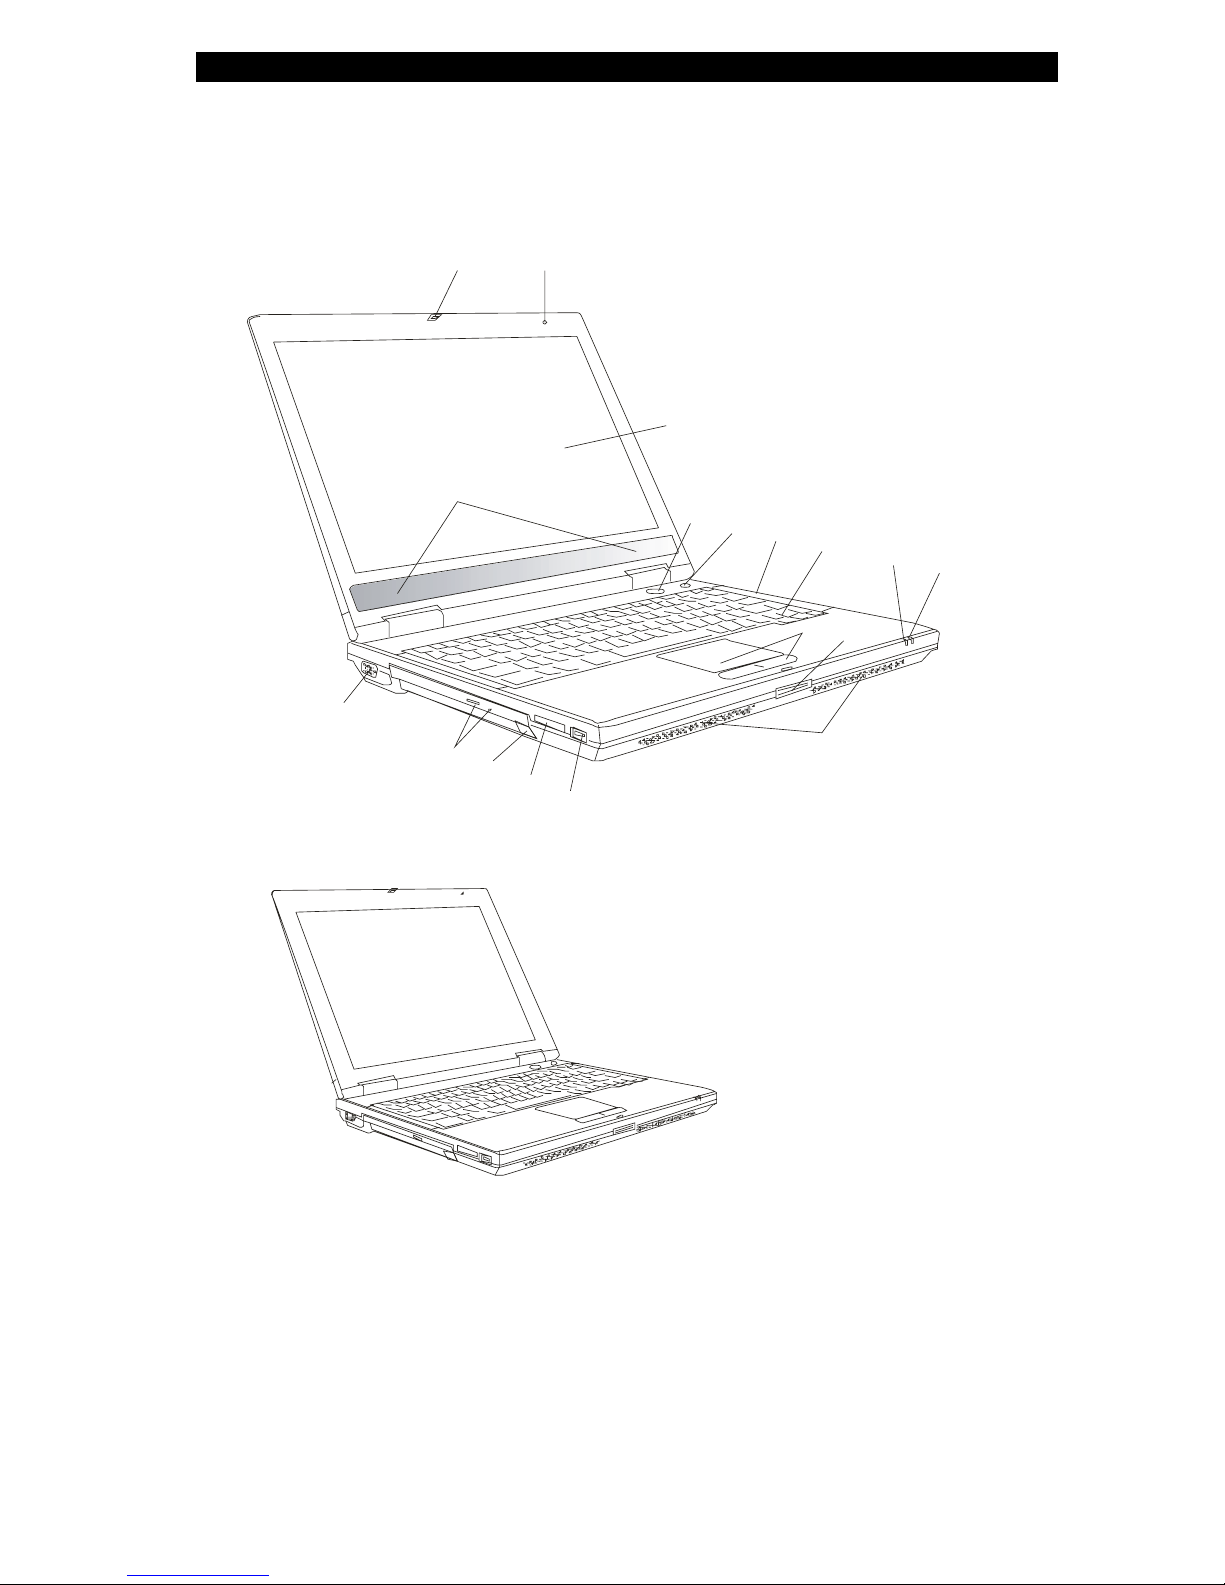
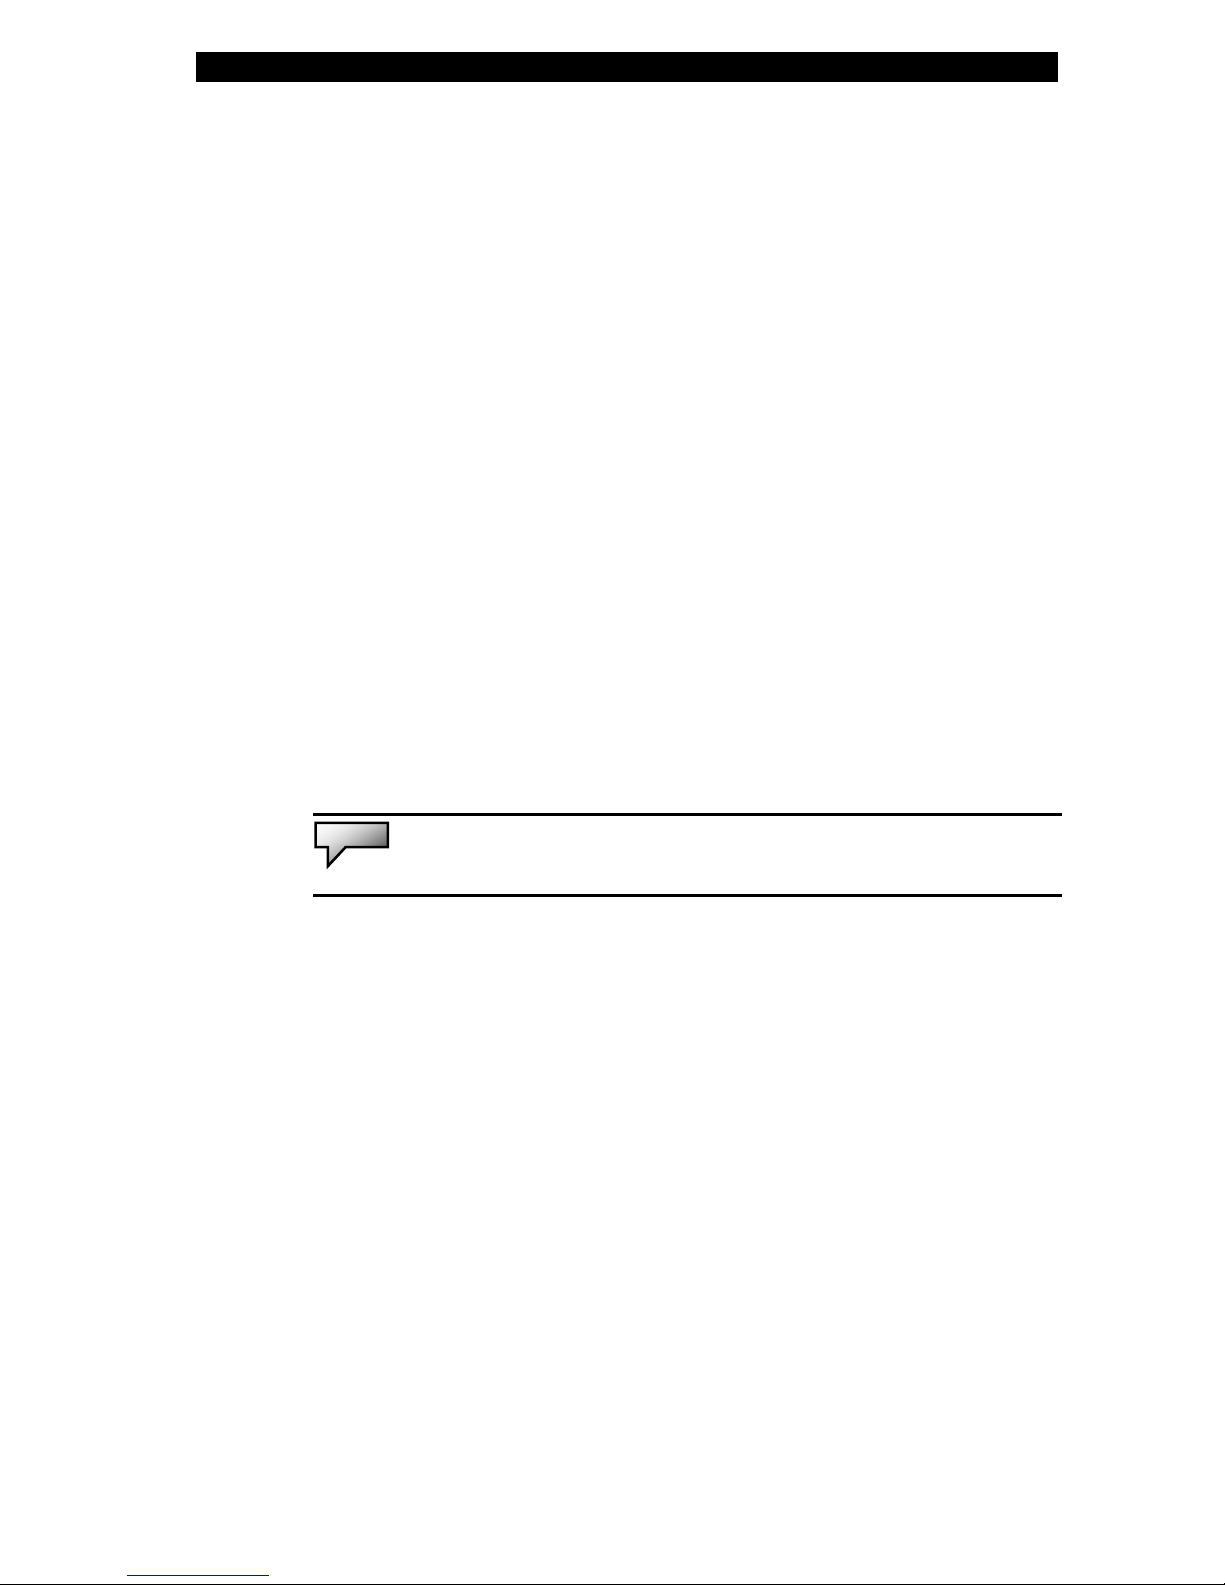
System At A Glance
Front View
1
11
9
8
7
6
5
4
2
12
13
14
15
16
17
1
10
3

chapter 1 getting to know the basics
1-5
Note: Your computer may come with the 12.1”display in the wide 16:10
aspect ratio or in the standard 4:3 aspect ratio. If your computer comes with the
wide 12.1”display, there is an extra pair of built-in loudspeakers located below
the display panel.
1. LCD Latch
The LCD latches lock / unlock the LCD panel.
2. Built-in Microphone
The built-in microphone records sound.
3. LCD Display
The panel is where the system content is displayed.
4. Power / Suspend Button
The power/suspend button turns the notebook on and off and it
also acts as a system suspend key. Press momentarily to turn
on the system. Press and hold for at least 3~4 seconds to turn
off the system. How this key behaves can be defined in [Start >
Settings > Control Panel > Power Options > Advanced] menu.
Press the power / suspend button again to return from the
suspend mode. (See Chapter 3 for more details on system
suspend function.)
5. Power Cinema Launch Key / Silent Mode Button
This is a dual function key.
Power Cinema Launch (When system is off) –
The key allows you to watch DVD movies in the optical
drive without having to boot to Windows. Additionally,
Power Cinema application allows you to view photos and
play music files in the optical drive as well as in the hard

chapter 1 getting to know the basics
1-6
disk drive. Please see Appendix C to learn how to use
Power Cinema.
Silent Mode Button (When system has already booted to
Windows) –
Pressing the key enables the system to lower its power
usage, therefore turning off the fan to achieve lowest
operating noise.
Note: The way the Power Cinema works is that when the key is pressed, the
system boots to a Linux-based O/S and movie-player application in a separate
hard drive partition. In case you have a brand new HDD or when you need to
re-install O/S and Power Cinema, please go to Appendix C for installation
instructions.
6. LED Status Indicator
The LED Status indicators reveal the status of these functions:
Numeric keypad, cap lock, scroll lock, WLAN module enabling
and disabling and also the ODD, HDD activities. (See the LED
Status Indicator Section for details.)
7. Keyboard
The keyboard is used to enter data. It has an embedded
numeric keypad and cursor control keys. (See Keyboard
Section for details.)
8. Suspend Status LED
Flashing green light indicates the notebook is in suspend mode.
(See the LED Status Indicator Section for details.)
9. Battery Status LED
The multi-color LED indicates the battery status of the
notebook. (See the LED Status Indicator Section for details.)
chapter 1 getting to know the basics
1-7
10. Built-in Stereo Speakers
The built-in speakers output the sound in stereo.
11. Touch Pad
The touch pad is a built-in pointing device with functions similar
to a mouse.
12. USB2.0 Port
The Universal Serial Bus (USB2.0-compliant) port allows you to
connect a wide variety of devices to your computer at a rate of
up to 480 Mbps. This port conforms to the latest USB2.0
plug-and-play standards.
13. 4-in-1 Card Reader
The 4-in-1 Card Reader supports SD Card, MS Card, MMC
Card, and MS-Pro Card.
Note: In some models, the Card Reader may not be available.
14. USB Device (Optional)
You may install the optional Bluetooth module or USB Thumb
Drive into this slot. Please see Appendix D to learn how to use
the Bluetooth device.
15. Optical Drive and Disk Eject Button and Manual Eject Key
Hole
If your computer comes with the Combo drive, DVD-RW,
DVD+RW, or DVD-Dual drive, you may save data onto a CD-R
/ CD-RW or DVD RW disc. Press the eject button to eject the
disk tray. The manual eject keyhole allows you to manually
eject a jammed disk.

chapter 1 getting to know the basics
1-8
16. External VGA Port
The 15-pin VGA analog port is for connecting the external CRT
monitor or projector.
17. Built-in Stereo Speakers
If your system comes with the 12.1-inch wide aspect ratio panel,
there is an additional pair of speakers built-in.

chapter 1 getting to know the basics
1-9
Rear View
11
9
8
7
6
5
4
212
1
10
3
Warning: Do not place any heavy objects on the top of notebook. This may
damage the display
1. PC Card Slot (Type II PCMCIA) and Card Eject Button
The slot is where PC Card (Type II PCMCIA) is inserted. Press
the eject button to release the PC Card.
Note: In some models, the PC Card Slot may not be available.
2. Stereo Headphone / SPDIF-out Jack
The stereo headphone jack (3.5-mm diameter) is where you
connect the headphones or external speakers.
Alternatively, you may connect the SPDIF output to an external
DTS, AC3, or PCM sound processor / decoder in your home
stereo system.
Note: In some models, the SPDIF-out feature may not be available.

chapter 1 getting to know the basics
1-10
3. Microphone Jack
The microphone jack (3.5-mm diameter) is where you connect
a microphone.
4. Firewire / IEEE1394 / 1394a Port
This is a high-speed serial data port. You may connect any
Fire-wire-ready device to this port.
Note: In some models, theFirewire/1394 Port may not be available.
5. USB2.0 Port
The Universal Serial Bus (USB2.0-compliant) port allows you to
connect a wide variety of devices to your computer at a rate of
up to 480 Mbps. This port conforms to the latest USB2.0
plug-and-play standards.
6. TV (S-Video) Port
The S-Video port permits you to redirect the screen output to a
television set or any analog video playback device. This TV
Port is copyright protected; when DVD movie is played, the
output is scrambled to prevent analog recording.
7. Modem Port
This is where you plug the phone jack (RJ-11) for fax/modem
functions.
8. Ethernet / LAN Port
The port connects to a network hub via the RJ-45 cable and
also conforms to 10/100Base-TX transmission protocol.
9. Kensington Lock Key Hole

chapter 1 getting to know the basics
1-11
A Kensington-type security lock latches to this keyhole for
anti-theft purpose.
10. Power Jack (DC-in)
The DC-out jack of the AC Adapter connects here and powers
the computer.
11. Ventilation Grill
The fan grill is where air is exchanged to dissipate the internal
heat. Do not block this airway completely.
12. Battery Pack
The battery pack is a built-in power source for the notebook.
Table of contents
Other Electrovaya Laptop manuals

Popular Laptop manuals by other brands


Lenovo
Lenovo THINKPAD R60 Příručka pro základní servis a odstraňování problém

Dell
Dell Studio 1735 Service manual

Toshiba
Toshiba M105-S1041 Specifications

Dell
Dell Latitude 15 3580 quick start guide

Lenovo
Lenovo ThinkPad G41 Sprievodca servisom a odstraňovaním problémov

Sony
Sony VAIO VGN-TXN19P Specifications