www.ezytrail.com.au 7
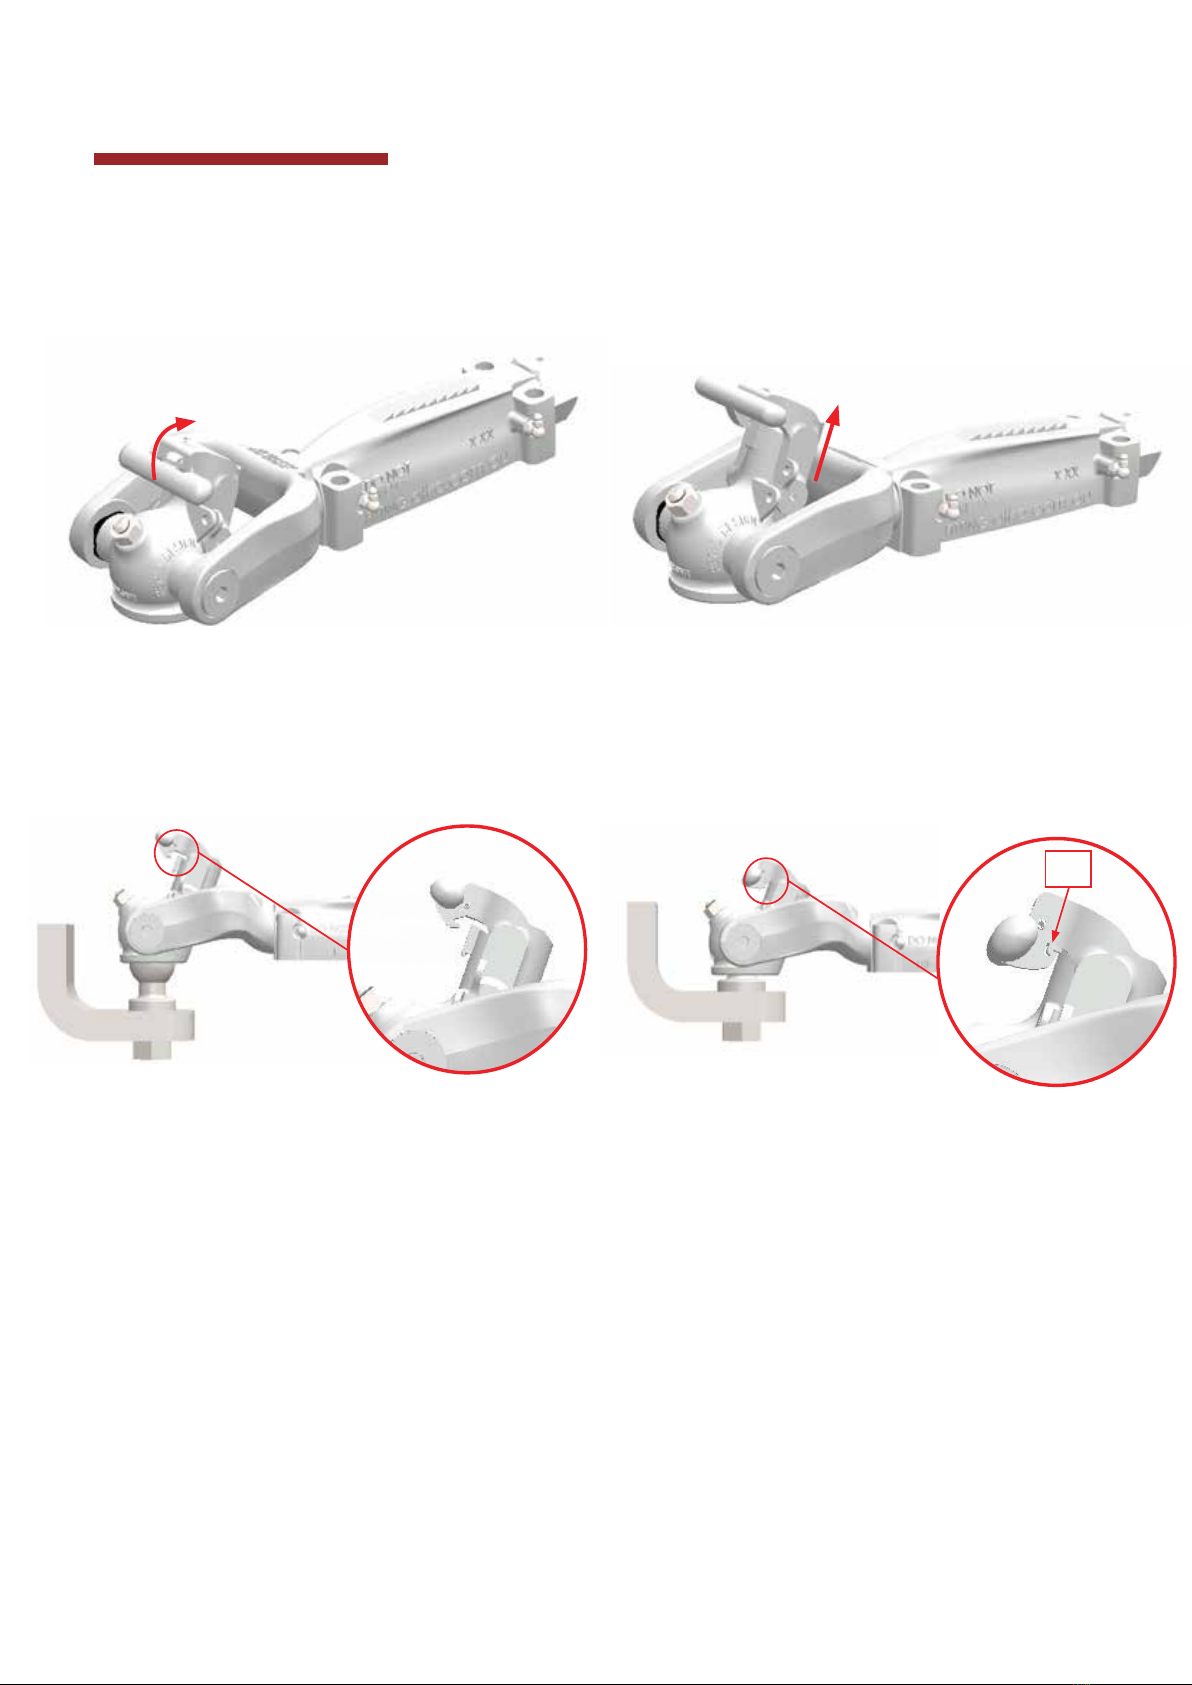
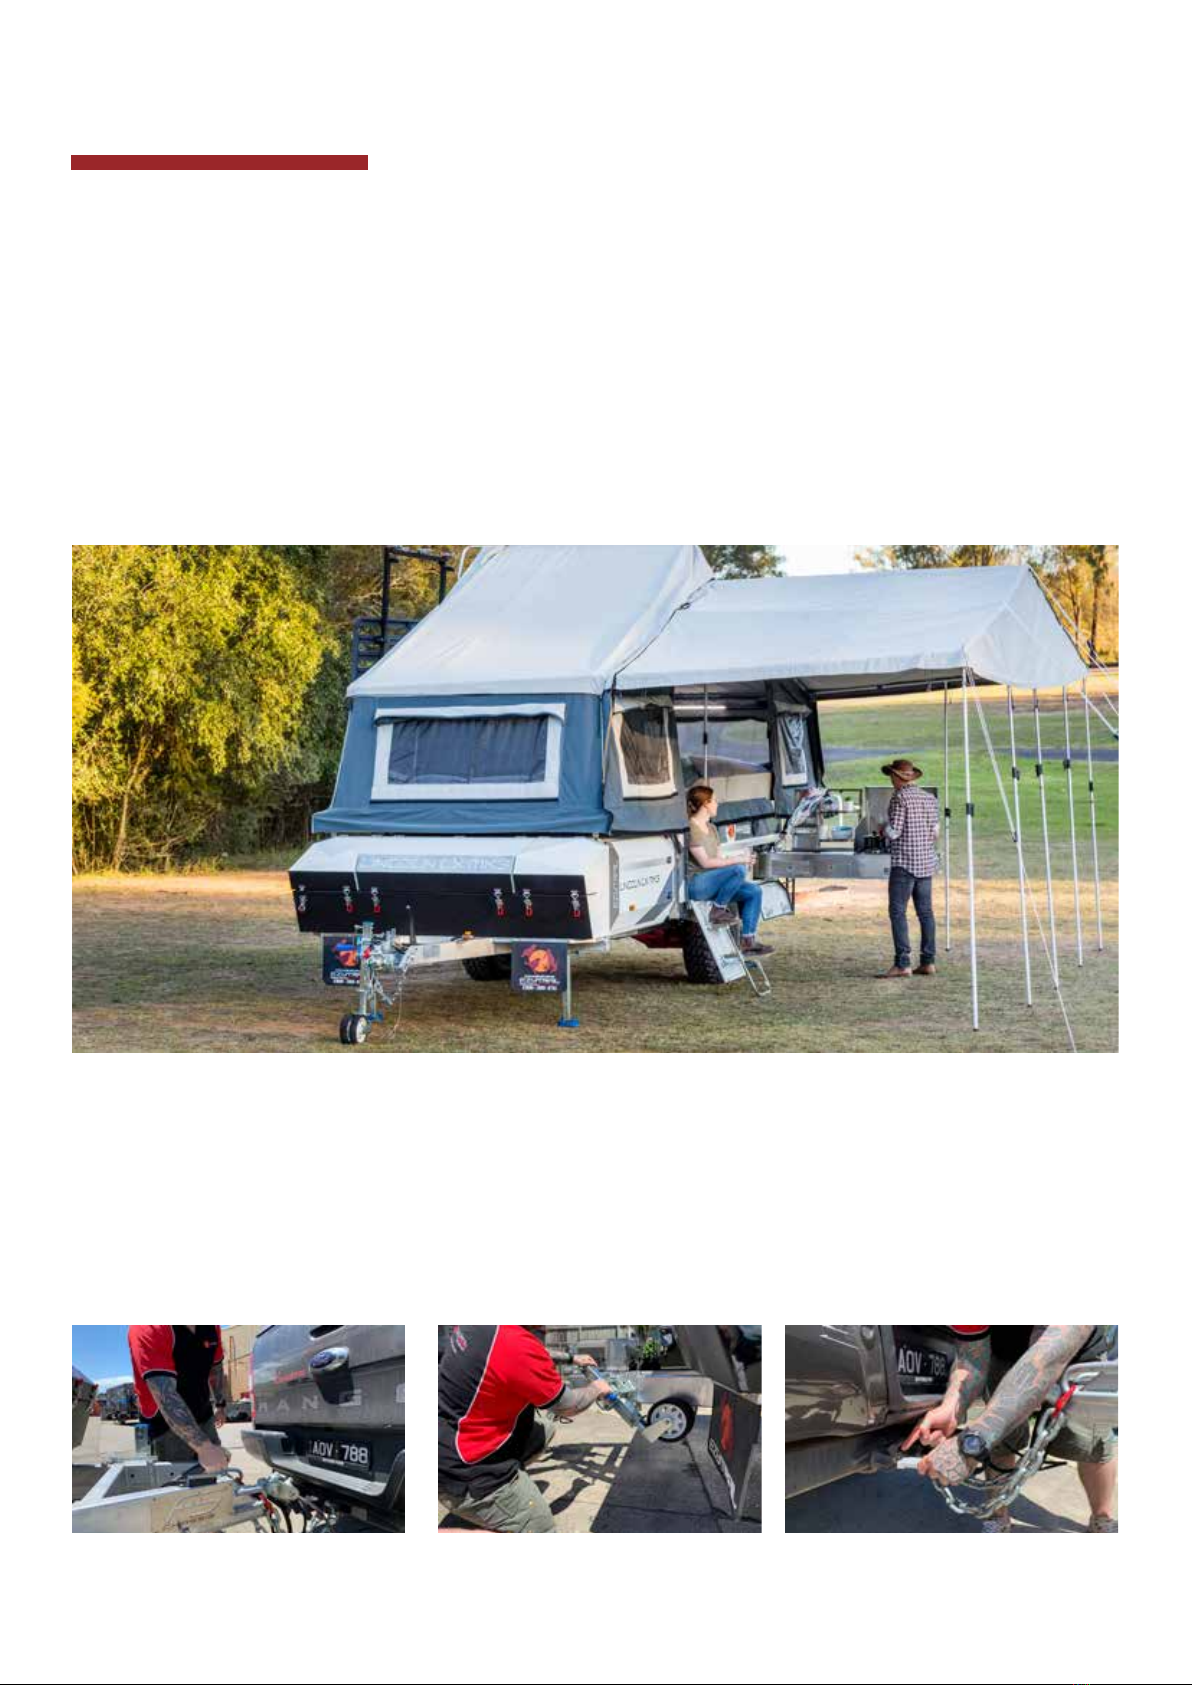
To Attach Coupling To Towball:
619350 (Fixed) & 619200 (Override)
1. Rotate latch handle upward.
2. At the same time pull latch assembly up to lift tongue.
Page 1
2. At the same time pull latch assembly up to lift tongue.
4. Release latch assembly.
5. Check that the latch has released and is engaged in the
coupling head indicated as “A” below.
CANVAS CARE
SEASONING THE CANVAS
All campers must be set up prior to use and seasoned before your first outing. This gives you an opportunity to familiarise
yourself with your tent set-up and make sure you have all necessary components.
At this time the camper should be hosed with water to allow seam take up, in a process called seasoning your canvas.
You may find that in first wettings some leakage occurs through the seams and canvas. This is not a fault of the manufac-
turer, but a natural characteristic of the blend of canvas and synthetic fabrics. For this reason your canvas product must be
erected and thoroughly saturated and then allowed to dry prior to its first use. This process (seasoning) should be followed
a number of times – 3 times is the recommendation, allowing the fabric to shrink and help close up fibres and seams which
may cause leakage. Follow these 4 simple steps to begin seasoning the canvas
1. Set up your camper and annex with all doors and windows zipped up and closed
2. Using your garden hose apply a light spray of water over all the external canvas areas. Wet out the canvas without allow-
ing water to pool in any section then allow to dry thoroughly.
3. Repeat the process of wetting and allowing to dry another 2 times.
4. On the third wetting check for any leaks in the canvas particularly along the seams. If a seam is weeping water through,
allow the canvas to thoroughly dry then apply a wax stick along the area of the seam. This is done by lightly rubbing the wax
stick over the area. Once applied wet the canvas and check again. NOTE: It is not unusual for seams that aren’t able to be
seam sealed with tape to weep after seasoning. This is not a reflection of canvas or workmanship but simply a characteristic
of canvas tents. If the leak persists, contact your Ezytrail customer representative.
*Note - Seasoning process should be repeated periodically once tent material stretches during normal use.
PROTECTING SEAMS AND SCREENS
Seams: When erecting any canvas tent, it is vitally important that you don’t stress the canvas by overtightening when
adjusting the poles. The most common cause of damage to canvas is over tensioning. Adjusting the tent should give the
canvas good shape but the material should be relaxed. If you can see the stitching exposed in a seam, then the canvas is
under strain and the pole should be backed off.
Screens: Fly mesh screens are vulnerable to damage by poles rubbing against it. When packing up your camper it is impor-
tant to close windows with both inner and outer canvas zipped up thus protecting the mesh. Never leave door screens rolled
up when packing your camper as this can cause harsh creases and damage the screen. Mesh damage by owner misuse is not
a warrantable issue.
Ezytrail ensure your tent is made using the finest water repellent fabric. However, canvas products are not permanent
structures and in extreme conditions some water may penetrate. Seepage may occur in the seams through the needle holes
created in the sewing process. This is normal and can be corrected with the application of seam sealing compound. It is sug-
gested you purchase a wax stick to keep with your camping equipment in case of spot leakage.
STITCH HOLES
WICKING
Your canvas product will not leak if you touch the canvas. However, if you rub your finger back and forth continuously on the
canvas you may eventually draw water through (wicking). For this reason it is advisable not to have anything in direct con-
tact with your canvas. Similarly, if water is left to pool on your canvas, water may seep through the fabric causing leakage.
To avoid such occurances, set your tent appropriately for the weather conditions.