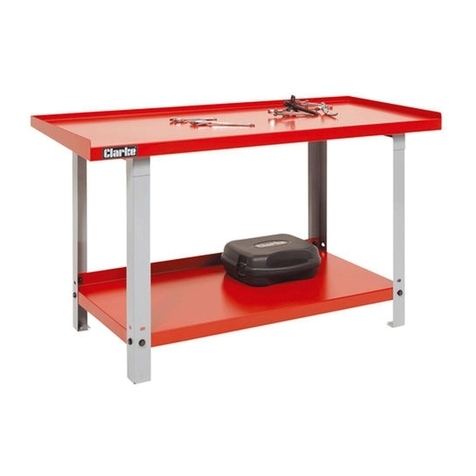
Feider Machines FST7IN1 User manual

EN
7-IN-1
WORKBENCH
FST7IN1
Original instructions
BUILDER SAS
Zi, du Casque, 32 rue Aristide Berges, 31270 Cugnaux, France
MADE IN PRC - 2021

EN
WARNING!
Readcarefully andunderstand allASSEMBLY ANDOPERATION INSTRUCTIONSbefore operating.
Failure tofollow thesafety rulesand other basic safetyprecautions may result inserious personalinjury.
Thismachineis designedforcertain applications only.Thedistributorcannotberesponsibleforissues arising
frommodification. We stronglyrecommendthis machine not be modified and/or used for anyapplication
otherthanthat forwhichit wasdesigned.If youhave anyquestions relativetoaparticular application,DO NOT
use the machineuntil youhave first contactedthe distributor to determineif itcan orshould beperformed
onthe product.
INTENDED USE:
Theworkbench is the ultimate7-in-1 portable workbench,sawhorse, scaffold,platform, carcreeper, dollyand
handtruck.The itemcan betransformedeasilybetween differentmodes byfollowing theinstruction manual.
Thisproductisintendedfor DIY andlighttradeuse.
TECHNICAL SPECIFICATIONS
▶ Work platform size:
> 108.5x 54.5 x15.5 cm
> 42.7x 21.5x 6.1Inch
▶Workheight:
> 52/78cm
> 20.5/30.7Inch
Loading capacity:
▶ Scaffold / Platform mode –
Net weight:13.5Kgs / 29.8Lbs
Socket:250v16AMax
150Kgs
▶ Hand Truck mode – 150Kgs
▶ Workbench /Saw Horse mode:
150Kgs
250Kgs
▶ Car Creeper & Dolly mode –
1

1/ GENERAL SAFETY RULES
WARNING: Readandunderstandallinstructions.Failuretofollow allinstructionslistedbelowmay resultinserious injury.
CAUTION: Donotallowpersonstooperateor assemblethisworkbench untiltheyhavereadthismanualandhavedevelopeda
thoroughunderstandingofhowthe unitworks.
WARNING: Thewarnings,cautionsandinstructionsdiscussedin thisinstructionmanualcannot coverall possibleconditions
orsituationsthatcouldoccur.It mustbeunderstoodbytheoperatorthatcommonsenseand cautionarefactors
whichcannotbebuiltintothis product,butmustbe appliedbytheoperator.
SAVETHESEINSRUCTIONS.
2/ IMPORTANT SAFETY CONSIDERATIONS
FAILURE TO FOLLOW THESESAFETY PRECAUTIONSAND INSTRUCTIONSCOULD RESULT IN DAMAGE TOTHE PRODUCTAND/
OR SERIOUS INJURY TOYOU!
Makesure allmovingpartsare freefrominterference.
Keephandsclearof allmovingparts.
Ensureworkbenchisusedinadry place,protectedfromrain.Theproductisfor INDOORuse only.Donotstoreoruseit outdoors
orina moistenvironment.
Keepworkareawell lit.
Be awareofover balancing.Whenusingthisproductinallmodes,pleasekeepyourbodyor a heavyobject inthecentreorsurface
toavoidoverbalance.Incorrectusagemay causeit toturnoverand resultin personalinjury.
Whentransportingthe workbenchinavehicle,alwaystiedowntopreventmovementandpossibledamage.
Checktomakesurethatallfixing screws and knobs aretight andall legs arelocked into positionbefore operatingthe workbench.
DON’T USE SCAFFOLD/PLATFORM MODE WITH LEGS FULLYEXTENDED.Alwaysuse thisproductona stable,levelsurface.Failure
to useproperlyor overloadmayresult inseriouspersonalinjury.
When using this product with power tools, please refer to the manufacturer’s instructions for guidance on usage.
The productmustbeusedonlyfor itsprescribedpurpose.Anyuseother thanthosementionedintheseinstructionswillbe
considereda caseof misuse. Themanufacturershall notbe liable for any damageor injuryresulting fromsuch casesof misuse.
The manufacturershallnotbeliableforanymodificationsmade tothetoolorforany damageresultingfromsuchmodifications.
3/ASSEMBLY
Your7-in-1 workbench comes fully assembled, just take it out of the packaging and follow the simple set up steps, then it’s ready
touse.
1- Workbench mode
2- Sawhorse mode
3- Scaffold mode
4- Platform mode
5- Car creeper & dolly mode
6- Hand truck mode
2

a/ Car Creeper & Dolly Mode
Pleasefollowthesestepstoinstallwheelsinthecarcreeper&dollymode:
1. Findthe wheels,gasketsandscrewsinthe backoftheworkbench,thenline upallthescrews,
gasketandwheels.Noticethatthe 2universalwheelswithbrakesshouldbe installedunderthe
tooltrayandtheleft 2fixedwheelson theotherside.
2. Putone gasketon thescrewhole andsecure thescrewbyusing ascrewdriver.
3. Rotatethewheeltofix the4 screws,makesurethewheelsarefullysecured.
4. Followsteps1-3to assemblethe other3wheels,thenyourcar creeperisreadyto go.
5. Connectapullingropetothe towingholes,thenthe dollyis completed.
Fixed wheels
Universal wheels
with brakes
TIP : How to install the wheels
The4wheelsarepackedinthebackof the
workbench andneedtobeinstalledbythe
consumerafterpurchase.Duringinstallation,
pleasebe awareof thefollowing:
1. Alwaysuse thegasketswhichare
providedinthecarton.Seethe
illustrationsabove.
2. Thereare 2universal/steeringwheelsplus
2fixedwheelsinthe set,andeachset
ofwheelshastheirownposition. Please
referto theillustrationabove.
b/ Hand truck mode
1. Pull the handle up from the car creeper mode until you can’t move it
anymore, thena handtruckisready.
2. Pushthe twobuttonsonthe handle,it canbewithdrawed.
Handle
buttons
b/ Scaffold & Platform
mode
1. Releasealllegsfromtheirlocking
position,thenrotateeachpairoflegs
until you can’t move them anymore.
2. Ensurethe gussetbraceislockedby
pullingupit.Repeatforallthe other
gussetbraces.
Gusset
Braces
3. Pullthehandleupuntil you can’t move
itanymore,thenreleasethetool tray
fromits lockingposition,put the tool
trayon thetopof thehandle,forming
aplatform.THELOADINGCAPACITY
FORTHETOOLTRAYIS 2KGS(4.5LBS)
WARNING:
INTHIS MODE.
DON’T USE SCAFFOLD PLATFORM
4. Hangthehookon thehandle,it canbe
usedto hangtoolbags whileworking
ontheplatform.
MODE WITH LEGS FULLY EXTENDED.
The inner legs are notdesigned
to be used in this function.
3

c/ Workbench & Sawhorse mode
Snap
1. Firstly,set upthelegs byfollowingthesamestepsas detailed
withinscaffoldmodesection. See A.
button
2. Pushthesnapbuttonsonthe sideofeachlegtoreleasethem,
thenpulltheinnerlegsoutto the workbenchheight.When
legsarefully extendedtheywillsnapintoplace.Gentlyturnthe
workbenchuprightonto astable,levelsurface.
3. Pleasefollowbelowstepstoconnectwitha quickclamp.
1)Removethesmallplasticpart ofyourquick clamp
2) Putthesteelbar intoourconnector(Fig2)andputa
pinintothelockhole,makesuretheyareconnected
firmly(Fig3);
3) Putthe connectorintoSawhorseholeonthe
workbenchsurfaceand rotateatleast30degrees
(Fig4);
4) Withthehelpof the2vicepegsonthe workbench,a
sawhorseiscompleted.
NOTE: DO NOT step on the workbench while
the legs are fully extended.
4/ MAINTENANCE
Maintainyourworkbench.Itis recommendedthatthegeneralconditionofanyworkbenchbeexaminedbeforeitis used.Keep
yourworkbenchin good repairbyadoptingaprogramof conscientiousrepairandmaintenance.Havenecessaryrepairsmade
byqualifiedservicepersonnel.
Wipeawaydirtanddustfrom the workbenchonaregularbasis.
.
A. Depending on the model of sergeant it may be necessary to remove the ring that is placed on the sergeant's splint, to remove
it use a punch or any element that makes pressure on the ring.
Note: the quick clamp is not provided with this tool.
4

5/DECLARATION OF CONFORMITY EC
5
Cugnaux, 01/01/2021
Philippe MARIE / PDG
Responsible of technical file: Mr Olivier Patriarca
This machine is also in conformity with the following standard
EN ISO 12100 :2010
Machine Directive 2006/42/CE
REACH Directive 1907/2006
Is in conformity with the following Directives
Numéro de série:
WORKBENCH 7 IN 1
FST7IN1
Declare that the machine
BUILDER SAS 32, rue Aristide
Bergès - ZI 31270 Cugnaux –France
Declaration of conformity
20210208408-20210210807

WARRANTY
The manufacturer guarantees the product against defects in material and workmanship for a period of 2
years from the date of the original purchase. The warranty only applies if the product is for household use.
The warranty does not cover breakdowns due to normal wear and tear.
The manufacturer agrees to replace parts identied as defective by the designated distributor. The
manufacturer does not accept responsibility for the replacement of the machine, in whole or in part , and/or
ensuing damage.
The warranty does not cover breakdowns due to:
• insucient maintenance.
• abnormal assembly, adjustment or operations of the product.
• parts subject to normal wear and tear.
The warranty does not extend to:
• shipping and packaging costs.
• using the tool for a purpose other than that for which it was designed.
• the use and maintenance of the machine done in a manner not described in the user manual.
Due to our policy of continuous product improvement, we reserve the right to alter or change specications
without notice. Consequently, the product may be dierent from the information contained therein, but a
modication will be undertaken without notice if it is recognized as an improvement of the preceding
characteristic.
READ THE MANUAL CAREFULLY BEFORE USING THE MACHINE.
When ordering spare parts, please indicate the part number or code, you can nd this in the spare parts list
in this manual. Keep the purchase receipt; without it, the warranty is invalid. To help you with your product,
we invite you to contact us by phone or via our website:
• +33 (0)9.70.75.30.30
• https://services.swap-europe.com/contact
You must create a "ticket" via the web platform.
• Register or create your account.
• Indicate the reference of the tool.
• Choose the subject of your request.
• Describe your problem.
• Attach these les: invoice or sales receipt, photo
of the identication plate (serial number), photo
of the part you need (for example: pins on the
transformer plug which are broken).
6. WARRANTY
6

WHAT TO DO IF MY MACHINE BREAKS DOWN?
If you bought your product in a store:
a) Empty the fuel tank.
b) Make sure that your machine is complete with all accessories supplied, and clean! If this is not the case,
the repairer will refuse the machine.
Go to the store with the complete machine and with the receipt or invoice.
If you bought your product on a website:
a) Empty the fuel tank.
b) Make sure that your machine is complete with all accessories supplied, and clean! If this is not the case,
the repairer will refuse the machine.
c) Create a SWAP-Europe service ticket on the site: https://services.swap-europe.com When making the
request on SWAP-Europe, you must attach the invoice and the photo of the nameplate (serial number).
d) Contact the repair station to make sure it is available before dropping o the machine.
Go to the repair station with the complete machine packed, accompanied by the purchase invoice and the
station support sheet downloadable after the service request is completed on the SWAP-Europe site
For machines with engine failure from manufacturers BRIGGS & STRATTON, HONDA and RATO, please
refer to the following instructions.
Repairs will be done by approved engine manufacturers of these manufacturers, see their site:
• http://www.briggsandstratton.com/eu/fr
• http://www.honda-engines-eu.com/fr/service-network-page;jsessionid=5EE8456CF39CD572AA2AEEDFD
290CDAE
• https://www.rato-europe.com/it/service-network
Please keep your original packaging to allow for after-sales service returns or pack your machine
with a similar cardboard box of the same dimensions.
For any question concerning our after-sales service you can make a request on our website https://
services.swap-europe.com
Our hotline remains available at +33 (9) 70 75 30 30.
7. PRODUCT FAILURE
7

THE WARRANTY DOES NOT COVER:
• Start-up and setting up of the product.
• Damage resulting from normal wear and tear of the product.
• Damage resulting from improper use of the product.
• Damage resulting from assembly or start-up not in accordance with the user manual.
• Breakdowns related to carburetion beyond 90 days and fouling of carburetors.
• Periodic and standard maintenance events.
• Actions of modication and dismantling that directly void the warranty.
• Products whose original authentication marking (brand, serial number) has been degraded, altered or
withdrawn.
• Replacement of consumables.
• The use of non-original parts.
• Breakage of parts following impacts or projections.
• Accessories breakdowns.
• Defects and their consequences linked to any external cause.
• Loss of components and loss due to insucient screwing.
• Cutting components and any damage related to the loosening of parts.
• Overload or overheating.
• Poor power supply quality: faulty voltage, voltage error, etc.
• Damages resulting from the deprivation of enjoyment of the product during the time necessary for repairs
and more generally the costs related to the immobilization of the product.
• The costs of a second opinion established by a third party following an estimate by a SWAP-Europe repair
station
• The use of a product which would show a defect or a breakage which was not the subject of an immediate
report and/or repair with the services of SWAP-Europe.
• Deterioration linked to transport and storage*.
• Launchers beyond 90 days.
• Oil, petrol, grease.
• Damages related to the use of non-compliant fuels or lubricants.
* In accordance with transport legislation, damage related to transport must be declared to carriers within 48
hours maximum after observation by registered letter with acknowledgement of receipt.
This document is a supplement to your notice, a non-exhaustive list.
Attention: all orders must be checked in the presence of the delivery person. In case of refusal by the
delivery person, it you must simply refuse the delivery and notify your refusal.
Reminder: the reserves do not exclude the notication by registered letter with acknowledgement within 72
hours.
Information:
Thermal devices must be wintered each season (service available on the SWAP-Europe site). Batteries must
be charged before being stored.
8. WARRANTY EXCLUSIONS
8
Table of contents
