First Degree Fitness Fluid Rower FDF User manual
FLUIDROWER
1
FDF Console withFDF Console with
ADJUSTABLE
FLUID RESISTANCEFLUID RESISTANCE
MACHINES
FLUIDROWER.COM FIRSTDEGREEFITNESS.COM
User Guide Version 1.0

FLUIDROWER
2
FLUIDROWERROWER - The Rowers fitted with Bluetooth Consoles
CONSOLE OVERVIEW
WORKOUT OPERATION
START UP SCREEN
USING THE CONSOLE
Workout Display
Display Readings
USING CONSOLE BUTTONS
Console Buttons
Changing Target Distance
Changing Chart Type
Console Reset
SPECIAL FUNCTIONS
Equipment Selection
BLUETOOTH CONNECTIVITY
Connect to Mobile Device
Connect to Bluetooth Heart Rate Monitor
Connect to Bluetooth Heart Rate Touch Handle
CONSOLE SUPPORT
FDF Connect Console DFU/Firmware APP
Firmware Update
RESISTANCE LEVEL CALIBRATION
HANDLING & MAINTENANCE
General
Battery Replacement
SPECIFICATIONS
3
4
4
4
5
5
6
6
7
7
8
9
10
10
11
11
12
13
13
14
CONTENTS
FLUIDROWER
3
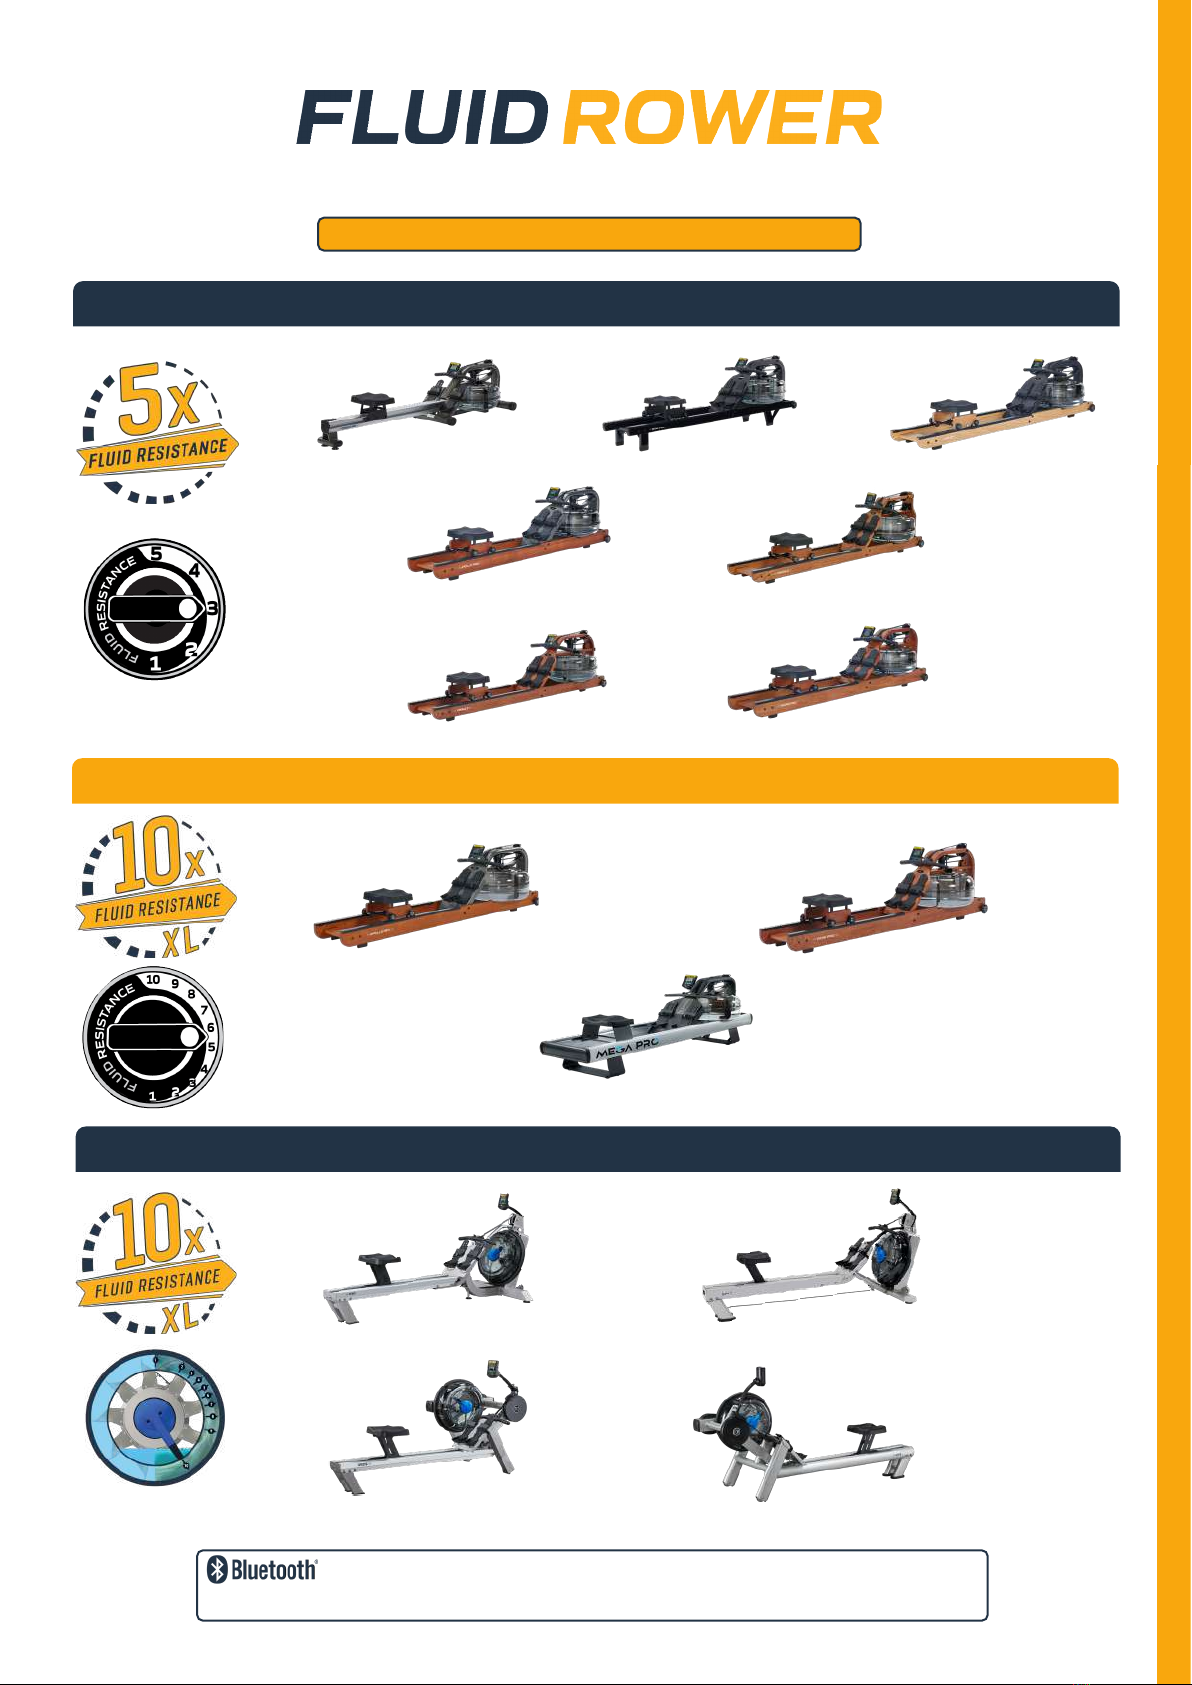
Viking PRO V
Viking 3 V
Viking 2 V
Apollo PRO V
NEON PRO V
Trident PRO V
Viking PRO XL
Apollo PRO XL
MEGA PRO XL
VX-3
E550
VX-2
E350
THE RANGE ASCENDING - ENTRY to ADVANCED
PRO MODELS SUITABLE FOR COMMERCIAL USE
5 ADJUSTABLE LEVELS V SERIES - HORIZONTAL 518mm TWIN TANK
10 ADJUSTABLE LEVELS XL SERIES - HORIZONTAL 540mm TWIN TANK
10 ADJUSTABLE LEVELS COMMERCIAL SERIES - VERTICAL 525mm TWIN TANK
Apollo V
FTMS (FiTness Machine Service protocol) Consoles are compatible
with Apple and Android Devices plus BT Heart Rate Straps/Monitors.

FLUIDROWER
4
CONSOLE OVERVIEW
+ First Degree Fitness Fluid Rower Models
+ Bluetooth® FTMS Rower Data Compatibility
+ Bluetooth® Heart Rate Monitor Compatibility - Including Polar Bluetooth® Monitors
+ Automatic Resistance Level Detection
+ Numeric Display of Workout Data, Stroke Metrics and Heart Rate
+ Real-Time Speed and Watts History Scrolling Charts
+ Set Distance Workouts
+ Simple 3 Button User Interface
+ Auto power down after 5 minutes of no activity (ONLY if Bluetooth® is not connected)
+ 2 x D Cells for Extended Battery Life
WORKOUT OPERATION
This console has 2 modes of operation.
JUST ROW - allows users to exercise with no time or distance limits.
SET DISTANCE - allows users to exercise for a desired distance.
START UP SCREEN
Press any button or begin exercising to power on the console. The startup screen displays firmware
version information, selected equipment model, and battery level.
Firmware Version:
August 11, 2020 @ 7:40pm
Model: 1000 (Pro V, 5 Level Rower)
Battery Level: 93%

FLUIDROWER
5
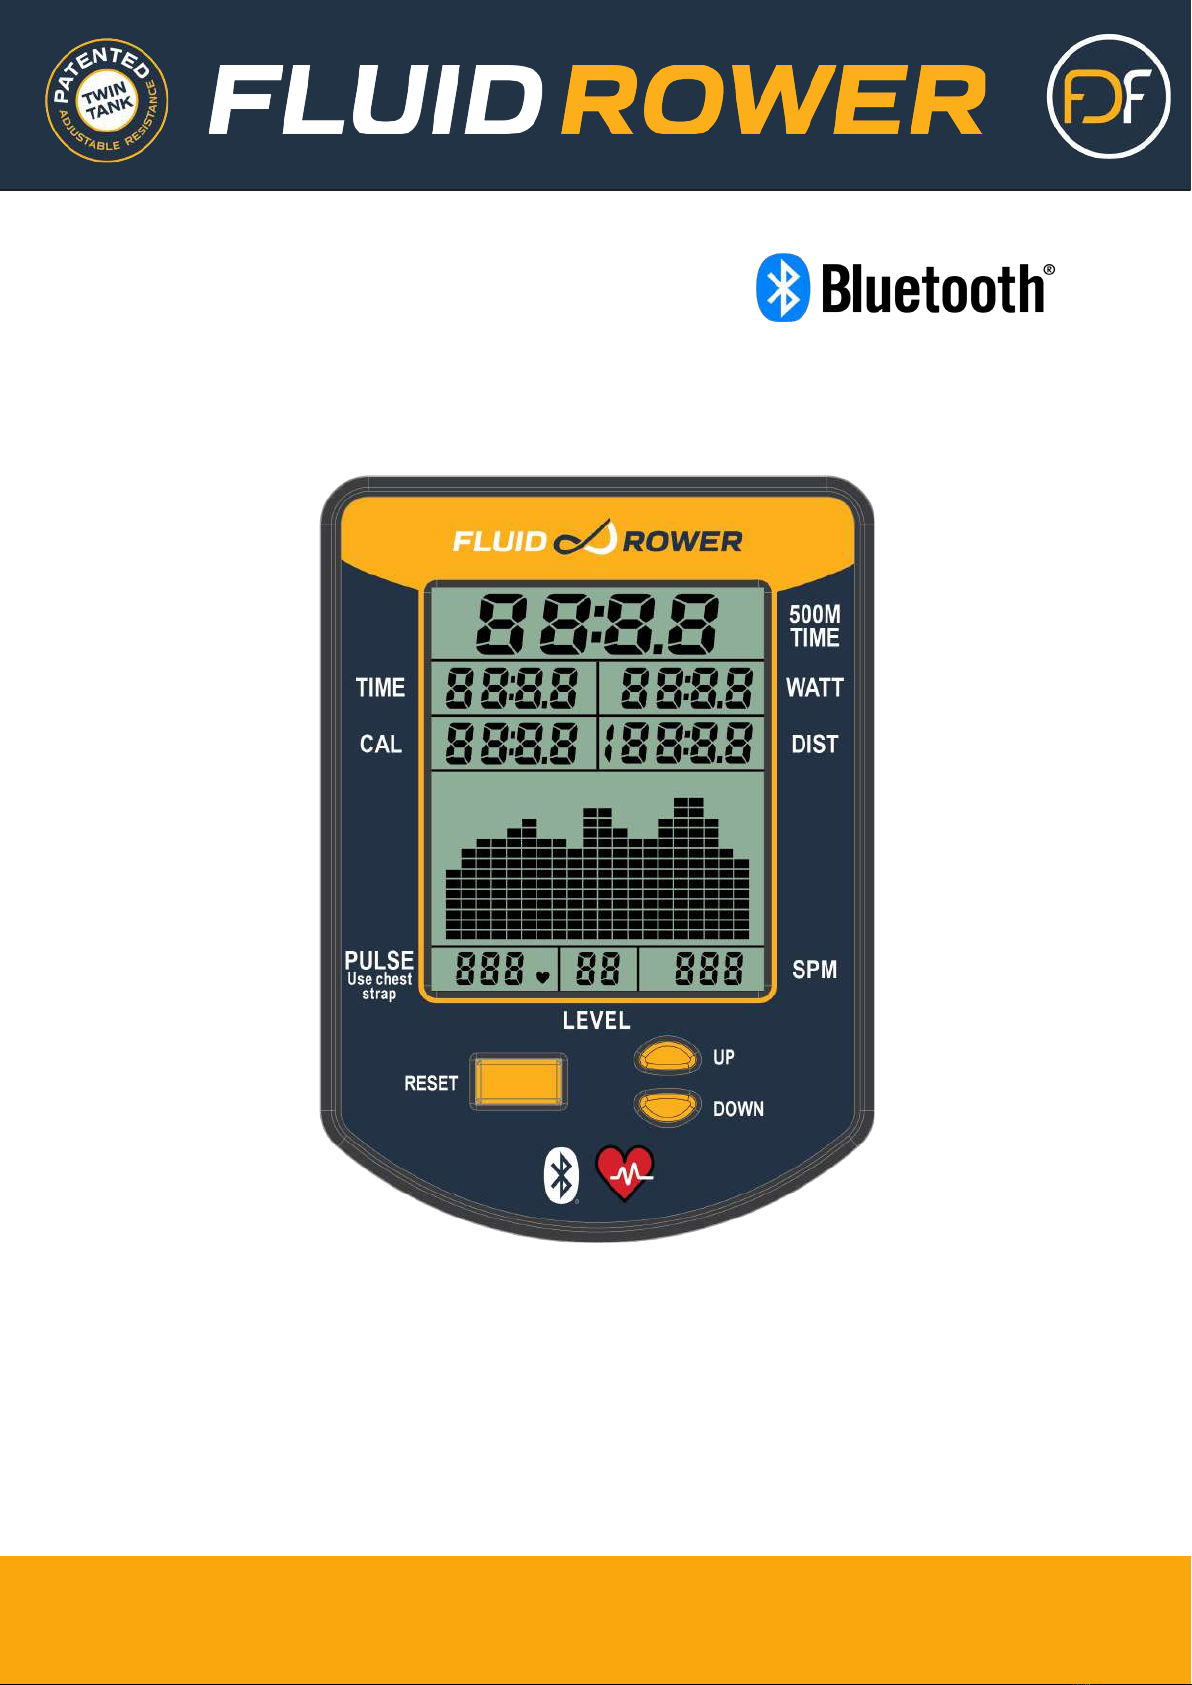
USING THE CONSOLE
500M TIME: While a workout is ongoing this will show Time to complete a 500m split based on
current Pace. When a workout is paused or stopped this will show average 500m split
time based on accumulated distance and elapsed time.
TIME: Workout elapsed time in minutes and seconds.
WATTS: While exercising, this shows the Power for the previous stroke. When a workout is
paused or stopped, this shows average power based on average split time.
CALS: While exercising this shows kCals/hr burned. When a workout is paused or stopped
this shows total kCals burned.
DIST: Accumulated Distance.
PULSE: Heart Rate from a Bluetooth® connected heart rate monitor.
LEVEL: Current resistance level which automatically updates when adjusted on the rower.
SPM: Current cadence as Strokes per Minute.
CHART: Shows real-time Speed or Watts history.
DISPLAY READINGS
WORKOUT DISPLAY
Table of contents
Other First Degree Fitness Music Mixer manuals


