Fisher-Price Pixter User manual
NModelnummer: B5724
INumero Modello: B5724
ENúmero de modelo: B5724
GModel Number: B5724
FRéférence : B5724
DArtikelnummer: B5724
GModel Number: B5724
FRéférence : B5724
DArtikelnummer: B5724
NModelnummer: B5724
INumero Modello: B5724
ENúmero de modelo: B5724
®
2
3
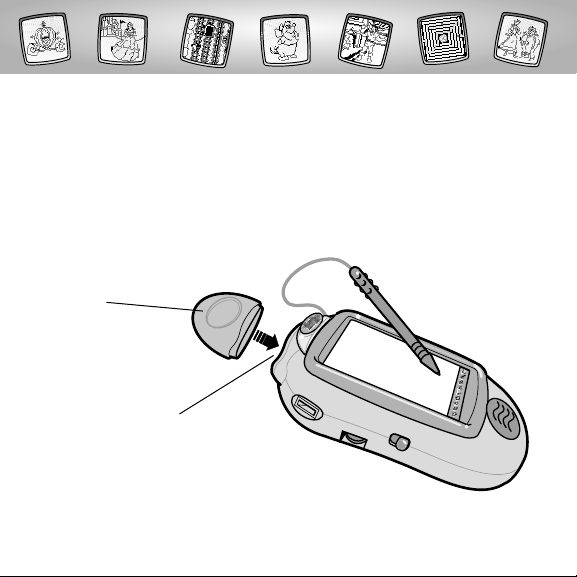
GLet’s Go! FJouons ! DLos geht's!
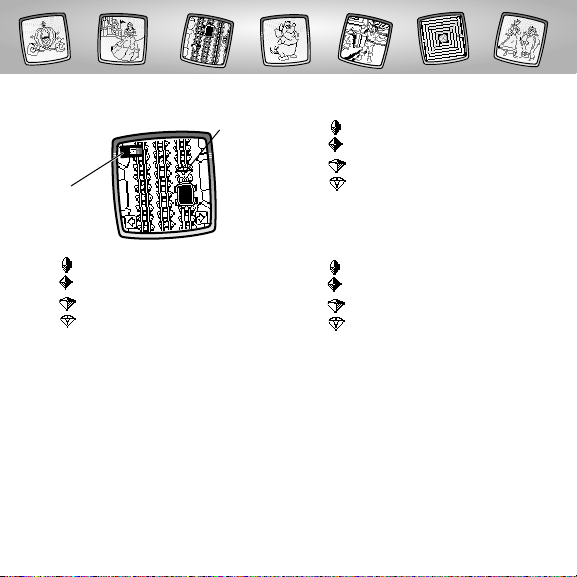
GSoftware Port
FLecteur de
la cartouche
DSoftware-Anschluss
GSoftware
Cartridge
FCartouche
du logiciel JEUX
DSPIELCENTER
Software-Kassette
GBefore inserting a software cartridge, turn power off! Insert the software
cartridge into the software port.Turn power back on.
FÉteins le jouet avant d’insérer la cartouche du logiciel ! Insère la cartouche
dans le lecteur et rallume-le.
DVor Einlegen einer Software-Kassette das Produkt immer ausschalten!
Die Software-Kassette in den Software-Anschluss stecken. Das Produkt
wieder einschalten.
4
G• Some of the tools on the tool menu are not available for use during an activity.
If a tool is not available for use, you will hear a tone.The Home and the Save It
(or Send It) tools are always available for use.
Hint: This software cartridge can be used with Pixter®, Pixter® Plus and Pixter® 2.0 units.
The Save It tool on the tool menu with Pixter® and Pixter® Plus is different than the
Save It or Send It tool on Pixter® 2.0.
• Please keep this manual for future reference, as it contains important information.
IMPORTANT! If the tip of the stylus and the image on screen do not align, it’s time to
calibrate them! Please refer to page 32,Calibrating the Stylus.
F• Certains outils de la barre d’outils ne sont pas disponibles pendant certaines activités.
Si l’outil choisi n’est pas disponible pendant une activité,un signal sonore est émis. Les
outils « Accueil » et « Sauvegarde » (ou « Envoi ») sont toujours disponibles.
Remarque : Cette cartouche est compatible avec les consoles Pixter,Pixter Plus et Pixter 2.0.
L’outil « Sauvegarde » de la barre d’outils des consoles Pixter et Pixter Plus est différent de
l’outil « Sauvegarde » ou « Envoi » de la console Pixter 2.0.
• Conserve ce guide pour pouvoir t’y référer si nécessaire car il contient des
informations importantes.
IMPORTANT ! Si la pointe du stylet et l’image à l’écran ne sont pas alignées,il faut les
calibrer. Reporte-toi à la page 32, « Calibrage du stylet ».
D• Einige Werkzeuge auf der Werkzeugleiste können während einer Aktivität nicht
benutzt werden.Kann ein Werkzeug nicht benutzt werden,erklingt ein Ton. Die Home-
und Speichern- (oder Senden-) Werkzeuge können immer benutzt werden.
Hinweis: Diese Software-Kassette kann auch mit Pixter,Pixter Plus und Pixter 2.0 Spielein-
heiten benutzt werden.Das Speichern-Werkzeug auf der Werkzeugleiste von Pixter and
Pixter Plus ist anders als das Speichern- oder Senden-Werkzeug von Pixter 2.0.
• Diese Bedienungsanleitung bitte für mögliche Rückfragen aufbewahren. Sie enthält
wichtige Informationen.
WICHTIG! Erscheint eine mit dem Stift gemachte Markierung nicht dort, wo der
Stift aufgesetzt wurde,muss der Stift ausgerichtet werden! Siehe Seite 32 Abschnitt
"Den Stift ausrichten".

5
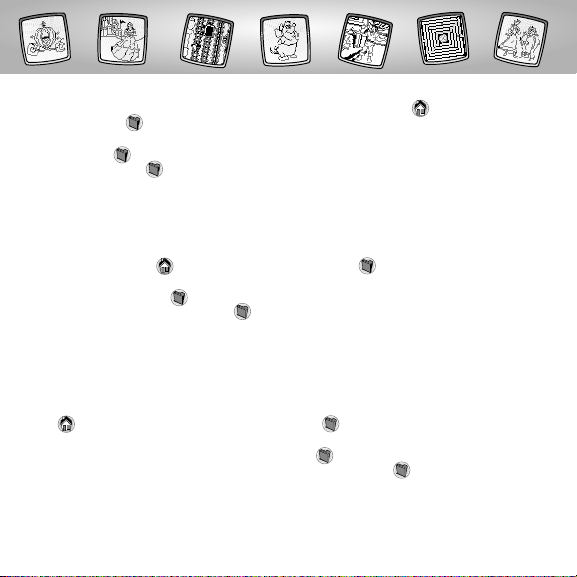
GChoose an activity or game from the Home Screen: Gem Mine, Enchanted Garden
Maze, Cinderella’s Connect-the-Dots, and Be Our Guest Decorator.Touch the activity
or game on the screen with the stylus.
FChoisis une activité ou un jeu à partir de l’écran d’accueil : La mine aux mille joyaux,
Le labyrinthe du jardin enchanté, Point-à-point Cendrillon et Décorateur de palace.
Avec le stylet, touche le jeu apparaissant à l’écran.
DWähle auf dem Ausgangsbildschirm eine Aktivität oder ein Spiel: Edelsteinmine,
Verzaubertes Gartenlabyrinth, Punkte verbinden mit Cinderella und Kreativer
Raumgestalter! Berühre die Aktivität oder das Spiel auf dem Bildschirm mit dem Stift.
GBe Our Guest
Decorator
FDécorateur de
palace
DKreativer
Raumgestalter
GEnchanted
Garden Maze
FLe labyrinthe du
jardin enchanté
DVerzaubertes
Gartenlabyrinth
GGem Mine
FLa mine aux
mille joyaux
DEdelsteinmine
GCinderella’s
Connect-the-Dots
FPoint-à-point
Cendrillon
DPunkte verbinden
mit Cinderella
GDisney Character Fun™
FAmuse-toi avec les personnages Disney !
DDisneyfiguren-Spaß

6
G• Watch the work
bell ring.Get ready!
Your cart begins
to roll!
F• La cloche sonne
alors prépare-toi !
Ton chariot démarre !
D• Schau, wie die Arbeitsglocke läutet.
Mach dich bereit! Deine Lore beginnt
zu rollen!
GLa mine aux mille joyaux FLa mine aux mille joyaux
DEdelsteinmine
G• Touch the arrows
on the bottom
of the screen with
the stylus to jump
the cart over the
tracks to the left
or right.
F• Avec le stylet,sers-toi
des flèches au bas de l’écran
pour que ton chariot saute d’un rail
à l’autre,vers la gauche ou la droite.
D• Berühre die Pfeile am unteren
Bildschirmrand mit dem Stift, um mit
der Lore über die Schienen nach links
oder rechts zu springen.
7
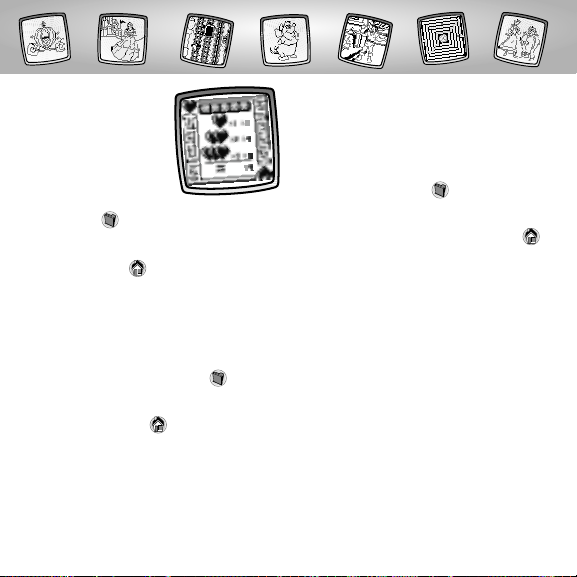
G• Run the cart over gems to score points!
Ruby (10 points)
Sapphire (20 points)
Emeralds (30 points)
Diamond (50 points)
• Look in the upper left corner to see
your score.
GScore
FScore
DPunktestand
GDiamond
FDiamant
DDiamant
F• Roule sur les pierres précieuses avec
ton chariot pour marquer des points !
Rubis (10 points)
Saphir (20 points)
Emeraude (30 points)
Diamant (50 points)
• Ton score est affiché en haut à gauche
de l’écran.
D• Fahre mit der Lore über die Edelsteine,
um Punkte zu erzielen!
Rubin (10 Punkte)
Saphir (20 Punkte)
Smaragd (30 Punkte)
Diamant (50 Punkte)
• Schaue in die obere linke Bildschir-
mecke, um deinen Punktestand
zu sehen.
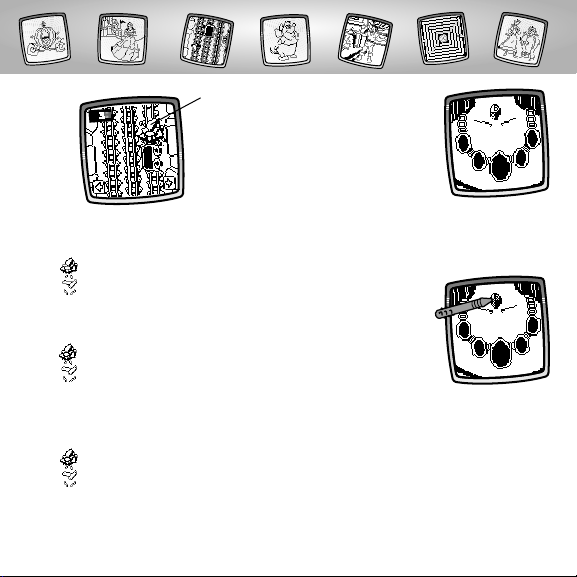
G• Touch the gem
with the stylus
on the screen.
F• Touche le joyau
apparaissant
à l’écran avec
le stylet.
D• Berühre den Edelstein auf dem
Bildschirm mit dem Stift.
G• For each 100
points, you’ll get
to place a jewel
into the necklace.
F• Tous les 100
points, tu pourras
placer un joyau
sur le collier.
D• Für jeweils 100 Punkte darfst du einen
Edelstein in die Halskette einsetzen.
8
G• Watch for obstacles – boulders
or broken track! If you run over an
obstacle, points are subtracted.
Boulders (-10 points)
Broken Track (-30 points)
F• Attention aux obstacles : les rochers et
les rails détruits ! Si tu roules sur un
obstacle,tu perds des points.
Rochers (-10 points)
Rails détruits (-30 points)
D• Vorsicht vor den Hindernissen –
Felsblöcke oder gebrochene Schienen!
Überfährst du ein Hindernis, werden
dir Punkte abgezogen.
Felsblöcke (-10 Punkte)
Gebrochene Schienen
(-30 Punkte)
GBoulder
FRochers
DFelsblock

9
G• Drag the gem
and place it into
the necklace.
F• Déplace le joyau
et mets-le sur
le collier.
D• Ziehe den
Edelstein über
den Bildschirm, und setze
ihn in die Halskette ein.
G• The game continues
until you have
placed all five gems
in the necklace!
Hints:
- If you have a
Pixter® 2.0 unit,
and you’d like to send your score to
another Pixter® 2.0, touch the Save It
or Send It tool on the tool menu with
the stylus.
- If you’d like to go to another activity,
touch Home on the tool menu to
return to the Home Screen.
F• Le jeu se poursuit jusqu’à ce que tu
aies placé les cinq joyaux sur le collier !
Conseils :
- Si tu utilises une console Pixter 2.0 et que
tu aimerais envoyer ton score à une
autre console Pixter 2.0,touche l’outil
« Sauvegarde » ou « Envoi » sur la
barre d’outils avec le stylet.
- Pour passer à une autre activité,touche
l’outil « Accueil » de la barre d’outils
pour retourner à l’écran d’accueil.
D• Das Spiel geht weiter, bis du
insgesamt fünf Edelsteine in die
Halskette eingesetzt hast!
Hinweise:
- Benutzt du eine Pixter 2.0 Spieleinheit
und möchtest deinen Punktestand an
eine andere Pixter 2.0 Spieleinheit
senden,berühre das Speichern- oder
Senden-Werkzeug auf der
Werkzeugleiste mit dem Stift.
- Möchtest du zu einer anderen Aktivität
wechseln,berühre das Home-Symbol
auf der Werkzeugleiste mit dem
Stift,um zum Ausgangsbildschirm
zurückzukehren.

10
GEnchanted Garden FLe labyrinthe du jardin enchanté
DVerzaubertes Gartenlabyrinth
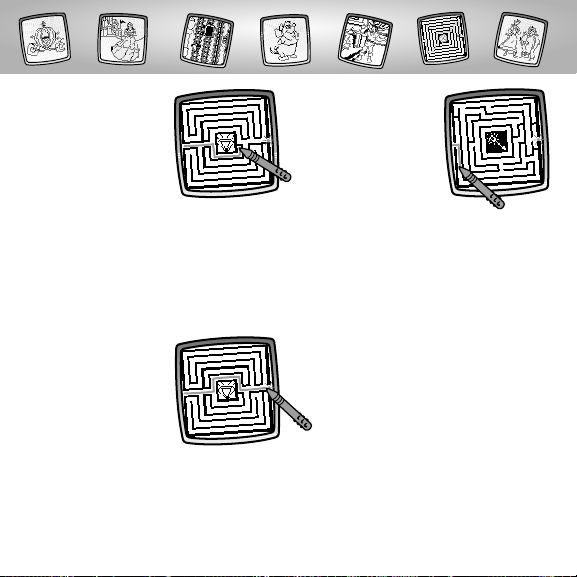
G• Locate the beginning of the maze
and the end of the maze.The begin-
ning of the maze is the blinking dot
on the left of the screen; the end of the
maze is the blinking dot on the right
of the screen.
F• Repère l’entrée du labyrinthe (point
clignotant à la gauche de l’écran)
et la sortie (point clignotant à la droite
de l’écran).
D• Schaue dir den Start und das Ziel des
Labyrinths an. Der Start des Labyrinths
ist der blinkende Punkt auf der linken
Seite des Bildschirms; das Ziel des
Labyrinths ist der blinkende Punkt
auf der rechten Seite des Bildschirms.
GEnd
FArrivée
DZiel
GBeginning
FDépart
DStart
G• Touch the begin-
ning dot and drag
it through the maze.
Hint: There is a time
limit to get all the
way through the maze.
F• Avec le stylet,touche
le point de départ et déplace-le
dans le labyrinthe.
Remarque : Tu dois réussir à sortir du
labyrinthe rapidement :attention, ton
temps est limité!
D• Berühre den Start-Punkt, und ziehe
ihn durch das Labyrinth.
Hinweis: Das Labyrinth muss
innerhalb einer festgelegten Zeit
durchlaufen werden.
11
G• Opps, you’ve hit
a wall. Drag the
stylus backward
and go in a new
direction!
F• Oups ! Tu es rentré
dans un mur!
Recule avec le
stylet et prends
une autre direction !
D• Hoppla, du bist an eine Wand
gekommen. Ziehe den Stift wieder
zurück, und gehe in eine andere
Richtung!
G• Keep going
through mazes
until time is up!
F• Poursuis ton
chemin à travers les
labyrinthes jusqu’à
ce que le temps
soit écoulé !
D• Laufe weiter durch die Labyrinthe
hindurch, bis die Zeit abgelaufen ist!
G• When you get
through the first
maze, you’re onto
the next maze!
F• Une fois sorti du
premier labyrinthe,
passe au suivant !
D• Bist du durch das erste Labyrinth
hindurchgelangt, geht es weiter
mit dem nächsten Labyrinth!
12
G• Look at your score!
Hints:
- If you have a
Pixter® 2.0 unit,
and you’d like to
send your score to
another Pixter® 2.0,
touch the Save It or
Send It tool on the
tool menu with the stylus.
- If you’d like to go to another activity,
touch Home on the tool menu to
return to the Home Screen.
F• Regarde ton score !
Remarques :
- Si tu utilises une console Pixter 2.0 et
que tu aimerais envoyer ton score à une
autre console Pixter 2.0,touche l’outil
« Sauvegarde » ou « Envoi » sur la
barre d’outils avec le stylet.
- Pour passer à une autre activité,touche
l’outil « Accueil » de la barre d’outils
pour retourner à l’écran d’accueil.
D• Schau dir deinen Punktestand an!
Hinweise:
- Benutzt du eine Pixter 2.0 Spieleinheit
und möchtest deinen Punktestand an
eine andere Pixter 2.0 Spieleinheit-
senden,berühre das Speichern- oder
Senden-Werkzeug auf der
Werkzeugleiste mit dem Stift.
- Möchtest du eine andere Aktivität
wählen,berühre das Home-Symbol
auf der Werkzeugleiste mit dem
Stift,um zum Ausgangsbildschirm
zurückzukehren.

13
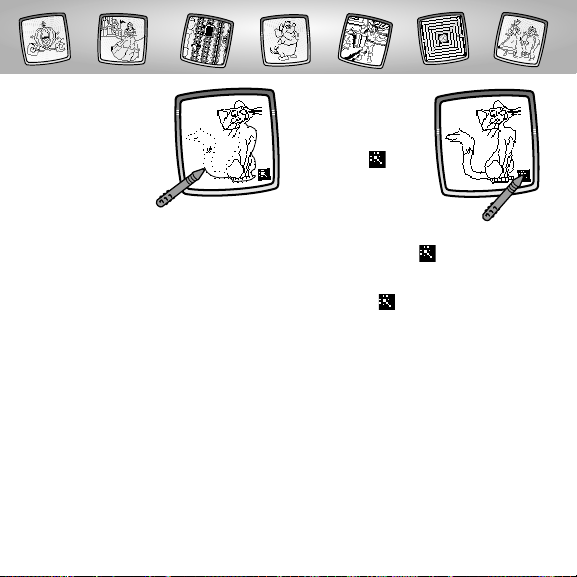
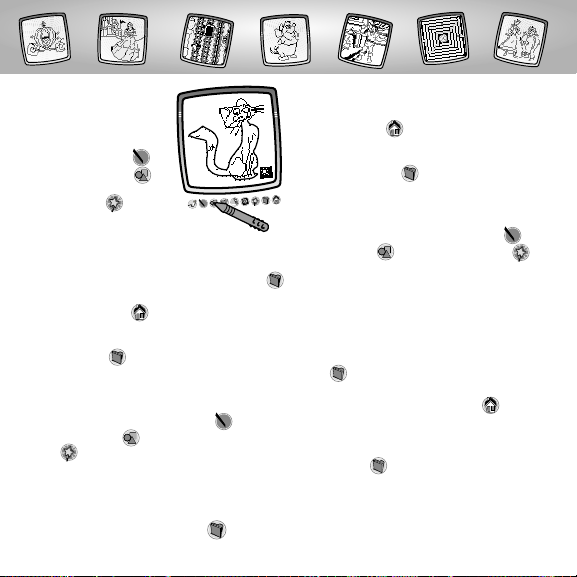
GCinderella’s Connect-the-Dots
FPoint-à-point Cendrillon
DPunkte verbinden mit Cinderella
G• When you find
one that you like,
touch the screen
with the stylus.
F• Quand tu en
trouves une qui
te plaît, touche
l’écran avec le stylet.
D• Möchtest du ein Bild verwenden, dann
berühre den Bildschirm mit dem Stift.
G• Touch the arrows
on the bottom of
the screen with
the stylus to scroll
through picture
choices.
F• Touche les flèches
apparaissant au bas de l’écran
avec le stylet pour voir défiler les
différentes images.
D• Berühre die Pfeile am unteren
Bildschirmrand mit dem Stift, um
dir die Bilder nacheinander anzeigen
zu lassen.
G• If you’d like
Pixter® to auto-
matically draw
the picture,
touch on
the screen with
the stylus.
F• Si tu veux que
ta console Pixter fasse
apparaître automatiquement
l’image,touche avec le stylet.
D• Möchtest du, dass Pixter das
Bild automatisch fertig zeichnet,
berühre auf dem Bildschirm
mit dem Stift.
14
G• Use the“pencil”
tool to connect
the dots and
complete the
picture.
F• Utilise l’outil
"Crayon" sur la
barre d’outils
pour relier les points
et compléter l’image.
D• Benutze das "Bleistift"-Werkzeug, um
die Punkte zu verbinden und das Bild
fertig zu zeichnen.
G• Now, use any of
the other tools on
the tool menu to
add to your picture:
Straight Line ;
Shape Maker ;
or Special Effects
Selector to make
your drawing come to life!
Hints:
- If you have a Pixter®2.0 unit,and you’d
like to send your picture to another
Pixter® 2.0, touch the Save It or Send It
tool on the tool menu with the stylus.
- Touch Home on the tool menu with
the stylus to return to the Home Screen
at any time or Save it (and Adjust the
Volume) to save/retrieve a drawing
or adjust the volume.
F• Utilise maintenant un des outils de
la barre d’outils pour compléter
ton dessin : « Ligne droite » ,
« Formes » ou « Effets spéciaux »
pour animer ton dessin !
Remarques :
- Si tu utilises une console Pixter 2.0 et que
tu aimerais envoyer ton dessin à une
autre console Pixter 2.0,touche l’outil
« Sauvegarde » ou « Envoi » sur la
barre d’outils avec le stylet.
- À tout moment,tu peux retourner à
l’écran d’accueil en touchant l’outil
« Accueil » ou sauvegarder/récupérer
ton dessin ou régler le volume en
touchant « Sauvegarde » (ou « Réglage
du volume ») .
D• Benutze anschließend eines der
anderen Werkzeuge von der
Werkzeugleiste, um dein Bild zu
vervollständigen: Gerade Linie ,
Formen , oder Spezialeffekte
erwecken deine Zeichnung
"zum Leben"!
Hinweise:
- Benutzt du eine Pixter 2.0 Spieleinheit
und möchtest dein Bild an eine andere
Pixter 2.0 Spieleinheit senden, berühre
das Speichern- oder Senden-Werkzeug
auf der Werkzeugleiste mit
dem Stift.
- Berühre mit dem Stift Home auf
der Werkzeugleiste,um jederzeit zum
Ausgangsbildschirm zurückzukehren,
oder Speichern (und die Lautstärke
regeln) , um eine Zeichnung zu
speichern,zu öffnen oder die Lautstärke
zu regeln.
15
16
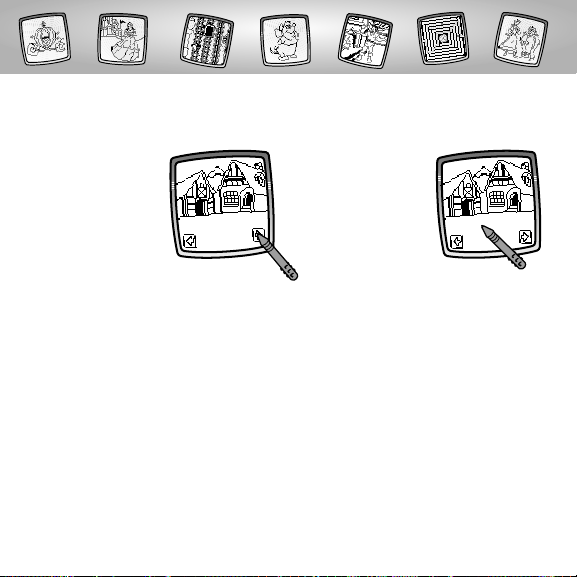
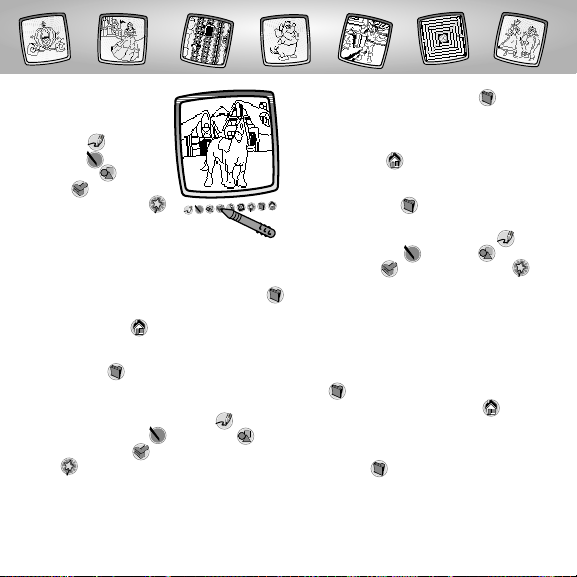
GBe Our Guest Decorator FDécorateur de palace
DKreativer Raumgestalter
G• Touch the arrows
on the bottom
of the screen
with the stylus
to view different
backgrounds.
F• Touche les flèches
apparaissant au bas de l’écran
avec le stylet pour voir apparaître
tous les arrière-plans.
D• Berühre die Pfeile am unteren
Bildschirmrand mit dem Stift,
um dir verschiedene Hinter-
grundszenen anzusehen.
G• When you find
one that you like,
touch the screen
with the stylus.
F• Quand tu en
trouves un qui
te plaît, touche
l’écran avec le stylet.
D• Möchtest du eine der Hintergrunds-
zenen verwenden, dann berühre
den Bildschirm mit dem Stift.
G• Use any of the
tools on the tool
menu:“Pencil”
Tool ; Straight
Line ; Shape
Maker ; Stamp
It or Special
Effects Selector
to make your
drawing come to life!
Hints:
- If you have a Pixter® 2.0 unit,and you’d
like to send your picture to another
Pixter® 2.0, touch the Save It or Send It
tool on the tool menu with the stylus.
- Touch Home on the tool menu with
the stylus to return to the Home Screen
at any time or Save It (and Adjust the
Volume) to save/retrieve a drawing
or adjust the volume.
F• Touche n’importe quel outil de
la barre d’outils : « Crayon » ,
« Ligne droite » , « Formes » ,
« Tampons » ou « Effets spéciaux »
pour animer ton dessin !
Remarques :
- Si tu utilises une console Pixter 2.0 et que
tu aimerais envoyer ton dessin à une
autre console Pixter 2.0,touche l’outil
17
« Sauvegarde » ou « Envoi » sur la
barre d’outils avec le stylet.
- À tout moment,tu peux retourner à
l’écran d’accueil en touchant l’outil
« Accueil » ou sauvegarder/ récupérer
ton dessin ou régler le volume en
touchant « Sauvegarde » (ou « Réglage
du volume ») .
D• Benutze eines der Werkzeuge von
der Werkzeugleiste: "Bleistift" ,
Gerade Linie , Formen ,
Stempel oder Spezialeffekte ,
um deine Zeichnung "zum Leben
zu erwecken"!
Hinweise:
- Benutzt du eine Pixter 2.0 Spieleinheit
und möchtest dein Bild an eine andere
Pixter 2.0 Spieleinheit senden, berühre
das Speichern- oder Senden-Werkzeug
auf der Werkzeugleiste mit dem Stift.
- Berühre mit dem Stift Home auf der
Werkzeugleiste, um jederzeit zum
Ausgangsbildschirm zurückzukehren,
oder Speichern (und die Lautstärke
regeln) , um eine Zeichnung zu
speichern,zu öffnen oder die Lautstärke
zu regeln.

GTool Menu FBarre d’outils DWerkzeugleiste
GCreate your own
drawing or write
a message with
the stylus.
FCrée ton propre
dessin ou écris
un message avec
le stylet.
DZeichne dein eigenes Bild,oder schreibe
eine Nachricht mit dem Stift.
G“Pencil”Tool
FCrayon
D“Bleistift”Werkzeug
GTouch for freestyle drawing or writing.
FTouche l’icone avec le stylet pour
dessiner ou écrire.
DBerühre das Symbol für freies Malen
oder Schreiben.
GStraight Line
FLigne droite
DGerade Linie
GTouch to make a straight line.
FTouche l’icone avec le stylet pour faire
une ligne droite.
DBerühre das Symbol, um eine gerade
Linie zu zeichnen.
GNow, choose the
line thickness for
your“pencil”tool.
FMaintenant, choisis
l’épaisseur de la
ligne pour ton
outil « Crayon ».
DWähle nun, wie dick der Strich
deines "Bleistifts" sein soll.
GPixter®, Pixter® Plus,Pixter® 2.0
FPixter,Pixter Plus et Pixter 2.0
DPixter,Pixter Plus,Pixter 2.0
GPixter®, Pixter® Plus,Pixter® 2.0
FPixter,Pixter Plus et Pixter 2.0
DPixter,Pixter Plus,Pixter 2.0
18

GTouch the screen with the stylus.Now,
drag the stylus on the screen and stop.
Look – a straight line!
Hint: Make your own shapes or create
your own connect-the-dots.
FTouche l’écran avec le stylet et dessine
une ligne droite.Regarde : une ligne
droite apparaît à l’écran !
Remarque : Dessine tes propres formes
et crée ton propre point-à-point.
DBerühre den Bildschirm mit dem
Stift. Ziehe den Stift nun über den
Bildschirm, und stoppe.Schau –
du hast eine gerade Linie gezeichnet!
Hinweis: Zeichne deine eigenen Formen
oder dein eigenes Punkte-verbinden-Bild.
GShape Maker
FFormes
DFormen
GTouch to make shapes.
FSélectionne cet outil pour créer
des formes.
DBerühre den Bildschirm, um Formen
zu machen.
GNow, choose
the shape:
- Triangle
- Circle
- Square/rectangle
- Make your
own shape!
FMaintenant, choisis une forme :
- Triangle
- Cercle
- Carré/rectangle
- Dessine ta propre forme !
DSuche dir eine Form aus:
- Dreieck
- Kreis
- Quadrat/Rechteck
- Zeichne deine eigene Form!
GPixter®, Pixter® Plus,Pixter® 2.0
FPixter,Pixter Plus et Pixter 2.0
DPixter,Pixter Plus,Pixter 2.0
19

GTouch the screen and drag the
stylus to make small or large shapes.
Hint: To make a triangle,touch the screen
and drag the stylus to make the base of
the triangle.Then,touch the base line
with the stylus and drag it to complete
the triangle.
FTouche l’écran avec le stylet et fais-le
glisser pour dessiner des petites ou des
grandes formes.
Remarque : Pour faire un triangle,
place le stylet sur l’écran et dessine la base
du triangle.Ensuite,positionne le stylet
sur la base et fais-le glisser pour compléter
le triangle.
DBerühre den Bildschirm, und ziehe den
Stift darüber, um kleine oder große
Formen zu machen.
Hinweis: Möchtest du ein Dreieck
machen,dann berühre den Bildschirm
und ziehe den Stift,um die Grundlinie des
Dreiecks zu zeichnen.Berühre dann die
Grundlinie mit dem Stift,und ziehe sie
zu einem vollständigen Dreieck hoch.
GStamp It!
FTampons !
DStempeln!
GTouch for stamper art.
FTouche le tampon.
DBerühre das Symbol, um zu stempeln.
GTouch the arrows on the bottom of the
screen with the stylus to see each of the
stamper designs.
FAvec le stylet, touche les flèches au bas
de l’écran pour faire défiler les tampons.
DBerühre die Pfeile unten am
Bildschirm mit dem Stift, um jedes
der Stempeldesigns zu sehen.
GPixter®, Pixter® Plus,Pixter® 2.0
FPixter,Pixter Plus et Pixter 2.0
DPixter,Pixter Plus,Pixter 2.0
20
Other manuals for Pixter
2
This manual suits for next models
1
Other Fisher-Price Game Console manuals


Popular Game Console manuals by other brands

Coleco
Coleco Alien Attack 2370 instruction manual

Mattel
Mattel Mind Flex P2639 instruction manual

PlayStation
PlayStation SCPH-7501 - Game Console Service manual

Radica Games
Radica Games Lighted Tetris instruction manual

Nintendo
Nintendo Wii U supplementary guide

Microsoft
Microsoft Xbox 360 Series Important information


