Flo 79725 User manual
GLEBOGRYZARKA ELEKTRYCZNA
ELECTRIC TILLER
ELEKTRO-BODENHACKE
ЭЛЕКТРИЧЕСКИЙ КУЛЬТИВАТОР
ЕЛЕКТРИЧНИЙ КУЛЬТИВАТОР
ELEKTRINIS PURENTUVAS
ELEKTRISKĀAUGSNES FRĒZE
ELEKTRICKÝ KULTIVÁTOR
ELEKTRICKÝ KULTIVÁTOR
ELEKTROMOS KAPÁLÓGÉP
MOTOSAPA ELECTRICA
CULTIVADOR ROTATIVO ELÉCTRICO
MOTOBINEUSE ÉLECTRIQUE
MOTOZAPPA ELETTRICA
ELEKTRISCHE TUINFREES
ΗΛΕΚΤΡΙΚΟ ΣΚΑΠΤΙΚΟ
PL
GB
D
RUS
UA
LT
LV
CZ
SK
H
RO
E
F
I
NL
GR
INSTRUKCJA ORYGINALNA 1
UWAGA! Przed pierwszym uruchomieniem urządzenia należy dokładnie zapo-
znaćsięz tekstem instrukcji obsługi.
79725
INSTRUKCJA ORYGINALNA
2
PL D RUS UA LT LV CZ SK H RO E F I NL GR
TOYA S.A. ul. Sołtysowicka 13-15, 51-168 Wrocław, Polska
Rok produkcji:
Production year:
Produktionsjahr:
Год выпуска:
Рік випуску:
Pagaminimo metai:
Ražošanas gads:
Rok výroby:
Rok výroby:
2021 Gyártási év:
Anul producţiei utilajului:
Año de fabricación:
Année de fabrication:
Anno di produzione:
Bouwjaar:
Έτος παραγωγής:
VVI
VII
II
I III
1
22
3
4
5
6

INSTRUKCJA ORYGINALNA 3
PL D RUS UA LT LV CZ SK H RO E F I NL GR
1. obudowa silnika
2. uchwyt
3. włącznik
4. blokada włącznika
5. noże
6. osłona noży
7. koło pomocnicze
PL
1. motor housing
2. handle
3. power switch
4. power switch lock
5. blades
6. blades’ guard
7. supporting wheel
GB
1. Motorgehäuse
2. Halter
3. Ein-/Ausschalter
4. Schaltersperre
5. Messer
6. Messer-Schutzabdeckung
7. Hilfsrad
D
1. корпус двигателя
2. ручка
3. выключатель
4. блокировка выключателя
5. лезвия
6. защитная крышка
7. вспомогательное колесо
RUS
1. корпус двигуна
2. ручка
3. вимикач
4. блокування вимикача
5. ножі
6. кожух фрез
7. допоміжне колесо
UA
1. variklio korpusas
2. rankena
3. jungiklis
4. jungiklio užraktas
5. peiliai
6. peiliųdangtis
7. pagalbiniai rateliai
LT
1. dzinēja korpuss
2. rokturis
3. slēdzis
4. slēdža bloķētājs
5. naži
6. nažu pārsegs
7. palīgritenis
LV
1. skříňmotoru
2. rukojeť
3. vypínač
4. blokáda vypínače
5. nože
6. kryt nože
7. pomocné kolo
CZ
1. plášťmotora
2. rúčka
3. zapínač
4. blokáda zapínača
5. nože
6. kryt nožov
7. pomocné koleso
SK
1. motor védőburkolata
2. fogantyú
3. bekapcsológomb
4. bekapcsolás reteszelő
5. kések
6. kések védőburkolata
7. segédkerék
H
1. carcasa motorului
2. mâner
3. comutator de alimentare
4. blocare comutator electric
5. lame
6. apărătoare lame
7. roatăde susținere
RO
1. caja del motor
2. soporte
3. interruptor
4. bloqueo del interruptor
5. cuchillas
6. protección de cuchillas
7. rueda auxiliar
E
1. boîtier du moteur
2. poignée
3. interrupteur
4. blocage de la gâchette de l’interrupteur
5. couteaux
6. capot des lames
7. roues auxiliaires
F
1. corpo del motore
2. impugnatura
3. pulsante di accensione
4. blocco del pulsante di accensione
5. lame
6. protezione delle lame
7. ruota ausiliaria
I
1. motorbehuizing
2. handvat
3. schakelaar
4. schakelaarvergrendeling
5. messen
6. messenafdekking
7. hulpwiel
NL
1. περίβλημα κινητήρα
2. υποδοχή
3. διακόπτης λειτουργίας
4. ασφάλιση διακόπτη
5. μαχαίρια
6. προστατευτικό μαχαιριών
7. βοηθητικός τροχός
GR
Ten symbol informuje o zakazie umieszczania zużytego sprzętu elektrycznego i elektronicznego (w tym baterii i akumulatorów) łącznie z innymi odpadami. Zużyty sprzęt
powinien byćzbierany selektywnie i przekazany do punktu zbierania w celu zapewnienia jego recyklingu i odzysku, aby ograniczaćilość odpadów oraz zmniejszyćstopnień
wykorzystania zasobów naturalnych. Niekontrolowane uwalnianie składników niebezpiecznych zawartych w sprzęcie elektrycznym i elektronicznym może stanowićzagroże-
nie dla zdrowia ludzkiego oraz powodowaćnegatywne zmiany w środowisku naturalnym. Gospodarstwo domowe pełni ważnąrolęw przyczynianiu siędo ponownego użycia
i odzysku, w tym recyklingu zużytego sprzętu. Więcej informacji o właściwych metodach recyklingu można uzyskaću władz lokalnych lub sprzedawcy.
Dieses Symbol weist darauf hin, dass Elektro- und Elektronik-Altgeräte (einschließlich Batterien und Akkumulatoren) nicht zusammen mit anderen Abfällen entsorgt werden
dürfen. Altgeräte sollten getrennt gesammelt und bei einer Sammelstelle abgegeben werden, um deren Recycling und Verwertung zu gewährleisten und so die Abfallmenge
und die Nutzung natürlicher Ressourcen zu reduzieren. Die unkontrollierte Freisetzung gefährlicher Stoffe, die in Elektro- und Elektronikgeräten enthalten sind, kann eine
Gefahr für die menschliche Gesundheit darstellen und negative Auswirkungen auf die Umwelt haben. Der Haushalt spielt eine wichtige Rolle bei der Wiederverwendung
und Verwertung, einschließlich des Recyclings von Altgeräten. Weitere Informationen zu den geeigneten Recyclingverfahren erhalten Sie bei den örtlichen Behörden oder
Ihrem Händler.
Этот символ информирует озапрете помещать изношенное электрическое иэлектронное оборудование (втом числе батареи иаккумуляторы) вместе сдругими
отходами. Изношенное оборудование должно собираться селективно ипередаваться вточку сбора, чтобы обеспечить его переработку иутилизацию, для
того, чтобы ограничить количество отходов, иуменьшить использование природных ресурсов. Неконтролируемый выброс опасных веществ, содержащихся в
электрическом иэлектронном оборудовании, может представлять угрозу для здоровья человека, иприводить кнегативным изменениям вокружающей среде.
Домашнее хозяйство играет важную роль при повторном использовании иутилизации, втом числе, утилизации изношенного оборудования. Подробную
информацию оправильных методах утилизации можно получить уместных властей или упродавца.
This symbol indicates that waste electrical and electronic equipment (including batteries and storage cells) cannot be disposed of with other types of waste. Waste equipment
should be collected and handed over separately to a collection point for recycling and recovery, in order to reduce the amount of waste and the use of natural resources. Un-
controlled release of hazardous components contained in electrical and electronic equipment may pose a risk to human health and have adverse effects for the environment.
The household plays an important role in contributing to reuse and recovery, including recycling of waste equipment. For more information about the appropriate recycling
methods, contact your local authority or retailer.

INSTRUKCJA ORYGINALNA
4
PL D RUS UA LT LV CZ SK H RO E F I NL GR
Цей символ повідомляє про заборону розміщення відходів електричного та електронного обладнання (втому числі акумуляторів), утому числі зіншими
відходами. Відпрацьоване обладнання повинно бути вибірково зібрано іпередано впункт збору для забезпечення його переробки івідновлення, щоб зменшити
кількість відходів ізменшити ступінь використання природних ресурсів. Неконтрольоване вивільнення небезпечних компонентів, що містяться велектричному та
електронному обладнанні, може представляти небезпеку для здоров’ялюдини івикликати негативні зміни внавколишньому середовищі. Господарство відіграє
важливу роль урозвитку повторного використання та відновлення, включаючи утилізацію використаного обладнання. Більш детальну інформацію про правильні
методи утилізації можна отримати умісцевої влади або продавця.
Šis simbolis rodo, kad draudžiama išmesti panaudotąelektrinęir elektroninęįrangą(įskaitant baterijas ir akumuliatorius) kartu su kitomis atliekomis. Naudota įranga turėtų
būti renkama atskirai ir siunčiama įsurinkimo punktą, kad būtųužtikrintas jos perdirbimas ir utilizavimas, siekiant sumažinti atliekas ir sumažinti gamtos ištekliųnaudojimą.
Nekontroliuojamas pavojingųkomponentų, esančiųelektros ir elektroninėje įrangoje, išsiskyrimas gali kelti pavojųžmoniųsveikatai ir sukelti neigiamus natūralios aplinkos
pokyčius. Namųūkis vaidina svarbųvaidmenįprisidedant prie pakartotinio įrenginiųnaudojimo ir utilizavimo, įskaitant perdirbimą. Norėdami gauti daugiau informacijos apie
tinkamus perdirbimo būdus, susisiekite su savo vietos valdžios institucijomis ar pardavėju.
Šīs simbols informēpar aizliegumu izmest elektrisko un elektronisko iekārtu atkritumus (tostarp baterijas un akumulatorus) kopāar citiem atkritumiem. Nolietotas iekārtas ir
jāsavāc atsevišķi un jānodod savākšanas punktāar mērķi nodrošināt atkritumu otrreizējo pārstrādi un reģenerāciju, lai ierobežotu to apjomu un samazinātu dabas resursu
izmantošanas līmeni. Elektriskajās un elektroniskajās iekārtās ietverto bīstamo sastāvdaļu nekontrolēta izdalīšanās var radīt cilvēku veselības apdraudējumu un izraisīt
negatīvas izmaiņas apkārtējāvidē. Mājsaimniecība pilda svarīgu lomu otrreizējās izmantošanas un reģenerācijas, tostarp nolietoto iekārtu pārstrādes veicināšanā. Vairāk
informācijas par atbilstošām otrreizējās pārstrādes metodēm var saņemt pie vietējo varas iestāžu pārstāvjiem vai pārdevēja.
Tento symbol informuje, že je zakázáno likvidovat použité elektrické a elektronické zařízení (včetněbaterií a akumulátorů) společněs jiným odpadem. Použité zařízení by
mělo být shromažďováno selektivněa odesíláno na sběrné místo, aby byla zajištěna jeho recyklace a využití, aby se snížilo množství odpadu a snížil stupeňvyužívání
přírodních zdrojů. Nekontrolované uvolňování nebezpečných složek obsažených v elektrických a elektronických zařízeních může představovat hrozbu pro lidské zdraví a
způsobit negativní změny v přírodním prostředí. Domácnost hraje důležitou roli při přispívání k opětovnému použití a využití, včetněrecyklace použitého zařízení. Další
informace o vhodných způsobech recyklace Vám poskytne místní úřad nebo prodejce.
Tento symbol informuje o zákaze vyhadzovania opotrebovaných elektrických a elektronických zariadení (vrátane batérií a akumulátorov) do komunálneho (netriedeného)
odpadu. Opotrebované zariadenia musia byťseparované a odovzdané do príslušných zberných miest, aby mohli byťnáležite recyklované, čím sa znižuje množstvo odpadov
a zmenšuje využívanie prírodných zdrojov. Nekontrolované uvoľňovanie nebezpečných látok, ktoré sú v elektrických a elektronických zariadeniach, môže ohrozovaťľudské
zdravie a maťnegatívny dopad na životné prostredie. Každá domácnosťmá dôležitú úlohu v procese opätovného použitia a opätovného získavania surovín, vrátane recy-
klácie, z opotrebovaných zariadení, Bližšie informácie o správnych metódach recyklácie vám poskytne miestna samospráva alebo predajca.
Ez a szimbólum arra hívja fel a figyelmet, hogy tilos az elhasznált elektromos és elektronikus készüléket (többek között elemeket és akkumulátorokat) egyéb hulladékokkal
együtt kidobni. Az elhasznált készüléket szelektíven gyűjtse és a hulladék mennyiségének, valamint a természetes erőforrások felhasználásának csökkentése érdekében
adja le a megfelelőgyűjtőpontban újrafeldolgozás és újrahasznosítás céljából. Az elektromos és elektronikus készülékben található veszélyes összetevők ellenőrizetlen
kibocsátása veszélyt jelenthet az emberi egészségre és negatív változásokat okozhat a természetes környezetben. A háztartások fontos szerepet töltenek be az elhasznált
készülék újrafeldolgozásában és újrahasznosításában. Az újrahasznosítás megfelelőmódjaival kapcsolatos további információkat a helyi hatóságoktól vagy a termék
értékesítőjétől szerezhet.
Acest simbol indicăfaptul cădeșeurile de echipamente electrice și electronice (inclusiv baterii și acumulatori) nu pot fieliminate împreunăcu alte tipuri de deșeuri. Deșeurile
de echipamente trebuie colectate și predate separat la un punct de colectare în vederea reciclării și recuperării, pentru a reduce cantitatea de deșeuri și consumul de resurse
naturale. Eliberarea necontrolatăa componentelor periculoase conținute în echipamentele electrice și electronice poate prezenta un risc pentru sănătatea oamenilor și are
efect advers asupra mediului. Gospodăriile joacăun rol important prin contribuția lor la reutilizare și recuperare, inclusiv reciclarea deșeurilor de echipamente. Pentru mai
multe informații în legăturăcu metodele de reciclare adecvate, contactați autoritățile locale sau distribuitorul dumneavoastră.
Este símbolo indica que los residuos de aparatos eléctricos y electrónicos (incluidas las pilas y acumuladores) no pueden eliminarse junto con otros residuos. Los aparatos
usados deben recogerse por separado y entregarse a un punto de recogida para garantizar su reciclado y recuperación a fin de reducir la cantidad de residuos y el uso de
los recursos naturales. La liberación incontrolada de componentes peligrosos contenidos en los aparatos eléctricos y electrónicos puede suponer un riesgo para la salud
humana y causar efectos adversos en el medio ambiente. El hogar desempeña un papel importante en la contribución a la reutilización y recuperación, incluido el reciclado
de los residuos de aparatos. Para obtener más información sobre los métodos de reciclaje adecuados, póngase en contacto con su autoridad local o distribuidor.
Αυτό το σύμβολο δείχνει ότι απαγορεύεται ηαπόρριψη χρησιμοποιημένου ηλεκτρικού και ηλεκτρονικού εξοπλισμού (συμπεριλαμβανομένων των μπαταριών και
συσσωρευτών) με άλλα απόβλητα. Οχρησιμοποιούμενος εξοπλισμός θα πρέπει να συλλέγεται επιλεκτικά και να αποστέλλεται σε σημείο συλλογής για να εξασφαλιστεί η
ανακύκλωσή του και ηανάκτησή του για τη μείωση των αποβλήτων και τη μείωση του βαθμού χρήσης των φυσικών πόρων. Ηανεξέλεγκτη απελευθέρωση επικίνδυνων
συστατικών που περιέχονται στον ηλεκτρικό και ηλεκτρονικό εξοπλισμό μπορεί να αποτελέσει απειλή για την ανθρώπινη υγεία και να προκαλέσει αρνητικές αλλαγές
στο φυσικό περιβάλλον. Το νοικοκυριό διαδραματίζει σημαντικό ρόλο στην συμβολή στην επαναχρησιμοποίηση και ανάκτηση, συμπεριλαμβανομένης της ανακύκλωσης,
χρησιμοποιημένου εξοπλισμού. Για περισσότερες πληροφορίες σχετικά με τις κατάλληλες μεθόδους ανακύκλωσης, επικοινωνήστε με τις τοπικές αρχές ήτον πωλητή.
Ce symbole indique que les déchets d’équipements électriques et électroniques (y compris les piles et accumulateurs) ne peuvent être éliminés avec d’autres déchets.
Les équipements usagés devraient être collectés séparément et remis à un point de collecte afin d’assurer leur recyclage et leur valorisation et de réduire ainsi la quantité
de déchets et l’utilisation des ressources naturelles. La dissémination incontrôlée de composants dangereux contenus dans des équipements électriques et électroniques
peut présenter un risque pour la santé humaine et avoir des effets néfastes sur l’environnement. Le ménage joue un rôle important en contribuant à la réutilisation et à la
valorisation, y compris le recyclage des équipements usagés. Pour plus d’informations sur les méthodes de recyclage appropriées, contactez votre autorité locale ou votre
revendeur.
Dit symbool geeft aan dat afgedankte elektrische en elektronische apparatuur (inclusief batterijen en accu’s) niet samen met ander afval mag worden weggegooid. Afge-
dankte apparatuur moet gescheiden worden ingezameld en bij een inzamelpunt worden ingeleverd om te zorgen voor recycling en terugwinning, zodat de hoeveelheid afval
en het gebruik van natuurlijke hulpbronnen kan worden beperkt. Het ongecontroleerd vrijkomen van gevaarlijke componenten in elektrische en elektronische apparatuur
kan een risico vormen voor de menselijke gezondheid en schadelijke gevolgen hebben voor het milieu. Het huishouden speelt een belangrijke rol bij het bijdragen aan
hergebruik en terugwinning, inclusief recycling van afgedankte apparatuur. Voor meer informatie over de juiste recyclingmethoden kunt u contact opnemen met uw gemeente
of detailhandelaar.
Questo simbolo indica che l’apparecchiatura elettrica e elettronica usurata (comprese le batterie e gli accumulatori) non può essere smaltita insieme con altri rifiuti. Le appa-
recchiature usurate devono essere raccolte separatamente e consegnate al punto di raccolta specializzato per garantire il riciclaggio e il recupero, al fine di ridurre la quantità
di rifiuti e diminuire l’uso delle risorse naturali. Il rilascio incontrollato dei componenti pericolosi contenuti nelle apparecchiature elettriche e elettroniche può costituire il rischio
per la salute umana e causare gli effetti negativi sull’ambiente naturale. Il nucleo familiare svolge il ruolo importante nel contribuire al riutilizzo e al recupero, compreso il
riciclaggio dell’apparecchiatura usurata. Per ottenere le ulteriori informazioni sui metodi di riciclaggio appropriate, contattare l’autorità locale o il rivenditore.
INSTRUKCJA ORYGINALNA 5
PL D RUS UA LT LV CZ SK H RO E F I NL GR
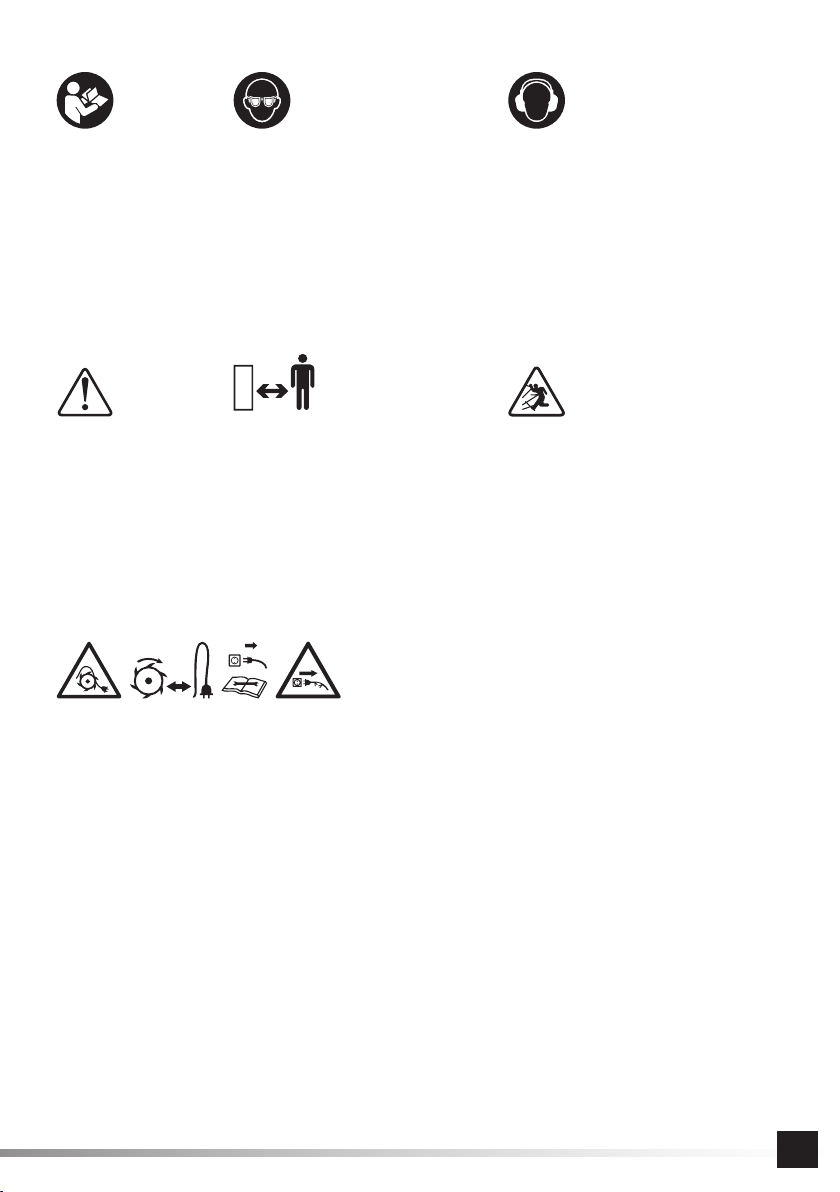
Przeczytaćinstrukcję
Read the operating instruction
Bedienungsanleitung durchgelesen
Прочитать инструкцию
Прочитать iнструкцiю
Perskaityti instrukciją
Jālasa instrukciju
Přečtet návod k použití
Prečítaťnávod k obsluhe
Olvasni utasítást
Citeşti instrucţunile
Lea la instrucción
Lisez la notice d’utilisation
Leggere il manuale d’uso
Lees de instructies
Διαβάστε τις οδηγίες χρήσης
Używaj gogle ochronne
Wear protective goggles
Schutzbrille tragen
Пользоваться защитными очками
Користуйтесь захисними окулярами
Vartok apsauginius akinius
Jālieto drošības brilles
Používej ochranné brýle
Používaj ochranné okuliare
Használjon védőszemüveget!
Intrebuinţeazăochelari de protejare
Use protectores del oído
Portez des lunettes de protection
Utilizzare gli occhiali di protezione
Draag een veiligheidsbril
Χρησιμοποιήστε τα γυαλιά προστασίας
Używaćochrony słuchu
Wear hearing protectors
Tragen Sie Gehörschutz
Пользоваться средствами защиты слуха
Користуйтесь засобами захисту слуху
Vartoti ausines klausai apsaugoti
Jālieto dzirdes drošības līdzekļu
Používej chrániče sluchu
Používaj chrániče sluchu
Használjon fülvédőt!
Intrebuinţeazăantifoane
Use protectores de la vista
Portez une protection auditive
Utilizzare i dispositivi di protezione dell’udito
Draag gehoorbescherming
Χρησιμοποιήστε τις ωτασπίδες
Ostrzeżenie!
Warning!
Warnung!
Внимание!
Увага!
Įspėjimas!
Brīdinājums!
Upozornění!
Varovanie!
Figyelmeztetés!
Avertizare!
¡Advertencia!
Attention!
Avvertenza!
Waarschuwing!
Προειδοποίηση!
Strzec sięwyrzucanych przedmiotów
Beware of the discarded items
Vor den ausgeworfenen Gegenständen sollte man sich schützen
Не забывать овозможности выброса предметов
Памятайте про можливість викиду предметів
Saugotis iš po dalgio išmetamųdaiktų
Piesargāties no izmestiem priekšmetiem
Chraňte se před odmršťovanými předměty
Chráňte sa pred vymršťovanými predmetmi
Óvakodjon a kirepülőtárgyaktól
Feriţi-văde elementele aruncate de coasă
Evite los objetos que pueden ser expulsados por la podadora
Attention aux objets éjectés
Far attenzione agli oggetti proiettati
Wees voorzichtig met weggegooide voorwerpen
Μείνετε μακριά από τα εκτοξευόμενα αντικείμενα
Pozostawaćz dala od osób postronnych
Stay away from bystanders
Die unbefugten Personen fern halten
Хранить вдали от посторонних лиц
Перебувати здаля від посторонніх осіб
Dirbti saugiame atstume nuo pašaliniųasmenų
Atstāties tālu no nepiederošām personām
Dodržovat bezpečnou vzdálenost od druhých osob
Dodržiavaťbezpečnú vzdialenosťod ostatných osôb
Az illetéktelen személyektől távol tárolja
Menţine distanţă faţă de persoane lăturalnice
Manténgase lejos de los terceros
Restez à l’écart des passants
Stai lontano dagli astanti
Blijf uit de buurt van omstanders
Μείνετε μακριά από τους παρευρισκόμενους
Trzymaćgiętki przewód zasilający z dala od narzędzi tnących. Przed regulacją, czyszczeniem, w przypadku zaplątania sięlub uszkodzenia przewodu, wyłączyćurządzenie
i wyciągnąć wtyczkęz gniazda sieciowego.
Keep the flexible power cord away from the cutting tools. Before adjusting or cleaning, in case of cable braiding or damage, switch offthe device and pull the plug out of
the socket.
Netzkabel fern von den Schneiden halten. Vor der Einstellung, Reinigung, und beim Verflechten oder Beschädigung der Stromleitung, den Grasmäher ausschalten und den
Leitungsstecker aus der Netzsteckdose herausziehen.
Гибкий провод питания держать вдали от режущих элементов. Перед регулировкой иочисткой, атакже вслучае, когда провод запутался или повредился, следует
выключить устройство ивынуть штепсель из сетевого гнезда.
Гнучкий провід живлення тримати здаля від ріжучих інструментів. Перед регулюванням, чищенням, атакож увипадку, коли провід заплутався або пошкодився,
необхідно вимкнути пристрій та вийняти штепсель згнізда мережі.
Lankstųmaitinimo laidąlaikyti saugiame atstumei nuo rotuojančio peilio. Prieš įrankįreguliuojant bei valant, o taip pat laido susipainiojimo arba jo sužalojimo atveju, įrankį
išjungti ir ištraukti kištukąiš elekros tinklo rozetės.
Turēt elektrības vadu tālu no griešanas ierīcēm. Pirms regulācijas, tīrīšanas, gadījumā, kad elektrības vads nokļūs vai sabojās, izslēgt ierīci un atslēgt to no elektrības tīkla.
Ohebný napájecí vodičumístit v dostatečné vzdálenosti od řezných nástrojů. Před nastavováním, čistěním, v případězapletení nebo poškození vodiče zařízení vypnout a
vytáhnout zástrčku ze síťové zásuvky.
Ohybný napájací vodičumiestniťv dostatočnej vzdialenosti od rezných nástrojov. Pred nastavovaním, čistením a v prípade, keďsa vodičzapletie alebo poškodí zariadenie
vypnúťa vytiahnuťzástrčku zo sieťovej zásuvky.
A rugalmas elektromos tápvezetéket tartsa távol a vágóeszközöktől. Beállítások elvégzése és gép takarítása előtt, illetve vezeték elcsavarodása vagy megsérülése esetén,
kapcsolja ki a berendezést és húzza ki a csatlakozót az elektromos aljzatból.
Conductorul flexibil de alimentare ţine-l departe de piesele tăietoare. In cazurile în care vrei săreglezi, săcurăţi, sau sădescurci conductorul care s-a încurcat, totdeauna
deconecteazăutilajul dela alimentare scoţând ştecărul din priza cu tensiune.
Mantenga el cable elástico de alimentación lejos de las herramientas cortadoras. Antes de realizar el ajuste, la limpieza, en el caso de que el cable se enrede o quede
estropeado, apague la herramienta y saque el enchufe del contacto de la red eléctrica.
Gardez le cordon d’alimentation flexible loin des outils de coupe. Avant de procéder au réglage ou au nettoyage, en cas de tressage ou de détérioration du câble, éteignez
l’appareil et débranchez la fiche de la prise de courant.
Tenere il cavo di alimentazione fl
essibile lontano dagli utensili da taglio. Prima di regolare o pulire, in caso di intreccio di cavi o danni, spegnere il dispositivo e staccare la
spina dalla presa.
Houd het flexibele netsnoer uit de buurt van snijgereedschap. Alvorens af te stellen of te reinigen, in geval van kabelvlechtwerk of schade, schakel het apparaat uit en trek
de stekker uit het stopcontact.
Κρατήστε το εύκαμπτο καλώδιο ρεύματος μακριά από τα εργαλεία κοπής. Πριν από τη ρύθμιση ήτον καθαρισμό, σε περίπτωση πλέξης καλωδίων ήβλάβης, απενεργοποιήστε
τη συσκευή και τραβήξτε το βύσμα από την πρίζα.
INSTRUKCJA ORYGINALNA
6
PL D RUS UA LT LV CZ SK H RO E F I NL GR
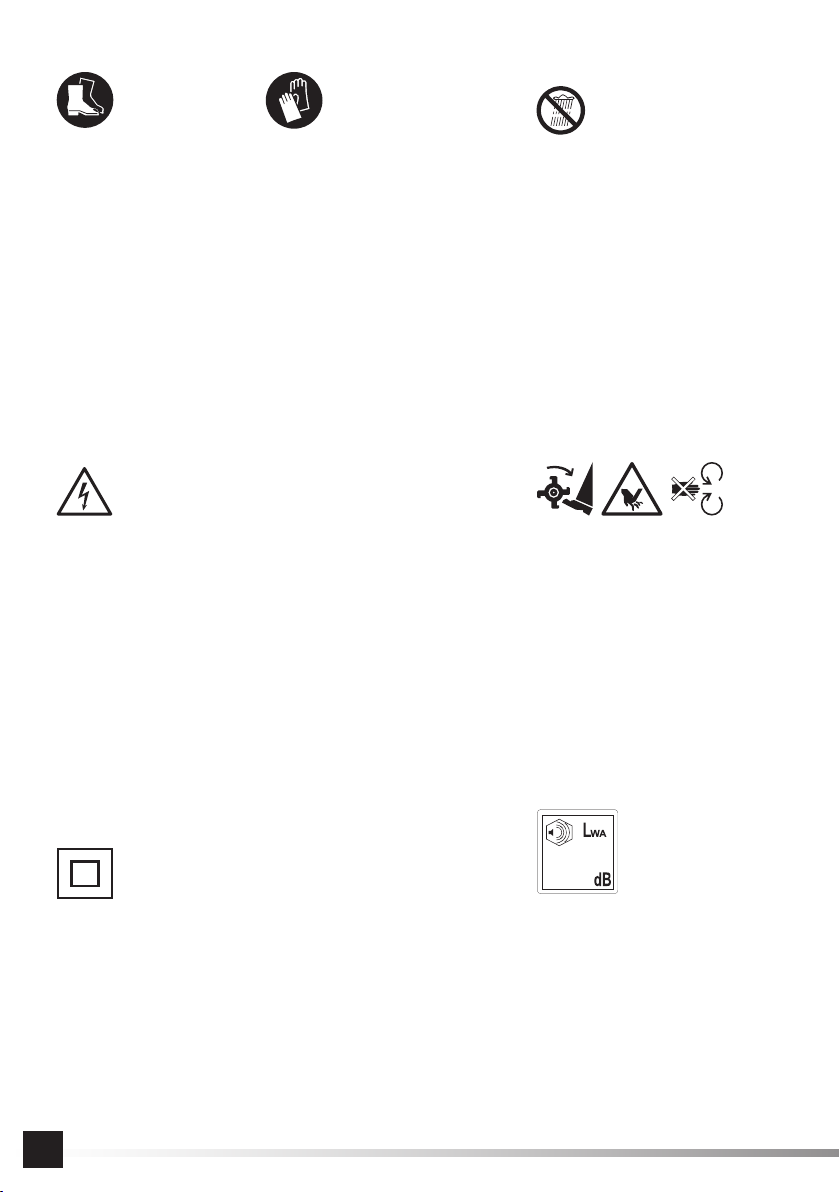
Nie wystawiaćna działanie opadów atmosferycznych
Do not expose to precipitation
Nicht dem Niederschlag aussetzen
Не подвергать влиянию атмосферных осадков
Не піддавати дії атмосферних опадів
Nestatyti pjūklo įatmosferiniųkrituliųpoveikio pavojų
Nedrīkst atstāt zem atmosfēriskiem nokrišņiem
Nevystavovat působení atmosférických srážek
Nevystavovaťpôsobeniu atmosférických zrážok
Soha ne tegye ki csapadék hatásának
Eviataţi expunerea ferăstrăului la precipitaţiile atmosferice
No exponga la herramienta a la humedad
Ne pas exposer aux précipitations
Non esporre a precipitazioni
Niet blootstellen aan neerslag
Μην εκθέτετε τις βροχοπτώσεις
Niebezpieczeństwo porażenia elektrycznego.
Electrocution hazard.
Gefahr eines elektrischen Schlages
Опасность поражения электрическим током.
Небезпека ураження електричним струмом.
Elektros smūgio pavojus.
Elektrošoka risks.
Nebezpečí úrazu elektrickým proudem.
Nebezpečenstvo zásahu el. prúdom.
Elektromos áramütés veszélye.
Pericol de electrocutare.
Riesgo de descarga eléctrica.
Danger de choc électrique.
Pericolo di scosse elettriche.
Risico op elektrische schokken.
Κίνδυνος ηλεκτροπληξίας.
Druga klasa bezpieczeństwa elektrycznego
Second class of insulation
Zweite Klasse der elektrischen Sicherheit
Второй класс электрической безопасности
Другий клас електричної ізоляції
Antros klasės elektrinėapsauga
Elektrības drošības II. klase
Druhá třída elektrické bezpečnosti
Druhá trieda elektrickej bezpečnosti
Második osztályú elektromos védelem
Securitatea electricăde clasa a doua
Segunda clase de la seguridad eléctrica
Seconde classe de sécurité électrique
Seconda classe di sicurezza elettrica
Tweede klasse elektrische veiligheid
Δεύτερη τάξη ηλεκτρικής ασφαλείας
93
Hałas - moc LwA
Noise - LwA power
Lärm – Leistung LwA
Сила шума LwA
Сила шуму LwA
Triukšmas - galia LwA
Trokšņa līmenis - jauda LwA
Hluk – výkon LwA
Hluk – výkon LwA
Zaj - LwA teljesítmény
Zgomotul - puterea LwA
Ruido - potencia LwA
Bruit - puissance LwA
Rumore - potenza LWA
Lawaai - geluidsvermogen LwA
Θόρυβος - ισχύς LwA
Stosowaćrękawice ochronne
Use protective gloves
Schutzhandschuhe verwenden
Необходимо пользоваться защитными перчатками
Слід користуватися захисними рукавицями
Vartoti apsaugines pirštines
Lietot aizsardzības cimdus
Používejte ochranné rukavice
Používajte ochranné rukavice
Használjon védőkesztyűt
Utilizarea mănuşilor de protrcţie
Use guantes de protección
Portez des gants de protection
Utilizzare i guanti di protezione
Gebruik beschermende handschoenen
Φορέστε τα γάντια προστασίας
Zachowaćodległość o obracających sięczęści.
Keep away from rotating parts.
Halten Sie den Abstand von rotierenden Teilen.
Соблюдать расстояние от вращающихся частей.
Тримайте дистанцію від деталей, що обертаються.
Laikykitės atokiau nuo besisukančiųdalių.
Ievērojiet atbilstošu attālumu no rotējošām daļām.
Udržujte odstup od rotujících částí.
Udržiavajte bezpečnú vzdialenosťod rotujúcich častí.
Tartson kellőtávolságot a forgó alkatrészektől.
Feriți corpul de componentele rotative.
Manténgase alejado de las partes giratorias.
Garder la distance des pièces en rotation.
Mantenere la distanza dalle parti rotanti.
Houd afstand tot draaiende onderdelen.
Κρατήστε απόσταση από τα περιστρεφόμενα εξαρτήματα.
Stosowaćbuty ochronne
Wear protective shoes
Verwendung der Schutzschuhe
Использование защитной обуви
Використання захисного взуття
Naudokite apsauginius batus
Izmantojiet aizsardzības kurpes
Používejte ochranné boty
Používajte ochranné topánky
A védőcipő
Utilizaţi pantofide protectie
Use los zapatos de protección
Mettre les chaussures de protection
Utilizzare le scarpe antinfortunistiche
Draag beschermende schoenen
Χρησιμοποιείτε υποδήματα προστασίας

INSTRUKCJA ORYGINALNA 7
PL
CHARAKTERYSTYKA PRODUKTU
Glebogryzarka elektryczna jest przeznaczona do spulchniania i kultywacji niewielkich powierzchni gleby. Znacznie ułatwia uprawę
ziemi w ogródkach i na działkach. Kultywacja gleby jest realizowana za pomocąobracających sięnoży. Niedopuszczalne jest
stosowanie glebogryzarki do uprawy większych powierzchni ziemi. Prawidłowa, niezawodna i bezpieczna praca przyrządu jest
zależna od właściwej eksploatacji, dlatego:
Przed przystąpieniem do pracy z narzędziem należy przeczytaćcałą instrukcjęi zachowaćją.
Za wszelkie szkody i obrażenia powstałe w wyniku używania narzędzia niezgodnie z przeznaczeniem, nie przestrzegania prze-
pisów bezpieczeństwa i zaleceńniniejszej instrukcji, dostawca nie ponosi odpowiedzialności. Używanie narzędzia niezgodnie z
przeznaczeniem powoduje także utratępraw użytkownika do gwarancji i rękojmi.
Maszyna została zaprojektowany do użytku wyłącznie w gospodarstwach domowych i nie może byćwykorzystywany profesjonal-
nie, tj. w zakładach pracy i do prac zarobkowych.
WYPOSAŻENIE
Glebogryzarka dostarczana jest w stanie kompletnym, ale przed pierwszym użyciem wymagany jest montaż.
DANE TECHNICZNE
Parametr Jednostka miary Wartość
Numer katalogowy 79725
Napięcie znamionowe [V~] 230-240
Częstotliwość znamionowa [Hz] 50
Moc znamionowa [W] 750
Maks. głębokość pracy [mm] 205
Szerokość bruzdy [mm] 320
Masa [kg] 8,0
Poziom hałasu
- moc LpA [dB(A)] 79,0 ± 3,0
- moc LwA [dB(A)] 91,87 ± 0,48
Poziom drgań(lewa / prawa rękojeść) [m/s2] 1,153 ± 1,5 / 1,158 ± 1,5
Klasa izolacji II
Stopieńochrony IPX4
INSTRUKCJE BEZPIECZEŃSTWA
WAŻNE!
PRZED UŻYTKOWANIEM DOKŁADNIE PRZECZYTAJ
POZOSTAW DO PRZYSZŁEGO WYKORZYSTANIA
Instruktaż
Przeczytaj dokładnie instrukcje. Zapoznaj sięz układami sterowniczymi i prawidłowym użytkowaniem urządzenia. Jeżeli będziesz
przekazywałurządzenie kolejnej osobie zawsze dołącz do urządzenia instrukcjęobsługi. Urządzenie zawsze powinno byćużyt-
kowane zgodnie z zaleceniami zawartymi w instrukcji obsługi.
Nigdy nie pozwalaj na obsługęurządzenia przez dzieci i osoby nie zapoznane z instrukcjami obsługi urządzenia. Przepisy krajowe
mogąokreślaćdokładnie wiek operatora.
Nigdy nie pracuj, gdy inne osoby, szczególnie dzieci lub zwierzęta domowe, sąw pobliżu. Przed rozpoczęciem pracy wyznacz
strefębezpieczeństwa, do której nie będąmiały wstępu osoby postronne i zwierzęta domowe.
Pamiętaj, że operator lub użytkownik jest odpowiedzialny za wypadki lub występujące zagrożenia wobec innych osób lub oto-
czenia.
Przygotowanie
Podczas pracy zawsze nośsolidne obuwie i długie spodnie. Nie obsługuj urządzenia z bosąstopąlub w odkrytych sandałach.
Unikaj zniszczonego ubrania, które jest zbyt luźne lub które ma zwisające paski lub tasiemki. Luźne części odzieży mogązostać
pochwycone przez ruchome elementy urządzenia co może byćprzyczynąurazów.
Sprawdźdokładnie teren, na którym urządzenie będzie pracowaći usuńwszystkie przedmioty które mogłyby dostaćsiędo urzą-
dzenia. Pochwycone przedmioty mogąspowodowaćuszkodzenie urządzenia, mogąteżzostaćwyrzucone z dużą prędkościąco
stanowi zagrożenie dla operatora oraz otoczenia.

INSTRUKCJA ORYGINALNA
8
PL
Przed użyciem zawsze sprawdźczy noże, śruby i wyposażenie zespołu noży nie sązużyte lub uszkodzone. Wymieńzużyte lub
uszkodzone części w zestawach, w celu zachowania wyważenia. Zastąp uszkodzone lub nieczytelne tabliczki.
Przed użyciem sprawdźprzewód zasilający i przedłużacz pod kątem uszkodzenia lub zużycia. Jeżeli przewód zostałuszkodzony
podczas użytkowania, odłącz go od bezpośredniego zasilania. NIE DOTYKAJ PRZEWODU PRZED ODŁĄCZENIEM ZASILANIA.
Nie używaj urządzenia, jeżeli przewód jest uszkodzony lub zniszczony.
Użytkowanie
Pracuj tylko w świetle dziennym lub przy dobrym oświetleniu sztucznym. Niewłaściwe oświetlenie miejsca pracy może byćprzy-
czynąwypadków.
Zawsze upewnij się, że twoje nogi na pochyłości stojąpewnie.
Chodź, nigdy nie biegaj.
Pracuj w poprzek zbocza, nigdy w góręlub w dół. Zapanowanie nad urządzeniem stanie sięo wiele łatwiejsze.
Zachowaj szczególnąostrożność przy zmianie kierunku jazdy na zboczu.
Nie pracuj na nadmiernie pochylonych zboczach.
Zwracaj szczególnąuwagęprzy cofaniu lub ciągnięciu urządzenia do siebie.
Wyłącz napęd elementu( w) tnącego(-y), jeżeli urządzenie należy przechylićpodczas przemieszczania go po innych niżmiejsce
pracy powierzchniach i gdy jest transportowane do miejsca pracy i z powrotem.
Nie używaj urządzenia z uszkodzonymi osłonami lub obudowami oraz bez urządzenia zabezpieczającego, np. dołączonych osłon.
Włączaj silnik ostrożnie zgodnie z instrukcją, zwracając uwagę, czy stopy sąz dala od elementu tnącego.
Nie przechylaj urządzenia podczas włączania silnika, z wyjątkiem sytuacji, gdy wymaga ono przechylenia podczas uruchamiania.
W tym przypadku nie przechylaj więcej, niżto jest konieczne i podnośtylko tęczęść, która jest z dala od operatora.
Nie trzymaj rąk i stóp w pobliżu obracających sięczęści.
Nie przenośurządzenia z włączonym silnikiem.
Zatrzymaj urządzenie i wyciągnij wtyczkęz gniazda. Upewnij się, że wszystkie części ruchome nie sąw ruchu.
Zatrzymaj urządzenie i upewnij się, że wszystkie części ruchome sąnieruchome:
- za każdym razem, gdy odchodzisz od urządzenia,
- przed sprawdzaniem, czyszczeniem lub naprawąurządzenia,
- po uderzeniu obcym przedmiotem. Sprawdźczy urządzenie nie jest uszkodzone i jeżeli jest to konieczne, dokonaj naprawy
przed ponownym uruchomieniem i pracąurządzenia.
Jeżeli urządzenie zaczyna nadmiernie drgać(natychmiast sprawdź)
- sprawdźpod kątem uszkodzenia,
- wymieńlub napraw każdąuszkodzonączęść,
- sprawdźi dokręć poluzowane części.
Konserwacja i przechowywanie
Utrzymuj w należytym stanie wszystkie nakrętki, śruby i wkręty, aby byćpewnym, że urządzenie będzie pracowało bezpiecznie.
W przypadku urządzeńwielonożowych uważaj, gdyżobrót jednego elementu tnącego może spowodowaćobrót innych noży.
Zachowaj ostrożność podczas regulacji urządzenia, aby uniknąć dostania siępalców między poruszające sięnoże, a stałe części
urządzenia.
Zawsze pozostaw urządzenie w celu ochłodzenia przed następnym uruchomieniem, przechowywaniem w zamknięciu.
Podczas obsługi noży zachowaj ostrożność, mimo że napęd jest wyłączony, ponieważnoże mogąciągle sięobracać. Zawsze
odczekaj do całkowitego zatrzymania noży przed przystąpieniem do dalszych czynności.
Wymieniaj, w celu zachowania bezpieczeństwa, zużyte lub uszkodzone części. Używaj tylko oryginalnych części zamiennych i
wyposażenia.
Zalecenia dla urządzeńklasy II
Urządzenie należy zasilaćprzez urządzenie różnicowoprądowe (RCD) z prądem zadziałania nie większym niż30 mA.
Ryzyko związane z hałasem i drganiami
Urządzenie zostało zaprojektowane tak, aby w jak największym stopniu zredukowaćryzyko związane z narażeniem użytkownika
na hałas i drgania. Jednak nie jest możliwe całkowite wyeliminowanie tych zagrożeń. Dodatkowo na zagrożenia z hałasem nara-
żone sątakże osoby przebywające w otoczeniu pracy urządzeniem.
Można jednak zmniejszyćryzyko związane z ww. zagrożeniami stosując siędo następujących wytycznych:
- produkt należy stosowaćzgodnie z przeznaczeniem opisanym w instrukcji,
- należy sięupewnić, że urządzenie jest w dobrym stanie i jest regularnie konserwowane,
- stosowaćwłaściwe i dobrze naostrzone narzędzia tnące,
- stosowaćpewny chwyt rękojeści produktu,
- zaplanowaćpracętak, aby możliwe było stosowanie częstych przerw.
Ryzyko resztkowe
Nawet jeżeli podczas pracy będąprzestrzegane wszystkie zalecenia bezpieczeństwa nadal pozostaje potencjalne ryzyko urazu.

INSTRUKCJA ORYGINALNA 9
PL
W związku z konstrukcjąproduktu nadal pozostająnastępujące zagrożenia.
Urazy związane z drganiami spowodowane zbyt długąpracąurządzeniem, pracąw niewłaściwy sposób lub pracąurządzeniem
niewłaściwie konserwowanym.
Urazy spowodowane niespodziewanym uderzeniem od ukrytych, wyrzuconych przedmiotów.
OBSŁUGA PRODUKTU
Przygotowanie do pracy
Produkt należy wypakowaćz opakowania i usunąć wszystkie elementy opakowania. Zaleca sięzachowaćopakowanie, które
może byćprzydatne w trakcie transportu lub przechowywania produktu.
Sprawdzićczy żadna z części produktu nie uległa uszkodzeniu w trakcie transportu, wszelkie zaobserwowane uszkodzenia np.
pęknięcia lub odkształcenia, dyskwalifikująprodukt z dalszego użytku do czasu ich naprawy lub wymiany uszkodzonych części.
Zaleca sięwszystkie części ułożyćna płaskim, twardym i czystym podłożu.
Podczas montażu należy stosowaćśrodki ochrony osobistej, takie jak rękawice ochronne, osłonęoczu oraz strój ochronny.
Uwaga! Przed rozpoczęciem montażu, należy upewnićsię, że urządzenie nie zostało podłączone do zasilania Wtyczka
kabla zasilającego musi byćodłączona od gniazda sieciowego.
Montażurządzenia
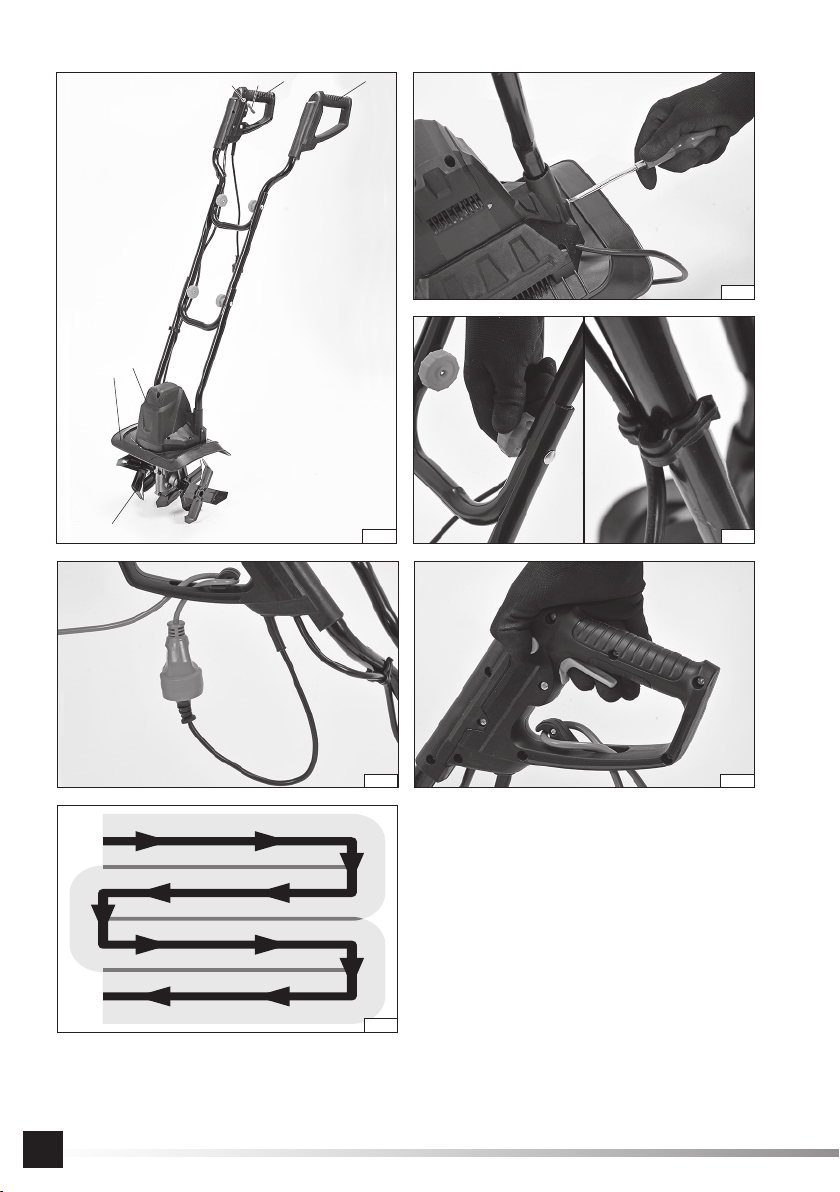
Urządzenie ustawićna podłożu tak, aby noże były skierowane w dół.
Uchwyty zmontowaćtak, aby urządzenie wyglądało jak na ilustracji (I). Dolne części uchwytów wsunąć w gniazda w obudowie
silnika i zabezpieczyćza pomocąwkrętów (II). Połączenia górnej części uchwytów zabezpieczyćza pomocąśrub i pokręteł(III).
Śruby mająkwadratowy łby, które należy dopasowaćdo otworów w rurach uchwytów. Pokrętła należy nakręcićod wewnętrznej
strony uchwytów. Taki montażzmniejszy ryzyko przypadkowego zahaczenia pokrętłami o przeszkodęw trakcie pracy. Kable
łączące włącznik z silnikiem należzamocowaćdo rur uchwytów za pomocądostarczonych klipsów (III). Luźno wiszące mogą
zaplątaćsięo przeszkodzę, urządzenie lub operatora zwiększając ryzyko odniesienia urazów i porażenia prądem elektrycznym.
Tak przygotowane urządzenie jest gotowe do pracy.
Przygotowanie miejsca pracy
Glebogryzarka służy tylko do uprawy ziemi. Ziemia nie może byćzbyt twarda. Jeżeli ziemia jest zbyt twarda lub wysuszona należy
nawilżyćjąprzed rozpoczęciem pracy i poczekać, ażwoda wsiąknie w ziemię.
Zabrania siępracy na twardym podłożu, jak beton lub drewno.
Przed rozpoczęciem pracy należy pousuwaćwszystkie widoczne kamienie, korzenie, druty i inne rzeczy, które mogąuszkodzić
noże glebogryzarki. Szczególnąuwagęnależy zwrócićna przewody elektryczne w tym także te zasilające urządzenie. Należy
miećna uwadze, że przewody elektryczne mogąbyćukryte pod ziemią.
Glebogryzarka pracuje poprawnie tylko podczas prowadzenia jej do przodu. Należy unikaćcofania urządzenia. Podczas cofania
może zostaćpochwycony i przecięty kabel zasilający, co może byćprzyczynąporażenia elektrycznego.
Miejsce pracy i długość kabla zasilającego należy przygotowaćw taki sposób, aby było możliwe poruszanie sięrzędami (VII).
Rzędy należy utrzymywaćrównej szerokości, nieco zachodzące na siebie tak, aby nie opuścićżadnego miejsca. Należy zacho-
waćszczególna ostrożność podczas zmiany kierunku. Należy zadbać, aby rozpocząć pracęod strony podłączenia elektrycznego.
Zmniejszy to ryzyko najechania na kabel zasilający.
Podłączenie do zasilania
Urządzenie zostało wyposażone tylko w krótki kabel zasilający i konieczne jest użycie kabli przedłużających. Ze względu na cha-
rakter pracy zawsze należy stosowaćkable przeznaczone do pracy na zewnątrz. Kabel zasilający powinien posiadaćpojedyncze
gniazdko pasujące do wtyczki urządzenia. Zabronione jest przerabianie wtyczki lub gniazdka celem dopasowania do siebie.
Parametry elektryczne kabla zasilającego powinny odpowiadaćparametrom elektrycznym urządzenia, wymienionym na tabliczce
znamionowej. Należy zwrócićuwagę, że wielkość przekroju przewodów kabla zasilającego zależy od długości kabla. Należy
zastosowaćsiędo poniższych zaleceńdotyczących pola przekroju przewodów kabla zasilającego:
- 1,0 mm2– długość kabla nie większa niż40 m.
- 1,5 mm2– długość kabla nie większa niż60 m,
- 2,5 mm2- długość kabla nie większa niż100 m.
Podczas przygotowańdo pracy oraz podczas pracy należy zwrócićuwagęna kabel zasilający. Chronićkabel zasilający przed
wodą, wilgocią, olejami, źródłami ciepła oraz ostrymi przedmiotami. Kabel układaćtak, aby nie dostałsięw zasięg ostrza urzą-
dzenia. Przecięcie kabla grozi porażeniem elektrycznym co może prowadzićdo poważnych urazów lub śmierci. Zwrócićuwagę,
aby nie zaplątaćsięw kabel. Grozi to upadkiem i może prowadzićdo poważnych urazów.
Nie przeciążaćkabla zasilającego, nie doprowadzaćdo stanu kiedy kabel będzie naprężony na jakimkolwiek odcinku. Nie cią-
gnąć za kabel podczas przemieszczania urządzenia. Wtyczkęi gniazdko kabla zawsze odłączaćciągnąc za obudowęwtyczki i
gniazdka, nigdy nie ciągnąć za kabel.
Kabel przedłużający należy przełożyćprzez otwór w uchwycie urządzenia i zaczepićo hak (V). W ten sposób zabezpieczy się
wtyczkękabla i przedłużacza przed wyrwaniem.

INSTRUKCJA ORYGINALNA
10
PL
Uruchamianie urządzenia
Glebogryzarkęustawićw miejscu rozpoczęcia pracy. Glebogryzarkęmożna uruchamiaćtylko jak znajduje sięw pozycji pionowej.
Jeżeli glebogryzarka jest wyposażona w koła pomocnicze, oprzećjąna kołach i unieść noże, aby nie miały kontaktu z podłożem.
W przypadku glebogryzarki bez kółpomocniczych oprzećnoże o podłoże. Chwycićpewnym i mocnym chwytem obie rękojeści.
Włącznik jest wyposażony w zabezpieczenie przed przypadkowym uruchomieniem urządzenia. W celu uruchomienia urządzenia
należy kciukiem wcisnąć i przytrzymaćprzycisk blokady, a następnie nacisnąć i przytrzymaćwłącznik, urządzenie sięuruchomi, a
noże zacznąwirować. Dalsze przytrzymywanie przycisku blokady nie jest konieczne, ale cały czas należy przytrzymywaćwłącz-
nik. Włącznik nie ma możliwości zablokowania w pozycji włączony.
Zatrzymanie urządzenia następuje po zwolnieniu nacisku na włącznik.
Noże mogąwirowaćjeszcze przez jakiśczas po zwolnieniu nacisku na włącznik.
Po zakończeniu pracy, wyłączyćurządzenie, odczekaćdo całkowitego zatrzymania sięostrzy, odłączyćod zasilania odłączając
wtyczkęod gniazdka sieciowego i przejść do czynności konserwacyjnych.
Praca glebogryzarką
Pracując trzeba byćprzygotowanym na niespodziewane sytuacje. Ostrza mogątrafićna niewidoczny wcześniej kamień, korzeń
lub innąprzeszkodę. W takim wypadku należy natychmiast wyłączyćurządzenie, odłączyćwtyczkękabla zasilającego i przystąpić
do oględzin. W przypadku wykrycia jakichkolwiek uszkodzeńzabrania siędalszej pracy.
Na glebogryzarkęnie należy wywieraćnadmiernego nacisku. Noże nie powinny sięzagłębiaćbardziej niżna 3 do 4 centymetrów.
W trakcie pracy należy robićregularne przerwy, aby uniknąć zmęczenia i przepracowania. Pozwoli to na lepsząkontrole produktu
i pozwoli zmniejszyćryzyko wypadku.
Uwaga! Glebogryzarkęw trakcie pracy zawsze należy pchać, nigdy ciągnąć ku sobie. Ciągniecie urządzenia powoduje, że
operator porusza siędo tyłu, co powoduje, że nie kontroluje obszaru za sobą. Ponadto podczas ciągnięcia wstecz glebogryzarki
ostrze może pochwycićkabel zasilający.
Glebogryzarkęnależy powoli pchać, zawsze chodzić, nigdy biegać. Zapewni to lepsząkontrolęnad urządzeniem i skróci czas
reakcji na niespodziewane wydarzenia.
Podczas pracy należy poruszaćsięrzędami (VII). Rzędy należy utrzymywaćrównej szerokości, nieco zachodzące na siebie tak,
aby nie opuścićżadnego miejsca. Należy zachowaćszczególna ostrożność podczas zmiany kierunku.
Należy zadbać, aby rozpocząć pracęod strony podłączenia elektrycznego. Zmniejszy to ryzyko najechania na kabel zasilający.
Uwaga! Jeżeli w trakcie pracy w urządzenie uderzy obcy obiekt. Należy natychmiast wyłączyćurządzenie, odczekaćdo za-
trzymania sięostrzy, a następnie odłączyćkabel zasilający i odczekaćdo ostygnięcia urządzenia. Następnie sprawdzićczy
glebogryzarka nie uległa uszkodzeniu. W przypadku wykrycia uszkodzeń, zabroniona jest dalsza praca przed ich usunięciem.
Nadmierne wibracje w trakcie pracy mogąbyćspowodowane przez uszkodzenie urządzenia. Należy zatrzymaćpracę, odłączyć
kabel zasilający i dokonaćsprawdzenia produktu.
KONSERWACJA PRODUKTU
Uwaga! Przed każdym rozpoczęciem konserwacji należy sięupewnić, że produkt zostałodłączony od zasilania. Wtyczka
kabla zasilającego musi byćodłączona od gniazdka sieciowego.
Podczas wszystkich czynności konserwacyjnych zawsze należy stosowaćrękawice ochronne.
Jeżeli jakaśczynność konserwacyjna nie została opisana w instrukcji oznacza to, że należy jąprzeprowadzićw autoryzowanym
serwisie producenta.
Produkt należy czyścićniezwłocznie po każdym użyciu. Ziemia, która pozostanie na ostrzach będzie najłatwiejsza do usunięcia
zanim zaschnie. Resztki ziemi z ostrzy należy usuwaćza pomocąszczotki lub pędzla z włosiem z tworzywa sztucznego, lub za
pomocąszmatki. Oczyścićotwory wentylacyjne, zapewniając ich drożność.
Trudniejsze do usunięcia zabrudzenia można usunąć strumieniem powietrza o ciśnieniu nie większym niż0,3 MPa.
Nigdy nie używaćchemikaliów, alkaloidów, środków ściernych lub agresywnych detergentów do czyszczenia produktu. Produktu
nie można czyścićstrumieniem wody lub zanurzając go w wodzie.
Sprawdzićstopieńzużycia oraz obecność uszkodzeńostrzy. Jeżeli zostanązaobserwowane nadmierne zużycie lub uszkodzenia
należy ostrze wymienićna nowe. Ostrze w trakcie pracy będątraciły powłokęlakierniczą, jest to zjawisko normalne i nie świadczy
o uszkodzeniu ostrzy. Brak powłoki lakierniczej powoduje jednak, że ostrza sąbardziej podatne na działanie korozji. Dlatego,
każdorazowo po wyczyszczeniu należy je pokryćcienkąwarstwąśrodka zapobiegającego korozji lub cienkąwarstwąlekkiego
oleju maszynowego. Przed rozpoczęciem pracy ostrza należy wyczyścićz resztek środka, aby zapobiec przenikaniu go do gleby.
Ostrza zawsze należy wymieniaćna oryginalne, identyczne z tym, które zostały zamontowane fabrycznie w glebogryzarce. Tylko
zastosowanie oryginalnych części zamiennych pozwala zachowaćbezpieczeństwo produktu. Wymianęostrza powinien przepro-
wadzaćdoświadczony użytkownik. W przypadku wątpliwości należy skontaktowaćsięz autoryzowanym serwisem producenta.
Ostrza należy wymieniaćco dwa lata lub co 50 godzin pracy.
Jeżeli uszkodzeniu ulegnie wewnętrzny kabel łączący włącznik produktu z silnikiem lub kabel zasilający należy je wymienićw
autoryzowanym serwisie producenta. Kabel nie może byćnaprawiany, należy je wymienić. Zabroniona jest praca z uszkodzonym
którymkolwiek z kabli.

INSTRUKCJA ORYGINALNA 11
PL
PRZECHOWYWANIE I TRANSPORT PRODUKTU
Uwaga! Zawsze przed przechowywaniem lub transportem produkt odłączyćod zasilania. Oczyścićwg wskazówek in-
strukcji.
Przechowywaćw ciemnych, suchych, wolnych od szronu i dobrze wentylowanych pomieszczeniach. Miejsce przechowywania
powinno chronićprzed dostępem dzieci. Produkt należy przechowywaćw temperaturze pomiędzy 10, a 30 st. C. Zalecane jest
przechowywanie produktu w opakowaniu fabrycznym lub w innym opakowaniu chroniącym przed kurzem.
Produkt transportowaćprzenosząc go za uchwyty. Transportowaćw takiej pozycji, aby ostrza nie miały kontaktu z podłożem.
Podczas transportu produkt należy chronićod uderzeńoraz silnych wibracji. Na czas transportu produkt zabezpieczyćprzed
ześlizgnięciem sięlub przewróceniem.

12
GB
ORIGINAL INSTRUCTIONS
PRODUCT CHARACTERISTICS
The electric tiller is designed for scarifying and cultivating small patches of soil. It makes cultivating land in gardens and plots sig-
nificantly easier. Soil cultivation is carried out using rotating blades. It is unacceptable to use the tiller for cultivating larger patches
of land. Proper, reliable and safe operation of the device depends on appropriate use, that is why you should
Read this entire instructions manual before the first use of the tool and keep it for future reference.
The supplier shall not be held liable for any damage or injury resulting from improper use of the tool, failure to observe the safety
regulations and recommendations of this manual. Use of the tool for purposes other than those for which it was intended shall
cause the loss of the user’s rights to a warranty and statutory warranty.
The machine is designed for household use only and must not be used professionally, i.e. in workplaces or for paid work.
ACCESSORIES
The tiller is supplied complete but requires assembly before first use.
TECHNICAL DATA
Parameter Unit Value
Catalogue No. 79725
Rated voltage [V~] 230-240
Rated frequency [Hz] 50
Rated power [W] 750
Max. operating depth [mm] 205
Groove width [mm] 320
Weight [kg] 8,0
Noise level
- power LpA [dB(A)] 79,0 ± 3,0
- power LwA [dB(A)] 91,87 ± 0,48
Vibration level (left / right handle) [m/s2] 1,153 ± 1,5 / 1,158 ± 1,5
Insulation class II
Protection rating IPX4
SAFETY INSTRUCTIONS
IMPORTANT!
READ CAREFULLY BEFORE USE
KEEP FOR FUTURE REFERENCE
Manual
Read the instructions carefully. Familiarise yourself with the controls and proper use of the tool. If you are going to pass the tool
on to another person, always attach the manual to the tool. Always use the tool in accordance with the guidelines in the manual.
Never allow children or persons who have not read the manual to operate the tool. National regulations may specify the exact
age of the operator.
Never work when anyone else, especially children or pets, is around. Before starting work, designate a safety zone within which
bystanders and pets will not be allowed.
Remember that it is the operator or the user who is responsible for accidents or hazards to other people or the environment.
Preparation
Always wear sturdy shoes and long trousers when working. Do not operate the tool barefoot or when wearing open toe sandals.
Avoid wearing damaged clothing which is too loose or has hanging straps or ribbons. Loose clothing parts can be caught by the
tool’s moving parts which can lead to injuries.
Carefully check the area where the tool will be operated and remove any objects which could get into the tool. Caught objects can
cause damage to the tool, or can be ejected at high speed, which poses a threat to the operator and the environment.
Always check the blades, bolts and the blades’ assembly equipment for wear or damage before use. Replace worn-out or dam-
aged parts in sets to maintain balance. Replace damaged or illegible plates.
Inspect the power supply cord and extension cord for damage or wear before use. If the cord is damaged during use, disconnect
it from the direct power supply. DO NOT TOUCH THE CORD BEFORE DISCONNECTING THE POWER SUPPLY. Do not use
the tool if the cord is defective or damaged.

13
ORIGINAL INSTRUCTIONS
GB
Operation
Work only in daylight or in good artificial lighting. Improper lighting of the workplace can lead to accidents.
When on a slope, always make sure your feet are set firmly.
Walk, never run.
Work across the slopes, never up or down. This will make control of the tool much easier.
Take special care when changing driving direction on a slope.
Do not work on excessively declined slopes.
Pay special attention when reversing or pulling the tool towards you.
Turn offthe drive of the cutting element(s) if the tool must be tilted when moving it on surfaces other than the workplace and when
transported to and from the workplace.
Do not use the tool with damaged guards or housings and without a safety device, e.g. Attached guards.
Switch on the motor carefully in accordance with the instructions, paying attention to whether your feet are away from the cutting
element.
Do not tilt the machine when starting the motor, except when it requires tilting during starting. In this case, do not tilt more than
necessary and lift only the part which is away from the operator.
Keep your hands and feet away from rotating parts.
Do not move the tool with the motor running.
Stop the tool and pull the plug from the socket. Make sure that all moving parts are not in motion.
Stop the machine and make sure that all moving parts are stationary:
- every time you step away from the tool;
- before checking, cleaning or repairing the tool;
- after it being hit by a foreign object. Check that the tool is not damaged and, if necessary, repair it before restarting and operating.
If the tool starts to vibrate excessively (check immediately):
- check for damage;
- replace or repair any damaged part;
- check and tighten any loose parts.
Maintenance and storage
Keep all nuts, bolts and screws in good condition to ensure safe tool operation.
In the case of multi-blade tools, be careful, as rotation of one cutting element may cause rotation of other blades.
Use caution when adjusting the tool to avoid fingers getting between the tool’s moving blades and fixed parts.
Always leave the tool to cool down before the next start-up, or before storing in a closed space.
Be careful when performing any work on the blades, even when the drive is switched offas the blades can still rotate. Always wait
for the blades to come to a complete stop before proceeding with any activities.
Replace worn-out or damaged parts to ensure safety of operation. Use original spare parts and equipment only.
Recommendations for class II tools
The tool must be powered by a residual current device (RCD) with a tripping current of 30 mA or less.
Risks related to noise and vibrations
The tool is designed to reduce the risk of exposing the user to noise and vibration as much as possible. However, it is not possible
to completely eliminate these hazards. Additionally, people in the vicinity of the operating tool are also exposed to noise hazards.
However, the risks associated with the above mentioned hazards can be reduced by observing the following guidelines:
- the product should be used in accordance with its intended purpose, described in the manual;
- make sure that the tool is in good condition and is regularly maintained;
- use proper and well-sharpened cutting tools;
- use a firm grip on the product handle;
- plan work so that frequent breaks can be incorporated.
Residual risks
Even if all safety precautions are followed during operation, the potential risk of injury remains. The following risks remain in
relation to the design of the product.
Vibration-related injuries caused by prolonged operation of the tool, incorrect manner of work, or work with an improperly main-
tained tool.
Injuries caused by an unexpected impact from hidden, ejected objects.
PRODUCT OPERATION
Preparing for operation
Unpack the product by removing all packaging components. It is recommended to retain the packaging, which can be of use when
transporting or storing the product.

14
GB
ORIGINAL INSTRUCTIONS
Check that no part of the product has been damaged during transport. In case of damage detection, such as cracks or deforma-
tions, it will disqualify the product from further use until it is repaired or damaged components are replaced.
It is recommended to place the components on a flat, hard, and clean surface.
Use personal protective equipment such as protective gloves, eye protection, and protective clothing during assembly.
Caution! Make sure that the tool is not connected to the power supply before starting the assembly. The power supply
cord plug must be removed from the socket.
Tool assembly
Set the tool on the ground so that the blades face downwards.
Install the handles so that the tool looks as in Figure (I). Slide the lower parts of the handles into the sockets in the motor housing
and secure them with screws (II). Secure the connections of the upper part of the handles using screws and knobs (iii). The screws
have square heads which must be adjusted to the holes in the handle pipes. Screw the knobs on the inside of the handles. Such
installation will reduce the risk of accidental catching of the knobs on an obstacle during operation. The cables connecting the
switch to the motor should be fixed to the handle pipes with the supplied clips (III). If they are allowed to hang loose, they can
become entangled with an obstacle, tool or the operator, increasing the risk of injury and electric shock.
When assembled in this manner, the tool is ready to work.
Preparing the workplace
The tiller is intended only for soil cultivation. The ground cannot be too hard. If the ground is too hard or dry, moisturise it before
starting work and wait for the water to soak into the ground.
Working on a hard surface such as concrete or wood is prohibited.
Before starting work, remove all visible stones, roots, wires and other items which may damage the tiller blades. Particular atten-
tion should be paid to electrical cables, including those supplying power to the tool. Be aware that electrical cables can be hidden
underground.
The tiller only works correctly when it is driven forward. Avoid reversing the tool. During reversing, the power supply cord can be
caught and cut, which can cause electric shock.
The workplace and length of the power supply cord must be prepared and adjusted in such a manner that it is possible to move
along rows (VII). Rows should be kept equal in width, slightly overlapping so as not to leave any space. Take special care when
changing the direction. Make sure to begin work from the electrical connection side. This will reduce the risk of driving over the
power supply cord.
Connecting to the power supply
The tool is equipped only with a short power supply cord and it is necessary to use extension cords. Always use cords intended
for outdoor use due to the nature of the work. The power supply cord should have a single socket matching the tool’s plug. It is
forbidden to modify the plug or socket to make them fit. The electrical parameters of the power supply cord should correspond to
the electrical parameters of the tool, listed on the rating plate. It should be noted that the size of the power supply cord’s gauge
depends on the length of the cord. Follow the instructions below regarding the power supply cord gauge:
- 1.0 mm2– cord length not greater than 40 m;
- 1.5 mm2– cord length not greater than 60 m;
- 2.5 mm2– cord length not greater than 100 m.
When preparing for operation and during operation, pay attention to the power supply cord. Protect the power supply cord from
water, moisture, oils, heat sources and sharp objects. Lay the cord so that it does not come within the reach of the tool’s blade.
Cutting the cord may result in electric shock and serious injury or death. Make sure that you do not become entangled in the cord.
This can lead to a fall and serious injury.
Do not overload the power supply cord, and do not cause any of the cord’s section to become stressed. Do not pull the cord
when moving the tool. Always remove the cord plug and socket by pulling on the plug and socket housing, never pull on the cord.
Pass the extension cord through the hole in the tool handle and attach it to the hook (V). This will protect the plug of the cord and
extension cord from being pulled out.
Starting the tool
Set the tiller in the place where the work is to commence. The tiller can only be started when in vertical position.
If the tiller is equipped with supporting wheels, rest it on the wheels and lift the blades so that they do not come into contact with
the ground. If the tiller does not have supporting wheels, set the blades on the ground. Grasp both handles firmly.
The switch is equipped with a safety device, protecting against starting the tool accidentally. To start the tool, press and hold the
lock button with your thumb, then press and hold the switch. The tool will start and the blades will begin spinning. You do not need
to hold down the lock button any longer, but hold down the switch at all times. The switch cannot be locked in the “on” position.
The tool stops when the pressure on the switch is released.
The blades may still rotate for some time after releasing the pressure on the switch.
When work is finished, turn offthe tool, wait for the blades to stop completely, disconnect it by removing the plug from the power
supply socket and proceed with maintenance.

15
ORIGINAL INSTRUCTIONS
GB
Tiller operation
When working, you have to be prepared for unexpected situations. The blades may hit a stone, root or other obstacle which was
not visible before. In such a case, turn the tool offimmediately, remove the power supply cord plug and inspect the tool. In case
of any damage, do not proceed with work.
Do not exert excessive pressure on the tiller. Blades should not sink in more than 3 to 4 centimetres.
Take regular breaks during work to avoid fatigue and overwork. This will allow better product control and reduce the risk of acci-
dents.
Caution! Always push the tiller while working; never pull it towards you. Pulling the tool causes the operator to move back-
wards, which means no control over the area behind the operator’s back. In addition, when pulling the tiller backwards, the blades
can catch the power supply cord.
Push the tiller slowly; always walk, never run. This will give you better control of the tool and reduce the response time to unex-
pected events.
During operation, move along the rows (VII). Rows should be kept equal in width, slightly overlapping so as not to leave any space.
Take special care when changing the direction.
Make sure to begin work from the electrical connection side. This will reduce the risk of driving over the power supply cord.
Caution! If a foreign object hits the tool during operation, switch the tool offimmediately, wait for the blades to stop, then disconnect
the power supply cord, and allow the tool to cool down. Then check the tiller for damage. If the damage is detected, it is forbidden
to continue working before removing the damage. Excessive vibration during operation can be caused by damage to the tool. In
that case, stop working, disconnect the power supply cord, and check the product.
PRODUCT MAINTENANCE
Caution! Make sure that the product is disconnected from the power supply before starting any maintenance works. The
power cord must be unplugged from the socket.
Always wear protective gloves during all maintenance works.
If the maintenance procedure is not contained in the manual, it means that it should be performed at an authorised service centre.
Clean the product immediately after each use. The soil which remains on the blades will be the easiest to remove before it dries.
Soil residues should be removed from the blades with a soft brush or a painting brush with plastic bristles, or with a cloth. Clean
the ventilation openings to ensure that they are clear.
Dirt that is difficult to remove can be cleaned with an air jet with a pressure of up to 0.3 MPa.
Never use chemicals, alkaloids, abrasives, or aggressive detergents to clean the product. The product cannot be cleaned with a
water jet or by immersion in water.
Check for wear and damage to the blades. If excessive wear or damage is observed, replace the blade with a new one. The
blades will lose the paint coating during operation. This is a normal phenomenon and does not indicate damage to the blades.
Lack of paint coating, however, makes the blades more susceptible to corrosion. Therefore, each time after cleaning, they should
be covered with a thin layer of anti-corrosion agent or a thin layer of light mechanical oil. Before starting work, the blades must be
cleaned of any residual material to prevent the material from penetrating the soil.
Always replace the blades with the original ones, identical to the ones installed in the tiller at the factory. Only the use of original
spare parts can maintain the product safety. The blade should be replaced by an experienced user. To do this, contact an author-
ised service centre of the manufacturer.
The blades should be replaced every two years or after every 50 hours of operation.
If the power supply cord or the internal cable connecting the product power switch to the motor is damaged, it must be replaced by
an authorised service centre of the manufacturer. The cables cannot be repaired and must be replaced. It is forbidden to operate
the tool with any of the cables damaged.
STORAGE AND TRANSPORT
Caution! Always disconnect the product from the power supply before storing or transporting it. Clean according to the
instructions.
Store in the dark, dry, frost-free, and well-ventilated areas. The place of storage should protect the tool from access by children.
The product should be stored at a temperature between 10 and 30°C. It is recommended that the product is stored in its original
packaging or another packaging that protects it from dust.
Transport the product by carrying it by the handles. Transport in such a position that the blades do not come into contact with the
ground. Protect the product from impacts and strong vibrations during transport. Secure the product against slipping or tipping
over during transport.

16 ORIGINALANLEITUNG
D
PRODUKTBESCHREIBUNG
Der elektrische Bodenfräser ist zur Auflockerung und Bearbeitung kleiner Bodenflächen konzipiert. Das Gerät erleichtert den An-
bau von Land in Gärten und Grundstücken erheblich. Die Bodenbearbeitung erfolgt mit rotierenden Messern. Der Bodenfräser
darf keinesfalls für den Anbau größerer Flächen des Bodens verwendet werden. Der korrekte, zuverlässige und sichere Betrieb
des Gerätes hängt vom ordnungsgemäßen Produktgebrauch ab, deshalb:
Lesen Sie vor Beginn der Arbeiten mit dem Werkzeug die gesamte Bedienungsanleitung durch und bewahren Sie sie für
die weitere Nutzung auf.
Der Lieferant haftet nicht für jegliche Schäden und Verletzungen, die durch unsachgemäße Verwendung des Gerätes, Nichtbe-
achtung der Sicherheitsvorschriften und Empfehlungen dieser Bedienungsanleitung entstehen. Die unsachgemäße Verwendung
des Werkzeugs führt außerdem zum Erlöschen der Garantie- und Gewährleistungsansprüche.
Die Maschine ist nur für den häuslichen Gebrauch bestimmt und darf nicht beruflich, d. h. in Betrieben und zu gewerblichen
Zwecken, eingesetzt werden.
ZUBEHÖR
Die Bodenfräse wird komplett geliefert, vor dem ersten Einsatz ist jedoch der Zusammenbau erforderlich.
TECHNISCHE DATEN
Parameter Maßeinheit Wert
Katalog-Nr. 79725
Nennspannung [V~] 230-240
Nennfrequenz [Hz] 50
Nennleistung [W] 750
Max. Arbeitstiefe [mm] 205
Breite der Furche [mm] 320
Gewicht [kg] 8,0
Lärmpegel
- Leistung LpA [dB(A)] 79,0 ± 3,0
- Leistung LwA [dB(A)] 91,87 ± 0,48
Schwingungspegel (linker / rechter Griff) [m/s2] 1,153 ± 1,5 / 1,158 ± 1,5
Schutzklasse II
Schutzart IPX4
SICHERHEITSHINWEISE
WICHTIG!
VOR GEBRAUCH SORGFÄLTIG LESEN
ZUR ZUKÜNFTIGEN VERWENDUNG AUFBEWAHREN
Betriebsanleitung
Lesen Sie die Anweisungen sorgfältig durch. Machen Sie sich mit den Steuerungssystemen und der ordnungsgemäßen Verwen-
dung des Geräts vertraut. Wenn Sie das Gerät an eine andere Person weitergeben möchten, fügen Sie die Bedienungsanleitung
immer dem Gerät bei. Das Gerät sollte immer gemäß den Anweisungen in der Betriebsanleitung verwendet werden.
Lassen Sie niemals Kinder oder Personen, die mit der Bedienungsanleitung des Geräts nicht vertraut sind, das Gerät bedienen.
Nationale Vorschriften können das genaue Alter des Bedieners festlegen.
Arbeiten Sie niemals, während andere, insbesondere Kinder oder Haustiere, in der Nähe sind. Vor Arbeitsbeginn ist eine Sicher-
heitszone festzulegen, zu der Umstehende und Haustiere keinen Zutritt haben.
Denken Sie daran, dass der Bediener oder Benutzer für Unfälle oder Gefahren für andere Personen oder für die Umwelt ver-
antwortlich ist.
Vorbereitung
Tragen Sie bei der Arbeit immer robuste Schuhe und lange Hosen. Betreiben Sie das Gerät nicht mit Barfuß- oder in offenen
Sandalen. Vermeiden Sie beschädigte Kleidung, die zu locker ist oder über Aufhängeriemen oder Bänder verfügt. Lose Teile der
Kleidung können durch bewegliche Teile des Geräts aufgefangen werden, was zu Verletzungen führen kann.
Überprüfen Sie gründlich den Arbeitsbereich des Geräts und entfernen Sie alle Gegenstände, die ins Gerät gelangen könnten. Er-
fasste Gegenstände können Schäden am Gerät verursachen, sie können auch mit hoher Geschwindigkeit ausgeworfen werden,

17
ORIGINALANLEITUNG
D
was eine Bedrohung für den Bediener und die Umwelt darstellt.
Überprüfen Sie vor dem Gebrauch immer die Messer, Bolzen und Geräte der Messerbaugruppe auf Verschleiß oder Beschädi-
gung. Ersetzen Sie verschlissene oder beschädigte Teile in Sets, um die Auswuchtung (das Gleichgewicht) des Geräts zu sichern.
Ersetzen Sie beschädigte oder unleserliche Platten.
Überprüfen Sie das Netzkabel und das Verlängerungskabel vor Gebrauch auf Beschädigung oder Verschleiß. Wenn das Kabel
während des Gebrauchs beschädigt wurde, trennen Sie es von der direkten Stromversorgung. BERÜHREN SIE DAS KABEL
NICHT, BEVOR SIE DIE STROMVERSORGUNG TRENNEN. Verwenden Sie das Gerät nicht, wenn das Kabel beschädigt oder
zerstört ist.
Verwendung
Arbeiten Sie nur bei Tageslicht oder guter künstlicher Beleuchtung. Eine unsachgemäße Beleuchtung des Arbeitsplatzes kann
zu Unfällen führen.
Achten Sie immer darauf, dass Ihre Füße sicher auf Hängen stehen.
Gehen, niemals laufen.
Arbeiten Sie quer am Hang, niemals nach oben oder unten. Die Kontrolle über das Gerät ist dann viel einfacher.
Seien Sie besonders vorsichtig beim Richtungswechsel am Hang.
Arbeiten Sie nicht an übermäßig geneigten Hängen.
Achten Sie besonders darauf, wenn Sie umkehren oder das Gerät in Ihre RIchtung ziehen.
Schalten Sie den Antrieb des oder der Schneidelemente aus, wenn das Gerät beim Bewegen auf anderen Oberflächen als dem
Arbeitsplatz und beim Transport zum und vom Arbeitsplatz gekippt werden muss.
Verwenden Sie das Gerät nicht mit beschädigten Schutzabdeckungen oder -gehäusen und ohne Sicherheitsvorrichtungen, z. B.
beigefügte Abdeckungen.
Schalten Sie den Motor sorgfältig gemäß den Anweisungen ein und achten Sie darauf, dass die Füße vom Schneidelement ent-
fernt sind.
Kippen Sie das Gerät beim Starten des Motors nicht, es sei denn, dies ist beim Starten notwendig. Kippen Sie es in diesem Fall
nicht mehr als nötig und heben Sie nur das Teil an, das weit vom Bediener entfernt ist.
Hände und Füße von rotierenden Teilen fernhalten.
Tragen Sie das Gerät nicht bei laufendem Motor von einem Ort an den anderen.
Halten Sie das Gerät an und ziehen Sie den Stecker aus der Steckdose. Stellen Sie sicher, dass sich alle beweglichen Teile nicht
in Bewegung befinden.
Halten Sie das Gerät an und stellen Sie sicher, dass alle beweglichen Teile stillstehen:
- jedes Mal, wenn Sie sich vom Gerät entfernen,
- bevor Sie das Gerät überprüfen, reinigen oder reparieren,
- nachdem ee von einem Fremdkörper getroffen wurde. Überprüfen Sie, dass das Gerät nicht beschädigt ist, und reparieren Sie
es gegebenenfalls, bevor Sie das Gerät neu starten und benutzen.
Wenn das Gerät übermäßig zu vibrieren beginnt (sofort prüfen)
- auf Beschädigungen prüfen,
- beschädigte Teile austauschen oder reparieren,
- lose Teile prüfen und festziehen.
Wartung und Aufbewahrung:
Halten Sie alle Muttern, Schrauben und Schrauben in gutem Zustand, um sicherzustellen, dass das Gerät sicher funktioniert.
Bei Geräten mit mehreren Messern ist Vorsicht geboten, da eine Drehung eines Schneidelements eine Drehung anderer Messer
zur Folge haben kann.
Seien Sie vorsichtig, wenn Sie die Maschine einstellen, um zu vermeiden, dass Finger zwischen sich bewegende Messer und
feste Teile der Maschine gelangen.
Lassen Sie das Gerät vor der nächsten Inbetriebnahme immer abkühlen und bewahren Sie es an einem geschlossenen Ort auf.
Seien Sie vorsichtig bei der Bedienung der Messer, auch wenn der Antrieb ausgeschaltet ist, da sich die Messer noch drehen
können. Warten Sie immer, bis die Messer vollständig gestoppt sind, bevor Sie weitere Tätigkeiten durchführen.
Ersetzen Sie verschlissene oder beschädigte Teile, um Sicherheit zu gewährleiten. Verwenden Sie nur Original-Ersatzteile und
-Ausrüstung.
Empfehlungen für Geräte der Klasse II
Das Gerät sollte mit einem Fehlerstromschutzschalter (RCD) mit einem Auslösestrom von nicht mehr als 30 mA betrieben werden.
Risiko durch Lärm und Vibrationen
Das Gerät ist so konzipiert, dass es das Risiko von Lärm und Vibrationen minimiert. Es ist jedoch nicht möglich, diese Gefahren
vollständig zu beseitigen. Darüber hinaus sind Menschen in der Arbeitsumgebung auch Lärmgefahren ausgesetzt.
Die mit den oben genannten Gefahren verbundenen Risiken können jedoch reduziert werden, indem Sie folgende Hinweise
befolgen:
- Das Produkt ist entsprechend dem im Handbuch beschriebenen Verwendungszweck zu nutzen.

18 ORIGINALANLEITUNG
D
- Vergewissern Sie sich, dass das Gerät in einwandfreiem Zustand ist und regelmäßig gewartet wird.
- Verwenden Sie geeignete und gut geschliffene Schneidwerkzeuge,
- Greifen Sie den das Produkt am Griffauf eine entschiedene Art und Weise,
- Planen Sie die Arbeiten so, dass häufige Pausen eingelegt werden können.
Restrisiko
Auch wenn bei der Arbeit alle Sicherheitsvorkehrungen beachtet werden, besteht trotzdem ein Verletzungsrisiko. Aufgrund der
Konstruktion des Produktes bleiben folgende Gefahren bestehen.
Vibrationsbedingte Verletzungen durch zu langen oder unsachgemäßen Betrieb oder das Verwenden eines nicht ordnungsgemäß
gewarteten Geräts.
Verletzungen durch einen unerwarteten Aufprall von versteckten, ausgestoßenen Gegenständen.
GERÄTEBEDIENUNG
Vorbereitung zum Betrieb
Das Produkt auspacken und alle Verpackungsteile entfernen. Es wird empfohlen, die Verpackungen aufzubewahren, weil sie
während des Transports oder der Lagerung des Produkts nützlich sein kann.
Prüfen Sie, dass kein Teil des Produkts während des Transports beschädigt wurde. Beobachtete Schäden, wie Risse oder Ver-
formungen, schließen das Produkt von der weiteren Verwendung aus, bis es repariert wird bzw. beschädigte Teile ersetzt werden.
Es wird empfohlen, alle Teile auf eine flache, harte und saubere Oberfläche zu legen.
Verwenden Sie bei der Installation persönliche Schutzausrüstung wie Schutzhandschuhe, Augenschutz und Schutzkleidung.
Achtung! Vergewissern Sie sich vor Beginn der Installation, dass das Gerät nicht an die Stromversorgung angeschlos-
sen ist. Der Stecker des Netzkabels muss aus der Steckdose gezogen werden.
Montage des Geräts
Stellen Sie das Gerät mit den Messern nach unten auf den Boden.
Montieren Sie die Halterungen so, dass das Gerät wie in Abbildung (I) aussieht. Setzen Sie die unteren Teile der Halterungen in
die Buchsen des Motorgehäuses ein und befestigen Sie sie mit Hilfe der Schrauben (II). Befestigen Sie die Verbindungen des
oberen Teils der Griffe mit Schrauben und Knöpfen (III). Die Schrauben haben quadratische Köpfe, die an die Bohrungen in den
Griffrohren angepasst werden müssen. Schrauben Sie die Knöpfe von der Innenseite der Griffe an. Eine solche Montage reduziert
die Gefahr eines versehentlichen Einhakens der Knöpfe an einem Hindernis während des Betriebs. Die Kabel, die den Schalter
mit dem Motor verbinden, sollten mit Hilfe der mitgelieferten Klemmen (III) an den Griffrohren befestigt werden. Locker hängende
Kabel können sich mit einem Hindernis, Gerät oder Bediener verheddern und die Gefahr von Verletzungen und Stromschlag
erhöhen.
Das so zusammengebaute Gerät ist einsatzbereit.
Vorbereitung des Arbeitsbereichs
Der Bodenfräser dient nur zur Bodenbearbeitung. Der Boden kann nicht zu hart sein. Wenn der Boden zu hart oder ausgetrocknet
ist, befeuchten Sie ihn vor Arbeitsbeginn und warten Sie, bis das Wasser in den Boden eingeweicht ist.
Es ist verboten, auf hartem Untergrund wie Beton oder Holz zu arbeiten.
Entfernen Sie vor Arbeitsbeginn alle sichtbaren Steine, Wurzeln, Drähte und andere Gegenstände, die die Bodenfräsermesser
beschädigen können. Besonderes Augenmerk sollte auf elektrische Kabel gelegt werden, einschließlich derjenigen des Netzteils.
Bitte beachten Sie, dass elektrische Kabel sich ebenfalls unter der Erde befinden können.
Der Bodenfräser funktioniert nur richtig, wenn er vorwärts bewegt wird. Vermeiden Sie es, das Gerät rückwärts zu fahren. Beim
Rückwärtsfahren kann das Netzkabel eingeklemmt und unterbrochen werden, was zu einem elektrischen Schlag führen kann.
Der Arbeitsort und die Länge des Netzkabels sollten so vorbereitet werden, dass Sie sich in der Reihe (VII) bewegen können. Die
Reihen sollten gleich breit gehalten werden und sich leicht überlappen, um keinen Platz unbearbeitet zu lassen. Bei Richtungs-
wechseln ist besondere Vorsicht geboten. Es ist darauf zu achten, dass die Arbeiten von der Seite des elektrischen Anschlusses
aus beginnen. Dadurch wird das Risiko verringert, dass Sie über das Netzkabel fahren.
Anschluss an die Stromversorgung
Das Gerät ist nur mit einem kurzen Netzkabel ausgestattet und es sind daher Verlängerungskabel erforderlich. Verwenden Sie
aufgrund der Art der Arbeiten immer Kabel, die für den Einsatz im Freien bestimmt sind. Das Netzkabel sollte eine Steckdose
haben, die dem Stecker des Geräts entspricht. Es ist verboten, den Stecker oder die Steckdose so zu verändern, dass sie zu-
sammenpassen. Die elektrischen Parameter des Netzkabels müssen den auf dem Typenschild angegebenen elektrischen Para-
metern des Geräts entsprechen. Beachten Sie, dass die Querschnittsgröße des Netzkabels von der Länge des Kabels abhängt.
Befolgen Sie die folgenden Empfehlungen für die Querschnittsfläche des Netzkabels:
- 1,0 mm2– Kabellänge nicht größer als 40 m.
- 1,5 mm2– Kabellänge nicht größer als 60 m,
- 2,5 mm2– Kabellänge nicht größer als 100 m.

19
ORIGINALANLEITUNG
D
Achten Sie bei der Vorbereitung der Arbeit und während des Betriebs auf das Netzkabel. Schützen Sie das Netzkabel vor Wasser,
Feuchtigkeit, Ölen, Wärmequellen und scharfen Gegenständen. Verlegen Sie das Kabel so, dass es nicht in die Reichweite der
Messer des Geräts gelangt. Das Durchschneiden des Kabels kann zu schweren Verletzungen oder zum Tod führen. Achten Sie
darauf, dass Sie sich nicht im Kabel verfangen. Dies kann zu Sturz und schweren Verletzungen führen.
Überlasten Sie das Netzkabel nicht und bringen Sie es nicht in einen Zustand, in dem das Kabel an einem Abschnitt gespannt
sein wird. Ziehen Sie nicht am Kabel, während Sie das Gerät tragen. Trennen Sie Stecker und Buchse immer durch Ziehen am
Stecker- und Buchsengehäuse, niemals am Kabel.
Stecken Sie das Verlängerungskabel durch das Loch in der Halterung des Gerätes und haken Sie am Haken ein (V). Dies schützt
den Kabelstecker und das Verlängerungskabel vor dem Herausziehen.
Inbetriebnahme des Gerätes
Stellen Sie den Bodenfräser dort auf, wo die Arbeit beginnen soll. Der Bodenfräser kann nur in senkrechter Position gestartet
werden.
Wenn der Bodenfräser mit Hilfsrädern ausgestattet ist, legen Sie ihn auf die Räder und heben Sie die Messer an, damit sie nicht
mit dem Boden in Berührung kommen. Bei einem Bodenfräser ohne Hilfsräder legen Sie die Messer auf den Boden. Greifen Sie
beide Griffe fest und sicher.
Der Schalter ist mit einem Schutz gegen unbeabsichtigtes Einschalten des Geräts ausgestattet. Um die Maschine zu starten,
drücken Sie die Verriegelungstaste mit dem Daumen und halten Sie sie gedrückt, drücken Sie anschließend den Schalter und
halten Sie ihn gedrückt. Die Maschine startet und die Messer drehen sich. Sie müssen die Einschaltsperre nicht mehr gedrückt
halten, lediglich den Schalter. Der Schalter kann in der Ein-Position nicht verriegelt werden.
Das Gerät stoppt, wenn Sie den Druck auf den Schalter ablassen.
Die Messer können sich nach dem Loslassen des Drucks auf den Schalter noch einige Zeit drehen.
Nach Beendigung der Arbeit schalten Sie das Gerät aus, warten Sie, bis die Messer vollständig gestoppt sind, ziehen Sie den
Netzstecker aus der Steckdose und gehen Sie zur Wartung über.
Arbeiten mit der Bodenfräse
Bei der Arbeit müssen Sie auf unerwartete Situationen vorbereitet sein. Die Messer können auf einen zuvor unsichtbaren Stein,
eine Wurzel oder ein anderes Hindernis treffen. Schalten Sie in diesem Fall das Gerät sofort aus, ziehen Sie den Netzstecker und
fahren Sie mit einer Inspektion fort. Wird ein Schaden festgestellt, ist der weitere Betrieb untersagt.
Üben Sie keinen übermäßigen Druck auf den Bodenfräser aus. Die Messer sollten nicht mehr als auf 3 bis 4 Zentimeter abgesenkt
werden.
Legen Sie während der Arbeit regelmäßig Pausen ein, um Müdigkeit und Überlastung zu vermeiden. Dies wird eine bessere
Produktkontrolle ermöglichen und das Unfallrisiko verringern.
Achtung! Schieben Sie den Bodenfräser während der Arbeit, ziehen Sie ihn nie zu sich selbst. Durch das Ziehen des Ge-
räts bewegt sich die Bedienperson rückwärts, d. h. er hat keine Kontrolle über den Bereich hinter ihm. Darüber hinaus kann das
Messer des Bodenfräsers ans Netzkabel gelangen, wenn das Gerät in der Rückwärtsbewegung gezogen wird.
Schieben Sie den Bodenfräser langsam, gehen Sie ausschließlich, laufen Sie nie. Dadurch erhalten Sie eine bessere Kontrolle
über das Gerät und reduzieren die Reaktionszeit auf unerwartete Ereignisse.
Bewegen Sie sich während der Arbeit in Reihen (VII). Die Reihen sollten gleich breit gehalten werden und sich leicht überlappen,
um keinen Platz ungemäht zu lassen. Bei Richtungswechseln ist besondere Vorsicht geboten.
Es ist darauf zu achten, dass die Arbeiten von der Seite des elektrischen Anschlusses aus beginnen. Dadurch wird das Risiko
verringert, dass Sie über das Netzkabel fahren.
Achtung! Wenn während des Betriebs ein Fremdkörper auf das Gerät trifft: Schalten Sie das Gerät sofort aus, warten Sie, bis die
Messer zum Stillstand gekommen sind, ziehen Sie dann den Netzstecker und warten Sie, bis das Gerät abgekühlt ist. Prüfen Sie
dann, ob der Bodenfräser nicht beschädigt ist. Wenn ein Schaden festgestellt wird, ist es verboten, die Arbeit vor der Beseitigung
des Schadens fortzusetzen. Übermäßige Vibrationen während des Betriebs können durch Schäden am Gerät verursacht werden.
Stellen Sie die Arbeit ein, trennen Sie das Netzkabel und überprüfen Sie das Produkt.
WARTUNG DES PRODUKTS
Achtung! Vergewissern Sie sich vor Beginn der Installation, dass das Produkt vom Stromnetz getrennt ist. Der Stecker
des Netzkabels muss aus der Steckdose gezogen werden.
Bei allen Wartungsarbeiten stets Schutzhandschuhe tragen.
Wenn eine Wartungsmaßnahme nicht im Handbuch beschrieben ist, bedeutet dies, dass sie bei einer autorisierten Reparatur-
werkstatt durchgeführt werden sollte.
Das Produkt muss unverzüglich nach jedem Gebrauch gereinigt werden. Erde, die auf den Messern verbleibt, lässt sich am
einfachsten entfernen, bevor sie austrocknet. Entfernen Sie Schmutz von den Messern mit einer Bürste bzw. einem Pinsel aus
Kunststoffoder mit einem Tuch. Reinigen Sie die Lüftungsöffnungen, um sicherzustellen, dass sie frei sind.
Schwieriger zu entfernender Schmutz kann mit einem Luftstrom von nicht mehr als 0,3 MPa entfernt werden.
Verwenden Sie zur Reinigung des Produkts niemals Chemikalien, Alkaloide, Scheuermittel oder aggressive Reinigungsmittel.
Das Produkt kann nicht mit einem Wasserstrahl oder durch Eintauchen in Wasser gereinigt werden.

20 ORIGINALANLEITUNG
D
Überprüfen Sie den Abnutzungsgrad und das Vorhandensein von Schäden an den Messern. Wenn übermäßiger Verschleiß oder
Schäden festgestellt werden, ersetzen Sie das Messer durch ein neues. Die Messer werden die Lackbeschichtung während des
Betriebs verlieren, dies ist normal und weist nicht auf Schäden an den Messern hin. Eine fehlende Lackierung macht sie jedoch
korrosionsanfälliger. Daher sollten sie nach jeder Reinigung mit einer dünnen Schicht Korrosionsschutzmittel oder einer dünnen
Schicht leichten Maschinenöls bedeckt werden. Vor Arbeitsbeginn müssen die Messer von jeglichem Restmaterial gereinigt wer-
den, um sein Eindringen in den Boden zu verhindern.
Ersetzen Sie die Messer immer durch Originalmesser, das mit dem werkseitig an der Bodenfräse montierten identisch ist. Nur
die Verwendung von Original-Ersatzteilen kann die Produktsicherheit gewährleisten. Das Messer sollte von einem erfahrenen
Anwender ausgetauscht werden. Wenden Sie sich dazu an eine autorisierte Fachwerkstatt des Herstellers.
Das Messer sollte alle zwei Jahre oder alle 50 Arbeitsstunden ausgetauscht werden.
Wenn das interne Kabel, das den Schalter des Produkts mit dem Motor verbindet, oder das Netzkabel beschädigt ist, muss es von
einem autorisierten Servicezentrum des Herstellers ersetzt werden. Das Kabel darf nicht repariert werden. Es muss vollständig
ausgetauscht werden. Das Arbeiten mit einem irgendeinem beschädigten Kabel ist untersagt.
LAGERUNG UND TRANSPORT DES PRODUKTS
Achtung! Trennen Sie das Produkt immer von der Stromversorgung, bevor Sie es lagern oder transportieren. Reinigen
Sie es gemäß den Anweisungen.
In dunklen, trockenen, frostfreien und gut belüfteten Räumen lagern. Außerhalb der Reichweite von Kindern aufbewahren. Das
Produkt sollte bei einer Temperatur zwischen 10 und 30 Grad Celsius gelagert werden. Es wird empfohlen, das Produkt in seiner
Originalverpackung oder einer anderen Verpackung, die es vor Staub schützt, zu lagern.
Transportieren Sie das Produkt, indem Sie es an den Griffen tragen. Transportieren Sie es in einer solchen Position, dass die
Messer nicht mit dem Boden in Berührung kommen. Schützen Sie das Produkt während des Transports vor Stößen und starken
Vibrationen. Sichern Sie das Produkt während des Transports gegen Verrutschen oder Umkippen.
Table of contents
Languages:


