Fluid 8010275 User manual

2.0 Wall Mount
TV Soundbar
Instruction Manual
Read all of the instructions before using this
soundbar and keep the manual in a safe
place for future reference.
8010275
2
Safety Information
WARNING: To reduce the risk of fire or electric shock, do not expose
this apparatus to rain or moisture.
This lightning flash with arrowhead symbol within an equilateral
triangle is intended to alert the user to the presence of non-insulated
“dangerous voltage” within the product’s enclosure that may be of
sufficient magnitude to constitute a risk of electric shock.
The exclamation point within an equilateral triangle is intended to
alert the user to the presence of important operating and maintenance
instructions in the literature accompanying the appliance.
Important Safety Instructions
• Read these instructions
• Keep these instructions
• Heed all warnings
• Follow all instructions
• Do not use this apparatus near water
• Clean only with dry cloth.
• Do not block any ventilation openings. Install in accordance with the
manufacture’s instructions.
• Do not install near any heat sources such as radiators, heat registers, stoves,
or other apparatus (including amplifiers) that produce heat.
• Do not defeat the safety purpose of the polarized or grounding plug. A
polarized plug has two blades with one wider than the other. A grounding
plug has two blades and a third grounding prong. The wide blade or the
third prong is provided for your safety. If the provided plug does not fit into
your outlet, consult an electrician for replacement of the obsolete outlet.
• Protect the power cord from being walked on or pinched particularly at the
plugs, convenience receptacles, and at the point where they exit from the
apparatus.
• Only use attachments/accessories specified by the
manufacturer.
• Use only with the cart, stand, tripod, bracket, or table
specified by the manufacturer, or sold with the apparatus.
When a cart or rack is used, use caution when moving the
cart/apparatus combination to avoid injury from tip-over.
• Unplug the apparatus during lightning storms or when
unused for long periods of time.
• Refer all servicing to qualified personnel. Servicing is required when the
apparatus has been damaged in any way, such as power supply cord or plug
is damaged, liquid has been spilled or objects have fallen into the apparatus,
has been exposed to rain or moisture, does not operate normally, or has
been dropped.
CA UT IO N
RISK OF ELECTRICAL SHOCK
DO NOT OPEN
To reduce the risk of electric
shock, do not remove cover
(or back) as there are no user-
serviceable parts inside. Refer
servicing to qualified personnel.

3
• Please keep the unit in a well-ventilated environment.
• WARNING: To reduce the risk of fire or electric shock, do not expose this
apparatus to rain or moisture.
• The apparatus shall not be exposed to dripping or splashing and that
objects filled with liquids, such as vases, shall not be placed on apparatus.
• WARNING: The wall socket plug is used as disconnect device, the
disconnect device shall remain readily operable.
• WARNING: The batteries shall not be exposed to excessive heat such as
sunshine, fire or the like.
The FCC Wants You to Know
This equipment has been tested and found to comply with the limits for a
Class B digital device, pursuant to Part 15 of the FCC Rules. These limits are
designed to provide reasonable protection against harmful interference in a
residential installation.
This equipment generates, uses and can radiate radio frequency energy
and, if not installed and used in accordance with the instructions, may cause
harmful interference to radio communications. However, there is no guarantee
that interference will not occur in a particular installation.
If this equipment does cause harmful interference to radio or television
reception, which can be determined by turning the equipment off and on, the
user is encouraged to try to correct the interference by one or more of the
following measures:
• Reorient or relocate the receiving antenna.
• Increase the separation between the equipment and receiver.
• Connect the equipment into an outlet on a circuit different from that to
which the receiver is connected.
• Consult the dealer or an experienced radio/TV technician for additional
suggestions.
Any changes or modifications not expressly approved by the party
responsible for compliance could void the user’s authority to operate the
equipment. Where shielded interface cables have been provided with the
product or specified additional components or accessories elsewhere defined
to be used with the installation of the product, they must be used in order to
ensure compliance with FCC regulation.
CAN ICES-3(B).

4
Safety Information
To ensure reliable and safe operation of this equipment, please read carefully
all the instructions in this user guide, especially the safety information below.
Electrical safety
• Do not defeat the safety purpose of the polarized or grounding-type
plug. A polarized plug has two blades with one wider than the other.
A grounding type plug has two blades and a third grounding prong,
the wide blade, or the third prong is provided for your safety. If the
provided plug does not fit into your outlet, consult an electrician for
replacement of the obsolete outlet.
• To prevent overload, do not share the same power supply socket with
too many other electronic components.
• Do not place any connecting wires where they may be stepped on or
tripped over.
• Do not place heavy items on them, which may damage the leads.
• Hold the main plug, not the wires, when removing from a socket.
• During a thunderstorm or when not using the television for long
periods, turn off the power switch on the back of the television.
• Do not allow water or moisture to enter the TV or power adapter. Do
NOT use in wet, moist areas, such as bathrooms, steamy kitchens or
near swimming pools.
• Pull the plug out immediately, and seek professional help if the main
plug or cable is damaged, liquid has spilt onto the set, if accidentally
exposed to water or moisture, if anything accidentally penetrates the
ventilation slots or if the set does not work normally.
• Do not remove the safety covers. There are no user serviceable parts
inside.
Trying to service the unit yourself is dangerous and may invalidate the
product’s warranty.
Only qualified personnel should service this apparatus.
Physical safety
• To clean - use a soft dry cloth. Do not use solvents or petroleum based
fluids.
• Do not install near any heat sources such as radiators, heat registers,
stoves or other apparatus (including amplifiers) that produce heat.
• Protect the power cord from being walked on or pinched particularly at
plugs.
• Unplug the apparatus during lightning storms or when unused for long
periods.
• Refer all servicing to a qualified service personnel. Servicing is required
when the apparatus has been damaged in any way, such as power-
supply cord or plug is damaged, liquid has been spilled, or objects have
fallen into the apparatus, has been exposed to rain or moisture, does
not operate normally, or has been dropped.

5
Contents
Important Safety Instructions .............................................2
Safety Information ......................................................4
Table of contents .......................................................5
Getting Started ........................................................6
Features ............................................................6
What’s Included .....................................................6
Product Components ....................................................7
Front Panel .........................................................7
Rear Panel ..........................................................7
Remote Control. ........................................................8
Installation .............................................................9
Placing the Main Unit .................................................9
Positioning the Soundbar System .....................................10
Wall Mounting .......................................................11
Connections ..........................................................12
Connection Overview ...............................................12
Connecting TV. ........................................................13
Connecting to TV using Optical input .................................13
Connecting to TV using AUX input ....................................14
Connecting to MP3 player using AUX input ............................15
Operation .............................................................16
Turn Off the Sound Temporarily. . . . . . . . . . . . . . . . . . . . . . . . . . . . . . . . . . . . . . . 16
Selecting a Soundbar Input Mode .....................................17
Adjusting Volume ...................................................18
Troubleshooting .......................................................20
Specifications .........................................................21
Limited Warranty ......................................................22
6
Getting Started
Features
2.0 Channel Built-In Digital Amplifier
Easy Installation, More Vivid Sound and Image
Stylish and Low Profile Design
Soundbar system in a stylish integrated single-unit design
Low profile design that can be placed below or mounted
above any flatscreen TV
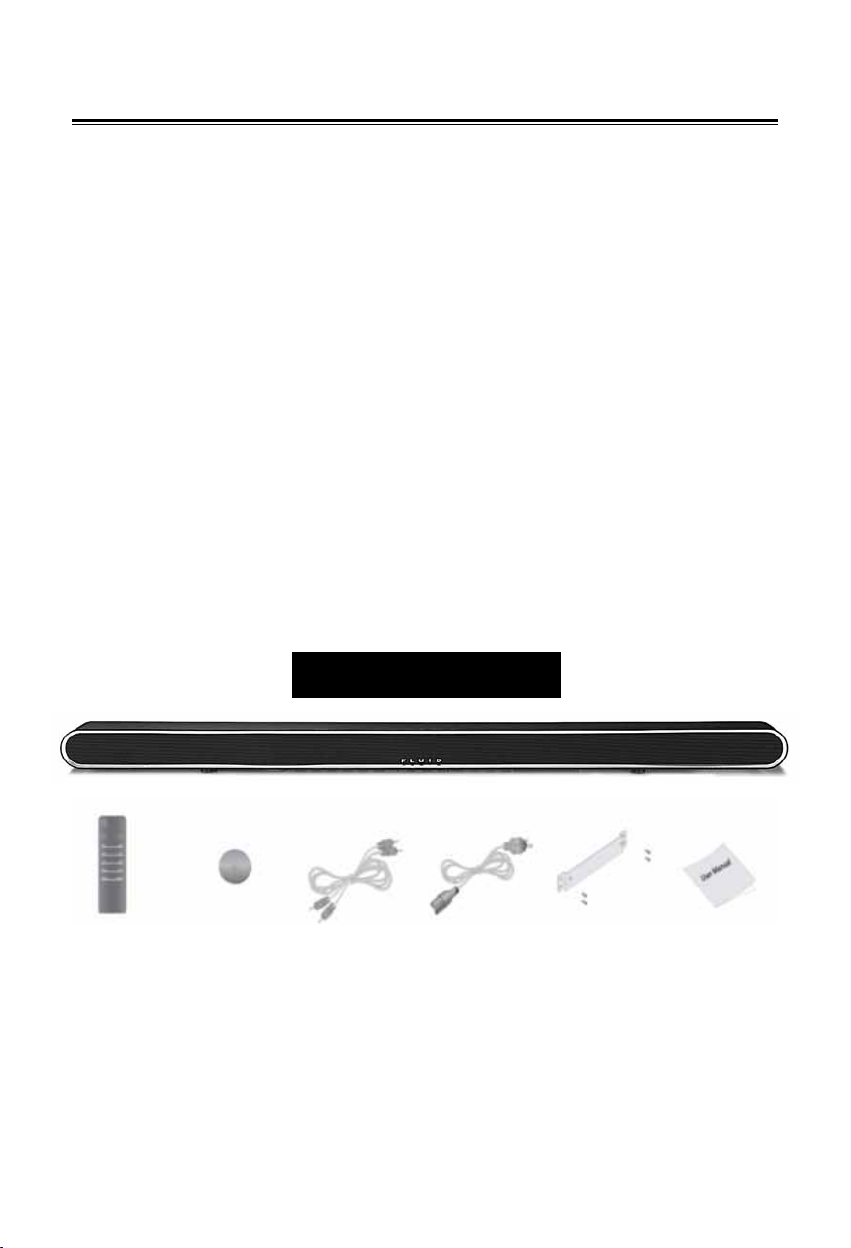
What’s Included
MAIN UNIT
REMOTE
CONTROL
AC POWER
CORD (1 ea)
WALL-MOUNING
BRACKET (1 ea)
USER
MANUAL
(1 ea)
RCA
CABLE
BATTERY
(1 ea)

7
Product Components
Front Panel
1. Display LED
Shows the current status of the main unit
2. Remote Sensor
Indicates where remote should be pointed
Rear Panel
1. SOURCE 1 (Optical)
Connect to the Optical (S/PDIF) output jack of a digital
optical audio device.
2. RCA IN
Connect to the RCA input jack of the TV
3. AC IN
Connect to the electrical outlet
4. MOVIE
Indicates preset listening mode optimized for Movie content
5. MUSIC
Indicates preset listening mode optimized for Music content
6. VSS Indicator LED
Indicates the Virtual Surround System mode
7. Optical Indicator LED
Indicates SPDIF (OPTICAL)
connection mode
8. RCA Indicator LED
Indicates RCA connection mode
1
2
4 5 6 7 8

8
1. Power
Turns the main unit ON or OFF.
2. VOL - / VOL +
Adjusts the speaker volume.
3. MUTE
Mutes the sound.
4. VSS
Switches Virtual Surround Sys-
tem mode ON or OFF.
5. OPTICAL / RCA
Selects audio input mode.
6. MOVIE / MUSIC
Selects the preset mode for
movie or music
7. TREBLE - / TREBLE +
Adjusts the treble volume.
8. BASS - / BASS +
Adjusts the bass volume.
Remote Control

98
Installation
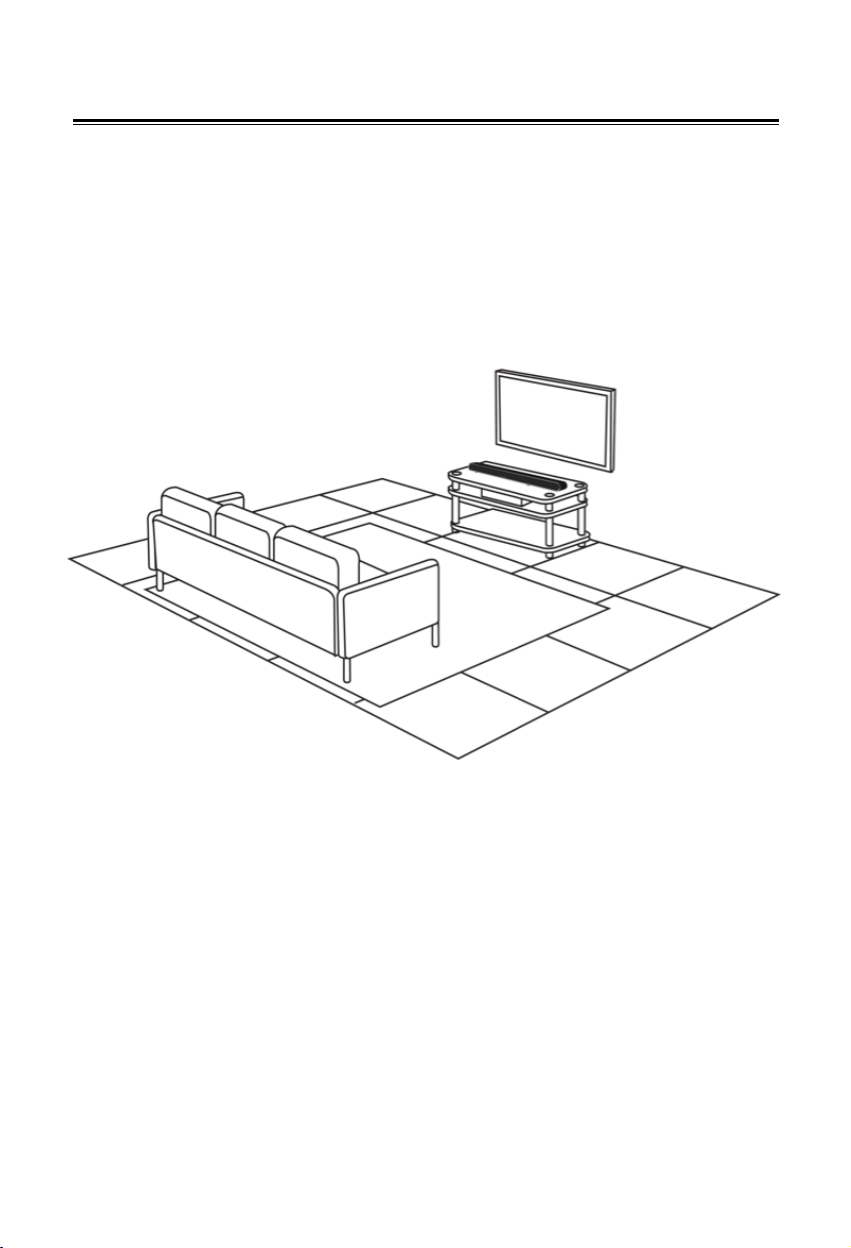
Placing the Main Unit
ON A SHELF
1. No assembly is required for main unit installation. Simply
place the main unit on a flat surface of a shelf or a stand
centered below the TV. For best sound experience, the
soundbar should be placed close to ear level.
10
Installation
Positioning the Soundbar System
1. Place the main unit at a height that is closest to ear-level in
the listening area.
2. Position the main unit so that it is parallel to the
listening area.
Note:
• Make sure not to place the main unit in an enclosed cabinet.
• Make sure to place the main unit on the top of a table to prevent sound
distortion

1110
WALL MOUNTING
The soundbar can also be mounted on the wall
Option 1: Attaching Soundbar directly to the wall
1. Attach the supplied wall mount sheet to the wall as level
(horizontal) as possible.
2. Mark the screw/nail holes on the wall.
3. Remove mounting template.
4. Use mounting hardware included to attach soundbar directly
to wall.
Option 2: Attaching Soundbar to wall using Mounting Bracket
1. DO NOT USE MOUNTING TEMPLATE.
2. Attach mounting bracket directly to wall using mounting
hardware included.
3. Attach soundbar to mounting bracket.
Installation
12
Connections
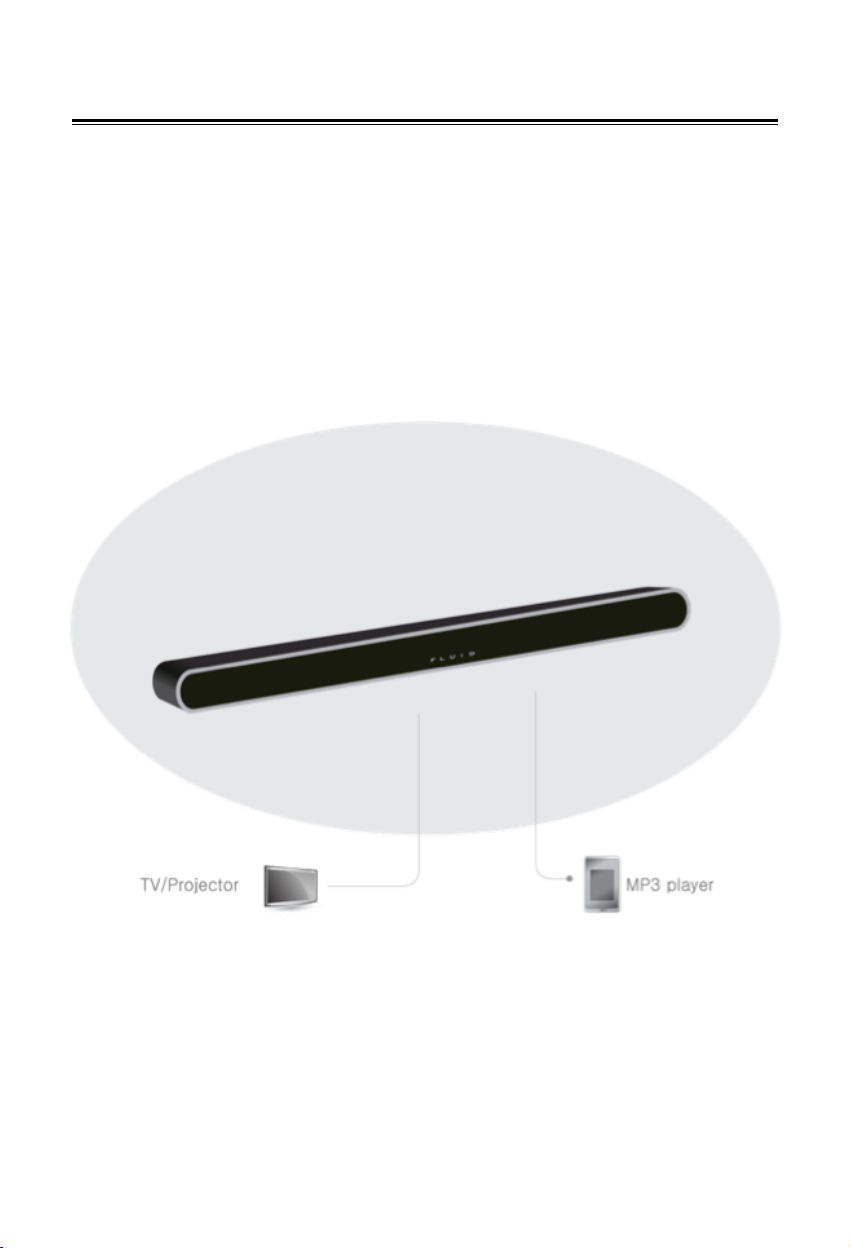
Connections Overview
You can enjoy music or movies with one of the following con-
nections.
1. Find an external device you want to connect to the main unit
as shown in the following images.
2. Check the connection type of the external device.
3. Find the appropriate image and check the connection details.
Note:
• Before connecting or changing any connections, make sure that all the
devices are disconnected from the power outlet.

13
Connecting to TV
Connecting to TV using Optical input
You can enjoy the sound from your display device with a digital
optical connection through your soundbar.
1. Connect the optical audio output of your device into the
SOURCE 1 (Optical) on the main unit.
2. Turn on the connected devices.
3. Press Optical key on the remote control to select optical
audio input on the soundbar.
14
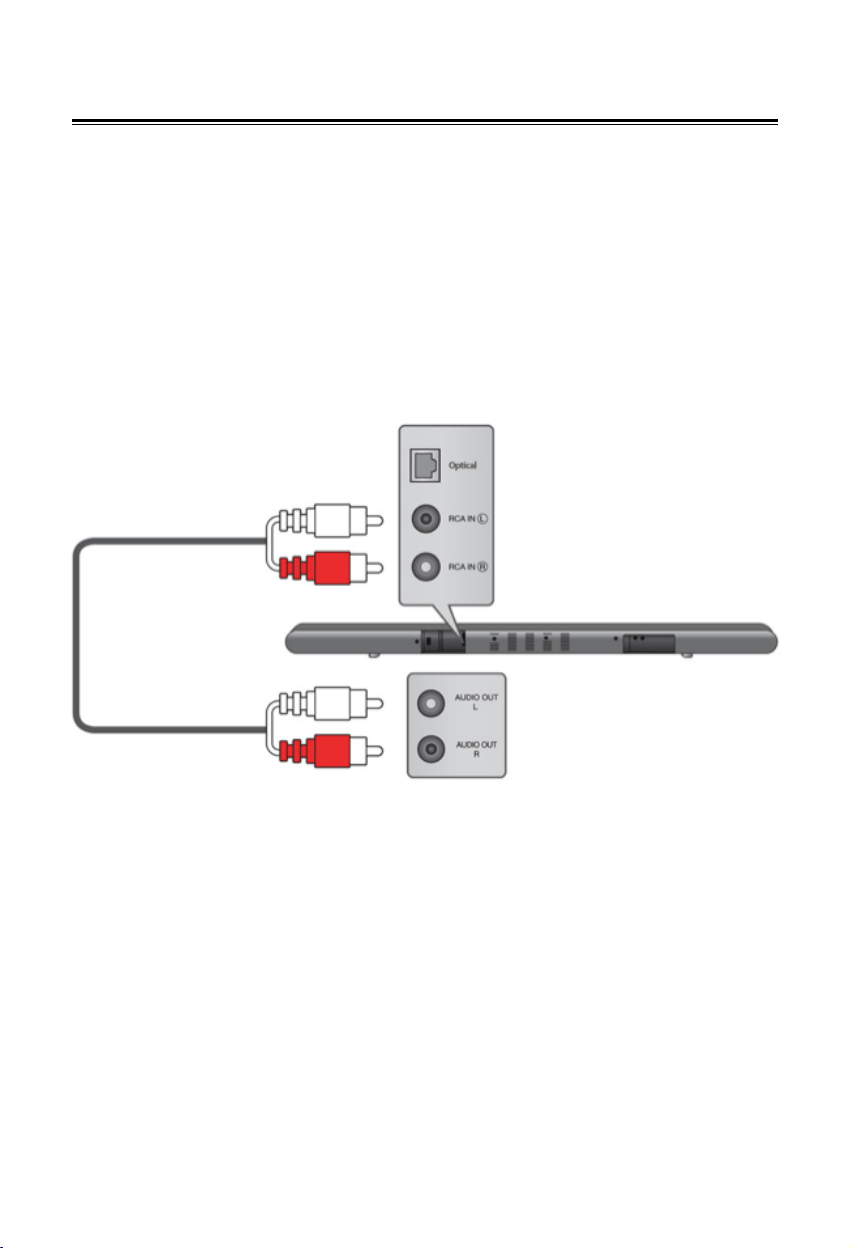
Connecting to TV
Connecting to TV using RCA input
1. Connect the AUDIO OUT from the display device with the
RCA IN on the main unit.
2. Turn on the connected devices.
3. Press RCA key on the remote control to select RCA input on
the soundbar.

15
Connecting to TV
Connecting to MP3 player using RCA input
You can enjoy the sound from your display device with a digital
optical connection through your soundbar.
1. Using the RCA adaptor (not included in the package),
connect the RCA cable into headset jack of the MP3 player
and connect the other end to the RCA IN on the main unit
2. Turn on the connected devices.
3. Press RCA key on the remote control to select RCA input on
the soundbar. audio input on the soundbar.
MP3
Player
(Not provided)

16
Operation
Setting the Sound Mode
You can enable VSS (Virtual Surround System) mode that will
provide listeners with virtual 5.1 channel audio system experi-
ence through 2.1 channel audio system with the aid of digital
sound processing
Turning Off the Sound Temporarily
You can mute the sound temporarily using MUTE.
1. Press MUTE to turn off the sound.
2. Check the connection type of the external device.
3. Press MUTE or VOL + / VOL - to turn on the sound.

17
Operation
Selecting a Soundbar Input Mode
Your soundbar acts as a device for switching between all the
input sources that are plugged into it.
On the remote control
When one of the source buttons on the remote control is
pressed, the corresponding input will be activated.
Adjusting the Volume
• Press VOL + to increase the volume level.
• Press VOL - to decrease the volume level.

18
MOVIE MUSIC VSS OPTICAL RCA NOTE
-3 LED flashes 3
times to indicate
minimum bass
volume has been
reached
-2
-1
0
+1
+2 LED flashes 3
times to indicate
maximum bass
volume has been
reached
+3
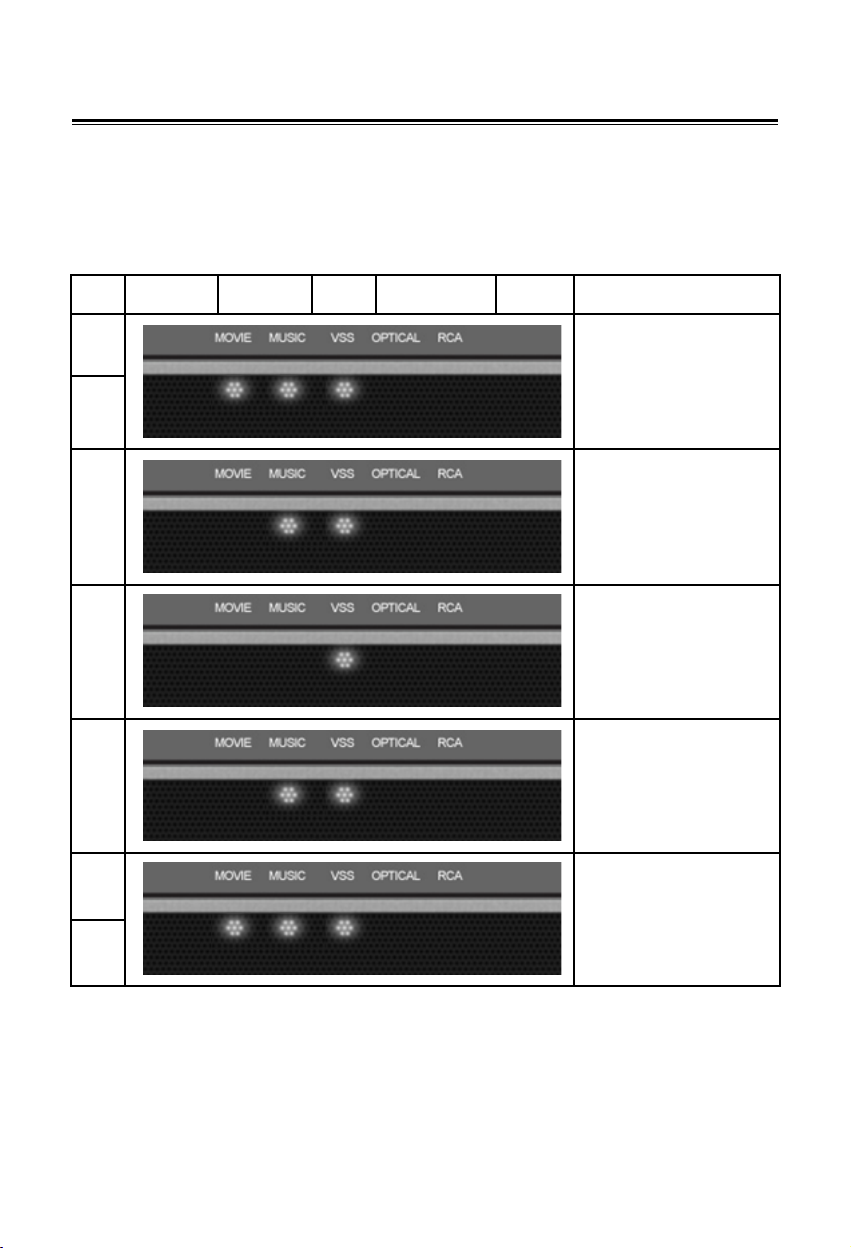
Adjusting Volume
Adjusting the Bass Volume
Press BASS - / BASS + repeatedly to adjust the bass
volume level
MOVIE
MUSIC
VSS
OPTICAL
RCA
Note
3
LEDflashes3timestoindicate
minimumbassvolumehasbeen
reached
2
1
0
+1
+2
+3
LEDflashes3timestoindicate
maximumbassvolumehasbeen
reached
MOVIE
MUSIC
VSS
OPTICAL
RCA
Note
3
LEDflashes3timestoindicate
minimumbassvolumehasbeen
reached
2
1
0
+1
+2
+3
LEDflashes3timestoindicate
maximumbassvolumehasbeen
reached
MOVIE
MUSIC
VSS
OPTICAL
RCA
Note
3
LEDflashes3timestoindicate
minimumbassvolumehasbeen
reached
2
1
0
+1
+2
+3
LEDflashes3timestoindicate
maximumbassvolumehasbeen
reached
MOVIE
MUSIC
VSS
OPTICAL
RCA
Note
3
LEDflashes3timestoindicate
minimumbassvolumehasbeen
reached
2
1
0
+1
+2
+3
LEDflashes3timestoindicate
maximumbassvolumehasbeen
reached
MOVIE
MUSIC
VSS
OPTICAL
RCA
Note
3
LEDflashes3timestoindicate
minimumbassvolumehasbeen
reached
2
1
0
+1
+2
+3
LEDflashes3timestoindicate
maximumbassvolumehasbeen
reached
MOVIE
MUSIC
VSS
OPTICAL
RCA
Note
3
LEDflashes3timestoindicate
minimumbassvolumehasbeen
reached
2
1
0
+1
+2
+3
LEDflashes3timestoindicate
maximumbassvolumehasbeen
reached
MOVIE
MUSIC
VSS
OPTICAL
RCA
Note
3
LEDflashes3timestoindicate
minimumbassvolumehasbeen
reached
2
1
0
+1
+2
+3
LEDflashes3timestoindicate
maximumbassvolumehasbeen
reached
MOVIE
MUSIC
VSS
OPTICAL
RCA
Note
3
LEDflashes3timestoindicate
minimumbassvolumehasbeen
reached
2
1
0
+1
+2
+3
LEDflashes3timestoindicate
maximumbassvolumehasbeen
reached
MOVIE
MUSIC
VSS
OPTICAL
RCA
Note
3
LEDflashes3timestoindicate
minimumbassvolumehasbeen
reached
2
1
0
+1
+2
+3
LEDflashes3timestoindicate
maximumbassvolumehasbeen
reached
MOVIE
MUSIC
VSS
OPTICAL
RCA
Note
3
LEDflashes3timestoindicate
minimumbassvolumehasbeen
reached
2
1
0
+1
+2
+3
LEDflashes3timestoindicate
maximumbassvolumehasbeen
reached
MOVIE
MUSIC
VSS
OPTICAL
RCA
Note
3
LEDflashes3timestoindicate
minimumbassvolumehasbeen
reached
2
1
0
+1
+2
+3
LEDflashes3timestoindicate
maximumbassvolumehasbeen
reached
Note:
• You can adjust the Bass volume level from -3 ~ +3.
• The factory default value of the Bass volume is 0.
19
MOVIE MUSIC VSS OPTICAL RCA NOTE
-3 LED flashes 3
times to indicate
minimum treble
volume has been
reached
-2
-1
0
+1
+2 LED flashes 3
times to indicate
maximum treble
volume has been
reached
+3
Adjusting Volume
Adjusting the Treble Volume
Press TREBLE - / TREBLE + repeatedly to adjust the treble
volume level.
MOVIE
MUSIC
VSS
OPTICAL
RCA
Note
3
LEDflashes3timestoindicate
minimumbassvolumehasbeen
reached
2
1
0
+1
+2
+3
LEDflashes3timestoindicate
maximumbassvolumehasbeen
reached
MOVIE
MUSIC
VSS
OPTICAL
RCA
Note
3
LEDflashes3timestoindicate
minimumbassvolumehasbeen
reached
2
1
0
+1
+2
+3
LEDflashes3timestoindicate
maximumbassvolumehasbeen
reached
MOVIE
MUSIC
VSS
OPTICAL
RCA
Note
3
LEDflashes3timestoindicate
minimumbassvolumehasbeen
reached
2
1
0
+1
+2
+3
LEDflashes3timestoindicate
maximumbassvolumehasbeen
reached
MOVIE
MUSIC
VSS
OPTICAL
RCA
Note
3
LEDflashes3timestoindicate
minimumbassvolumehasbeen
reached
2
1
0
+1
+2
+3
LEDflashes3timestoindicate
maximumbassvolumehasbeen
reached
MOVIE
MUSIC
VSS
OPTICAL
RCA
Note
3
LEDflashes3timestoindicate
minimumbassvolumehasbeen
reached
2
1
0
+1
+2
+3
LEDflashes3timestoindicate
maximumbassvolumehasbeen
reached
MOVIE
MUSIC
VSS
OPTICAL
RCA
Note
3
LEDflashes3timestoindicate
minimumbassvolumehasbeen
reached
2
1
0
+1
+2
+3
LEDflashes3timestoindicate
maximumbassvolumehasbeen
reached
MOVIE
MUSIC
VSS
OPTICAL
RCA
Note
3
LEDflashes3timestoindicate
minimumbassvolumehasbeen
reached
2
1
0
+1
+2
+3
LEDflashes3timestoindicate
maximumbassvolumehasbeen
reached
MOVIE
MUSIC
VSS
OPTICAL
RCA
Note
3
LEDflashes3timestoindicate
minimumbassvolumehasbeen
reached
2
1
0
+1
+2
+3
LEDflashes3timestoindicate
maximumbassvolumehasbeen
reached
MOVIE
MUSIC
VSS
OPTICAL
RCA
Note
3
LEDflashes3timestoindicate
minimumbassvolumehasbeen
reached
2
1
0
+1
+2
+3
LEDflashes3timestoindicate
maximumbassvolumehasbeen
reached
MOVIE
MUSIC
VSS
OPTICAL
RCA
Note
3
LEDflashes3timestoindicate
minimumbassvolumehasbeen
reached
2
1
0
+1
+2
+3
LEDflashes3timestoindicate
maximumbassvolumehasbeen
reached
MOVIE
MUSIC
VSS
OPTICAL
RCA
Note
3
LEDflashes3timestoindicate
minimumbassvolumehasbeen
reached
2
1
0
+1
+2
+3
LEDflashes3timestoindicate
maximumbassvolumehasbeen
reached
Note:
• You can adjust the Treble volume level from -3 ~ +3.
• The factory default value of the Treble volume is 0.

20
SYMPTOM CHECK
GENERAL There is no
power
Check that the power cord is securely
connected.
• Press POWER button on the remote
and ensure that one of the LED
indicator on the main unit is ON.
• Plug another working device to the
same outlet to ensure that the
outlet is working correctly.
SOUND
There is
no sound
coming
from the
main unit.
• Increase the volume using VOL+
button on the remote.
• Press MUTE to deactivate the
muting function.
• Check that the main unit and
device are connected correctly
and securely.
• Check that both the main unit and
the selected device are turned on.
• Press SPDIF or AUX to ensure the
selected mode is correct.
• Check your TV setting on audio
output setting to make sure
external speaker is selected.
Consult your TV user guide for
more details
Buzzing or
humming is
heard from
the sound-
bar system.
• Check that both ends of the cable
are connected securely.
• Test the cable on an alternate
device and replace it if the same
problem occurs.
• Connect the source device to
different input on the soundbar
Troubleshooting
Table of contents
Other Fluid Speakers manuals


