Fujitsu CELVIN NAS QE705 User manual

Operating Manual System
CELVIN® NAS

Congratulations on your purchase of an innovative
product from Fujitsu.
Latest information about our products, tips, updates etc. can be found on the Internet at:
http://www.fujitsu.com/fts/
For driver updates, please go to: http://support.ts.fujitsu.com/download
Should you have any technical questions, please contact:
●our Hotline/Service Desk (see Service Desk list or visit:
http://support.ts.fujitsu.com/contact/servicedesk)
●your sales partner
●your sales office
We hope you enjoy working with your new Fujitsu system!


CELVIN® NAS
Operating Manual
Your CELVIN® NAS… 3
Installing the NAS 11
Connecting to the NAS 23
Copying data using the front USB port 30
Web Server 32
FTP server 34
Using the synchronisation software
Qsync 35
Using the QGet download software 41
NetBak Replicator 43
Surveillance station 45
Firmware update 50
NAS maintenance 52
Troubleshooting RAID operation errors 56
Technical data 60

Remarks
Information on the product description meets the design specifications of Fujitsu and is
provided for comparison purposes. Several factors may cause the actual results to differ.
Technical data is subject to change without prior notification. Fujitsu rejects any responsibility
with regard to technical or editorial mistakes or omissions.
Trademarks
Fujitsu and the Fujitsu logo are registered trademarks of Fujitsu Limited or its subsidiaries in
the United States and other countries.
Microsoft and Windows are trademarks or registered trademarks of the Microsoft Corporation
in the United States and/or other countries.
CELVIN is a registered trademark of Fujitsu Technology Solutions GmbH.
All other trademarks specified here are the property of their respective owners.
Copyright
No part of this publication may be copied, reproduced or translated without the prior written
consent of Fujitsu.
No part of this publication may be saved or transferred by any electronic means without the
written approval of Fujitsu.

Fujitsu 1
Contents
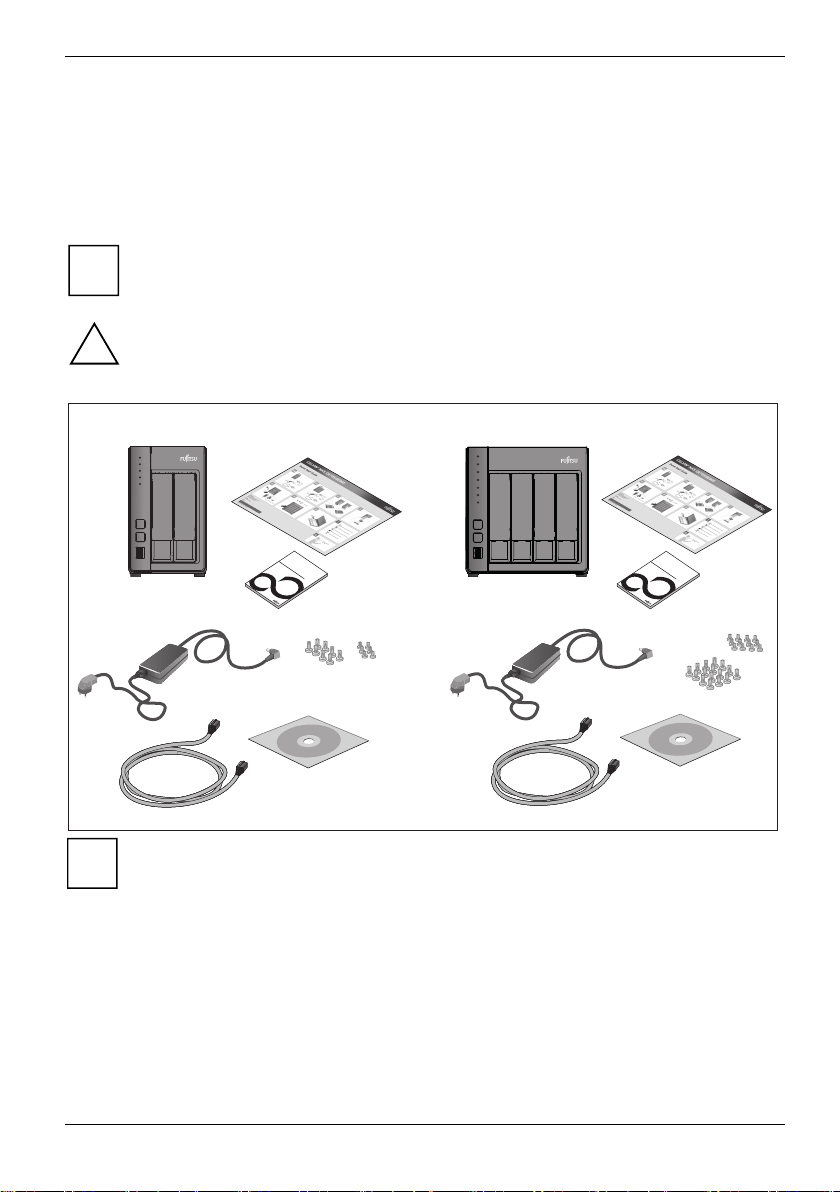
Your CELVIN®NAS… ......................................................................................................................... 3
Notational conventions ......................................................................................................................... 4
Safety notes.......................................................................................................................................... 5
CE marking................................................................................................................................... 5
FCC Compliance Statement................................................................................................................. 6
FCC Class B Compliance Statement ........................................................................................... 6
FCC Radiation Exposure Statement ............................................................................................ 6
Hardware overview............................................................................................................................... 7
CELVIN®NAS QE705 .................................................................................................................. 7
CELVIN®NAS QE805 .................................................................................................................. 9
Installing the NAS............................................................................................................................. 11
List of recommended hard disks......................................................................................................... 11
System ventilation .............................................................................................................................. 11
System status checks......................................................................................................................... 12
Configuring software settings ............................................................................................................. 15
Connecting a network drive........................................................................................................ 20
Connecting to the NAS..................................................................................................................... 23
Using the public folder (public network share).................................................................................... 23
Administering the NAS via a Web browser under Windows............................................................... 25
Administration user interface .............................................................................................................. 26
Opening the main menu ............................................................................................................. 27
Control Panel / Opening applications ......................................................................................... 28
Accessing the NAS from Linux........................................................................................................... 29
Copying data using the front USB port .......................................................................................... 30
Web Server........................................................................................................................................ 32
MySQL administration ................................................................................................................ 33
SQLite administration ................................................................................................................. 33
FTP server ......................................................................................................................................... 34
Using the synchronisation software Qsync................................................................................... 35
Getting started .................................................................................................................................... 35
Requirements for the use of Qsync............................................................................................ 35
Create a user account on the NAS............................................................................................. 35
Install Qsync utility...................................................................................................................... 35
Log on at NAS ............................................................................................................................ 36
Start using Qsync ....................................................................................................................... 36
Synchronisation .................................................................................................................................. 37
Offline editing ............................................................................................................................. 37
File sharing via download links........................................................................................................... 37
Share folder with a group ........................................................................................................... 38
Synchronisation manager................................................................................................................... 39
Add files and view the synchronisation result on the NAS ......................................................... 39
Control synchronisation process ................................................................................................ 39
Information on synchronisation and sharing............................................................................... 39
Manage or track Qsync status via web browser......................................................................... 40
Using the QGet download software................................................................................................41
NetBak Replicator............................................................................................................................. 43
Installing NetBak Replicator ............................................................................................................... 43

Contents
2 Fujitsu
Using NetBak Replicator.....................................................................................................................44
Surveillance station ..........................................................................................................................45
Firmware update ...............................................................................................................................50
Updating the system firmware using Fujitsu Finder ....................................................................51
NAS maintenance..............................................................................................................................52
Shutting down/rebooting the server ....................................................................................................52
Resetting the administrator password and network settings...............................................................53
Failure or malfunction of a hard disk...................................................................................................54
Power failure or abnormal shutdown...................................................................................................54
Abnormal system software behaviour.................................................................................................54
System temperature protection...........................................................................................................54
EuP mode configuration (for compliance with legal standby requirements) .......................................55
Troubleshooting RAID operation errors .........................................................................................56
Hot-swap Hard Drives .........................................................................................................................57
RAID Recovery ...................................................................................................................................58
Technical data ...................................................................................................................................60
GNU GENERAL PUBLIC LICENSE...................................................................................................61

Your CELVIN® NAS…
3 Fujitsu
Your CELVIN®NAS…
Thank you for purchasing a CELVIN®NAS! These operating instructions provide detailed information
on the use of this product. Please read the instructions carefully to enjoy the full benefit of the
powerful functions offered by the CELVIN®®NAS!
i
The CELVIN®NAS will subsequently also be referred to by the short names NAS, QE705
(model with 2 hard disks) or QE805 (model with 4 hard disks).
!
Back up your system regularly to avoid any potential data loss.
Fujitsu Technology Solutions will not accept responsibility for the loss of or the recovery of
any data in any form.
QE705
QE805
Display
safetynotes
SafetyNotes
safetynotes
SafetyNotes
i
See www.celvin.com for more information.

Your CELVIN® NAS…
4 Fujitsu
Notational conventions
!
Pay particular attention to text marked with this symbol. Failure to observe
these warnings could pose a risk to health, damage the device or lead to loss
of data. The warranty will be invalidated if the device becomes defective
through failure to observe these warnings.
i
Indicates important information for the proper use of the device.
Indicates instructions displayed on the device. Failure to observe them will
endanger your health or lead to physical damage.
►
Indicates an activity that must be performed
This font
indicates
terms and texts used in a software interface, e.g.: Click on Save
names of programs or files, e.g.Windows or setup.exe.
"This font"
indicates
cross-references to another section, e.g. "Safety information"
Names of CDs, DVDs and titles or designations for other materials, e.g.:
"Quick Start Guide" or "Safety/Regulations" manual
Key
indicates a key on the keyboard, e.g: F10

Your CELVIN® NAS…
Fujitsu 5
Safety notes
In order to prevent the risk of fire, the CELVIN® NAS Server QE705/QE805
must only be operated with the original adapter
Delta Electronics, Inc. DPS65VB 12V DC / 5,417 A (CELVIN® NAS QE705)
Delta Electronics, Inc. DPS90AB-3 12V DC / 7,5 A (CELVIN® NAS QE805).
i
The supplied AC/DC mains adapter must only be used with the CELVIN® NAS Server
QE705/QE805.
●The NAS can operate normally in temperatures of 0 to 40 ºC and at a relative humidity from
5 to 95 %. Please make sure that the environment is well-ventilated.
●The power cord and devices connected to the NAS must be connected to a suitable power
source (90 to 264 V, 100W)
●Do not place the NAS in direct sunlight or near chemicals. Make sure that the temperature and
humidity of the environment are within the permitted ranges.
●Unplug the power cord and separate all connected cables before cleaning the device. Wipe the
device with a dry towel. Do not use a chemical cleaning agent or aerosol to clean your NAS.
●Do not place any objects on top of the NAS for the server's normal operation and to avoid
overheating.
●When installing a hard disk in the NAS, use the flat head screws in the product package to fit
the hard disk in the NAS.
●Do not place the NAS near any liquid.
●Do not place the NAS on any uneven surface to avoid falling off and damage.
●Make sure the voltage is correct in the location where the NAS is installed. If you are uncertain,
contact thedistributor or the local power supply company for information.
●Do not place any objects on the power cord.
●Never try to repair your NAS yourself. Improper disassembly of the product mayexpose users
to electric shock or other risks. For any enquiries, please contact thedistributor.
CE marking
CE marking for devices without wireless component supplied at launch from 20 July 2007
The shipped version of this device complies with the requirements of EU directives
2004/108/EC "Electromagnetic compatibility", 2006/95/EC "Low voltage directive",
2011/65/EC "RoHS directive" and 2009/125/EC "ecodesign directive" from 20 April 2016:
2014/30/EC "Electromagnetic Compatibility" and 2014/35/EC "Low Voltage Directive").

Your CELVIN® NAS…
6 Fujitsu
FCC Compliance Statement
If the device complies with the FCC regulations, the FCC sign can be found on the type rating plate.
FCC Class B Compliance Statement
DOC (INDUSTRY CANADA) NOTICES
Notice to Users of Radios and Television :
This class B digital apparatus complies with Canadian ICES-003.
The following statement applies to the products covered in this manual, unless otherwise specified
herein. The statement for other products will appear in the accompanying documentation.
NOTE:
This equipment has been tested and found to comply with the limits for a "Class B" digital device,
pursuant to Part 15 of the FCC rules and meets all requirements of the Canadian Interference-
Causing Equipment Standard ICES-003 for digital apparatus. These limits are designed to provide
reasonable protection against harmful interference in a residential installation. This equipment
generates, uses and can radiate radio frequency energy and, if not installed and used in strict
accordance with the instructions, may cause harmful interference to radio communications. However,
there is no guarantee that interference will not occur in a particular installation. If this equipment does
cause harmful interference to radio or television reception, which can be determined by turning the
equipment off and on, the user is encouraged to try to correct the interference by one or more of the
following measures:
●Reorient or relocate the receiving antenna.
●Increase the separation between equipment and the receiver.
●Connect the equipment into an outlet on a circuit different from that to which the receiver is
connected.
●Consult the dealer or an experienced radio/TV technician for help.
Fujitsu not responsible for any radio or television interference caused by unauthorized modifications
of this equipment or the substitution or attachment of connecting cables and equipment other than
those specified by Fujitsu. The correction of interferences caused by such unauthorized modification,
substitution or attachment will be the responsibility of the user.
The use of shielded I/O cables is required when connecting this equipment to any and all optional
peripheral or host devices. Failure to do so may violate FCC and ICES rules.
FCC Radiation Exposure Statement
This equipment complies with FCC radiation exposure limits set forth for an uncontrolled
environment.
The transmitters in this device must not be co-located or operated in conjunction with any other
antenna or transmitter.
To prevent radio interference to the licensed service, this device is intended to be operated indoors
and away from windows to provide maximum shielding. Equipment (or its transmit antenna) that is
installed outdoors is subject to licensing.
Users are not authorized to modify this product. Any modifications invalidate the warranty. This
equipment may not be modified, altered, or changed in any way without signed written permission
from Fujitsu. Unauthorized modification will void the equipment authorization from the FCC and
Industry Canada and the warranty.

Your CELVIN® NAS…
Fujitsu 7
Hardware overview
CELVIN®NAS QE705
Front
STATUS
LAN
USB
HDD1
HDD2
1
2
3
4
5
1 = LED indicators: Status, LAN, USB
2 = LED indicators: HDD 1-2
3 = On/Off switch
4 = One Touch Copy button
5 = USB 3.0

Your CELVIN® NAS…
8 Fujitsu
Rear
2
3
4
5
6
1
1 = Kensington security slot
2 = Reset button for password and network settings
3 = 2 x Gigabit LAN
4 = 2 x USB 3.0
5 = 1 x eSATA
6 = Power supply

Your CELVIN® NAS…
Fujitsu 9
CELVIN®NAS QE805
Front
STATUS
LAN
USB
HDD1
HDD2
HDD3
HDD4
1
2
3
4
5
1 = LED indicators: Status, USB, LAN
2 = LED indicators: HDD 1-4
3 = On/Off switch
4 = One Touch Copy button
5 = USB 3.0

Your CELVIN® NAS…
10 Fujitsu
Rear
2
3
4
5
6
1
1 = Kensington security slot
2 = Reset button for password and network settings
3 = 2 x Gigabit LAN
4 = 2 x USB 3.0
5 = 1x eSATA
6 = Power supply

Installing the NAS
Fujitsu 11
Installing the NAS
For information on hard disk installation and initial operation, please refer to the "Quick Start Guide".
To install the NAS, proceed as follows:
►Switch on the NAS.
►Connect the NAS to the same network as your PC.
!
To make sure that the NAS works correctly, pay attention to LEDs and alarm buzzer
sounds during installation.
See "System status checks" for more information.
List of recommended hard disks
This product will work with 2,5/3,5 inch SATA hard disks from major hard disk manufacturers. A list of
compatible drives can be found at http://support.ts.fujitsu.com.
!
Fujitsu Technology Solutions will accept no liability whatsoever for any product
defects/faulty operation, and/or any time and costs associated with data loss/data
recovery, insofar as the cause can be attributed to misuse or improper installation of hard
disks, regardless of the circumstances or for whatever reason.
!
Please note that when installing a hard disk (new or used) which has not previously been
installed on the NAS, the hard disk will first be formatted and sub-divided automatically,
and all disk data will be lost.
System ventilation
Please ensure when setting up the device that sufficient ventilation will be available at all times. The
air inlet of the product must not be covered, as otherwise it is not possible to guarantee that the
system will receive sufficient ventilation, which may lead to the product being damaged.

Installing the NAS
12 Fujitsu
System status checks
The NAS is fitted with LED indicators to show the system status and further information. When the
NAS is switched on, check the following items to make sure that the system is working normally.
Please note that the information provided by the LEDs described below is only valid if the hard disks
have been correctly installed and the NAS is connected to the network and the power supply.
i
The following illustration shows the CELVIN®NAS QE805.
STATUS
LAN
USB
HDD1
HDD2
HDD3
HDD4
1
2
3
4
1 = System-Status
2 = LAN
3 = USB
4 = HDD 1 - 2 (QE705)
HDD 1 - 4 (QE805)

Installing the NAS
Fujitsu 13
LED Display & System Status Overview
LED Colour LED-Status Description
Flashes green
and red
alternately every
0.5 sec
●The hard disk drive on the NAS is being
formatted.
●The NAS is being initialized.
●The system firmware is being updated.
●RAID rebuilding is in process.
●Online RAID capacity expansion is in
process.
●Online RAID level migration is in process.
Red
●The hard disk drive is invalid.
●The disk volume has reached its full
capacity.
●The disk volume is going to be full.
●The system fan is out of function.
●An error occurs when accessing (read/write)
the disk data.
●A bad sector is detected on the hard disk
drive.
●The NAS is in degraded read-only mode
(2 member hard drives fail in a RAID 5 or
RAID 6 configuration, the disk data can still
be read).
●(Hardware self-test error).
Flashes red
every 0.5 sec
The NAS is in degraded mode (one member hard
drive fails in RAID 1, RAID 5 or RAID 6
configuration).
Flashes green
every 0.5 sec
●The NAS is starting up.
●The NAS is not configured.
●The hard disk drive is not formatted.
Green The NAS is ready.
System
Status
Red /
Green
Off All the hard disk drives on the NAS are in
standby mode.
Orange The NAS is connected to the network.
LAN Orange
Flashes orange The NAS is being accessed from the network.
Flashes red The disk data is being accessed and a read/write
error occurs during the process.
Red A hard drive read/write error occurs.
Flashes green The disk data is being accessed.
HDD Red /
Green
Green The hard drive can be accessed.

Installing the NAS
14 Fujitsu
LED Display & System Status Overview
LED Colour LED-Status Description
Flashes blue
every 0.5 sec
●A USB device (connected to front USB port)
is being detected.
●A USB device (connected to front USB port)
is being removed from the NAS.
●The USB device (connected to the front USB
port) is being accessed.
●The data is being copied to or from the
external USB or eSATA device.
Blue A front USB device is detected (after the device is
mounted).
USB Blue
Off
●No USB device is detected.
●The NAS has finished copying the data to or
from. the USB device connected to the front
USB port of the NAS.
Alarm Buzzer
The alarm buzzer can be disabled in Control Panel - Hardware.
i
The beep, which sounds when booting the device, cannot be deactivated.
Beep sound No. of Times Description
Short beep (0.5 sec) 1 ●The NAS is starting up.
●The NAS is being shut down (software
shutdown).
●The user presses the reset button to
reset the NAS.
●The system firmware has been updated.
Short beep (0.5 sec) 3 An attempt is being made to copy NAS data
to an external storage device connected to
the front USB port, but the data cannot be
copied.
Short beep (0.5 sec)
Long beep (1.5 sec)
3, every 5 min. The system fan is out of function.
This manual suits for next models
1
Table of contents