manuals.online logo
Brands
  1. Home
  2. •
  3. Brands
  4. •
  5. Garmin
  6. •
  7. GPS
  8. •
  9. Garmin EDGE 1030 User manual

Garmin EDGE 1030 User manual

EDGE®1030
Owner’s Manual
© 2017 Garmin Ltd. or its subsidiaries
All rights reserved. Under the copyright laws, this manual may not be copied, in whole or in part, without the written consent of Garmin. Garmin reserves the right to change
or improve its products and to make changes in the content of this manual without obligation to notify any person or organization of such changes or improvements. Go to
www.garmin.com for current updates and supplemental information concerning the use of this product.
Garmin®, the Garmin logo, ANT+®, Auto Lap®, Auto Pause®, Edge®, Forerunner®, inReach®, and Virtual Partner® are trademarks of Garmin Ltd. or its subsidiaries, registered in the
USA and other countries. Connect IQ™, Firstbeat Analytics™, Garmin Connect™, Garmin Express™, HRM-Dual™, Rally™, Varia™, and Vector™ are trademarks of Garmin Ltd. or its
subsidiaries. These trademarks may not be used without the express permission of Garmin.
Android™ is a trademark of Google LLC. Apple® and Mac® are trademarks of Apple, Inc., registered in the U.S. and other countries. The BLUETOOTH® word mark and logos are owned
by the Bluetooth SIG, Inc. and any use of such marks by Garmin is under license. The Cooper Institute®, as well as any related trademarks, are the property of The Cooper Institute.
Di2™ and Shimano STEPS™ are trademarks of Shimano, Inc. Shimano® is a registered trademark of Shimano, Inc. microSD® and the microSDHC logo are trademarks of SD-3C, LLC.
Training Stress Score™ (TSS), Intensity Factor™ (IF), and Normalized Power™ (NP) are trademarks of Peaksware, LLC. STRAVA and Strava™ are trademarks of Strava, Inc. Wi‑Fi®
is a registered trademark of Wi-Fi Alliance Corporation. Windows® is a registered trademark of Microsoft Corporation in the United States and other countries. Other trademarks and
trade names are those of their respective owners.
This product is ANT+® certified. Visit www.thisisant.com/directory for a list of compatible products and apps.
M/N: A03164
Table of Contents
Introduction......................................1
Device Overview...................................... 1
Pairing Your Smartphone........................2
Home Screen Overview...........................2
Viewing Widgets.................................. 3
Using the Touchscreen....................... 3
Locking the Touchscreen................... 3
Charging the Device................................ 4
About the Battery.................................4
Installing the Standard Mount................ 5
Installing the Out-Front Mount............... 6
Releasing the Edge.............................. 6
Acquiring Satellite Signals...................... 7
Training............................................7
Going for a Ride....................................... 7
Segments................................................. 8
Strava™ Segments............................... 8
Using the Strava Segment Explore
Widget.............................................. 8
Following a Segment From Garmin
Connect................................................ 8
Enabling Segments............................. 8
Racing a Segment............................... 9
Viewing Segment Details.................... 9
Segment Options................................. 9
Deleting a Segment........................... 10
Workouts............................................... 10
Creating a Workout........................... 10
Repeating Workout Steps................. 10
Editing a Workout.............................. 10
Following a Workout From Garmin
Connect.............................................. 11
Starting a Workout............................ 11
Stopping a Workout...........................11
Deleting a Workout............................ 11
Training Plans....................................... 11
Using Garmin Connect Training
Plans.................................................. 12
Viewing the Training Calendar......... 12
Training Indoors.................................... 12
Pairing Your ANT+®
Indoor Trainer.................................... 12
Using an ANT+ Indoor Trainer.......... 12
Setting Resistance.........................13
Setting the Simulated Grade......... 13
Setting Target Power.....................13
Interval Workouts.................................. 13
Creating an Interval Workout............ 13
Starting an Interval Workout............. 13
Setting a Training Target...................... 14
Cancelling a Training Target.............14
My Stats......................................... 14
Performance Measurements............... 15
Training Status.................................. 16
About VO2 Max. Estimates...............16
Getting Your VO2 Max. Estimate.. 17
Tips for Cycling VO2 Max.
Estimates....................................... 17
Heat and Altitude Performance
Acclimation.................................... 18
Training Load..................................... 18
Getting Your Training Load
Estimate......................................... 18
Training Load Focus......................... 19
About Training Effect........................ 19
Recovery Time................................... 20
Viewing Your Recovery Time........ 20
Getting Your FTP Estimate............... 21
Conducting an FTP Test............... 21
Automatically Calculating FTP..... 22
Viewing Your Stress Score............... 22
Turning Off Performance
Notifications...................................... 22
Viewing Your Power Curve............... 22
Syncing Activities and Performance
Measurements.................................. 22
Pausing Your Training Status........... 23
Resuming Your Paused Training
Status............................................. 23
Personal Records.................................. 23
Viewing Your Personal Records....... 23
Reverting a Personal Record............ 23
Deleting a Personal Record.............. 23
Training Zones...................................... 23
Navigation...................................... 24
Locations............................................... 24
Marking Your Location...................... 24
Saving Locations from the Map....... 24
Navigating to a Location................... 25
Table of Contents i
Navigating Back to Start................... 25
Stopping Navigation..........................25
Editing Locations...............................26
Deleting a Location........................... 26
Projecting a Location........................ 26
Courses.................................................. 26
Planning and Riding a Course.......... 27
Following a Course From Garmin
Connect.............................................. 27
Creating and Riding a Round-Trip
Course................................................ 28
Creating a Course from a Recent
Ride.................................................... 28
Tips for Riding a Course................... 28
Viewing Course Details..................... 29
Displaying a Course on the Map... 29
Using ClimbPro.................................. 29
Course Options.................................. 30
Stopping a Course............................. 30
Deleting a Course.............................. 30
Map Settings......................................... 30
Changing the Map Orientation......... 30
Map Themes...................................... 30
Route Settings....................................... 31
Selecting an Activity for Route
Calculation......................................... 31
Connected Features....................... 31
Bluetooth Connected Features............ 31
Incident Detection and Assistance
Features............................................. 32
Incident Detection......................... 32
Assistance..................................... 32
Adding Emergency Contacts........ 32
Viewing Your Emergency
Contacts......................................... 32
Requesting Assistance................. 32
Turning Incident Detection On and
Off................................................... 33
Cancelling an Automated
Message.........................................33
Sending a Status Update After an
Incident.......................................... 33
Turning On LiveTrack........................ 33
Starting a GroupTrack Session.........34
Tips for GroupTrack Sessions...... 34
Setting the Bike Alarm...................... 35
Playing Audio Prompts on Your
Smartphone....................................... 35
Transferring Files to Another Edge
Device.................................................35
Wi‑Fi Connected Features.................... 35
Setting Up Wi‑Fi Connectivity........... 35
Wi‑Fi Settings..................................... 36
Wireless Sensors............................36
Putting On the Heart Rate Monitor.......37
Setting Your Heart Rate Zones......... 38
About Heart Rate Zones................38
Fitness Goals................................. 38
Tips for Erratic Heart Rate Data....... 38
Installing the Speed Sensor.................. 39
Installing the Cadence Sensor............. 40
About the Speed and Cadence
Sensors.............................................. 40
Data Averaging for Cadence or
Power................................................. 40
Pairing Your Wireless Sensors............. 41
Training with Power Meters................. 41
Setting Your Power Zones................ 41
Calibrating Your Power Meter.......... 41
Pedal-Based Power........................... 42
Cycling Dynamics.............................. 42
Using Cycling Dynamics................42
Updating the Rally Software Using the
Edge Device....................................... 43
Situational Awareness.......................... 43
Enabling the Green Threat Level
Tone................................................... 43
Using Electronic Shifters...................... 43
Using an eBike....................................... 43
Viewing eBike Sensor Details........... 44
inReach® Remote................................. 44
Using the inReach Remote............... 44
History........................................... 44
Viewing Your Ride................................. 44
Viewing Your Time in Each Training
Zone................................................... 45
Viewing Data Totals.......................... 45
Deleting Data Totals...................... 45
Deleting a Ride...................................... 45
Garmin Connect.................................... 45
ii Table of Contents
Sending Your Ride to Garmin
Connect.............................................. 46
Data Recording...................................... 46
Data Management................................ 46
Connecting the Device to Your
Computer........................................... 46
Transferring Files to Your Device..... 47
Deleting Files..................................... 47
Disconnecting the USB Cable........... 47
Customizing Your Device................47
Connect IQ Downloadable Features.... 47
Downloading Connect IQ Features
Using Your Computer........................ 48
Profiles................................................... 48
Setting Up Your User Profile............. 48
About Training Settings........................ 48
Updating Your Activity Profile...........49
Adding a Data Screen........................50
Editing a Data Screen........................ 50
Rearranging Data Screens................ 50
Alerts.................................................. 50
Setting Range Alerts...................... 51
Setting Recurring Alerts................ 51
Setting Smart Eat and Drink
Alerts.............................................. 51
Auto Lap............................................. 52
Marking Laps by Position............. 52
Marking Laps by Distance.............52
Marking Laps by Time................... 52
Using Auto Sleep............................... 52
Using Auto Pause.............................. 53
Using Auto Scroll............................... 53
Starting the Timer Automatically..... 53
Changing the Satellite Setting.......... 53
Phone Settings...................................... 54
System Settings.................................... 54
Display Settings................................. 54
Using the Backlight........................54
Customizing the Widget Loop.......... 54
Data Recording Settings................... 55
Changing the Units of Measure........ 55
Turning the Device Tones On and
Off.......................................................55
Changing the Device Language........ 55
Time Zones........................................ 55
Setting Up Extended Display Mode...... 55
Exiting Extended Display Mode........ 55
Device Information......................... 56
Product Updates................................... 56
Updating the Software Using the
Garmin Connect App......................... 56
Updating the Software Using Garmin
Express.............................................. 56
Specifications........................................56
Edge Specifications.......................... 56
HRM-Dual™ Specifications................57
Speed Sensor 2 and Cadence Sensor 2
Specifications.................................... 57
Viewing Device Information................. 57
Viewing Regulatory and Compliance
Information........................................ 57
Device Care............................................57
Cleaning the Device...........................57
Caring for the Heart Rate Monitor.... 58
Installing a Memory Card..................... 58
User Replaceable Batteries.................. 59
Replacing the HRM-Dual Battery...... 59
Replacing the Speed Sensor
Battery................................................ 60
Replacing the Cadence Sensor
Battery................................................ 61
Troubleshooting............................. 61
Resetting the Device............................. 61
Restoring the Default Settings......... 61
Clearing User Data and Settings...... 61
Maximizing Battery Life........................ 62
Turning On Battery Save Mode.........62
My phone will not connect to the
device..................................................... 62
Improving GPS Satellite Reception...... 62
Setting Your Elevation...........................62
Temperature Readings......................... 63
My device is in the wrong language.....63
Replacement O-rings............................ 63
Getting More Information..................... 63
Appendix........................................ 63
Data Fields............................................. 63
VO2 Max. Standard Ratings................. 68
FTP Ratings........................................... 68
Heart Rate Zone Calculations.............. 69
Table of Contents iii
Wheel Size and Circumference............ 69
Radio Frequency Exposure................... 71
iv Table of Contents
Introduction
WARNING
See the Important Safety and Product Information guide in the product box for product warnings and other
important information.
Always consult your physician before you begin or modify any exercise program.
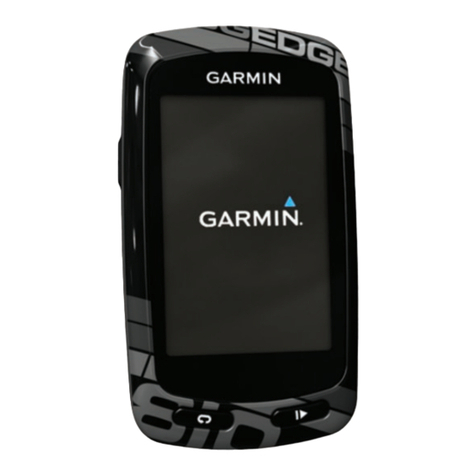
Device Overview
Select to enter sleep mode and wake the device.
Hold to turn the device on and off and lock the touchscreen.
Select to mark a new lap.
Select to start and stop the activity timer.
Memory card slot (under cover)
Install an optional microSD® card.
Electrical contacts
Charge using an Edge external battery pack accessory.
NOTE: Go to buy.garmin.com to purchase optional accessories.
Introduction 1
Pairing Your Smartphone
To use the connected features of the Edge device, it must be paired directly through the Garmin Connect™ app,
instead of from the Bluetooth® settings on your smartphone.
1From the app store on your smartphone, install and open the Garmin Connect app.
2Hold to turn on the device.
The first time you turn on the device, you will select the device language. The next screen prompts you to pair
with your smartphone.
TIP: You can swipe down on the home screen to view the settings widget, and select Phone > Pair
Smartphone to manually enter pairing mode.
3Select an option to add your device to your Garmin Connect account:
• If this is the first device you have paired with the Garmin Connect app, follow the on-screen instructions.
• If you have already paired another device with the Garmin Connect app, from the or menu, select
Garmin Devices > Add Device, and follow the on-screen instructions.
NOTE: Based on your Garmin Connect account and accessories, your device suggests activity profiles and
data fields during setup. If you have sensors paired with your previous device, you can transfer them during
setup.
After you pair successfully, a message appears, and your device syncs automatically with your smartphone.
Home Screen Overview
The home screen gives you quick access to all the features of the Edge device.
Select to go for a ride.
Use the arrows to change your activity profile.
Navigation Select to mark a location, search for locations, and create or navigate a course.
Training Select to access your segments, workouts, and other training options.
History Select to access your previous rides and totals.
My Stats Select to access your performance metrics, personal records, and user profile.
Select to access connected features and settings.
Select to access your Connect IQ™ apps, widgets, and data fields.
2 Introduction
Viewing Widgets
Your device is preloaded with several widgets, and more are available when you pair your device with a
smartphone or other compatible device.
1From the home screen, swipe down from the top of the screen.
The settings widget appears. A flashing icon means the device is searching for a signal. A solid icon means
the signal was found or the sensor is connected. You can select any icon to change the settings.
2Swipe left or right to view more widgets.
The next time you swipe down to view the widgets, the last widget you viewed appears.
Using the Touchscreen
• When the timer is running, tap the screen to view the timer overlay.
The timer overlay allows you to return to the home screen during a ride.
• Select to return to the home screen.
• Swipe or select the arrows to scroll.
• Select to return to the previous page.
• Select to save your changes and close the page.
• Select to close the page and return to the previous page.
• Select to search near a location.
• Select to delete an item.
• Select for more information.
Locking the Touchscreen
You can lock the screen to prevent inadvertent screen touches.
• Hold , and select Lock Screen.
• During an activity, select .
Introduction 3
Charging the Device
NOTICE
To prevent corrosion, thoroughly dry the USB port, the weather cap, and the surrounding area before charging or
connecting to a computer.
The device is powered by a built-in lithium-ion battery that you can charge using a standard wall outlet or a USB
port on your computer.
NOTE: The device will not charge when outside the approved temperature range (Edge Specifications,
page56).
1Pull up the weather cap from the USB port .
2Plug the small end of the USB cable into the USB port on the device.
3Plug the large end of the USB cable into an AC adapter or a computer USB port.
4Plug the AC adapter into a standard wall outlet.
When you connect the device to a power source, the device turns on.
5Charge the device completely.
After you charge the device, close the weather cap.
About the Battery
WARNING
This device contains a lithium-ion battery. See the Important Safety and Product Information guide in the product
box for product warnings and other important information.
4 Introduction
Installing the Standard Mount
For the best GPS reception, position the bike mount so the front of the device is oriented toward the sky. You
can install the bike mount on the stem or the handlebars.
1Select a secure location to mount the device where it does not interfere with the safe operation of your bike.
2Place the rubber disk on the back of the bike mount.
Two rubber disks are included, and you can select the disk that best fits your bike. The rubber tabs align with
the back of the bike mount so it stays in place.
3Place the bike mount on the bike stem.
4Attach the bike mount securely using the two bands .
5Align the tabs on the back of the device with the bike mount notches .
6Press down slightly and turn the device clockwise until it locks into place.
Introduction 5
Installing the Out-Front Mount
NOTE: If you do not have this mount, you can skip this task.
1Select a secure location to mount the Edge device where it does not interfere with the safe operation of your
bike.
2Use the hex key to remove the screw from the handlebar connector .
3Place the rubber pad around the handlebar:
• If the handlebar diameter is 25.4mm, use the thicker pad.
• If the handlebar diameter is 31.8mm, use the thinner pad.
4Place the handlebar connector around the rubber pad.
5Replace and tighten the screw.
NOTE: Garmin® recommends tightening the screw so the mount is secure, with a maximum torque
specification of 7lbf-in. (0.8N-m). You should check the tightness of the screw periodically.
6Align the tabs on the back of the Edge device with the bike mount notches .
7Press down slightly and turn the Edge device clockwise until it locks into place.
Releasing the Edge
1Turn the Edge clockwise to unlock the device.
2Lift the Edge off the mount.
6 Introduction
Acquiring Satellite Signals
The device may need a clear view of the sky to acquire satellite signals. The time and date are set automatically
based on the GPS position.
TIP: For more information about GPS, go to www.garmin.com/aboutGPS.
1Go outdoors to an open area.
The front of the device should be oriented toward the sky.
2Wait while the device locates satellites.
It may take 30–60 seconds to locate satellite signals.
Training
Going for a Ride
If you are using a wireless sensor or accessory, it can be paired and activated during initial setup (Pairing Your
Wireless Sensors, page41). If your device was packaged with a wireless sensor, they are already paired and
can be activated during initial setup.
1Hold to turn on the device.
2Go outside, and wait while the device locates satellites.
The satellite bars turn green when the device is ready.
3From the home screen, select or to select an activity profile.
4Select .
5Select to start the activity timer.
NOTE: History is recorded only while the activity timer is running.
6Swipe left or right to view additional data screens.
You can swipe down from the top of the data screens to view the widgets.
7If necessary, tap the screen to view status overlay data (including battery life) or return to the home screen.
8Select to stop the activity timer.
TIP: Before you save this ride and share it on your Garmin Connect account, you can change the ride type.
Accurate ride type data is important for creating bike friendly courses.
9Select Save Ride.
10 Select .
Training 7
Segments
Following a segment: You can send segments from your Garmin Connect account to your device. After a
segment is saved to your device, you can follow the segment.
NOTE: When you download a course from your Garmin Connect account, all segments in the course are
downloaded automatically.
Racing a segment: You can race a segment, trying to match or exceed your personal record or other cyclists
who have ridden the segment.
Strava™Segments
You can download Strava segments to your Edge 1030 device. Follow Strava segments to compare your
performance with your past rides, friends, and pros who have ridden the same segment.
To sign up for a Strava membership, go to the segments widget in your Garmin Connect account. For more
information, go to www.strava.com.
The information in this manual applies to both Garmin Connect segments and Strava segments.
Using the Strava Segment Explore Widget
The Strava Segment Explore widget allows you to view and ride nearby Strava segments.
1From the Strava Segment Explore widget, select a segment.
2Select an option:
• Select to star the segment in your Strava account.
• Select Download > Ride to download a segment to your device and ride it.
• Select Ride to ride a downloaded segment.
3Select or to view your segment times, the best times of your friends, and the time of the segment leader.
Following a Segment From Garmin Connect
Before you can download and follow a segment from Garmin Connect, you must have a Garmin Connect
account (Garmin Connect, page45).
NOTE: If you are using Strava segments, your starred segments are transferred automatically to your device
when it syncs with the Garmin Connect app.
1Select an option:
• Open the Garmin Connect app.
• Go to connect.garmin.com.
2Select a segment.
3Select or Send to Device.
4Follow the on-screen instructions.
5On the Edge device, select Training > Segments.
6Select the segment.
7Select Ride.
Enabling Segments
You can choose which segments currently loaded on the device are enabled.
1Select Training > Segments > > Enable/Disable > Edit Multiple.
2Select the segments to enable.
8 Training
Racing a Segment
Segments are virtual race courses. You can race a segment, and compare your performance to past activities,
other riders' performance, connections in your Garmin Connect account, or other members of the cycling
community. You can upload your activity data to your Garmin Connect account to view your segment position.
NOTE: If your Garmin Connect account and Strava account are linked, your activity is automatically sent to your
Strava account so you can review the segment position.
1Select to start the activity timer, and go for a ride.
When your path crosses an enabled segment, you can race the segment.
2Start racing the segment.
The segment data screen appears automatically.
3If necessary, use the arrows to change your goal during your race.
You can race against the segment leader, your past performance, or other riders (if applicable). The goal
automatically adjusts based on your current performance.
A message appears when the segment is complete.
Viewing Segment Details
1Select Training > Segments.
2Select a segment.
3Select an option:
• Select Map to view the segment on the map.
• Select Elevation to view an elevation plot of the segment.
• Select Leaderboard to view the ride times and average speeds for the segment leader, group leader or
challenger, your personal best time and average speed, and other riders (if applicable).
TIP: You can select a leaderboard entry to change your segment race goal.
• Select Enable to enable segment racing and prompts that alert you to approaching segments.
Segment Options
Select Training > Segments > .
Turn Guidance: Enables or disables turn prompts.
Auto Select Effort: Enables or disables automatic goal adjustment based on your current performance.
Search: Allows you to search for saved segments by name.
Enable/Disable: Enables or disables the segments currently loaded on the device.
Default Leader Priority: Allows you to select the order for goal targets while racing a segment.
Delete: Allows you to delete all or multiple saved segments from the device.
Training 9
Deleting a Segment
1Select Training > Segments.
2Select a segment.
3Select > .
Workouts
You can create custom workouts that include goals for each workout step and for varied distances, times, and
calories. You can create workouts using Garmin Connect, and transfer them to your device. You can also create
and save a workout directly on your device.
You can schedule workouts using Garmin Connect. You can plan workouts in advance and store them on your
device.
Creating a Workout
1Select Training > Workouts > Create New.
2Enter a workout name, and select .
3Select Add New Step.
4Select the type of workout step.
For example, select Rest to use the step as a rest lap.
During a rest lap, the timer continues to run and data is recorded.
5Select the workout step duration.
For example, select Distance to end the step after a specific distance.
6If necessary, enter a custom value for the duration.
7Select the workout step target type.
For example, select Heart Rate Zone to maintain a consistent heart rate during the step.
8If necessary, select a target zone or enter a custom range.
For example, you can select a heart rate zone. Each time you exceed or drop below the specified heart rate,
the device beeps and displays a message.
9Select to save the step.
10 Select Add New Step to add additional steps to the workout.
11 Select to save the workout.
Repeating Workout Steps
Before you can repeat a workout step, you must create a workout with at least one step.
1Select Add New Step.
2Select an option:
• Select Repeat to repeat a step one or more times. For example, you can repeat a 5-mile step ten times.
• Select Repeat Until to repeat a step for a specific duration. For example, you can repeat a 5-mile step for
60 minutes or until your heart rate reaches 160bpm.
3Select Back To Step, and select a step to repeat.
4Select to save the step.
Editing a Workout
1Select Training > Workouts.
2Select a workout.
3Select .
4Select a step, and select Edit Step.
5Change the step attributes, and select .
6Select to save the workout.
10 Training
Following a Workout From Garmin Connect
Before you can download a workout from Garmin Connect, you must have a Garmin Connect account (Garmin
Connect, page45).
1Select an option:
• Open the Garmin Connect app.
• Go to connect.garmin.com.
2Select Training > Workouts.
3Find a workout, or create and save a new workout.
4Select or Send to Device.
5Follow the on-screen instructions.
Starting a Workout
1Select Training > Workouts.
2Select a workout.
3Select Ride.
4Select to start the activity timer.
After you begin a workout, the device displays each step of the workout, the target (if any), and current workout
data. An audible alarm sounds when you are about to finish a workout step. A message appears, counting down
the time or distance until a new step begins.
Stopping a Workout
• At any time, select to end a workout step and begin the next step.
• From the workout screen, swipe up from the bottom of the screen, and select an option:
◦Select Pause to pause the current workout step.
◦Select Back to end a workout step and repeat the previous step.
◦Select Next to end a workout step and begin the next step.
• At any time, select to stop the activity timer.
• At any time, swipe down from the top of the screen, and on the controls widget, select Stop Workout > to
end the workout.
Deleting a Workout
1Select Training > Workouts.
2Select a workout.
3Select > > .
Training Plans
You can set up a training plan in your Garmin Connect account and send the training plan workouts to your
device. All scheduled workouts sent to the device appear in the training calendar.
Training 11
Using Garmin Connect Training Plans
Before you can download and use a training plan from Garmin Connect, you must have a Garmin Connect
account (Garmin Connect, page45).
You can browse Garmin Connect to find a training plan, and schedule workouts and courses.
1Connect the device to your computer.
2Go to connect.garmin.com.
3Select and schedule a training plan.
4Review the training plan in your calendar.
5Select an option:
• Sync your device with the Garmin Express™ application on your computer.
• Sync your device with the Garmin Connect app on your smartphone.
Viewing the Training Calendar
When you select a day in the training calendar, you can view or start the workout. You can also view saved rides.
1Select Training > Training Plan.
2Select .
3Select a day to view a scheduled workout or a saved ride.
Training Indoors
The device includes an indoor activity profile where GPS is turned off. When GPS is turned off, speed and
distance are not available unless you have a compatible sensor or indoor trainer that sends speed and distance
data to the device.
Pairing Your ANT+®Indoor Trainer
1Bring the device within 3m (10ft.) of the ANT+ indoor trainer.
2Select Training > Indoor Trainer > Pair ANT+ Bike Trainer.
3Select the indoor trainer to pair with your device.
4Select Add.
When the indoor trainer is paired with your device, the indoor trainer appears as a connected sensor. You can
customize your data fields to display sensor data.
Using an ANT+ Indoor Trainer
Before you can use a compatible ANT+ indoor trainer, you must mount your bike on the trainer and pair it with
your device (Pairing Your ANT+® Indoor Trainer, page12).
You can use your device with an indoor trainer to simulate resistance while following a course, activity, or
workout. While using an indoor trainer, GPS is turned off automatically.
1Select Training > Indoor Trainer.
2Select an option:
• Select Free Ride to manually adjust the resistance level.
• Select Follow a Course to follow a saved course (Courses, page26).
• Select Follow an Activity to follow a saved ride (Going for a Ride, page7).
• Select Follow a Workout to follow a saved workout (Workouts, page10).
3Select a course, activity, or workout.
4Select Ride.
5Select to start the activity timer.
The trainer increases or decreases resistance based on the elevation information in the course or ride.
12 Training
Setting Resistance
1Select Training > Indoor Trainer > Set Resistance.
2Select or to set the resistance force applied by the trainer.
3Select to start the activity timer.
4If necessary, select or to adjust the resistance during your activity.
Setting the Simulated Grade
1Select Training > Indoor Trainer > Set Grade.
2Select or to set the simulated grade applied by the trainer.
3Select to start the activity timer.
4If necessary, select or to adjust the simulated grade during your activity.
Setting Target Power
1Select Training > Indoor Trainer > Set Target Power.
2Set the target power value.
3Select to start the activity timer.
The resistance force applied by the trainer is adjusted to maintain a constant power output based on your
speed.
4If necessary, select or to adjust the target power during your activity.
Interval Workouts
You can create interval workouts based on distance or time. The device saves your custom interval workout
until you create another interval workout. You can use open intervals when you are riding a known distance.
When you select , the device records an interval and moves to a rest interval.
Creating an Interval Workout
1Select Training > Intervals > Edit > Intervals > Type.
2Select an option.
TIP: You can create an open-ended interval by setting the type to Open.
3If necessary, enter a high and low value for the interval.
4Select Duration, enter a time interval value, and select .
5Select .
6Select Rest > Type.
7Select an option.
8If necessary, enter a high and low value for the rest interval.
9Select Duration, enter time value for the rest interval, and select .
10 Select .
11 Select one or more options:
• To set the number of repetitions, select Repeat.
• To add an open-ended warm up to your workout, select Warm Up > On.
• To add an open-ended cool down to your workout, select Cool Down > On.
Starting an Interval Workout
1Select Training > Intervals > Do Workout.
2Select to start the activity timer.
3When your interval workout has a warm up, select to begin the first interval.
4Follow the on-screen instructions.
When you complete all of the intervals, a message appears.
Training 13
Setting a Training Target
The training target feature works with the Virtual Partner® feature so you can train toward a set distance,
distance and time, or distance and speed goal. During your training activity, the device gives you real-time
feedback about how close you are to achieving your training target.
1Select Training > Set a Target.
2Select an option:
• Select Distance Only to select a preset distance or enter a custom distance.
• Select Distance and Time to select a distance and time target.
• Select Distance and Speed to select a distance and speed target.
The training target screen appears, indicating your estimated finish time. The estimated finish time is based
on your current performance and the time remaining.
3Select .
4Select to start the activity timer.
5If necessary, scroll to view the Virtual Partner screen.
6After you complete your activity, select > Save Ride.
Cancelling a Training Target
Swipe down from the top of the screen, and on the controls widget, select Cancel Target.
My Stats
The Edge 1030 device can track your personal statistics and calculate performance measurements.
Performance measurements require a compatible heart rate monitor or power meter.
14 My Stats

Other manuals for EDGE 1030

1

Other Garmin GPS manuals

Garmin GRS 77 User manual

Garmin

Garmin GRS 77 User manual

Garmin GPSMAP 76Cx Quick start guide

Garmin

Garmin GPSMAP 76Cx Quick start guide

Garmin StreetPilot I2 - Automotive GPS Receiver User manual

Garmin

Garmin StreetPilot I2 - Automotive GPS Receiver User manual

Garmin nuvi 4592LM Instruction manual
Garmin

Garmin nuvi 4592LM Instruction manual

Garmin GPSMAP 60CS User manual

Garmin

Garmin GPSMAP 60CS User manual

Garmin Mobile 20 Reference guide

Garmin

Garmin Mobile 20 Reference guide

Garmin GPS III User manual

Garmin

Garmin GPS III User manual

Garmin nuvi 310 User manual

Garmin

Garmin nuvi 310 User manual

Garmin GekoTM 201 User manual

Garmin

Garmin GekoTM 201 User manual

Garmin aera 796 Manual

Garmin

Garmin aera 796 Manual

Garmin eTrex Legend H User manual

Garmin

Garmin eTrex Legend H User manual

Garmin Zumo 200 Series Instruction manual

Garmin

Garmin Zumo 200 Series Instruction manual

Garmin 205-Series User manual

Garmin

Garmin 205-Series User manual

Garmin G1000:Beechcraft Baron 58/G58 Manual

Garmin

Garmin G1000:Beechcraft Baron 58/G58 Manual

Garmin eTrex eTrex User manual

Garmin

Garmin eTrex eTrex User manual

Garmin Nuvi 2x5 Instruction manual

Garmin

Garmin Nuvi 2x5 Instruction manual

Garmin nuvi 350 User manual

Garmin

Garmin nuvi 350 User manual

Garmin NUVI User manual

Garmin

Garmin NUVI User manual

Garmin Personal Navigator GPS 100AVD User manual

Garmin

Garmin Personal Navigator GPS 100AVD User manual

Garmin Montana 600 Series User manual

Garmin

Garmin Montana 600 Series User manual

Garmin GPSMAP 176 User manual

Garmin

Garmin GPSMAP 176 User manual

Garmin GPS 100 User manual

Garmin

Garmin GPS 100 User manual

Garmin SEAT Portable System User manual

Garmin

Garmin SEAT Portable System User manual

Garmin Montana 600 Instruction manual

Garmin

Garmin Montana 600 Instruction manual

Popular GPS manuals by other brands

Mio Cyclo series user manual

Mio

Mio Cyclo series user manual

Leica mojo3D user manual

Leica

Leica mojo3D user manual

Topshine MT01 user manual

Topshine

Topshine MT01 user manual

Fleet Complete AT1000 Self-installation guide

Fleet Complete

Fleet Complete AT1000 Self-installation guide

Novatel PwrPak7D quick start guide

Novatel

Novatel PwrPak7D quick start guide

Kenwood DNX890HD, DNX7700BT, DNX690HD, instruction manual

Kenwood

Kenwood DNX890HD, DNX7700BT, DNX690HD, instruction manual

Nextar V4-TV Hardware instruction manual

Nextar

Nextar V4-TV Hardware instruction manual

Racelogic VBOX III user guide

Racelogic

Racelogic VBOX III user guide

iStartek VT206 user manual

iStartek

iStartek VT206 user manual

Mopar EVTS manual

Mopar

Mopar EVTS manual

Golf Buddy VS4 quick start guide

Golf Buddy

Golf Buddy VS4 quick start guide

Coban TK06B user manual

Coban

Coban TK06B user manual

Magellan RoadMate 360 - Automotive GPS Receiver instructions

Magellan

Magellan RoadMate 360 - Automotive GPS Receiver instructions

Future Electronics OSSO quick start guide

Future Electronics

Future Electronics OSSO quick start guide

BLUE INK TECH BIT ELD user manual

BLUE INK TECH

BLUE INK TECH BIT ELD user manual

SkyGolf SkyCaddie SG3 user guide

SkyGolf

SkyGolf SkyCaddie SG3 user guide

Pharos Drive GPS 250 Specifications

Pharos

Pharos Drive GPS 250 Specifications

TecTecTec ULT-G manual

TecTecTec

TecTecTec ULT-G manual

manuals.online logo
manuals.online logoBrands
  • About & Mission
  • Contact us
  • Privacy Policy
  • Terms and Conditions

Copyright 2025 Manuals.Online. All Rights Reserved.