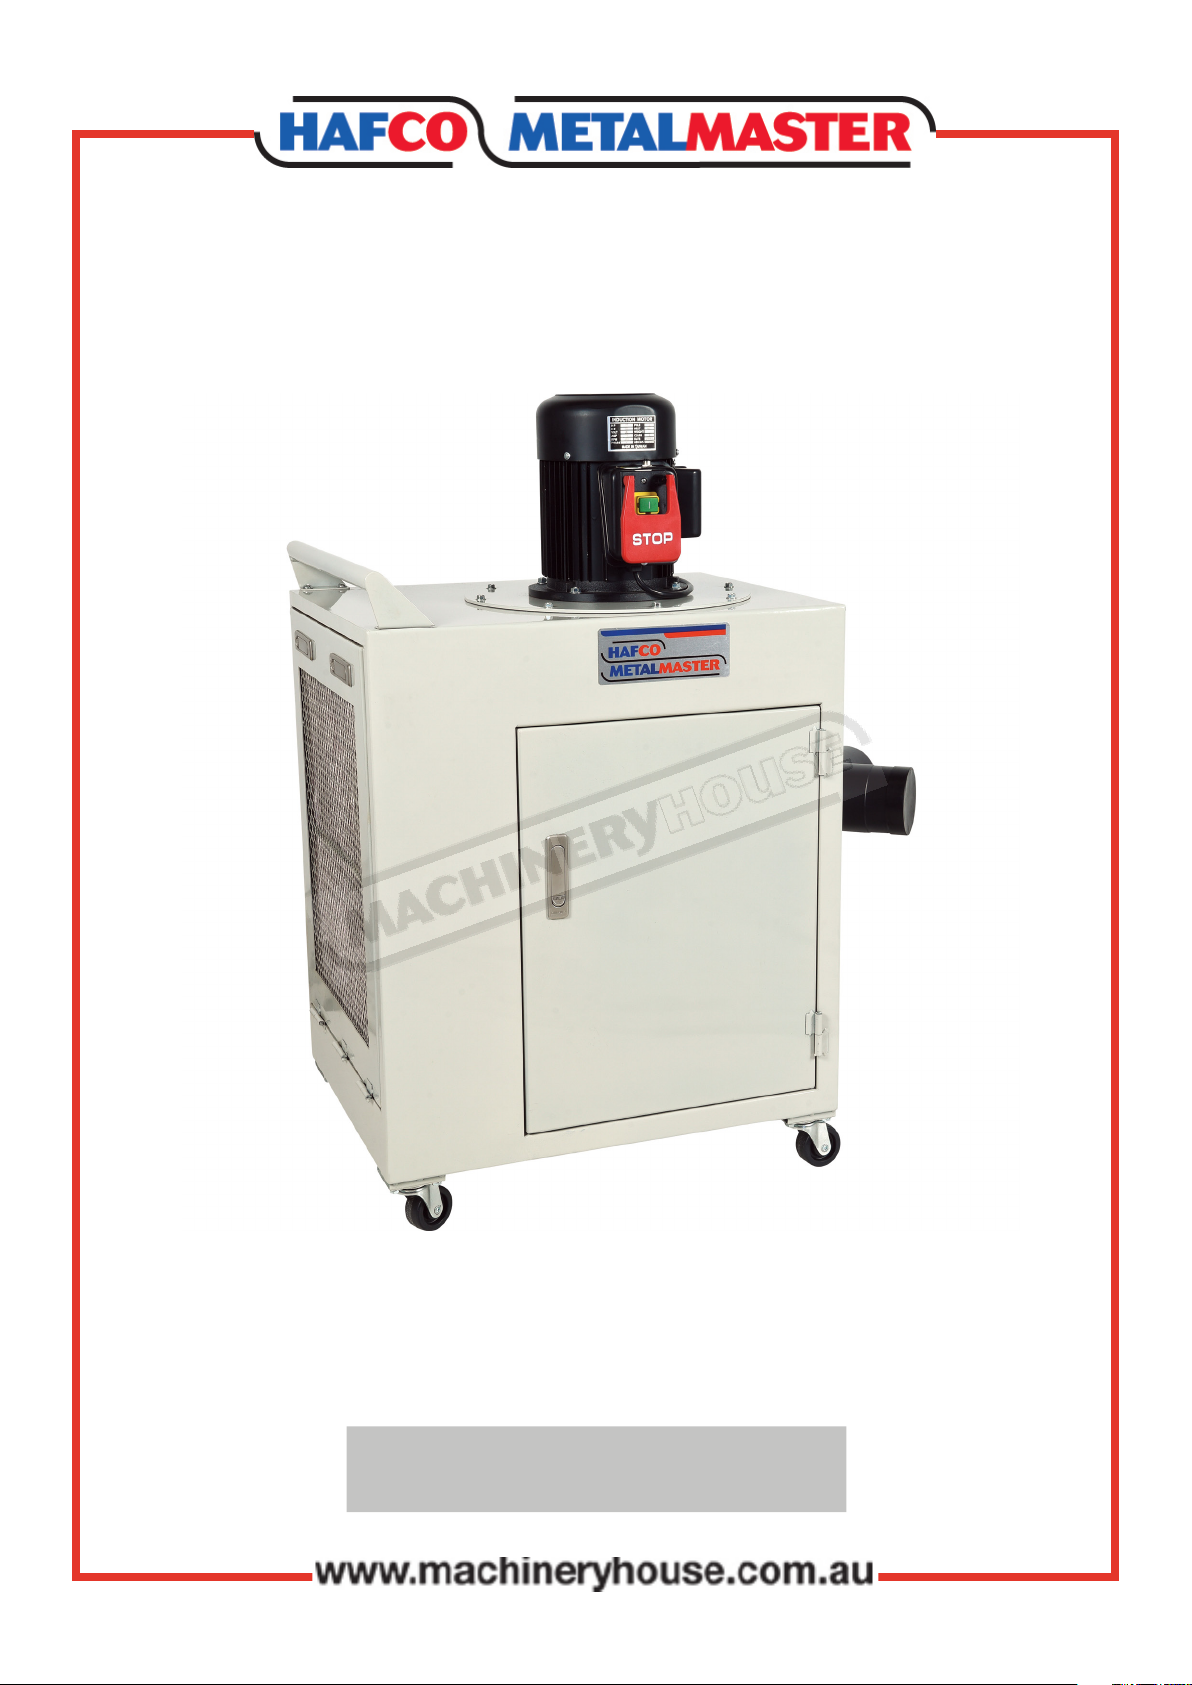
Hafco Metalmaster DCM-202 User manual

OPERATION MANUAL
Edition No : DCM-202-1
Date of Issue : 08/2020
Model. DCM-202
Order Code W321
METAL DUST COLLECTOR

2
OPERATION MANUAL
NOTE:
In order to see the type and model of the machine, please see the
specication plate. Usually found on the back of the machine. See
example (Fig.1)
Fig.1
METAL DUST COLLECTOR
MACHINE
DCM-202
MODEL NO.
SERIAL NO.
DATE OF MANF.
NOTE:
This manual is only for your reference. Owing to the continuous improvement of the HAFCO
METALMASTER machine, changes may be made at any time without obligation or notice.
Please ensure the local voltage is the same as that listed on the specication plate before
operating this electric machine.
DistributeD by
www.machineryhouse.co.nz
MACHINE DETAILS

3
OPERATION MANUAL
C O N T E N T S
1. GENERAL MACHINE INFORMATION
1.1 Specications............................................................... 4
1.2 Included Accessories................................................. 4
1.3 Identication................................................................ 5
2. SAFETY
2.1 General Woodworking Machine Safety.............. 6
2.2 Specic Safety For Dust Collectors....................... 9
3. POWER SUPPLY
3.1 Electrical Installation.................................................. 10
3.2 Full Load Current......................................................... 10
4. SETUP
4.1 Unpacking..................................................................... 11
4.2 Clean Up......................................................................... 11
4.3 Site Preparation........................................................... 11
4.4 Lifting Instructions..................................................... 11
4.5 Assembly........................................................................ 12
5. OPERATION
5.1 Operation Overview................................................... 13
5,2 Optional Accessories................................................. 13
6. MAINTENANCE
6.1 Schedule........................................................................ 14
6.2 Cleaning The Motor Impeller.................................. 16
6.3 Cleaning The Ducting Hose.................................... 16
6.4 Cleaning or Replacing The Filters......................... 17
6.5 Troubleshooting......................................................... 18
Spare Parts.............................................................................. 19
Risk Assessment Sheets..................................................... 22

4
OPERATION MANUAL
1.1 SPECIFICATION
Order Code W321
MODEL DCM-202
Dust Collector Type (Application) Metal
Airow (cfm) 650
Main Inlet Size (inch) 6
Adapter Inlets / Diameter (No/inch) 2/4
First-Stage Filter Type Stainless Steel Mesh
Second-Stage Filter Type Active Carbon
Second-Stage Filter Rating (Micron) 5
Third Stage Filter Type Pleated Micro Filter
Third Stage Filter Rating (Micron) 1
Motor Power (hp) 1.5
Voltage (V/Hz) 240/50
Amps (A) 10
Dimensions (L x W x H) (mm) 725 x 508 x 1092
Weight (kg) 90.5
1.2 ACCESSORIES INCLUDED
4 x Casters
1 x Dust Port
1 x Y-Inlet
1 x Collection Drawer
1 x Pleated Micro Filter
1 x Active Carbon Filter
1 x Stainless-Steel Mesh Filter
1 x Dust Tray

5
OPERATION MANUAL
1.3 IDENTIFICATION
AMotor FActive Carbon Filter
BON/OFF Switch with Paddle Stop GPleated Micro Filter
CAccess Door HFilter Access Door
DCollecting Door IDust Tray
EStainless Steel Mesh Filter
A
B
C
D
E
F
G
H
I

6
OPERATION MANUAL
DO NOT use this machine unless you have read this manual or have been instructed in the use
of this machine in its safe use and operation
This manual provides safety instructions on the proper setup, operation, maintenance, and
service of this machine. Save this manual, refer to it often, and use it to instruct other operators.
Failure to read, understand and follow the instructions in this manual may result in re or
serious personal injury—including amputation, electrocution, or death.
The owner of this machine is solely responsible for its safe use. This responsibility includes, but
is not limited to proper installation in a safe environment, personnel training and authorization
to use, proper inspection and maintenance, manual availability and comprehension, of the
application of the safety devices, integrity, and the use of personal protective equipment.
The manufacturer will not be held liable for injury or property damage from negligence,
improper training, machine modications or misuse.
WARNING
2.1 GENERAL METALWORKING MACHINE SAFETY
Always wear safety glasses or goggles.
Wear appropriate safety footwear.
Wear respiratory protection where required.
Gloves should never be worn while operating the machine, and only worn when
handling the work-piece.
Wear hearing protection in areas > 85 dBA. If you have trouble hearing someone speak
from one metre (three feet) away, the noise level from the machine may be hazardous.
DISCONNECTION THE MACHINE FROM POWER when making adjustments or servicing.
Check and adjust all safety devices before each job.
Ensure that guards are in position and in good working condition before operating.
Ensure that all stationary equipment is anchored securely to the oor.
Ensure all machines have a start/stop button within easy reach of the operator.
Each machine should have only one operator at a time. However, everyone should know
how to stop the machine in an emergency.

7
OPERATION MANUAL
Ensure that keys and adjusting wrenches have been removed from the machine before
turning on the power. Appropriate storage for tooling should be provided.
Ensure that all cutting tools and blades are clean and sharp. They should be able to cut freely
without being forced.
Stop the machine before measuring, cleaning or making any adjustments.
Wait until the machine has stopped running to clear cuttings with a vacuum, brush or rake.
Keep hands away from the cutting head and all moving parts.
Avoid awkward operations and hand positions. A sudden slip could cause the hand to move
into the cutting tool or blade.
Return all portable tooling to their proper storage place after use.
Clean all tools after use.
Keep work area clean. Floors should be level and have a non-slip surface.
Use good lighting so that the work piece, cutting blades, and machine controls can be seen
clearly. Position any shade lighting sources so that they do not cause any glare or reections.
Ensure there is enough room around the machine to do the job safely.
Obtain rst aid immediately for all injuries.
Understand that the health and re hazards can vary from material to material. Make sure all
appropriate precautions are taken.
Clean machines and the surrounding area when the operation is nished.
Use proper lock out procedures when servicing or cleaning the machines or power tools.
DO NOT
×Do not distract an operator. Horseplay can lead to injuries and should be strictly prohibited.
×Do not wear loose clothing, gloves, necktie’s, rings, bracelets or other jewellery that can be
come entangled in moving parts. Conne long hair.
×Do not handle cuttings by hand because they are very sharp. Do not free a stalled cutter
without turning the power o rst. Do not clean hands with cutting uids.
×Do not use rags or wear gloves near moving parts of machines.
×Do not use compressed air to blow debris from machines or to clean dirt from clothes.
×Do not force the machine. It will do the job safer and better at the rate for which it was
designed.
2.1 GENERAL METALWORKING MACHINE SAFETY Cont.
BEFORE OPERATING ANY MACHINE, TAKE TIME TO READ
AND UNDERSTAND ALL SAFETY SIGNS AND SYMBOLS.
IF NOT UNDERSTOOD SEEK EXPLANATION FROM YOUR
SUPERVISOR.

8
OPERATION MANUAL
2.1 GENERAL METALWORKING MACHINE SAFETY Cont.
HAZARDS ASSOCIATED WITH MACHINES include, but are not limited to:
• Being struck by ejected parts of the machinery
• Being struck by material ejected from the machinery
• Contact or entanglement with the machinery
• Contact or entanglement with any material in motion
Health Hazards (other than physical injury caused by moving parts)
• Chemicals hazards that can irritate, burn, or pass through the skin
• Airborne items that can be inhaled, such as oil mist, metal fumes, solvents, and dust
• Heat, noise, and vibration
• Ionizing or non-ionizing radiation (X-ray, lasers, etc.)
• Biological contamination and waste
• Soft tissue injuries (for example, to the hands, arms, shoulders, back, or neck) resulting
from repetitive motion, awkward posture, extended lifting, and pressure grip)
Other Hazards
• Slips and falls from and around machinery during maintenance
• Unstable equipment that is not secured against falling over
• Safe access to/from machines (access, egress)
• Fire or explosion
• Pressure injection injuries from the release of uids and gases under high pressure
• Electrical Hazards, such as electrocution from faulty or ungrounded electrical
components
• Environment in which the machine is used (in a machine shop, or in a work site)
MACHINES ARE SAFEGUARDED TO PROTECT THE OPERATOR FROM INJURY OR DEATH WITH THE
PLACEMENT OF GUARDS. MACHINES MUST NOT BE OPERATED WITH THE GUARDS REMOVED
OR DAMAGED.

9
OPERATION MANUAL
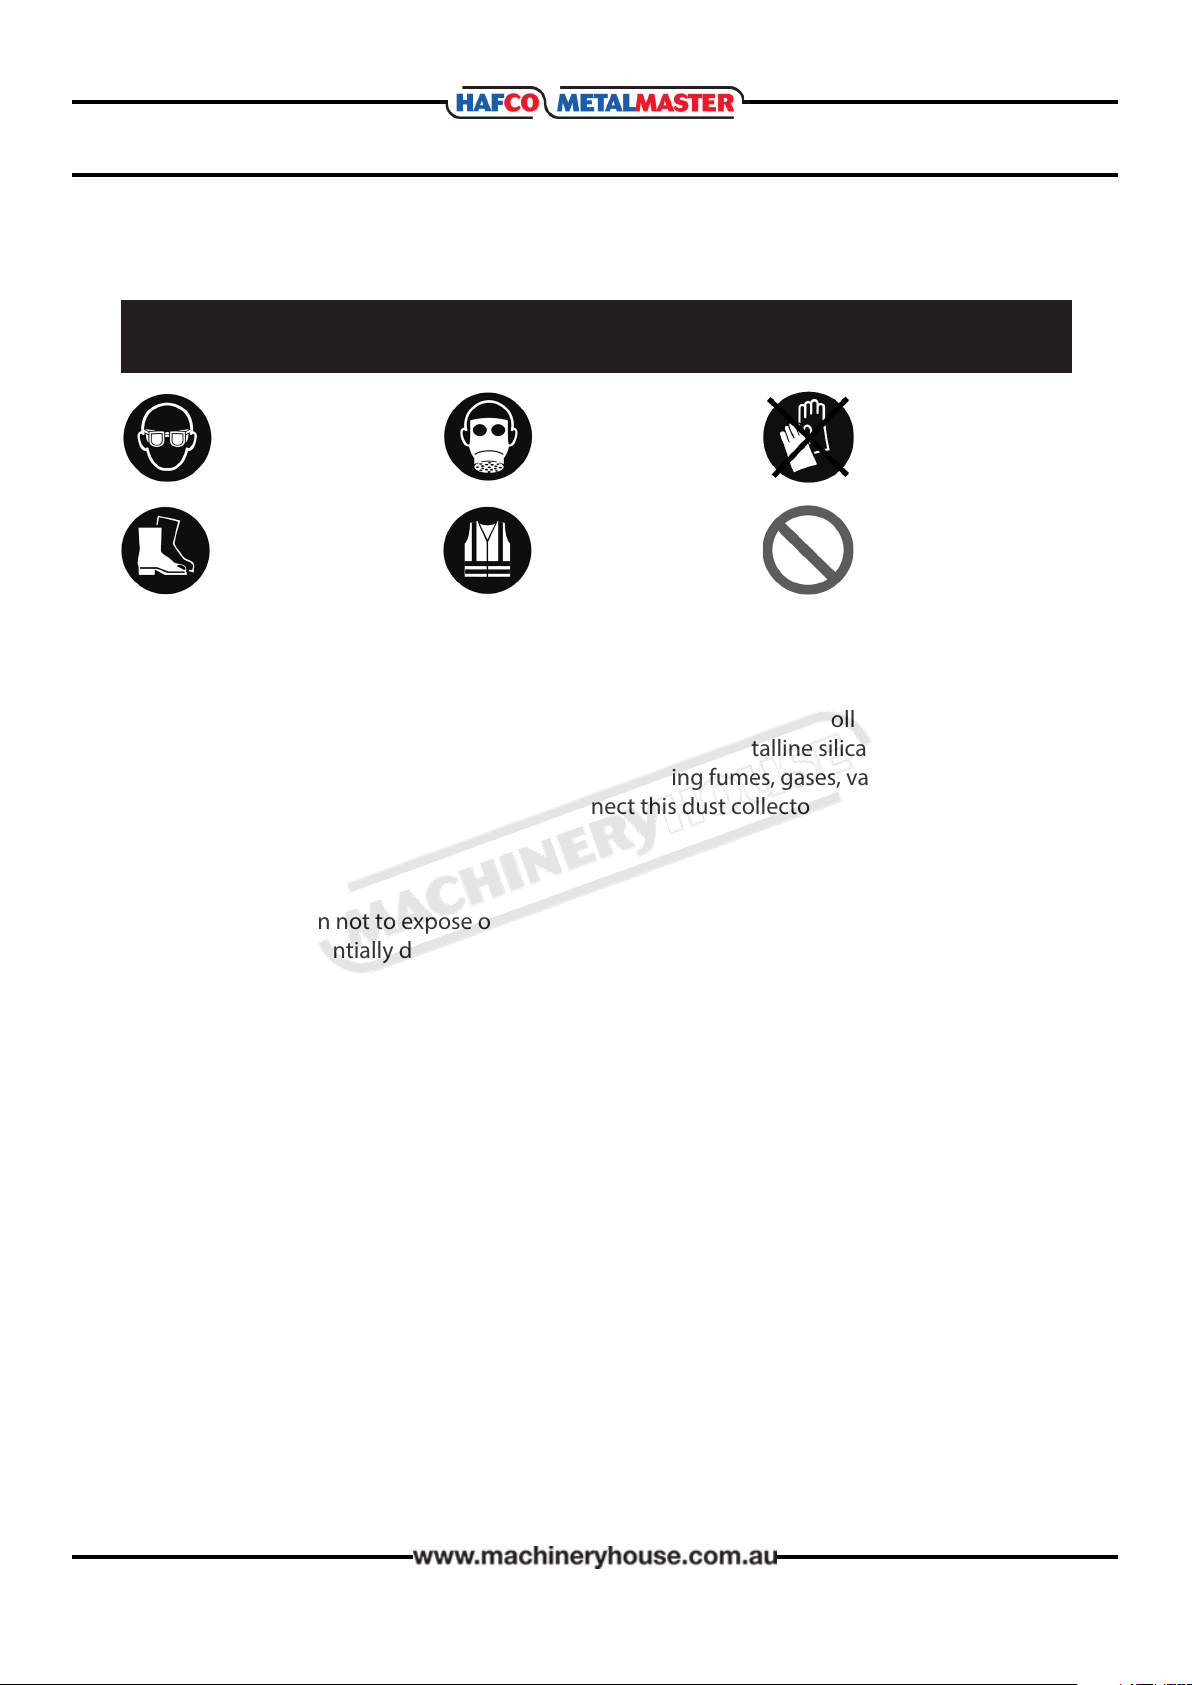
2.2 SPECIFIC SAFETY FOR DUST COLLECTORS
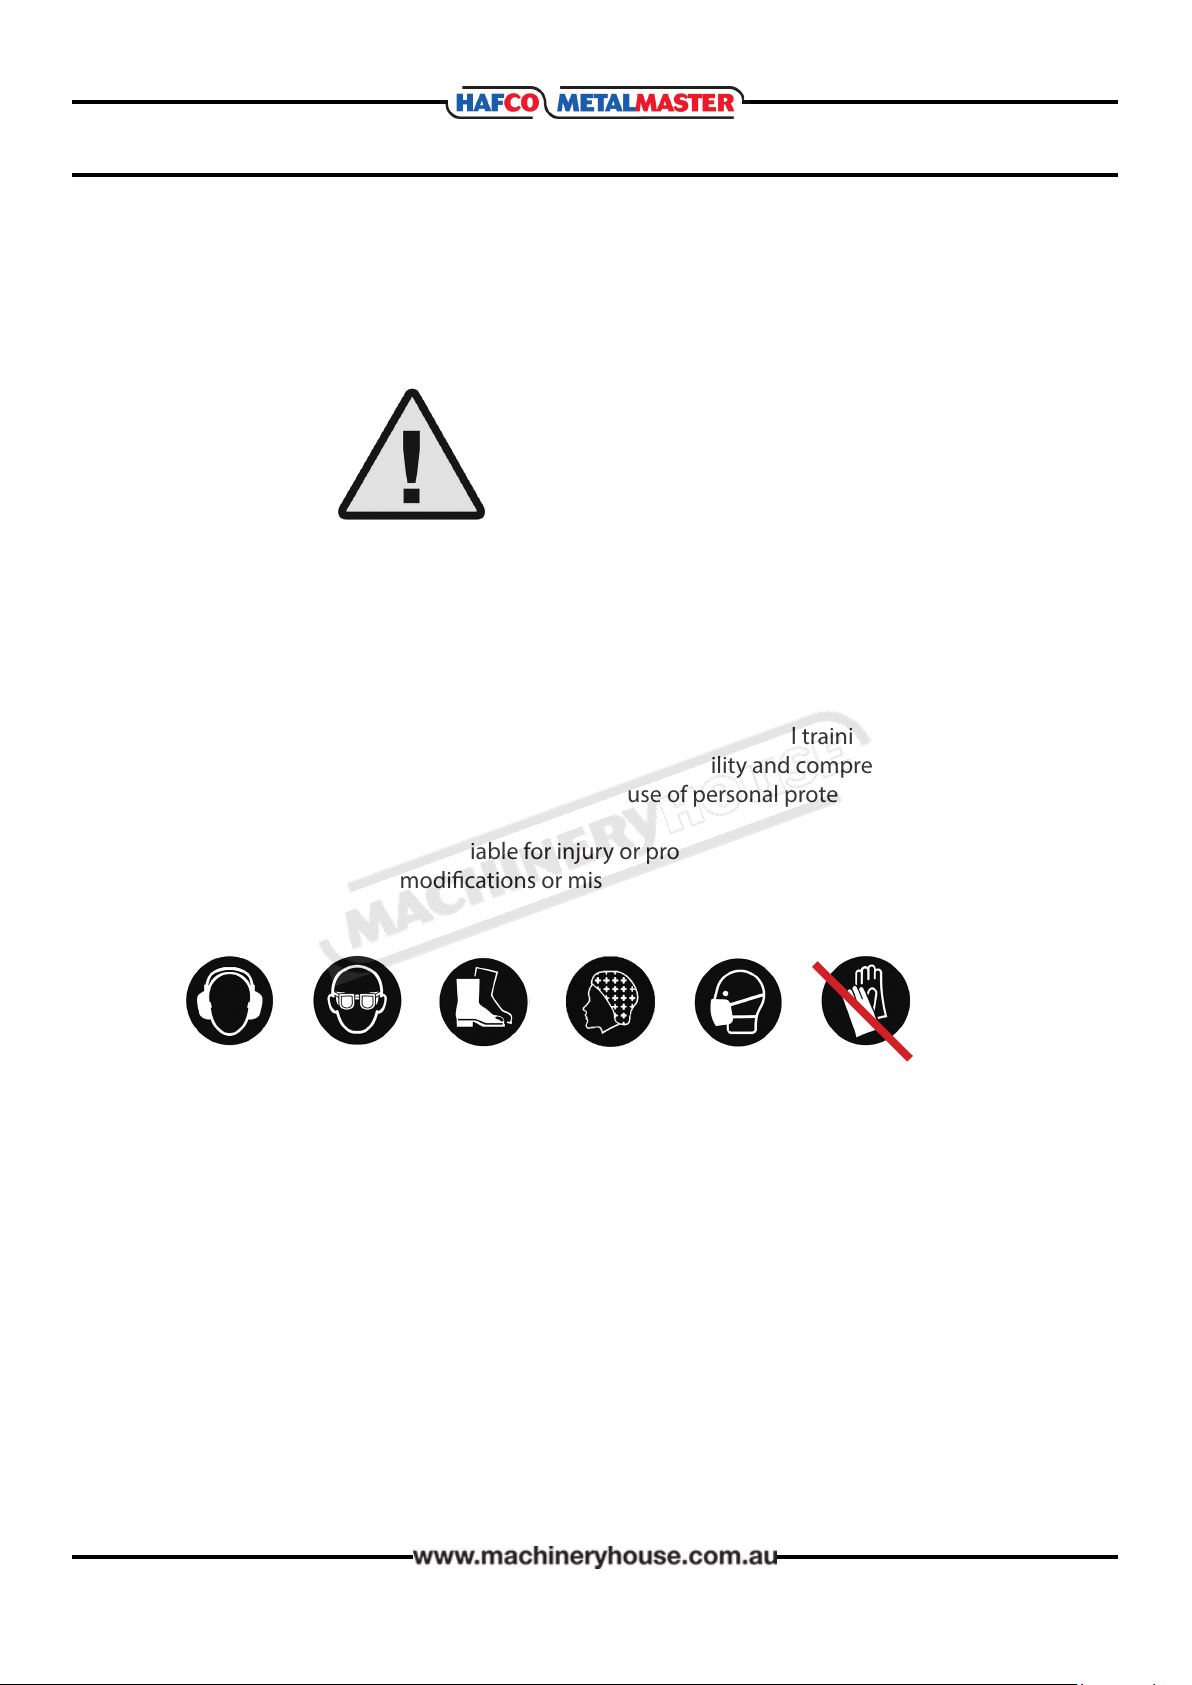
DO NOT use this machine unless you have been instructed in its safe use and
operation and have read and understood this manual
Safety glasses must be
worn at all times in work
areas
Approved respirator
should be worn.
Gloves must not be
worn when using this
machine.
Sturdy footwear must be
worn at all times in work
areas
Close tting/protective
clothing must be worn
Rings and jewelery must
not be worn.
USE FOR INTENDED PURPOSE.
This is a metal dust collector and is only designed to capture noncombustible or non-explosive
metal particles. When using the dust collector only collect one type of metal/material at one
time. DO NOT use to collect wood or wood products. DO NOT use it to collect lead, magnesium,
niobium, tantalum, titanium, zirconium, hafnium, asbestos, crystalline silica, gypsum, or any
other non-metal products. DO NOT use to capture welding fumes, gases, vapors, liquids, smoke,
or ordinary combustible materials. DO NOT connect this dust collector to any machine using a
coolant system.
TOXIC MATERIALS.
Care should be taken not to expose operators to certain types of metal dusts or fumes that can
result in serious, potentially deadly health eects. To reduce this risk, investigate the toxicity of
metal types you work with and always seek to minimize or eliminate exposure to the operator
and other bystanders.
KNOW WHEN TO CHANGE FILTERS
A simple but important safety requirement is to change lters when airow through the system
reaches a reduced pressure. Filter changing is also necessary when the pressure drop across
the collector is aecting the ability of the system to capture dust, allowing it to escape into the
atmosphere. Some cartridge lters can operate longer between changes. However, for heavy
dust-loading applications, lter replacement might be much more frequent.
RISK OF FIRE/EXPLOSIONS.
Only connect with smooth-walled, sheet-metal ducting, to minimize static electrical charge.
DO NOT use PVC pipe. If using ducting, the system must be sealed and grounded. Fine metal
dust particles can ignite, depending on material type and circumstances. Be educated and
prepared to ght a combustible metal re. Keep the dust collector away from pilot lights, open
ames, or other ignition sources.
NEVER use near chemical fumes or within an enclosed spray booth.

10
OPERATION MANUAL
The full-load current rating is the amperage a machine draws when running at 100% of the out-
put power. Where machines have more than one motor, the full load current is the
amperage drawn by the largest motor or a total of all the motors and electrical devices that
might operate at one time during normal operations.
Full-Load Current Rating for this machine at 240V is 6.7 Amps
It should be noted that the full-load current is not the maximum amount of amps that the
machine will draw. If the machine is overloaded, it will draw additional amps beyond the
full-load rating and if the machine is overloaded for a long period of time, damage, overheating,
or re may be caused to the motor and circuitry.
This is especially true if connected to an undersized circuit or a long extension lead. To reduce
the risk of these hazards, avoid overloading the machine during operation and make
sure it is connected to a power supply circuit that meets the requirements.
3.2 FULLLOAD CURRENT RATING
Place the machine near an existing power source. Make sure all power cords are protected from
trac, material handling, moisture, chemicals, or other hazards. Make sure there is access to a
means of disconnecting the power source. The electrical circuit must meet the requirements for
240V.
NOTE : The use of an extension cord is not recommended as it may decrease the life of electrical
components on your machine.
3.1 ELECTRICAL INSTALLATION
ELECTRICAL REQUIREMENTS
Nominal Voltage.........................................240V
Cycle............................................................50 Hz
Phase...............................................Single Phase
Power Supply Circuit............................10 Amps
Full Load Current................................ 6.7 Amps
(Full load current rating is also on the specication plate on the motor.)
3. POWER SUPPLY

11
OPERATION MANUAL
4.1 UNPACKING
This machine was carefully packaged for safe transport. When unpacking, separate all enclosed
items from packaging materials and inspect them for shipping damage. If items are damaged,
please contact your distributor.
NOTE: Save all the packaging materials until you are completely satised with the machine and
have resolved any issues with the distributor, or the shipping agent.
When unpacking, check the packing list to make sure that all parts shown are included. If any
parts are missing or broken, please contact the your distributor.
4 SETUP
The unpainted surfaces of the machine have been coated with a waxy oil to protect them from
corrosion during shipment. Remove the protective coating with a solvent cleaner or a citrus
based degreaser.
Optimum performance from your machine will be achieved when you clean all moving parts or
sliding contact surfaces that are coated with rust prevented products.
It is advised to avoid chlorine based solvents, such as acetone or brake parts cleaner, as they
will damage painted surfaces and strip metal should they come in contact. Always follow the
manufacturer’s instructions when using any type of cleaning product.
4.2 CLEAN - UP
4.3 SITE PREPARATION
When selecting the site for the machine, consider the largest size of workpiece that will be
processed through the machine and provide enough space around the machine for operat-
ing the machine safely. Consideration should be given to the installation of auxiliary equip-
ment. Leave enough space around the machine to open or remove doors/covers as required
for the maintenance and service as described in this manual.
It is recommended that the machine is stable on the oor to prevent tipping or shifting. It
also reduces vibration that may occur during operation.
4.4 LIFTING INSTRUCTIONS
This machine is extremely heavy.
Serious personal injury may occur if safe moving methods are not
followed. To be safe, you will need assistance and power equip-
ment when moving the shipping crate and removing the machine
from the crate.
On the day that the machine arrives, make sure that a forklift or lifting device, with sucient
capacity is available to unload the machine from the vehicle. Ensure access to the chosen site
is clear and that doors and ceilings are suciently high and wide enough to receive the
machine.

12
OPERATION MANUAL
4.5 ASSEMBLY
The machine must be fully assembled before it can be operated. First clean any parts that are
coated in rust preventative to ensure the assembly process can proceed smoothly.
To assemble the dust collector:
1. Attach the casters to the bottom of dust collector
using the 5⁄16”x 1⁄2” hex. head bolts. (Fig.4.1)
Fig.4.1
Fig.4.2
2. Attach the dust port to the side of the dust
collector with the 5⁄16”x 1⁄2” button head cap
screws. (Fig.4.2)
Fig.4.3
3. Using a Phillips screwdriver, attach the Y-inlet to
the dust port with a #10 x 3⁄8” ange screw.
(Fig.4.3).
4. Open the front access door. Remove the protective
packing from the collecting drawer, and
place the drawer into its place. (Fig.4.4) Close and
lock the front access door.
Fig.4.4

13
OPERATION MANUAL
4.5 ASSEMBLY Cont.
Fig.4.6
5. Open the lter door and make sure that the dust
tray is installed correctly. (Fig.4.5)
Fig.4.5
6. Install the lters with the Pleated Micro lter on the
outside, then the Active Carbon lter, in the middle
and the Stainless Steel Mesh lter on the inside.
(Fig.4.6)
Close and lock the lter access door and attach the
dust collecting ducting to the dust port
USING CORRECT DUCTING
This dust collector is designed exclusively to collect dry metal, chips, and swarf. DO NOT use
this dust collector to collect wood dust or metal chips containing cutting uid or coolant.
Due to re or explosion risk, DO NOT use this machine to collect combustible or explosive
metals such as, magnesium, niobium, tantalum, titanium, zirconium, hafnium, combustible
liquids or fuels, gasoline, oil, or solvent-based paints.
For the best performance, place this dust collector as close to the dust-generating machines as
possible and install dust shut o valves at the beginning of ducting lines. Only open one line at
a time to focus the maximum suction from the machine where dust is being collected.
DUCTING MATERIAL
HAFCO METALMASTER DO NOT recommend using any plastic duct material with this machine.
When plastic or non-conductive ducting is used, static electrical buildup in the ducting can
cause explosion or re hazard.
For the best results, use only Flame Retardant Dust Hose or smooth-wall, sheet-metal ducting
or exible metal ducting to connect to each machine.
Advantages of metal ducting is its conductivity and that it does not contribute to static
electrical charge build-up.

14
OPERATION MANUAL
5. OPERATION
This machine may perform many types of operations that are beyond the scope of this manual.
Many of these operations may be dangerous or deadly if performed incorrectly.
The instructions in this section are written with the understanding that the operator has the
necessary knowledge and skills to operate this machine. If at any time you are experiencing
diculties performing any operation, stop using the machine!
If you are an inexperienced operator, we strongly recommend that you read books, trade
articles, or seek training from an experienced operator before performing any unfamiliar
operations. Above all, your safety should come rst!
To use metal dust collector:
1. First turn the metal dust collector ON.
2. Turn dust-producing machine ON and perform the operation.
3. When shutting down rst turn the dust-producing machine OFF when the operation is
complete.
4. Turn metal dust collector OFF when nished with the operation and check or clean the
collecting drawer. Empty drawer and tray when they are approximately 1⁄3–1⁄2 full.
5.2 OPTIONAL ACCESSORIES
5.1 OPERATING OVERVIEW
DCH-100F - Flame Retardant Dust Hose 100mm x 4Mtrs.
(Order Code: W322A)
DCA-100C - Dust Hose Shut O Valve 100mm
(Order Code: W335)
REPLACEMENT FILTERS
Stainless Steel Mesh Filter
1st Stage
(Order Code 3CP1025)
Active Carbon Filter
2nd Stage
(Order Code 3CP1024)
Pleated Micro Filter
3nd Stage
(Order Code 3CP1028)

15
OPERATION MANUAL
For optimum performance from the machine, it is important that the machine is well cleaned
and maintain. Follow the maintenance schedule listed in the following section and refer to any
specic instructions given.
Before maintaining or cleaning the machine, turn o the circuit
breaker, or disconnect the machine from the power supply.
Post a sign to inform other workers that the machine is under maintenance.
6. MAINTENANCE
6.1 SCHEDULE
To maintain a low risk of injury and proper machine operation, if you ever observe any of the
items below, shut down the machine immediately and x the problem before continuing
operations:
• Loose mounting bolts.
• Check and empty dust collection drawer-and tray.
• Check or replace lters.
• Worn or damaged wires.
• Any other unsafe condition.
Weekly Check
• Clean dust buildup from inside cabinet and o motor. Inspect and clean inside ducts.
Every 10–15 Hours
• Clean Stage 1, 30-Micron stainless steel mesh lter.
Every 25–30 Hours
• Clean Stage 2, 5-Micron active carbon lter.
Every 35–40 Hours
• Clean Stage 3, 1-Micron pleated micro lter.
Every 300 Hours
• Replace 5-Micron active carbon lter and pleated micro lter every 300 hours or sooner
if cleaning lters no longer improves airow.
Frequently monitor and empty collection drawer and dust tray during operations.
When inspecting or emptying drawer or tray, always wear an approved respirator, approved
safety goggles, and leather gloves.

16
OPERATION MANUAL
6.2 CLEANING THE MOTOR IMPELLER
Normally the impeller requires no maintenance, but the blades can accumulate metal dust that
can adversely aect impeller balance. Removing the motor and impeller assembly allows for
cleaning and inspection of the impeller blades.
To clean impeller and inspect motor shaft:
1. DISCONNECT THE MACHINE FROM THE POWER!
2. Put on an approved respirator, approved safety
goggles, and leather gloves.
3. Remove the 8 ange bolts from the motor mounting
plate, that secures the motor and impeller assembly
to the cabinet. (Fig. 6.1)
4. Remove motor/impeller assembly and carefully lay it
on its side on the top of the cabinet.(Fig. 6.2)
5. Use a soft bristle brush and dry rag to remove the dust
from the impeller blades and impeller housing.
DO NOT use compressed air or your bare hands.
Serious injury can occur if it enters the blood stream.
6. Inspect impeller for damage and replace if necessary
7. Replace motor and impeller and secure the ange
bolts.
Fig. 6.1
Flange
bolts
Fig. 6.2
6.3 CLEANING THE DUCTING HOSE
Monthly inspection of all the ducts and ttings should be carried out and when required the
ducts and ttings should be cleaned.
To clean inside the ducts:
1. DISCONNECT THE MACHINE FROM THE POWER SUPPLY!
2. Wear an approved respirator, approved goggles, and leather gloves.
3. Undo the clamps and disconnect the ducts and ttings. Use a soft bristle brush and dry or
damp rag to remove the accumulated metal dust.
4. Reconnect the ducts and ttings and secure the clamps.

17
OPERATION MANUAL
6.4 CLEANING OR REPLACING THE FILTERS
Fig. 6.3
Cleaning and replacing lters is essential for the optimum operation of the dust collector. The
5-Micron active carbon and 1-Micron pleated micro lters need regular cleaning. Replace
every 300 hours or when the airow performance becomes noticeably reduced despite being
cleaned.
Always clean lters outdoors where possible!
When cleaning lters, always inspect for damage and replace lters if ANY damage or tears are
found.
NOTE: DO NOT use compressed air to clean lters, especially if indoors as it will likely cause a
large amount of ne dust to become airborne and could damage the Stage-2 and -3 lters
Stage-1 Stainless-Steel Mesh Filter
Flush with water or other liquid into an enclosed container and air dry. Carefully collect ushed
waste and dispose of properly.
Stage-2 Active Carbon Filter
Clean with a soft bristle brush and vacuum with a shop vacuum equipped with a HEPA lter.
Stage-3 Pleated Micro Filter
Clean with a soft bristle brush and vacuum with a shop vacuum equipped with a HEPA lter.
When Replacing Filters
1. DISCONNECT THE MACHINE FROM THE POWER!
2. Wear an approved respirator, approved goggles, and
protective gloves while handling the lters.
3. Unlock the lter door and open to approximately 30
degrees.
4. Open the 2 retaining clips on the door and remove the
lters (Fig. 6.3). If re-using the lters, note the airow
direction across lter for replacement in Step 5.
5. Replace the lters in same sequence shown with the
stage 3 Pleated lter on the outside, then the stage 2
Active Carbon lter in the middle and the stage 1
Stainless Steel Mesh lter on the inside. Ensure the
lters are installed with the proper airow direction.
Close retaining clips to secure lters.
6. Close and lock the lter door.

18
OPERATION MANUAL
6.5 TROUBLESHOOTING
Review the troubleshooting and procedures in this section if a problem develops with your
machine. If you need replacement parts then follow the procedure in beginning of the spare
parts section or if additional help with a procedure is required, then contact you distributor.
Note: Make sure you have the model of the machine, serial number,and manufacture date
before calling.
Symptoms Possible Cause Possible Solution
Machine does
not start or a
breaker trips.
1. Power supply circuit breaker tripped or fuse
blown.
2. Motor wires connected incorrectly.
3. Plug/receptacle at fault/wired incorrectly.
4. Wiring open/has high resistance.
5. START/STOP or circuit breaker switch at
fault.
6. Start capacitor at fault.
7. Centrifugal switch/contact points at fault.
8. Motor at fault.
1. Ensure circuit is sized correctly and free of shorts.
Reset circuit breaker or replace fuse.
2. Correct motor wiring connections.
3. Test for good contacts; correct the wiring.
4. Check/x broken, disconnected, or corroded wires.
5. Replace switch/circuit breaker.
6. Test/replace.
7. Adjust/replace centrifugal switch/contact points.
8. Test/repair/replace.
Machine has
vibration or noisy
operation.
1. Debris caught in impeller.
2. Motor or component loose.
3. Motor fan rubbing on cover.
4. Motor mount loose/broken.
5. Motor bearings at fault.
6. Motor shaft bent.
7. Dust collector not on a at surface.
8. Impeller damaged or unbalanced.
9. Impeller loose on motor shaft.
1. Inspect impeller for debris or damage.
2. Inspect/replace damaged bolts/nuts, and re-tighten
with thread-locking uid.
3. Fix/replace fan cover; replace loose/damaged fan.
4. Tighten/replace.
5. Test by rotating shaft; rotational grinding/loose
shaft requires bearing replacement.
6. Test with dial indicator. Replace motor if damaged.
7. Stabilize dust collector.
8. Disconnect dust collector from power. Inspect
impeller for dents, bends, or loose ns. Replace
impeller if damaged.
9. Secure impeller; replace motor and impeller as a
set if motor shaft and impeller hub are damaged
Dust collector
does not
adequately
collect dust or
chips; poor
performance.
1. Collection drawer or air lter dust tray are
full.
2. Filters are dirty/clogged.
3. Clog in ducting.
4. Leak in ducting/connections.
5. Ducting blocked/restricted.
6. The dust collector is too far away from the
point of suction, or there are too many
sharp bends in the ducting.
7. Dust collector is undersized.
8. Run capacitor at fault.
9. Centrifugal switch/contact points at fault.
1. Empty collection drawer and dust tray.
2. Clean lters; replace with new lters if performance
does not improve.
3. Remove clog.
4. Seal leak.
5. Remove ducting from dust collector inlet and
unblock the restriction.
6. Relocate the dust collector closer to the point of
suction; remove sharp bends in ducting.
7. Install a larger dust collector.
8. Test/replace.
9. Adjust/replace centrifugal switch/contact points if
available.

19
OPERATION MANUAL
SPARE PARTS SECTION
CONTENTS
Spare Parts Diagram................................................ 20
Spare Parts List.......................................................... 21
Edition No : DCM-202-1
Date of Issue : 08/2020
Model. DCM-202
Order Code W321
METAL DUST COLLECTOR
The following section covers the spare parts diagrams and lists that were current at the time
this manual was originally printed. Due to continuous improvements of the machine, changes
may be made at any time without notication.
HOW TO ORDER SPARE PARTS
1. Have your machines model number, serial number & date of manufacture
on hand, these can be found on the specication plate mounted on the machine
2. A scanned copy of your parts list/diagram with required spare part/s
identied.
NOTE: SOME PARTS MAY ONLY BE AVAILABLE AS AN ASSEMBLY
3. Go to www.machineryhouse.com.au/contactus and ll out the inquiry form attaching a
copy of scanned parts list.

20
OPERATION MANUAL
SPARE PARTS DIAGRAM
This manual suits for next models
1
Table of contents
Popular Dust Collector manuals by other brands

National Flooring Equipment
National Flooring Equipment 3474 HEPA instruction manual

Oneida Air Systems
Oneida Air Systems XXK100300 owner's manual

Grizzly
Grizzly G1030 owner's manual

Skelton
Skelton SKV-250AT-ACC instruction manual

Vaniman
Vaniman ABRASIVE VAC BRUSHLESS manual

Woodstock
Woodstock G9975 parts list