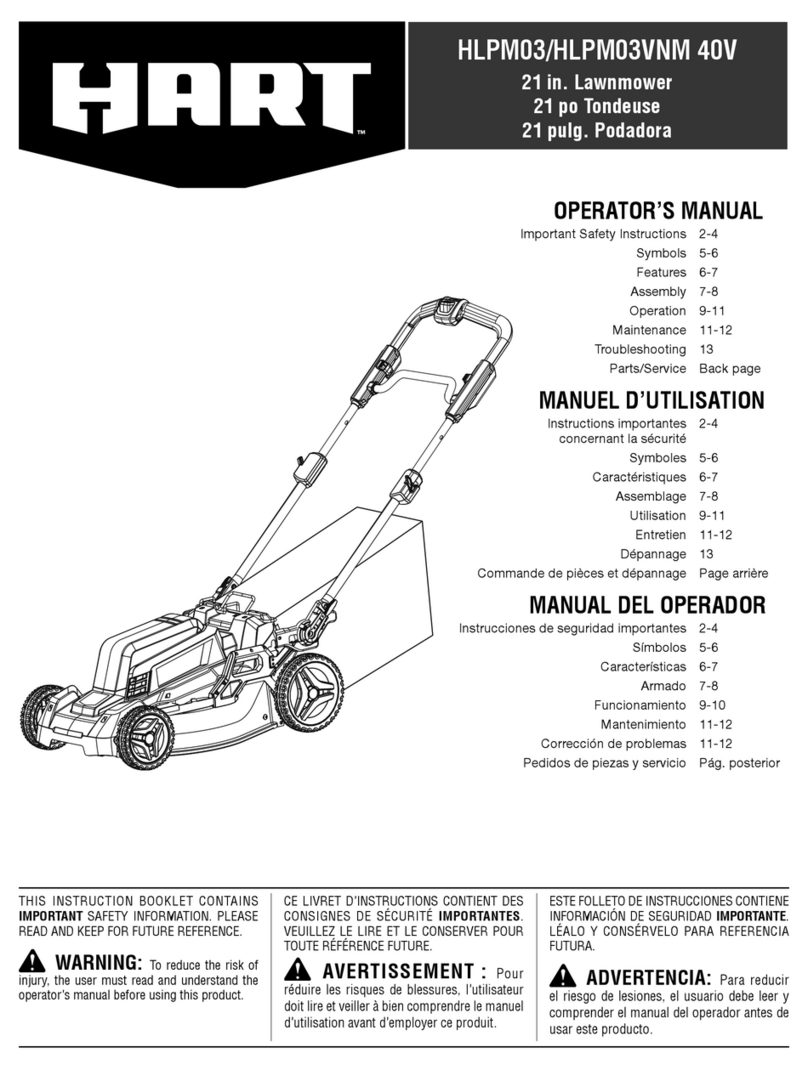
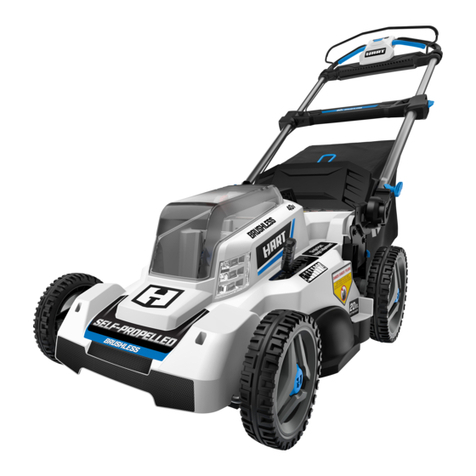
HART HLPM03 40V User manual

HLPM03 40V
21 in. Lawnmower
21 po Tondeuse
21 pulg. Podadora
OPERATOR’S MANUAL
Important Safety Instructions 2-4
Symbols 5-6
Features 6-7
Assembly 7-8
Operation 9-11
Maintenance 11-12
Troubleshooting 13
Parts/Service Backpage
MANUEL D’UTILISATION
Instructions importantes 2-4
concernant la sécurité
Symboles 5-6
Caractéristiques 6-7
Assemblage 7-8
Utilisation 9-11
Entretien 11-12
Dépannage 13
Commandedepiècesetdépannage Pagearrière
MANUAL DEL OPERADOR
Instruccionesdeseguridadimportantes 2-4
Símbolos 5-6
Características 6-7
Armado 7-8
Funcionamiento 9-10
Mantenimiento 11-12
Correccióndeproblemas 11-12
Pedidosdepiezasyservicio Pág.posterior
THIS INSTRUCTION BOOKLET CONTAINS
IMPORTANT SAFETY INFORMATION. PLEASE
READ AND KEEP FOR FUTURE REFERENCE.
WARNING: To reduce the risk of
injury, the user must read and understand the
operator’s manual before using this product.
CE LIVRET D’INSTRUCTIONS CONTIENT DES
CONSIGNES DE SÉCURITÉ IMPORTANTES.
VEUILLEZ LE LIRE ET LE CONSERVER POUR
TOUTE RÉFÉRENCE FUTURE.
AVERTISSEMENT :
Pour
réduire les risques de blessures, l’utilisateur
doit lire et veiller à bien comprendre le manuel
d’utilisation avant d’employer ce produit.
ESTE FOLLETO DE INSTRUCCIONES CONTIENE
INFORMACIÓN DE SEGURIDAD IMPORTANTE.
LÉALO Y CONSÉRVELO PARA REFERENCIA
FUTURA.
ADVERTENCIA: Para reducir
el riesgo de lesiones, el usuario debe leer y
comprender el manual del operador antes de
usar este producto.

ii
See this fold-out section for all of the figures
referenced in the operator’s manual.
Consulter l’encart à volets afin d’examiner toutes
les figures mentionnées dans le manuel d’utilisation.
Consulte esta sección desplegable para ver todas
las figuras a las que se hace referencia en el manual del operador.
FIG. 1
A - Carrying/lifting handle (poignée de transport/soulèvement, mango de
transporte/elevación)
B - LED headlights (phares DEL, luces delanteras LED)
C - Battery cover (couvercle des piles, tapa de las baterías)
D - Height adjustment lever (levier de réglage de la hauteur, palanca de
ajuste de altura)
E - Handle adjustment knob (bouton de réglage de la poignée, perilla de
ajuste del mango)
F - Lower handle (poignée inférieure, mango inferior)
E
G - Handle lock lever (levier de verrou de la poignée, palanca de seguro del
mango)
H - Upper handle (poignée supérieure, mango superior)
I - Handle lock (verrou de la poignée, seguro del mango)
J - Start button (bouton de démarrage, botón de arranque)
K - Grass catcher (collecteur d’herbe, receptor de hierba)
L - Start key (clé de démarrage, llave del arranque)
M
- Mulching plug (insert broyeur, tapón para trituración)
N - Self-propel levers (leviers de fonction automotrice, palancas
autopropulsadas)
A
N
I
D
B
C
G
G
J
H
F
K
M
L
E

iii
FIG. 2
FIG. 3
A - Handle adjustment knob (bouton de réglage de la poignée, perilla de
ajuste del mango)
B - Lower handle (poignée inférieure, mango inferior)
C - To unlock (pour déverrouiller, para desbloquear)
D - To lock (pour verrouiller, para asegurar)
D
C
B
A
FIG. 4
FIG. 5
A - Clips (attaches, clips)
E
A - Frame (support, armazón)
B - Bag (sac, bolsa)
C - Handle (poignée, mango)
D - Vinyl floor (plancher en vinyle, piso de vinilo)
E - Clip (attache, clip)
D
A
C
B
A
A
A
A
A - Upper handle (poignée supérieure, mango superior)
B - Handle lock lever (levier de verrou de la poignée, palanca de seguro del
mango)
C - Unlocked position (position déverrouillée, posición desbloqueada)
D - Locked position (position engagé, posición trabada)
D
C
B
B
A

iv
1
3
2
C
B
D
D
A
A - Rear discharge opening (ouverture d’éjection
arrière, abertura de descarga posterio)
B - Mulching plug (insert broyeur, tapón para
trituración)
C - Metal lock (verrou de métal, dispositivo de
seguridad de metal)
D - Slot (fente, ranura)
E - Handle (poignée, mango)
E
FIG. 11
A - Start key (clé de démarrage, llave del
arranque)
B - Battery cover (couvercle des piles, tapa de
las baterías)
C - Start key slot (fente de la clé de démarrage,
ranura de la llave del arranque)
A - Battery pack (bloc-piles, paquete de
baterías)
B - Battery cover (couvercle des piles, tapa de
las baterías)
C - Battery storage compartment (compartiment
de rangement de pile, compartimiento de
almacenamiento de la batería)
D - Latch (loquet, pestillo)
E - Battery port (logement de piles,
compartimiento de la batería)
FIG. 9
A - Height adjustment trigger (gâchette de
réglage de la hauteur, gatillo de ajuste de
altura)
B - Lowest blade setting (le plus bas réglage de
la lame, ajuste más bajo de la hoja)
C - Highest blade setting (le plus haut réglage
de la lame, ajustes de cuchilla más alto)
B
B
E
C
C
FIG. 7 FIG. 10
FIG. 12
D
C
B
A - Handle (poignée, mango)
B - Slot (fente, ranura)
C - Metal lock (verrou de métal, dispositivo de
seguridad de metal)
A
AA
FIG. 8
A
A - Grass catcher handle (poignée de collecteur
d’herbe, mango del receptor de hierba)
B - Rear discharge opening (ouverture d’éjection
latérale, abertura de descarga lateral)
B
A
B
A - Start button (bouton de démarrage, botón
de arranque)
B - Start levers (leviers de volet de départ,
palancas de arranque)
B
A
FIG. 6
C

v
15° MAXIMUM
15° MAXIMAL
15° MÁXIMA
FIG. 16
A - Blade (lame, hoja)
B - Wrench (clé, llave)
C - Block of wood (pièce de bois, bloque de
madera)
A
B
C
FIG. 15
FIG. 13
FIG. 14 FIG. 17
FIG. 19
FIG. 18
TO STORE THE MACHINE
IN THE HORIZONTAL POSITION
POUR REMISER L’ÉQUIPEMENT
EN POSITION HORIZONTALE
PARA GUARDAR LA MÁQUINA
EN POSICIÓN HORIZONTAL
TO STORE THE MACHINE
IN THE VERTICAL POSITION
POUR REMISER L’ÉQUIPEMENT
EN POSITION VERTICALE
PARA GUARDAR LA MÁQUINA
EN POSICIÓN VERTICALE
A - Shaft (arbre, eje)
B - Hub (moyeu, buje)
C - Blade post (round) [tiges pour lame (ronde),
montantes de cuchilla (redondo)]
D - Blade post (half circle) [tige pour lame (demi-
cercle), puerto de la hoja (semicircular)]
E - Blade (lame, hoja)
F - Bladehole(half circle)[trou pour lame (demi-
cercle), orificio de la hoja (semicircular)]
G - Blade hole (round) [trou pour lame (ronde),
orificio de la hoja (redondo)]
H - Blade insulator (isolant de lame, aislante de
hoja)
I - Spacer (entretoise, separador)
J - Blade nut (écrou de lame, tuerca de la hoja)
A
D
H
G
E
C
B
J
I
F
A - Handle lock (verrou de la poignée, seguro
del mango)
B - To lock (pour verrouiller, para asegurar)
C - To unlock (pour déverrouiller, para
desbloquear)
A
BC

2 – English
WARNING:
READ AND UNDERSTAND ALL INSTRUCTIONS.
Failure to follow all instructions listed below and on
themachinemayresultinelectricshock,fire,and/or
seriouspersonalinjury.
READ ALL INSTRUCTIONS
Thiscuttingmachineiscapableofamputatinghandsand
feetandthrowingobjects.Failuretoobserveallsafety
instructionscouldresultinseriousinjuryordeath.
Avoid dangerous environment – Do not use the lawn
mowerindamporwetconditionsoroperateintherain.
Keepchildrenaway–Keepallbystanders,children,and
petsatleast100ft.away.Stopmachineifanyoneenters
thearea.
Tragicaccidentscanoccuriftheoperatorisnotalertto
thepresenceofchildren.Childrenareoftenattractedto
themachineandthemowingactivity.Neverassumethat
childrenwillremainwhereyoulastsawthem.
• Keepchildrenoutofthemowingareaandunderthe
watchful care of a responsible adult other than the
operator.
• Bealertandturnmoweroffifachildentersthearea.
• Neverallowchildrentooperatethemachine.
• Useextracarewhenapproachingblindcorners,shrubs,
trees,orotherobjectsthatmayblockyourviewofa
child.
Dressproperly–Wearheavy,longpants,longsleeves,
gloves, and protectivefootwear that will protect your
feetandimproveyourfootingonslipperysurfaces.Do
notwearloosefittingclothing,shortpants,sandals,or
gobarefoot.Donotwearjewelryofanykind.Theycan
becaughtinmovingparts.
Don’toverreach–Keepproperfootingandbalanceatall
times.Overreachingcanresultinlossofbalance.
Donotleavethemowerunattendedwhilerunningorwith
thestartkeyinstalled.
Keephandsandfeetawayfromcuttingarea.Keepclear
ofthedischargeopeningatalltimes.
Operatethelawnmoweronlyindaylightorgoodartificial
light.
Usesafety glasses –Alwayswear eye protection with
sideshieldsmarkedtocomplywithANSIZ87.1. Use face
maskifoperationisdusty.
Usetherightappliance–Donotusethelawnmowerfor
anyjobexceptthatforwhichitisintended.
Donotforcethelawnmower–Itwilldothejobbetter
andsaferattherateforwhichitwasdesigned.
Donotchargelawnmowerinrain,orinwetlocations.
Stayalert–Watchwhatyouaredoingandusecommon
sensewhenoperatingthelawnmower.Donotoperate
themowerwhiletired,upset,orundertheinfluenceof
drugs,alcohol,ormedication.Amomentofinattention
while operating the lawn mower may result in serious
personalinjury.
Maintainlawnmowerwithcare–Keepmachineingood
workingcondition.Keepbladessharpandguardsinplace
andinworkingorder.Replacedamagedorunevenlyworn
bladesbeforeusingmowerforbestperformance.
Checkallnuts, bolts, and screwsatfrequentintervals
for proper tightness to be sure the equipment is in
safeworkingcondition.Mowerbladesaresharp.Wrap
thebladeor weargloves,anduseextracautionwhen
servicingthem.
Do not dispose of the battery in a fire. The cell may
explode. Check with local codes for possible special
disposalinstructions.
Stopthemotor,waituntilthebladecomestoacomplete
stop,andremovethestartkeyandbatterypackbefore
performinganymaintenance,cleaningthelawnmower,
removingthegrasscatcher,or removingthemulching
plug.
Never use a hose, water, or any liquids to clean or
rinse off the lawn mower. Corrosive liquids, water,
fertilizers,andchemicalsusedtotreatlawnscanenter
thelawnmowerand/orbatterycompartmentanddamage
electroniccomponentsand/orthebatterypack, which
can result in a short circuit, increased risk of fire, and
serious personal injury. Remove any buildup of grass
and leaves on or around the mower housing and/or
underneaththemowerdeck.Wipethemowercleanwith
adryclothoccasionally.
Replace blade if it is bent or cracked. An unbalanced
blade causes vibration that could damage the motor
driveunitorcausepersonalinjury.Sharpenadullblade
equallyateachendtomaintainthebalance.Cleanthe
bladethoroughlyandcheckitsbalancebysupportingit
horizontallyonathinnailthroughitscenterhole.Thenail
shouldbeinahorizontalposition.Ifeitherendoftheblade
rotatesdownward,removesomemetalfromtheheavy
IMPORTANT SAFETY INSTRUCTIONS

3 – English
IMPORTANT SAFETY INSTRUCTIONS
oflowerenduntilthebladeisbalanced.Itisbalanced
whenneitherenddrops.
Alwaysusesafetyprotectivedevices.Donotoperatethe
mowerwithoutthegrasscatcher,mulchingplug,orrear
dischargechuteinplaceandworkingproperly.
Donotopenormutilatethebattery.Releasedelectrolyte
iscorrosiveandmaycausedamagetotheeyesorskin.
Itmaybetoxicifswallowed.
Follow manufacturer’s instructions for proper operation
and installation of accessories. Only use accessories
approvedbythemanufacturer.
Exercisecareinhandlingbatteriesinordernottoshortthe
batterywithconductingmaterialssuchasrings,bracelets,
andkeys.Thebatteryorconductormayoverheatand
causeburns.
Cleartheworkareabeforeeachuse.Removeallobjects
suchasrocks,treenuts,sticks,metal,wire,bones,toys,
orotherobjectswhichcanbethrownbytheblade.Stay
behindthehandlewhenthemotorisrunning.
Preventunintentionalstarting.Ensuretheswitchisinthe
off-positionbeforeconnectingtobatterypack,picking
uporcarryingtheappliance.Carryingtheappliancewith
yourfingerontheswitchorenergizingappliancethathave
theswitchoninvitesaccidents.
When battery pack is not in use, keep it away from
othermetalobjects,likepaperclips,coins,keys,nails,
screws or other small metal objects, that can make a
connection from one terminal to another. Shorting the
batteryterminalstogethermaycauseburnsorafire.
Under abusive conditions, liquid may be ejected from
thebattery;avoidcontact.Ifcontactaccidentallyoccurs,
flushwithwater.Ifliquidcontactseyes,additionallyseek
medicalhelp.Liquidejectedfromthebatterymaycause
irritationorburns.
Donotuseabatterypackorappliancethatisdamaged
ormodified.Damagedormodifiedbatteriesmayexhibit
unpredictablebehaviorresultinginfire,explosionorrisk
ofinjury.
Do not expose a battery pack or appliance to fire or
excessivetemperature.Exposuretofireortemperature
above265°Fmaycauseexplosion.
Followallcharginginstructionsanddonot chargethe
battery pack or appliance outside of the temperature
rangespecifiedintheinstructions.Chargingimproperly
orattemperaturesoutsideofthe specified rangemay
damagethebatteryandincreasetheriskoffire.
Donotmodifyorattempttorepairtheapplianceorthe
batterypack(asapplicable)exceptasindicatedinthe
instructionsforuseandcare.
Avoidholes,ruts,bumps,rocks,propertystakes,orother
hiddenobjects.Uneventerraincouldcauseaslipandfall
accident.
Donotmowneardrop-offs,ditches,orembankments.
Mow across the face of slopes, never up and down.
Exercise extreme caution when changing direction on
slopes.
Planyourmowingpatterntoavoiddischargeofmaterial
towardroads,sidewalks,bystandersandthelike.Also,
avoiddischargingmaterialagainstawallorobstruction,
whichmaycausethematerialtoricochetbacktoward
theoperator.
Donotmowonwetgrassorexcessivelysteepslopes.
Poorfootingcouldcauseaslipandfallaccident.Walk,
neverrun.
Useextracarewhenapproachingblindcorners,shrubs,
trees,orotherobjectsthatmayblockyourview.
Do not pull the mower backward unless absolutely
necessary. If you must back the mower away from a
wallorobstruction,firstlookdownandbehindtoavoid
trippingorpullingthemoweroveryourfeet.
Neverdirectdischargedmaterialtowardanyone.Avoid
dischargingmaterialagainstawallorobstruction.Material
mayricochetbacktowardtheoperator.Stoptheblade
whencrossinggravelsurfaces.
Objectsstruckbythelawnmowerbladecancausesevere
injuriestopersons.Thelawnshouldalwaysbecarefully
examinedandclearedofallobjectspriortoeachmowing.
Ifthelawnmowerstrikesaforeignobject,followthese
steps:
• Stopthelawn mowerbyreleasingthebladecontrol
lever,waituntilthebladecomestoacompletestop,
andthenremovestartkey.
• Thoroughlyinspectthemowerforanydamage.
• Replacethebladeifitisdamagedinanyway.Repair
anydamagebeforerestartingandcontinuingtooperate
themower.
Stopthemotor,waituntilthebladecomestoacomplete
stop,andremovestartkeybeforeuncloggingthechute.
Thecuttingbladecontinuestorotateforafewseconds
afterthemotorisshutoff.Neverplaceanypartofthe
bodyinthebladeareauntilyouaresurethebladehas
stoppedrotating.

4 – English
IMPORTANT SAFETY INSTRUCTIONS
Ifthemowershouldstarttovibrateabnormally,stopthe
motor,removethestartkey,andcheckimmediatelyfor
the cause. Replace the blade if it is unevenly worn or
damagedinanyway.Vibrationisgenerallyawarningof
trouble.
Serviceontheproductmustbeperformedbyqualified
repairpersonnelonly.Serviceormaintenanceperformed
byunqualifiedpersonnelcouldresultininjurytotheuser
ordamagetotheproduct.
Thegrasscatcherassemblyissubjecttodeterioration
andwearandshouldbecheckedeachtimethemoweris
used.Ifreplacementisneeded,makesurethenewgrass
catchermeetsoriginalmanufacturer’srecommendations
andspecifications.
Useonlyauthorizedreplacementparts whenservicing
theproduct.Useidenticalreplacementbladesonly.Use
ofunauthorizedpartsmaycreateariskofseriousinjury
totheuser,ordamagetotheproduct.
Maintain or replace safety instructions labels, as
necessary.
Disconnect battery and remove start key. Disconnect
batterypackandremovestartkeyfromthe appliance
beforestoring,servicing,orchangingaccessoriessuch
asblades.Suchpreventivesafetymeasuresreducethe
riskofstartingthetoolaccidentally.
Stoptheunitanddisconnectbatterypackandstartkey
whennotinuse.Carryorpushtheunitwiththemotor
stoppedandthestartkeyremovedfromthemower.
Batterytoolsdonothavetobepluggedintoanelectrical
outlet;therefore,theyarealwaysinoperatingcondition.
Beawareofpossiblehazardswhennotusingyourbattery
toolorwhenchangingaccessories.Followingthisrulewill
reducetheriskofelectricshock,fire,orseriouspersonal
injury.
Donotusebattery-operatedapplianceinrain.
Removeordisconnectbatterybeforeservicing,cleaning
orremovingmaterialfromthegardeningappliance.
Usethisproductonlywithbatteriesandchargerslistedin
tool/appliance/batterypack/chargercorrelationsupple-
ment985000885.
Storeidlelawnmowerindoors–Whennotinuse,mower
shouldbestoredindoorsinadry,lockedplaceoutofthe
reachofchildren.Thestartkeyandbatterypacksshould
alsoberemovedandstoredinaseparatelocationoutof
thereachofchildren.
Follow instructions for lubricating and changing
accessories.
Onlyallowresponsibleadults,whoarefamiliarwiththe
instructions,tooperatethismachine.
Neveroperatemachineinaclosedarea.
Nevertamperwithsafetydevices.Checkforproperop-
erationregularly.
Savetheseinstructions.Refertothemfrequentlyanduse
themtoinstructotherswhomayusethisproduct.Ifyou
loansomeonethistool,loanthemtheseinstructionsalso.

5 – English
SYMBOLS
The following signal words and meanings are intended to explain the levels of risk associated with this product.
SYMBOL SIGNAL MEANING
DANGER: Indicatesahazardoussituation,which,ifnotavoided,willresultindeathorseriousinjury.
WARNING: Indicatesahazardoussituation,which,ifnotavoided,couldresultindeathorserious
injury.
CAUTION: Indicatesahazardoussituation,that,ifnotavoided,mayresultinminorormoderate
injury.
NOTICE: (Without Safety Alert Symbol) Indicates information considered important, but not
relatedtoapotentialinjury(e.g.messagesrelatingtopropertydamage).
Some of the following symbols may be used on this product. Please study them and learn their meaning. Proper
interpretation of these symbols will allow you to operate the product better and safer.
SYMBOL NAME DESIGNATION/EXPLANATION
Safety Alert Indicatesapotentialpersonalinjuryhazard.
Read Operator’s Manual Toreducetheriskofinjury,usermustreadandunderstandoperator’s
manualbeforeusingthisproduct.
Eye Protection Alwaysweareyeprotectionwithsideshieldsmarkedtocomplywith
ANSIZ87.1.
Wet Conditions Alert
Riskoffireandburns.Donotexposebattery,batterycompartment,
orelectroniccomponentstorain,water,orliquids.Closecoverduring
use.Donotoperateonwetground.
Electric Shock Failure to use in dry conditions and to observe safe practices can
resultinelectricshock.
Keep Hands and Feet
Away Keephandsandfeetawayfrombladeandcuttingarea.
No Reach Donotreachhandsorfeetundermowerdeck.
No Slope Donotoperateoninclinesgreaterthan15º.Mowacrossthefaceof
slopes,neverupanddown.
Keep Children and
Bystanders Away Keepallchildrenandbystandersatleast100ft.away.
Ricochet Thrownobjectscanricochetandresultinpersonalinjuryorproperty
damage.

6 – English
SYMBOLS
PRODUCT SPECIFICATIONS
Motor......................................................................................................................................................................40VoltDC
DeckSize....................................................................................................................................................................... 21in.
HeightAdjustments.............................................................................................................................................. 1in.to4in.
WheelSize..............................................................................................................................................8in.front,10in.rear
FEATURES
KNOW YOUR LAWN MOWER
See Figure 1.
Thesafeuseofthisproductrequiresanunderstandingofthe
informationontheproductandinthisoperator’smanualas
wellasaknowledgeoftheprojectyouareattempting.Before
use of this product, familiarize yourself with all operating
featuresandsafetyrules.
BATTERY COVER
Thebatterycoverprotectsthebatteryportfrommoisture
anddebris.
BATTERY STORAGE COMPARTMENT
Thebatterystoragecompartmentoffersaconvenientplace
forstoringyourbatteryortostoreanextrabatterypack.
GRASS CATCHER
The grass catcher collects grass clippings and prevents
themfrombeingdischargedacrossyourlawnasyoumow.
NOTE: Mower will not start without the grass catcher or
mulchplugattached.
HEIGHT ADJUSTMENT TRIGGER
The height adjustment trigger provides cutting height
adjustments.
LED HEADLIGHTS
LED headlights are located on the front of the unit to
illuminateyourpathinlowlightconditions.Thelightswill
operatecontinuouslywheneverthemotorisrunning.
NOTE:Ifthethestartbuttonispressedorthestartlevers
inside the upper handle are squeezed and released, the
headlightswillilluminateforsixtyseconds.
MULCHING PLUG
Yourmowerisequippedwithamulchingplugthatcovers
thereardischargeopening,whichallowsthemowerblade
tocutandrecutforfinerclippings.
NOTE: Mower will not start without the grass catcher or
mulchplugattached.
Some of the following symbols may be used on this product. Please study them and learn their meaning. Proper
interpretation of these symbols will allow you to operate the product better and safer.
SYMBOL NAME DESIGNATION/EXPLANATION
Recycle Symbol
Thisproductuseslithium-ion(Li-ion)batteries.Local,state,orfederal
lawsmayprohibitdisposalofbatteriesinordinarytrash.Consult your
localwasteauthorityforinformationregardingavailablerecyclingand/
ordisposaloptions.
Direct Current Type or a characteristic of current
VVolts Voltage
AAmperes Current
Hz Hertz Frequency(cyclespersecond)
WWatt Power
hrs Hours Time

7 – English
UNPACKING
Thisproductrequiresassembly.
n Carefullyremovetheproductandanyaccessoriesfrom
thebox.MakesurethatallitemslistedinthePacking
List areincluded.
WARNING:
Donotusethisproductif any parts onthePacking
Listarealreadyassembledtoyourproductwhenyou
unpackit.Partsonthislistarenotassembledtothe
productbythemanufacturerandrequirecustomerin-
stallation.Useofaproductthatmayhavebeenimprop-
erlyassembledcouldresultinseriouspersonalinjury.
n Inspecttheproductcarefullytomakesurenobreakage
ordamageoccurredduringshipping.
n Donotdiscardthepackingmaterialuntilyouhavecare-
fullyinspectedandsatisfactorilyoperatedtheproduct.
n If any parts are damaged or missing, please call
1-800-776-5191forassistance.
PACKING LIST
LawnMower
Start Key
GrassCatcherBagandFrame
MulchingPlug
Operator’sManual
WARNING:
Ifanypartsaredamagedormissing,donotoperate
this product until the parts are replaced. Use of this
productwithdamagedormissingpartscouldresultin
seriouspersonalinjury.
WARNING:
Do not attempt to modify this product or create ac-
cessoriesnotrecommendedforusewiththisproduct.
Anysuchalterationormodificationismisuseandcould
resultinahazardousconditionleadingtopossibleseri-
ouspersonalinjury.
WARNING:
Donotinsertstartkeyorbatterypackuntilassemblyis
completeandyouarereadytomow.Failuretocomply
couldresultinaccidentalstartingandpossibleserious
personalinjury.
WARNING:
To prevent accidental starting, do not make any ad-
justmentsorinstallationswiththestartkeyorbattery
packinserted.Accidentalstartingofthemowerduring
assemblycouldresultinseriouspersonalinjury.
WARNING:
Never operate the mower without the proper safety
devicesinplaceandworking.Neveroperatethemower
with damaged safety devices. Operating the mower
with missing or damaged parts can result in serious
personalinjury.
FEATURES
SELF-PROPELLED FEATURE
The adaptive self-propelled feature of your mower
automaticallyslowsorincreasesthespeedofyourmower
basedonyourpace.
NOTE: Theself-propelledfeaturewillonlyworkintheforward
direction.Itwillnotworkifyoupullthemowertowardsyou.
START BUTTON AND START LEVERS
Thestartbuttonandthestartleversinsidetheupperhandle
areusedtostarttheblades.Squeezethestartleversthen
depressthestartbuttontostarttheblades.Releasethestart
leverstostopthemotor.
NOTE:Thebladeswillalsostartifthestartbuttonispressed
firstandtheleversaresqueezedafter.
START KEY
Thestartkeymustbe inserted beforethemowercan be
started.
TILT SENSOR
Thesensorpreventstheunitfromstartingifitisinavertical
positionortiltedatananglegreaterthan45º.
ASSEMBLY

8 – English
ASSEMBLY
UNFOLDING AND ADJUSTING THE HANDLE
ASSEMBLY
See Figure 2.
NOTICE:
Donotallowthestartercabletobecomepinchedor
trappedwhenraisingthehandle.
To raise the handle assembly:
Pullthehandleadjustmentknobsoutandrotate90de-
grees.
Raisethehandleassembly.Avoidpinchingortrapping
anycables.
NOTE: There are two stop positions for a higher and
loweradjustmentofthehandle.Thisallowsforamore
comfortableoperatingposition.
Rotatetheknob90degreesagaintosecurehandlein
place.
EXTENDING THE UPPER HANDLE
See Figure 3.
Movebothhandlelockleverstotheunlockedposition.
Fullyextendtheupperhandle.
Movebothhandlelockleverstothelockedpositionto
securetheupperhandleinplace.
Toretracttheupperhandle,movebothhandlelocklevers
totheunlockedpositionandpushtheupperhandleinto
thelowerhandle.Movebothhandlelockleverstothe
lockedpositiontosecure.
ASSEMBLING THE GRASS CATCHER
See Figures 4 - 5.
Placethegrasscatcherframeonaflatsurfacewiththe
handlefacingdown.
Orientthegrasscatcherbagsothevinylfloorisfacingup,
thenslidethebagontotheframe.Wheninstalling,allow
theframehandletoremainoutsidethebagandmake
surethebagseamsarelocatedattheframeedges.
Pulltheclipovertheframerailtosecureinplace.
Liftthebag’svinylfloortothetopoftheframerailand
secureinplace.
Usingthesamemethod,attachtheremainingclipson
eachsideofthebagtotheframerailtosecure.
INSTALLING THE GRASS CATCHER (FOR
REAR BAGGING OPERATION)
See Figures 6 - 7.
NOTE: When using the grass catcher, do not install the
mulchingplug.
Removethestartkeyandbatterypack.
Placethegrasscatcherontothemowersotheopening
onthegrasscatchercoversthereardischargeopening
andthegrasscatcher’smetallocksareinsidetheslots
onthemowerhousing.
Gentlypush down onthegrass catcher to ensurethe
metallocksarefullyseatedintheslots.Themowerwill
notstartifthemetallocksarenotfullyseated.
Reinstall the start key and battery pack when you are
readytomow.
INSTALLING THE MULCHING PLUG
(FOR MULCHING OPERATION)
See Figure 8.
NOTE: When using the mulching plug, do not install the
grasscatcher.
Removethestartkeyandbatterypack.
Raisethemetallockonthemulchingplug.
Insertthemulchingplugintothemower’sreardischarge
openingandlowerthemulchingplug’smetallockinto
theslotontherightsideofthemowerhousing.
Gentlypushdownonthemetallocktoensureitisfully
seatedintheslot.Themowerwillnotstartifthemetal
lockisnotfullyseated.
Reinstall the start key and battery pack when you are
readytomow.
SETTING THE BLADE HEIGHT
See Figure 9.
Whenshipped,thebladeonthemowerissettoalow-cutting
position.Beforeusingthemowerforthefirsttime,raisethe
cuttingpositiontotheheightbestsuitedforyourlawn.The
averagelawnshouldbebetween1-1/2in.to2in.duringcool
monthsandbetween2in.and3-1/4in.duringhotmonths.
To adjust the blade height:
Removethestartkeyandbatterypack.
Toraisethebladeheight,squeezetheheightadjustment
triggerandliftthemowerdeckup.
NOTE:Usethescaleontopofthemowerdecktoselect
theappropriatebladeheight.
Tolowerthebladeheight,squeezetheheightadjustment
triggerandpushthemowerdeckdown.
Reinstall the start key and battery pack when you are
readytomow.

9 – English
WARNING:
Donotallowfamiliaritywithproductstomakeyoucare-
less.Rememberthatacarelessfractionofasecondis
sufficienttoinflictseriousinjury.
WARNING:
Alwaysweareyeprotectionwithsideshieldsmarkedto
complywithANSIZ87.1.Failuretodosocouldresult
in objects being thrown into your eyes resulting in pos-
sibleseriousinjury.
WARNING:
Do not use any attachments or accessories not recom-
mendedbythemanufacturerofthisproduct.Theuse
ofattachmentsoraccessoriesnotrecommendedcan
resultinseriouspersonalinjury.
WARNING:
Alwaysinspectmowerformissingordamagedparts
andbladefordamage,uneven,orexcessivewearprior
touse.Useofthemowerwithdamagedormissingparts
canresultinseriouspersonalinjury.
WARNING:
Alwaysremovebatterypacksandstartkeyfromyour
tool when you are assembling parts, making adjust-
ments,cleaning,orwhennotinuse.Followingthese
instructionswillpreventaccidentalstartingthatcould
causeseriouspersonalinjury.
NOTICE:
Beforeeachuse,inspecttheentireproductfordam-
aged, missing, or loose parts such as screws, nuts,
bolts,caps,etc.Tightensecurelyallfastenersandcaps
and do not operate this product until all missing or
damagedpartsarereplaced.Pleasecontactcustomer
serviceoranauthorizedservicecenterforassistance.
APPLICATIONS
Youmayusethisproductforthepurposelistedbelow:
Mowing your lawn
WARNING:
Withtheexceptionofusingtheself-propelledfeatureto
relocatethemowertothemowingsite,alwaysremove
batterypacksandstartkeywhenmovingortransport-
ingthemowertoavoidaccidentalstartingthatcould
resultinseriouspersonalinjury.
INSTALLING/REMOVING THE BATTERY PACK
See Figure 10.
Raisethebatterycover.
Align raised ribs on battery pack with grooves in the
batteryportandinstallthebatterypackintothemower.
WARNING:
Makesurethelatchonthebottomofthebatterypack
snapsinplaceandthebatterypackisfullyseatedand
secure in the mower’s battery port before beginning
operation. Failure to securely seat the battery pack
could cause the battery pack to fall out, resulting in
seriouspersonalinjury.
Lowerthebatterycover.
To remove the battery pack:
Raisethebatterycover.
Pressandholdthebatterylatchbuttonatthebottomof
thebatterypack.
Removethebatterypackfromthemower.
Lowerthebatterycover.
Forcompletecharginginstructions,seetheoperator’smanu-
alsforyourbatterypackandcharger.
WARNING:
Toavoidaccidentalstartingthatcouldresultinserious
personalinjury,alwaysremovethestartkeywhenmov-
ingortransportingthemower.
NOTE: Thebatterystoragecompartmentoffersaconvenient
placeforstoringyourbattery,ortostoreanextrabattery
pack.Theunitcannotbepoweredbythebatterywhileit
isinstalledinthebatterystoragecompartment;itmustbe
movedtothebatteryportinordertopowertheunitfrom
thebatteryport.
OPERATION

10 – English
STARTING/STOPPING THE MOWER
See Figures 11 - 12.
NOTE: Mower will not start without the grass catcher or
mulchplugattached.
Unfoldthehandleassemblyandextendtheupperhandle
asdescribedearlier.
NOTE: Themowerwillnotstartifthehandleassembly
isnotintheoperatingposition.
Raisethebatterycover.
Installthebatterypackintothebatteryport.
Insertthestartkeyintotheslotbesidethebatterystorage
compartment.
Lowerthebatterycover.
Squeezeandholdthestartleversinsidetheupperhandle.
Pressandreleasethestartbuttontostarttheblades.
NOTE: The blades will also start if the start button is
pressedfirstandtheleversaresqueezedafter.
Tostopthemower,releasethestartlevers.
NOTE:Thebladeisdisengagedeachtimethestartlevers
arereleased.
SELF-PROPELLED MOWING
See Figures 12 - 13.
WARNING:
Neverengagethebladeswhentransportingthemower
fromonelocationtoanother.Onlyengagethebladesby
pressingthestartbuttonwhenyouarereadytomow.
Failure to follow these instructions can result in serious
personalinjury.
Movethehandlelocktotheunlockedposition.
NOTE:Theself-propelledfeaturewillnotengageunless
thehandlelockisintheunlockedposition.Tooperate
themowermanually,movethehandlelocktothelocked
position,startthemower,andpushthemowerforward.
Squeezeandholdthestartleversinsidetheupperhandle.
Pressandreleasethestartbuttontostarttheblades.
Once the mower has been started, the self-propelled
featureisengagedbypushingtheupperhandleforward.
NOTE:Theself-propelledfeaturecanbeusedwithout
engagingthebladetopowerthemowerfromoneloca-
tiontoanother.Youmustmovethehandlelocktothe
unlocked position, squeeze and hold the start levers
insidetheupperhandle,andthenpushtheupperhandle
forward.Ifthemowerispoweredandthebladeisalready
engaged, completely release the start levers and then
squeezeandholdthestartleversagain.
OPERATION
MOWING TIPS
WARNING:
Donotmowonwetgrass,whichcancauseyoutoslip
andfallandresultinpossibleseriouspersonalinjury.
Makesurethelawnisclearofstones,treenuts,sticks,
wires, and other objects that could damage the lawn
mowerbladesormotor.Donotmowoverpropertystakes
or other metal posts. Such objects could damage the
bladeorbeaccidentallythrownbythemowerinanydi-
rectionandcauseseriouspersonalinjurytotheoperator
andothers.
Forahealthylawn,alwayscutoffone-thirdorlessofthe
totallengthofthegrass.
Whencuttingheavygrass,reducewalkingspeedtoallow
formoreeffectivecuttingandaproperdischargeofthe
clippings.
Donotcutwetgrass.Itwillsticktotheundersideofthe
deckandpreventproperbaggingormulchingofgrass
clippings.
Neworthickgrassmayrequireanarrowercutorahigher
cuttingheight.
Cleantheundersideofthemowerdeckaftereachuse
to remove grass clippings, leaves, dirt, and any other
accumulateddebris.
NOTE:Alwaysstopthemower,allowthebladestocom-
pletelystop,removethestartkeyandremovethebattery
packfromthebatteryportbeforecleaningunderneath
themower.
SLOPE OPERATION
See Figure 14.
WARNING:
Slopes are a major factor related to slip and fall ac-
cidentsthatcanresultinsevereinjury. Operation on
slopesrequiresextracaution.Ifyoufeeluneasyona
slope,donotmowit.Foryoursafety,donotattempt
tomowslopesgreaterthan15degrees.
Mowacrossthefaceofslopes,notupanddown.Exercise
extremecautionwhenchangingdirectiononslopes.
Watchforholes,ruts,rocks,hiddenobjects,orbumps
whichcancauseyoutosliportrip.Tallgrasscanhide
obstacles.Removeallobjectssuchasrocks,treelimbs,
etc.,whichcouldbetrippedoverorthrownbytheblade.
Alwaysbesureofyourfooting.Aslipandfallcancause
serious personal injury. If you feel you are losing your
balance,releasethestartleversimmediately.
Donotmowneardrop-offs,ditches,orembankments;
youcouldloseyourfootingorbalance.

11 – English
WARNING:
Before performing any maintenance or cleaning the
lawnmower,makesurethemowerbladescometoa
completestopandthebatteriesandstartkeyarere-
movedtoavoidaccidentalstartingandpossibleserious
personalinjury.
WARNING:
Alwaysweareyeprotectionwithsideshieldsmarkedto
complywithANSIZ87.1.Failuretodosocouldresult
in objects being thrown into your eyes resulting in pos-
sibleseriousinjury.
WARNING:
Whenservicing,useonlyauthorizedreplacementparts.
Useofanyotherpartscancreateahazardorcause
productdamage.
WARNING:
Never use a hose, water, or any liquids to clean or
rinse off the lawn mower.Corrosiveliquids,water,fer-
tilizers,andchemicalsusedtotreatlawnscanenterthe
lawnmowerand/orbatterycompartmentanddamage
electroniccomponentsand/orthebatterypack,which
canresultinashortcircuit,increasedriskoffire,and
seriouspersonalinjury.Removeanybuildupofgrass
and leaves on or around the mower housing and/or
underneath the mower deck. Wipe the mower clean
withadryclothoccasionally.
OPERATION
MAINTENANCE
NOTICE:
Periodically inspect the entire product for damaged,
missing, or loose parts such as screws, nuts, bolts,
caps,etc.Tightensecurelyallfastenersandcapsand
donotoperatethisproductuntilallmissingordamaged
partsarereplaced.Pleasecontactcustomerserviceor
anauthorizedservicecenterforassistance.
GENERAL MAINTENANCE
Avoid using solvents when cleaning plastic parts. Most
plasticsaresusceptibletodamagefromvarioustypesof
commercialsolventsandmaybedamagedbytheiruse.Use
cleanclothstoremovedirt,dust,oil,grease,etc.
WARNING:
Donotatanytimeletbrakefluids,gasoline,petroleum-
basedproducts,penetratingoils,etc.,comeincontact
with plastic parts. Chemicals can damage, weaken,
ordestroyplasticwhichcanresultinseriouspersonal
injury.
LUBRICATION
Allofthebearingsinthisproductarelubricatedwithasuf-
ficientamountofhighgradelubricantforthelifeoftheunit
under normal operating conditions. Therefore, no further
bearinglubricationisrequired.
WARNING:
Alwaysprotecthandsbywearingheavyglovesand/or
wrappingthecuttingedgesofthebladewithragsand
other material when performing blade maintenance.
Contactwiththebladecouldresultinseriouspersonal
injury.
EMPTYING THE GRASS CATCHER
See Figure 15.
Stopthemowerandallowthebladestocompletelystop.
Openthebatterycover.
Removethestartkeyandbatterypackfromthebattery
port.
Liftthegrasscatcherbyitshandletoremovefrommower.
Emptygrassclippings.
Reinstall the grass catcher as described earlier in this
manual.
Reinstall the start key and battery pack when you are
readytomow.

12 – English
MAINTENANCE
REPLACING THE CUTTING BLADE
See Figures 16 - 17.
NOTE: Onlyuseauthorizedreplacementblades.
Stopthemotorandremovethestartkey.Allowtheblade
tocometoacompletestop.
Removethebatterypackfromthebatteryport.
Turnthemoweronitsside.
Wedgeablockofwoodbetweenthebladeandmower
decktopreventthebladefromturning.
Loosenthebladenutbyturningitcounterclockwise(as
viewedfrombottomofmower)usinga15mmwrenchor
socket(notprovided).
Removethebladenut,spacer,bladeinsulator,andblade.
Do not removethehubortheadaptor.
WARNING:
Ifthehuband/ortheadaptorhavebeenremoved,re-
placethembeforeplacingbladeontheshaft.Failure
todosocouldcausethebladetodetachorbecome
unbalancedsincebladewillnottightenproperly,which
canresultinseriouspersonalinjury.
Placethenewbladeontheshaftagainstthebladeposts
onthehub.Ensurebladeisproperlyseatedwithshaftgo-
ingthroughcenterbladeholeandthetwobladepostson
thehubinsertedintotheirrespectiveholesontheblade.
Makesureitisinstalledwiththecurvedendspointingup
towardthemowerdeckandnotdowntowardtheground.
Whenseatedproperly,thebladeshouldbeflat.
Replacethebladeinsulatorandspacer,thenthreadthe
bladenutontheshaftandfingertighten.
NOTE:Makecertainallpartsarereplacedintheexact
orderinwhichtheywereremoved.
Torque the blade nut down clockwise using a torque
wrench (notprovided) to ensure the bolt is properly
tightened.Therecommendedtorqueforthebladenutis
310–360in.lbs.
WARNING:
Ensurebladeisproperlyseatedandthebladenutis
tightenedtothetorquespecificationsabove.Failureto
properlyattachthebladecouldcauseittocomeloose
andresultinpossibleseriouspersonalinjury.
STORING THE MOWER
See Figures 18 - 20.
WARNING:
Removeallbatterypacksfromthebatteryportandbat-
terystoragecompartmentandstartkeyandstoreina
securelocationoutofthereachofchildrentoprevent
unauthorizeduseofthelawnmowerandpossibleseri-
ouspersonalinjury.
Beforestorage,wipeanydirtordebrisfromthebattery
area.
Turnmoweronitssideandcleangrassclippingsthat
haveaccumulatedontheundersideofthemowerdeck.
Wipethemowercleanwithadrycloth.
Checkallnuts,bolts,knobs,screws,fasteners,etc.,for
tightness.
Inspectmovingpartsfordamage,breakage,andwear.
Haverepairsmade on any damaged or missingparts.
Checkbladefordamage,uneven,orexcessivewearand
replacebladeiftheseconditionsexist.
Storemowerindoorsinaclean,dryplaceoutofthereach
ofchildren.
• To store the mower in a horizontal position, lower
thehandleassembly.Avoidpinchingortrappingany
cables.
• Tostorethemowerinaverticalposition,removethe
grass bag, then lower the handle assembly. Avoid
pinchingortrappinganycables.Raisethemower90°
torestonitsrearsupport.
NOTE:Makesurethepinsonthehandleadjustment
knobsarefullylockedbeforeattemptingtoraisethe
mowertothestandingposition.
NOTICE:
Donotallowthestartercabletobecomepinchedor
trappedwhenloweringthehandle.
Donotstorenearcorrosivematerialssuchasfertilizeror
rocksalt.

13 – English
TROUBLESHOOTING
IF THESE SOLUTIONS DO NOT SOLVE THE PROBLEM CONTACT YOUR AUTHORIZED SERVICE DEALER.
PROBLEM POSSIBLE CAUSE SOLUTION
Handlenotinposition. Handle adjustment knobs and/or
handlelockleversarenotsecured.
Makesurehandleadjustmentknobsare
fully seated and handle lock levers are
fullylocked.
Mowernotstarting. Batteryislowincharge.
Startkeynotinstalled.
Handleassemblyisnotinoperating
position.
Mowerisinaverticalpositionortilted
atananglegreaterthan45º.
Themetallock(s)onthegrasscatcher
ormulchingplugisnotfullyseated
intheslot(s)onthemowerhousing.
Chargethebattery.
Installstartkey.
Makesurethehandleassemblyisinthe
operatingposition.
Placethemowerinahorizontalposition.
Gentlypushdownonthemetallock(s)to
ensureitisfullyseatedintheslot(s).
Mowercuttinggrassunevenly. Lawnisroughorcuttingheightnot
setproperly.
Adjustthecuttingheight.
Mowernotmulchingproperly. Wet grass clippings sticking to the
undersideofthedeck.
Waituntilthegrassdriesbeforemowing.
Mowerhardtopush. High grass, rear of mower housing
andbladedragging inheavygrass,
orcuttingheighttoolow.
Raisecuttingheight.
Mowernotbaggingproperly. Cuttingheightsettoolow. Raisecuttingheight.
Mowervibratingathigherspeed. Bladeisunbalanced,excessivelyor
unevenlyworn.
Bentmotorshaft.
Replacetheblade.
Stopthemotor,removestartkeyandbat-
tery.Inspectfordamage.Haverepaired
by an authorized service center before
restarting.
Motorstopswhilecutting. Cuttingheightsettoolow. Raisethecuttingheight.

2 – Français
AVERTISSEMENT :
LISEZ ET VEILLEZ À COMPRENDRE TOUTES LES
INSTRUCTIONS. Le non respect des instructions
énumérées ci-dessous et sur la machine pourrait résulter
en un choc électrique, un incendie, et/ou des blessures
sérieuses.
LIRE TOUTES LES INSTRUCTIONS
Cet outil coupant est capable d’amputer des mains et des
pieds et projeter des objets. Le non respect de toutes les
instructions de sécurité pourrait résulter en des blessures
graves ou la mort.
Éviter les environnements dangereux – N’utilisez pas la
tondeuse dans un environnement mouillé ou humide et ne
l’utilisez pas durant la pluie.
Garder les enfants à l’écart – Garder les badauds, enfants et
animaux domestiques à une distance minimum de 30,5 m
(100 pi). Arrêter la machine si quelqu’un entre dans la zone.
Des accidents tragiques peuvent survenir si l’opérateur n’est
pas conscient de la présence des enfants. Les enfants sont
souvent attirés pas la machine et l’activité de tondaison.
Ne prenez jamais pour acquis que les enfants resteront à
l’endroit où vous les avez vus la dernière fois.
• Assurez-vous que les enfants soient éloignés de la zone
de coupe et qu’ils soient supervisés par un adulte autre
que l’opérateur.
• Soyez vigilant et éteignez la tondeuse si un enfant
s’approche.
• Ne permettez jamais à des enfants d’utiliser la machine.
• Redoublez la prudence quand vous vous approchez des
coins, des arbustes, des arbres ou d’autres objets qui
peuvent masquer la présence d’un enfant.
Porter une tenue appropriée – Porter des pantalons
longs, manches longues, des gants épais et des souliers
de protection qui protègeront vos pieds et amélioreront
votre équilibre sur des surfaces glissantes. Ne pas porter
de vêtements amples, bijoux, shorts, sandales et ne pas
travailler pieds nus. Ne porter aucun bijou. Ils peuvent être
pris dans les parties en mouvement.
Ne pas travailler hors de portée – Toujours se tenir bien
campé et en équilibre. Le travail hors de portée risque de
faire perdre l’équilibre.
Ne laissez pas la tondeuse sans surveillance quand elle est
allumée ou une fois la clé de démarrage fixée.
Éloignez les mains et les pieds de la zone de coupe. Tenez
vous éloigné de l’ouverture de décharge en tout temps.
Utilisez la tondeuse seulement à la lumière du jour ou avec
une bonne lumière artificielle.
Porter des lunettes de sécurité – Toujours porter une
protection oculaire munie d’écrans latéraux certifiée
conforme à la norme ANSI Z87.1. Utilisez une masque faciale
si l’utilisation produit de la poussière.
Utilisez l’outil approprié – N’utilisez pas la tondeuse pour
aucune tâche sauf celle pour laquelle elle est conçue.
Ne forcez pas la tondeuse – Elle exécutera le travail mieux
et de façon plus sécuritaire à la vitesse pour laquelle elle fut
conçue.
Ne pas charger l’outil sous la pluie ou dans un endroit
mouillé.
Restez vigilant – Regardez ce que vous faites et utilisez
votre meilleur jugement lorsque vous utilisez la tondeuse.
N’utilisez pas la tondeuse si vous êtes fatigué, contrarié ou
sous influence de drogues, d’alcool ou de médicaments. Un
moment d’inattention pendant l’utilisation de la tondeuse
peut résulter en une blessure grave.
Faire l’entretien de la tondeuse avec soins – Gardez l’outil
en bon état. Assurez-vous que les lames soient affûtées et
que les dispositifs de protections soient en place et en état
de fonctionnement. Remplacer les lames endommagées ou
usées de façon inégale avant d’utiliser la tondeuse d’obtenir
un rendement optimal.
Vérifiez fréquemment si tous les écrous, boulons et vis sont
serrés pour s’assurer que l’équipement est sécuritaire. Les
lames de tondeuse sont tranchantes. Envelopper la lame ou
porter des gants et prendre beaucoup de précautions lors
de l’entretien.
Ne pas jeter le pile au feu. La cellule peut exploser. Vérifier
les codes locaux pour connaître toute instruction spéciale
relative à l’élimination des piles.
Arrêter le moteur, attendre que la lame s’arrête complètement
et retirer la clé de démarrage et bloc-piles avant de réparation
du produit, de nettoyer la tondeuse, d’enlever le collecteur
d’herbe ou retrait du capuchon du broyeur.
Ne jamais utiliser un boyau, de l’eau ou une autre liquide
pour nettoyer ou rincer la tondeuse. Les liquides corrosifs,
l’eau, l’engrais et les produits chimiques utilisés pour traiter
les pelouses peuvent s’infiltrer dans la tondeuse et/ou le
compartiment de la pile et endommager les composants
électroniques et/ou le bloc-pile, ce qui peut entraîner
un court-circuit, augmenter le risque d’incendie ou des
blessures corporelles graves. Enlever toute accumulation
d’herbes ou de feuilles sur ou autour du corp de la tondeuse
et/ou en dessous de la plateforme de la tondeuse. Essuyer
la tondeuse de temps en temps avec un linge sec.
Remplacer la lame si elle est pliée ou fissurée. Une
lame déséquilibrée provoque des vibrations qui peuvent
endommager le moteur de l’appareil et provoquer
des blessures. Affûter également les extrémités de la
lame émoussée afin de maintenir l’équilibre. Nettoyer
complètement la lame et vérifier son équilibre en la déposant
à l’horizontale et en plaçant l’orifice du centre sur un petit
clou. Le clou doit être placé à l’horizontale. Si l’une des
extrémistes de la lame tourne vers le bas, enlever un peu de
métal de la partie épaisse inférieure de la lame jusqu’à ce que
celle-ci soit équilibrée. Une lame équilibrée lorsqu’aucune
extrémité n’est inclinée.
Toujours, utiliser des dispositifs de protection. N’utilisez
pas la tondeuse sans le collecteur d’herbe, le capuchon du
broyeur, ou chute de décharge arrière en place et fonctionne
correctement.
INSTRUCTIONS IMPORTANTES CONCERNANT LA SÉCURITÉ

3 – Français
INSTRUCTIONS IMPORTANTES CONCERNANT LA SÉCURITÉ
Ne pas ouvrir ou altérer le bloc-piles. L’électrolyte est un
produit corrosif pouvant causer des lésions cutanées ou
oculaires. Il peut être toxique en cas d’ingestion.
Suivez les instructions du fabricant relatives à l’installation
et l’utilisation des accessoires. Utilisez seulement des
accessoires approuvés par le fabricant.
Manipuler les batteries avec soin pour éviter des courts-
circuits avec des objets conducteurs comme des anneaux,
des bracelets et des clés. La batterie ou l’objet conducteur
peuvent surchauffer et causer des brûlures.
Nettoyez la zone de travail avant chaque utilisation. Enlevez
tous les objets tels que les roches, noix d’arbres, les
branches, métal, les fils, les os, les jouets et d’autres objets
qui peuvent être projetés par la lame. Restez en arrière de
la poignée quand le moteur est en marche.
Empêcher les démarrages accidentels. S’assurer que la
gâchette est en position d’arrêt avant d’insérer la bloc piles,
de le ramasser ou de le transporter. Le fait de transporter
un appareil en gardant le doigt sur la gâchette ou de mettre
sous tension un appareil lorsque la gâchette est en position
de marche favorise les accidents.
Lorsque le bloc de batteries n’est pas en usage, le garder
à l’écart d’articles tels qu’attaches trombones, pièces
de monnaie, clous, vis et autres petits objets métalliques
risquant d’établir le contact entre les deux bornes. Le
court-circuitage des bornes peut causer des brûlures ou un
incendie.
En cas d’usage abusif, du liquide peut s’échapper des
batteries. Éviter tout contact avec ce liquide. En cas de
contact accidentel, rincer immédiatement les parties
atteintes avec de l’eau. Si le liquide pénètre dans vos yeux,
il faut aussi consulter un médecin. Le liquide s’échappant
des batteries peut causer des irritations ou des brûlures.
Ne pas utiliser un bloc-piles ou un appareil endommagé ou
modifié. Le bris ou la modification du bloc-piles peut causer
un comportement imprévisible et causer un incendie, une
explosion ou des blessures.
Ne pas exposer le bloc-piles ou l’outil à un feu ou à des
températures excessives. Une exposition à un incendie ou à
une température supérieure à 130 °C (265 °F) peut provoquer
une explosion.
Suivre toutes les instructions afférentes à la recharge
et ne pas recharger le bloc-piles ou l’appareil hors des
températures spécifiées dans les instructions. Une recharge
incorrecte ou hors des températures spécifiées peut
endommager la pile et augmenter les risques de feu.
Ne modifiez pas ou n’essayez jamais de réparer l’appareil ou
le bloc de batterie (selon le cas), sauf comme indiqué dans
les instructions d’utilisation et d’entretien.
Évitez les trous, les ornières, les roches, bornes de propriété
ou d’autres objets cachés. Un terrain accidenté pourrait
provoquer un glissement et vous faire tomber par accident.
Ne tondez pas près des dépressions, fossés ou des berges.
Tondez les pentes dans le sens transversal, jamais en
montant ou en descendant. Soyez particulièrement prudent
lors des changements de direction sur les terrains en pente.
Planifiez le parcours de la tondeuse pour éviter d’éjecter
les matériaux sur les routes, les trottoirs, les passants, etc.
Évitez également d’éjecter les matériaux sur un mur ou une
obstruction ce qui pourrait causer un matériau d’être projeté
par ricochet en direction de l’opérateur.
Ne tondez pas l’herbe mouillée ou sur des pentes
excessivement raides. Une mauvaise position peut vous faire
glisser et tomber par accident. Marchez, ne courez jamais.
Redoublez la prudence si vous vous approchez des coins,
des arbustes, des arbres ou d’autres objets qui vous cachent
la vue.
Ne tirez jamais la tondeuse vers l’arrière à moins que cela
soit absolument nécessaire. Si vous devez tirer la tondeuse
pour éviter un mur ou une obstruction, commencez par
regarder en bas et en arrière pour ne pas trébucher o tirando
la podadora hacia los pies.
N’éjectez jamais du matériel en direction de quelqu’un.
Évitez d’éjecter le matériel sur un mur ou une obstruction.
Le matériel pourrait être projeté par ricochet en direction
de l’opérateur. Arrêtez la lame quand vous traversez des
surfaces recouvertes de gravier.
Des objets frappés par la lame de la tondeuse peuvent
causer des sérieuses blessures. La pelouse devrait toujours
être examinée attentivement et nettoyée de tout objet avant
la tondaison.
Si la tondeuse frappe un objet étranger, suivez ces étapes:
• Arrêter la tondeuse en relachant l’levier de commande de
la lame, attendre que la lame s’arrête complètement, puis
retirer la clé de démarrage.
• Inspectez attentivement la tondeuse pour desceller les
dommages.
• Remplacer la lame si elle est endommagée de quelque
façon que ce soit Réparez tout dommage avant de
démarrer et de continuer à utiliser la tondeuse.
Arrêter le moteur, attendre que la lame s’arrête complètement
et retirer la clé de démarrage avant de déboucher la goulotte.
La lame continue de tourner pendant quelques secondes
après que le moteur soit arrêté. Ne mettez jamais aucune
partie du corps dans la proximité de la lame avant d’être
certain que la lame a cessé de tourner.
Si la tondeuse commence à vibrer de façon anormale,
arrêtez le moteur, retirer la clé de démarrage et vérifiez
immédiatement la cause. Remplacer la lame si elle est usée
de façon inégale ou endommagée de quelque façon que ce
soit. La vibration est généralement un signe d’un problème.
Le produit doit être réparé par un personnel qualifié
seulement. Des réparations ou l’entretien effectués par un
personnel non qualifié pourrait résulter en des blessures
pour l’utilisateur ou endommager le produit.
L’assemblage du collecteur d’herbe peut se détériorer et
s’user et doit être vérifier chaque fois avant d’utiliser la
tondeuse à gazon. S’il doit être remplacé, s’assurer que le
nouveau collecteur d’herbe répond aux exigences et aux
spécifications du fabricant d’origine.

4 – Français
INSTRUCTIONS IMPORTANTES CONCERNANT LA SÉCURITÉ
Lors de réparation du produit, utilisez pièces de remplacement
autorisées. Utiliser uniquement des lames de rechange
identiques. L’utilisation des pièces non autorisées peut
créer un risque d’une blessure sérieuse à l’utilisateur ou
endommager le produit.
Conserver ou remplacer les étiquettes d’instructions de
sécurité, si nécessaire.
Débrancher la pile et retirer la clé de démarrage – Débrancher
le bloc-piles et retirer la clé de démarrage de l’appareil avant
de le ranger, le réparer ou changer les accessoires tels que
des lames. Ces mesures de sécurité réduisent les risques
de démarrage accidentel de l’outil.
Arrêter l’produit et retirer le bloc de piles et clé de démarrage
lorsqu’il n’est pas utilisé. Transporter ou pousser l’appareil
lorsque le moteur est arrêté et d’avoir retirer la clé de
démarrage de la tondeuse.
Les outils fonctionnant piles n’ayant pas besoin d’être
branchés sur une prise secteur, ils sont toujours en état de
fonctionnement. Tenir compte des dangers possibles lorsque
l’outil n’est pas en usage et lors du remplacement des piles.
Le respect de cette règle réduira les risques d’incendie, de
choc électrique et de blessures graves.
Ne pas utiliser un appareil alimenté par pile sous la pluie.
Retirer ou débrancher la pile avant l’entretien ou le nettoyage
de l’outil de jardin ou avant d’en retirer des matériaux.
Utiliser ce produit seulement avec la piles et le chargeurs
indiqués dans le supplément de raccordement pour
chargeur/outils/piles/appareil n˚ 985000885.
Ranger les appareils qui ne sont pas utilisés à l’intérieur –
lorsque la tondeuse n’est pas utilisé, le ranger à l’intérieur
dans un endroit sec et verrouillé hors de la portée des
enfants. La clé de démarrage et les blocs-piles doivent être
retirés et rangés dans un autre endroit et hors de la portée
des enfants.
Suivre les instructions de lubrification et de changement
d’accessoires.
Faire fonctionner cet appareil ne doit être permis qu’aux
adultes responsables et familiers avec les instructions.
Ne jamais faire fonctionner l’appareil dans un endroit clos.
Ne jamais modifier les dispositifs de sécurité. Vérifier
périodiquement l’état de fonctionnement.
Conserver ces instructions. Les consulter fréquemment et les
utiliser pour instruire les autres utilisateurs éventuels. Si cet
outil est prêté, il doit être accompagné de ces instructions.
Table of contents
Languages:
Other HART Lawn Mower manuals