HeimVision HM205 User manual

V2.02
Pleasereadthisusermanualcarefullybeforeusingandkeepitforfutureuse.
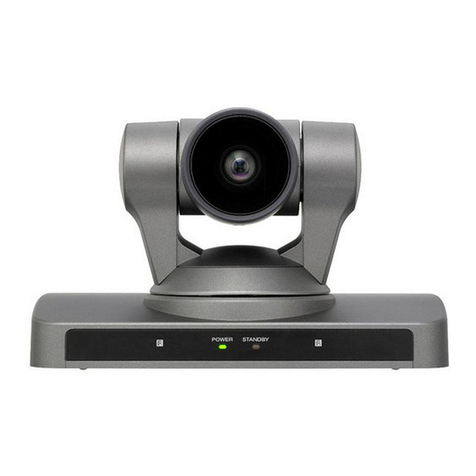
HDSmartWi-FiCamera
HM205
User Manual

Product Overview.....................................................01
DownloadtheApp..................................................01
AccountRegistration..............................................02
Connectingthe Camera............................................02
1.ConnectingbyScanningtheQRCode...........................03
2.Connecting by AP Hotspot...............................................05
*Off-lineDirectAPConnection............................................08
ConnectingtheCameratoAmazonAlexa.............11
FunctionsIntroduction...........................................14
1. Pan & Tilt Control and Preset...............................16
2. Video Playback.......................................................18
3. Video Cut.................................................................19
4. Messages.................................................................20
5. The microSD Card................................................ 21
6. Optional Cloud Service.......................................23
7. Other Functions Introduction.............................24
HowtoWatchtheVideosonPC.............................30
TroubleshootingGuide...........................................30

DownloadtheApp
ForAndroid ForiOS
Option1:
SearchanddownloadPixplusfromGooglePlayor
Pixplus-ENfromAppStore;
Option2:
ScantheQRcodebelowtodownload.
01
ProductOverview
Reset
PowerInput
Reset
microSDCardSlot
(Max128G)
Speaker
Lens
Microphone
IRLED
support@heimvision.com

ConnectingtheCameratoYourMobileDevice
IMPORTANT:
⑴Forallconnectingoptions,youwillhear"Camerastart.
Waitforconnection"afterthecameraispoweredon.
PressandholdtheResetbuttonfor5-6storesetthe
cameraifnovoiceprompts.Youwillhear"Resetsuccess,
pleasewaitreboot"atasuccessfulreset;
⑵Thiscameraonlysupports2.4GHzWi-Fi;
AccountRegistrationandLogin
Pleaseregisteranaccountwithavalidemailaddressatyour
firstuseofthisApp,thenlogin.
Note:
Ifyoudidnotreceiveanactivationemail,pleasecheckyour
SPAMorcontactus.
Next
Password
Confirmation password
Password
The password length is 6-26 digits,consisting of
uppercase letters, lowercaseletters and numerals
Hi,
You are welcome
Email addr ess
Password
Sig n Up For get pas sword
Log in
Local login
Login in with mobile phone number
Email address
Email address
Next
Registrationindicatestheagreement
andUseclauses Privacypolicy
⑶Forstablenetworkconnection,pleasemakesurethe
cameraandthemobiledeviceareclosetotherouter.
02 support@heimvision.com

1.ConnectingbyScanningtheQRCode
+
Step1:
ConnectthemobiledevicetoyourWi-Fi,thenloginto
Pixplus.Tapintheupperrightcorner,thenselect
IntelligentcameraandDeviceaddingbyscanningthecode;
Step2:
TickIfyouhavefinishedtheabovesteps,clickConnectto
theNetwork,thentapConnecttothenetwork.Selectthe
Wi-Fiyourmobiledeviceisconnected,enterthecorrect
passwordandtapNexttocontinue;
GUIDE
PixPlus
The starter guide video
Add the d evice
Intelligent camera
Smart annunciator
Add the d evice
Device adding by sca nni ng
the code
Pai r with Wi -Fi by sc annin g QR code
on th e mobil e phone
AP
Addition by connec tin g to
network cable
Onl y appli cable f or the de vice wi th the
net work ca ble soc ket
Addition of AP hotspot
Pai r with Wi -Fi by co nnect ion wit h AP
hot spot of t he devi ce
1 2 3
03
support@heimvision.com

Tip:
TapNetworkTestingintheupperrightcornerofConnectto
Wi-FiinterfacetocheckthestatusofyourWi-Ficonnection.
Step3:
AligntheQRcodeonyourmobiledevicewiththecamera
lensandkeepadistanceof4-8inches.WhentheQRcodeis
clear,slightlymoveyourmobiledeviceforwardand
backwardforbetterscanning.
Step4:
TapIheardthe"beep"voicetoconnecttotheInternetafter
2beepsfromthecamera.Duringtheprocess,youwillhear
"Networkconnecting,pleasewait".Whenyouhear"Wi-Fi
connectionsuccess.Cameraisonline",thecamerais
connectedtoPixplussuccessfully.
4 5 6
Add the d evice
3. Pl ace the d evice a s close t o the rou ter as
pos sible , and thu s reduc e the obs tacle
bet ween th e route r and the c amera
If yo u have fi nishe d the abo ve step s, clic k
Con nect to t he Netw ork
Connec t to th e Network
1/3 Network testing
Switch the network
Input Wi-Fi name
Input Wi-Fi password
!
5GH z wirel ess net work is n ot supp orted
What requirements does the device have on Wi-Fi>
Next
Connect to Wi-Fi
Exit
Network testing results:Normal
Network information
Wi-Fi quality
Server status
Good
Network-induced
delay is 101ms
Network stability
is Good
Connection
success
Test results
Your network is normal
Finish
1.Ifaddingthedevicefails,itisrequiredtoconfirm
whethertheWi-Fifrequencyrangeis2.4G
Finishtheaboveoperationandretrytheadding
Contactusifaddingthedevicefails
04 support@heimvision.com

2. Connecting by AP Hotspot
Step1:
ConnectthemobiledevicetoyourWi-Fi,thenloginto
Pixplus.Tapintheupperrightcorner,thenselect
IntelligentcameraandAdditionofAPhotspot;
+
2/3
The camera is connecting to the network
The connection will take about 1-2 minutes. Wait a
moment
6%
The router and mobile phone shall be as close to the
device as possible
7 8 9
3/3
Addition is successful
Dev ice nam e
Ent er or sel ect a nam e
Start to e xpe rie nce
2/3
!
Align the QR code the camera lens
10~ 20cm
No vo ice is he ard?
I heard th e "beep" vo ice
Bed room Livi ng roo m
Sec ond bed room Ent rance
Off ice Me eting R oom
GUIDE
PixPlus
The starter guide video
Add the d evice
Intelligent camera
Smart annunciator
Add the d evice
Device adding by sca nni ng
the code
Pai r with Wi -Fi by sc annin g QR code
on th e mobil e phone
AP
Addition by connec tin g to
network cable
Onl y appli cable f or the de vice wi th the
net work ca ble soc ket
Addition of AP ho tspot
Pai r with Wi -Fi by co nnect ion wit h AP
hot spot of t he devi ce
1 2 3
05
support@heimvision.com

Step2:
TickIfyouhavefinishedtheabovesteps,clickNext,then
tapNexttoentertheNetworkconfigurationinterface;
Step3:
TapGotoSettingtoenterthenetworksettinginterfaceofthe
mobiledevice,thenconnecttothePIXPLUS_AP_XXXXWi-Fi;
Step4:
TaptogetbacktoPixplustoenterNetworkconfiguration
interface,thentapNexttocontinue;
4 5 6
Device configuration
2. Keep pressing "SET" or "RESET" key, for at
least 5 seconds
If you have finished the above steps, click Next
Next
Network configuration
1/3
The device will start Wi-Fi with " "PIXPLUS_AP_XXXX
field. Click the button in the lower part to the setting
interface for connecting to this Wi-Fi
How to connect the device>
Go to Setting
WLAN
WLAN
WLAN Off
AVAILABLE NETWORKS
HeimVision
Enhanced Internet experience
Connected
PIXPLUS_AP_146b9c7cbe76
Saved
PIXPLUS_AP_146b9c7cbe76
Signal strength
Encryption Type
Excellent
None
CONNECT
FORGET
CANCEL
06 support@heimvision.com

Tips:
1.Therewillbeapop-upwindowifthePIXPLUS_AP_XXXX
Wi-Ficonnectionisfailed.TapConfirmtoconnectagain;
2.IfyoustillcannotconnecttothePIXPLUS_AP_XXXXWi-Fi,
itmaybeprohibitedbythesecuritysettingofyourmobile
device.Pleasechangeyoursettingorcontactwithus.
Step5:
SelecttheWi-Fiyourmobiledeviceisconnected,enterthe
correctpassword,thentapConfirm.Thecamerawill
connecttotheInternetafter2beepsfromthecamera.
Duringtheprocess,youwillhear"Networkconnecting,
pleasewait".Whenyouhear"Wi-Ficonnectionsuccess.
Cameraisonline",thecameraisconnectedtoPixplus
successfully.
Network configuration
1/3
Set the Wi-Fi that has been connected with this device
How to connect the device>
Next
7 8 9
WLAN
WLAN
WLAN Off
AVAILABLE NETWORKS
HeimVision
Enhanced Internet experience
Connected
PIXPLUS_AP_146b9c7cbe76
Saved,encrypted
Sca n WLA N Direct Con figure Mor e
Network configuration
1/3
How t o conne ct the de vice>
Next
1
2
3
Confirm
Go to the setting page to start the Wi-Fi
function of the mobile device
Start the device Wi-Fi
In Wi-Fi list, choose and connect to
"PIXPLUS_AP_XXXX" network
Choose Wi-Fi for the device
Return to PixPlus APP
PIX PLUS _AP_XXX X
07
support@heimvision.com

11 1210
2/3
Connect to Wi-Fi
Choose Wi-Fi to be connected, and input Wi-Fi
password
HeimVision
!
The device does not support 5G network
Note:
Additionbyconnectingtonetworkcableisnotsupported
inthismodel.
2/3
The camera is connecting to the network
The connection will take about 1-2 minutes. Wait a
moment
6%
The router and mobile phone shall be as close to the
device as possible
3/3
Addition is successful
Dev ice nam e
Ent er or sel ect a nam e
Start to e xpe rie nce
Bed room Livi ng roo m
Sec ond bed room Ent rance
Off ice Me eting R oom
08 support@heimvision.com
*Off-lineDirectAPConnection
ConnectyourmobiledevicetotheWi-Fiofthecamerato
watchthevideosorsetupthecamerawhenthereisno
networkconnection.However,yourmobiledevicemustbe
locatedwithintherangeofthecamera'sWi-Fisignal.
Step1:
EnterthelogininterfaceoftheAppandtapLocalLogin
ortheicontoenterthecameraconnectinginterface,
thentapontherightuppercornertocontinue;
+

09
support@heimvision.com
Step2:
TapNext.Therewillbeapop-upwindowandtapOKtoenter
theNetworksettinginterfaceoftheApp.TapGotoSettingto
enterthenetworksettinginterfaceofthemobiledevice;
Network setting
1/3
How t o conne ct the de vice>
Go to Sett ing
1
2
3
confirm
Go to t he sett ing pag e to star t the Wi- Fi
fun ction o f the mob ile dev ice
Start the de vice Wi-Fi
In Wi -Fi lis t, choo se and co nnect t o
"PI XPLUS _AP_X XXX" ne twork
Choose Wi- Fi for the device
Return to Pi xPlus APP
PIX PLUS _AP_XXX X
AP networking devi ce p. ..
Che ck the vi deo by us ing the n etwor king pr eview t ool of
AP ho t poin ts of th e devi ce.B efor e the use ,ensu re tha t
the m obile p hone ha s been co nnect ed with t he devi ce
sup porti ng AP mode
2. Ke ep pres sing "S ET" or "R ESE T" key, f or at
lea st 5 seco nds
Next
Network configuration
1/3
The d evice w ill sta rt Wi-F i with "P IXPLU S_AP_ XXXX"
fie ld. Cli ck the bu tton in t he lowe r part to t he sett ing
int erfac e for con necti ng to thi s Wi-Fi
How t o conne ct the de vice>
Go to Setting
3 4 5
Hi,
You are welcome
Email address
Password
Sign Up Forget p assword
Log in
Local login
Hi,
You are welcome
Email address
Password
Sign Up F org et pas swo rd
Log in
Log in with mobile phone number
+
YCC36 5 Plus
Nodev iceinfo rmatio n
1 2

Step4:
Afterthescanningissuccessful,entertheaccountname
PixPlusandpassword123456,thentapNexttostartto
connectthecamera.Youcanwatchthelivevideoandsetup
thecameraafterasuccessfullyconnection!
10 support@heimvision.com
Step3:
ConnecttothePIXPLUS_AP_XXXXWi-Fi.Afterconnected,
taptogetbacktoPixPlustoentertheNetworksetting
interface,thentapNexttoenterascanninginterface;
WLAN
WLAN
WLAN Off
AVAIL ABLE N ETWO RKS
HeimVi sio n
Enh anced I ntern et expe rience
Connected
PIXPLUS_A P_1 46b 9c7cbe76
Sav ed, encr ypt ed
Scan WLAN D irect Conf igure More
Off
WLAN
WLAN
WLAN
AVAIL ABLE N ETWO RKS
HeimVi sio n
Enh anced I ntern et experie nce
Con nec ted
PIXPLUS_A P_1 46b 9c7cbe76
Sav ed
Network setting
1/3
Set t he WiFi t hat has b een con necte d with th is devi ce
How t o conne ct the de vice>
Next
PIXPLUS_ AP_ 146b9c7cbe76
Exc ell ent
Non e
Signal stre ngt h
Encryptio n Type
CONNECT
FORGET
CANCEL
6 7 8

ConnectingtheCameratoAmazonAlexa
Step1:
LogintoAmazonAlexawithyourAmazonaccountafter
downloadingandinstallingit,tapontheleftupper
corneroftheHomepage,thenselectSkills&Games;
Note:
Allthecommunicationswillbedisconnectedfromthe
networkandsomefunctionsofPixPlusarenotavailable
whenyourmobiledeviceisconnectingtothecamera'sWi-Fi.
APnetworkingdevicepreview
AP networking d evice p...
Scanning the device in the WiFi network...
Device accoun t
Device p assword
Next
3/3
Addition is successful
Dev ice nam e
Clic k to input the d evice nam e or choose the follow ing name
Bed room Liv ing roo m
Sec ond bed room Ent rance
Off ice Me eting R oom
Start to expe rie nce
9 10 11
11
support@heimvision.com

Step2:
SearchandselectCloseli,thenenableitbytappingENABLE
TOUSE;
Step3:
LogintoCloseliwithyourPixplusaccount,thenallow
AmazonAlexatolinkwithyourPixplusaccountbytapping
Allow.
Sign in
Fogotpa ssw ord ?
Show pas swo rd
New t o Ama zon?
© 199 6-201 8Ama zon.c om, Inc . or its affi liate s
amazon alexa
Ema il (phon e for mob ile acc ounts )
Ama zon pas sword
SIGN IN
CREATEANE W AMAZON ACCOUNT
Settings
?
of
news
Add Dev ice
Lists
Remin der s & Alarms
Conta cts
Routi nes
Thing s to Try
Activ ity
Help & Fe edb ack
Skill s & Gam es
Setti ngs
SEARCH
Home C ommun icate Play Devi ces
Closeli
Hom e Commu nicat e Pla y Dev ices
Search
closeli
1 Result Sor t:Releva nce
Closel i
Sma rt Home
0
Contro l your came ras with Cl ose li Ski ll an d Alexa
ENABLE TO USE
Rat ed:Gui danceS ugge sted
Accountlinkingrequired
“A lexa, turn on the door”
Closeli
杭州登虹 科技有限公司
With the C los eli Skill and Ale xa, y ou can now
access y our c ameras using Al exa w ith your
Echo Sho w, Ech o Spot, Fire TV, Sec ond
Genera tio ns of The Fir e TV Stick, F ire TV
Editio n sma rt TVs or Fir e Tablets (Ge n7 and...
0
See More
Start By Saying
Englis h (US)
12 support@heimvision.com

Discover Devices
Smart Ho me de vic es must be disco ver d
before t hey c an be u sed with Alexa.
CANCEL DISCOV ER
DEVICE S
Link Account
amazon
Closeli has been successfully
linked.
Whattodon ext :
→ Closeth iswi ndo w to discover sm art -ho me
device s you c an co ntrol with Alex a.
Done ski lls -st ore.ama zon .com
Amazo n Alexa
Sign in
Wel come t o use Cl osel i
User na me
Passw ord
For got Pas sword
Closeli
Done ucl oud cam.com
Link Acc ount
Closeli
Done ucl oud cam .com
sup por t@he imvi sion .co m Sign o ut
Allow
Amazon Alexa would l ike t o do th e
following :
• Receive you r pro file i nfo rmation.
• See your devi e’s setti ngs a nd
access live v ide o
Note:
CloseliistheapplicationthathelpsPixplusrealizeAlexa'sSkill.
Step4:
ClosethepageofCloselihasbeensuccessfullylinkedafter
asuccessfullink,thentapDISCOVERDEVICESinthepop-up
pagetodiscoverthecamerainthePixplusApp.
13
support@heimvision.com

Step5:
Afterdiscovering,tapCHOOSEDEVICEtostarttheexperience.
YoucancontrolyourcamerawithAmazonAlexabystarting
tosay"Alexa,showthecamera"toentertheLIVEvideo
interface,thensay"Alexa,stop"toexitfromit.
Note:
Forrenamingthelinkedcameraorlinkingthenewcamera
inthePixplusAppwithAmazonAlexa,pleasediscoverthe
deviceagain.
Alexaisdiscove ringde vices …
SET UP
1 device discovered
CHOOSE D EVI CE
Next, we w ill s et th e devices up one a t a
time to en sur e pro per setup. Cho ose
which de vic e you 'd like to set up fir st.
Hom e Play De vices
Com munic ate
This may t ake l ong er than 20 secon ds
14 support@heimvision.com
FunctionsIntroduction
Tapthethumbnailofthecamerainthemaininterfaceof
PixPlustoentertheLIVEinterface.

15
support@heimvision.com
Playthevideo
*Taptoplaythehistoricalvideos.
*Taptorotatethecamerabacktothedefaultfactory
position.
*Taptopresetthecertainfocalpointsforthiscamera.
*Touchtorotatethecamerafollowingyourfingertouch.
*Holdtotalk,thenreleasetosendtheaudiotothe
camera.
*TaptochangethequalityoftheimagefromHDtoSD
forsmootherstreaming.
*Taptoshareyourcamerawithyourfamilymembers.
ThesharedaccountshouldregisterPixPlusApp.
*Taptorecordthevideototheinternalstorageofyour
mobiledevice.
A.Setting
B.Snapshot
C.FullScreen
D.Pan&TiltReset
E.Preset
F.Pan&TiltControl
G.Holdtotalk
H.PrivateShare
I.DeviceSwitch
HeimVision
LIV E
55. 21K B/s
Play the video
Mes sage Qu ality Sou nd More
A
B C
D E
F
G
Heimvision
Dev ice Mess age Clo ud serv ice Min e
PixPlus
Baby Camera
Recor d C loud Album
H I
2019/06/13THU10:57:10
FHDIPCSub
2019/06/13THU10:57:10
FHDIPCSub
Qualit y
Recor d

16 support@heimvision.com
1.Pan&TiltControlandPreset
⑴Pan&TiltControl
*TouchintheLIVEinterfacetorotatethecamera
upward/downward/leftward/rightward;
*Double-tappingofthepictureinthelivescreencan
digitallyzoominandzoomoutthepicture;
*Rotatethecameraupward/downward/leftward/rightward
byslidingthelivescreenwithyourfinger.
Sound
Tip:
Tohearthesoundfromthecamera,makesureyouunmute
Soundhere(meansthesoundismuted).
HeimVision
LIV E
55.21K B/s
Play the video
Mes sage Q ualit y Sou nd Mo re
F
HeimVision
LIV E
55.21K B/s
Play the video
Mes sage Q ualit y Sou nd Mo re
HeimVision
LIV E
55.21K B/s
Play the video
Mes sage Q ualit y Sou nd Mo re
2019/06/13THU10:57:10
FHDIPCSub
2019/06/13THU10:57:10
FHDIPCSub
2019/06/13THU10:57:10
FHDIPCSub
Tips:
*Duetothenetworkenvironment,therotationofthe
cameramaynotbesmoothandthestreamofthelive
videomaylag.

17
support@heimvision.com
*Makesurethenetworkqualityforthecameraandmobile
deviceisexcellentwhenusingApp.Trytoadjustthe
QualityoflivevideofromHDtoSDforsmootherstreaming
ifthenetworkqualityisnotgoodenough.
⑵Preset
Taptopresetthecertainfocalpointsforthiscamera,
whichcanbeadded,calledanddeleted;
*AddaPreset:taptoaddapreset,enterthename,then
tapSave;
*CallaPreset:thecamerawilldirectlyrotatetothepreset
focalpointbytapingthethumbnail.
*DeleteaPreset:tap,thentaptodeletethePreset.
+
Sou nd Mor e
LIV E
Play the video
HeimVision
55.21K B/s
Mes sage Q ualit y
Add the pr eset...
Sou nd Mor e
LIV E
Play the video
HeimVision
55.21K B/s
Mes sage Qu alit y
Add the pr eset...
Baby
Sou nd Mor e
LIV E
Play the video
HeimVision
55.21K B/s
Mes sage Qu alit y
Add the pr eset...
2019/06/13THU10:57:10
FHDIPCSub
2019/06/13THU10:57:10
FHDIPCSub
2019/06/13THU10:57:10
FHDIPCSub
Input t he name o f the preset...
Cancel Save

18 support@heimvision.com
2.VideoPlayback
Taptoenterthevideoplaybackinterface.Itwill
replaythehistoricalvideosintheCloudServiceofthe
camerabydefault.
Slideyourfingeronthetimelinetocheckthehistorical
videos.
*Darkblueinthetimelinemeansthevideosrecordedwhen
thecameradetectsthehuman,motion,whilethelightblue
meansthenormalvideos;
*Tapthetoreplaythevideorecordedontheselected
date;
*Tapthetocontroltheplaybackspeed,amongwhich
isslowmotion,isnormalspeed,whileand
arefastforward.
Play the video
X1.0
X0.5 X2.0
X4.0
Tips:
*EntertheinterfaceofSetting,tapPlayVideosFrom,then
selectMemorycardtowatchthevideosinthemicroSD
card;
*ColorsinthetimelineofthevideosstoredinthemicroSD
cardarethesame;
*FastforwardandSlowmotionarenotsupportedwhen
playingthevideosfrommicroSDcard.
X1.0
Table of contents

