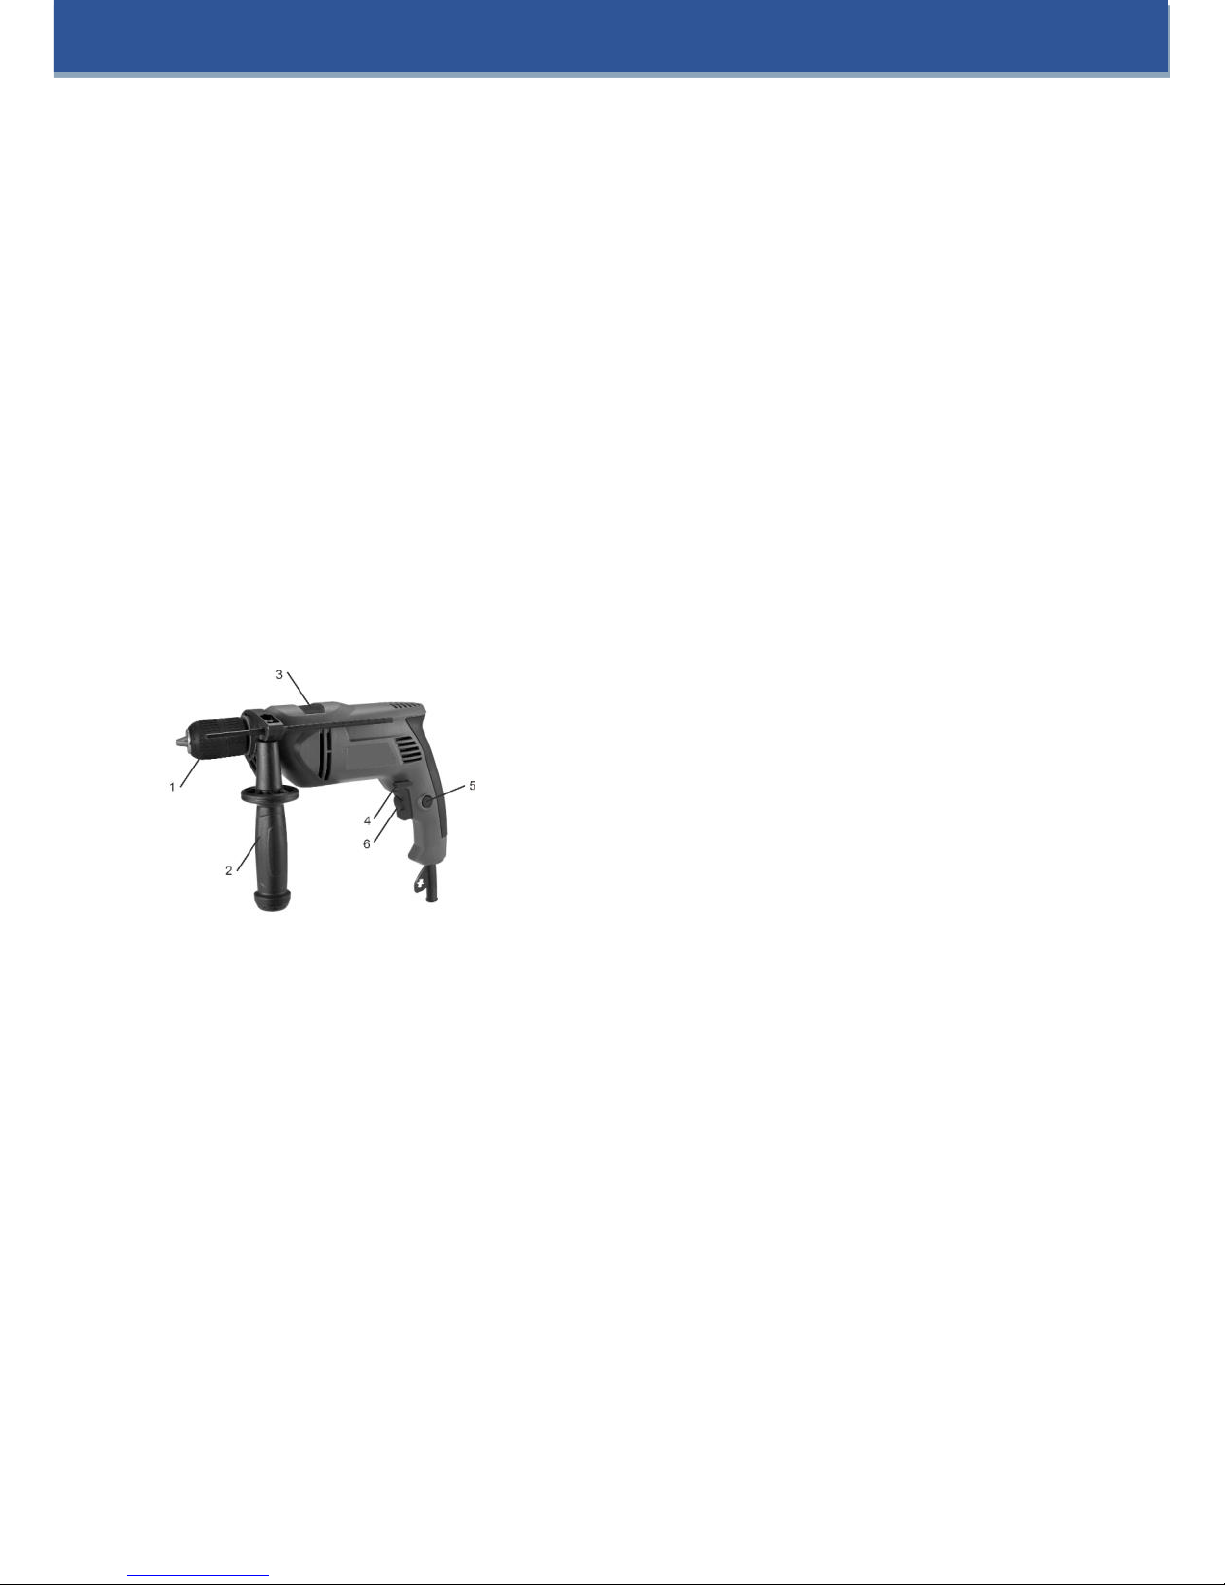
The direction switch (4) controls the direction of motion when the machine is used
as a screwdriver or if you would like to remove a drilling bit that has become jammed.
Using the adjustable bit stop you can fix the depth of blind holes accurately during drilling.
Preparing the Drilling Machine
Warning! When performing the following work, always ensure that the machine is
not connected to the mains power supply
Inserting the Second Handle (2)
In order to assemble the second handle (2), release it by rotating the lower part anti-clockwise so
that you can easily pull the handle over the drill chuck on to the flange located behind it. Then turn
the handle to a working position that iscomfortable for you andfix it in place by tightening it (rotating
the lower part clockwise).
Adjusting the Bit Stop
The second handle (2) has a retainer for the bit stop. Insert a drill. Now release the handle. Push
the bit stop forwards until its end is in line with the end of the drill. Now push the bit stop back until
the distance between the end of the bit stop and the end of the drill corresponds to the depth to
which you would like to drill.
Inserting the Drill
First hold the head of the drill chuck(1) and pull it outward.Rotating the drill chuck(1) in a clockwise
direction until the clamping jaws are open wide enough.Insert the drill into the clamping jaws of the
drill chuck(1).Then push the drill chuck(1) inward in order to grip the clamping jaws and fix the drill
in place.Note:The drill chuck(1) is the axial locking mode.
Working with the Drilling Machine
Ensure that the mains power supply voltage is the same as the operating voltage of your machine.
For details, please see the type plate. Insert the correct drill for the type of job to be performed. If
necessary, adjust the bit stop. Adjust the speed of the machine using the regulating wheel on the
operating switch (6). The more the operating switch (6) is pressed in, the faster the drill rotates. Set
the direction switch (4) to the desired direction of motion. Never alter the position of the percussion
drilling switch (3) or the direction switch (4) when the machine is switched on. The machine is
switched on by pressing the operating switch (6). When the operating switch (6) is released, the
machine stops. If you would like to use continuous operation press the locking button (5) while the
operating switch (6) is pressed. In order to switch off the machine during continuous operation,
press the operating switch (6) again and then let it go. Do not touch the drill chuck (1) while the
machine is switched on.
Drilling Tips
• Always insert the correct size and type of drill or screwdriver.
• Set the machine to the correct speed.
• Always hold the machine tightly by the handle and second handle (2).
• When drilling wood and metal, set the percussion-drilling switch (3) to drilling.
• When drilling masonry, set the percussion-drilling switch (3) to percussion drilling.
• When using the machine as a screwdriver, set the percussion-drilling switch (3) to drilling.
• Set the direction switch (4) to the correct direction.
• Never change the direction of motion when the machine is switched on.