
Our Commitment
3
2.2 Location
Find a stable ground to settle the cabinet. The bottom side is not weatherproof. Flooding
and sprinkler should be considered. Always remain the cabinet above the high water line.
Pond’s edge
If a power source is available near the pond’s edge, locate the cabinet at the pond’s edge
for quicker installation.
Away from Pond’s edge
If a power source is not available near the pond’s edge or you prefer a better place. You
could install it next to the barn/shed/house.
Notice:
The airline would increase the pressure to the pump. For PAS10 system, it would
increase 0.35-0.4 bar (5-5.8 PSI) for each 100’ air hose. That means the MAX depth
would diminish 11-13 ft. For PAS20 system, it would increase 0.17-0.2 Bar (2.5-3 PSI)
for each 100’ air hose (no matter which air way). The MAX depth would diminish
5.5-6.5 ft.
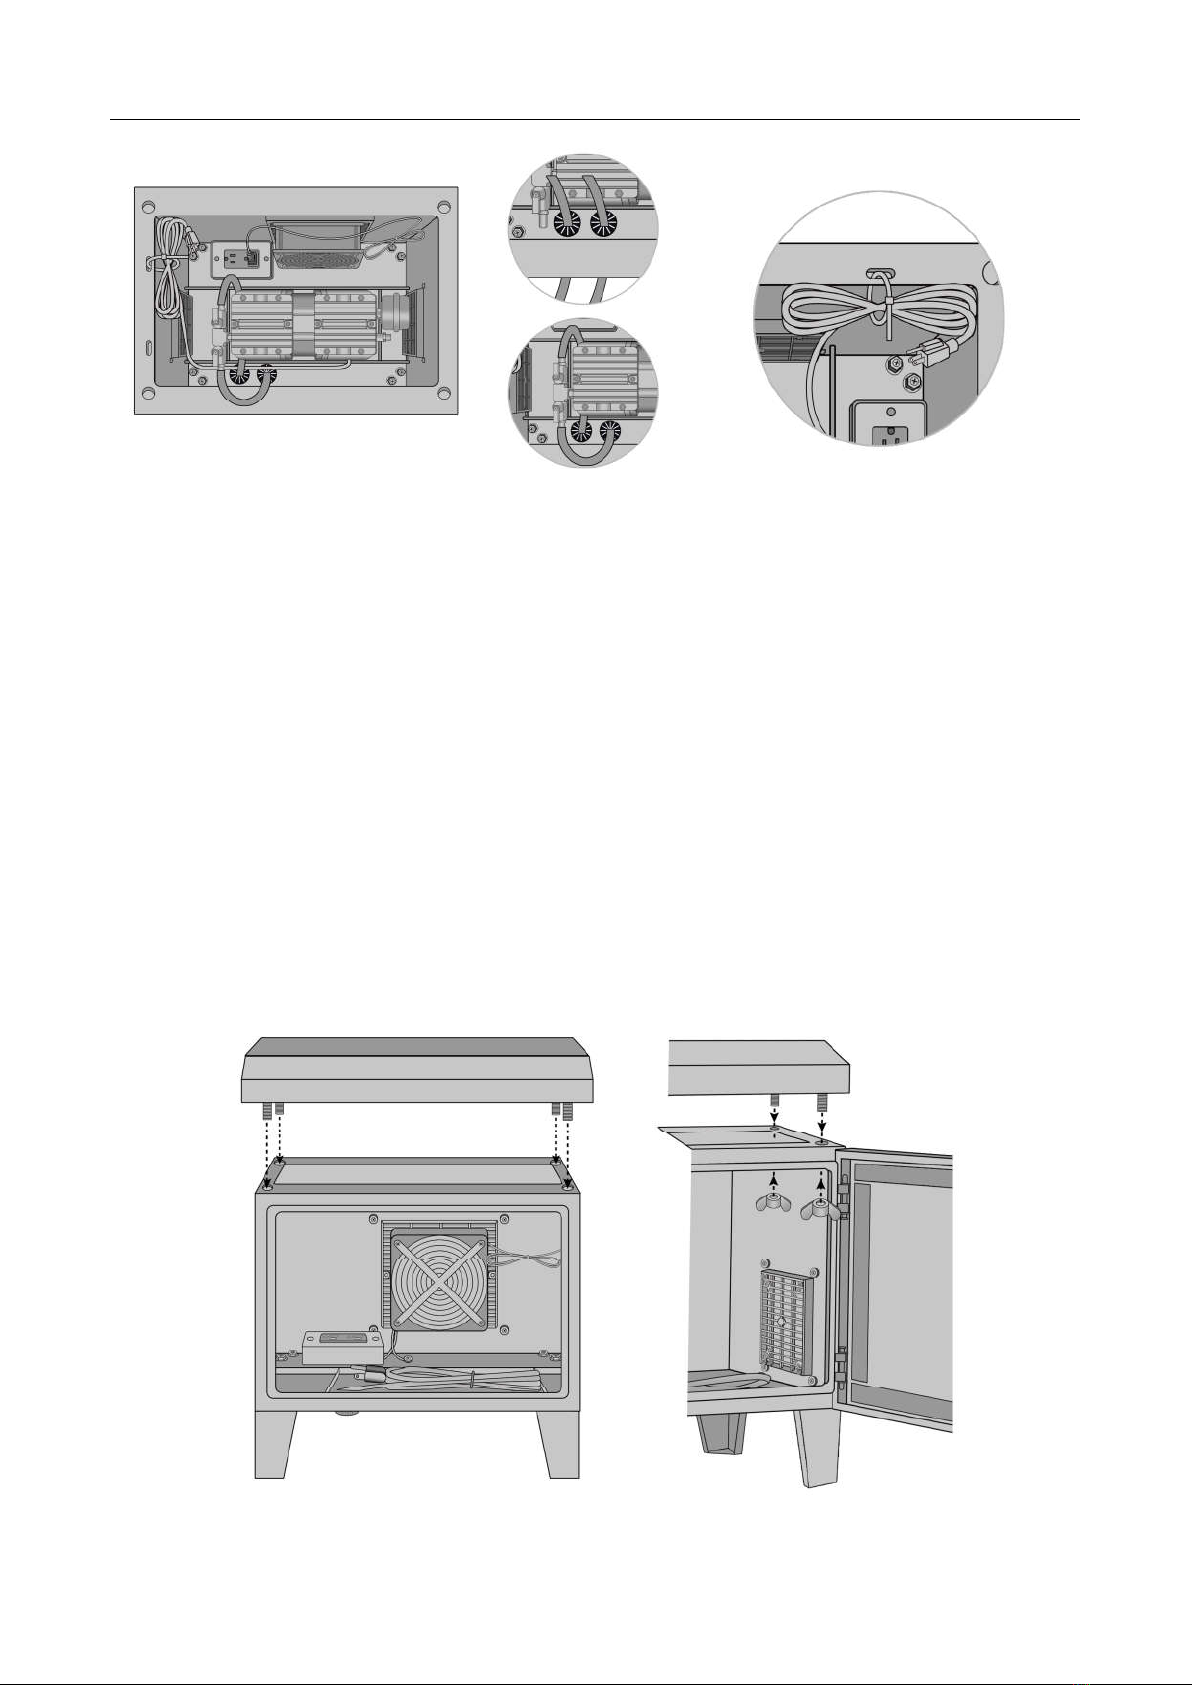
2.3 Installation
1. Unlock and open the cabinet
door (We have a key to lock the
cabinet if you worry about the
safety). Through the power cords
out from the bottom holes.


 user manual")


